This article introduces the detailed method of configuring the open source containerization platform and tool set Docker in the Linux operating system Ubuntu and above . Among them, we take configuring one of the core components of the Docker platform - Docker Engine as an example to introduce in detail.18.04
First of all, everyone needs to be clear that what we often call Docker actually refers to Docker Desktop or Docker Engine . Among them, Docker Desktop software is a complete Docker suitable for desktop operating systems , and Docker Engine is the core running engine of Docker ; Docker Desktop software includes Docker Engine and some other additional functions. Regarding downloading Docker Desktop or Docker Engine , in simple terms, if you are using a desktop operating system (such as a Windows computer or a Mac computer), download the Docker Desktop software because it can implement a variety of Docker functions through a graphical interface ; if On platforms such as servers and Linux computers, you can download Docker Engine because it can complete various Docker functions through the command line. For a more detailed introduction and distinction between the two, you can refer toThe explanation given by the Docker official website will not be repeated here.
Without further ado, let’s start with the specific configuration of Docker Engine . Among them, all the codes involved in this article can be executed in the terminal.
1 Preprocessing
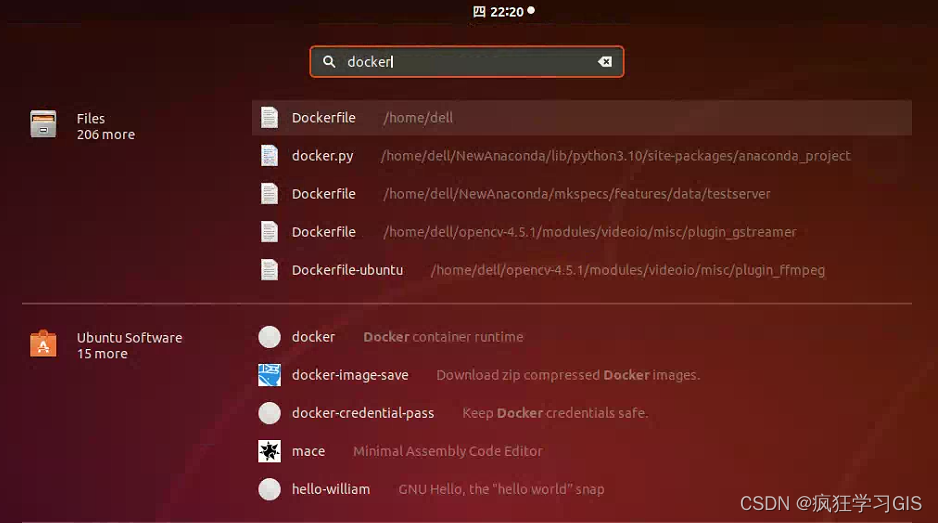
First, we need to ensure that there are no old versions of Docker and its components on the computer. For example, although my computer here does not have a Docker application, I can still search for some related dockerfiles or folders; as shown in the figure below.
Therefore, unless your computer is a new computer that has just been bought and has not been configured, in other cases it is recommended that you first execute the following code.
sudo apt-get remove docker docker-engine docker.io containerd runc
The above code uses apt-getcommands to remove Docker related packages and container runtime commands. Among them, is a keyword sudoused to run commands with super user ( rootsudo ) permissions; by using it , you can perform operations that require administrator permissions. What followed apt-getwere command line tools for package management in Debian - based Linux distributions such as Debian and Ubuntu . Is an option to the command used to uninstall the specified package from the system. , , , and are all the names of the software packages to be uninstalled, specifying the package names of Docker and its related components. By listing the names of these packages in the command, they and their associated files and configuration will be uninstalled.removeapt-getdockerdocker-enginedocker.iocontainerdruncapt-get
Run the above code as shown in the image below. As you can see, there are actually no Docker related files in my computer before .

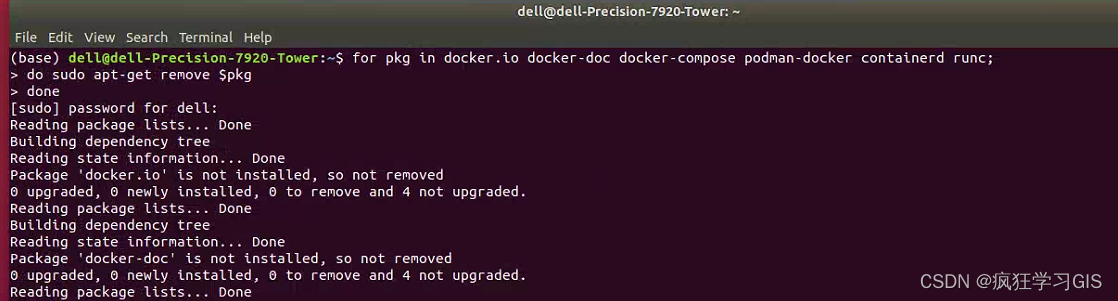
In addition, we can also use a line of code provided by Docker's official website to achieve similar functions as above; its function is the same as the aforementioned code.
for pkg in docker.io docker-doc docker-compose podman-docker containerd runc;
do sudo apt-get remove $pkg;
done
Run the above code as shown below.
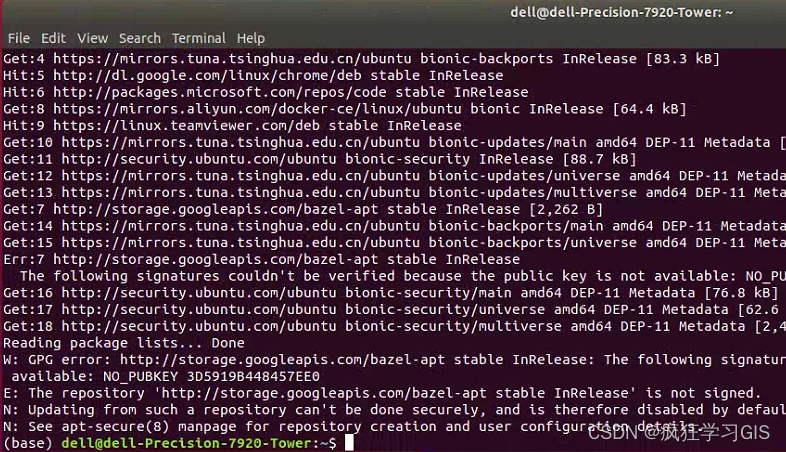
Next, we need to update the system's software package list; this requirement can be achieved through the following code.
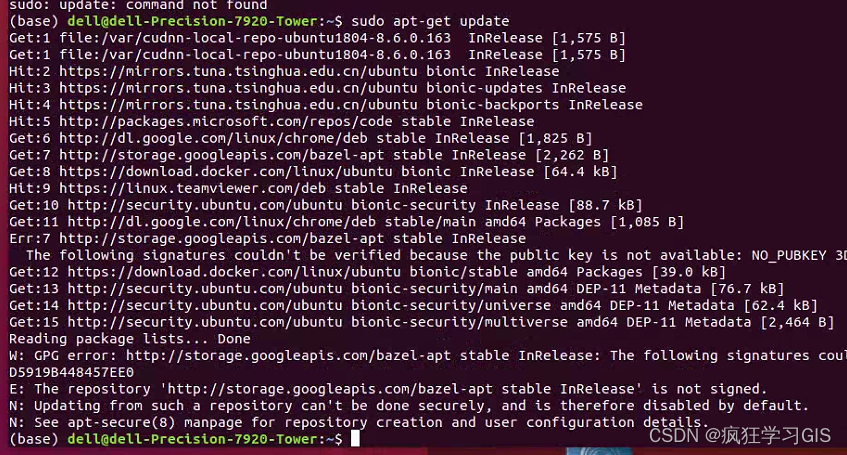
sudo apt-get update
Running the above code will connect the system to the package repository server and check whether updated versions and new packages are available. This command updates the package list on the local system to reflect the latest available package information.
Before running other apt-getcommands (such as installing packages, upgrading the system, etc.), it is usually recommended to run the above code to ensure that the system gets the latest package list. This ensures that we get packages from the latest package repository and reduces possible problems caused by older versions of packages.
Note that apt-get updateonly the package list is updated and the packages are not actually downloaded or installed. If we want to install or upgrade the software package later, we need to use it apt-get installfurther apt-get upgrade.
Run the above code as shown below. The purple box is where we enter the computer account password.

When running the above code, sometimes there will be some errors, as shown in the figure below. But under normal circumstances, these error reports will not affect our subsequent normal operations.
2 Repository configuration
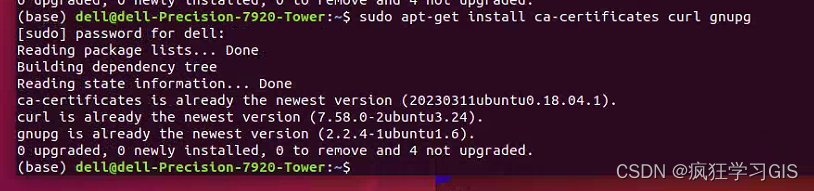
Next, we need to pass the following code to use the warehouse aptthrough HTTPS (this is a necessary condition for Docker ).
sudo apt-get install ca-certificates curl gnupg
Among them, ca-certificatesis a software package name, which contains a set of root certificates and intermediate certificates used to verify the security of HTTPSca-certificates connections; installing the software package ensures that the system has the latest root certificate list. curlIt is a tool for making network requests in the command line. It supports multiple protocols, such as HTTP , HTTPS , FTP, etc.; installing curlthe software package allows us to conveniently make network requests and download files in the terminal. gnupgIt is the abbreviation of GNU Privacy Guard, also known as GPG ; it is a toolset for encrypting and signing data. The installation package can use GPG keys and encryption functions gnupgin the system .
Run the above code as shown below.
Next, we set the GPG key of the Docker software source through the following code ; this GPG is a tool used to encrypt and sign data.
sudo install -m 0755 -d /etc/apt/keyrings
curl -fsSL https://download.docker.com/linux/ubuntu/gpg | sudo gpg --dearmor -o /etc/apt/keyrings/docker.gpg
sudo chmod a+r /etc/apt/keyrings/docker.gpg
First, -m 0755there is the option to set the permissions on a file or directory, 0755meaning that the owner has read, write, and execute permissions, while other users have read and execute permissions. Subsequently -d /etc/apt/keyringsspecifying the path to the directory to be created creates a /etc/apt/keyringsdirectory named . The purpose of this command is to create /etc/apt/keyringsthe directory that will be used to hold the key file.
Next, -fsSLthere are curlthe command options, which are used to specify the request method and parameters; which -fsSLmeans sending the request in silent mode (no progress information is displayed) and following the redirection. The link that follows is the URL of the GPG key to be obtained . What follows is the pipe symbol, which is used to pass the output of the previous command as the input of the next command. Used to convert a binary format GPG key to text format and subsequently specify to save the converted GPG key to a file. The purpose of this command is to download the GPG key of the Docker software source from the specified URL and save it after converting it to text format.|--dearmor/etc/apt/keyrings/docker.gpgcurl
Secondly, chmodit is a command used to modify file or directory permissions, a+rwhich means granting read permissions to all users. The final path is the file path to which permissions are to be modified. The purpose of this command is to grant read permission to the GPG key file to all users to ensure that all users can read the key information in the file.
Run the above code as shown below.

Next, we need to configure the Docker repository, the code is as follows.
echo \
  "deb [arch="$(dpkg --print-architecture)" signed-by=/etc/apt/keyrings/docker.gpg] https://download.docker.com/linux/ubuntu \
  "$(. /etc/os-release && echo "$VERSION_CODENAME")" stable" | \
  sudo tee /etc/apt/sources.list.d/docker.list > /dev/null
First, echoit is a command used to output text in the terminal, and the content within the quotation marks is the text to be output. Here [arch="$(dpkg --print-architecture)" signed-by=/etc/apt/keyrings/docker.gpg]is an APT source configuration option used to specify the software architecture and the location of the GPG key; among them $(dpkg --print-architecture)is a subcommand used to obtain the architecture of the current system. The subsequent link is the URL of the Docker software source .
Next, $(. /etc/os-release && echo "$VERSION_CODENAME")there is a subcommand to get the Ubuntu version codename of the current system ( codename), and the file after it /etc/os-releasecontains information about the operating system. stableIndicates to use the stable version of the Docker software source.
Following this, teeis a command to read data from standard input and write it to a file. /etc/apt/sources.list.d/docker.listIs the file path to which data is to be written. > /dev/nullis to redirect the output of the command to an empty device ( nulldevice), i.e. discard the output. The purpose of this command is to use sudopermissions to write the configuration information of the Docker/etc/apt/sources.list.d/docker.list software source to a file and redirect the output to an empty device to avoid output to the terminal.
Run the above code as shown below.

Next, for some reason, we need to update the system's software package list according to the official website's process; we can just follow what the official website says.
sudo apt-get update
Run the above code as shown below.
3 Docker Engine configuration
Next, we can start configuring the Docker Engine itself. The process of configuring Docker Engine is still very simple, just execute the following code directly.
sudo apt-get install docker-ce docker-ce-cli containerd.io docker-buildx-plugin docker-compose-plugin
docker-ceAmong them, Docker Community Edition is the core component of Dockerdocker-ce-cli ; it represents Docker CLI (command line interface), which is used to interact with Docker and manage containers. containerdUsed to manage the life cycle of containers. docker-buildx-pluginIt is a Docker Buildx plug-in, used to build multi-platform Docker images; similarly, docker-compose-pluginit is a Docker Compose plug-in, used to define and manage the orchestration and deployment of multi-container applications.
Run the above code as shown below.

4 Docker Engine configuration verification
Then, we verify whether the Docker Engine configuration is successful. This can be verified with the following code. This command downloads a test image and runs it in the container.
sudo docker run hello-world
Run the above code as shown below.
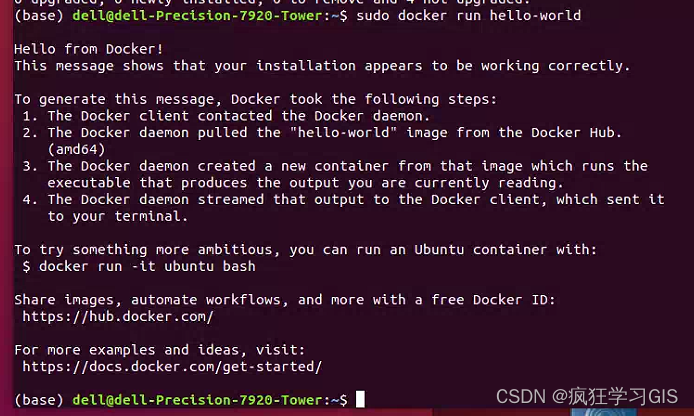
When the words shown in the picture above appear, it means that our Docker Engine configuration has been successful.
It should be noted that our article only introduces the downloading and configuration methods of Docker Engine ; regarding the method of managing Docker as a non- root user , you can refer to the article How to operate Docker as a non-root user on Linux system Ubuntu (https:/ /blog.csdn.net/zhebushibiaoshifu/article/details/132637472); Regarding the specific use of Docker Engine , we will introduce it in detail in subsequent blogs.
At this point, you're done.
Welcome to follow: Crazy Learning GIS