Table of contents
(1) Download opencv-3.4.15 data package
(3) Use cmake to install opencv
(2) Open the camera to display the processed video
1. Install opencv
(1) Download opencv-3.4.15 data package
Open the browser, enter the download address Release OpenCV 3.4.15 · opencv/opencv · GitHub , and select Source code (zip) to download

Configuring the opencv environment in ubuntu_detailed tutorial on the installation and configuration of opencv
(2) Unzip the package
Before decompressing the package, copy opencv-3.4.15.zip to the home folder, and then decompress it.

Configuring the opencv environment in ubuntu_detailed tutorial on the installation and configuration of opencv
Then use the following command to decompress
unzip opencv-3.4.15.zip
(3) Use cmake to install opencv
Enter the decompressed folder: opencv-3.4.15
Use the following code
cd opencv-3.4.15

Configuring the opencv environment in ubuntu_detailed tutorial on the installation and configuration of opencv
Then enter root mode and update

Configuring the opencv environment in ubuntu_detailed tutorial on the installation and configuration of opencv
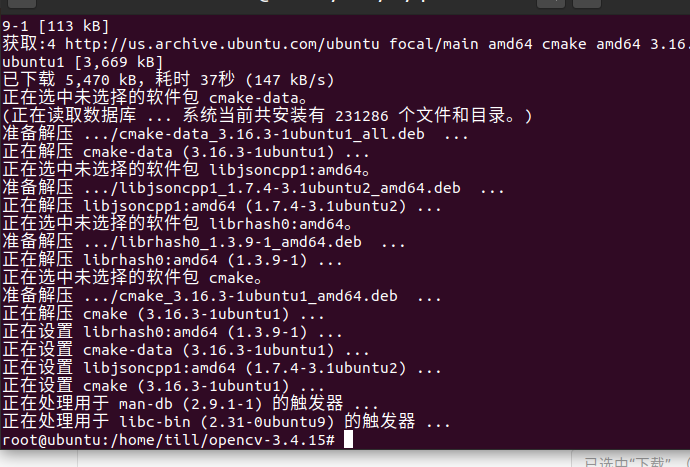
Then execute the following command to install cmake.
sudo apt-get install cmake
Configuring the opencv environment in ubuntu_detailed tutorial on the installation and configuration of opencv
Then enter the following command to install the dependent libraries
sudo apt-get install build-essential libgtk2.0-dev libavcodec-dev libavformat-dev libjpeg-dev libswscale-dev libtiff5-dev
sudo apt-get install libgtk2.0-dev
sudo apt-get install pkg-config
Then create a new build folder under the opencv3.4.15 folder
mkdir build
Then download cmake and compile it.
sudo make
Wait for the compilation to complete before installing
sudo make install
(4) Configuration environment
Use gedit to open /etc/ld.so.conf and add a line /usr/local/lib to the file. /user/loacal is the opencv installation path, which is the installation path specified in the makefile.
The command is as follows
sudo gedit /etc/ld.so.conf
Run sudo ldconfig, and modify the bash.bashrc file
sudo gedit /etc/bash.bashrc
Then add at the end of the text
PKG_CONFIG_PATH=$PKG_CONFIG_PATH:/usr/local/lib/pkgconfig export PKG_CONFIG_PATH
Then enter the command
source /etc/bash.bashrc
(5) Inspection
Enter last
pkg-config opencv –modversion

Configuring the opencv environment in ubuntu_detailed tutorial on the installation and configuration of opencv
At this point the opencv installation is completed
2. Example usage
(1)Open the picture
First create a folder to store the code, and then save a test.cpp in the folder
runs test.cpp
Then compile the file
g++ test.cpp -o test`pkg-config –cflags –libs opencv`
Then enter ./test to run
If you find that it cannot run successfully at this time, if you encounter this problem, there is some problem with your library.
The specific solutions are as follows
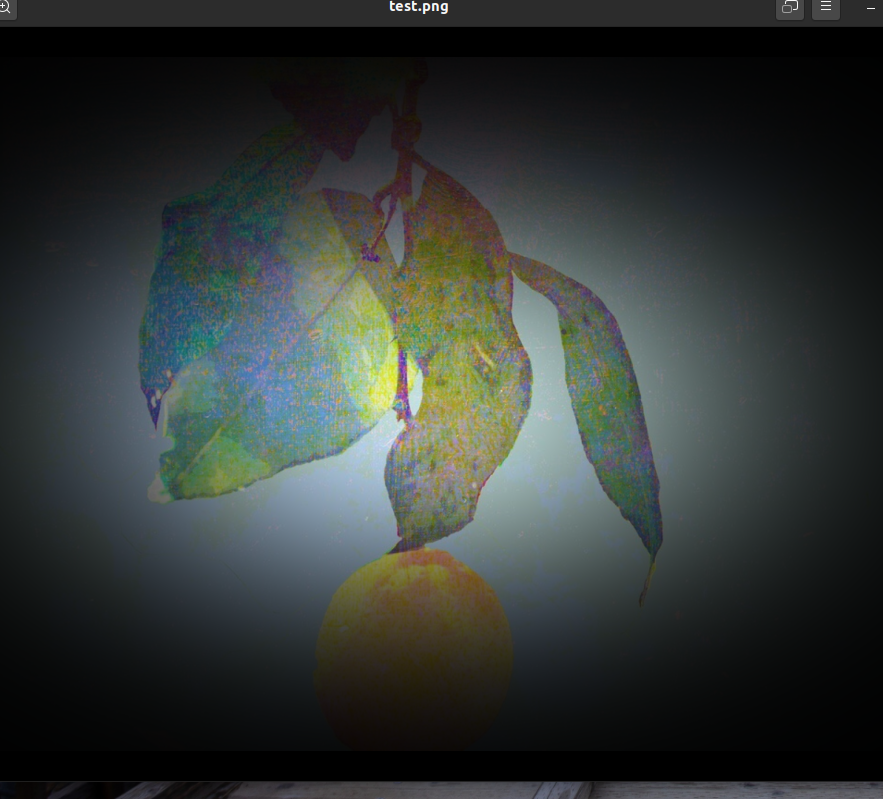
After completing the operation, we will find that a new test.png will be generated
Configuring the opencv environment in ubuntu_detailed tutorial on the installation and configuration of opencv
Configuring the opencv environment in ubuntu_detailed tutorial on the installation and configuration of opencv
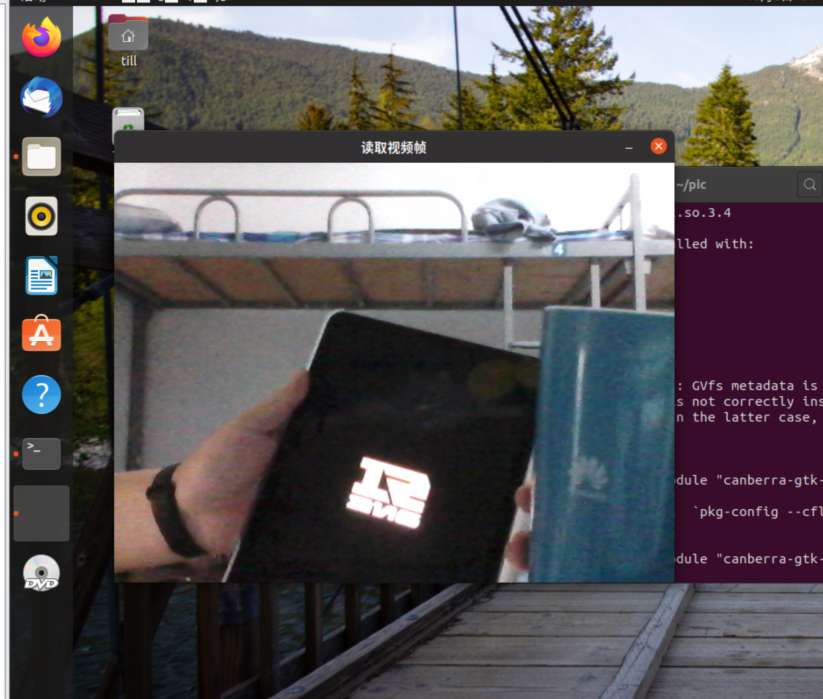
(2) Open the camera to display the processed video
Then create a test1.cpp in this folder
code show as below
#include <opencv2/opencv.hpp>
using namespace cv;

int main()
{
  VideoCapture capture(0);
  while(1)
  {
     Mat frame;
     capture >> frame;
     imshow("读取视频帧",frame);
     waitKey(30);
   }
     system("pause");
     return 0;
}
copy
Compile again
g++ test1.cpp -o test1 `pkg-config –cflags –libs opencv`
Finally run the program
./test1
Configuring the opencv environment in ubuntu_detailed tutorial on the installation and configuration of opencv
(3) Record video
Create another test2.cpp file
Then enter the following code
/*********************************************************************
打开电脑摄像头,空格控制视频录制,ESC退出并保存视频RecordVideo.avi
*********************************************************************/
#include<iostream>
#include <opencv2/opencv.hpp>
#include<opencv2/core/core.hpp>
#include<opencv2/highgui/highgui.hpp>
using namespace cv;
using namespace std;

int main()
{
	//打开电脑摄像头
	VideoCapture cap(0);
	if (!cap.isOpened())
	{
		cout << "error" << endl;
		waitKey(0);
		return 0;
	}

	//获得cap的分辨率
	int w = static_cast<int>(cap.get(CV_CAP_PROP_FRAME_WIDTH));
	int h = static_cast<int>(cap.get(CV_CAP_PROP_FRAME_HEIGHT));
	Size videoSize(w, h);
	VideoWriter writer("RecordVideo.avi", CV_FOURCC('M', 'J', 'P', 'G'), 25, videoSize);

	Mat frame;
	int key;//记录键盘按键
	char startOrStop = 1;//0  开始录制视频; 1 结束录制视频
	char flag = 0;//正在录制标志 0-不在录制; 1-正在录制

	while (1)
	{
		cap >> frame;
		key = waitKey(100);
		if (key == 32)//按下空格开始录制、暂停录制   可以来回切换
		{
			startOrStop = 1 - startOrStop;
			if (startOrStop == 0)
			{
				flag = 1;
			}
		}
		if (key == 27)//按下ESC退出整个程序,保存视频文件到磁盘
		{
			break;
		}

		if (startOrStop == 0 && flag==1)
		{
			writer << frame;
			cout << "recording" << endl;
		}
		else if (startOrStop == 1)
		{
			flag = 0;
			cout << "end recording" << endl;

		}
		imshow("picture", frame);
	}
	cap.release();
	writer.release();
	destroyAllWindows();
	return 0;
}
copy
Compile later
g++ test2.cpp -o test2 `pkg-config –cflags –libs opencv`
Finally, run ./test2

Configuring the opencv environment in ubuntu_detailed tutorial on the installation and configuration of opencv
If you want to open a video file on the hard disk for playback, you need to change the
VideoCapture capture(0);改为VideoCapture capture(“xxxx.mp4”);
In the while loop on line 6, Mat is a class that consists of two parts of data: the matrix header (including matrix size, storage method, storage address and other information) and a matrix pointing to all pixel values (depending on the selected storage method, Matrices can be pointers of different dimensions).
The waitKey command controls the duration of imshow. When imshow is not followed by waitKey, it is equivalent to not providing time for imshow to display the image, and only an empty window flashes by, so waitKey must be added.
This code will keep running in the while loop. If you try to close the image display window with the mouse, you will find that it cannot be closed. You need to use the keyboard Ctrl+C to forcefully interrupt the program, which is very unfriendly. The improvement method is as follows:
#include<iostream>
#include <opencv2/opencv.hpp>
#include<opencv2/core/core.hpp>
#include<opencv2/highgui/highgui.hpp>
using namespace cv;
using namespace std;

int main()
{
	//打开电脑摄像头
	VideoCapture cap(0);
	if (!cap.isOpened())
	{
		cout << "error" << endl;
		waitKey(0);
		return 0;
	}

	//获得cap的分辨率
	int w = static_cast<int>(cap.get(CV_CAP_PROP_FRAME_WIDTH));
	int h = static_cast<int>(cap.get(CV_CAP_PROP_FRAME_HEIGHT));
	Size videoSize(w, h);
	VideoWriter writer("RecordVideo.avi", CV_FOURCC('M', 'J', 'P', 'G'), 25, videoSize);

	Mat frame;
	int key;//记录键盘按键
	char startOrStop = 1;//0  开始录制视频; 1 结束录制视频
	char flag = 0;//正在录制标志 0-不在录制; 1-正在录制

	while (1)
	{
		cap >> frame;
		key = waitKey(100);
		if (key == 32)//按下空格开始录制、暂停录制   可以来回切换
		{
			startOrStop = 1 - startOrStop;
			if (startOrStop == 0)
			{
				flag = 1;
			}
		}
		if (key == 27)//按下ESC退出整个程序,保存视频文件到磁盘
		{
			break;
		}

		if (startOrStop == 0 && flag==1)
		{
			writer << frame;
			cout << "recording" << endl;
		}
		else if (startOrStop == 1)
		{
			flag = 0;
			cout << "end recording" << endl;

		}
		imshow("picture", frame);
	}
	cap.release();
	writer.release();
	destroyAllWindows();
}
copy
3. Summary
In this experiment, I learned how to use opencv, but encountered many difficulties during the installation process and spent a lot of time. Finally, I was able to complete it by referring to many experts.
4. References
The correct way to install opencv on ubuntu_Taotao name-CSDN blog_install opencv on ubuntu
error while loading shared libraries: libopencv_highgui.so.3.4: cannot open shared object file solution – Gray Letter Network (Software Development Blog Aggregation) https://blog.csdn.net/pink_lemon/article/details/120632557
https://blog.csdn.net/public669/article/details/99044895
Copyright statement: The content of this article is voluntarily contributed by Internet users, and the views expressed in this article represent only the author's own. This site only provides information storage space services, does not own any ownership rights, and does not assume relevant legal responsibilities. If you find any suspected infringement/illegal content on this site, please send an email to report. Once verified, this site will be deleted immediately.