1 overview
Ubuntu Server is a version of the Ubuntu operating system that is engineered to serve as the backbone of the Internet. Ubuntu Server brings economic and technical scalability to public or private data centers. Whether you want to deploy on an OpenStack cloud, a Kubernetes cluster, or a scenario with more than 50,000 nodes, Ubuntu Server can provide the best horizontal expansion performance. Ubuntu Server is a member of the Ubuntu family.
Ubuntu belongs to the Debian series. Debian is a model of community Linux and the Linux system that most follows the GNU specification so far. Debian was first created by Ian Murdock in 1993 and is divided into three version branches (branch): stable, testing and unstable. Among them, unstable is the latest test version, which includes the latest software package, but has relatively many bugs, and is suitable for desktop users. The testing version has been tested in unstable, which is relatively stable and supports many new technologies. Stable is generally only used for servers. Most of the above software packages are relatively old, but the stability and security are very high. The most distinctive feature of Debian is the apt-get / dpkg package management method. In fact, Redhat's YUM is also imitating Debian's APT method, but in the binary file distribution method, APT should be the best. Debian's information is also very rich, there are many supportive communities.
Ubuntu server supports Intel's x86 series and AMD's 64-bit series according to the hardware architecture. Because different CPUs implement different technologies and system architectures, Ubuntu will compile a development version that supports multiple hardware platforms. Usually, Ubuntu will support Hairstyle versions of hardware platforms such as x86 and AMD64.
2 Introduction to Ubuntu Versions
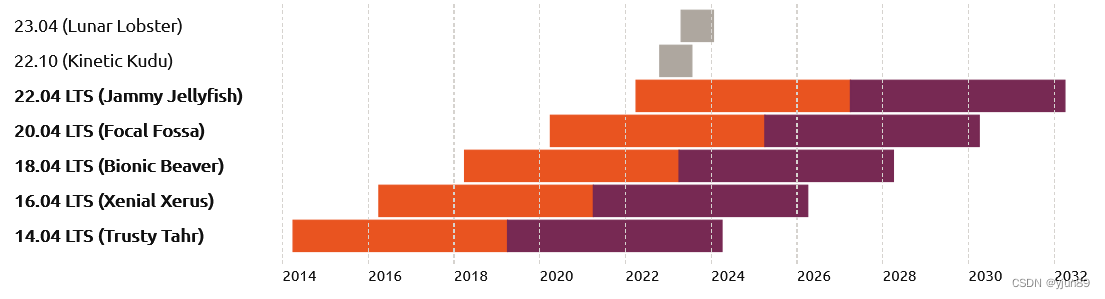
There are two flavors of Ubuntu, interim and long-term. Each Ubuntu LTS is maintained for a total of 10 years, 5 years of Standard Support + 5 years of ESM. The temporary release maintenance period is 9 months.
2.1 About the release cycle of Ubuntu
Long-term support and interim releases are numbered YY.MM, and Ubuntu releases have a development codename ("Lunar Lobster") and are versioned by the year and month of delivery, e.g. Ubuntu 23.04 is released in April 2023.
LTS is a "Long Term Support" release that is released every two years in April. The LTS releases are the "enterprise" versions of Ubuntu that are used the most. It is estimated that 95% of Ubuntu installations are LTS versions, so if you use it as a server in an enterprise, you should choose LTS to install the system.
Between LTS releases, interim releases of Ubuntu are released every six months, for example 23.04 is the latest interim release, supported by nine months of maintenance.
2.2 Ubuntu distribution
2.3 Download server version ISO
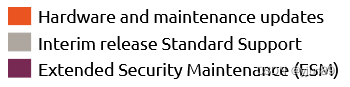
System download address: https://releases.ubuntu.com/. Select the LTS version to download and install, and then select "server install image" to download. Note that the server download contains the installer, and the download address of the LTS version and the interim version are shown in the figure below.
- Choose to download the LTS version 64 -bit server version image installation

3 Create a bootable USB boot
There are many ways to boot the installer, but the easiest and most common way is to create a bootable USB that boots the system to be installed (tutorials for other operating systems are also available).
3.1 Start the installer
Insert the USB drive into the host computer to be installed and start the host computer. Most computers will automatically boot from the USB or DVD, although in some cases this function is disabled to shorten the boot time. If you don't see the boot message and "Welcome" screen, you need to set up your computer to boot from the installation media.
There should be a message on the screen when the computer starts telling you which key to press for setup or the boot menu. Depending on the manufacturer, this could be Esc, F2, F10, or F12. Just restart the computer and press and hold the prompt key to enter the USB boot to install the system.
4. Install Ubuntu Server
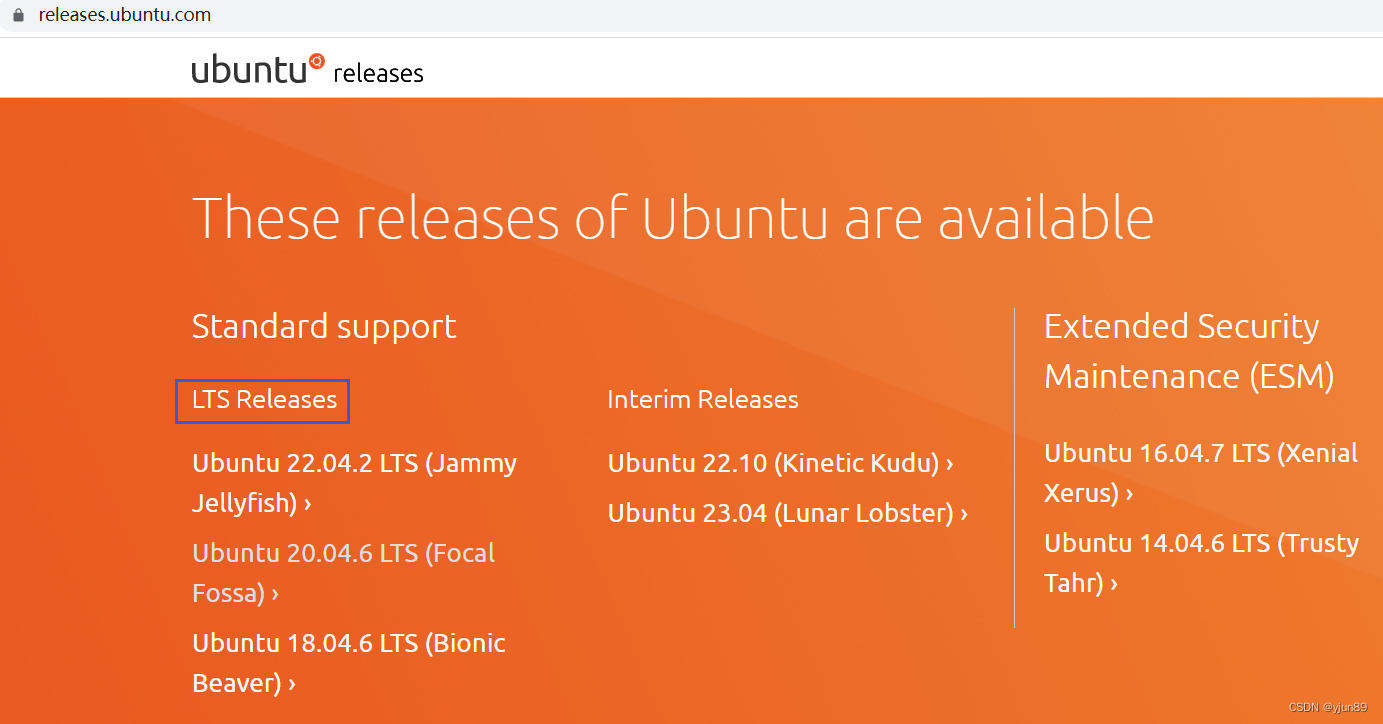
4.1 Enter the installation boot menu
Select [ Try or Install Ubuntu Server] to install the system.
4.2 Select the installation language
The installer will start in its language selection screen, [ English ] is selected by default, here directly press the Enter key.

4.3 Continue to install
Select [Continue without updating] (continue without updating)

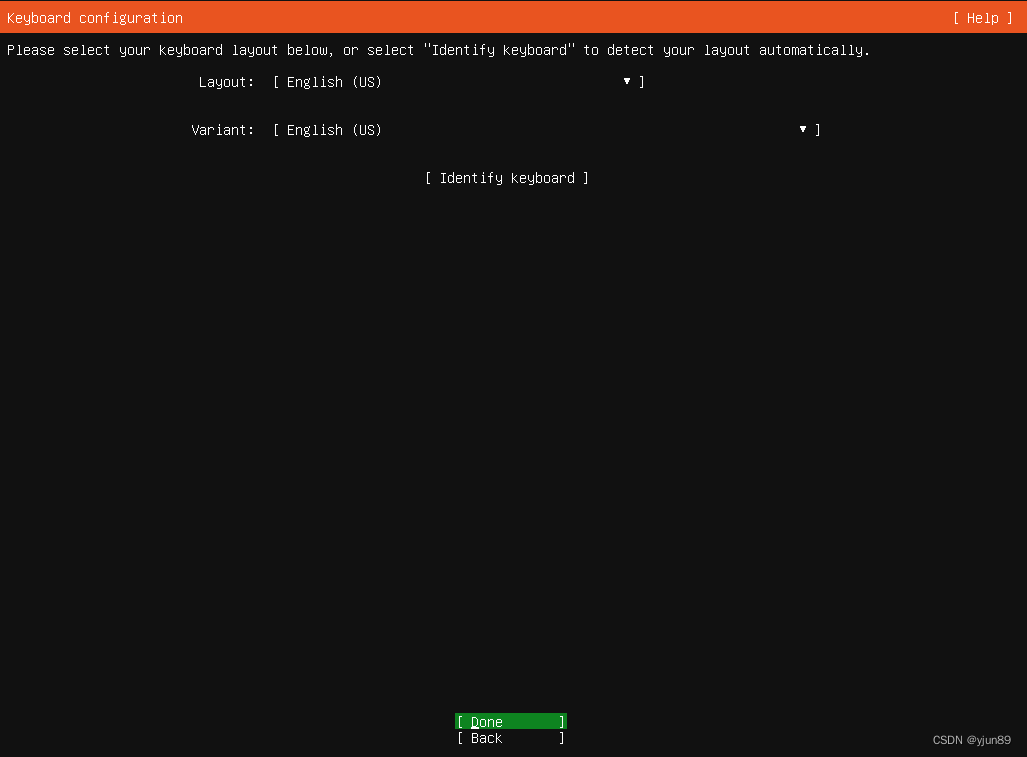
4.4 Select keyboard layout
Select the layout of the system keyboard, the default is fine here.
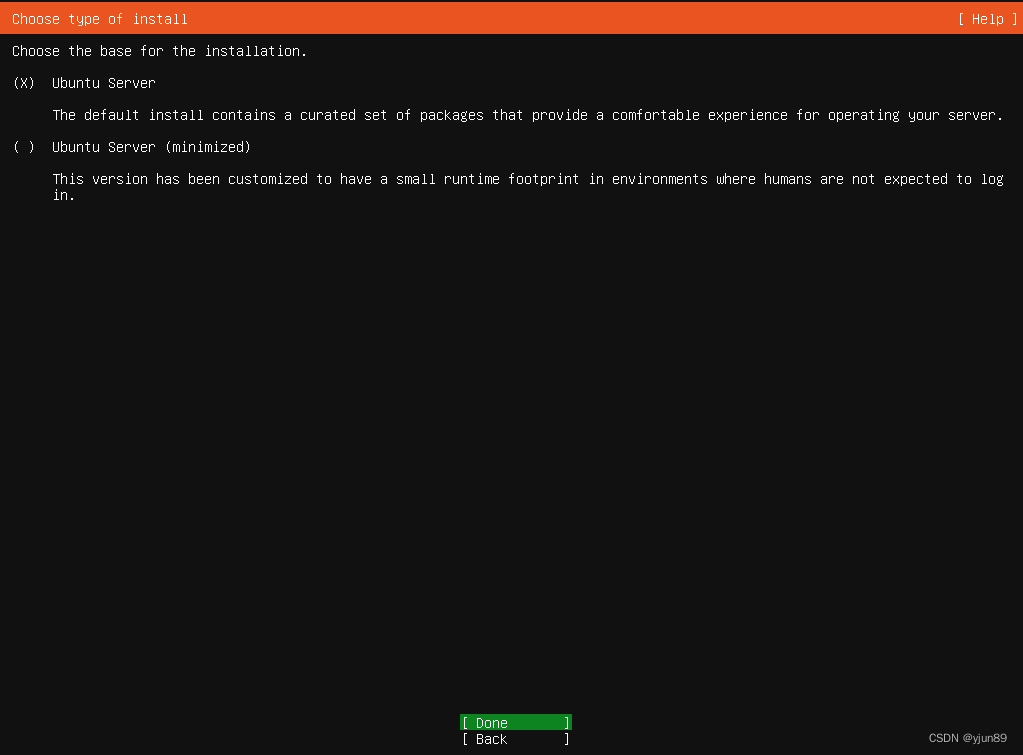
4.5 Select the installation type
Select the server version to be installed. If you need a simplified version, select [Minimized] for minimal installation. Here you can choose according to your needs. For this installation, select [ Ubuntu Server ].
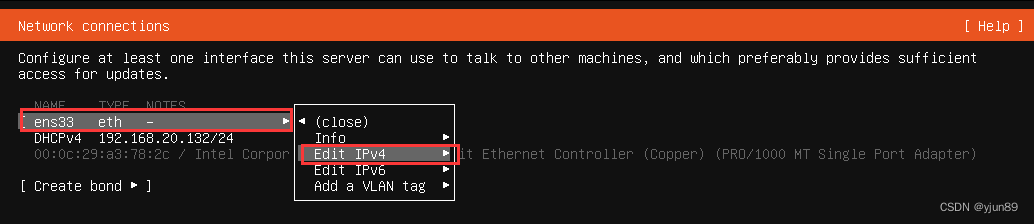
4.6 Network configuration
This interface allows to configure the network. The Ubuntu server uses NetPlan to configure the network. You can configure DHCP or configure a static address. It is recommended to use a static IP address. The static configuration method is used here, select [ens33] network card, and select [Edit IPv4].
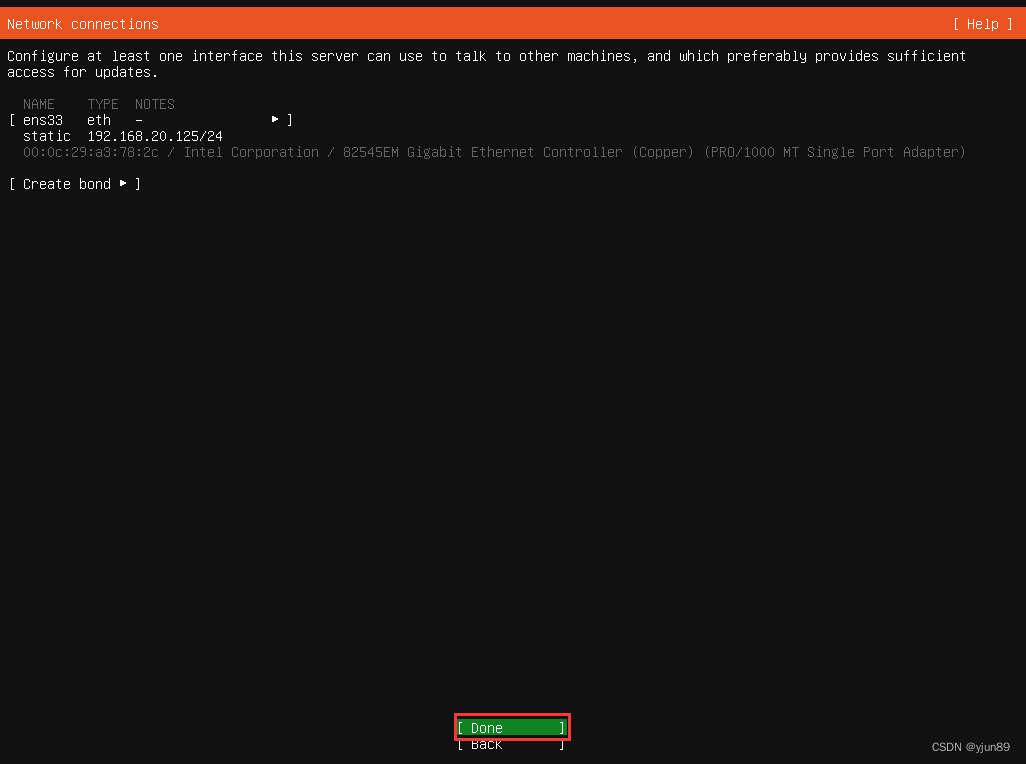
Select 【Manual】to configure manually, and fill in the subnet IP and mask, IPv4 address, gateway, and DNS server respectively. Search domains is the domain name, you can leave it blank if not required. Finally, select [Save] to save and exit.

After saving, return to the initial network configuration page, select [Done] to enter the next option configuration.
4.7 Proxy ( proxy configuration )
The configured proxy is used to access package repositories and snap repositories in the installer environment and installed systems.
There is no need to configure the agent here, just select [Done] directly.

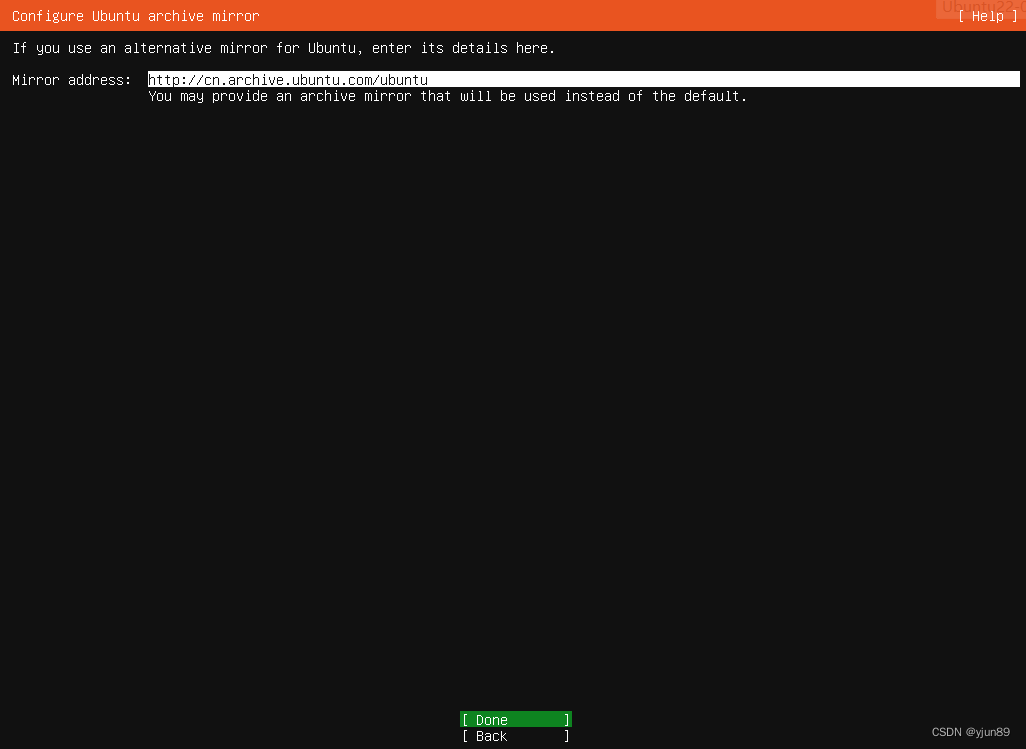
4.8 Configure software source
It is recommended to change to a domestic mirror source to increase the download speed. If you do not modify it, press Enter to continue. This installation will not be modified. After the system is installed, modify the configuration. Here, press Enter directly to enter the next configuration.
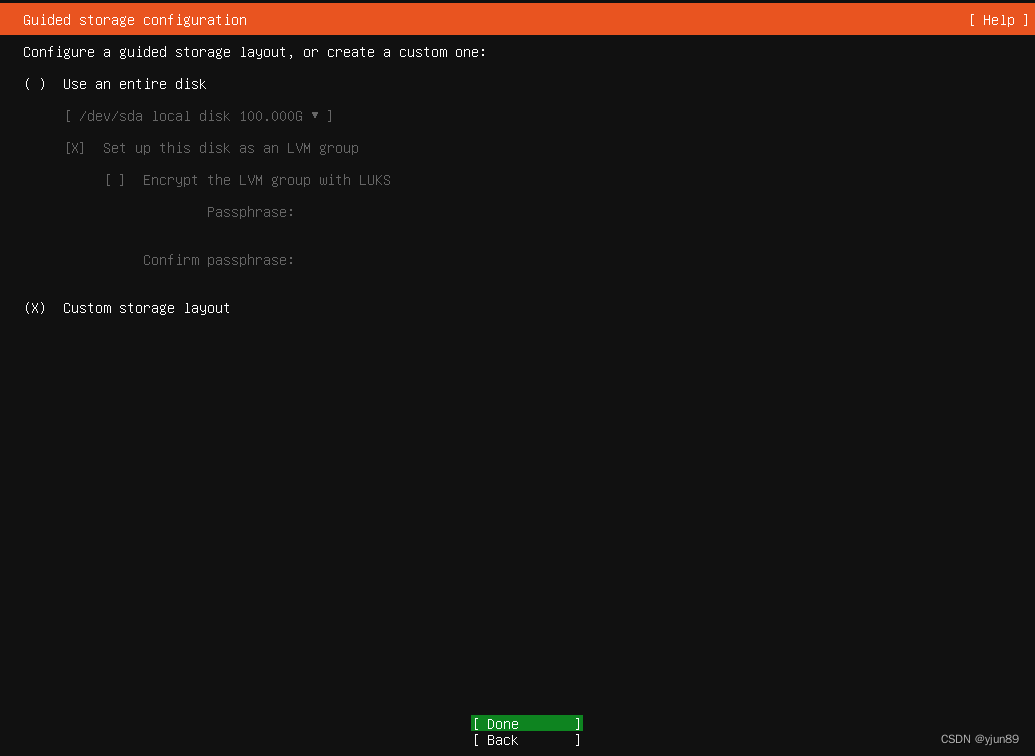
4.9 System installation partition configuration
The partition configuration here is recommended to divide the boot boot partition into 500M, the swap swap partition is recommended to be twice the physical memory, and the rest of the space is allocated to the root partition, and the partition format is xfs.
Select the installation disk and press Enter to automatically allocate by default. If manual partitioning is required, select [ custom storage layout ]. For this installation, select [Custom storage layout] for manual partitioning, press Tab to select the option, and press the space bar to select the option.
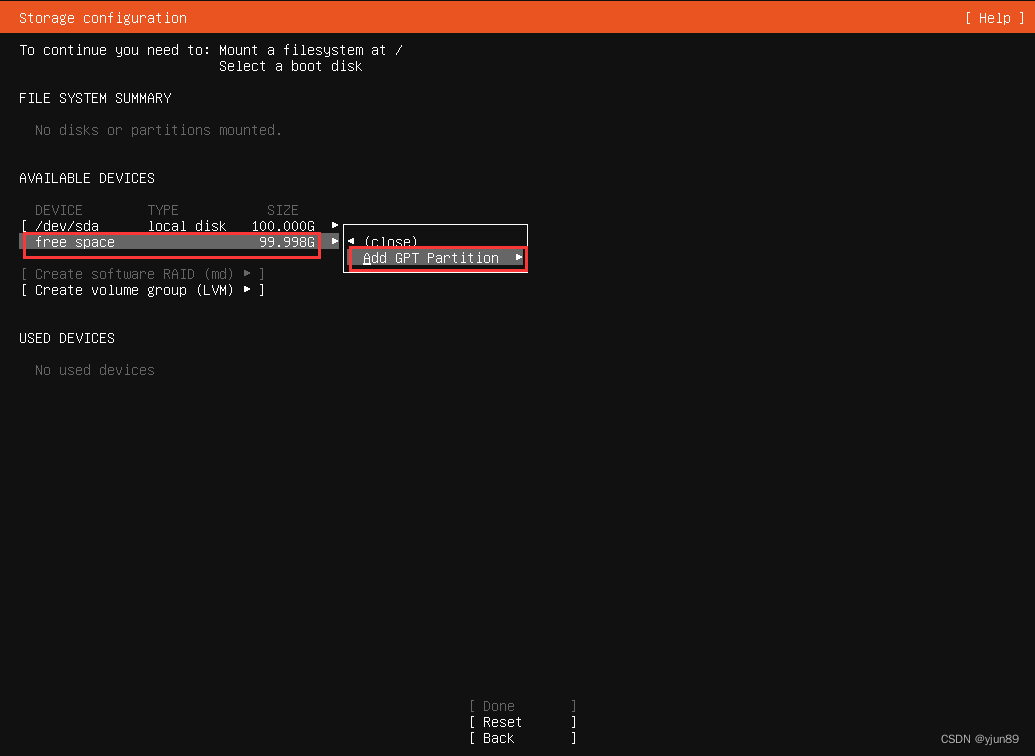
4.9.1 Create boot partition
Find [free space], select [Add GPT Partition] to add a partition, and enter the partition configuration
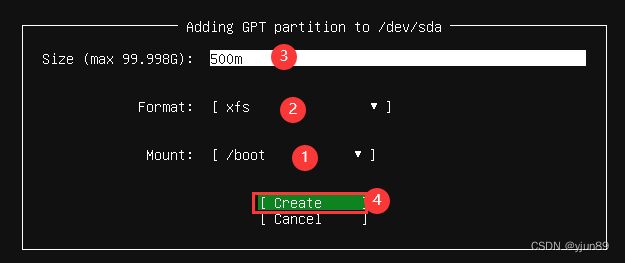
Configure the boot partition and allocate 500M space:
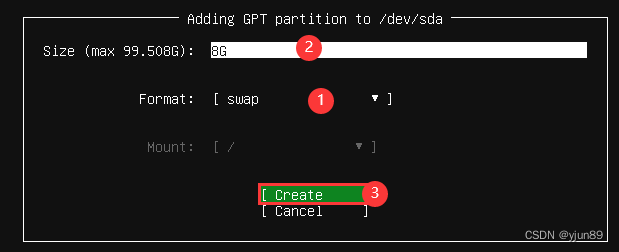
4.9.2 Create swap partition
Configure the swap partition, continue to select [free space], select [Add GPT Partition] to add a partition, and enter the partition configuration

The swap partition configures 8G space
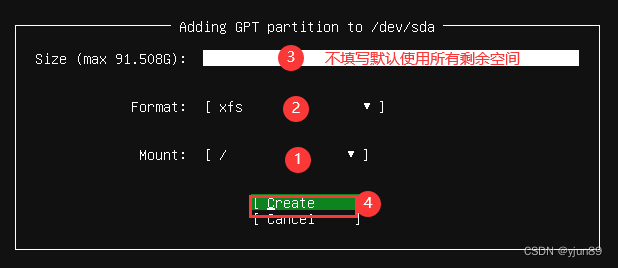
4.9.3 Create root partition
Configure the root partition and allocate all the remaining space to the root partition. Continue to select "free space", select "Add GPT Partition" to add a partition, and enter the partition configuration

Assign all the remaining space to the root partition, and select Create after configuring the information
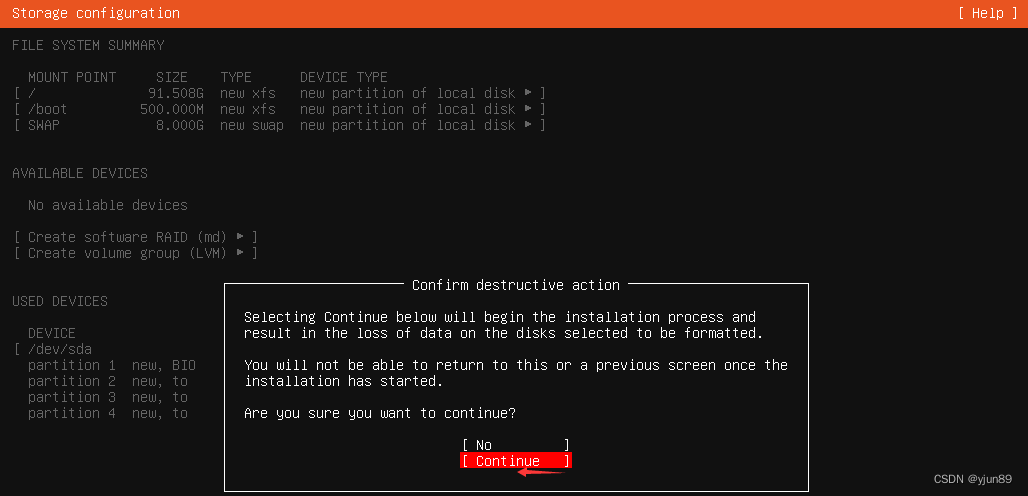
After the partition configuration is completed, return to the partition initial configuration interface, we check whether the disk partition meets the requirements, press Enter to continue

Here the system will prompt that the disk will be formatted, select [Continue] to continue.
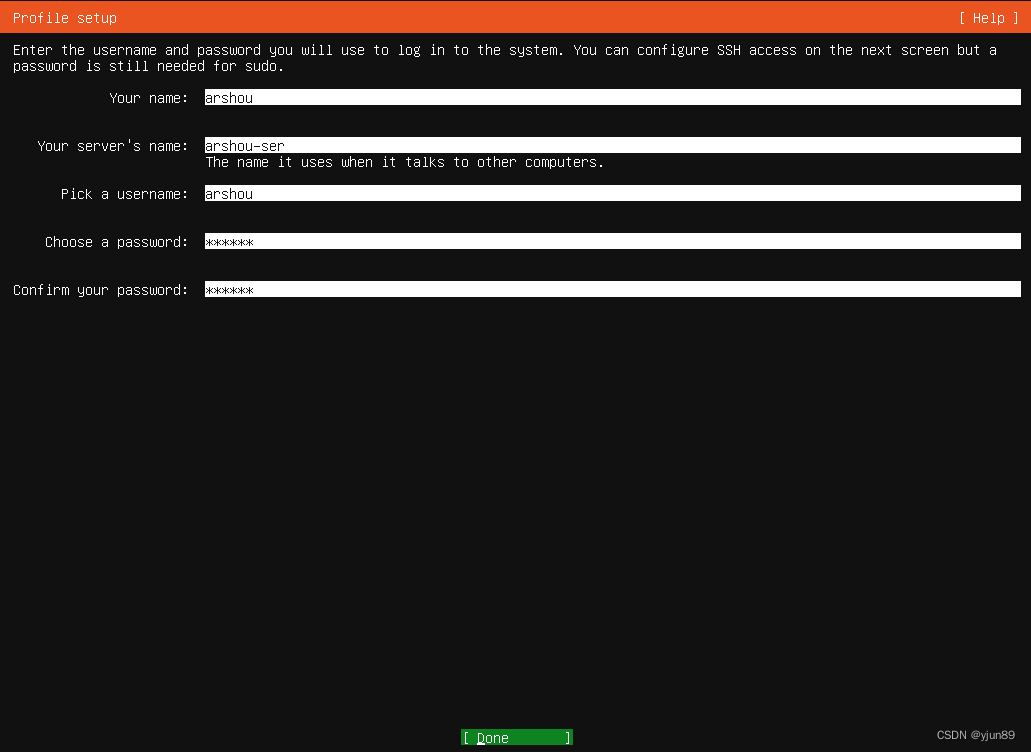
4.10 Set computer name, user name and password
The created user is used to log in to the system, because the default root password of Ubuntu is random, that is, there is a new root password every time it is turned on, and it is not required to set the root password when installing the system, so Ubuntu cannot be used after completion To log in to the system directly as root, you need to use the user set during installation to log in to the system and set the root password yourself.
The user set here directly has the sudo authority, and the user can use sudo by entering the user password when using the sudo authority.
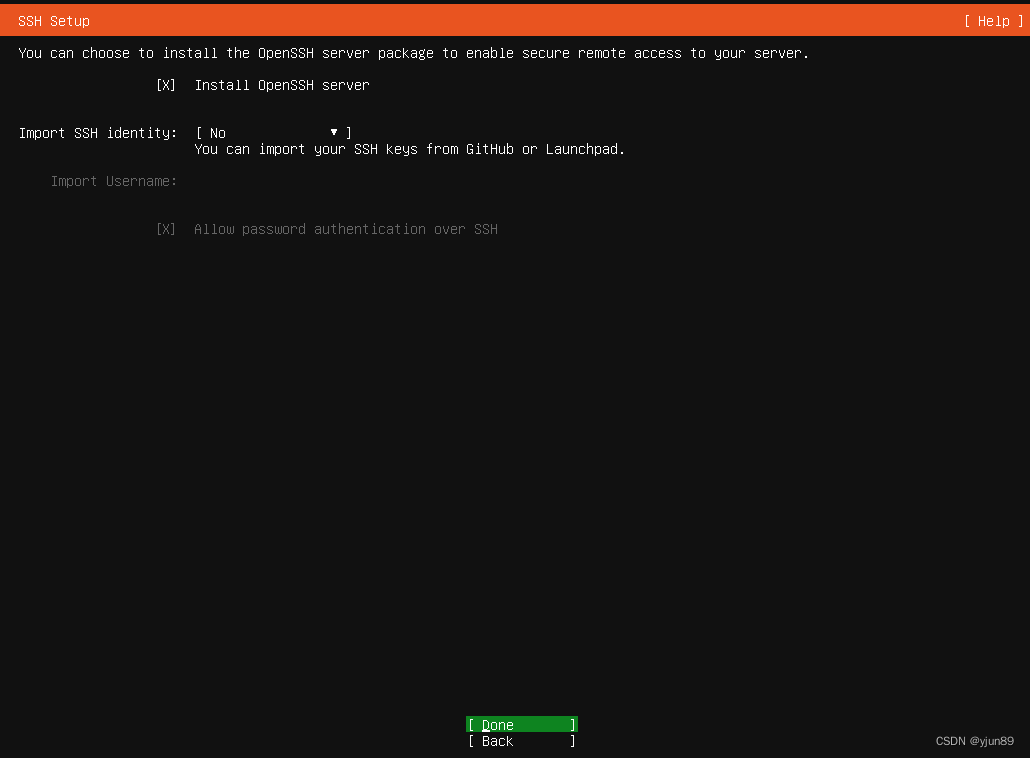
4.11 Install OpenSSH Server service
Select [Install OpenSSH server] to install the SSH service, which is convenient for remote connection later, and use the space bar to choose to install the OpenSSH Server service
4.12 Choose to install other services
Select the service that needs to be installed. Here you can choose it according to your needs. If you don’t need it, skip it directly.

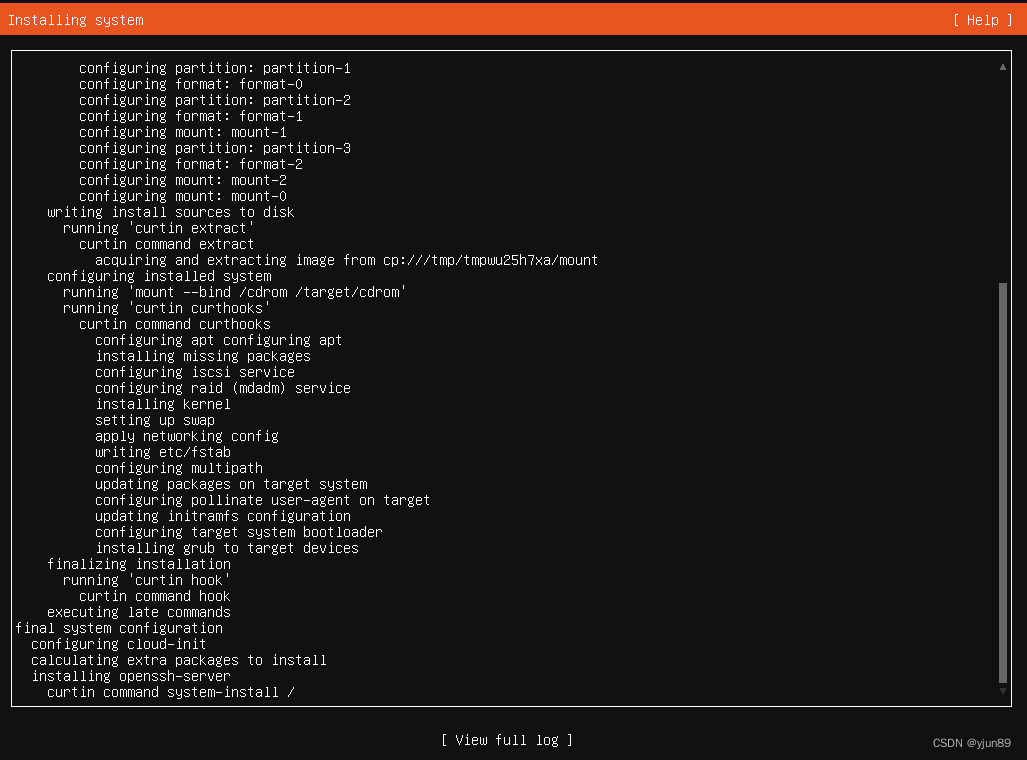
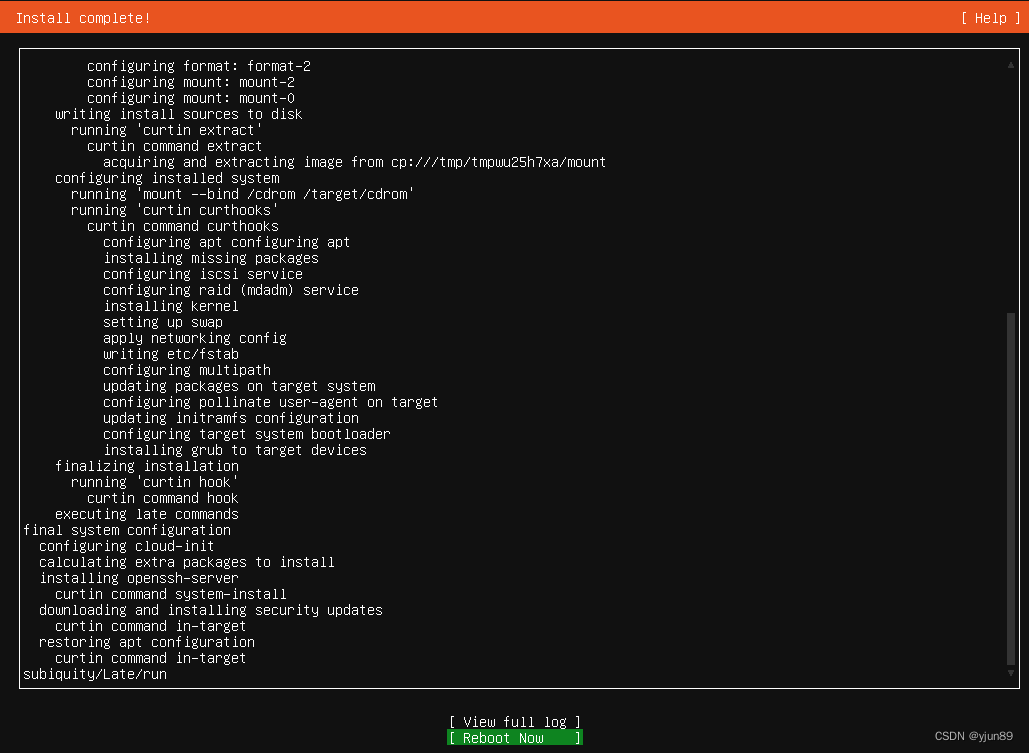
4.13 Start system installation.
After the installation is complete, select [Reboot Now] to restart the system.
5 After the system installation is complete, log in to the system
After the system installation is complete, enter the login interface after restarting, and log in to the system.
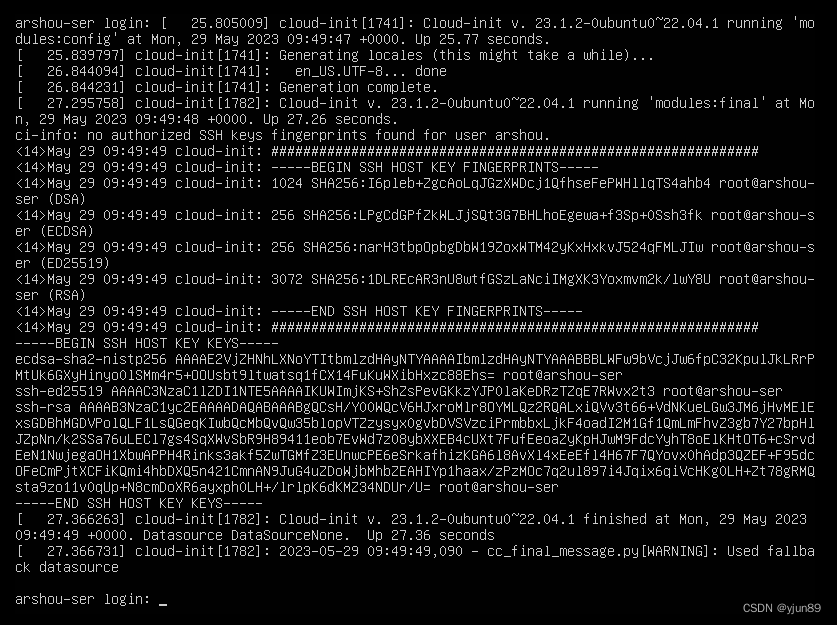
Use the user created when installing the system to log in to the system, as follows:
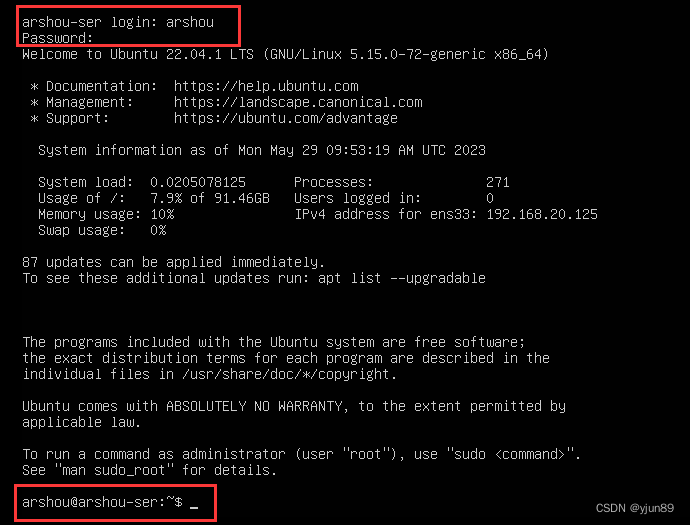
At this point the system installation is complete.