Linux knowledge points – the use of basic development tools in the Linux environment
Article directory
1. Linux editor - vim
vim configuration: https://gitee.com/HGtz2222/VimForCpp?_from=gitee_search
1. Open and close vim
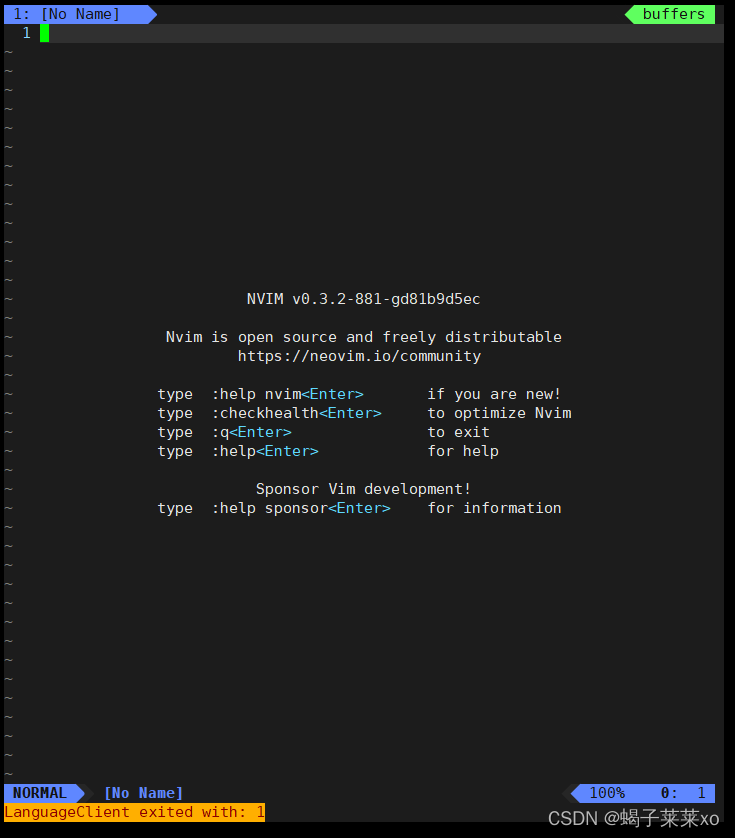
open vim
[lmx@VM-8-2-centos lesson07-27]$ vim
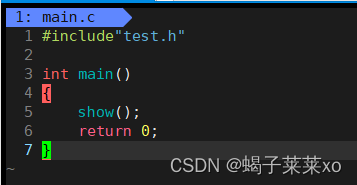
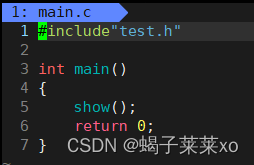
Open the file with vim
[lmx@VM-8-2-centos lesson07-27]$ vim main.c
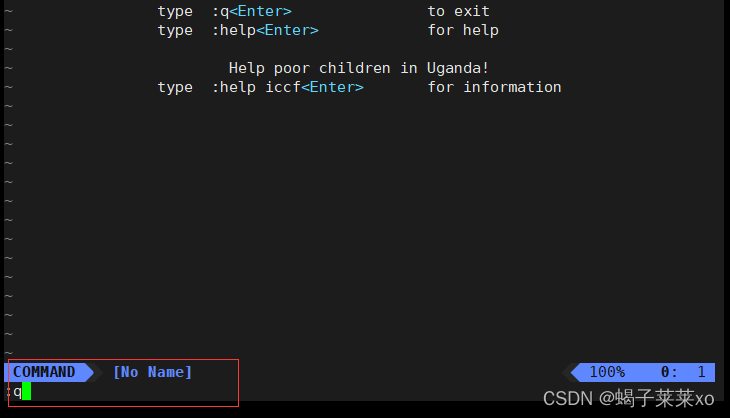
close vim
shift + :, move the cursor to the lower left corner, then enter q to exit vim;
2.Three modes of vim
(1) Command mode: the mode opened by default, the input command can be executed;
inputiSwitch to edit/insert mode, press ESC to return to command mode;
entershift + :Switch to bottom line mode, press ESC to return to command mode;
(2) Edit/Insert mode: for text editing;

(3) Bottom line mode: execute bottom line commands;
Note: Edit mode and bottom line mode cannot be switched to each other;
3. Common commands in command mode
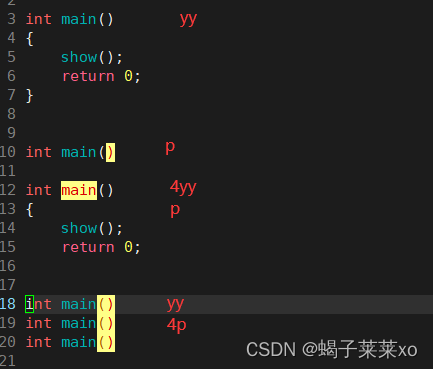
(1) yy: copy the line where the cursor is currently located;
nyy means copy n lines;
(2) p: paste the copied line at the cursor position;
np means paste n times;
(3) dd: copy the line where the current cursor is cut (delete) lines;
ndd means cut n lines;
(4) u: undo operation;
(5) ctrl + r: undo u operation;
(6) shift + g: the cursor is positioned at the end of the file;
( 7) gg: the cursor is positioned at the beginning of the file;
(8) n + shift + g: the cursor is positioned at any line of the file;
(9) shift + 6 (^): the cursor is positioned at the very beginning of the current line;
(10 ) shift + 4 (¥): the cursor is positioned at the end of the current line;
(11) w, b: move the cursor back and forth in units of words;
(12) h, j, k, l: left, down, Up, right;
(13) shift + ~: switch case
(14) shift + r: enter replacement mode (insert);
(15) r: replace the character where the cursor is located;
nr: replace n characters;
(16) x : delete the character where the cursor is;
shift + x: delete the character before the cursor;
support nx, n + shift + x;
4. Bottom line mode command
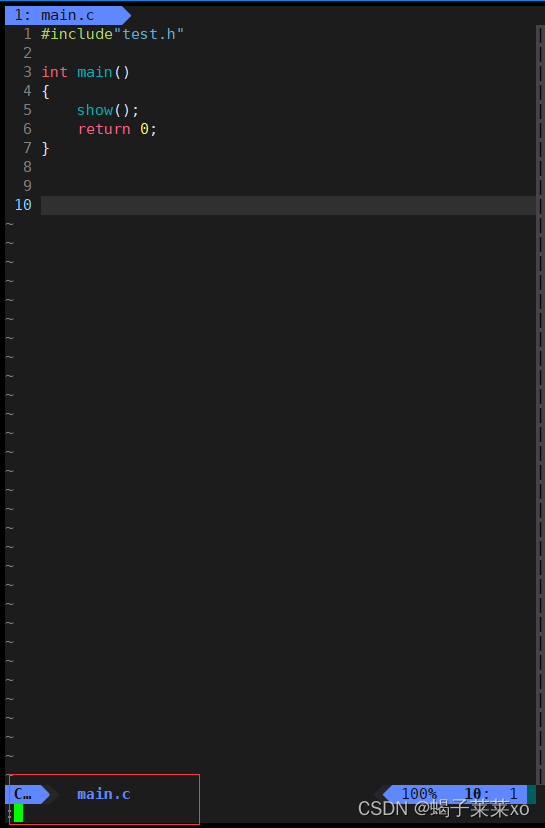
(1) set nu/nonu: open line number/cancel line number;
(2) vs file name: split screen operation;
split screen switch cursor: ctrl + ww;
(3) w: write, save; w! It is forced to save;
(4) q: exit; q! Forced exit;
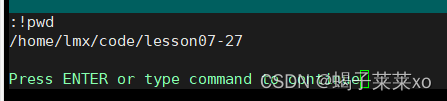
(5) !cmd: Do not exit vim to execute the corresponding cmd command (execute command line, compile, run, view man, etc.);
5. Set vim's table key to 4 characters
[lmx@VM-8-2-centos lesson07-27]$ cd ~  //进入家目录
[lmx@VM-8-2-centos ~]$ vim .vimrc	//打开vim配置文件
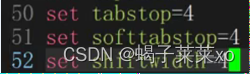
Change these lines to 4, the table is 4 characters;
6. Multi-line comment and de-comment in vim
-
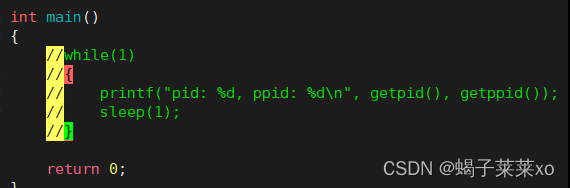
multiline comment
(1) In the command mode, CTRL + v enters the visual block mode;
(2) In this mode, use j and k to select the line that needs to be commented;
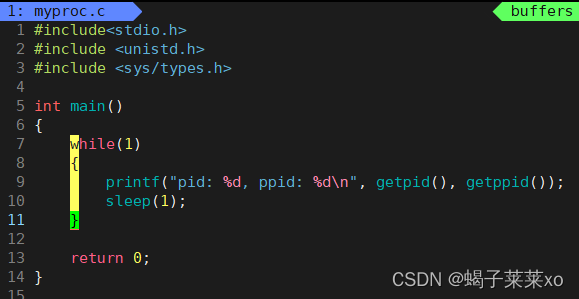
(3) shift + i enters the first line edit mode, and enters the comment code symbol // ;
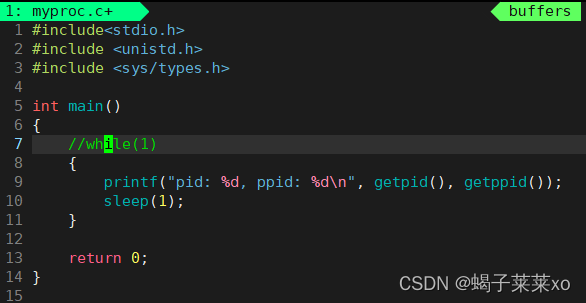
(4) All selected lines will be commented after ESC;
-
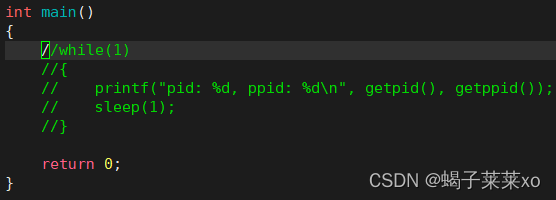
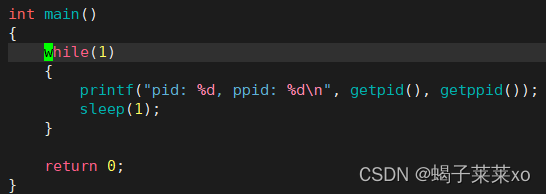
Uncomment multiple lines
(1) In command mode, press CTRL + v to enter visual block mode;
(2) Use h, j, k, l to select the content to be deleted;
(3) Enter d to delete the selected content;
2. Linux editor - gcc / g++
1 Introduction
gcc/g++ is a compiler specially used to compile and link c/c++; the
default gcc version matching centos7.6 or 8 is 4.8;
the process of gcc program processing is the same as that of the IDE processing process on the widows system, both go through 4 Steps:
(1) Preprocessing (a. Decomment b. Macro replacement c. Header file expansion d. Conditional compilation...) (2
) Compile (c -> Assemble)
(3) Assemble (Assemble -> Redirectable Binary Object file)
(4) link (link multiple .o files, multiple .obj files are combined to form an executable file, the default name is a.out)
2. Use of gcc/g++
Compile with gcc to generate an executable file:
Executegcc filename... -o executable filename
-o is to specify a new name and output to the file;
you can alsogcc -o executable-name file-name...
-o must be followed by the target file name;
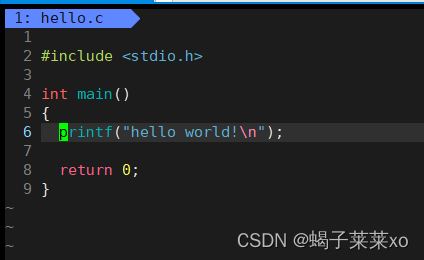
[lmx@VM-8-2-centos lesson07-27]$ gcc hello.c -o hello
[lmx@VM-8-2-centos lesson07-27]$ ls
hello    install.sh  main.o    mytest  test.c  test.o
hello.c  main.c      Makefile  proc    test.h
Run the executable file
./executable file
(./ refers to the current folder)
[lmx@VM-8-2-centos lesson07-27]$ ./hello
hello world!
Use g++ to compile and generate executable files
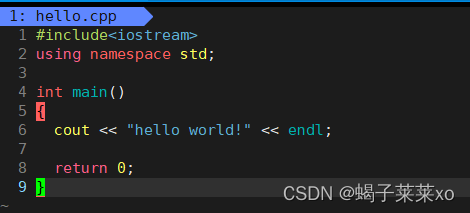
[lmx@VM-8-2-centos lesson07-27]$ g++ hello.cpp -o hello
[lmx@VM-8-2-centos lesson07-27]$ ls
hello      install.sh  main.o    mytest  test.c  test.o
hello.cpp  main.c      Makefile  proc    test.h
3. Compilation process of gcc / g++
gcc-options

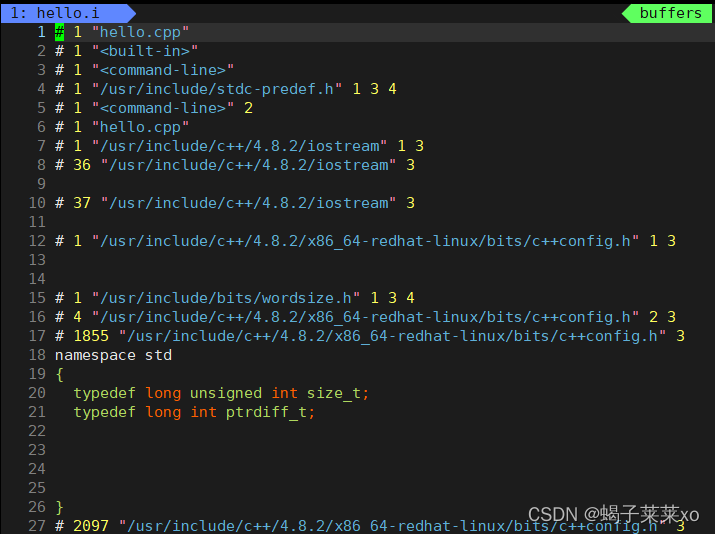
(1) Pretreatment

g++ -E: Translate the program from now on, stop if the preprocessing is complete;
save it to the executable temporary file hello.i after preprocessing;
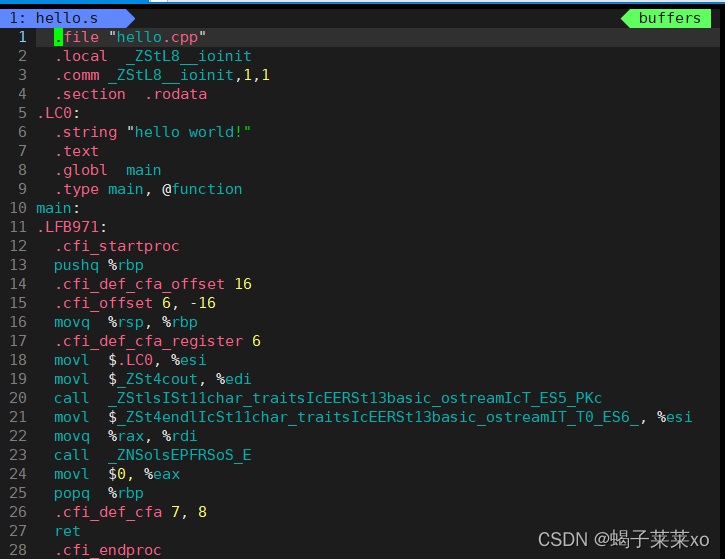
(2) compile

g++ -S: Translate the program from now on, stop if the compilation is complete;
save it to the hello.s file after compilation;
(3) Compilation

g++ -c: Translate the program from now on, stop if the assembly is complete;
generate a redirectable object file hello.o after assembly;

(4) link

The link generates the executable file hello (if the file name is not specified, the default name is a.out);
4. Dynamic and static libraries under Linux
static library: It means that when compiling and linking, all the code of the library file is added to the executable file, so the generated file is relatively large, but the library file is no longer needed at runtime, and its suffix is generally ".a" ( ".lib" under windows);
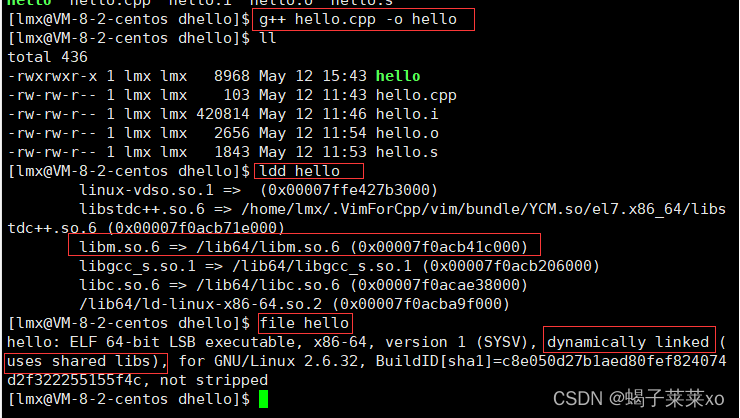
dynamic library: When compiling and linking, the code of the library file is not added to the executable file, but the library is loaded by the runtime link file when the program is executed, which can save system overhead; the general suffix of the dynamic library is ".so" (".dll" under windows);
The default binary program generated by gcc isdynamic linkof;
The library location in Linux

gcc/g++ generates executable files by default.
The gcc/g++ uses static linking
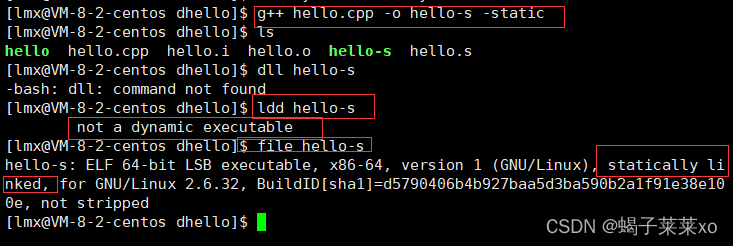
. If the linking fails, the static library may not be installed:
sudo yum install -y glibc-static  #c静态库
sudo yum install -y libstdc++-static  #c++静态库
3. Linux project automation build tool - make / Makefile
1 Introduction
There are many source files in a project, which are placed in several directories according to type, function, and module. Makefile defines a series of rules to specify which files need to be compiled first, which files need to be compiled later, and which files need to be recompiled. Compilation, even more complex functional operations;
make is a command, Makefile is a file, and the two together complete the automated construction of the project;
Makefile contains a. dependencies; b. dependent methods;
2. Use make / Makefile to build the project
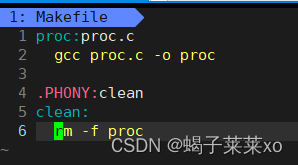
(1) Create a Makefile
[lmx@VM-8-2-centos lesson07-27]$ touch Makefile
(2) Write the Makefile and build the project.
Edit dependencies and dependency methods in the Makefile:
dependencies may not depend on any files;

after editing the Makefile, execute the make command on the command line, and the system will follow the dependencies and dependencies in the Makefile Method to build the project:


(3) Project cleaning
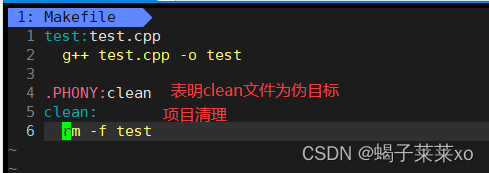
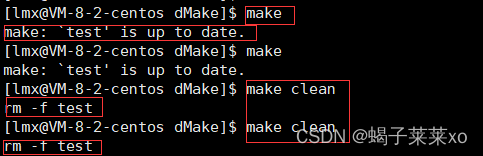
Use the make clean command to call the clean file and execute the command to clean the project;

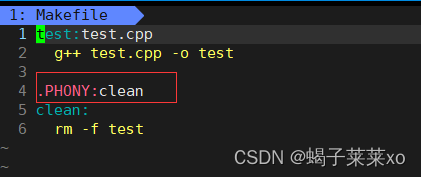
Note: Makefile will only find the first target file to execute by default, and there is only one pair of dependencies and methods;
like the above When Makefile executes the make command, it will only execute the test file, but will not find the following clean;
if it is changed to the following:
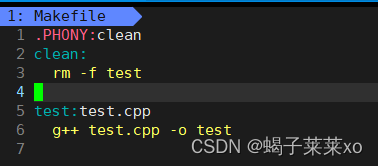
When making, it will only execute clean, and will not execute the subsequent test;

if you want to execute the target file after the Makefile, You can bring the file name after make;

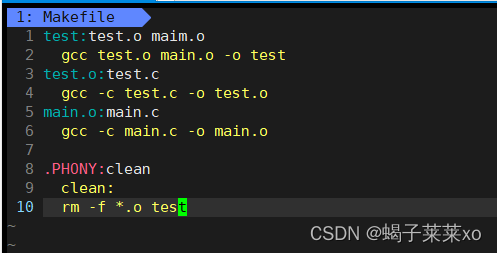
4 .PHONY: false target
==.PHONY:== The target file marked is a pseudo-target and is always executed;
clean is a pseudo-target;
after make is executed once, the executable program test is the latest and cannot be executed again;
and the pseudo-target clean can always be executed implement;
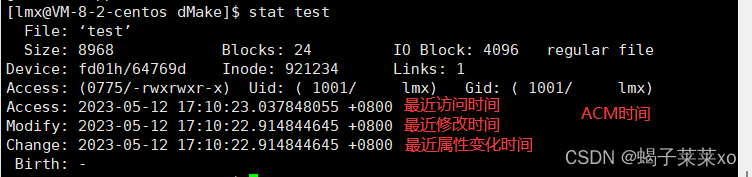
Note: How does Makefile know that our executable program is the latest:
it is based on the filelast modified timecome to know ;
5.Linux multi-file project

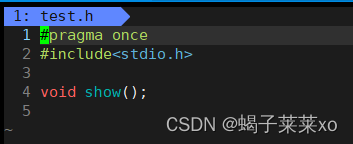
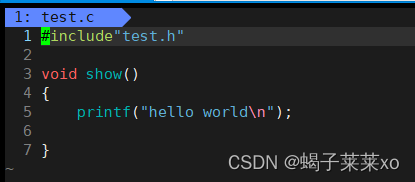
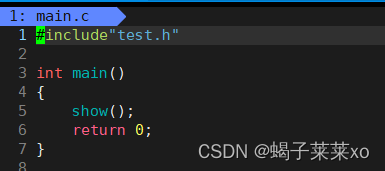
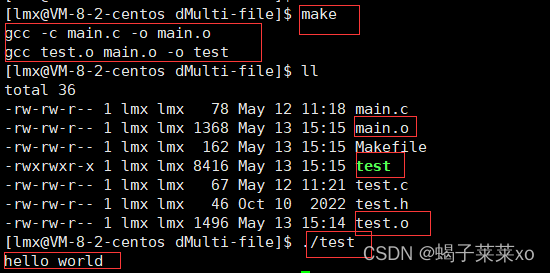
Instructions that Makefile needs to execute:
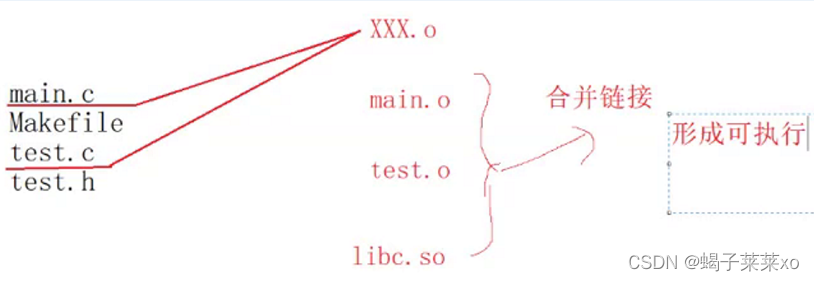
The first target file that Makefile finds is mytest, so at the first make, the system detects that there is no test.o and main.o, so it will continue to execute until test, o and mian.o;
6. Simple writing method of Makefile
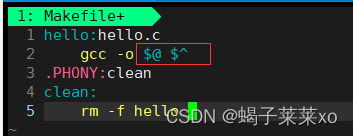
Among them, $@ represents the target file in the dependency relationship corresponding to this dependent method, which is hello;
$^ represents: all files on the right (hello.c, etc.), suitable for multiple .c files to synthesize an executable program;
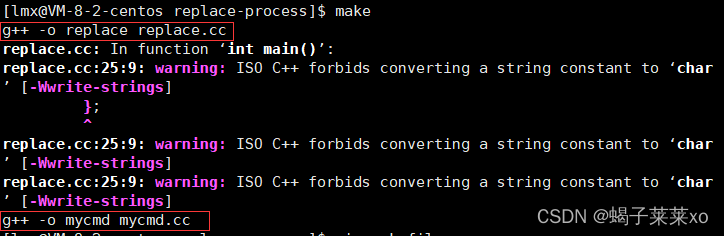
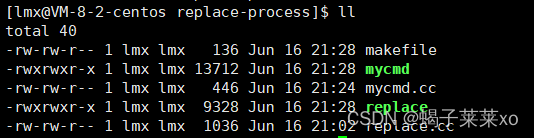
7. Use makefile to generate multiple executable programs in sequence

Pseudo-target all, there are only dependencies and no dependent methods, and the dependencies are two executable programs; if
no exec and mycmd are detected, it will continue to execute until these two files are generated;
4. Progress bar applet
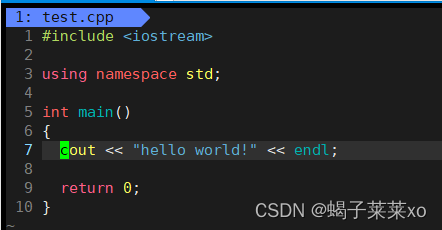
When writing code, write Makefile first to ensure that hello world can run through, and then write other codes;
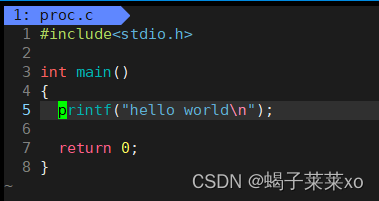
buffer problem:
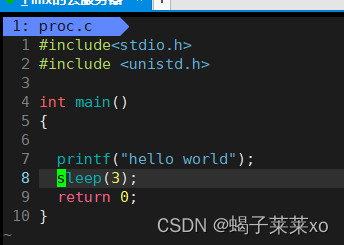

hello world will be printed after 3 seconds;
the code of printf has been executed long ago, but the information is not immediately read displayed;
c language will give usoutput buffer(a section of memory space), refresh according to a specific refresh strategy;
for display devices, the general refresh strategy isline refreshWhen encountering '\n', all characters before '\n' will be displayed;
If you need to refresh the output buffer immediately, you can use fflush:
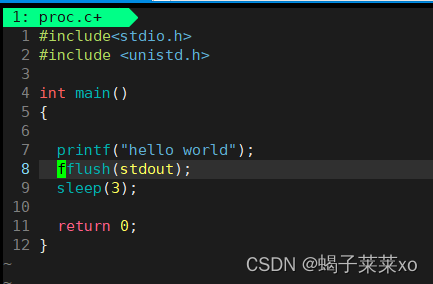

In this way, hello world will be printed out immediately, and wait 3 seconds for the program to finish after printing;
Countdown program:
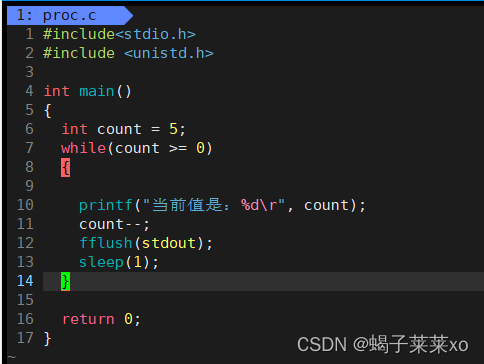
\r: carriage return, will not trigger line refresh; \n: line feed;
every time a string is printed, \r cursor returns to the beginning, continues to print backwards in the current line, and then forces the buffer to be refreshed; delay After 1s, enter the next cycle;

after the program runs, the cursor returns to the very beginning:

progress bar program:
  1 #include<stdio.h>
  2 #include <unistd.h>
  3 #include <string.h>
  4
  5 #define NUM 102
  6
  7 int main()
  8 {


  9   char bar[NUM];
 10   memset(bar, 0, sizeof(bar));
 11   const char* lable = "|/-\\"; //4符号代表进度条
 12
 13   int count = 0;
 14   while(count <= 100)
 15   {


 16
 17     printf("[%-100s][%d%%] %c\r", bar, count, lable[count%4]);
 18     bar[count++] = '#';
 19     fflush(stdout);
 20     usleep(30000);//单位是微妙
 21   }
 22   printf("\n");
 23   return 0;
 24 }
running result:

Five, Linux package manager yum
1 Introduction
Compile commonly used software in advance, make it into a software package, and put it on a server. You can easily obtain the compiled software package through the package manager and install it directly; software packages
and package managers are like apps and The relationship between the application store;
yum is a very commonly used package manager under Linux;
2. The use of yum
(1) Install yum source extension
sudo yum install -y epel-release
Yum installation generally requires sudo permission;
-y is followed by the name of the source extension;
(2) Find software
yum list | grep sl
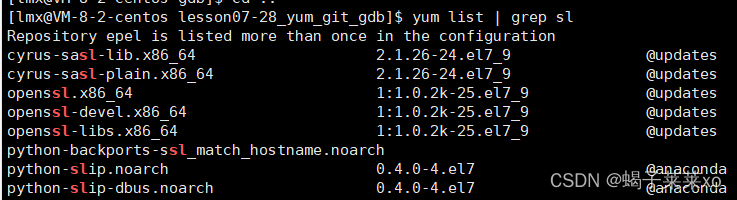
yum list is to list all the software under the yum source, | grep sl is to send the text to the pipeline, and then find the content containing the sl string, and then print it;
(3) Install the software
sudo yum install -y 软件名
-y means that all options are recognized by default;
(4) Uninstall the software
yum remove 软件名
6. Linux version controller git
use git on linux
(1) New warehouse
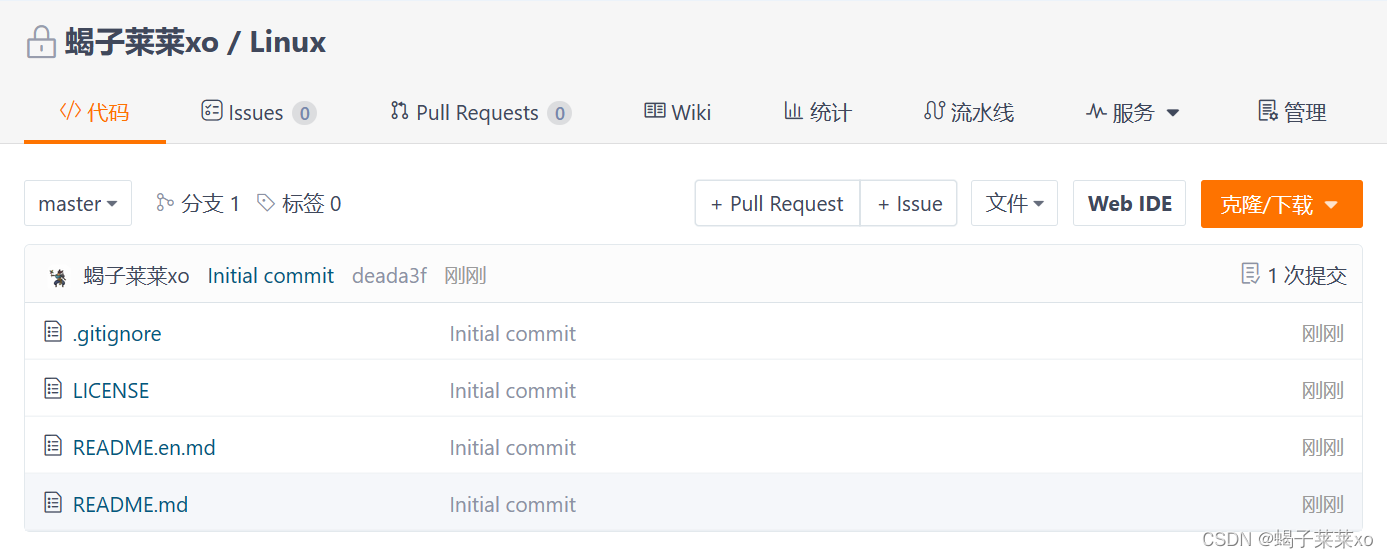
Copy repository link:

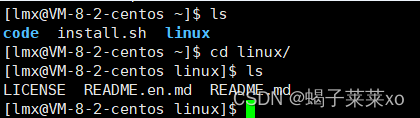
(2) Clone warehouse
git clone 仓库链接

(3)git add
git add 文件/文件夹名   #上传该文件/文件夹
git add .			  #上传现目录下所有文件
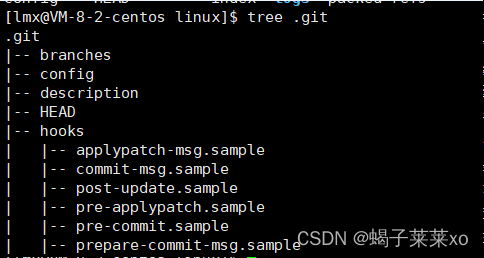
git add will automatically identify the changed file and upload it to the local warehouse;
in fact, it is added to the .git file, and git upload is to upload the .git file;
(4)git commit
git commit -m "提交日志"
Submit the code to the warehouse;

(5)git push
git push
Submit the code to the remote warehouse;
(6) Other circumstances
When using it for the first time, you may need to configure the user name and mailbox:

execute these two commands to change the user name and mailbox to your own;
Sometimes you can't commit, and there will be commit conflicts
git pull
Execute the gti pull command to synchronize the local warehouse code;
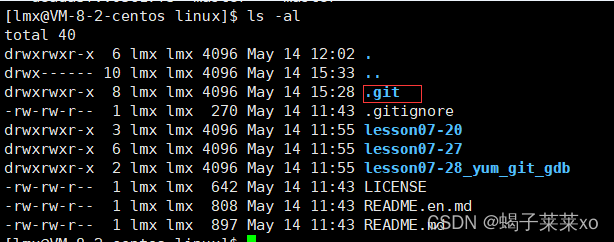
(7). gitignore file
If you don’t want to submit files with certain suffixes to the remote git warehouse, you can add the suffix of the file to the
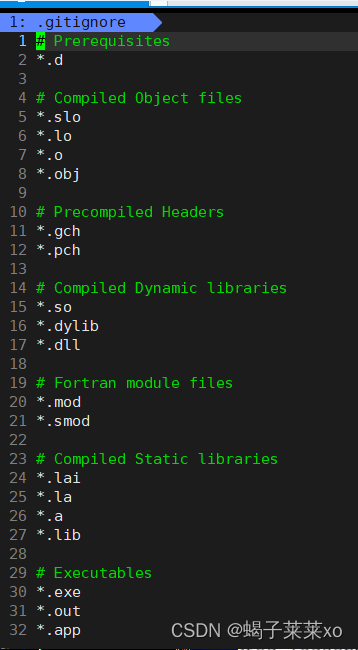
. The gitignore file should be operated as follows:
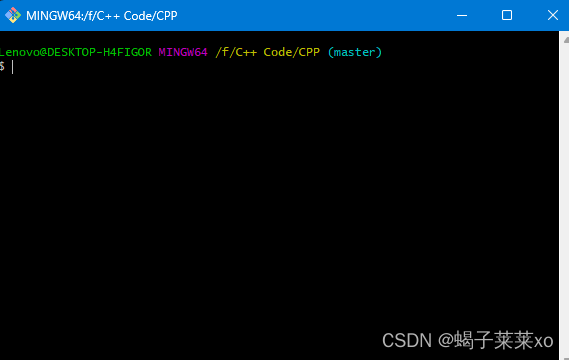
1. Open the git bash window in the current git folder:

2. Create a .gitignore file and add the suffix of the file you do not want to upload to this file:

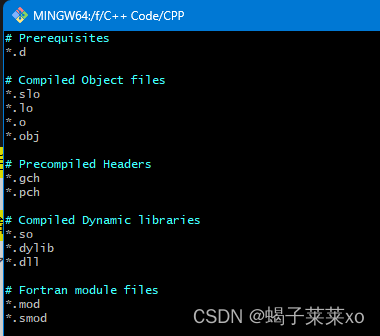
At this point, there is already .gitignore in the folder document;

3. To avoid conflicts, first synchronize the remote warehouse
git pull
4. Delete the cache in the local project directory
git rm -r --cached
5. Upload all files again
git add .
git commit -m "filter new files"
git push
(8)git rm
git rm 文件名
can delete files;
Seven, Linux debugger gdb
1. Background
If we debug the executable program generated by gcc/g++ directly with gdb, we will find that:

gdb will prompt that there is no debugging information;
this is becauseThe executable program generated by gcc / g++ by default is the release version, so it cannot be directly debugged;
Generate a debug version of the executable program:
g++ test.cpp -o test-deBug -g
-g indicates that the program is released in debug mode;
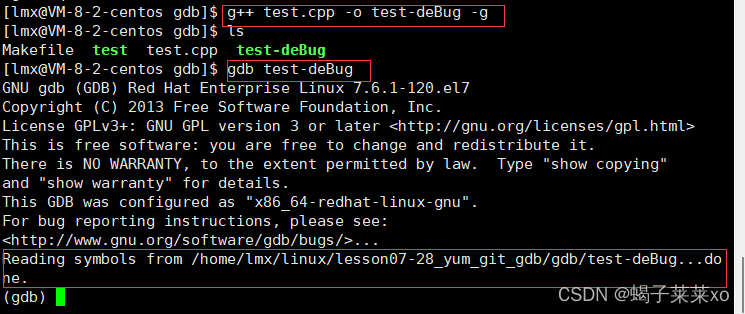
In this way, you can use gdb to debug the program;
2.gdb debugging instructions
Note: gdb will record the latest command, if there is no change in the command, you can directly press Enter to run the previous command;
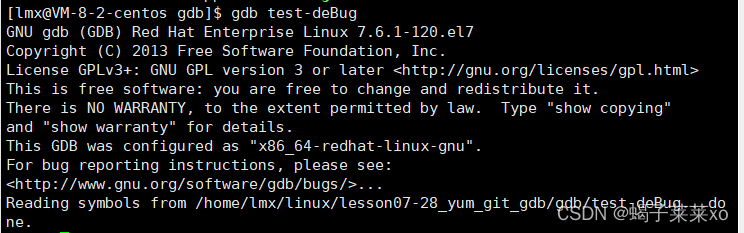
(1) Enter the debugging environment
gdb test-deBug
(2) Exit gdb
(gdb) q
Exit the debugging environment (quit);
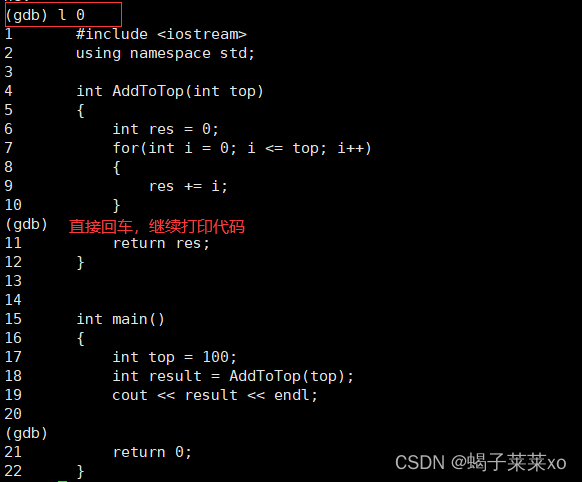
(3) print code
(gdb) l 0
l Line number, from which the code will be printed (the full name is list, which can be abbreviated);
(4) Start debugging and running
(gdb) r
Start debugging and running the code, run to the first breakpoint, if there is no breakpoint, run directly to the end (run);

(5) Interrupt point
(gdb) b 17
b Line number, you can break the breakpoint on this line;

after breaking the breakpoint, run the program:
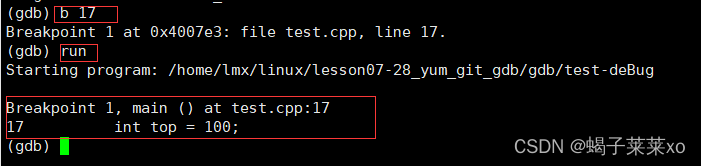
the program will stop at the first breakpoint, if you continue to run at this time:
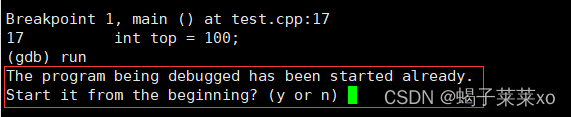
gdb will prompt that the program is already running , whether to re-run;
(6) View breakpoint information
(gdb) info b
(information)

(7) Delete the breakpoint
(gdb) d 1
d breakpoint number, you can delete the breakpoint with this number, you can’t delete the breakpoint with the line number (delete);

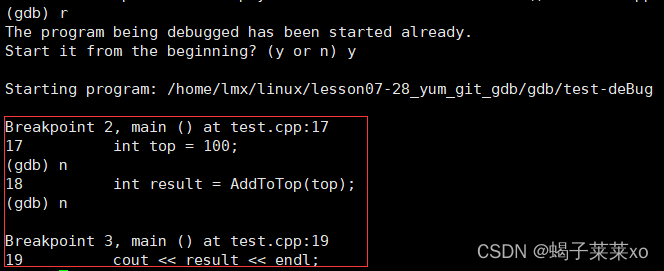
(8) Process by process
(gdb) n
Run the code step by step, which is equivalent to F10 (next) in vs;
(9) Print variable content
(gdb) p result
p Variable name, you can print the content of the variable in the current state (print);

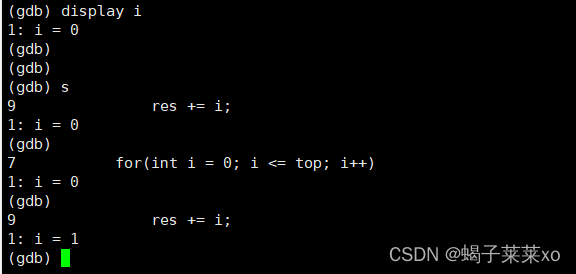
(10) sentence by sentence
(gdb) s
Run the program statement by statement, which is equivalent to F11 in VS. When encountering a function, it will enter the inside of the function. After entering the function, it will display the function name, formal parameter value and the file where it is located;

(11) View the call stack
(gdb) bt
You can view the current stack call situation, the top one is the stack that is currently being called;

(12) Finish the current function
(gdb) finish
Run the current function and get the return value;

after running, the current stack will not have this function;

(13) Always display variable values
(gdb) display i
display variable name, you can always display the value of the variable;
(14) Cancel the constant display
(gdb) undisplay 2
undisplay variable number, cancel the constant display of the number variable, note that it is the variable number;

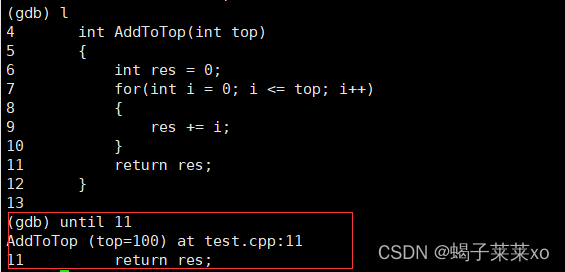
(15) Jump to run to the specified line
(gdb) until 11
until line number, jump to run to the specified line, execute within the function, it is not recommended to jump directly outside the function;
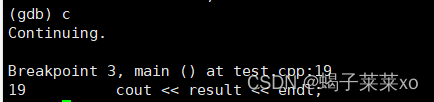
(16) Run to the next breakpoint
(gdb) c
Run directly to the next breakpoint, which is equivalent to F5 (continue) in vs;
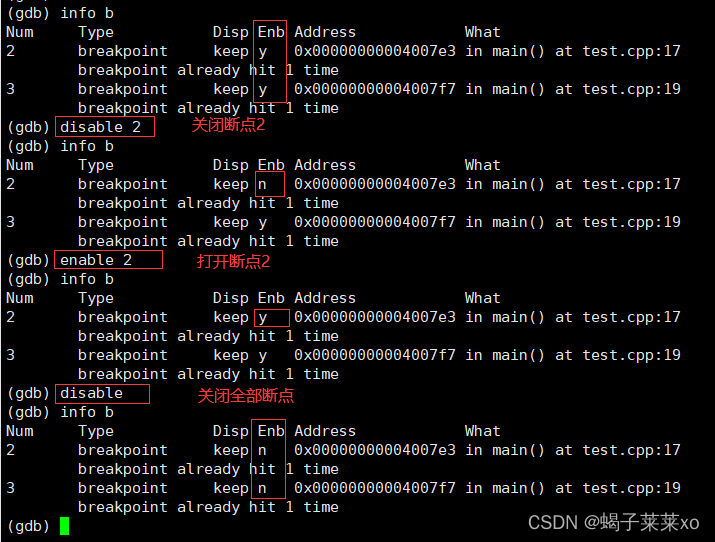
(17) Enable the breakpoint
(gdb) disable 2
(gdb) enable 2
(gdb) disable
disable / enable breakpoint number, enable (close / open) breakpoint;