Series Article Directory
Article Directory
foreword
To develop in linux, there are some basic tools and commands to learn.
1. yum
The application store is used to download the application on the mobile phone, and the package manager is used in linux.
The package manager of centos isyum.
A package manager is for downloading software from software sources.
1. Three axes
sudo yum list | grep xxx 搜索软件
sudo yum -y install xxx  安装软件
sudo yum -y remove xxx   删除软件
2. Expansion
yum makecache 命令的功能是将服务器的软件包信息缓存到本地

yum search 命令可以在所有软件包中搜索指定名称的软件包

yum clean all 命令可以清除缓存中老旧的头文件和软件包

yum -y update:升级所有包同时,也升级软件和系统内核;

yum -y upgrade:只升级所有包,不升级软件和系统内核,软件和内核保持原样。
3. Software package name
lrzsz.x86_64 0.12.20-36.el7 @os
- Software package name: major version number. minor version number. source program release number - software package release number. host platform. cpu architecture.
- The "x86_64" suffix indicates the installation package for the 64-bit system, and the "i686" suffix indicates the installation package for the 32-bit system. When selecting the package, it must match the system.
- "el7" indicates the version of the operating system distribution. "el7" indicates centos7/redhat7. "el6" indicates centos6/redhat6.
- In the last column, os represents the name of "software source", which is similar to concepts such as "Xiaomi App Store" and "Huawei App Store".
Two, vim
Linux editor - vim
1. vim basic mode

2. Basic operation of vim
insert mode
It's normal edit mode
command mode
- move cursor
「h」、「j」、「k」、「l」:vim可以直接用键盘上的光标来上下左右移动,但正规的vim是用小写英文字母 「分别控制光标左、下、上、右移一格
「G」:移动到文章的最后
「 $ 」:移动到光标所在行的“行尾”
「^」:移动到光标所在行的“行首”
「w」:光标跳到下个字的开头
「e」:光标跳到下个字的字尾
「b」:光标回到上个字的开头
「#l」:光标移到该行的第#个位置,如:5l,56l
[gg]:进入到文本开始
[shift+g]:进入文本末端
「ctrl」+「b」:屏幕往“后”移动一页
「ctrl」+「f」:屏幕往“前”移动一页
「ctrl」+「u」:屏幕往“后”移动半页
「ctrl」+「d」:屏幕往“前”移动半页
- delete text
"x": Each time you press, delete a character at the cursor position "#x" : For example, "6x" means to delete the 6 characters "behind
(including yourself)" where the cursor is located
- copy
"yw": Copy the characters from the cursor position to the end of the word into the buffer.
"#yw": Copy # characters to the buffer
"yy": Copy the line where the cursor is located to the buffer.
"#yy": For example, "6yy" means to copy 6 lines of text "counting down" from the line where the cursor is located.
"p": Paste the characters in the buffer to the position of the cursor. Note: All copy commands related to "y" must cooperate with "p" to complete the copy and paste functions.
- cut and paste
"dd": Cut the line where the cursor is located
"#dd": Cut # line from the line where the cursor is located
"p": Paste the characters in the buffer to the position where the cursor is located. Note: All cut commands related to "d" must cooperate with "p" to complete the cut and paste functions.
- replace
"r": Replace the character where the cursor is located.
"R": Replace the character where the cursor is, until the "ESC" key is pressed.
- undo last action
"u": If you execute a command by mistake, you can immediately press "u" to return to the previous operation. Press "u" multiple times to perform multiple replies.
"ctrl + r": undo redo
- Change
"cw": Change the character at the cursor position to the end of the word
"c#w": For example, "c3w" means change 3 characters
- jump to the specified line
"ctrl" + "g" lists the line number of the line where the cursor is located.
"#G": For example, "15G", means to move the cursor to the beginning of the 15th line of the article
Bottom Row Mode
Before using the end-line mode, please remember to press the "ESC" key to confirm that you are already in the normal mode, and then press the ":" colon to enter the end-line mode.
- list line numbers
"set nu": After entering "set nu", the line number will be listed in front of each line in the file.
- jump to a line in a file
"#": "#" means a number, enter a number after the colon, and then press the Enter key to jump to the line. For example, enter the number 15 and press Enter, it will jump to the 15th line of the article.
- find character
"/Keyword": Press the "/" key first, and then enter the character you want to find. If the keyword you find at the first time is not what you want, you can keep pressing "n" to find the keyword you want.
"?Keyword": Press the "?" key first, and then enter the character you want to find. If the keyword you find at the first time is not what you want, you can keep pressing "n" to find the keyword you want.
- save document
"w": Enter the letter "w" in the colon to save the file
- leave vim
"q": Press "q" to quit. If you can't leave vim, you can force to leave vim with a "!" after "q".
"wq": It is generally recommended to use it together with "w" when leaving, so that the file can be saved when exiting; wq saves and exits editing, even if there is no modification, it will be written, and the time attribute of the file will be modified.
"x!": Save and exit editing, save only when the file is modified, and modify the time attribute of the file to replace in batches
"%s/keyword1/keyword2/g": replace all keyword 1 with keyword 2
- multi-display
"vs file": multi-screen display; "ctrl ww": multi-screen switching
- execute bash command
"!+command": Execute the command
note
- Multi-line comments:
First press esc to enter the command line mode, press Ctrl + v to enter the column (also called block) mode;
use the up and down keys at the beginning of the line to select multiple lines that need to be commented;
press the keyboard (capital) "I" key to enter the insert mode;
then enter the comment character ("//", "#", etc.);
finally press the "Esc" key.
Note: After pressing the esc key, the comment will appear after a while, don't worry ~~ the time is very short
- Remove multi-line comments:
First press esc to enter the command line mode, press Ctrl + v, enter the column mode;
select multiple lines to be uncommented;
press "x" or "d".
Note: If it is a "//" comment, you need to perform this operation twice. If it is a "#" comment, you can do it once
3. gcc/g++
Linux Compiler - gcc/g++
gcc –E hello.c –o hello.i
gcc –S hello.i –o hello.s
gcc –c hello.s –o hello.o
gcc hello.o –o hello
1. Pretreatment
Preprocessing functions mainly include macro definition, file inclusion, conditional compilation, and comment removal.
Preprocessing directives are lines of code that begin with the # sign.
Example: gcc –E hello.c –o hello.i
option "-E", the function of this option is to let gcc stop the compilation process after the preprocessing is completed.
The option "-o" refers to the object file, and the ".i" file is the original C program that has been preprocessed.
2. Compile
In this stage, gcc first needs to check the standardization of the code, whether there are grammatical errors, etc., to determine the actual work to be done in the code, and after the check is correct, gcc translates the code into assembly language.
Users can use the "-S" option to view, this option only compiles but not assembles, and generates assembly code.
Example: gcc –S hello.i –o hello.s
3. Compilation
The assembly stage is to convert the ".s" file generated in the compilation stage into an object file. You
can use the option "-c" here to see that the assembly code has been converted into a ".o" binary object code.
Example: gcc –c hello.s –o hello.o
4. Link
After successful compilation, it enters the linking phase.
Example: gcc hello.o –o hello
5. Dynamic and static libraries
Static library: It means that when compiling and linking, all the code of the library file is added to the executable file, so the generated file is relatively large, but the library file is no longer needed at runtime. The suffix is generally ".a"
Dynamic library: Contrary to the static library, the code of the library file is not added to the executable file when compiling and linking, but the library is loaded by the runtime link file when the program is executed, which can save system overhead. The general suffix of the dynamic library is ".so", as mentioned libc.so.6 is the dynamic library. gcc uses dynamic libraries by default when compiling. After the link is completed, gcc can generate the executable file, as shown below. gcc hello.o –o hello
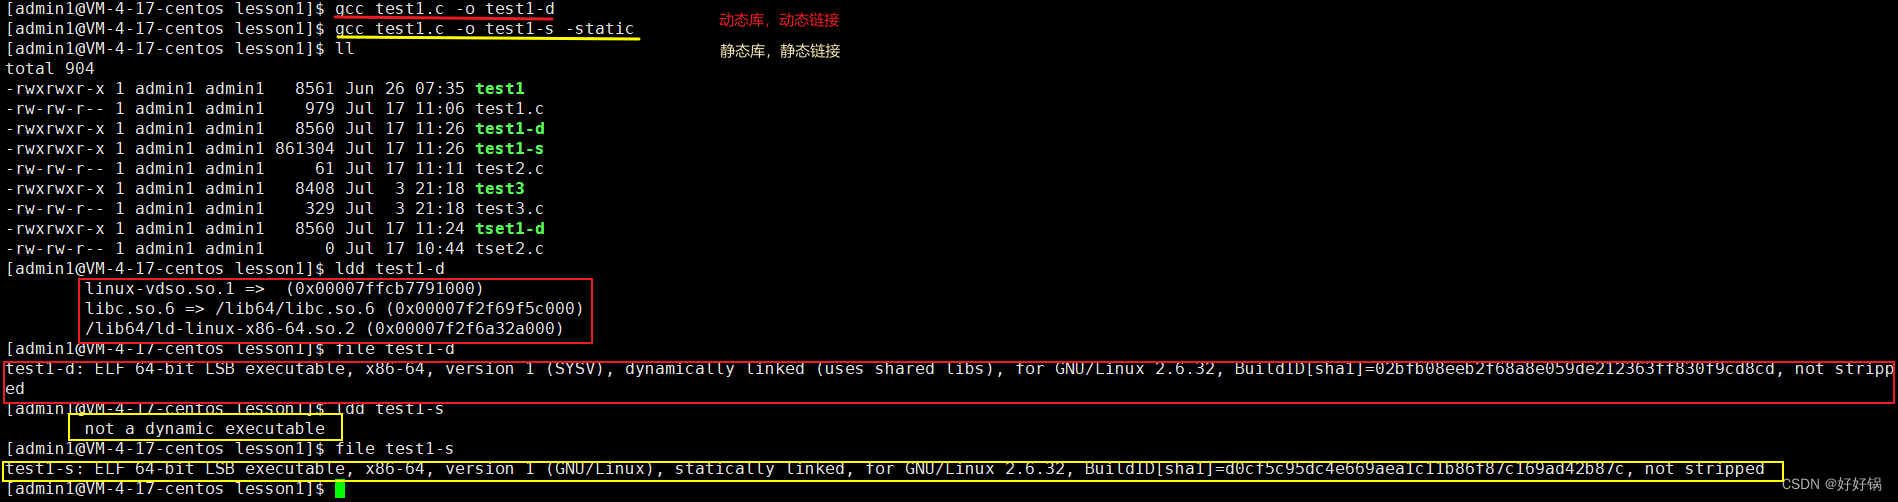
The binary program generated by gcc by default is dynamically linked, which can be verified by the file command
Four, gdb
Linux debugger - gdb
debug command
gdb binFile Exit: ctrl + d or quit Debug command:
list/l line number: display the source code of binFile, and then go to the following position from the last position, and list 10 lines each time.
list/l function name: List the source code of a function.
r or run: Run the program. Equivalent to f5 in vs
n or next: single execution. Equivalent to f10 in vs
s or step: Step into a function call. Equivalent to f11 in vs
break(b) line number: set a breakpoint on a certain line. Equivalent to f9 in vs
break function name: set a breakpoint at the beginning of a function
info break : View breakpoint information.
finish: Execute until the current function returns, then stand down and wait for the command
print ( p): Print the value of the expression, through which the value of the variable can be modified or the function can be called
p variable: Print variable value.
set var: modify the value of a variable
continue (or c): Continuous rather than single-step execution of the program from the current position. Equivalent to f5 in vs
run (or r): Execute the program continuously from the beginning rather than single-step. Equivalent to f5 in vs
delete breakpoints: delete all breakpoints
delete breakpoints n: delete the breakpoint with sequence number n
disable breakpoints: disable breakpoints
enable breakpoints: enable breakpoints
info (or i) breakpoints: See which breakpoints are currently set
display variable name: track and view a variable, and display its value every time you stop
undisplay: undisplay those variables that were previously set
until X line number: jump to X line
breaktrace (or bt): View function calls and parameters at all levels
info(i) locals: View the value of local variables in the current stack frame
quit: quit gdb
example

5. make/Makefile
Linux project automation build tool-make/Makefile

principle
- make will look for a file named "Makefile" or "makefile" in the current directory.
- If found, it will find the first target file (target) in the file. In the above example, it will find the "test" file and use this file as the final target file.
- If the test file does not exist, or the file modification time of the test.o file that the test depends on is newer than the test file (can be tested with touch), then he will execute the command defined later to generate the test file.
- If the test.o file that test depends on does not exist, then make will find the dependency whose target is the test.o file in the current file, and if found, then generate the test.o file according to that rule. (This is a bit like a stack process)
Of course, your C file and H file exist, so make will generate the test.o file, and then use the test.o file to declare the ultimate task of make, which is to execute the file test.
This is the dependency of the entire make, and make will find the dependencies of the files layer by layer until the first target file is finally compiled.
In the process of searching, if there is an error, such as the last dependent file cannot be found, then make will directly exit and report an error, and make will ignore the error of the defined command or the failure of compilation.
make only cares about the dependencies of the files, that is, if the files after the colon are still not there after I find the dependencies, then I'm sorry, I won't work.
Six, git
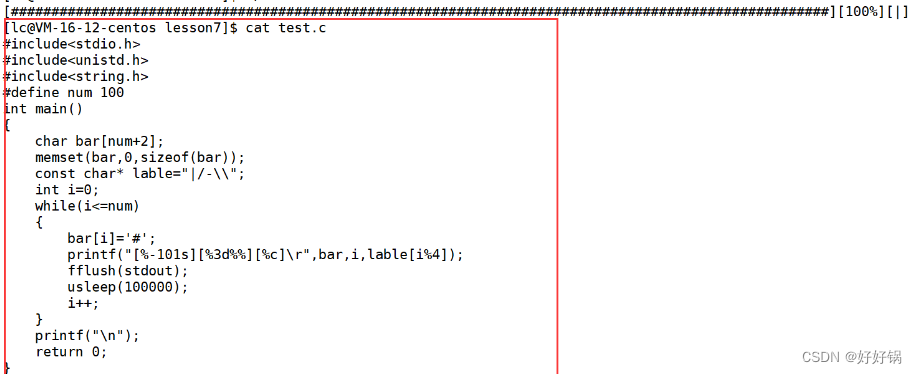
7. Small program under Linux - progress bar
buffer zone
The essence of the buffer is a section of memory space, which temporarily stores temporary data and refreshes it when appropriate
Refresh policy
- Refresh directly without buffering
- The buffer is full, then refresh, all refresh
- When encountering \n, it will be refreshed, and the line will be refreshed (written to the display)
- Force refresh (actually write data to disk, file, display, network and other devices or files)
In any C language program, when starting, three input and output streams (files) will be opened by default (stdin (keyboard), stdout (display), stderr (display) They are all file pointer types)
Summarize
Learning to use linux tools is an important step in learning Linux.
If you persevere, you will not break the dead wood; if you persevere, you can carve gold and stone. —— Xun Kuang