This article will take Myirtech's MYD-YF13X and STM32MP135F-DK as examples to explain how to use STM32CubeMX combined with the Developer package to achieve the minimum system startup.

1. Development preparation
1.1 Developer package preparation
a.Developer package download:
https://www.st.com/en/embedded-software/stm32mp1dev.html
b. Enter the source directory after decompression:

c. Source code preparation (you can prepare according to the third point in README.HOW_TO.txt in each source directory):
-
TFA source code
$> cd tf-a-stm32mp-v2.6-stm32mp-r2-r0
$> tar xf tf-a-stm32mp-v2.6-stm32mp-r2-r0.tar.xz
$> cd tf-a-stm32mp-v2.6-stm32mp-r2
$> for p in `ls -1 ../*.patch`; do patch -p1 < $p; done-
OP-TEE source code
$> cd optee-os-stm32mp-3.16.0-stm32mp-r2-r0
$> tar xf optee-os-stm32mp-3.16.0-stm32mp-r2-r0.tar.xz
$> cd optee-os-stm32mp-3.16.0-stm32mp-r2
$> tar xf ../fonts.tar.gz
$> for p in `ls -1 ../*.patch`; do patch -p1 < $p; done-
U-Boot source code
$> cd u-boot-stm32mp-v2021.10-stm32mp-r2-r0
$> tar xf u-boot-stm32mp-v2021.10-stm32mp-r2-r0.tar.xz
$> cd u-boot-stm32mp-v2021.10-stm32mp-r2
$> for p in `ls -1 ../*.patch`; do patch -p1 < $p; done -
Kernel source code
$> cd linux-stm32mp-5.15.67-stm32mp-r2-r0
$> tar xf linux-5.15.67.tar.xz
$> cd linux-5.15.67
$> for p in `ls -1 ../*.patch`; do patch -p1 < $p; done
1.2 SDK installation
Please read the WIKI to complete Install_the_SDK.
1.3 STM32CubeProgrammer installation
Please install CubeProgrammer and libusb installation according to the commands/steps given by WIKI.
2. Block Diagram
First look at Myirtech's schematic framework:

The following hardware configuration information can be drawn from the block diagram:
1. STM32MP135DAF7
2. DDR3L
3. Separate power supply design
4. Support QSPI NAND, SD card boot
5. Dual Gigabit Ethernet ports
6.USB Host
7.USB OTG (for programming)
8. UART4 debug serial port
9. External clock source, HSE (24MHz), LSE (32.768KHz)
3. STM32CubeMX project creation
Open STM32CubeMX, select the correct chip package according to the part number of the chip to start project creation, for example: Myirtech uses STM32MP135DAF7,


After clicking "Generate Code", a nearly empty project will be generated, with a device tree structure:
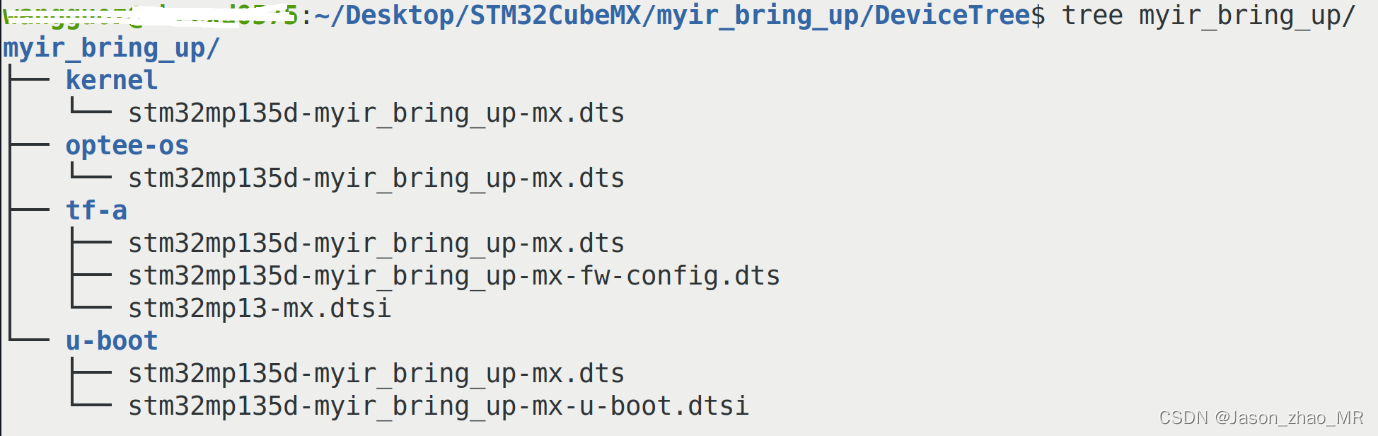
Note : The rule of STM32CubeMX is to first generate the dts of the Kernel, and then copy the generated dts file to the u-boot directory, that is to say, the u-boot device tree stm32mp135d-myir_bring_up-mx.dts is copied from the kernel directory. Therefore, when modifying the device tree in the U-Boot stage and adding User code, please modify the device tree of the kernel synchronously or copy the modified device tree to the Kernel directory to prevent the u-boot part from being Modifications are overwritten by the kernel's unmodified device tree.
Create a device tree soft link:
-
TFA:
PC $> cd
PC $> ln -s /local/home/xxx/Desktop/STM32CubeMX/myir_bring_up/DeviceTree/myir_bring_up/tf-a/* fdts/-
OP-TEE:
PC $> cd
PC $> ln -s /local/home/xxx/Desktop/STM32CubeMX/myir_bring_up/DeviceTree/myir_bring_up/optee-os/* core/arch/arm/dts/-
U-Boot:
PC $> cd
PC $> ln  -s /local/home/xxx/Desktop/STM32CubeMX/myir_bring_up/DeviceTree/myir_bring_up/u-boot/* arch/arm/dts/
The training materials are not finished, please pay attention to the next article.