Table of contents
- 1. Start the environment created before
- 2. Develop a three-level classification list of goods and services
-
- 1. Background module
- 2. Front-end module
-
- 1) Start the renren-fast front-end and back-end projects
- 2) In System Management-"Menu Management-"New Catalog-"Commodity System
- 3) Add category maintenance
- 4) View role management
- 5) Create a product catalog vue file
- 6) Introduce the Tree tree control from the official website of element UI
- 7) Refer to the role.vue module to write the commodity catalog module
- 8) Modify the interface request address
- 9) Gateway configuration
- 10) You need to register renren-fast to the gateway.
- 11) Problems encountered: class definition not found
- 12) Then an error will be reported, and the configuration does not exist.
- 13) Modify the gateway route
- 14) Verification code error
- 15) Rewrite the forwarding path
- 16) Login error, cross-domain
- 17) The port number has changed
- 18) Cross-domain meaning
- 19) Preflight Request
- 20) Cross-domain URL resolution
- 21) Resolve cross-domain methods
- 22) The online deployment environment uses nginx
- 23) Use the following methods in development (because it is not easy to configure nginx in development):
- 24) Configure cross-domain
- 25) Same-origin policy multiple values
- 3. Query
- 4. Delete
- 5. Add
- 6. Modify
- 7. Modify - drag and drop effect
- 8. Modify - get drag and drop data set
- 9. Batch drag and drop effect
- 10. Batch delete
- 11. Summary
1. Start the environment created before
1. Start the virtual machine
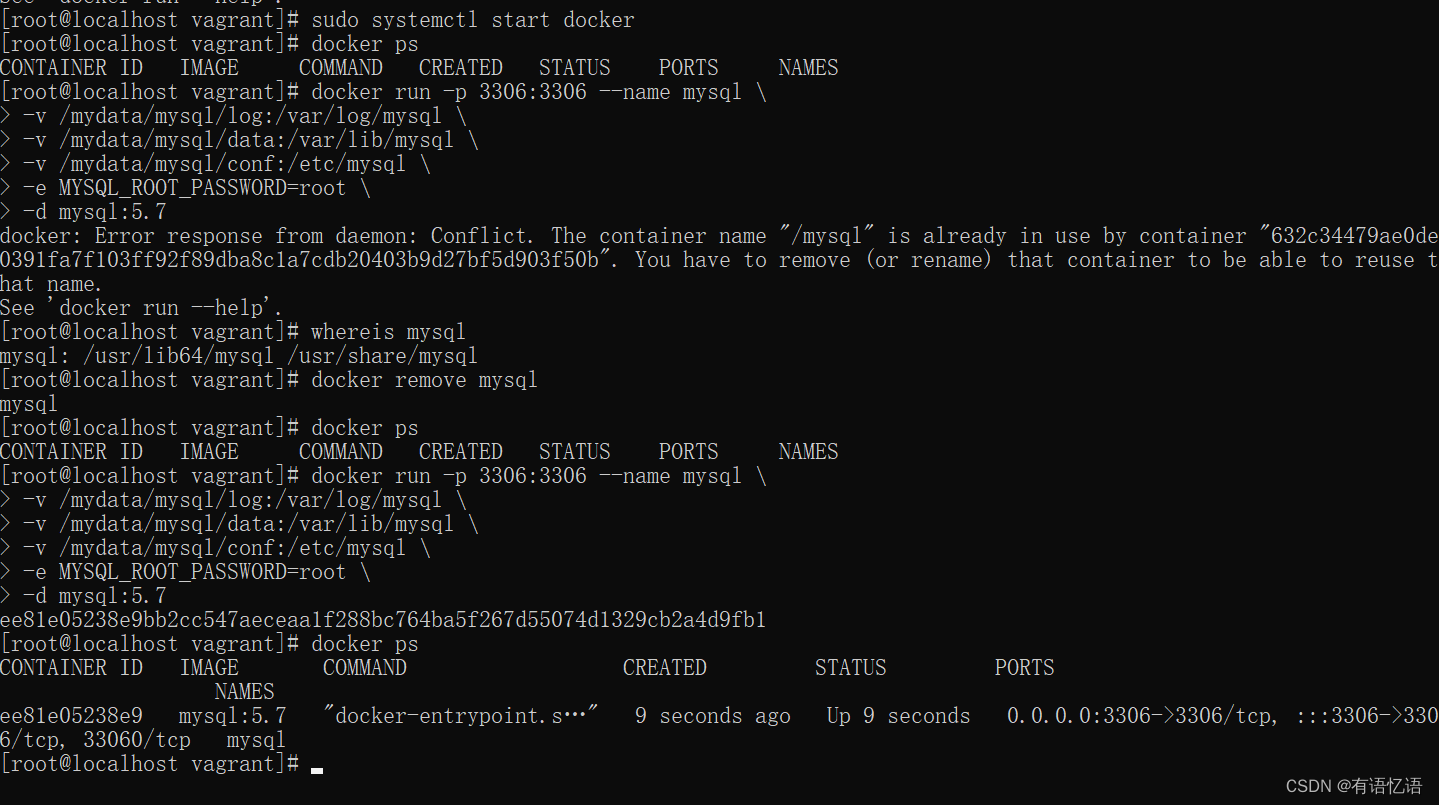
2. Start mysql
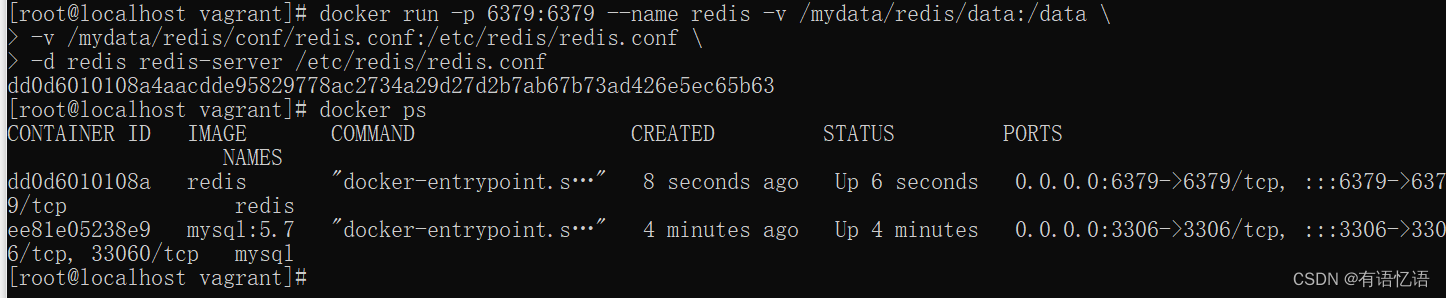
3. Start redis
4. Start nacos

5. Import three-level classification test data
Import the data of the three-level classification into mysql, the pms_category table in the pms library.

Create some data to facilitate development. During normal development, after the function is developed, the data will be recreated, and the new function will be written first.
2. Develop a three-level classification list of goods and services
1. Background module
1) Write the background business logic of the three-level classification table of commodities
Find our product module code: zhenyanmall-product
Just now we imported the pms_category product three-level classification table, so open CategoryController.java, and then write the background business logic by yourself to query the three-level classification list in a parent-child structure.
2. Front-end module
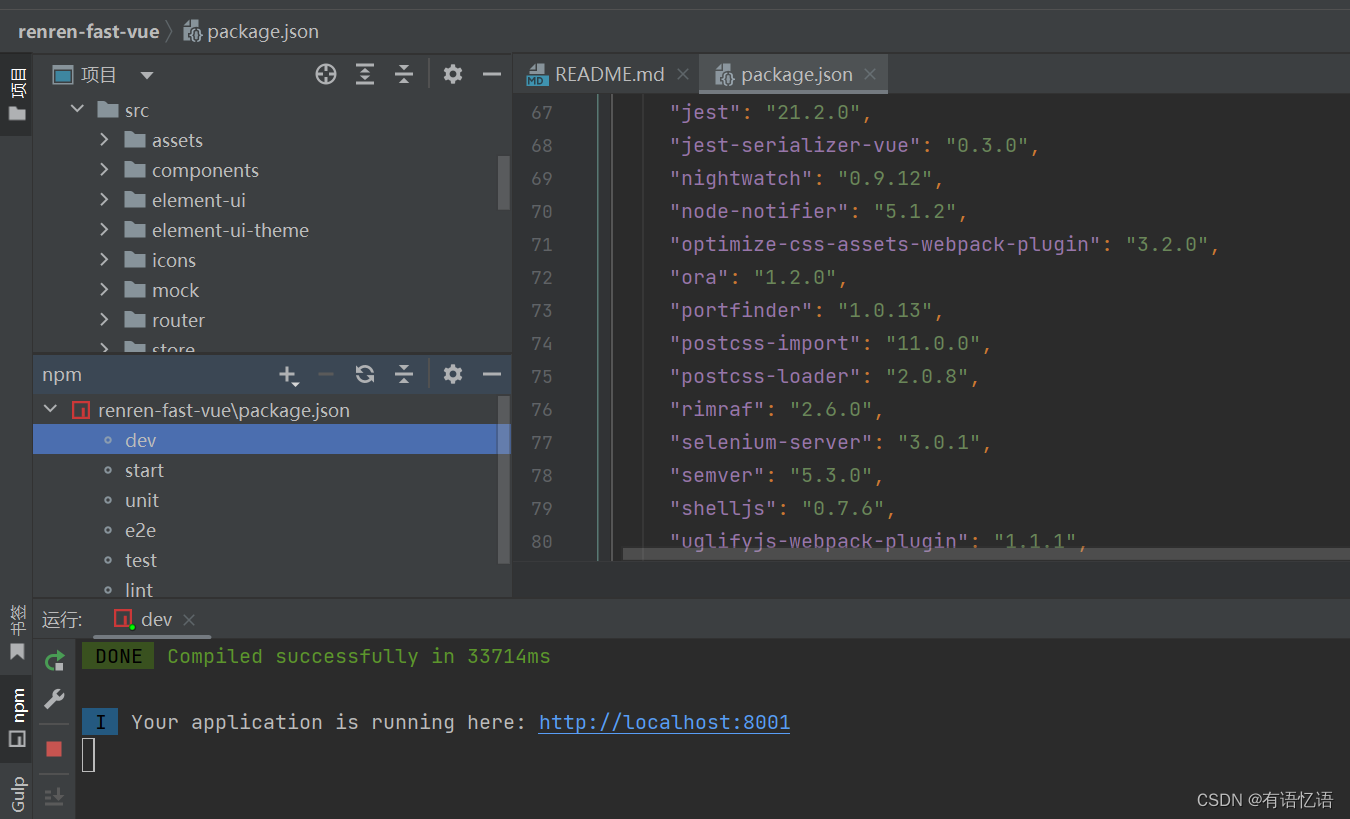
1) Start the renren-fast front-end and back-end projects
Find our reneren-fast-vue project, before starting the front end, you need to start the renren-fast backend project
npm run dev
default account and password are admin/admin
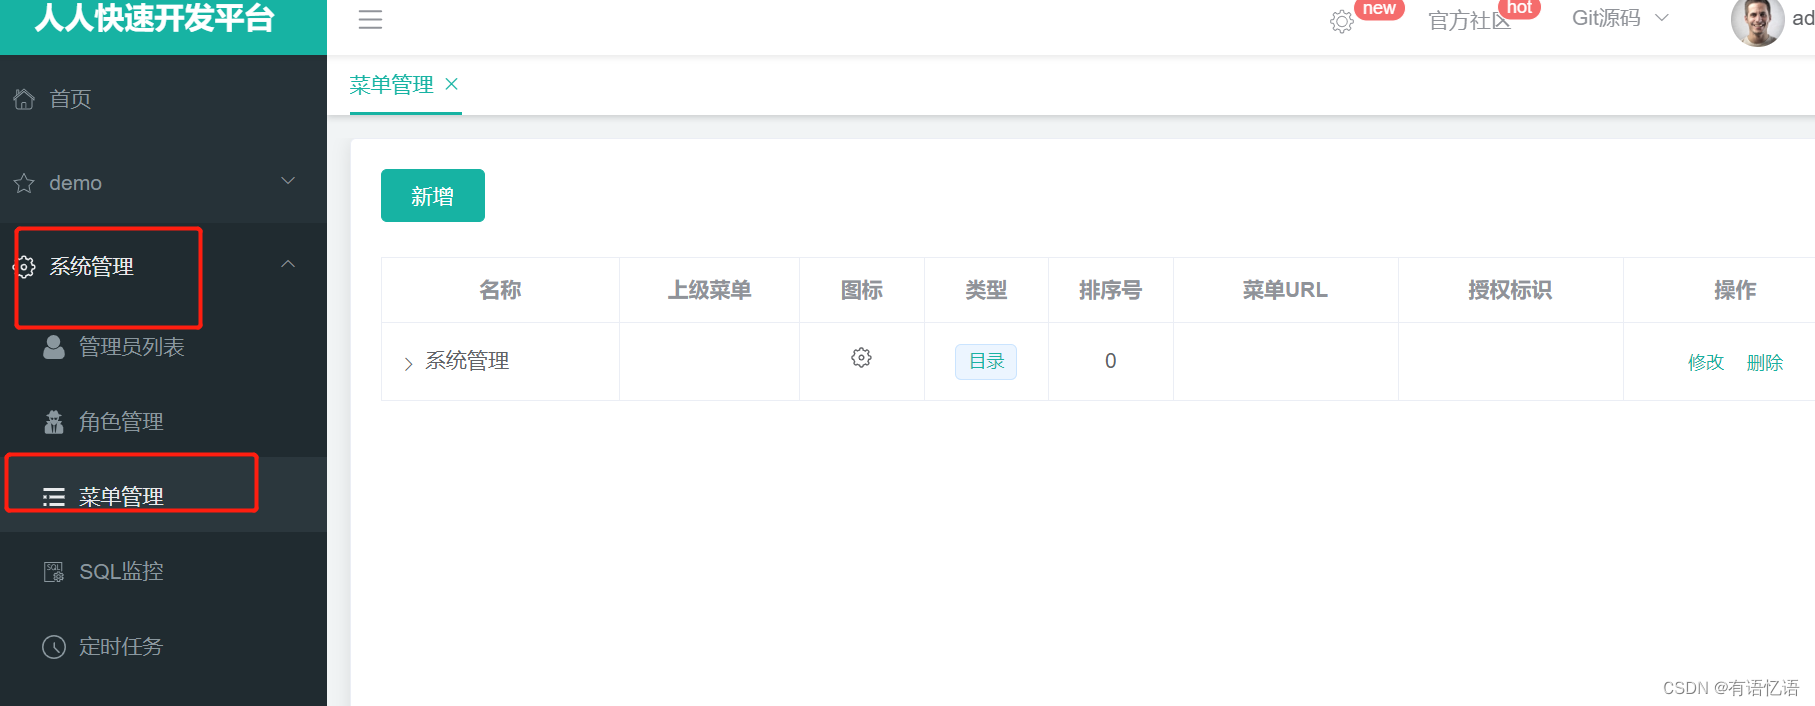
2) In System Management-"Menu Management-"New Catalog-"Commodity System
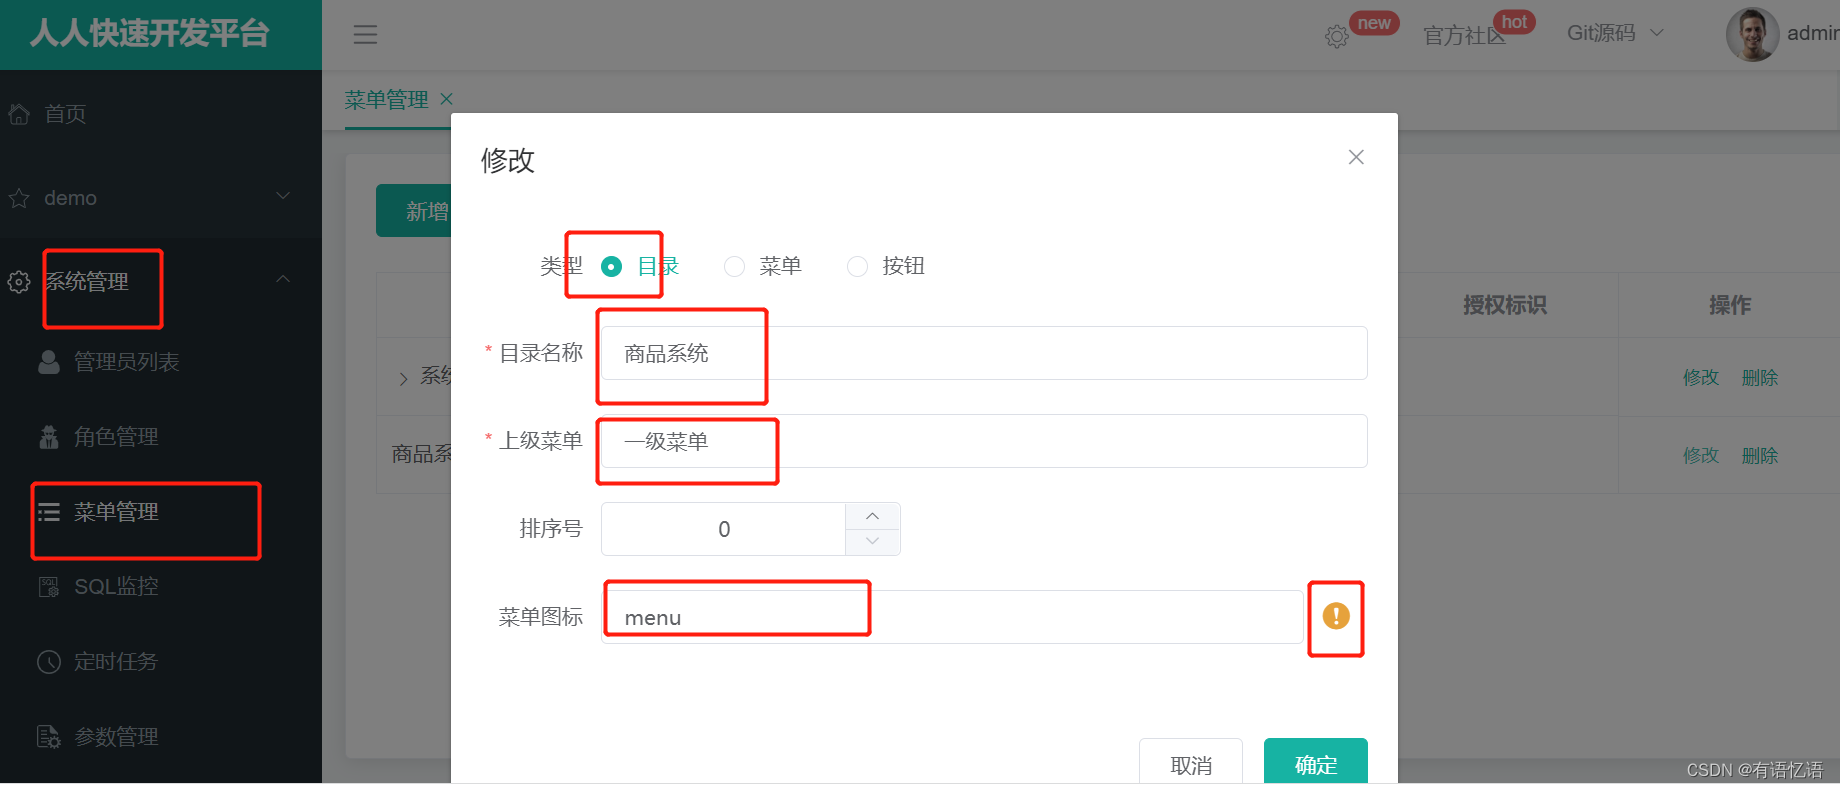
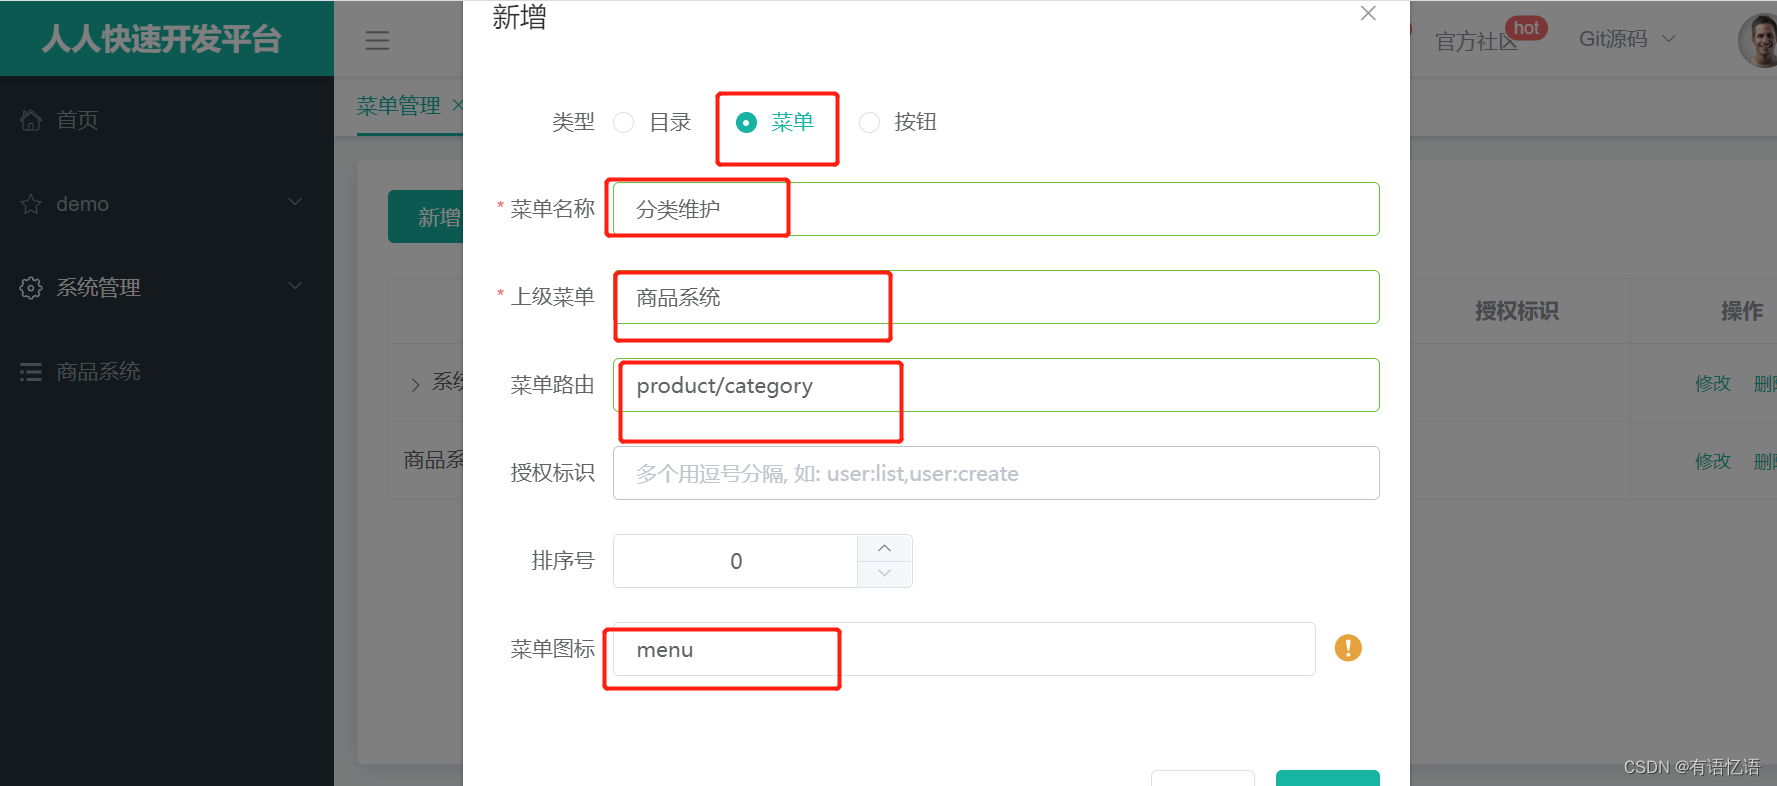
3) Add category maintenance
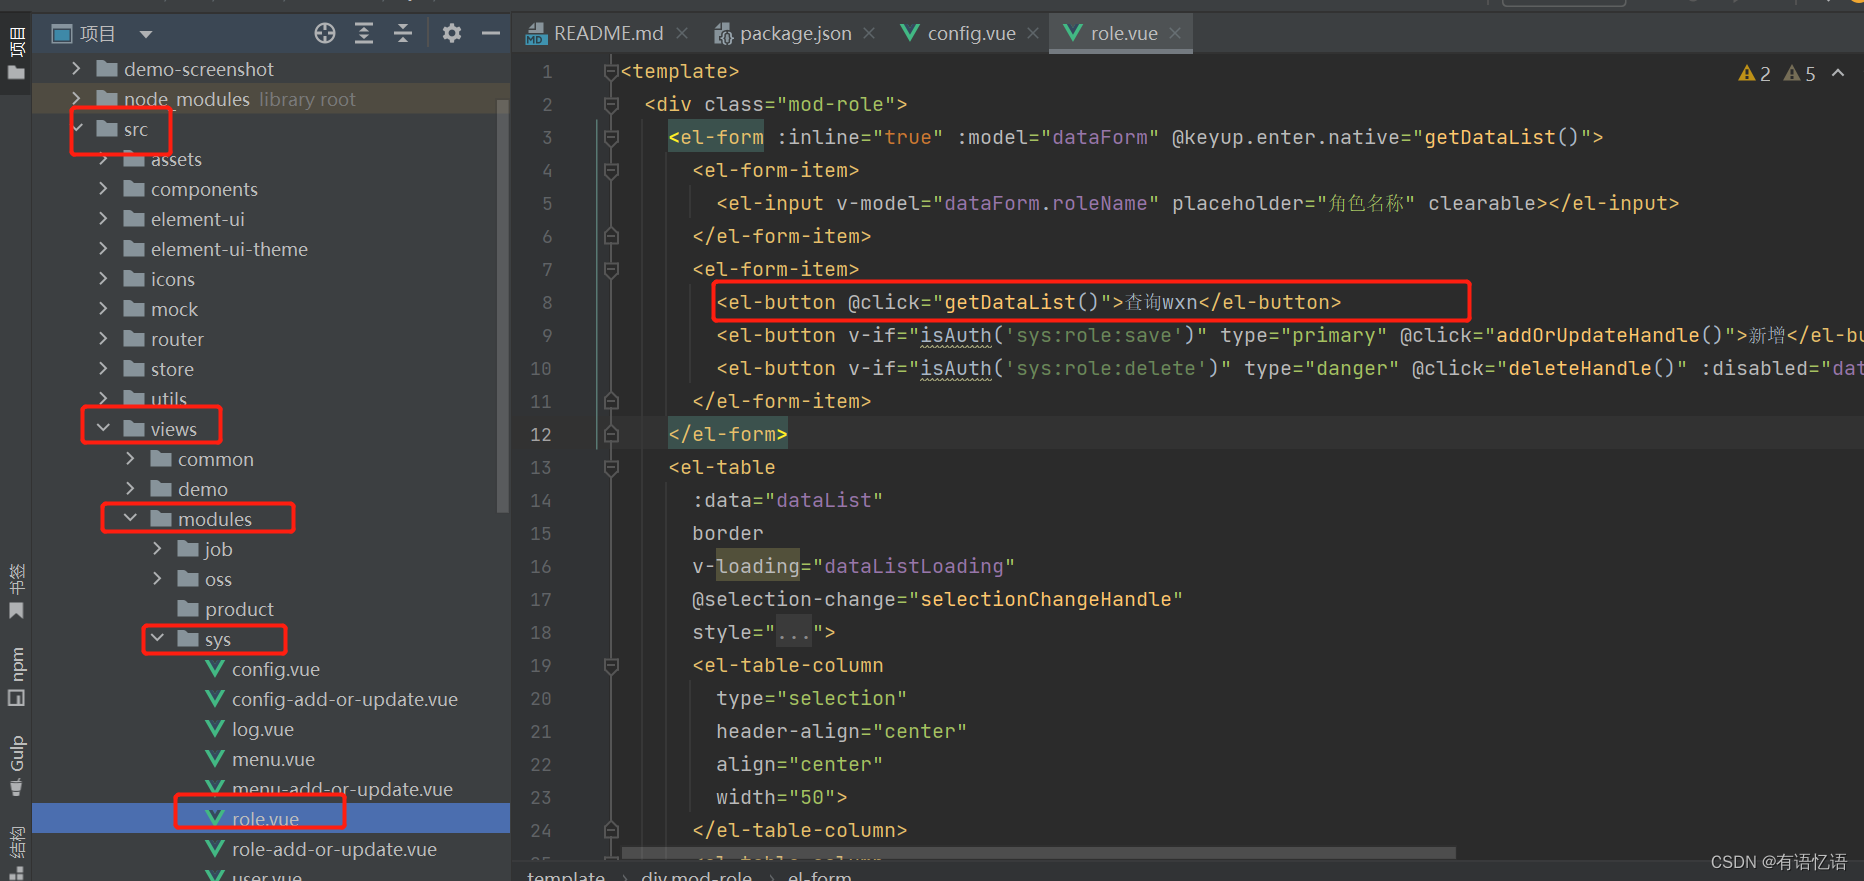
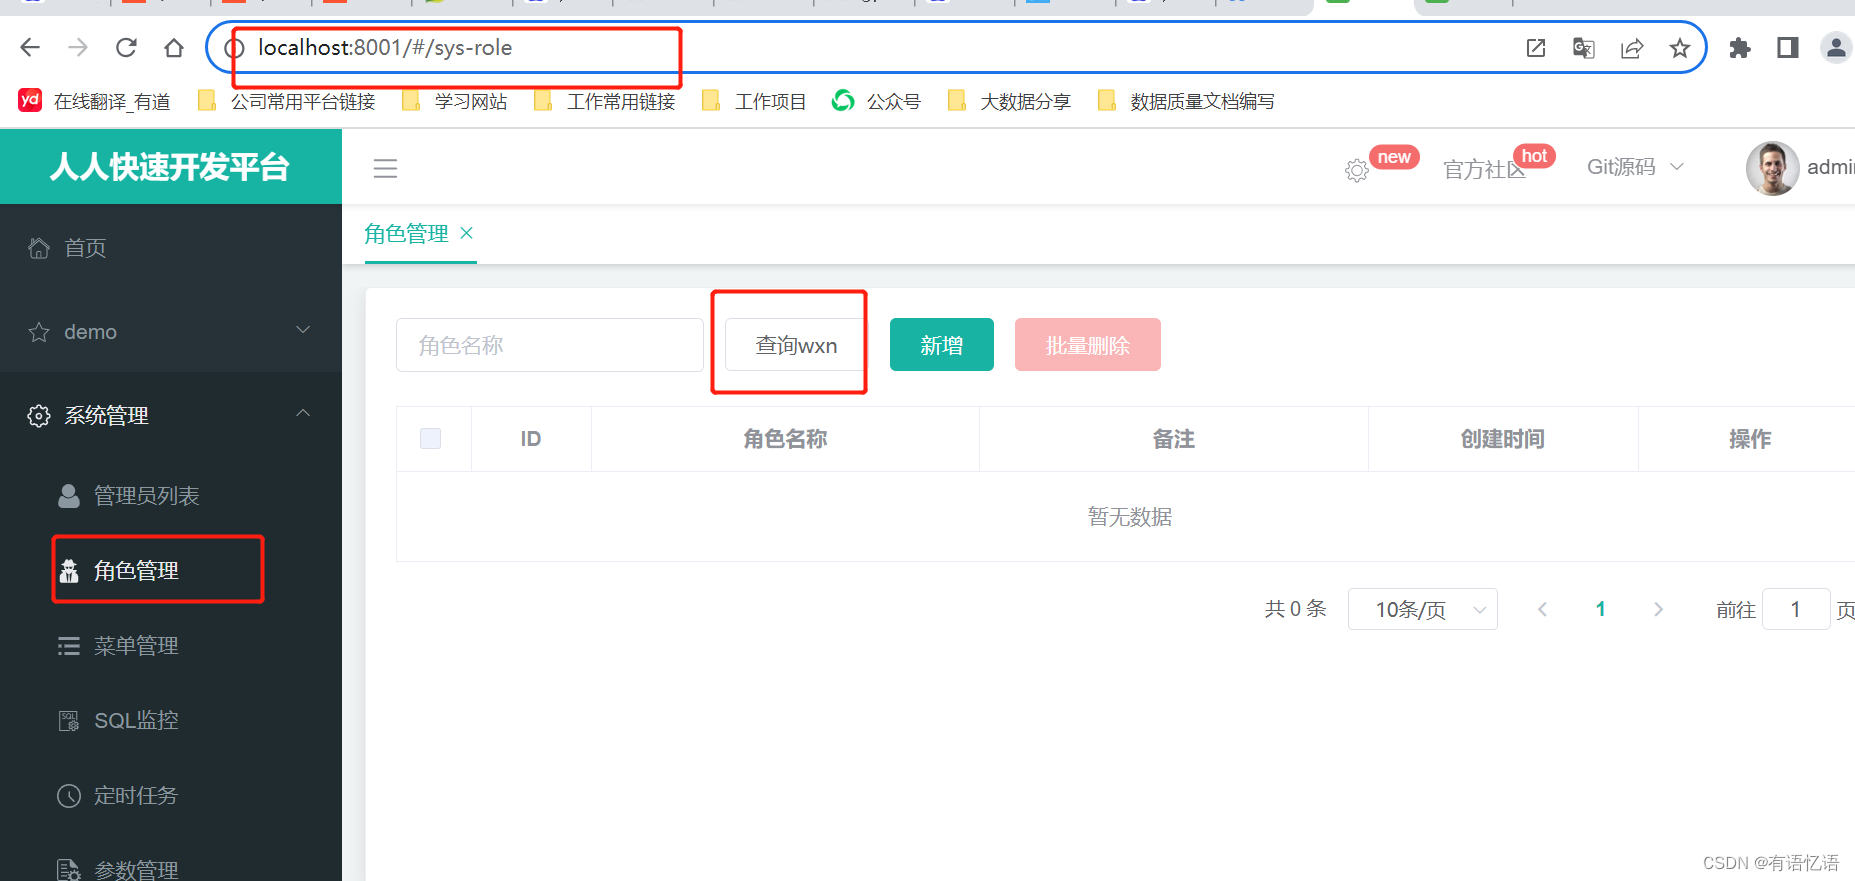
4) View role management
At this point we are in System Management - "Role Management, from which we can see the path http://localhost:8001/#/sys-role

And the sys-role code is
restarting the front-end project
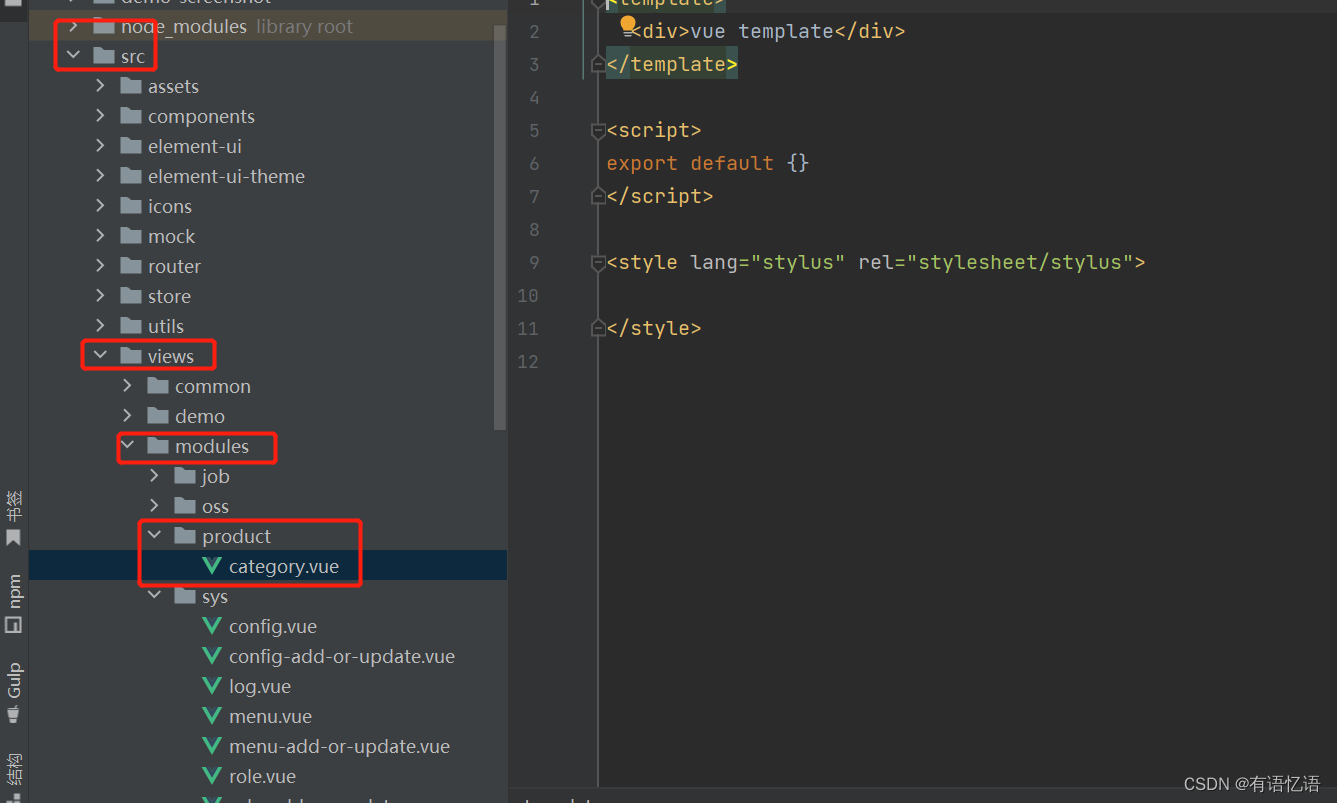
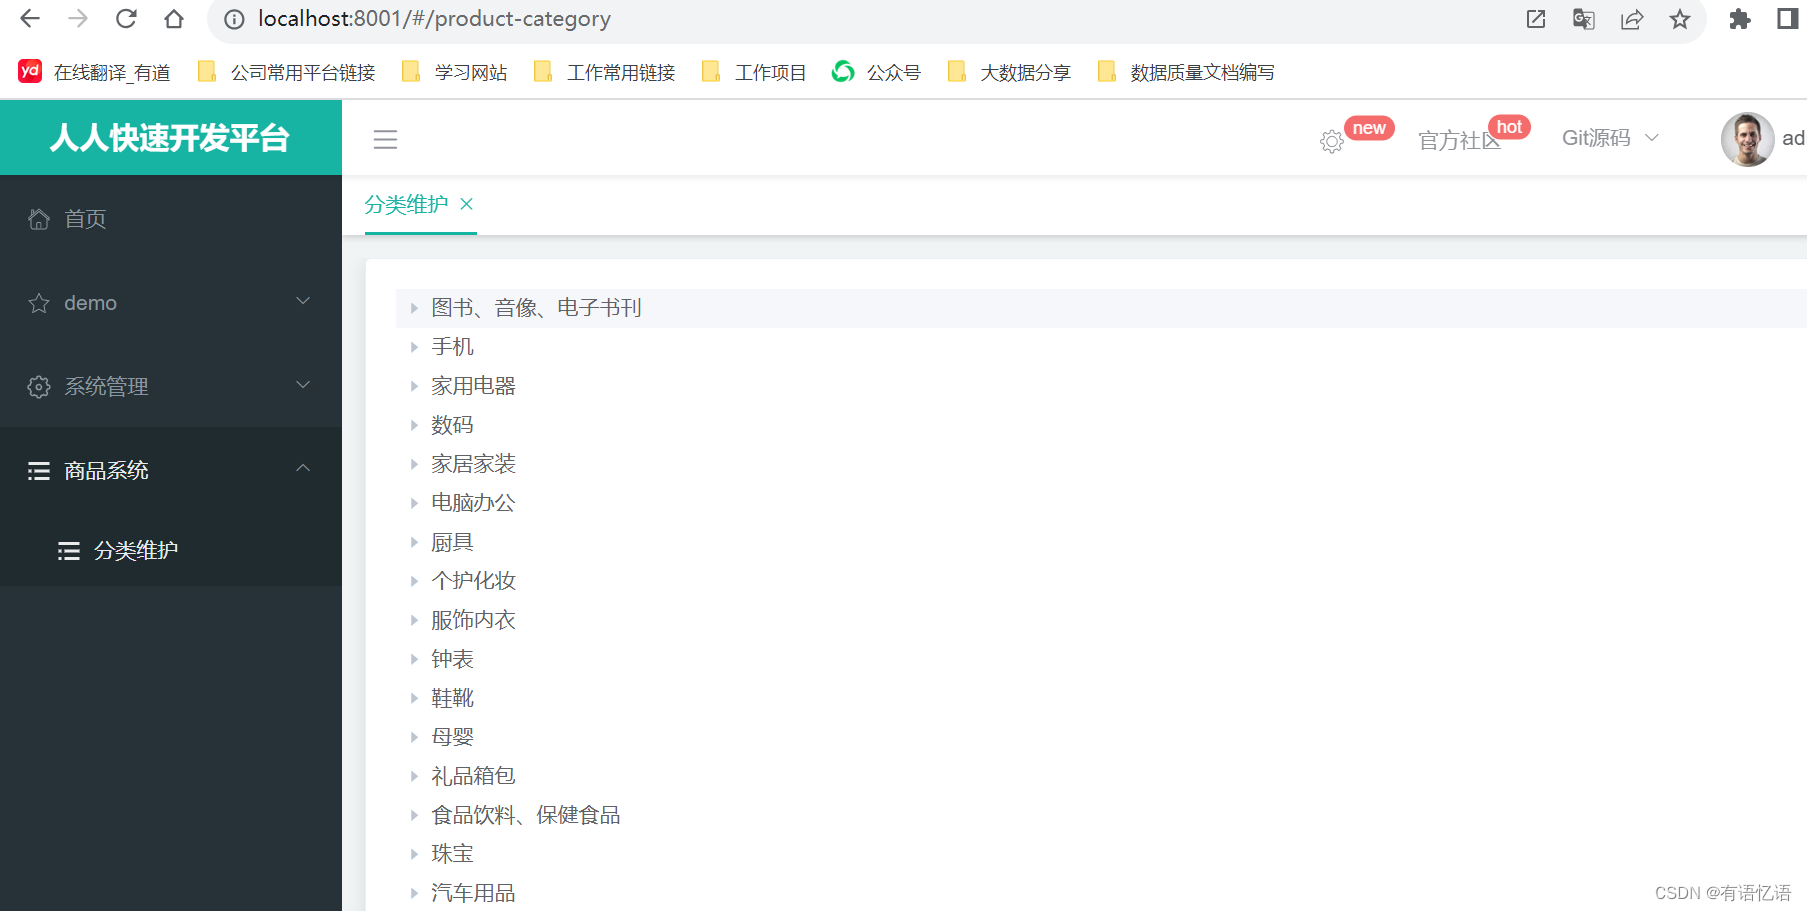
5) Create a product catalog vue file
Therefore, we only need to src/views/modulescreate the corresponding directory under the productdirectory . And create category.vue file, write category maintenance code here. Because the project has already set the style, you need to download some styles, or remove the style商品系统分类维护

6) Introduce the Tree tree control from the official website of element UI
We are using element ui, so we can download it from the official website: https://element.eleme.cn/#/zh-CN/component/installation
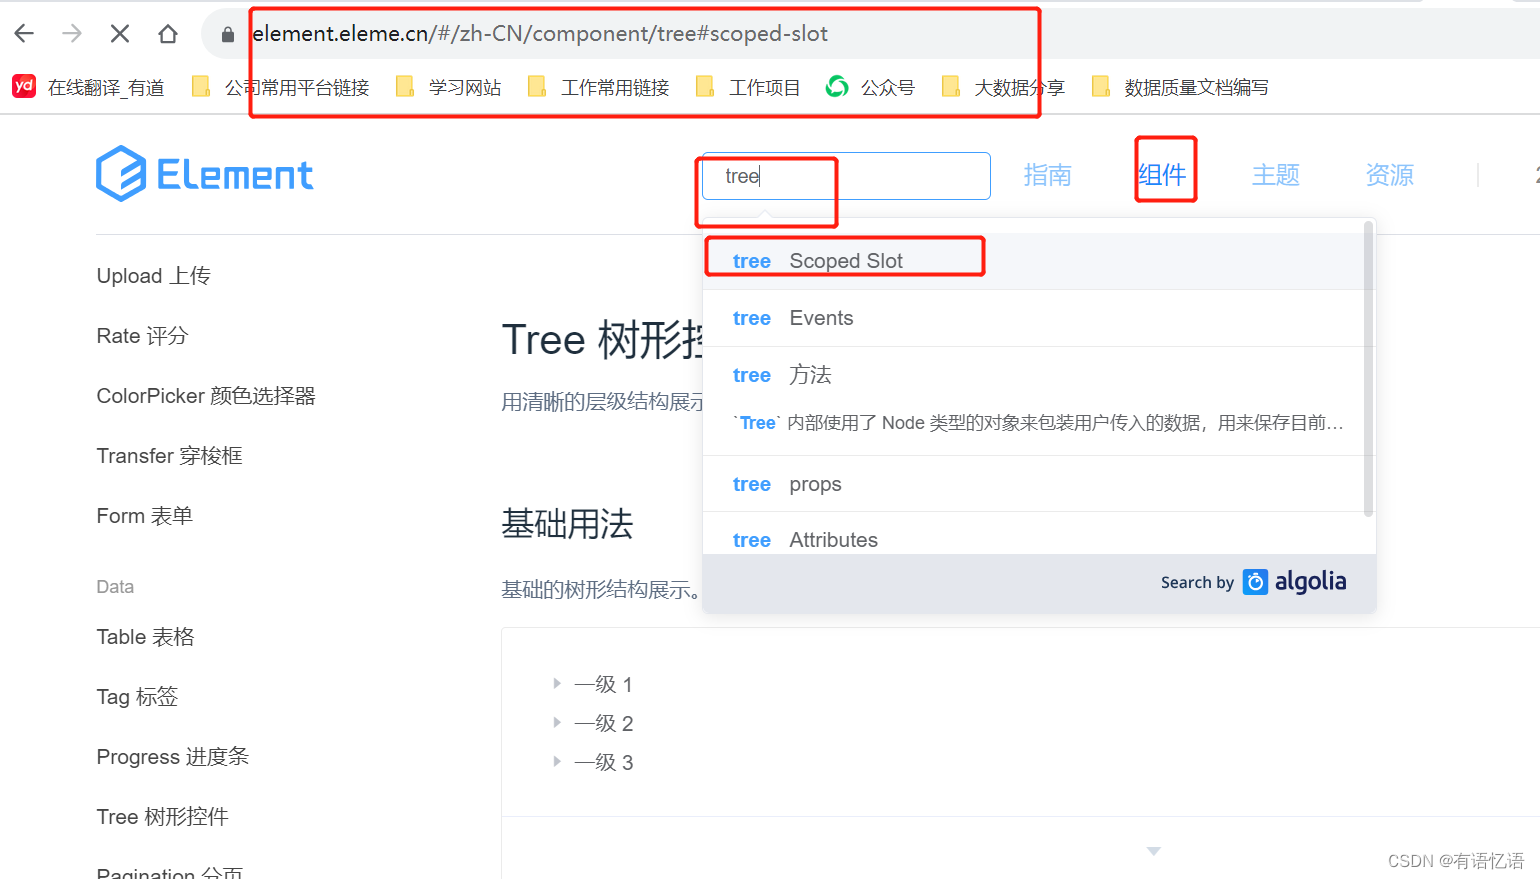
Search for the tree component, and then copy and use it.
7) Refer to the role.vue module to write the commodity catalog module
It contains static data. We can replace the static data module and write it as a method of requesting the background to obtain data and put it in data.
You can refer to the writing method of obtaining data in the role.vue module.
After writing the code, request the background interface.
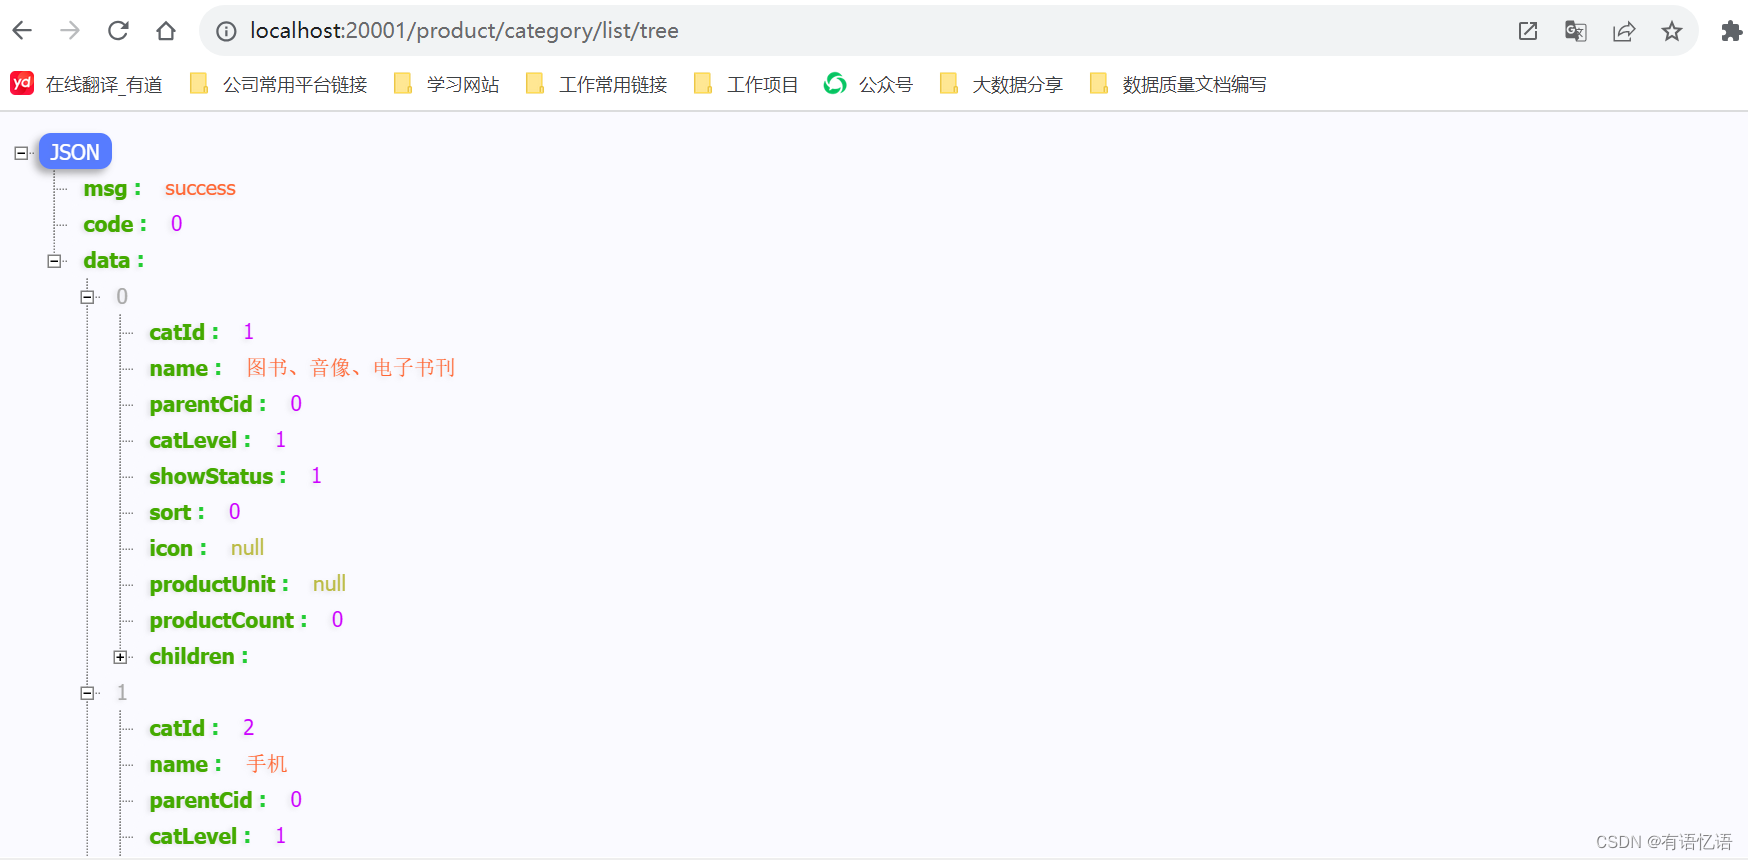
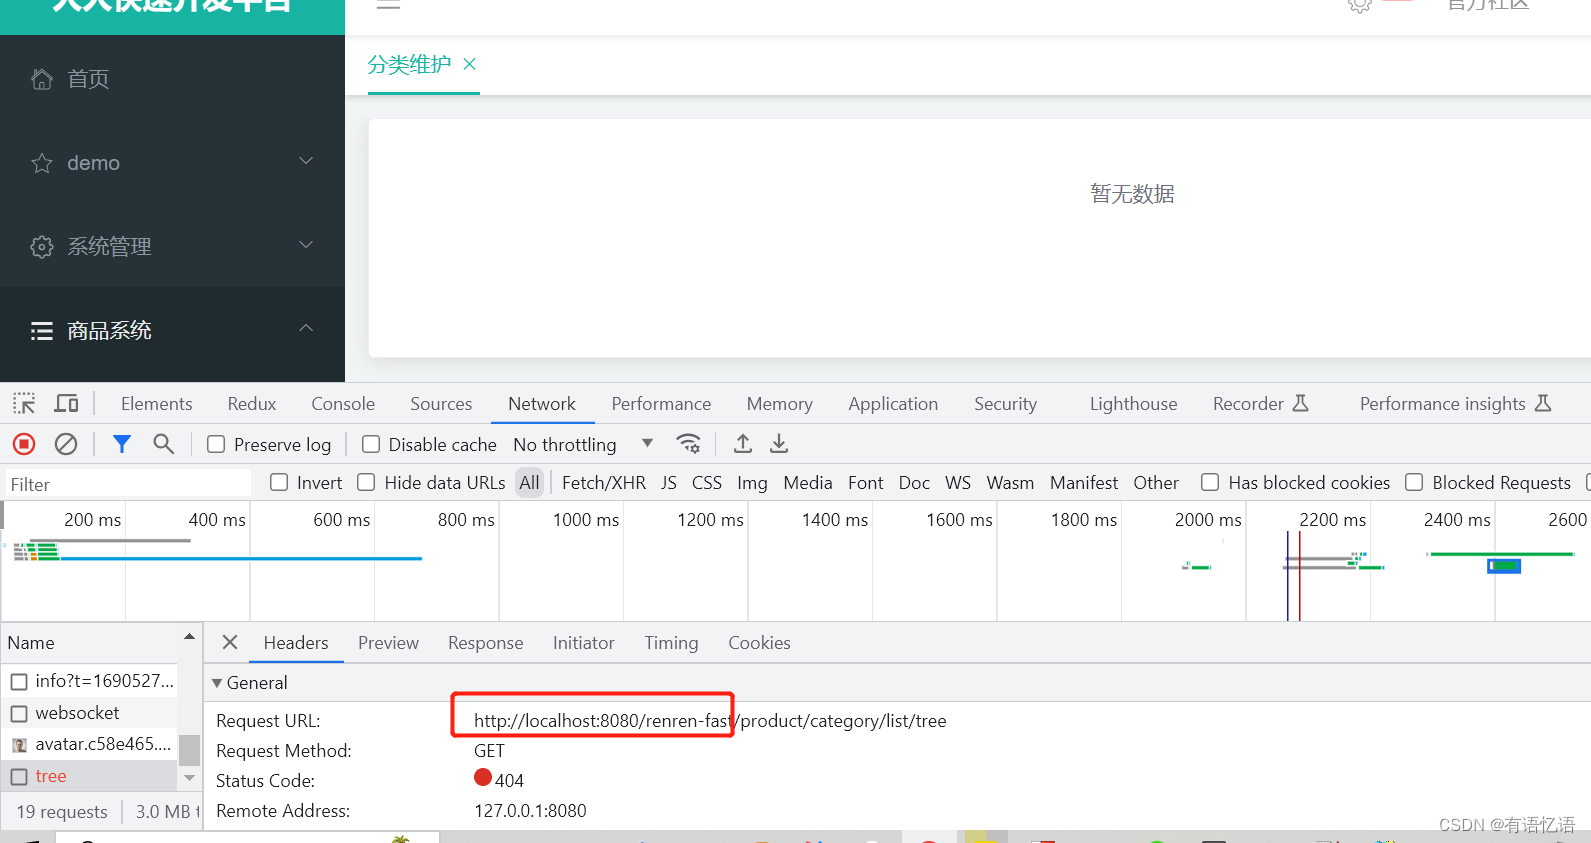
8) Modify the interface request address
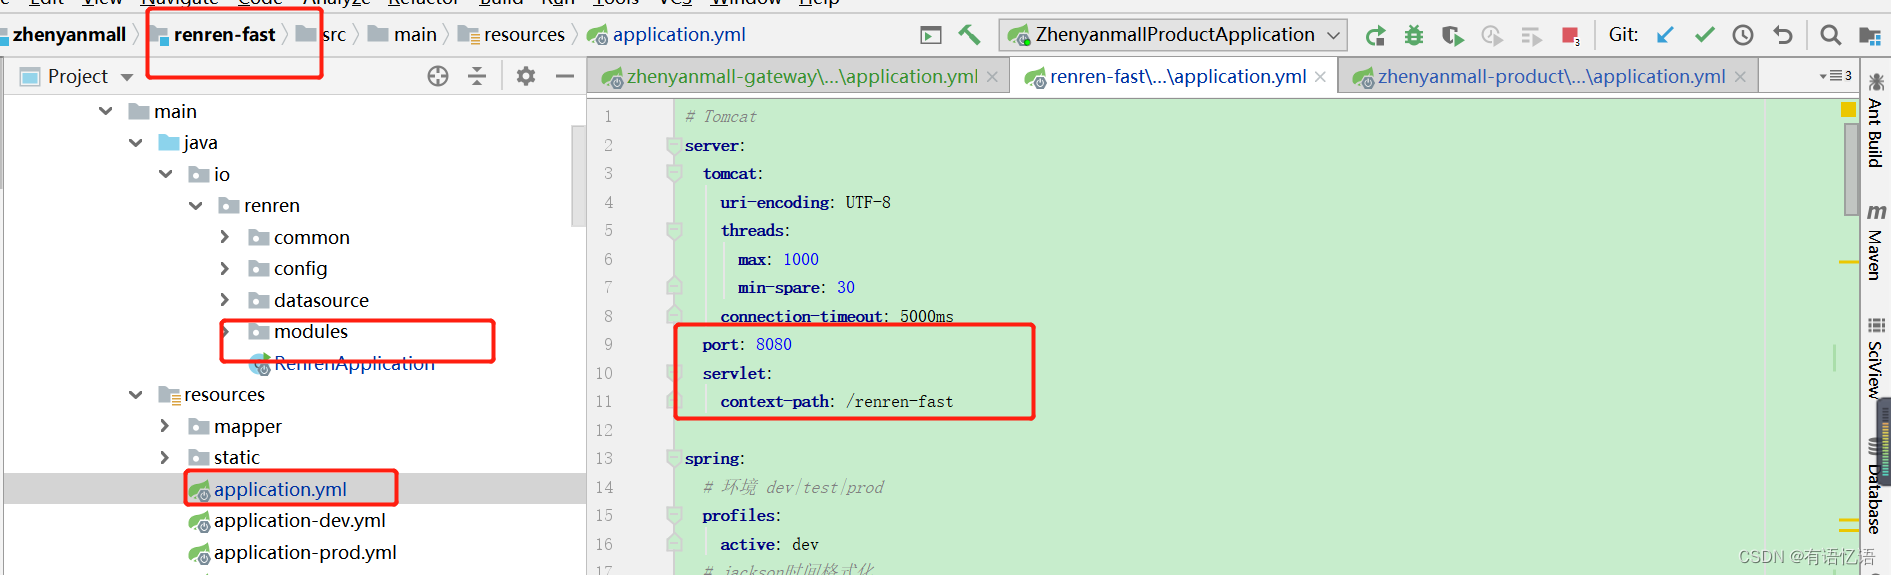
Open the console and find that no data is obtained, the requested address is not a commodity item, but http://localhost:8080/renren-fast/product/category/list/tree, (and 8080 is the renren-fast background port) The requested address should be http://localhost:20001/product/category/list/tree
9) Gateway configuration
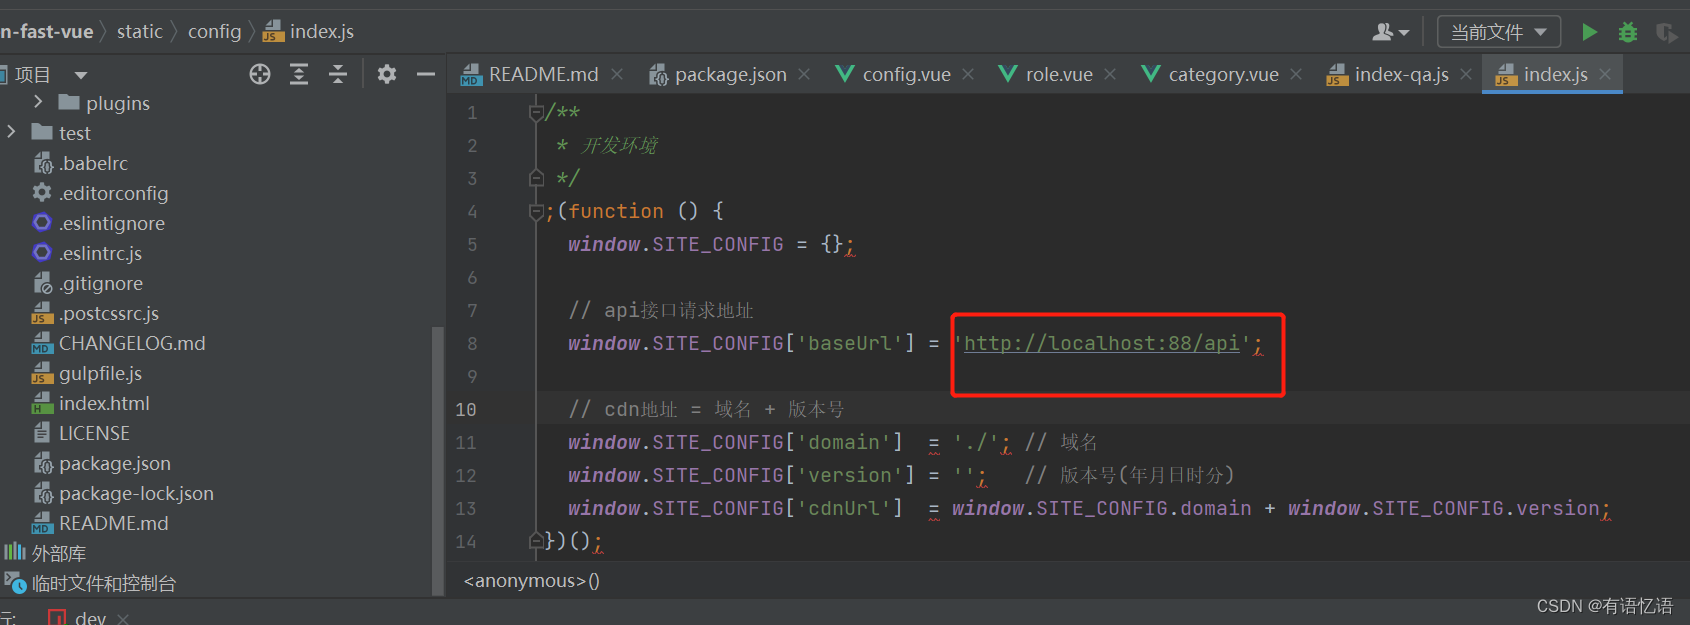
In fact, what we need to configure is the address of the gateway, so that the gateway can forward to the corresponding service address instead of directly requesting the corresponding service address. http://localhost:8080/renren-fast This address is actually the background forwarding address of the request configured by renren-fast. Search and change the configuration globally to see where the configuration is changed, and then configure it as the gateway address. It is found that the configuration is in static/config/ index.js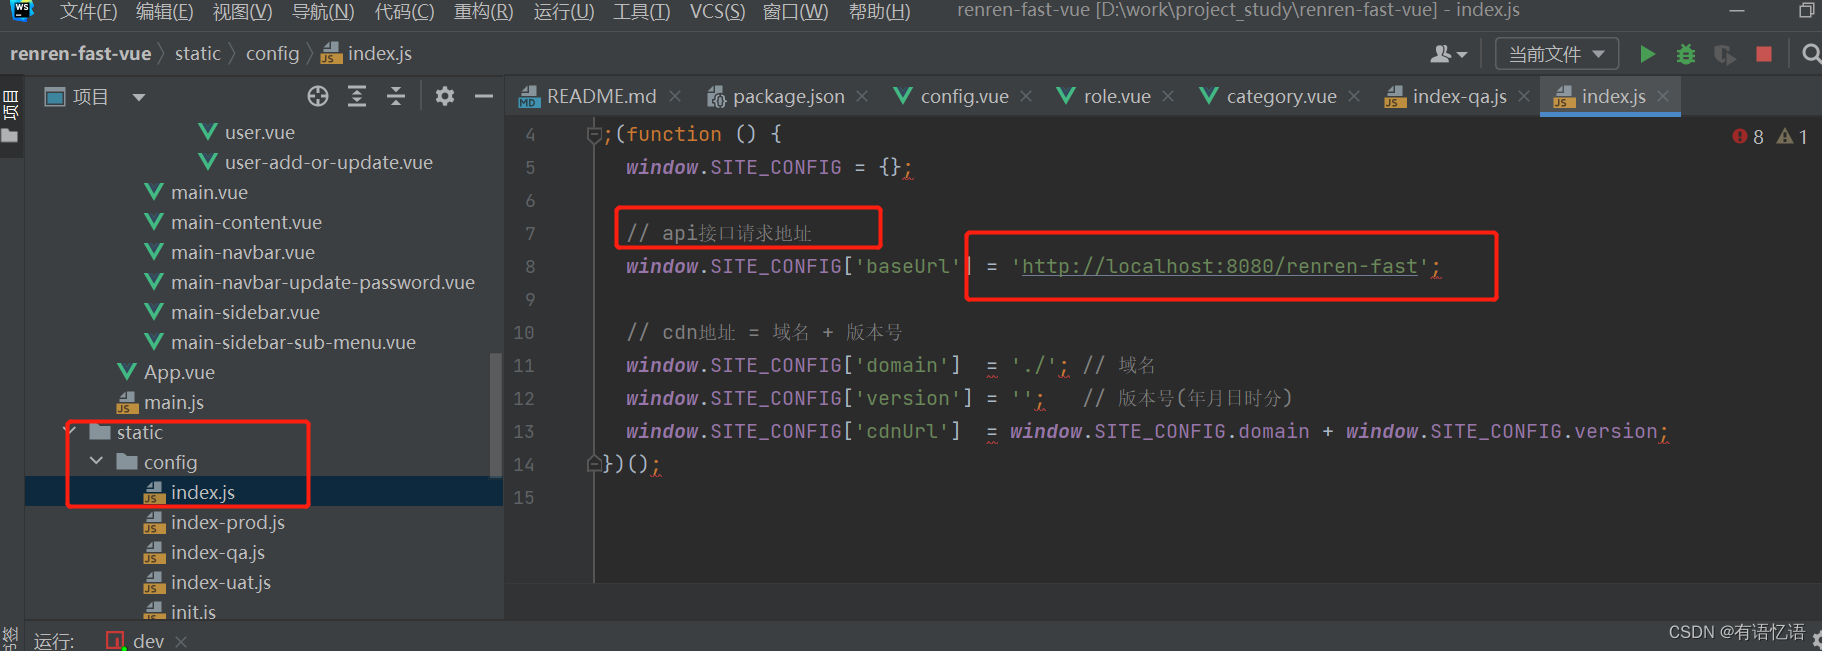
Change to: http://localhost:88
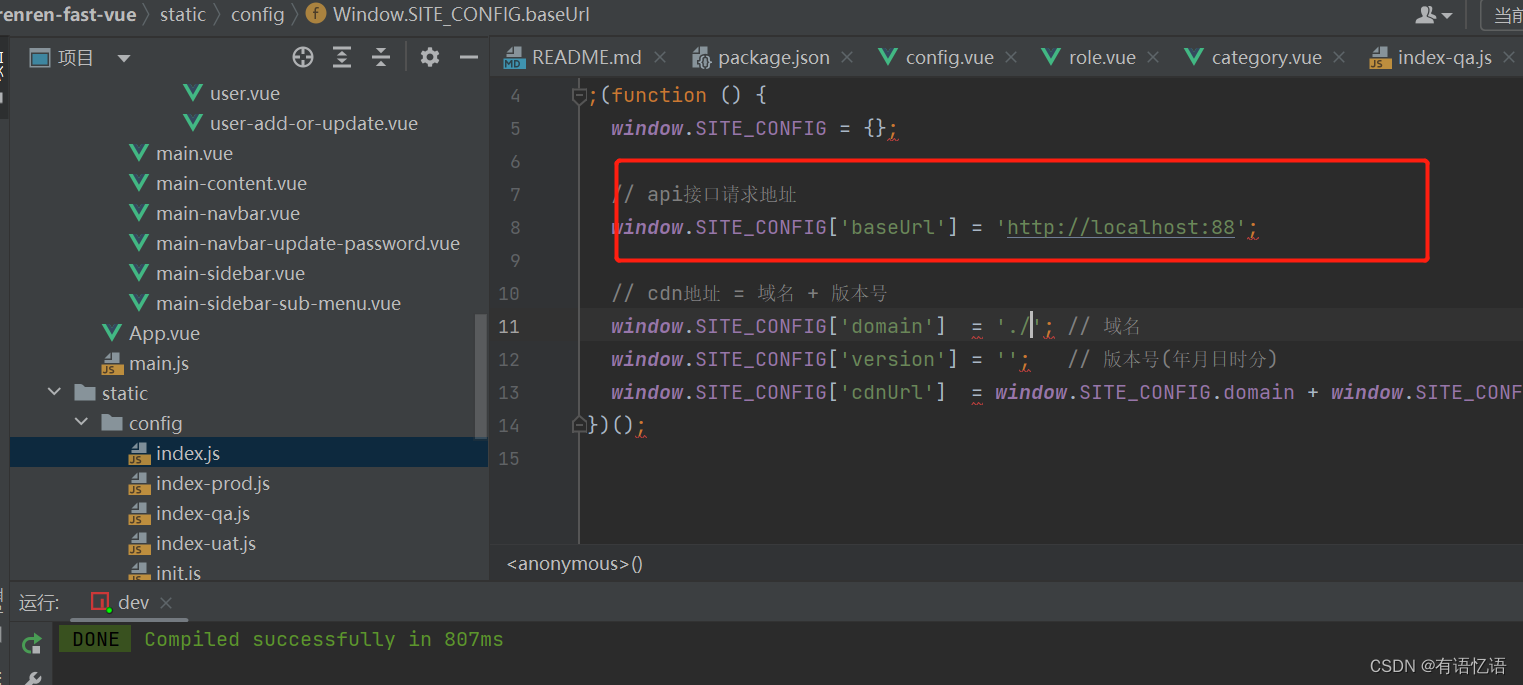
At this time, we have changed the request api address, so we cannot request to the renren-fast background.
10) You need to register renren-fast to the gateway.
renren-fast introduces common, adds registration center annotations, adds service name and registration center address (because of spring version conflicts, it is not necessary to introduce common, and registration center and configuration center can be introduced separately)


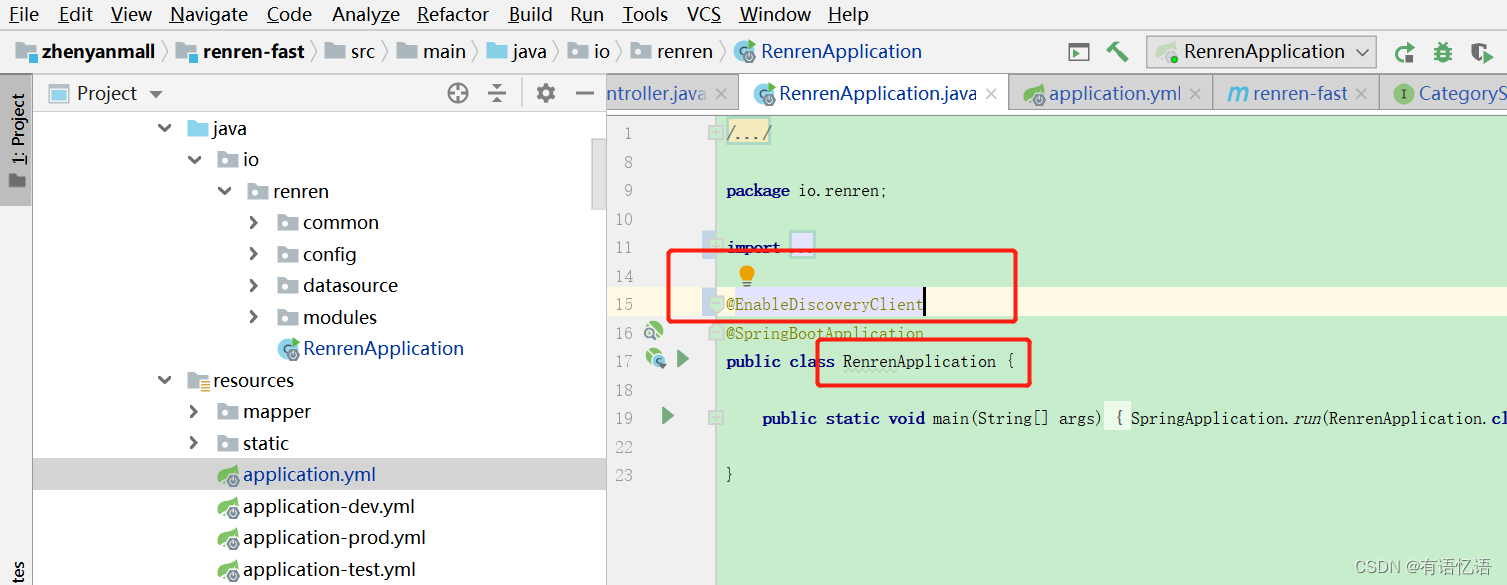
Then restart RenrenApplication
11) Problems encountered: class definition not found
The ConfigurationPropertiesBeans class under the org.springframework.cloud.context.properties package
reports an error:
Caused by: java.lang.NoClassDefFoundError: org/springframework/boot/context/properties/ConfigurationBeanFactoryMetadata
	at java.base/java.lang.Class.getDeclaredMethods0(Native Method)
	at java.base/java.lang.Class.privateGetDeclaredMethods(Class.java:3166)
	at java.base/java.lang.Class.getDeclaredMethods(Class.java:2309)
	at org.springframework.util.ReflectionUtils.getDeclaredMethods(ReflectionUtils.java:467)
	... 37 common frames omitted
Caused by: java.lang.ClassNotFoundException: org.springframework.boot.context.properties.ConfigurationBeanFactoryMetadata
	at java.base/jdk.internal.loader.BuiltinClassLoader.loadClass(BuiltinClassLoader.java:581)
	at java.base/jdk.internal.loader.ClassLoaders$AppClassLoader.loadClass(ClassLoaders.java:178)
	at java.base/java.lang.ClassLoader.loadClass(ClassLoader.java:521)
	... 41 common frames omitted
Analysis:
1: Check that
there are three classes with the same name in ConfigurationPropertiesBeans
2: Remove the dependencies of the nacos service registration center and configuration center without reporting an error, which exists at this time
There are two ConfigurationPropertiesBeans classes (there is a version 2.2.0RELEASE for other projects, and version 3.1.5 for Renren open source projects)
3: Dependency conflict, remove the dependency from the nacos dependency:
spring-cloud-context
4: nacos itself also needs to remove dependencies
spring-cloud-starter-netflix-ribbon
solution: modify the pom file
 <!--注册中心  服务注册/发现-->
        <dependency>
            <groupId>com.alibaba.cloud</groupId>
            <artifactId>spring-cloud-starter-alibaba-nacos-discovery</artifactId>
            <version>2.1.0.RELEASE</version>
			<exclusions>
				<exclusion>
					<groupId>org.springframework.cloud</groupId>
					<artifactId>spring-cloud-context</artifactId>
				</exclusion>
				<exclusion>
					<groupId>org.springframework.cloud</groupId>
					<artifactId>spring-cloud-starter-netflix-ribbon</artifactId>
				</exclusion>
			</exclusions>

        </dependency>

        <!--配置中心  管理配置-->
        <dependency>
            <groupId>com.alibaba.cloud</groupId>
            <artifactId>spring-cloud-starter-alibaba-nacos-config</artifactId>
            <version>2.1.0.RELEASE</version>
            <exclusions>
                <exclusion>
                    <groupId>org.springframework.cloud</groupId>
                    <artifactId>spring-cloud-context</artifactId>
                </exclusion>
                <exclusion>
                    <groupId>org.springframework.cloud</groupId>
                    <artifactId>spring-cloud-starter-netflix-ribbon</artifactId>
                </exclusion>
            </exclusions>
        </dependency>
12) Then an error will be reported, and the configuration does not exist.
Because we introduced the configuration center, but did not configure the configuration of the configuration center, the index will report an error, but it does not affect, just add the configuration of the configuration center later

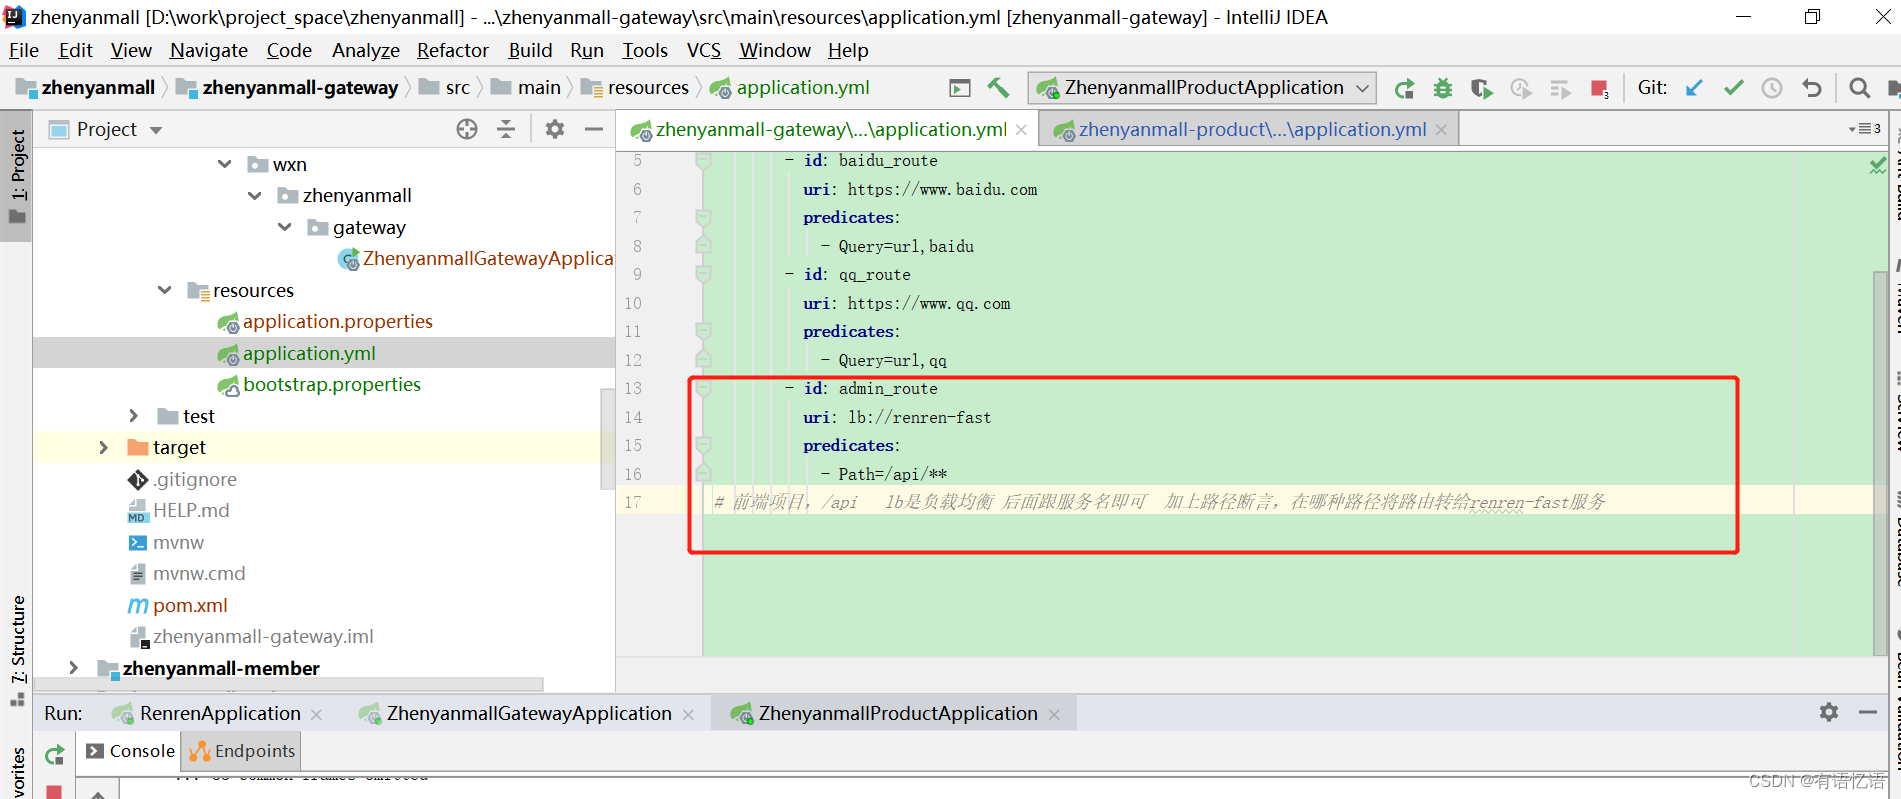
13) Modify the gateway route
You can modify the route of the gateway later, and then when the front end requests the API, if it is the renren-fast background, it will go to renren-fast, if it is a commodity service, it will go to the commodity service background.
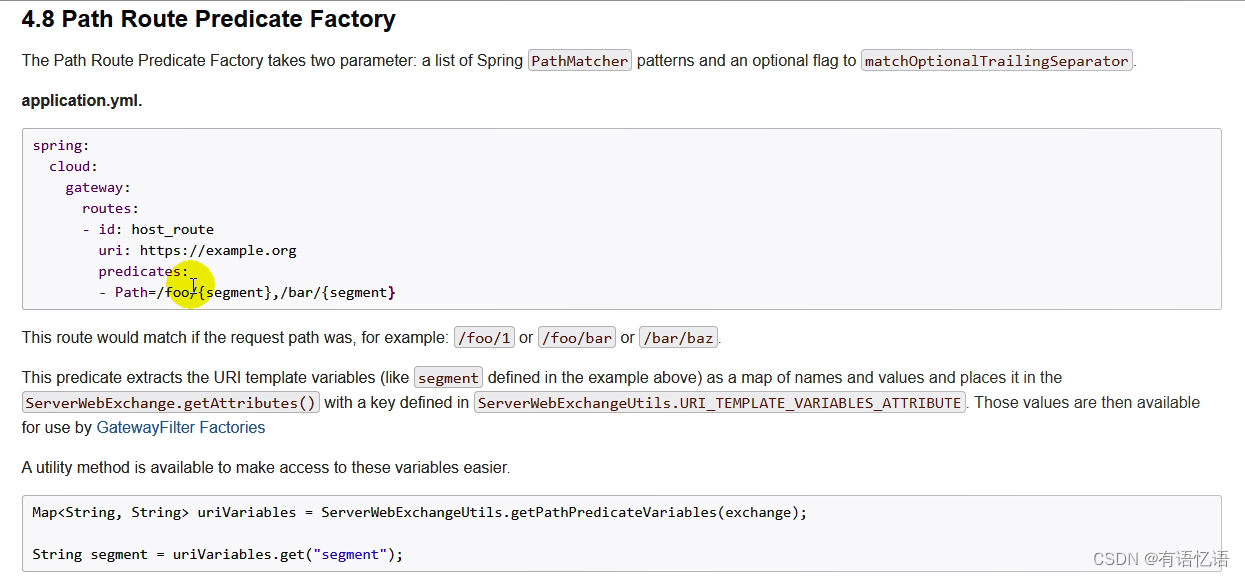
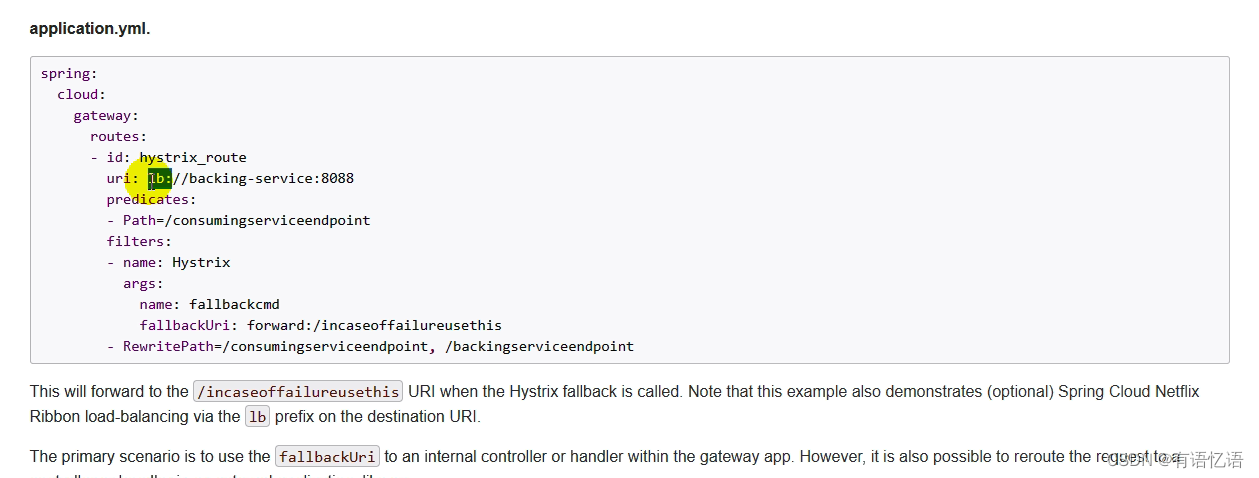
Match according to the path, when the path is matched, go to the corresponding uri.
In the front-end project + API, all requests go through the API
14) Verification code error
Request to log in, and the verification code will report an error
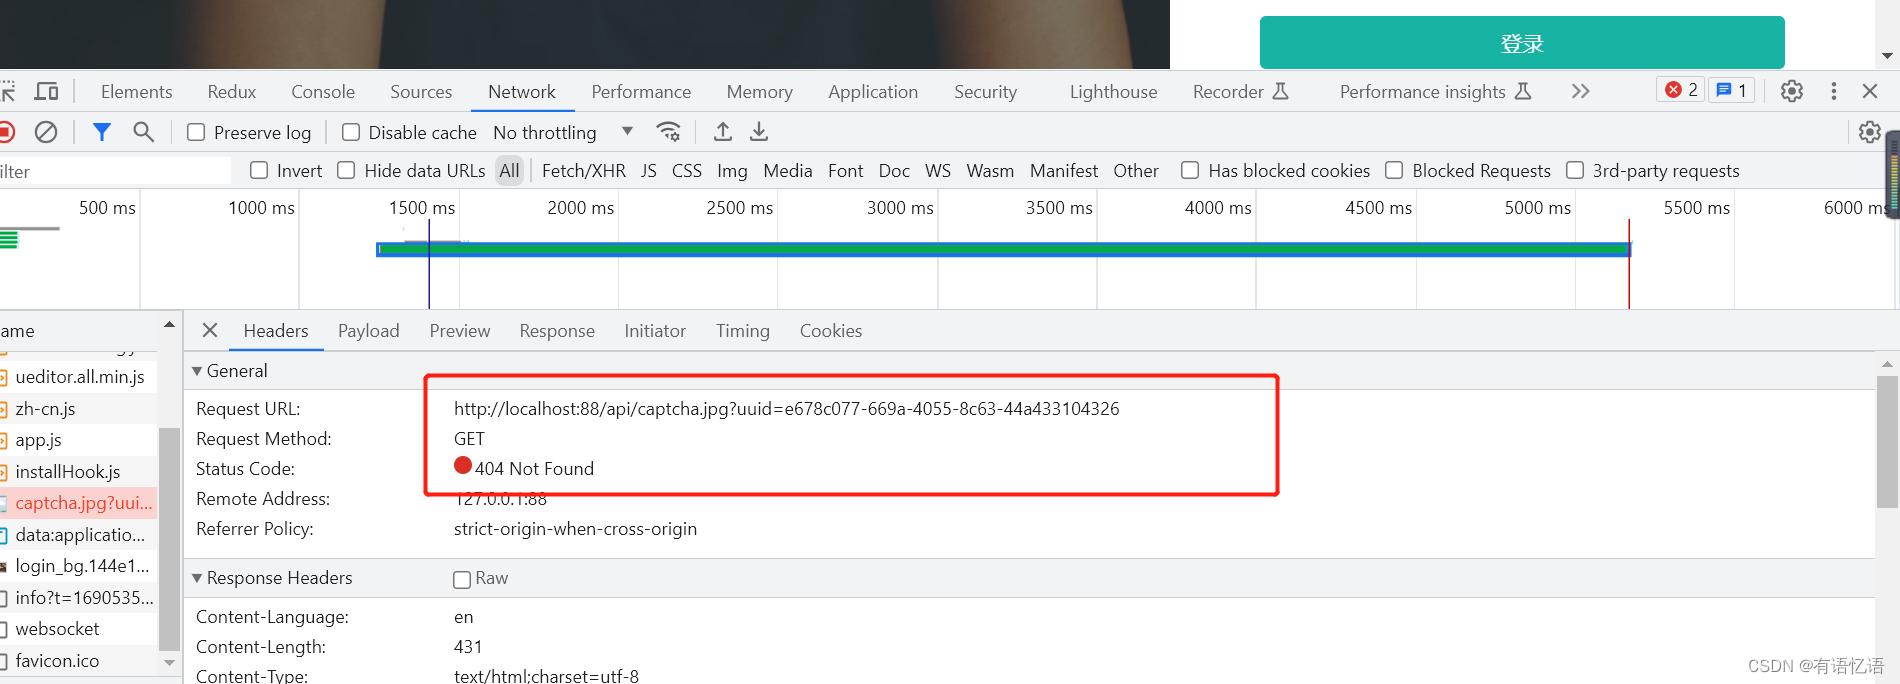
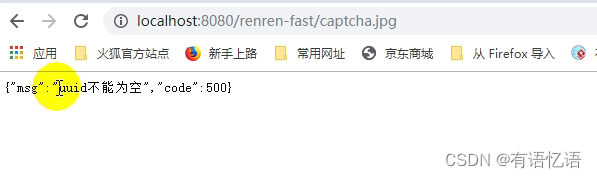
Send from the front-end project: http://localhost:88/api/captcha.jpg Request to the gateway, the gateway sees that the prefix is api to satisfy the assertion, go to renren-fast, request: http://renren-fast:8080/ api/captcha.jpg will still report an error. (actually you should visit: http://localhost:8080/renren-fast/captcha.jpg)应该进行重定向
15) Rewrite the forwarding path
Therefore, you need to forward http://localhost:88/api/captcha.jpg to http://localhost:8080/renren-fast/captcha.jpg Use the path rewriting of the gateway
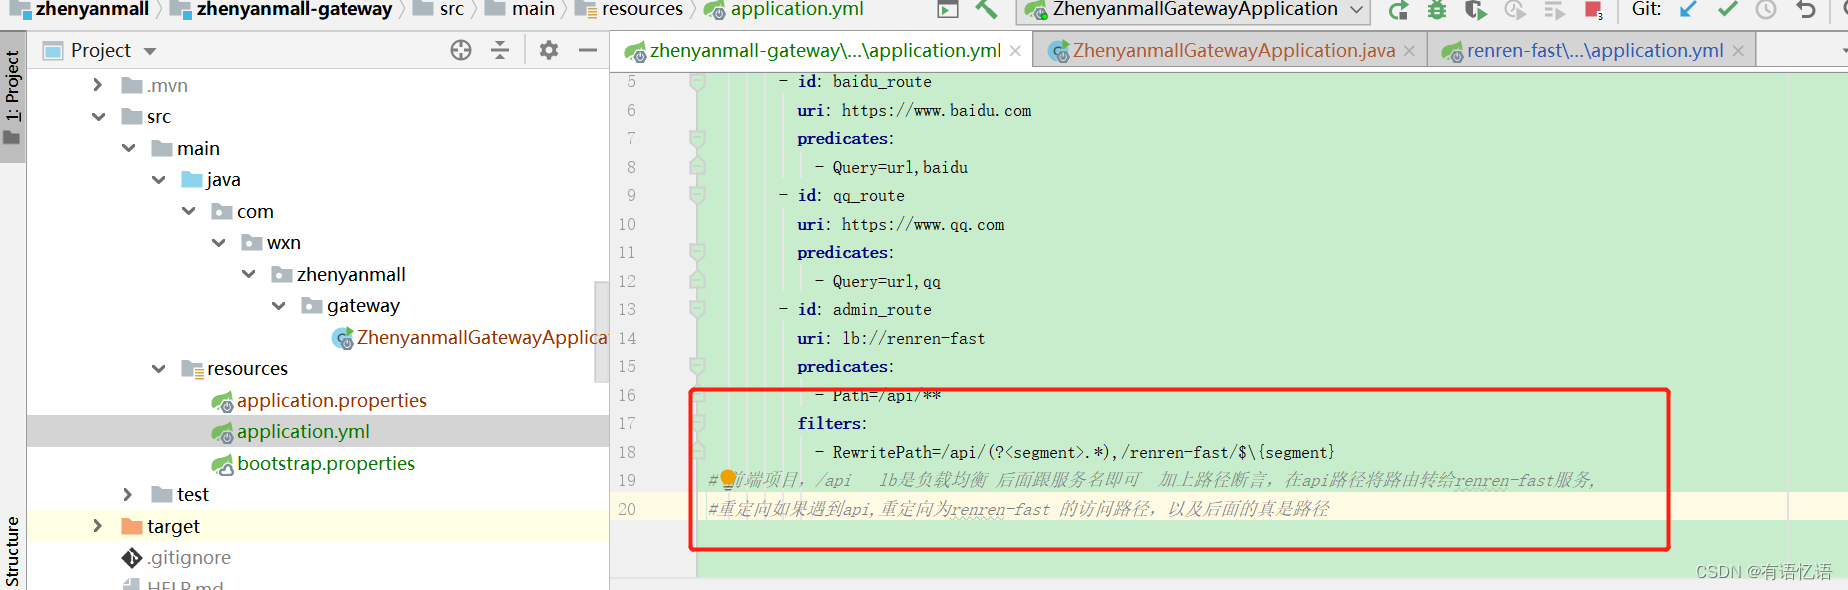
to get the verification code normally
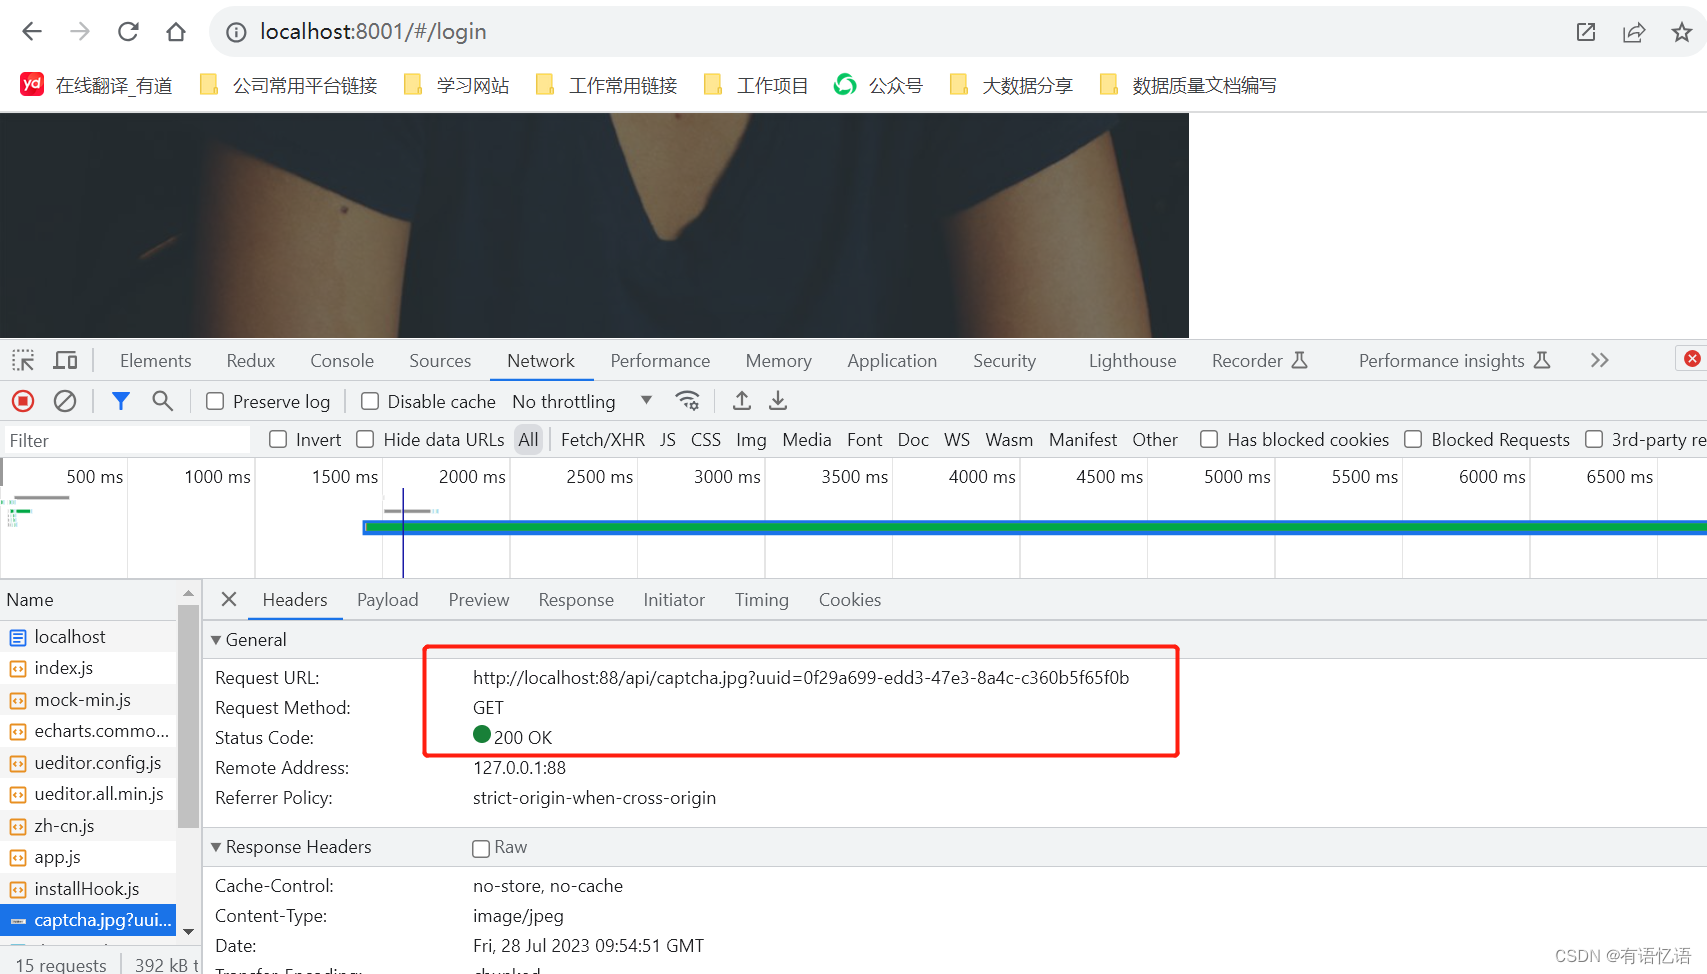
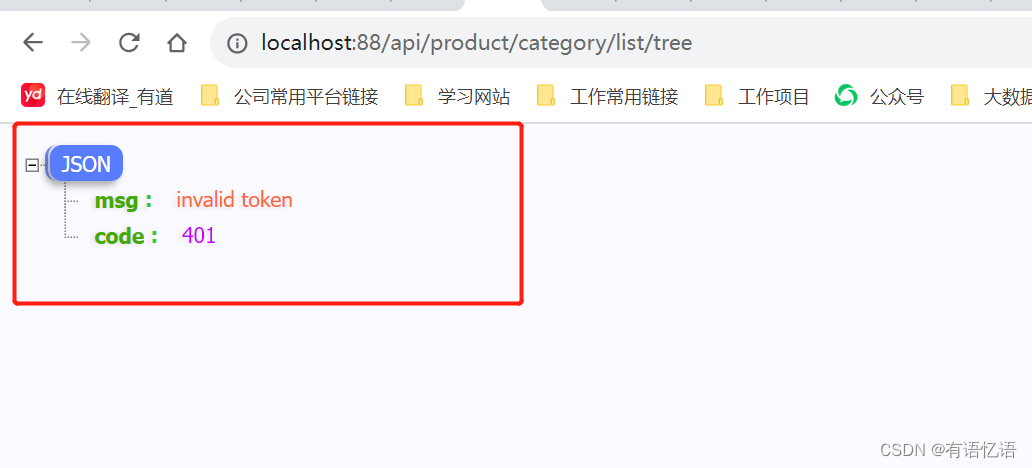
16) Login error, cross-domain
Then log in and find the following error:
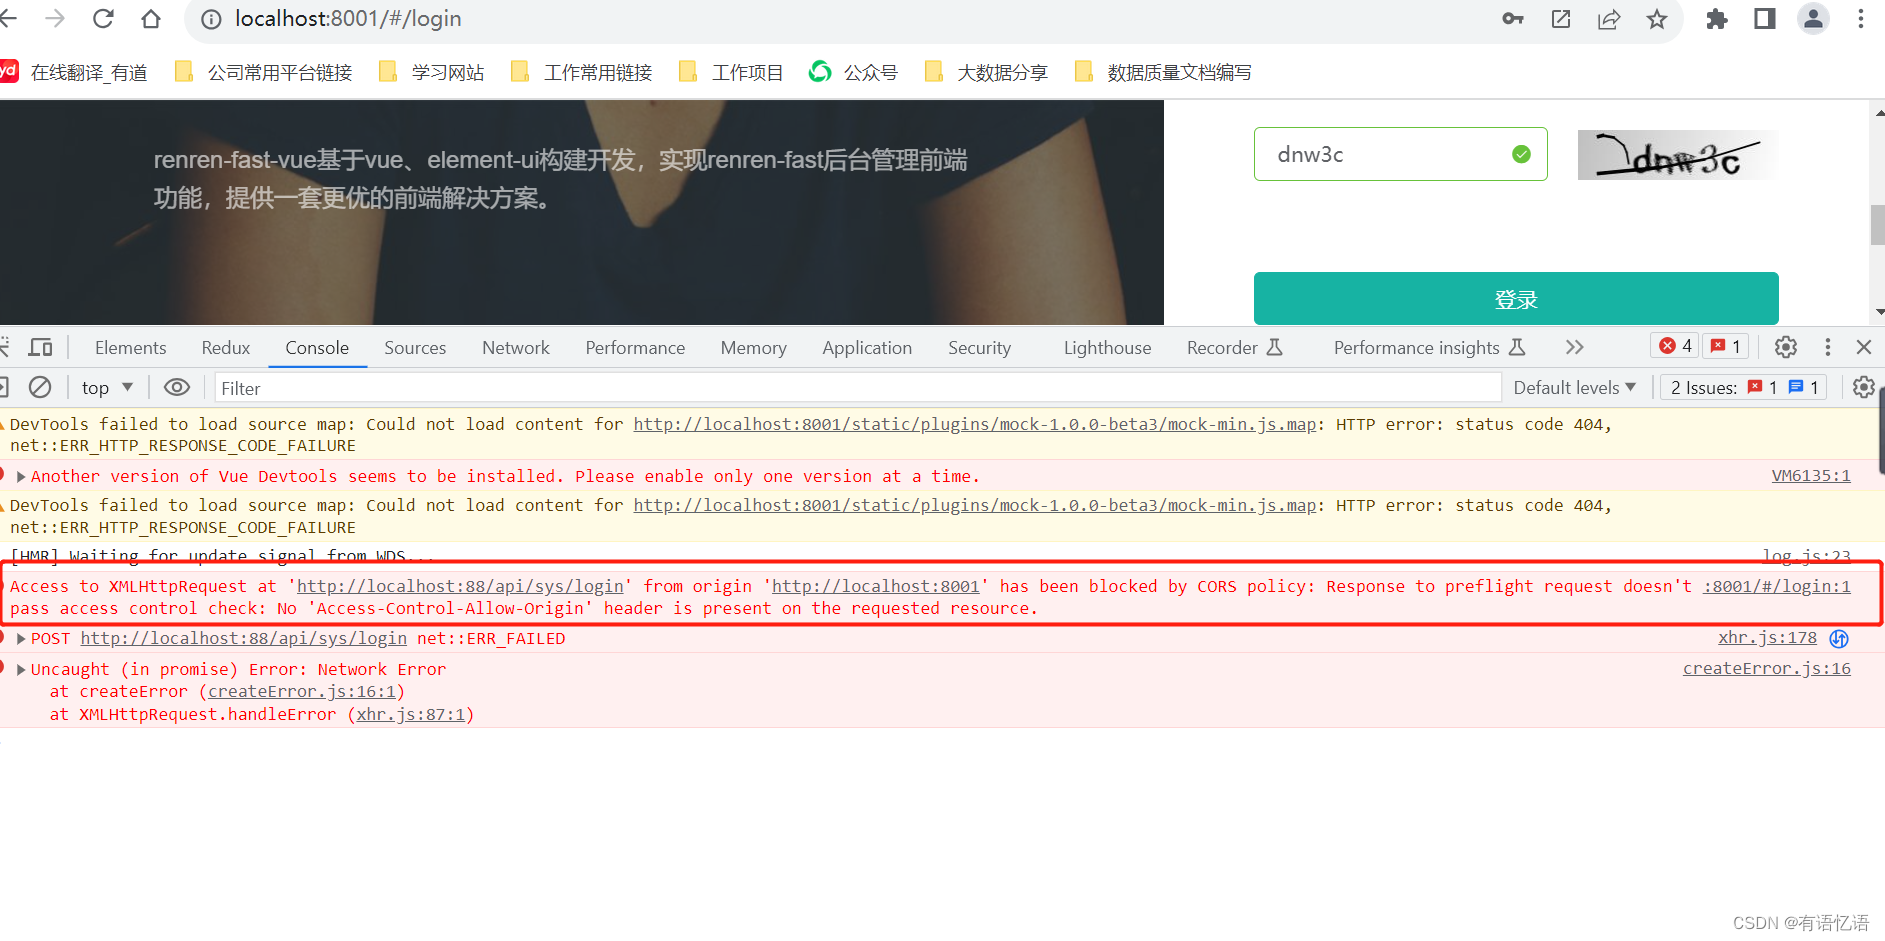
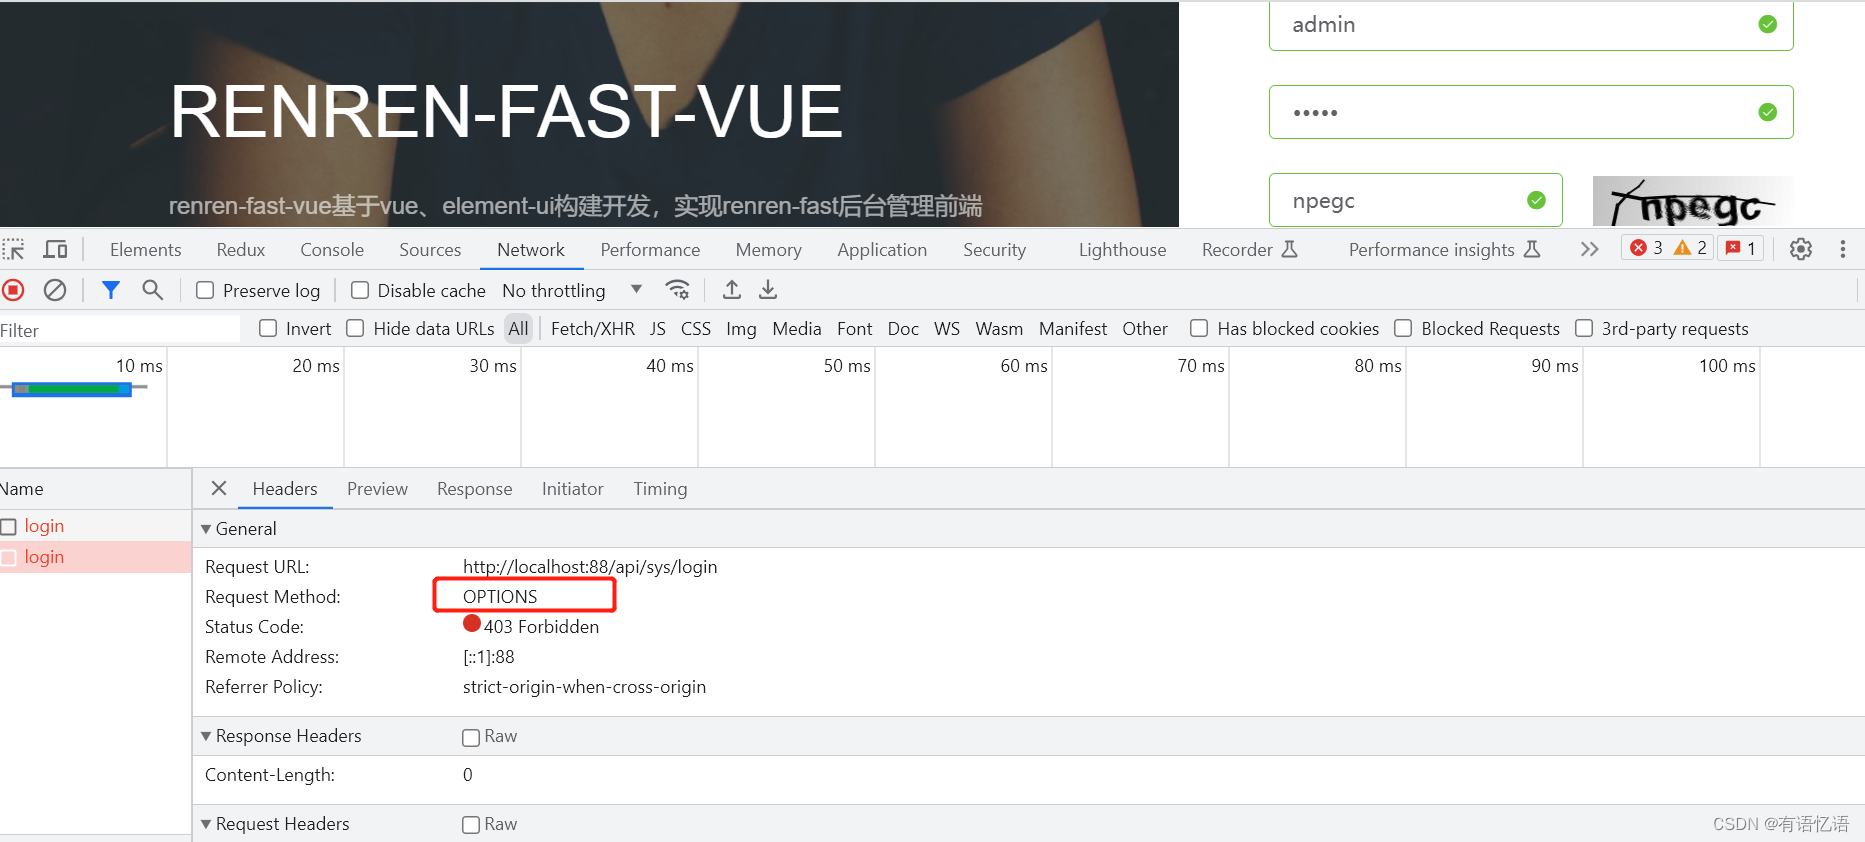
17) The port number has changed
403Forbidden is rejected, accessing 'http://localhost:88/api/sys/login' from 'http://localhost:8001', the request is blocked by cors policy, that is, cross-domain, browser security restrictions period, refuse to cross domain request. The browser checks that there is a request header: Access-Control-Allow-Origin, which is not in the request header.
Because the port number of accessing http://localhost:88/api/sys/login from http://localhost:8001 has changed
18) Cross-domain meaning

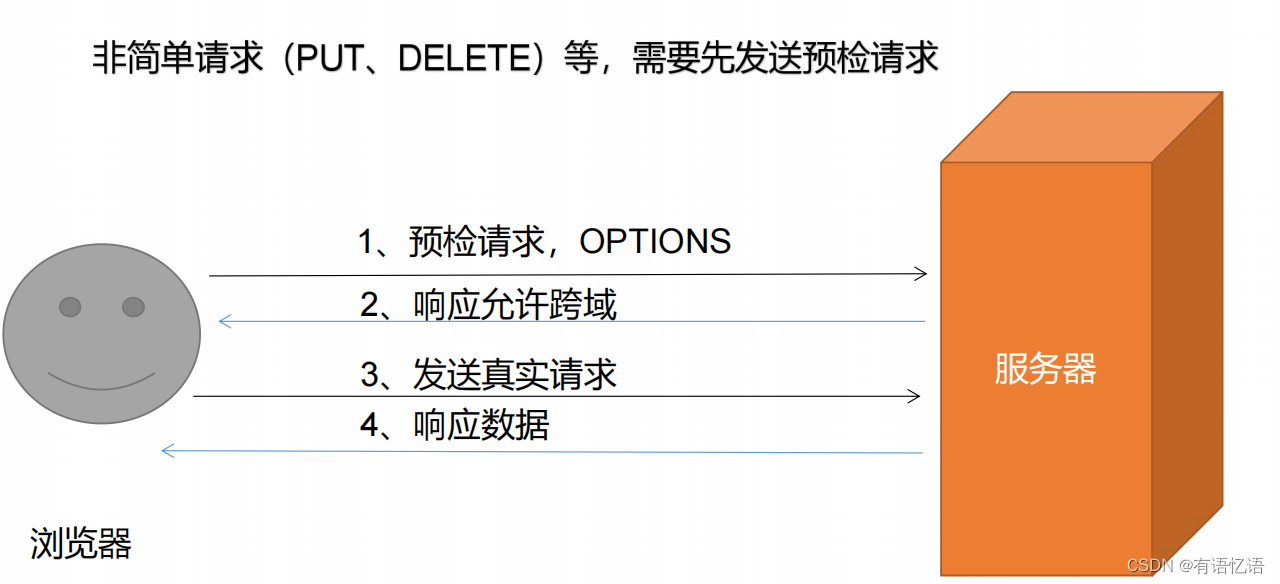
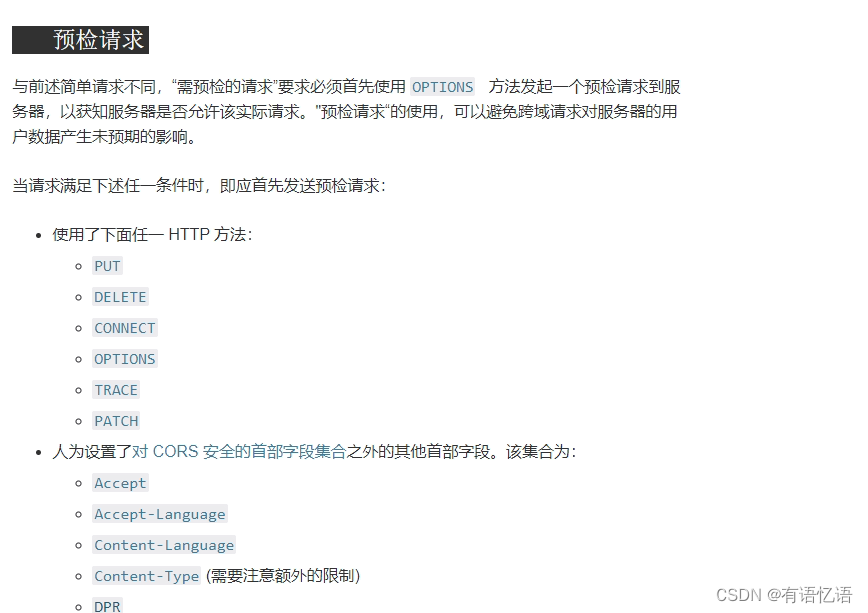
19) Preflight Request
options: Pre-request for cross-domain requests
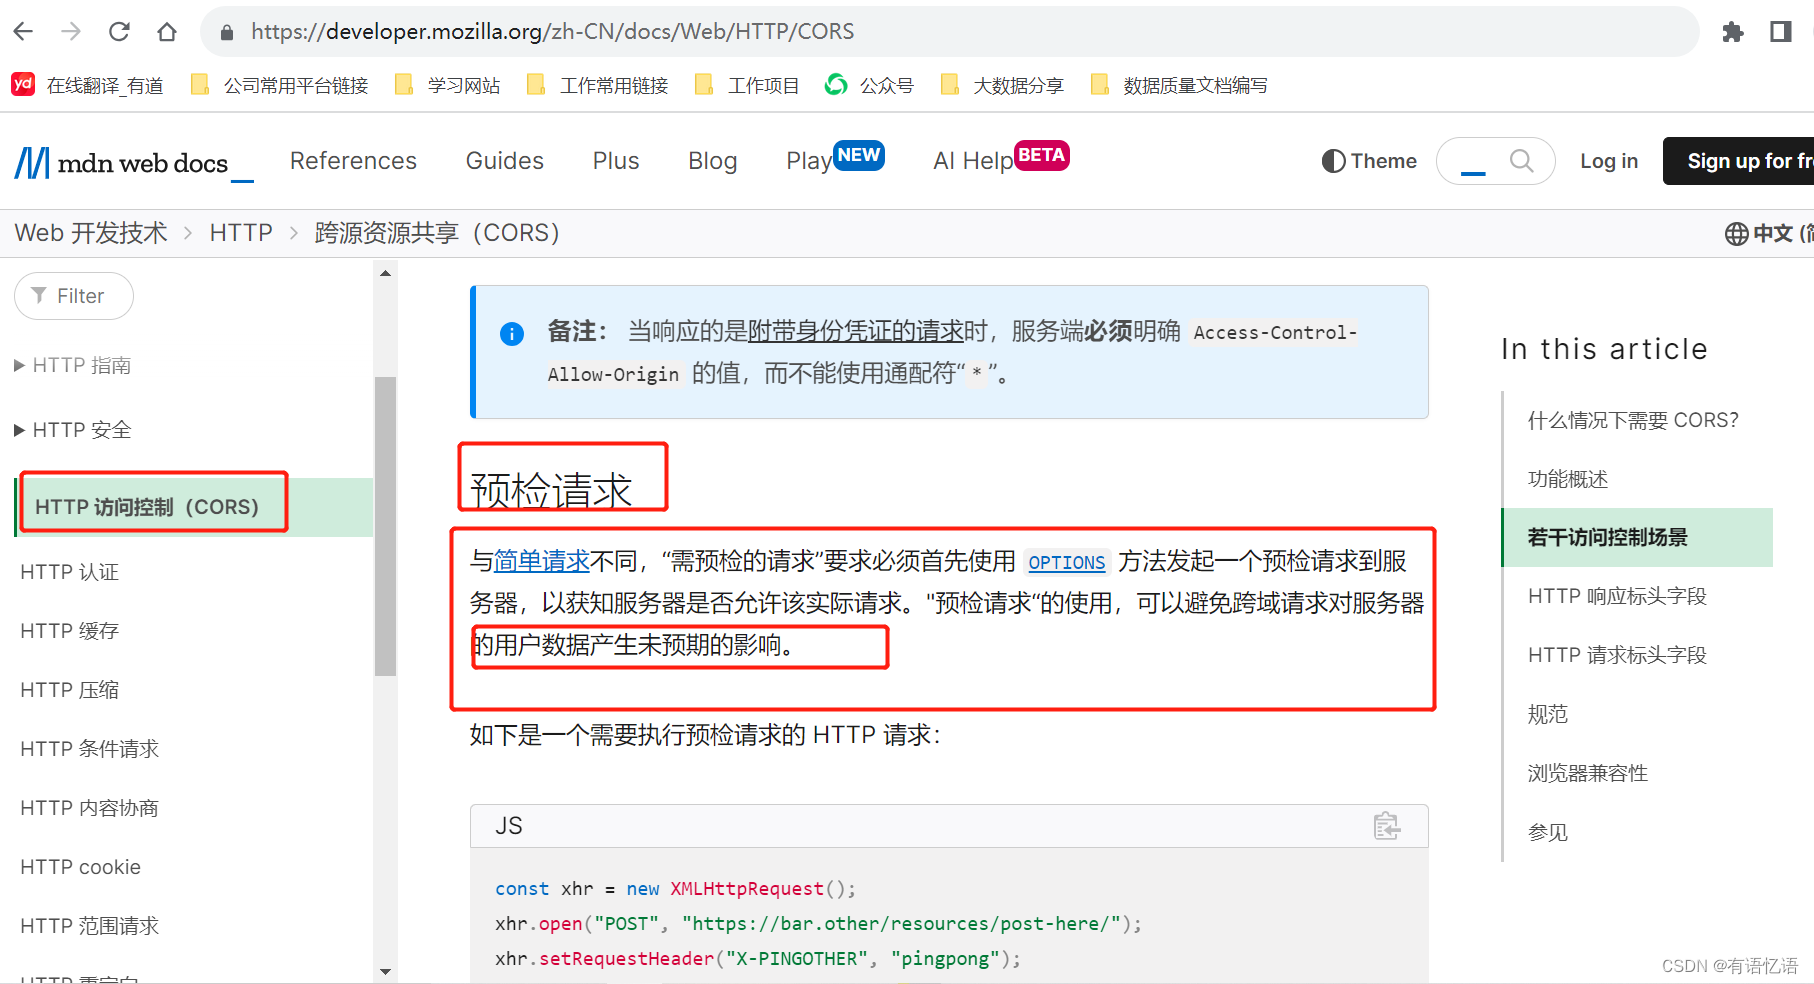
20) Cross-domain URL resolution
https://developer.mozilla.org/zh-CN/docs/Web/HTTP/CORS
Simple requests will not cross-domain,

and our login is POST, Application/json requests,
and requests that are not simple requests need to send a preflight request
21) Resolve cross-domain methods
There are several solutions to solve the cross-domain problem. The root cause of cross-domain is the above three reasons: the protocol, domain name, and port number are different, and these three situations can be solved.
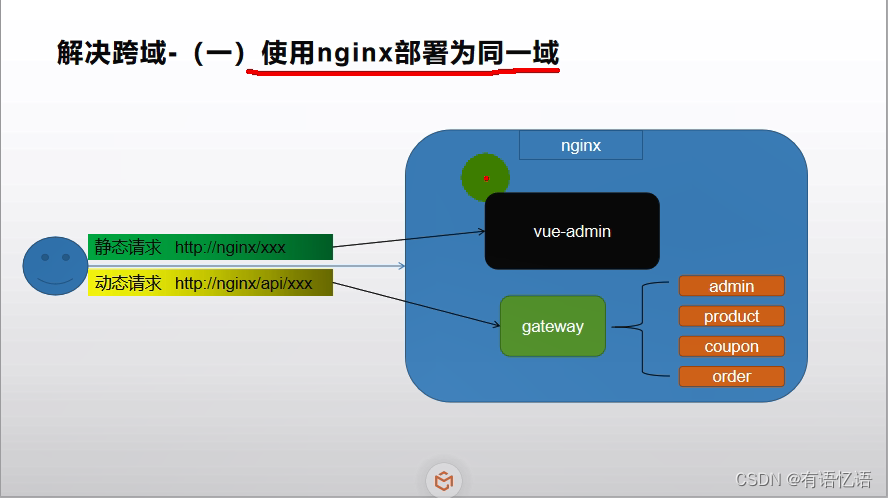
22) The online deployment environment uses nginx
23) Use the following methods in development (because it is not easy to configure nginx in development):

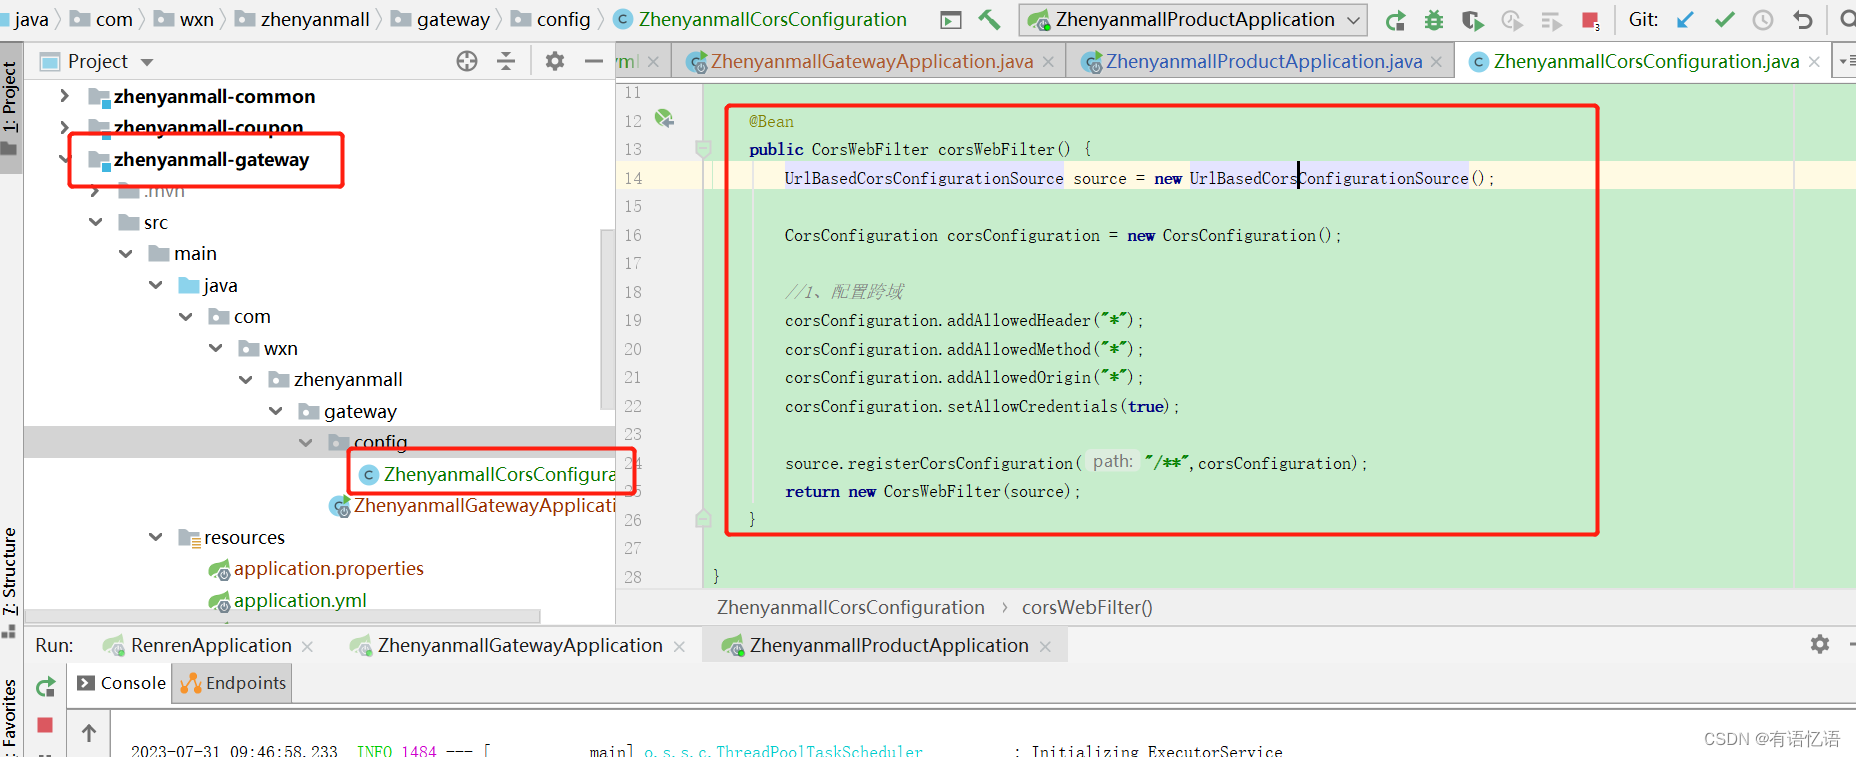
24) Configure cross-domain
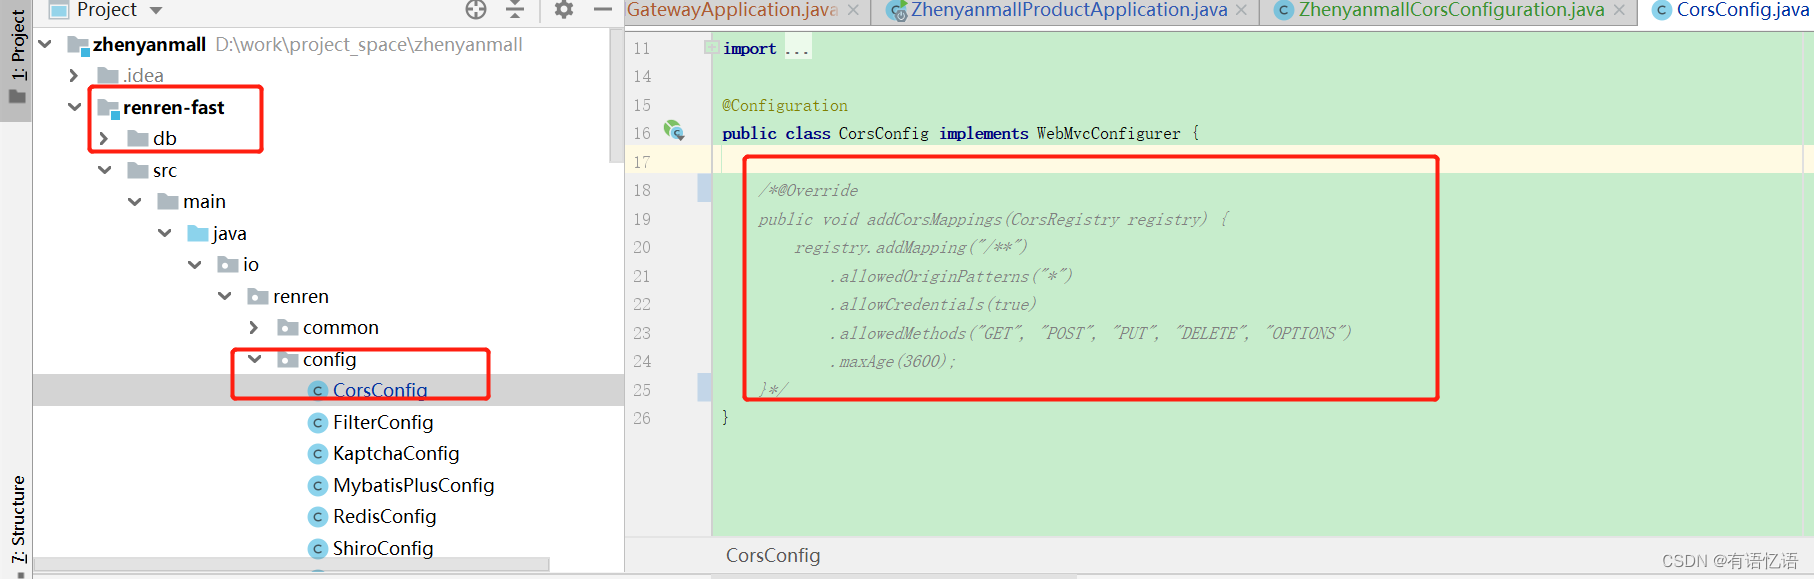
Each request needs to add the above fields to the response header, so we can write a filter, all our requests come in, before returning to the browser, add those response headers, the filter does not need to be written in each item, each item will be accessed remotely Cross-domain can be written directly in the gateway, because the gateway proxies other services, and the unified cross-domain configuration in the gateway solves the problem.
Write the configuration in the gateway to config
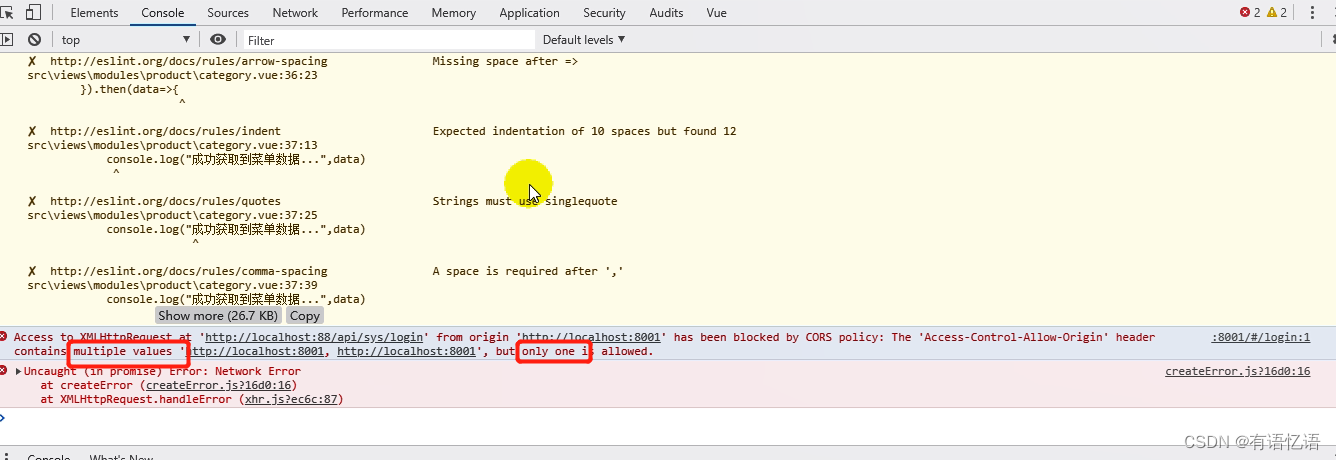
25) Same-origin policy multiple values
Restart the gateway service, log in, and the pre-check request is fine. The real request log-in interface reports an error and reports multiple values of the same-origin policy. I only hope for one, because the background of the renren-fast scaffolding project is also configured with cross-domain, and the renren-fast one Cross-domain commented out.
3. Query
1) Configure product routing
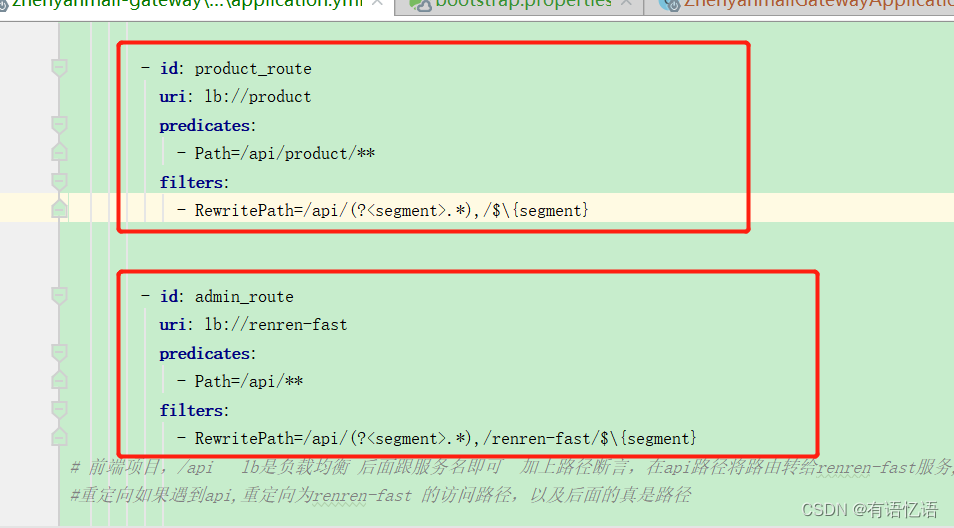
2) Configure routing order
It should be noted that the order of routing configuration is that the one with a small range is accurate in the front (high priority), and the one with a large range is in the back (low priority), otherwise it will be matched by the front.
3) Directly request the gateway and test the query interface:
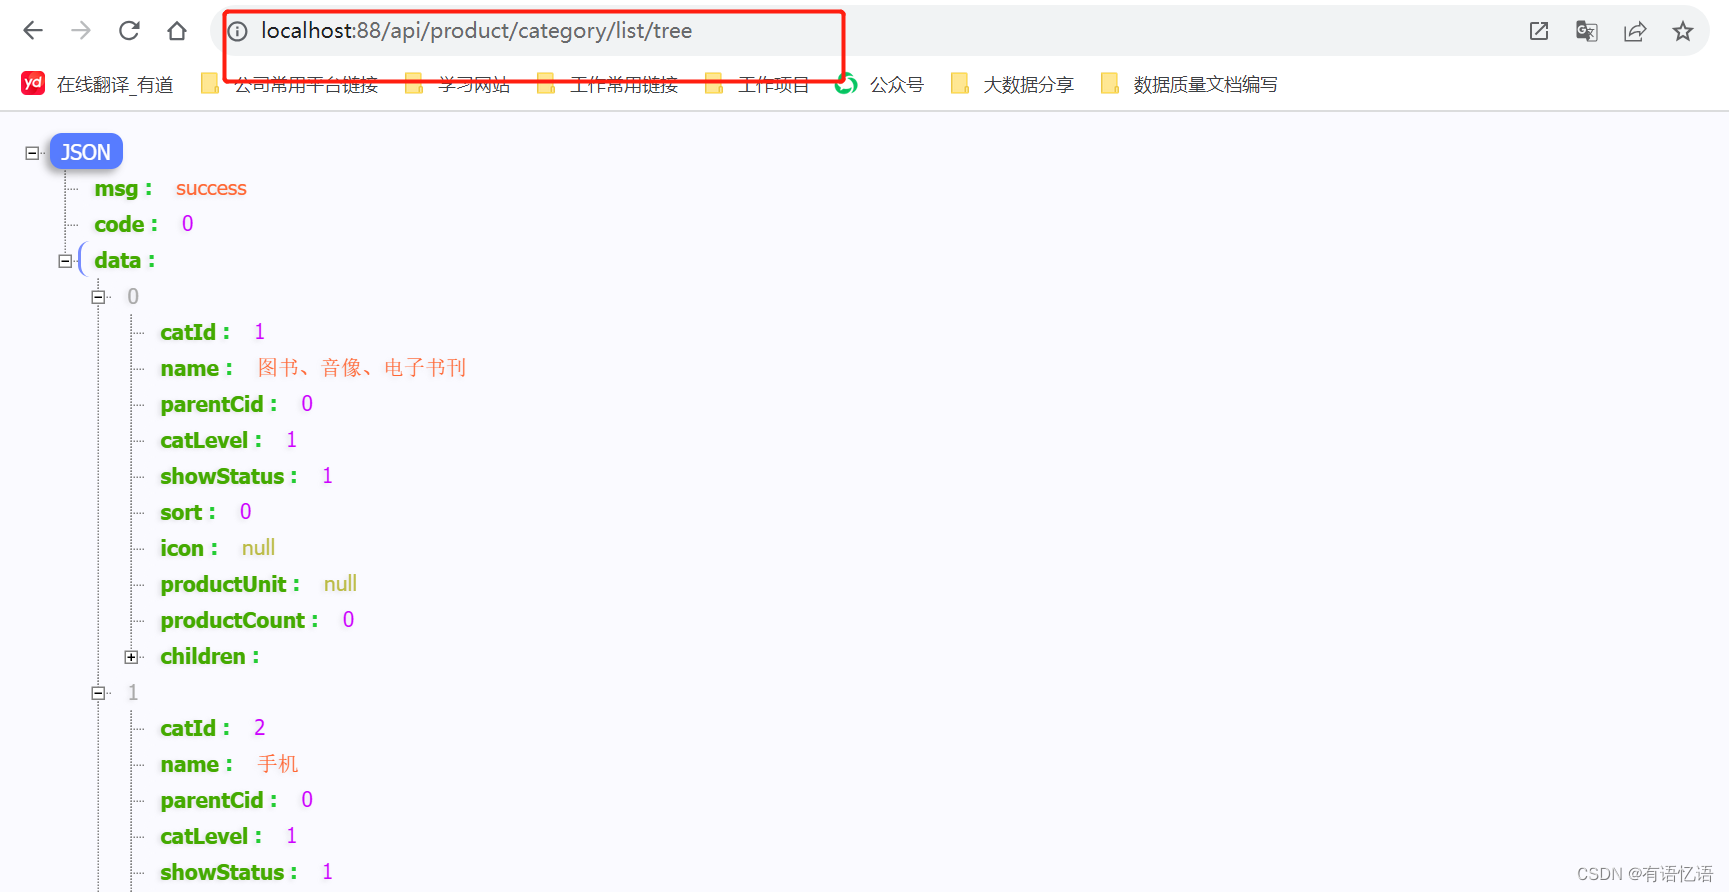
Modify the category.vue file.
4. Delete
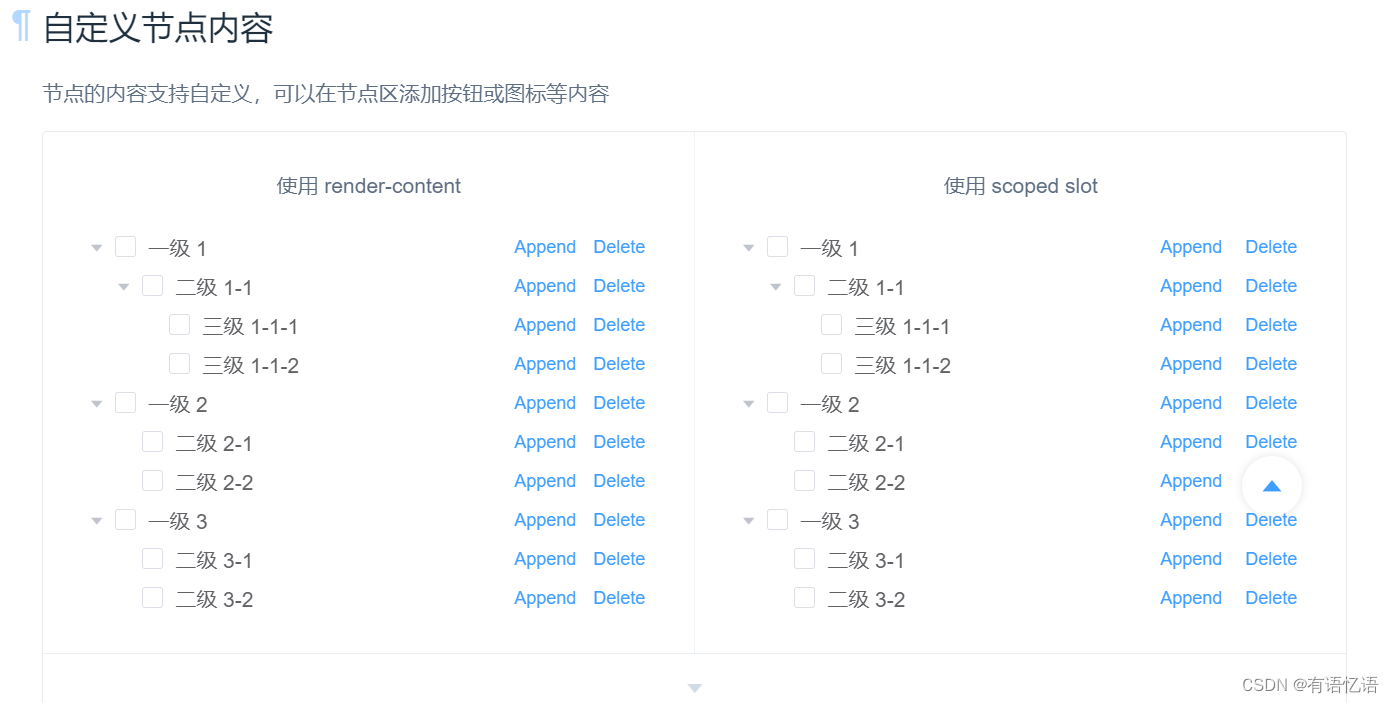
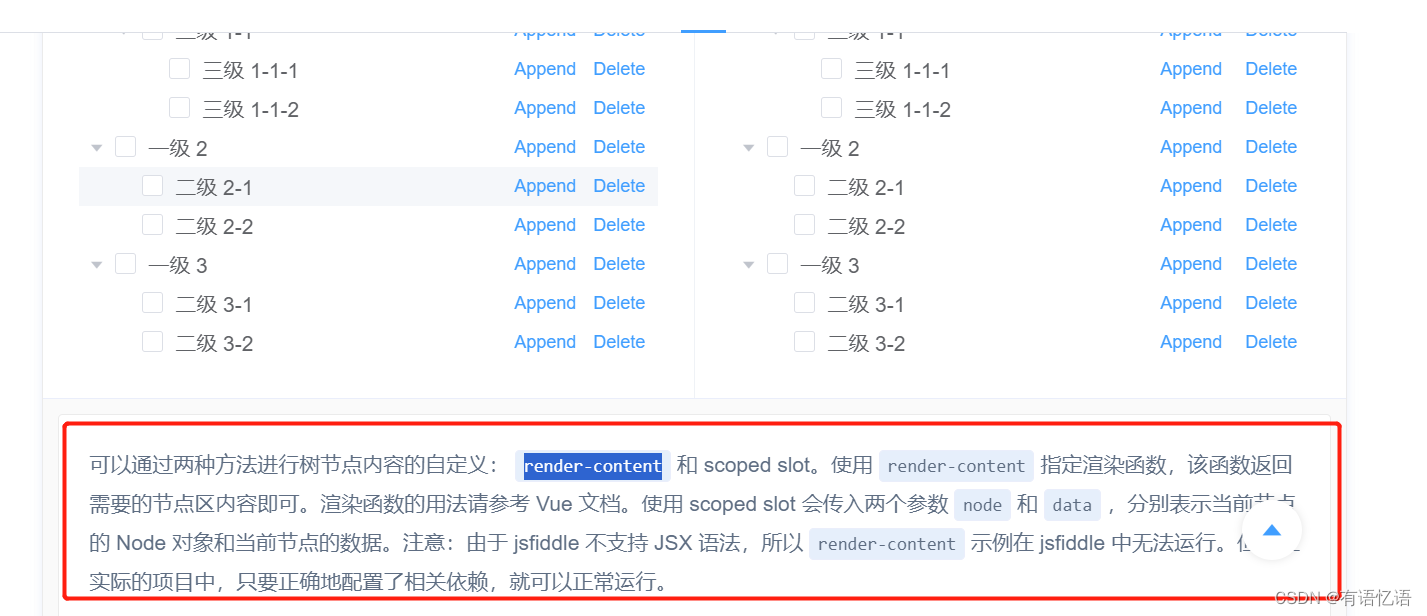
1) element ui custom node content
Write a menu delete function, there is no submenu, and it is not referenced, you can refer to element ui to customize the node content, there are two ways, render-content and scoped slot, we use scoped slot here, just need to introduce the span tag . (Using vue's slot mechanism)
Then modify the append and remove methods in it, and need to send a request to the background
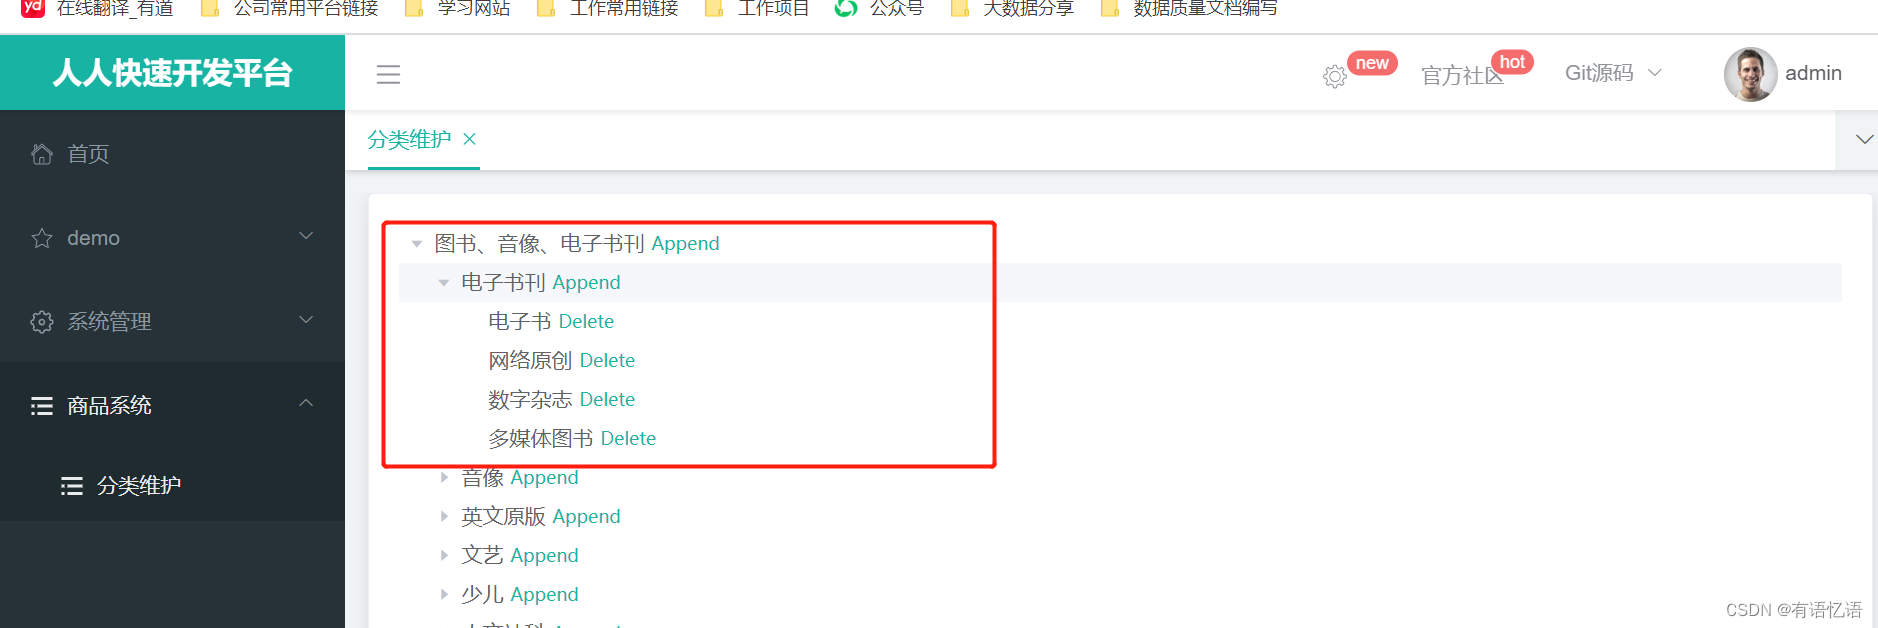
2) After deleting the expanded content: expand-on-click-node="true"
Find the custom node content of the corresponding control from element ui, introduce the add and delete function, and modify the content to expand to flase, so that the content can only be expanded by clicking the arrow: expand-on-click-node="false" // 3. Remove the click
function @node-click="handleNodeClick"
// 4. The effect we want to do is to display the Delete button only if there are no submenus and references, and only the first and second level menus can display the Append button. Use v-if to judge //
5 . When using the remove method, the node parameters will be passed in, and several levels of nodes will
be deleted in batches
// 7. Add the unique node identifier in the tree, node-key Each node has a catId
2) The backend writes the delete function interface
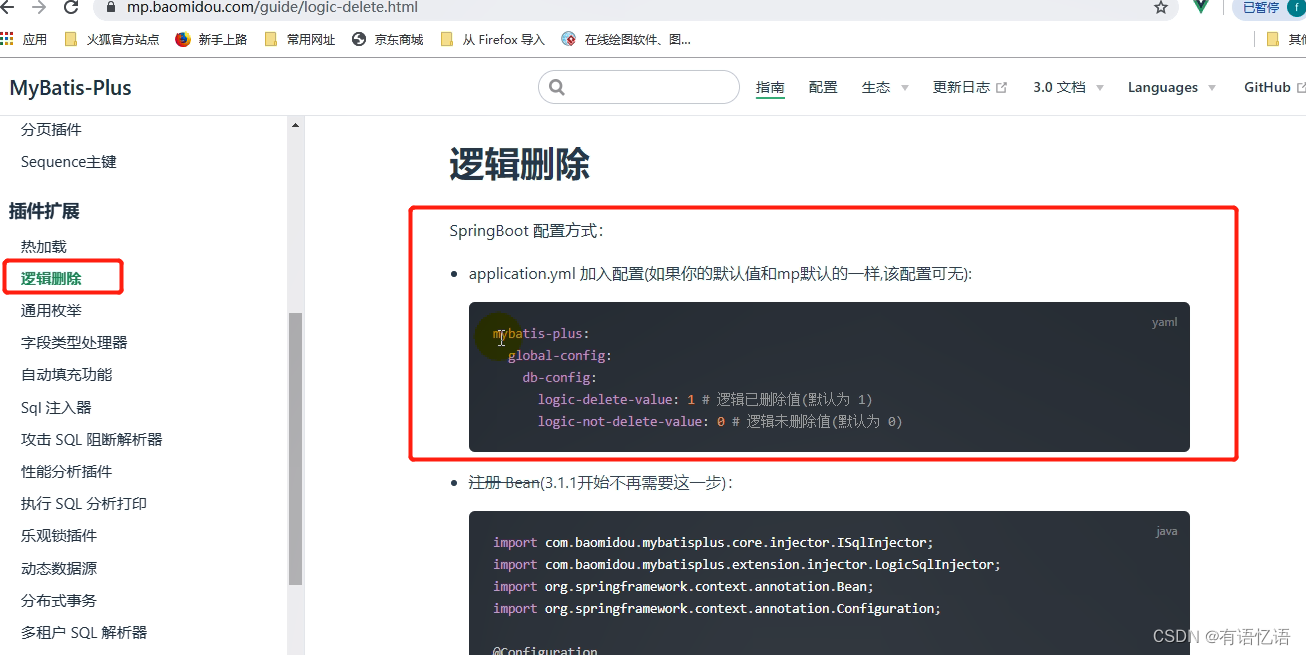
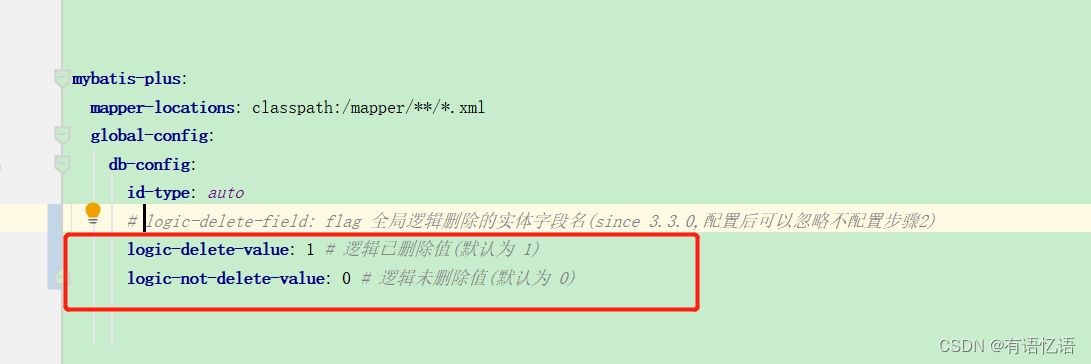
Configure mybatis tombstone, refer to MyBatis-Plus documentation
1. Tombstone
-
1), configure global logical deletion rules (omitted)
-
2), configure the logical delete component Bean (omitted)
-
3) Add the tombstone annotation @TableLogic to the bean. When the actual tombstone value is inconsistent with the global configuration, you can specify the corresponding tombstone value
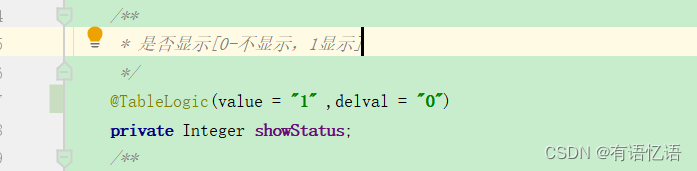
-
4) Print the sql statement and adjust the log level to debug.
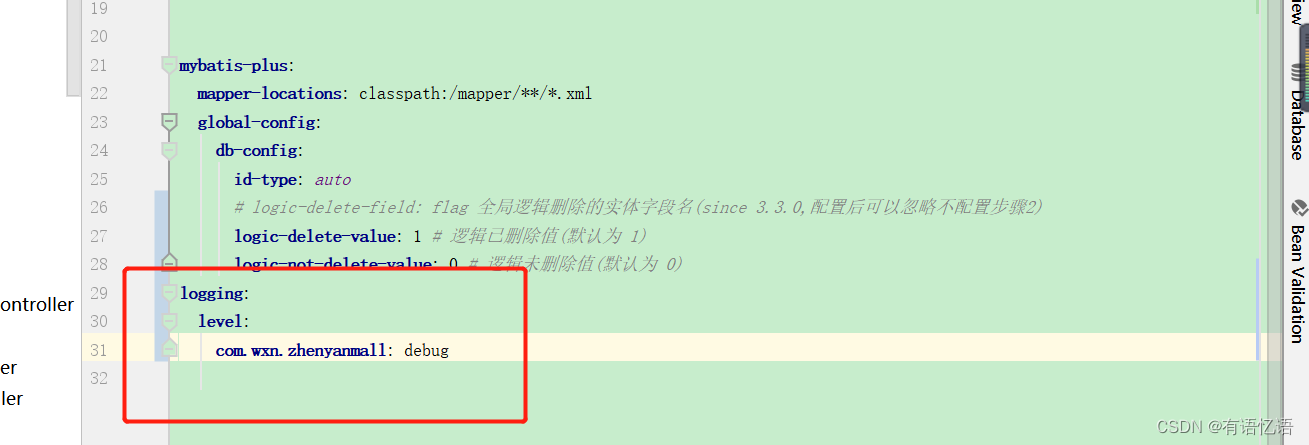
According to the log, it is found that deleting is actually modifying the marked field.

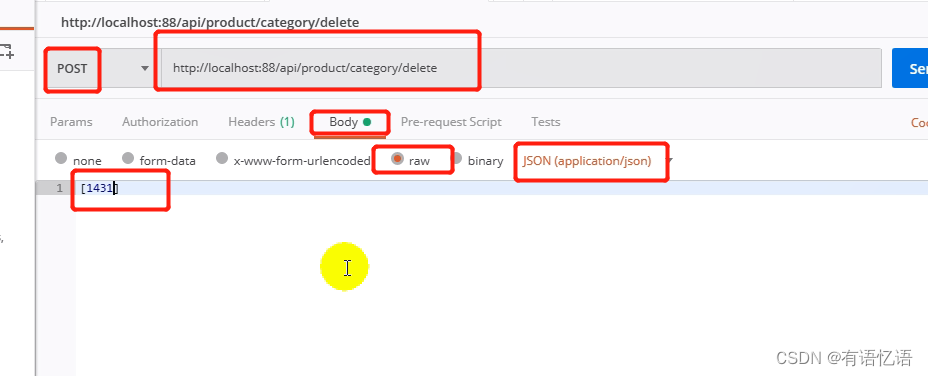
You can use postman to test.
3) Refer to role.vue's request to delete the interface

// 8. Request the background deletion interface, there must be a pop-up confirmation box for deletion, after deleting, update the menus, and the list is still in the expanded state // 9.
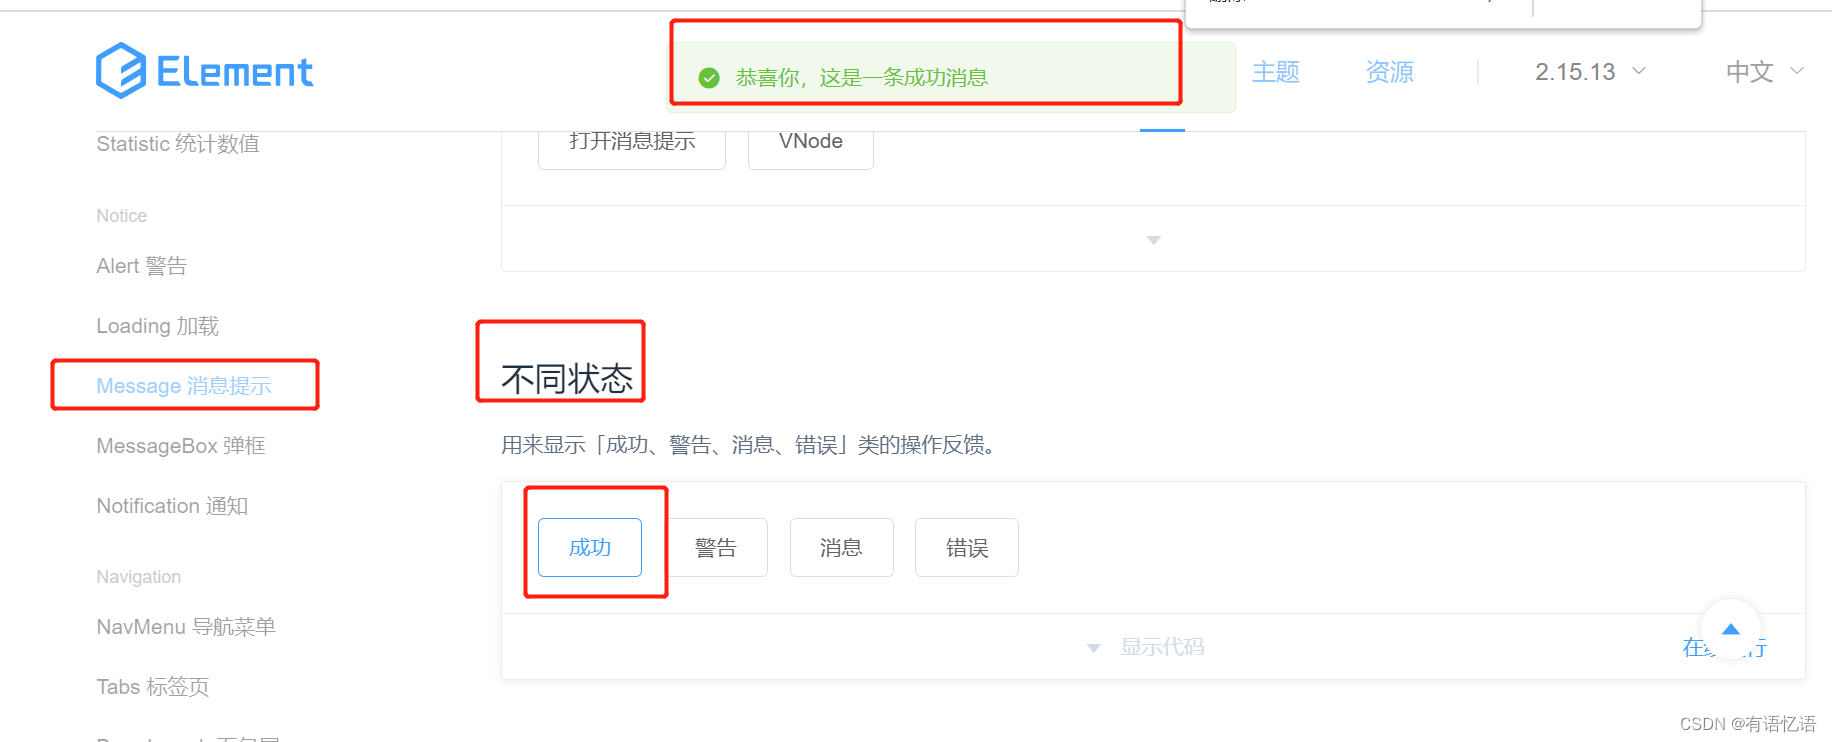
Use the Message Box pop-up box to confirm deletion
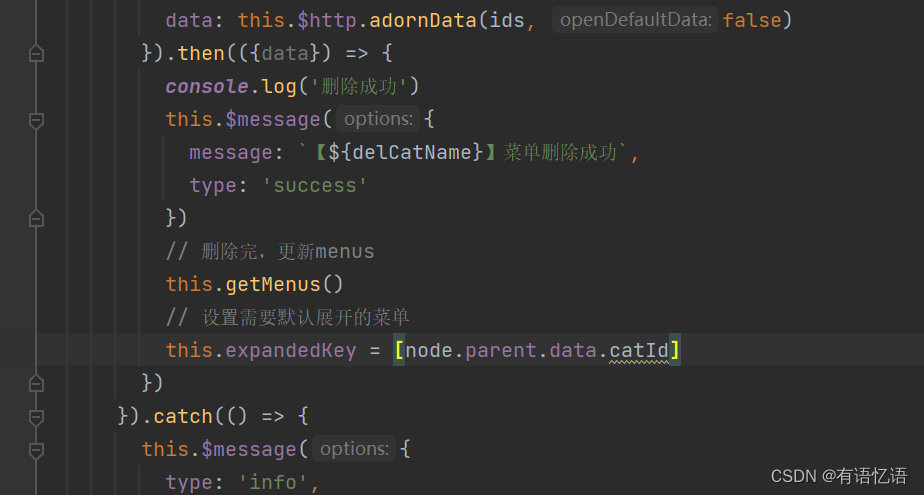
// 10. Use the Message message prompt to confirm Deleted successfully
// 11. After deletion, the list is expanded. default-expanded-keys is an array of keys of nodes expanded by default.
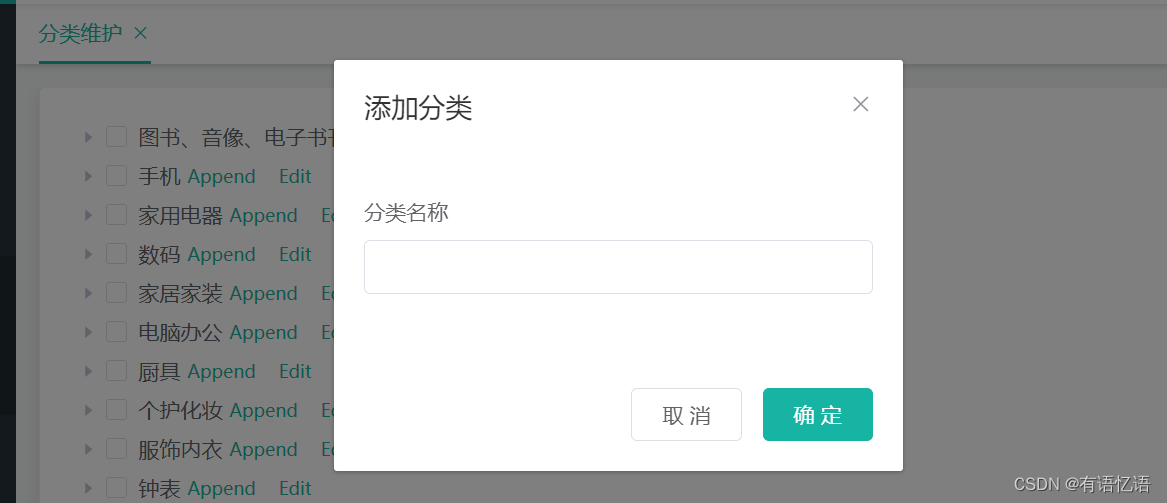
5. Add
1) Some simple configuration of the front end
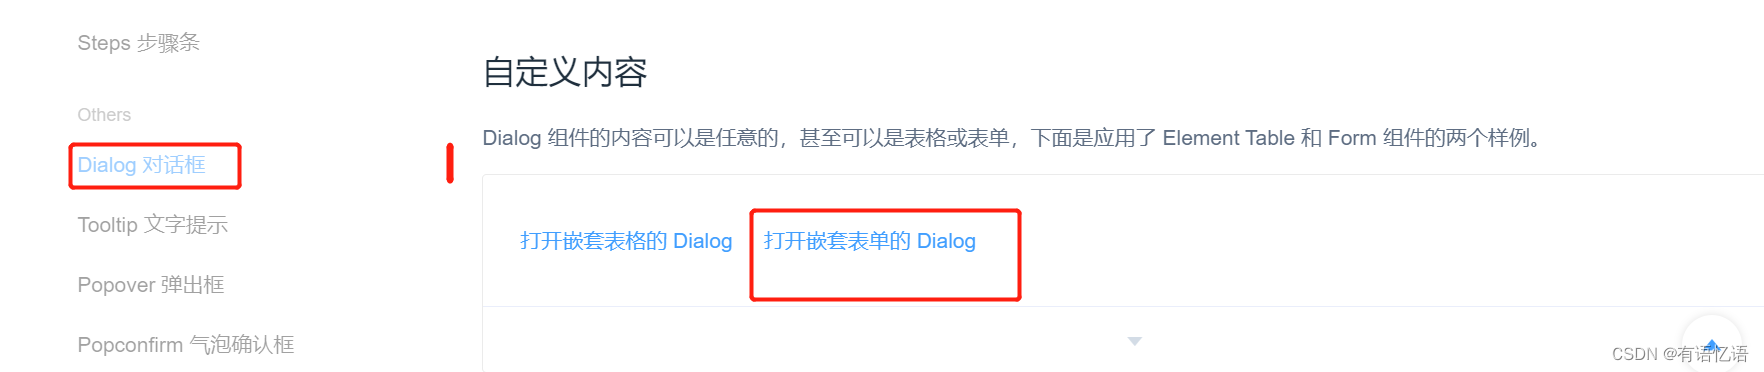
Use the dialog in element ui to open nested forms with custom content
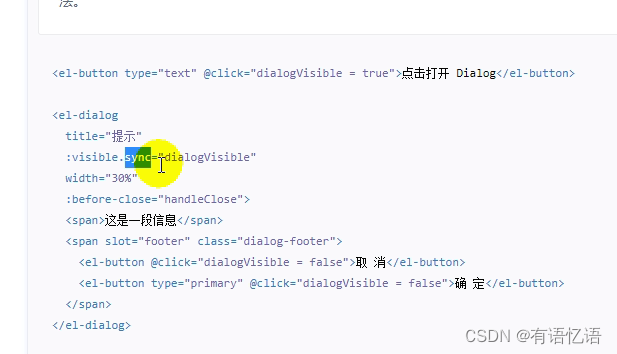
The .sync modifier is used to implement two-way binding of data in parent-child components.

If using multiple components, there must be a root element
Contains all components.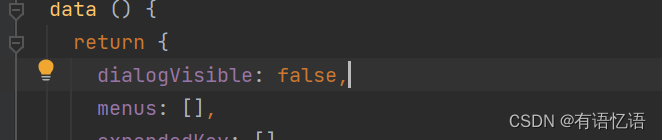
Initially, the dialog box is false, and when adding, set it to true
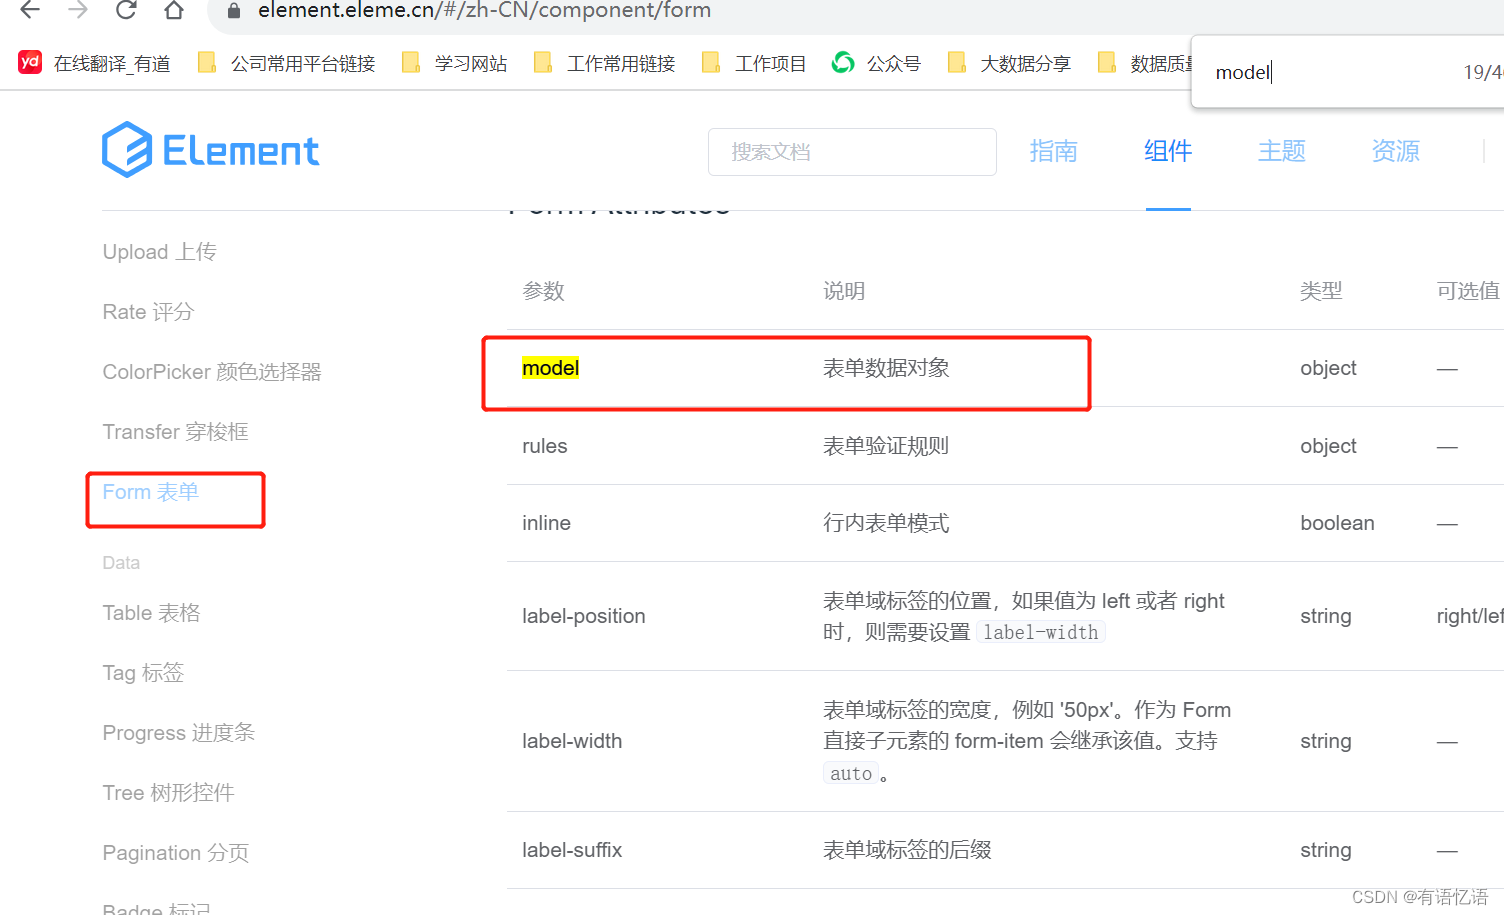
Then use the form, model to bind the data object
// 12. Add a three-level classification to introduce the el-dialog dialog box of element ui, and use custom content to open nested forms
// 13. Modify the value of the model, and the form data is bidirectionally bound
// 14. Add the addCategory method
// 15. Add the properties of the object in the category. Obtain some data attributes in the append method and put them in the category object. //
16. Request the background interface in the addCategory() method and close the dialog box this.dialogVisible = false to refresh a new one Menu this.getMenus() Set the menu that needs to be expanded by default
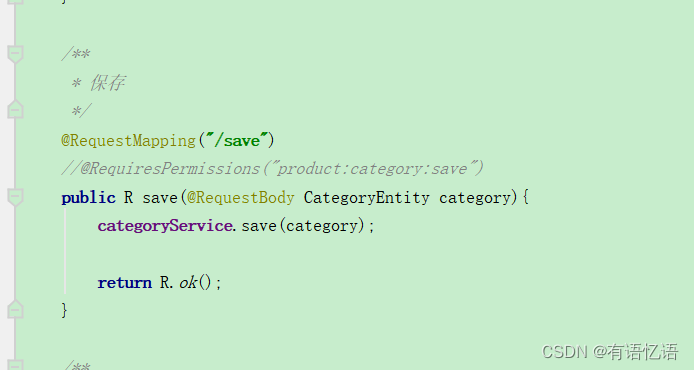
2) Write a new three-level directory interface in the backend
You can directly delete the new three-level menu interface in the reverse generation project
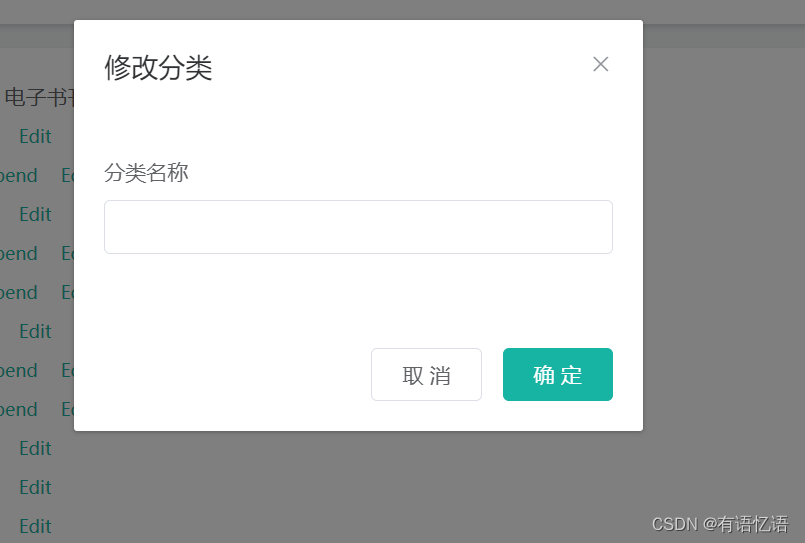
6. Modify
// 17. Add a modification button, just copy the newly added one, and remove the if, the modification button exists at any time
// 18. Set the pop-up dialog box in the edit method to set the modified name classification ID
// 19. It needs to be added or modified when clicking confirm, add the logo dialogType: '', // edit, add
// 20, the title prompt also needs to be modified, whether to add or modify
// 21. Add icon and unit of measurement
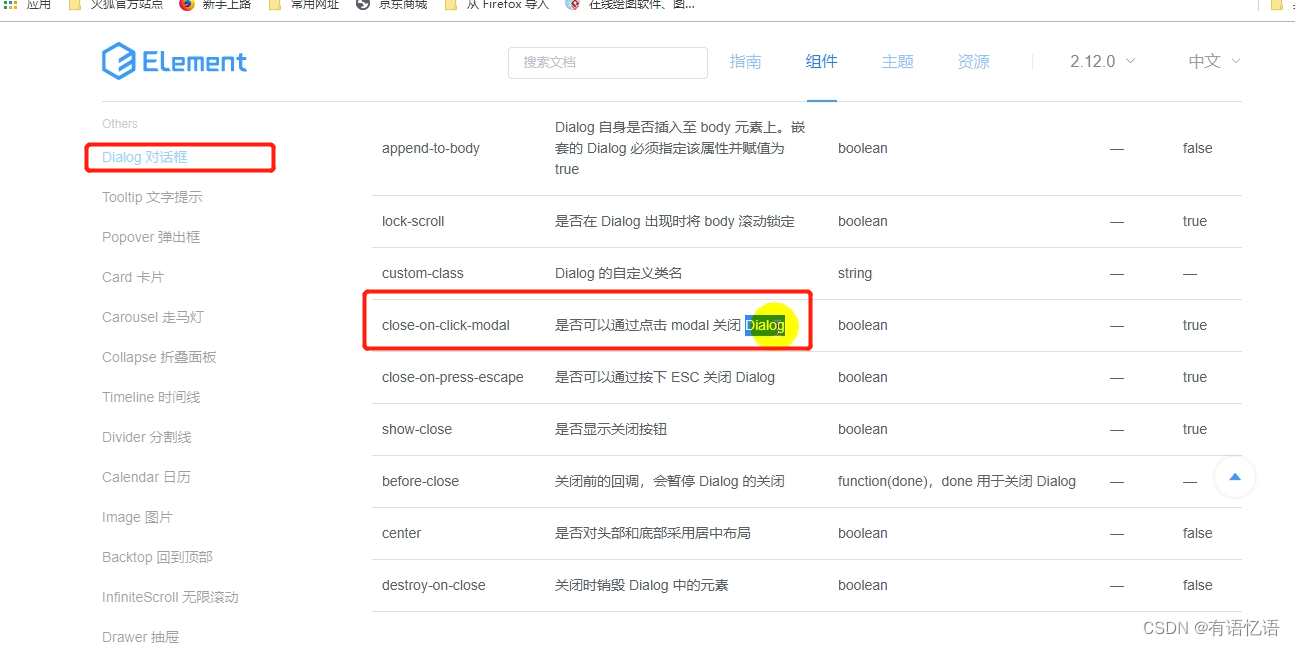
// 22. If the echo content is modified, if multiple people modify it, a request should be sent to obtain the latest data of the node
// 23. When the setting is modified, the dialog box can be closed by clicking close-on-click-modal
/ / 24. When you click Add, clear the echoed value
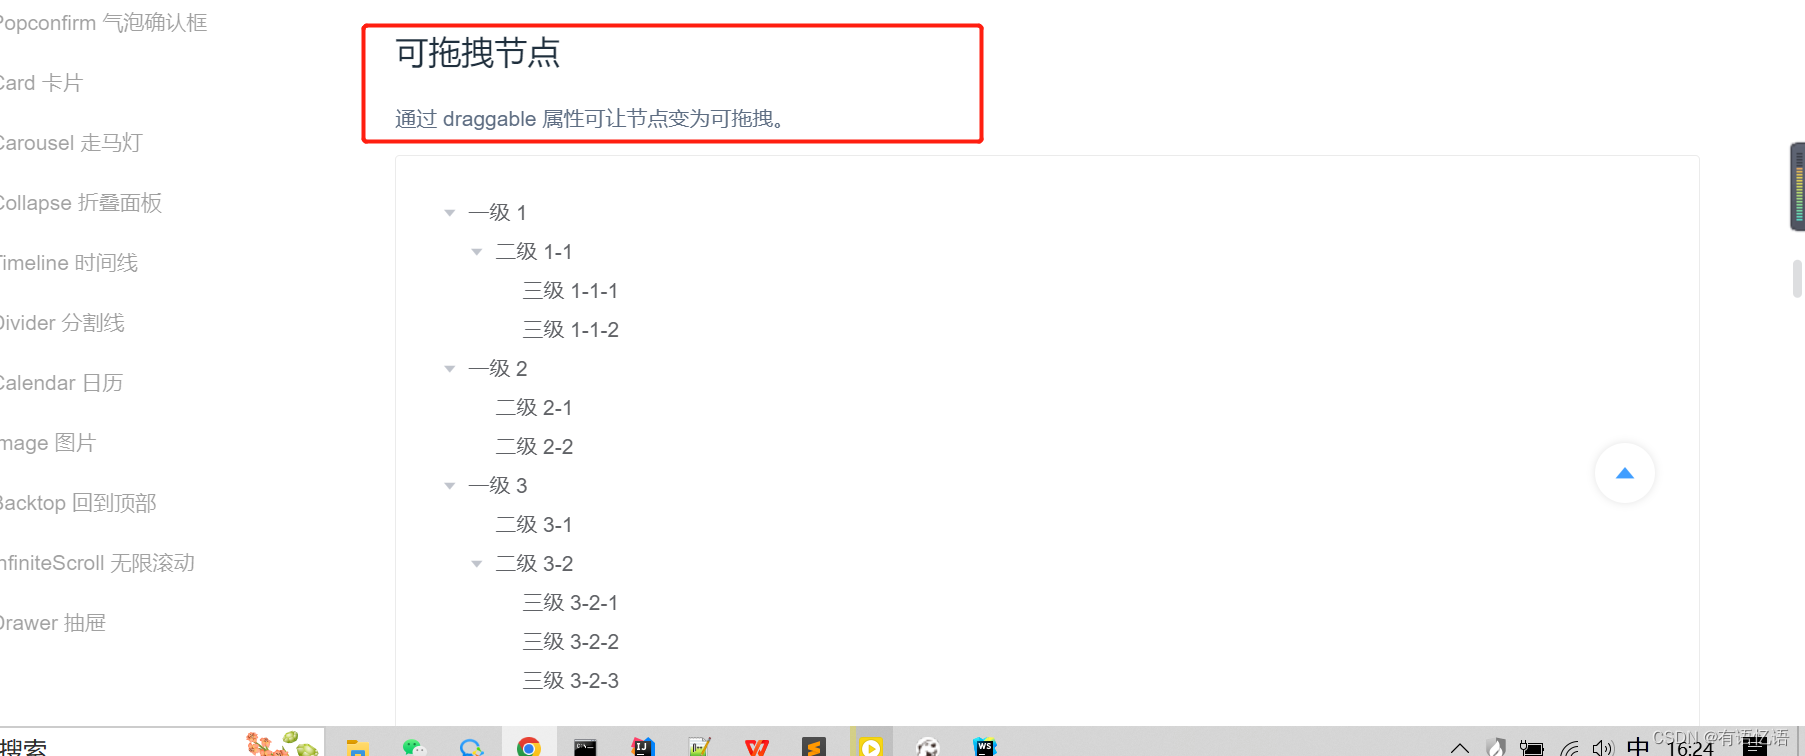
7. Modify - drag and drop effect
View the element ui document, according to the drag function of the tree tree control.
// 25. Drag and drop effect, currently there are only three levels of directories, you need to judge whether you can place the draggable node function allow-drop When dragging, determine whether the target node can be placed. There are three types of parameters: 'prev', 'inner' and 'next', which respectively indicate placing before the target node, inserting into the target node, and placing after the target node Function(draggingNode, dropNode, type) // 26, being
dragged The total layers of the active current node and its parent node cannot be greater than 3
8. Modify - get drag and drop data set
// 27. Drag and drop data collection, save the position of the modified node to the background to monitor the drag success event Events node-drop The event triggered when the drag is successfully completed has four parameters, in order: the Node corresponding to the dragged node , the last node entered when the drag is over, the placement position of the dragged node (before, after, inner), event
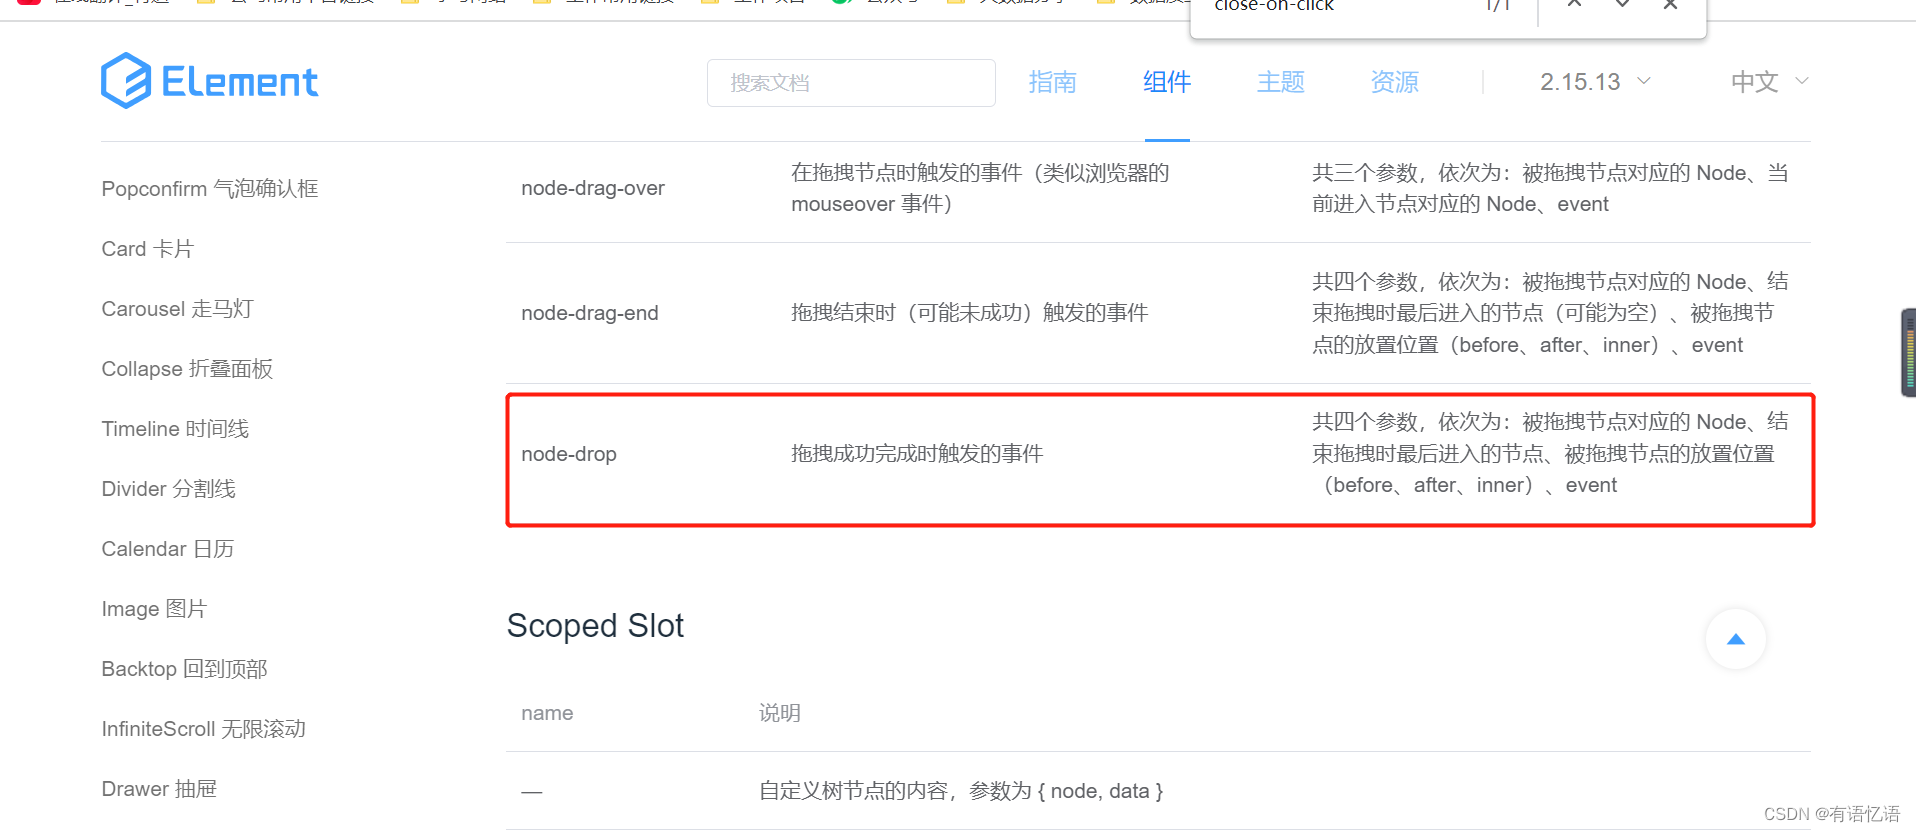
The batch modification function is written in the background.
9. Batch drag and drop effect
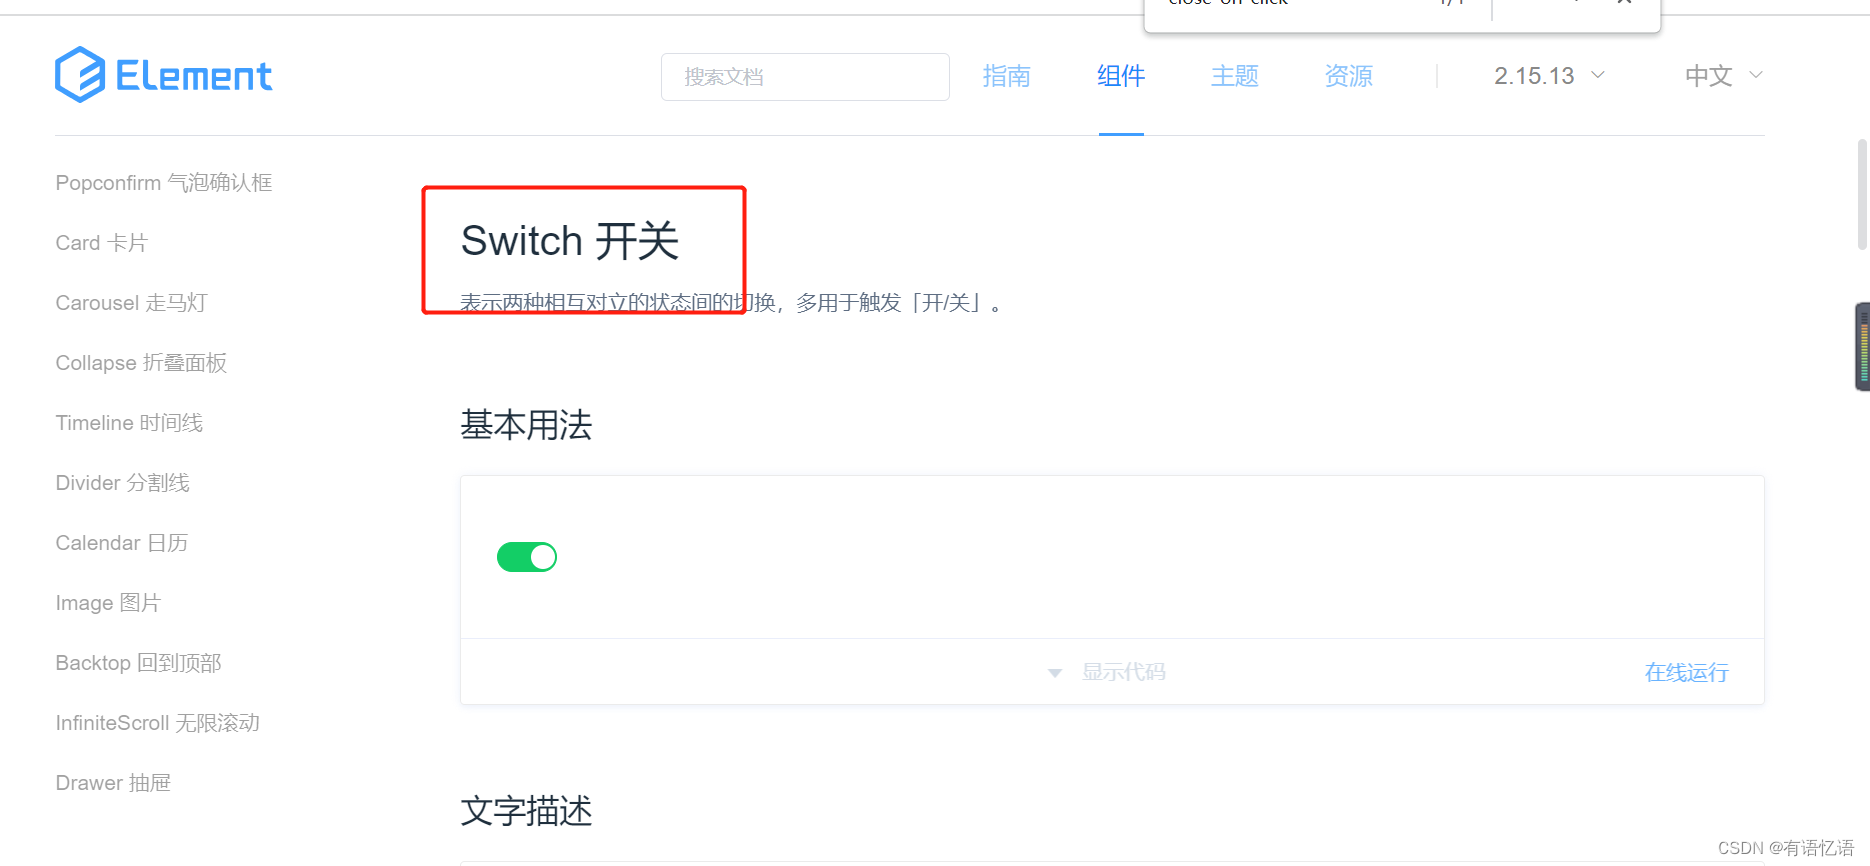
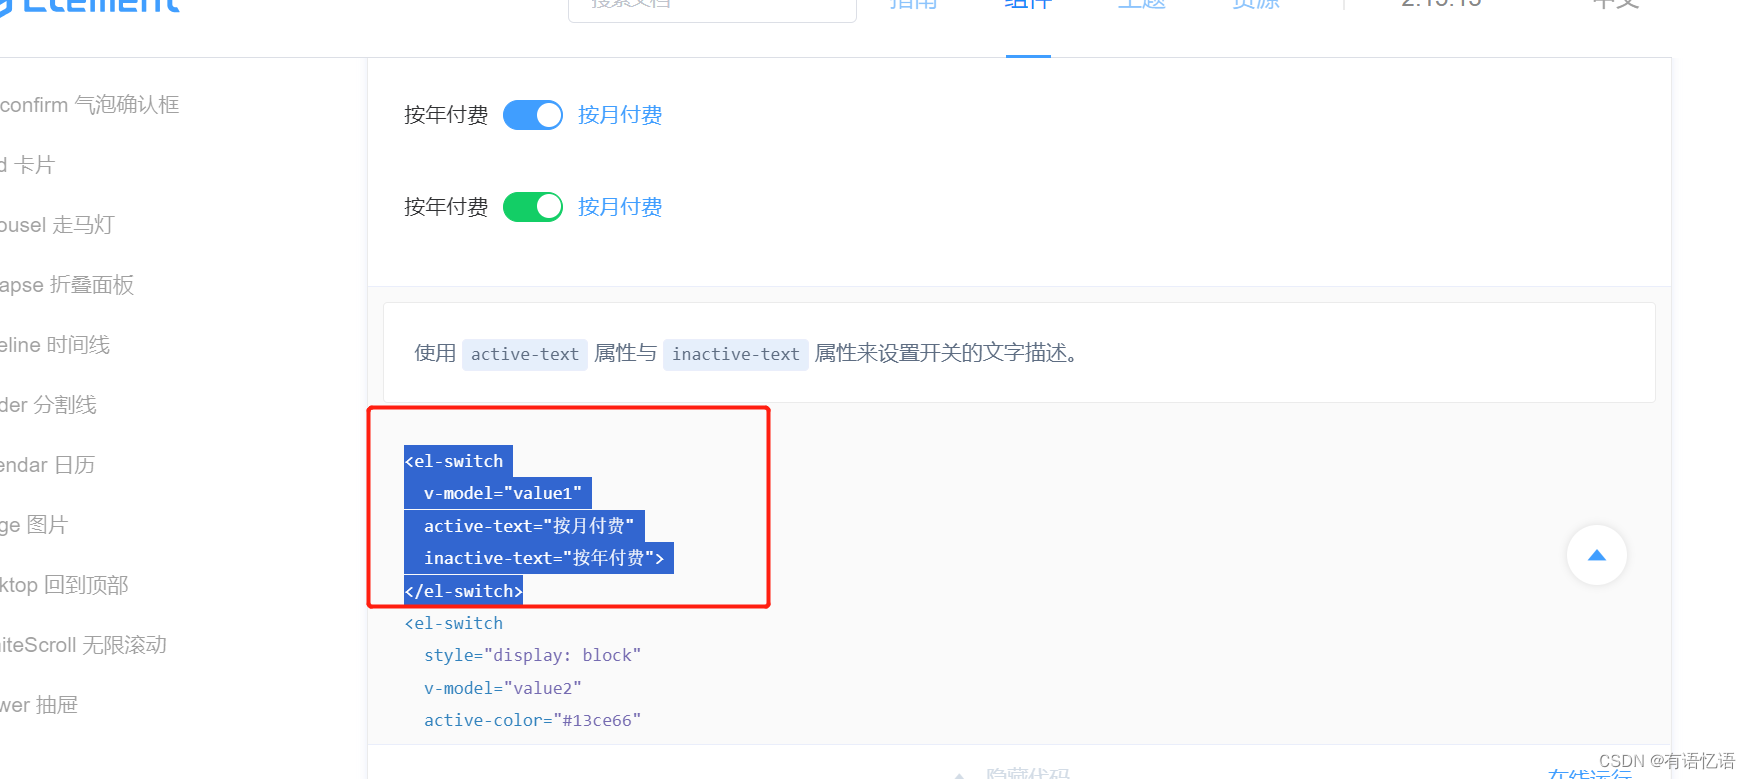
// 28. Add a batch drag button to use the component switch
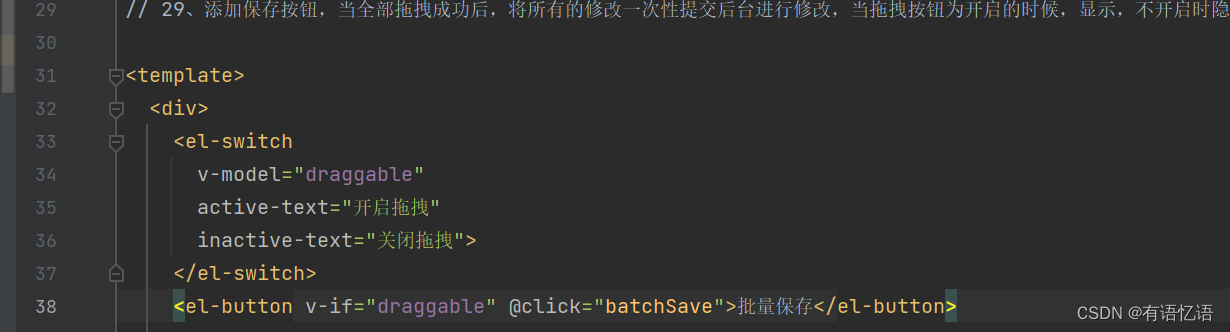
// 29. Add a save button. When all the dragging is successful, submit all the modifications to the background for modification at one time. When the dragging button is enabled, it will be displayed. When it is not enabled, it will be hidden and the level will be obtained from the node itself, because dragging pull is always changing
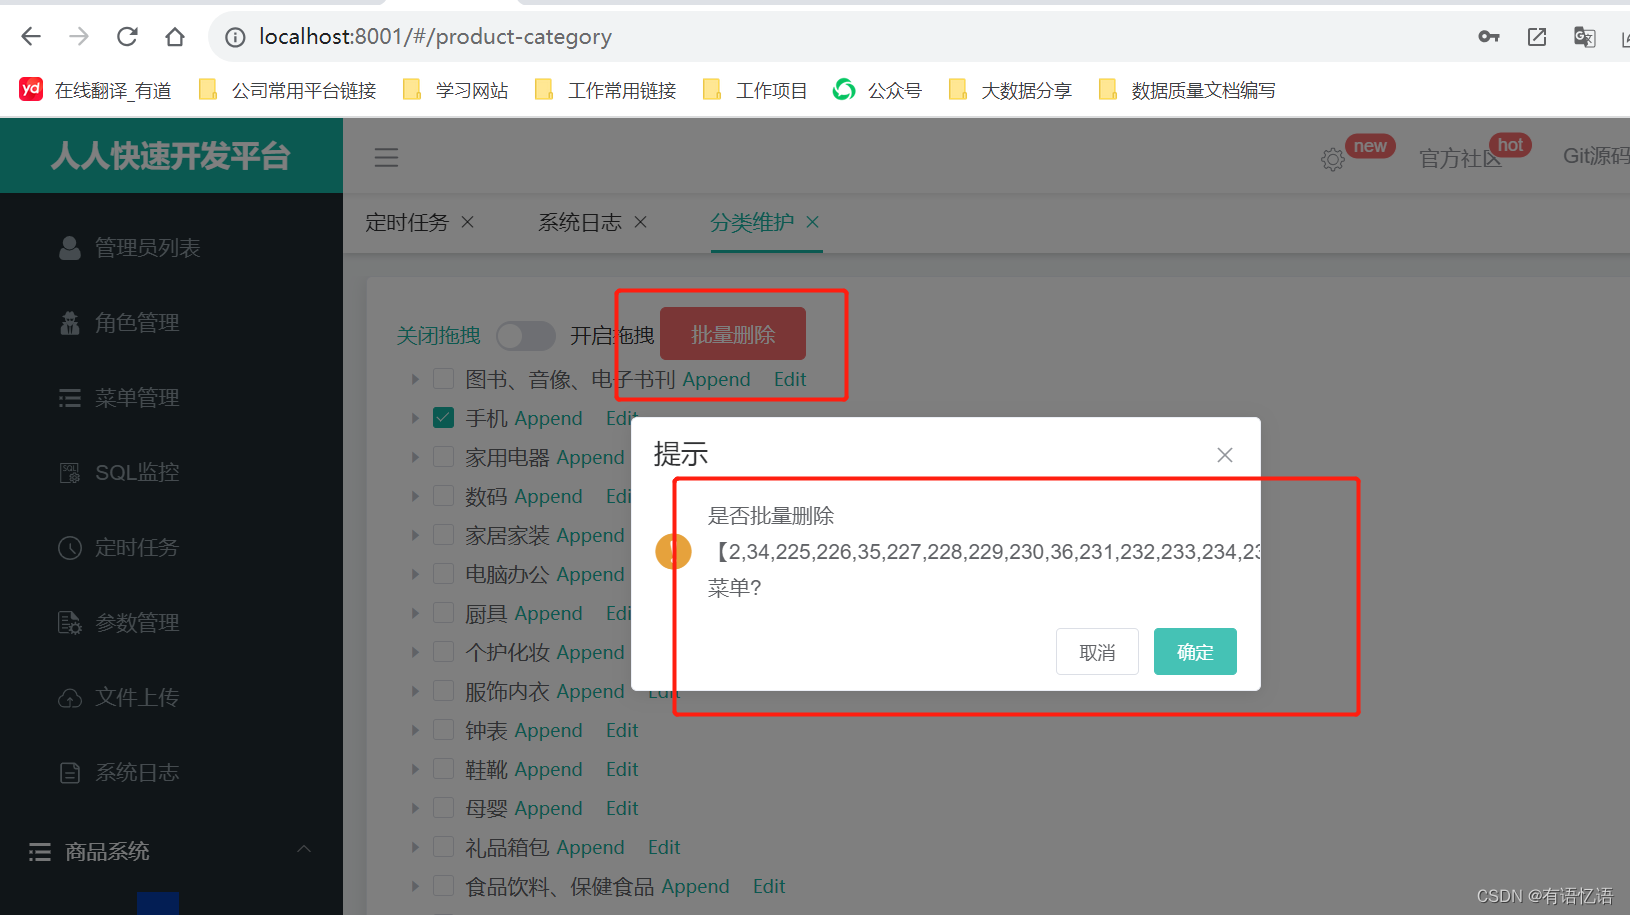
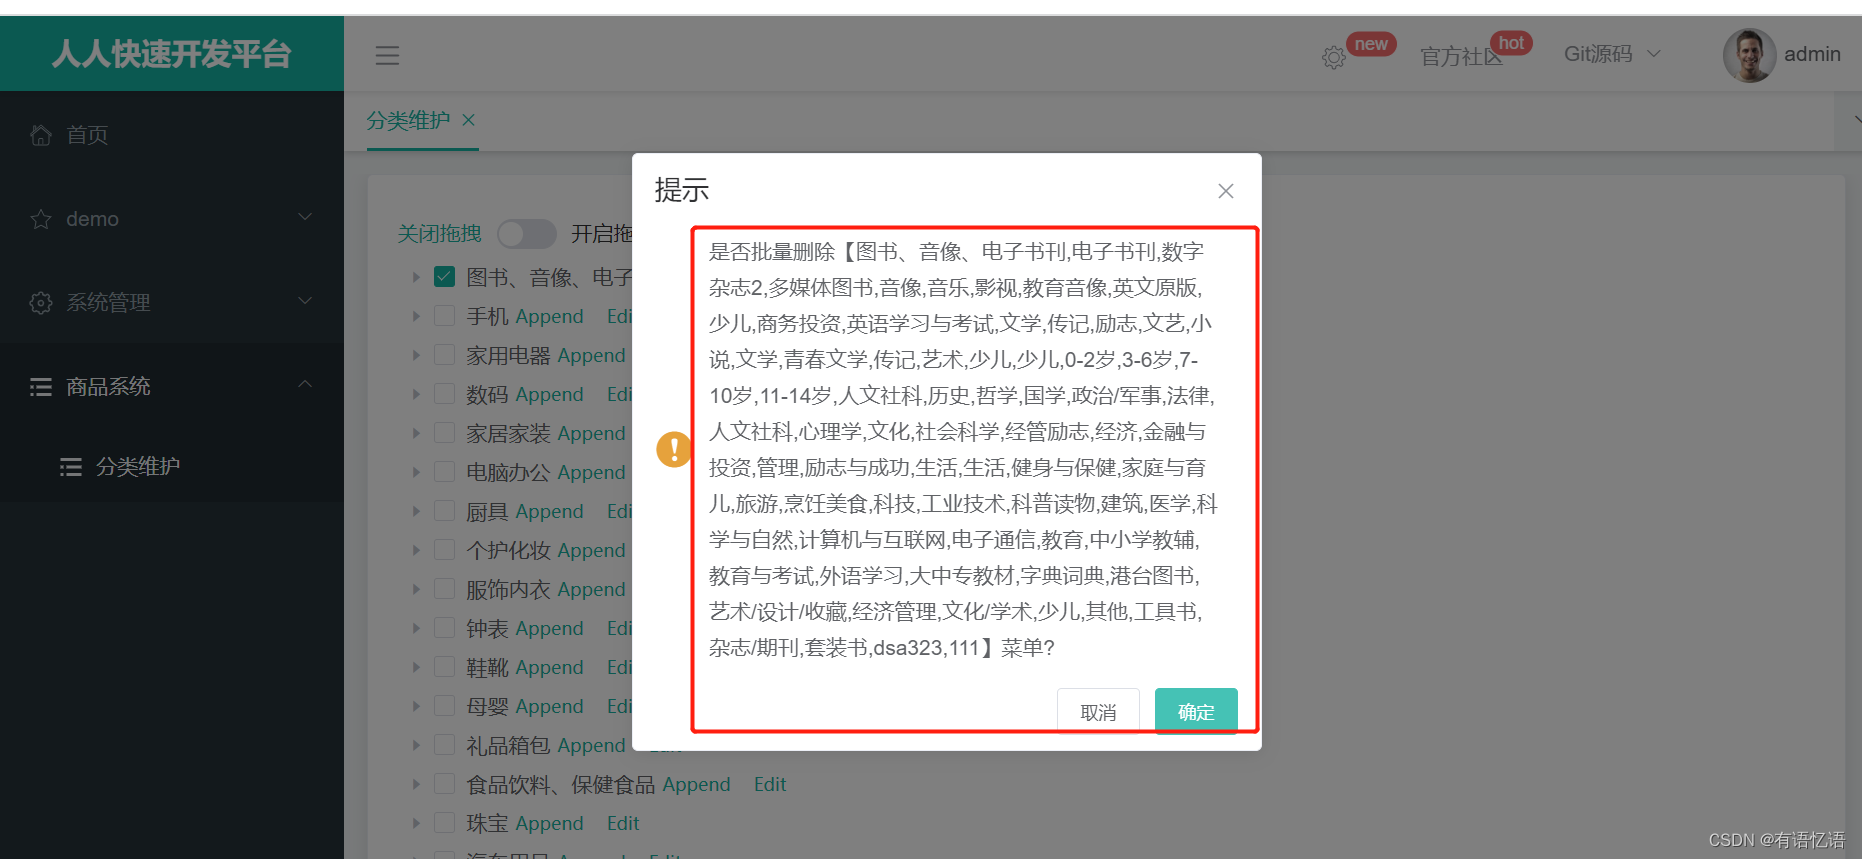
10. Batch delete
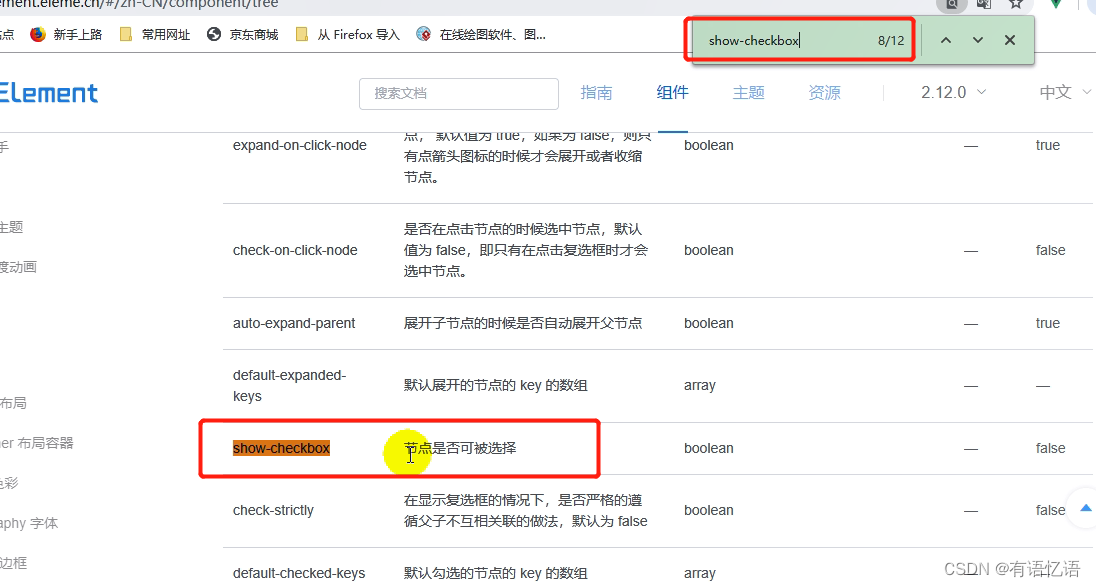
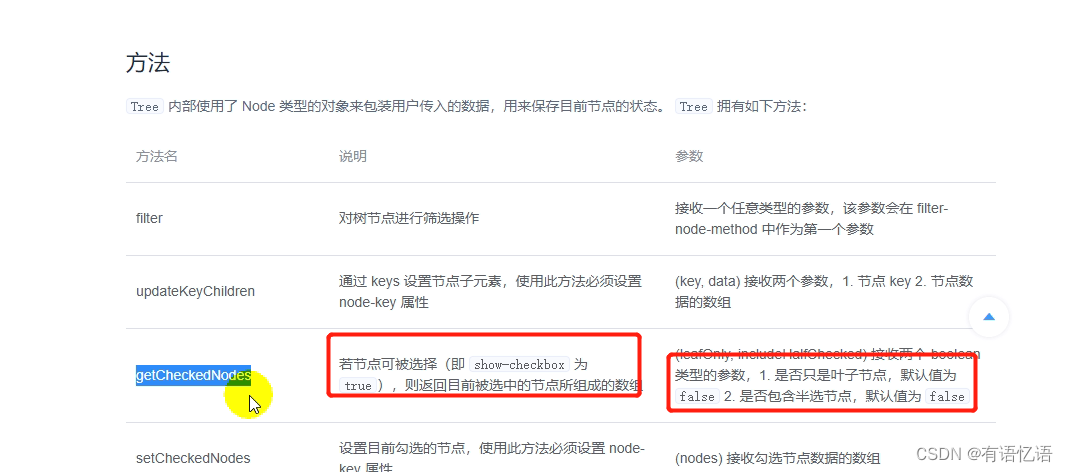
// 30. Use the button to delete in batches and get the selected nodes. Look at the method of the tree component.
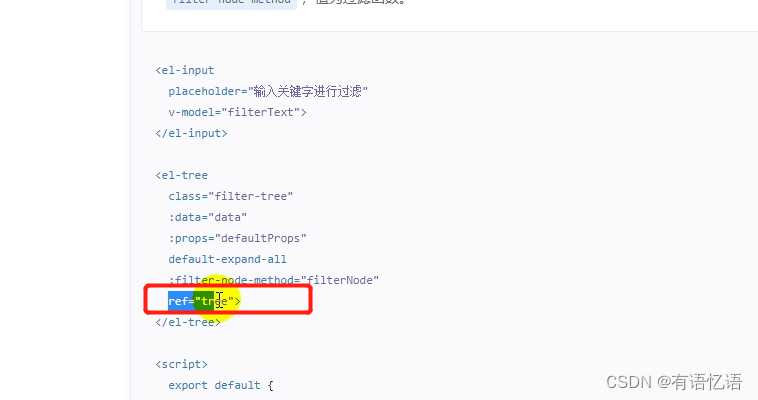
// 31. To adjust a method provided by a component, first write a ref to give the component a unique identifier, and adjust the el-tree package When using the method, this.ref.tree.filter ( val ) this is a vue instance, ref.tree.filter(val) this is a vue instance,re f . t ree . f i lt er ( v a l ) t hi s is a vue instance, ref all components of the current vue instance, tree is the identification name of the corresponding component, and filter corresponds to the method of the component
// 32, this. $confirm pops up a confirmation prompt box, and converts the menu ID to a name
11. Summary
// 1. Find the tree tree control from element ui, import it, refer to role.vue to request the background remote interface, and obtain data data
// 2. Find the custom node content of the corresponding control from element ui, introduce the add and delete function, and modify The content is expanded to flase, so that only the arrow can be clicked to expand the content: expand-on-click-node="false"
// 3. Remove the click function @node-click="handleNodeClick"
// 4. The effect we want to do is , the Delete button will be displayed only if there are no submenus and references, and the Append button will be displayed only if there are no submenus and second level menus. Use v-if to judge
// 5. When using the remove method, the node parameters will be passed in, which level of nodes
// 6. To delete in batches, just add show-checkbox
// 7. Add the unique node identifier in the tree, node-key Each node has a catId
// 8. Request the background deletion interface, there must be a pop-up confirmation box for deletion, after deletion , update the menus, and the list is still in the expanded state
// 9. Use the Message Box to confirm the deletion
// 10. Use the Message message prompt to confirm that the deletion is successful
// 11. After the deletion, the list is in the expanded state default-expanded-keys default The array of the keys of the expanded nodes
// 12. Add a three-level category to introduce the el-dialog dialog box of element ui, and use custom content to open the nested form
// 13. Modify the value of the model, and the form data is bound bidirectionally
// 14. Add addCategory method
// 15. Add the attributes of the object in the category. In the append method, get some data attributes of the upper menu of the menu to be added and put them in the category object. // 16. In the
addCategory() method, request the background interface and close the dialog this. dialogVisible = false Refresh a new menu this.getMenus() Set the menu that needs to be expanded by default
// 17. Add a modification button, just copy the newly added one, and remove the if, the modification button exists at any time
// 18 . In the edit method, set the pop-up dialog box to set the modified name category ID
// 19. When clicking confirm, whether to request addition or modification, add the logo dialogType: '', // edit,add
// 20. title The prompt also needs to be modified, whether to add or modify
// 21. Add icons and units of measurement
// 22. To modify the echo content, if multiple people modify, you should send a request to obtain the latest data of the node
// 23. When setting the modification, the dialog box Click to close close-on-click-modal
// 24. When you click Add, clear the echoed value
// 25. Drag and drop effect, currently there are only three levels of directories, you need to judge whether you can place the draggable node in the drag node The function allow-drop determines whether the target node can be dropped when dragging. There are three types of parameters: 'prev', 'inner' and 'next', which respectively indicate placing before the target node, inserting into the target node, and placing after the target node Function(draggingNode, dropNode, type) // 26, being
dragged The total layers of the active current node and its parent node cannot be greater than 3
// 27. Drag and drop data collection, save the position of the modified node to the background to monitor the drag success event Events node-drop The event triggered when the drag is successfully completed has four parameters, in order: the Node corresponding to the dragged node , The last node entered when the drag is over, the position of the dragged node (before, after, inner), event
// 28, add a batch drag button to use the component switch
// 29, add a save button, when all are dragged After success, submit all the modifications to the background at one time for modification. When the drag button is enabled, it will be displayed, and when it is not enabled, it will be hidden and the level will be obtained from the node itself, because the drag and drop is always changing// 30. Use the button to
batch Delete the selected node and look at the method of the tree component
// 31. To call a method provided by a component, first write a ref to give the component a unique identifier. When calling a method encapsulated by el-tree, use this. ref. tree. filter ( val ) this is a vue instance, ref.tree.filter(val) this is a vue instance,re f . t ree . f i lt er ( v a l ) t hi s is a vue instance, ref all components of the current vue instance, tree is the identification name of the corresponding component, and filter corresponds to the method of the component
// 32, this. $confirm pops up a confirmation prompt box, and converts the menu ID to a name