introduction:
The static IP configuration of the Raspberry Pi is similar to that of ubuntu. After all, they are all Linux. As long as you know one, you can read the others.
Table of contents
Configure static IP for Raspberry Pi
1. Determine the network interface of the Raspberry Pi
2. Edit the network configuration file:
4. Save and restart the Raspberry Pi:
5. Verify the static IP address settings:
Configure the Chinese environment
1. Install the Chinese language pack:
2. Configure the language environment:
4. Test the Chinese environment:
Configure static IP for Raspberry Pi
1. Determine the network interface of the Raspberry Pi
-
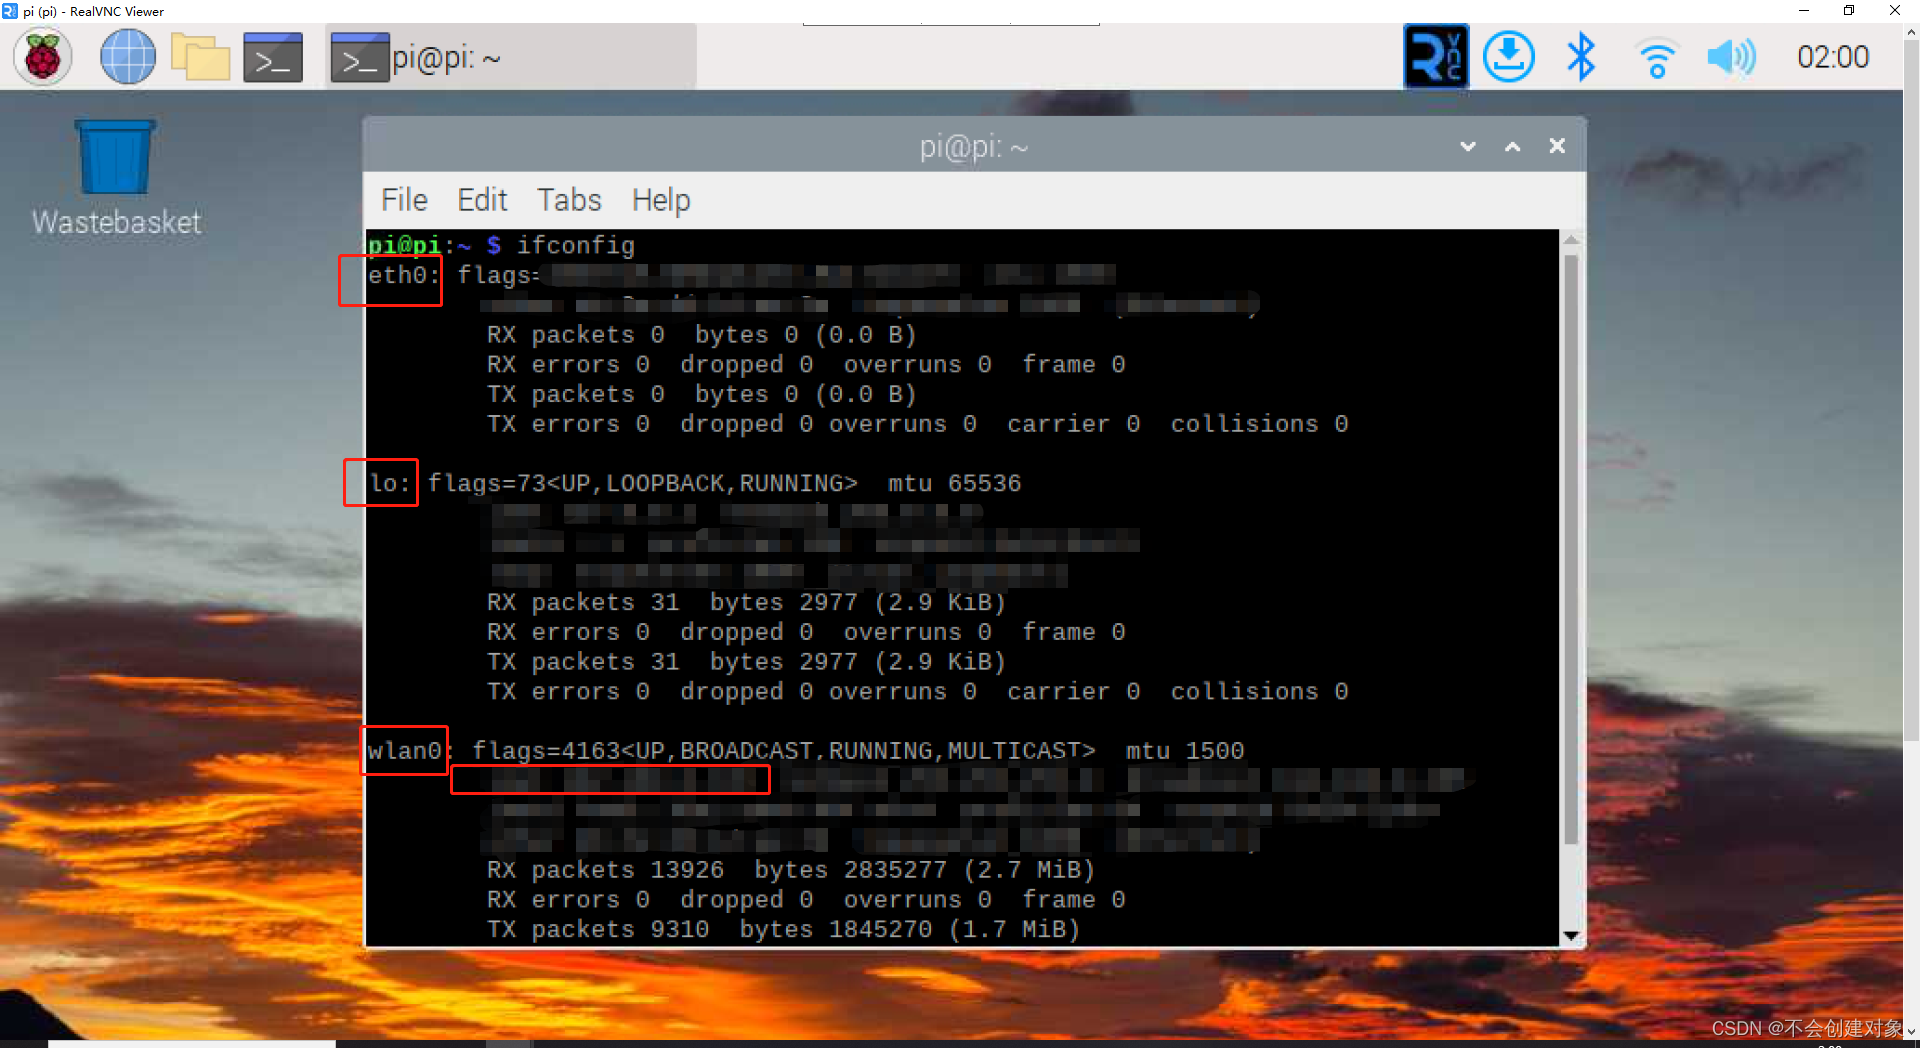
Before you start setting up a static IP address, you need to determine which network interface the Raspberry Pi is using. Most of the time this is over an ethernet connection, usually called eth0. If you are using a wireless network interface, it will probably be wlan0.
To determine the network interface, you can execute the following command on the Raspberry Pi, which will display the information of the network interface, including the name and IP address.
ifconfig
As shown in the picture:
2. Edit the network configuration file:
Next, the network configuration file on the Raspberry Pi needs to be edited to specify the desired static IP address. The file can be opened with any text editor such as nano or vim
Run the following command in a terminal to edit the network configuration file:
sudo nano /etc/dhcpcd.conf
Comes in like this:
Note the following:
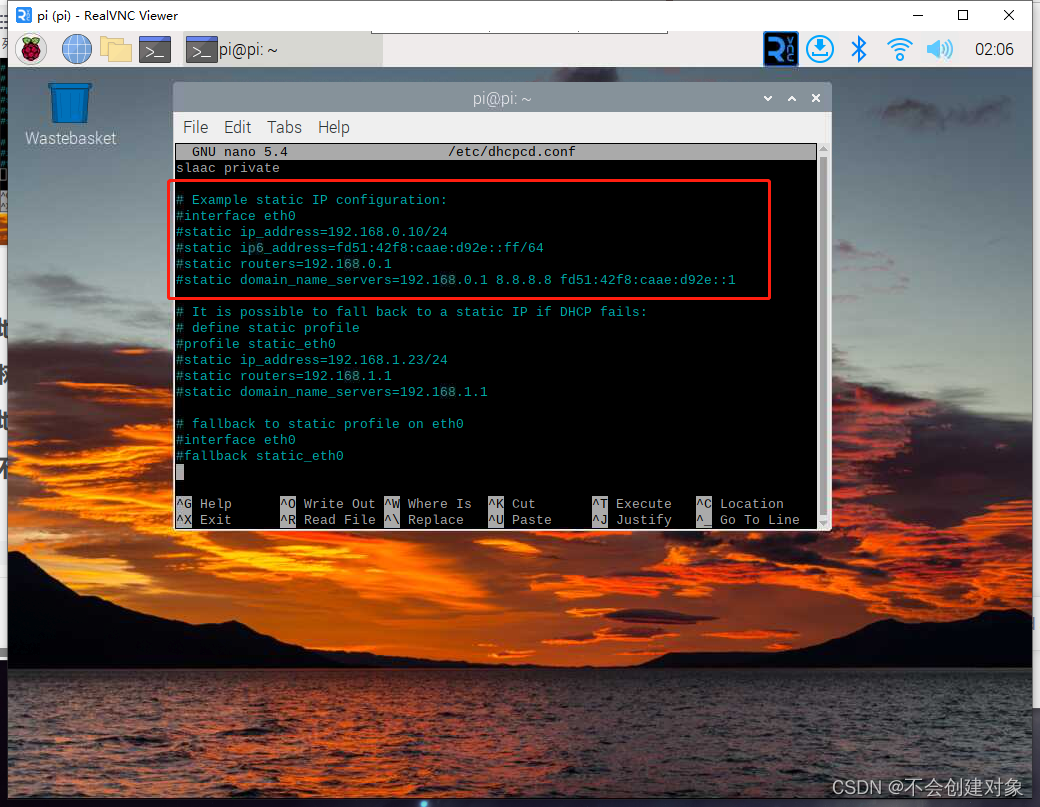 Remove the comment symbol (#) before these lines, and modify accordingly according to your desired network configuration. For example, if you want the Raspberry Pi to have a static IP address of 192.168.1.10, you need to change the corresponding line in the above example to:
interface eth0
static ip_address=192.168.1.10/24
static routers=192.168.1.1
static domain_name_servers=192.168.1.1
Make sure the IP address and router address match on the network configuration.
3. Set a static IP address:
Once you have finished editing the network configuration file, you need to set the desired static IP address. In the previous step, we specified the IP address in the network configuration file, now we need to set this address for the Raspberry Pi.
To set a static IP address, you can run the following command in Terminal:
sudo ifconfig eth0 192.168.1.10 netmask 255.255.255.0
Replace the IP address and subnet mask in the above command with the values configured in the second step.
4. Save and restart the Raspberry Pi:
After making the above configuration changes, the file needs to be saved and the Raspberry Pi restarted for the changes to take effect.
Save the file and exit the editor by pressing Ctrl+X, then typing "Y".
Restart Raspberry Pi command:
sudo reboot
5. Verify the static IP address settings:
After the restart is complete, enter "ifconfig" to verify whether the configuration is successful.
Configure the Chinese environment
1. Install the Chinese language pack:
Run the following command in the terminal to install the Chinese language pack:
sudo apt-get install language-pack-zh-hans
This will install the Simplified Chinese language pack to your Raspberry Pi system.
2. Configure the language environment:
Run the following command in a terminal to edit your system's locale settings:
sudo raspi-config
In the GUI, select "Localisation Options" and then select "Change Locale".
In the language environment setting interface, use the cursor keys to select "zh_CN.UTF-8 UTF-8", and then press the space bar to select. Press the Tab key to move the focus to the "OK" button, then press the Enter key to confirm the selection.
In the next screen, you can choose the default locale. Select "zh_CN.UTF-8" as the default locale.
Then, use the cursor keys to move the focus to the "Finish" button and press Enter to exit the locale setting.
3. Restart the Raspberry Pi:
For the changes to take effect, restart the Raspberry Pi:
sudo reboot
4. Test the Chinese environment:
After restarting, the system should have switched to the Chinese environment. You can test in the terminal or graphical interface to ensure that Chinese characters can be displayed correctly.