Author: CSDN @ _Yakult_
This article records the techniques and code scripts for marking samples on the Google Earth Engine (GEE) platform. Sample points can be used for land use classification, vegetation extraction, algae extraction, glacier extraction, crop extraction and other applications. The methods that can be applied include random forest (RF) classification , support vector machine (SVM) classification , decision tree classification and other machine learning classification methods.
Article directory
1. Display of sample point selection results

2. Code script
The code adds color synthetic images for reference. Of course, Landsat, Sentinel, MODIS or various reference data can be selected for auxiliary marking.
Code link: https://code.earthengine.google.com/275689210a495ca40bcfbca5dac9fc99?noload=true
var roi = table
Map.centerObject(roi, 6);
//设置显示样式:color代表边界颜色;fillcolor代表填充颜色
var styling={

    color:'red',fillColor:'00000000'}
//roi就是矢量边界
Map.addLayer(roi.style(styling),{

    },"roi")

var startDate = ee.Date('2019-01-01');
var endDate = ee.Date('2019-12-31');

// Visualize the Landsat image
var landsatCollection = ee.ImageCollection("LANDSAT/LC08/C01/T1")
                          .filterDate(startDate, endDate)
                          .filterBounds(roi)
                          .filterMetadata('CLOUD_COVER_LAND', 'less_than', 30);
print('landsatCollection',landsatCollection)

// Make a cloud-free composite.
var composite = ee.Algorithms.Landsat.simpleComposite({


  collection: landsatCollection,
  asFloat: true
});
print('composite', composite)
// Visualize the Composite
Map.addLayer(composite, {

    bands: ['B6', 'B5', 'B4'], max: 0.5, gamma: 2}, 'L8 Image', true);

// Visualize the Sentinel-2 image
var s2img = ee.ImageCollection('COPERNICUS/S2_SR')
              .filterDate(startDate, endDate)
              .filterBounds(roi)
              .map(maskS2clouds)
              .mean();

// Remove cloud
function maskS2clouds(image) {


  var qa = image.select('QA60');
  // Bits 10 and 11 are clouds and cirrus, respectively.
  var cloudBitMask = 1 << 10;
  var cirrusBitMask = 1 << 11;
  // Both flags should be set to zero, indicating clear conditions.
  var mask = qa.bitwiseAnd(cloudBitMask).eq(0)
               .and(qa.bitwiseAnd(cirrusBitMask).eq(0));
  return image.updateMask(mask).divide(10000);
}

var visualization = {


    min: 0.0,
    max: 0.4,
    bands: ['B11', 'B8', 'B4'],//分别对应SWIR1,NIR,RED波段
};
Map.addLayer(s2img, visualization, '假彩色');

// Merge points together
var sampleCollection  = constructionland.merge(forest).merge(cultivatedland).merge(water).merge(unusedland).merge(grassland);
print(sampleCollection , 'Sample Collection')
3. Sample creation tutorial
1. Create FeatureCollection
The first step is to click the red box new layer button in the map view area to add a FeatureCollection.

The second step is to click the gear part in the red frame to enter the attribute modification interface.

2. New attribute Property
In the attribute modification interface, you can modify the name of the sample element, select FeaturCollection as the format, and select the display color in the color bar, Property (attribute), write the band name as landcocer, and set the value to 1 (the landcover value of different types of samples should not be the same ).

3. Select the sample point
Select the red box forest, and then use the tool pointed by the red arrow to select a point on the map.

4. Merge samples
// Merge points together
var sampleCollection =constructionland.merge(forest).merge(cultivatedland).merge(water).merge(unusedland).merge(grassland);
print(sampleCollection , 'Sample Collection ')
5. Download samples
5.1 Download to local
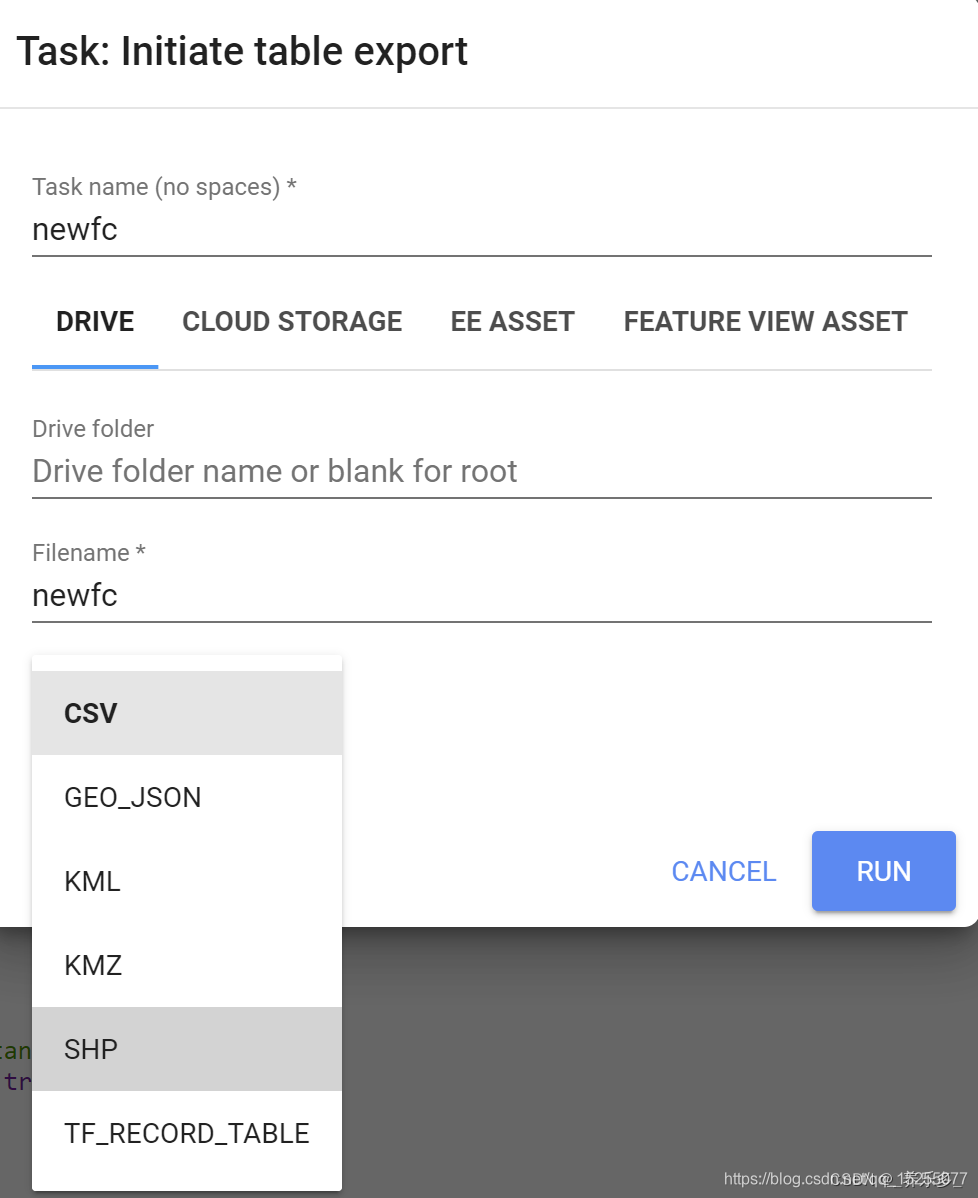
Sample data can be used for schematic diagrams and for local analysis. The specific steps to download the sample to Google Cloud Disk are shown in the figure below.
Export.table.toDrive({


  collection: sampleCollection,
  description: 'Sample Feature Collection',
  folder: 'Sample Folder'
});
Click RUN download in Task, and select the download format in the pop-up interface. The available formats are: shp, csv, JSON, KML, KMZ, TF_RECORD_TABLE.

5.2 Import into Assets
Export.table.toAsset({


collection:sampleCollection,
//description,
assetId:'sampleCollectionID',
//maxVertices
});