foreword
Elasticsearch launched the Cross Cluster Replication feature (hereinafter referred to as CCR) in the platinum version, that is, cross-cluster remote replication.
This feature can solve two types of problems:
1. Data migration;
2. Remote backup.
This article is mainly based on actual combat. For basic concepts and principles, please refer to the official website documents. https://www.elastic.co/guide/en/elasticsearch/reference/current/xpack-ccr.html
basic structure
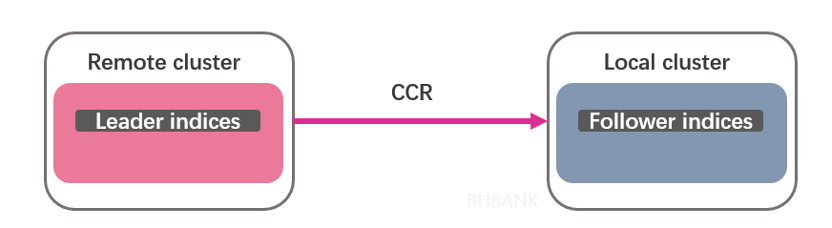
Figure 1. CCR structure
Points to note:
1. CCR is a master-slave replication for indexes, and the replication action is a pull operation initiated by the slave end;
2. The master index (leader index) can be read and written, and the slave index (follower index) is read-only;
3. The attribute index.soft_deletes.enabled of the main-end index must be true (for specific reasons, please refer to the official document)
https://www.elastic.co/guide/en/elasticsearch/reference/current/ccr-requirements.html#ccr-overview-soft-deletes
4. The CCR function requires a platinum license.
combat
1. Introduction to the environment
Tencent Cloud Big Data Elasticsearch 6.8.2 Platinum Edition Cluster* 2, hereinafter referred to as cluster A (remote cluster) and cluster B (local cluster)
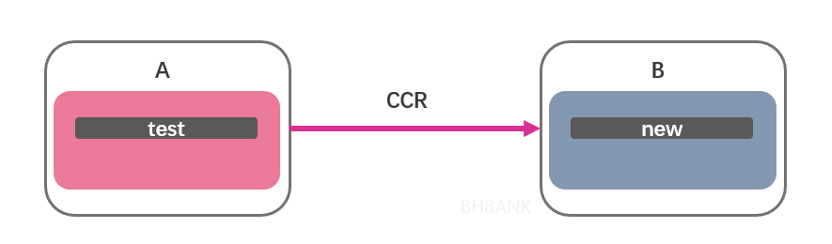
Figure 2. Actual combat architecture diagram
2. Configuration
1) Configure the remote cluster data source
Execute on cluster A:
PUT test
{
  "settings": {
    "index.soft_deletes.enabled": true
  }
}
2) Query the node transport_address in the remote cluster
Execute on cluster A:
GET _nodesThe result is as follows, just select the transport_address of any node
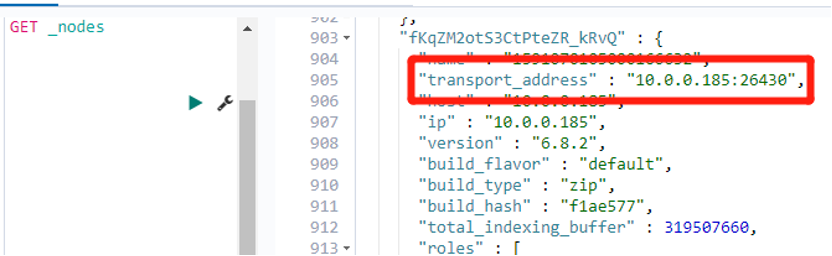
Figure 3. transport_ip of any node
3) Add a remote cluster to Kibana of the local cluster
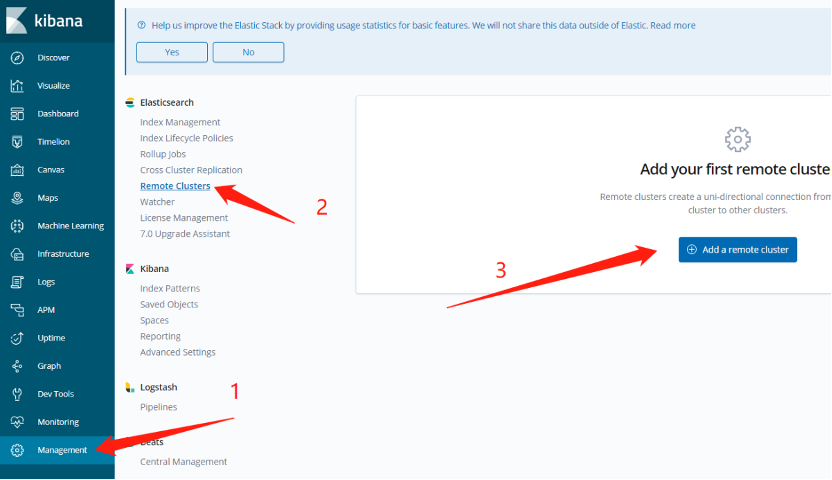
Figure 4. Adding a remote cluster
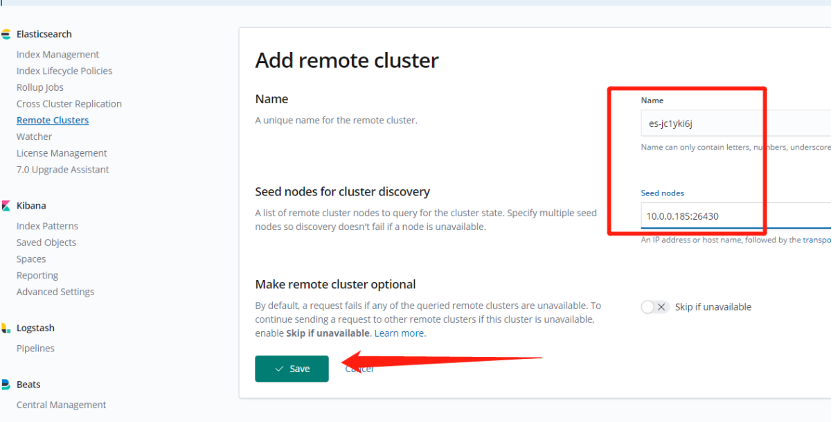
Figure 5. Adding a remote cluster
As shown in the figure above, operate sequentially to add remote cluster A to the local cluster, that is, cluster B.
It should be noted that the node IP & PORT needs to fill in the transport_address obtained in the previous step.
4) Deploy CCR in Kibana
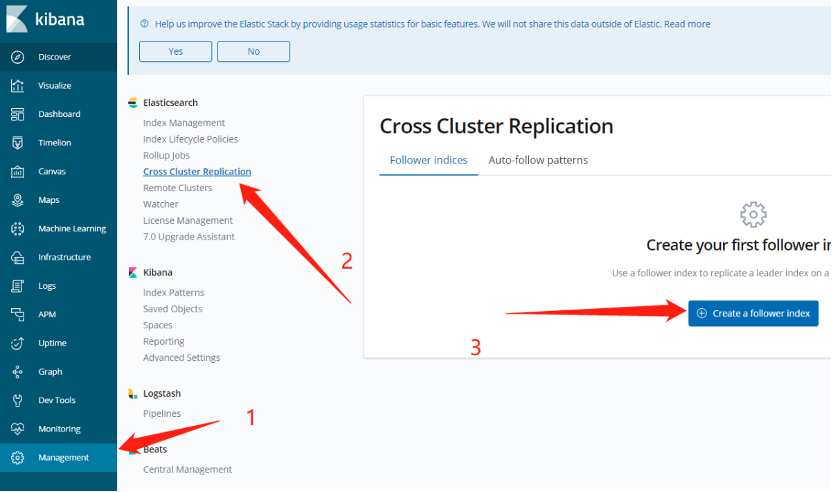
Figure 6. Deploying CCR in Kibana
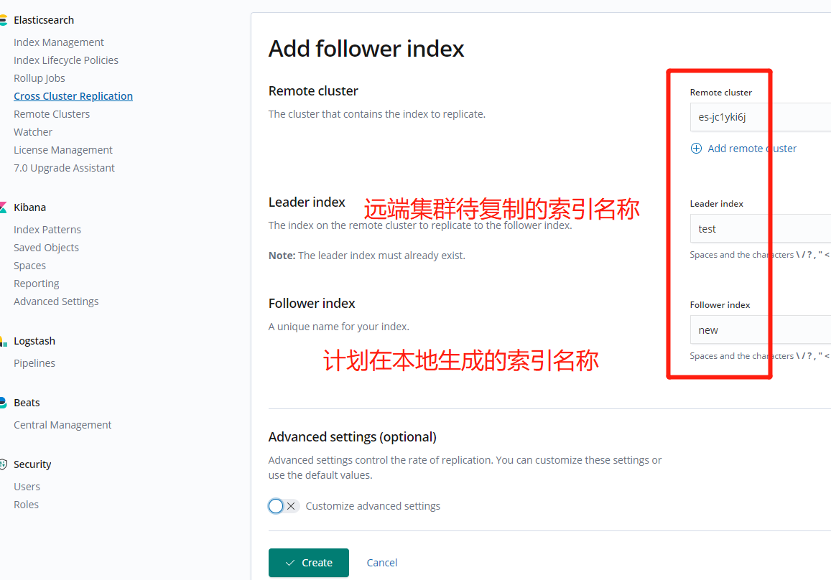
Figure 7. Deploying CCR in Kibana
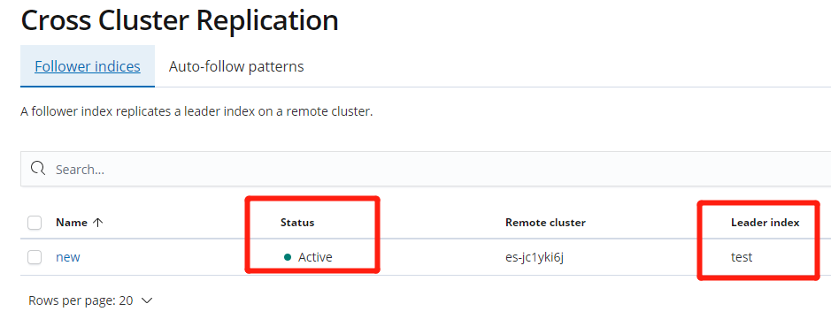
Figure 8. Deploying CCR in Kibana
As shown in the figure above, after configuring CCR, you can see that the status of the CCR instance will change from Paused to Active soon.
So far, the basic configuration of CCR has been completed.
3. Test
We can use the following methods to test whether the CCR configured above takes effect.
1) PUT documents in the remote cluster
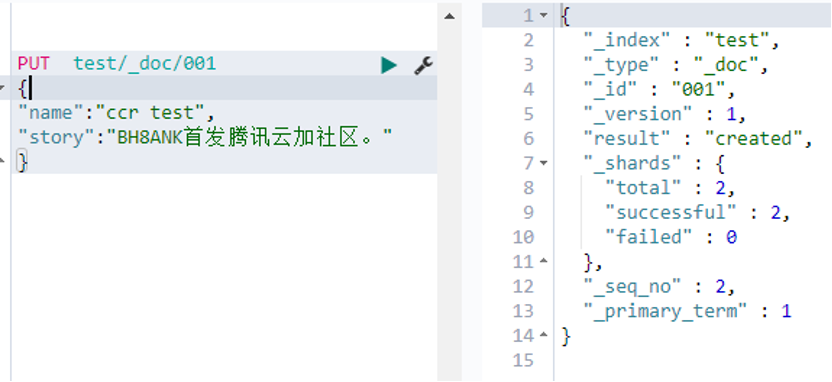
Figure 9. Create an index on the remote cluster
2) GET the corresponding index in the local cluster
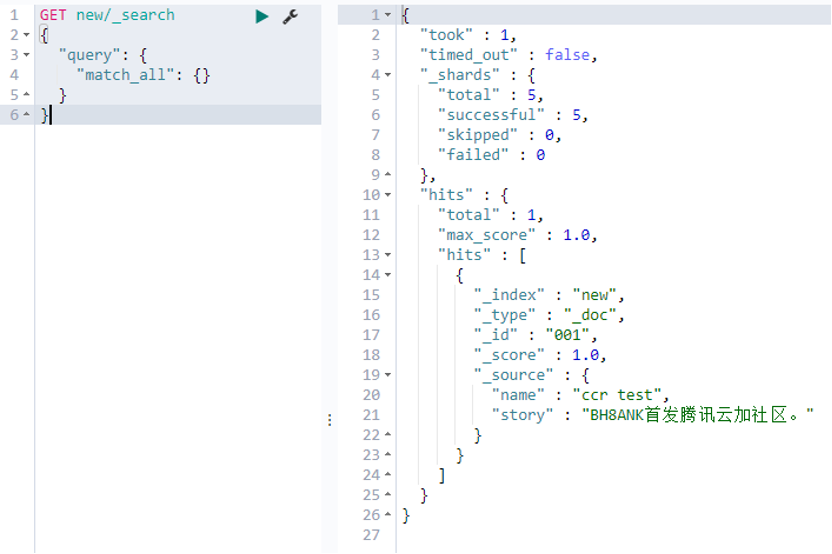
Figure 10. In the local cluster, view the index content
We can see through the above two steps that the content in the leader index test of the remote cluster has been copied to the follower index new of the local cluster through CCR.
In addition to creation, index changes and deletions are also the same as above, so I won’t repeat them here.
So, what happens if we modify or delete the follower index in the local cluster?
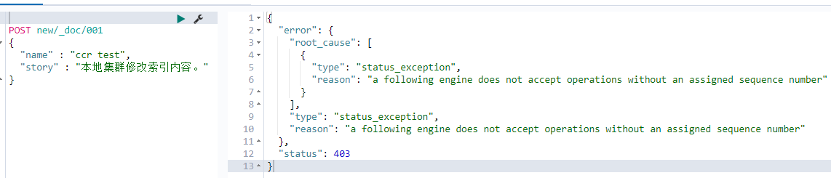
Figure 11. Modify follower index
Why can't write, please refer to the official document, as shown below:
https://www.elastic.co/guide/en/elasticsearch/reference/current/ccr-overview.html
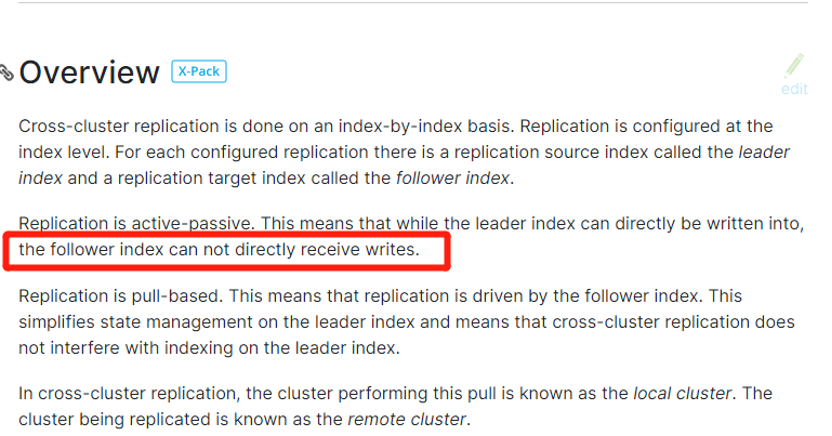
Figure 12. The reason why the follower index cannot be written
Summarize
The above briefly introduces the method of configuring and using Cross Cluster Replication through Kibana. In fact, you can still use the RESTFUL API to complete all the above operations. For details, please refer to the official documentation. Regarding the part of automatically generating indexes in CCR, I will not expand here.
The provision of the CCR function simplifies data replication at the index level between clusters. In actual commercial applications, the data in the production environment is often copied to each cluster through CCR for analysis by various business departments, which can not only meet the needs of data analysis, but also avoid modifying production data due to misoperation during business analysis.