Through cross cluster replication (Cross Cluster Replication - CCR), you can replicate indexes across clusters and achieve:
- Continue processing search requests during data center outages
- Prevent search volume from impacting indexing throughput
- Reduce search latency by processing search requests closer to the user
Cross-cluster replication uses an active-passive model. You index into the leader index and replicate data to one or more read-only follower indexes. Before adding a follower index to the cluster, a remote cluster containing the leader index must be configured.

As the leader index receives writes, the follower indexes pull changes from the leader index on the remote cluster. You can create follower indexes manually, or configure auto-follower mode to automatically create follower indexes for new time series indexes.
You can configure cross-cluster replication clusters in a unidirectional or bidirectional setup:
- In a unidirectional configuration, one cluster contains only leader indexes and the other contains only follower indexes.
- In a bidirectional configuration, each cluster contains a leader index and a follower index.
In a unidirectional configuration, the cluster containing the follower index must be running the same or newer version of Elasticsearch as the remote cluster. If newer, the versions must also be compatible, as shown in the table below.

multi-cluster architecture
Build multiple multi-cluster architectures within the Elastic Stack using cross-cluster replication:
- Disaster recovery when the primary cluster fails, and the secondary cluster acts as a hot backup
- Data locality, for maintaining multiple copies of datasets close to application servers (and users) and reducing costly latency
- Centralized reporting that minimizes network traffic and latency when querying multiple geographically distributed Elasticsearch clusters, or prevents search load from interfering with indexing by offloading searches to secondary clusters
Important : In all of these use cases, you must configure security independently on each cluster . When configuring cross-cluster replication for disaster recovery, security configurations are not replicated. To ensure a backup of the state of the Elasticsearch security features, take periodic snapshots . You can then restore native users, roles and tokens from the security configuration.
Disaster Recovery and High Availability
Disaster recovery provides your mission-critical applications with the ability to withstand data center or regional outages. This use case is the most common deployment for cross-cluster replication. You can configure clusters in different architectures to support disaster recovery and high availability. It can be divided into four parts:
- Single disaster recovery data center
- Multiple disaster recovery data centers
- chain replication
- two-way replication
Single disaster recovery data center
In this configuration, data is replicated from the production data center to the disaster recovery data center. Since the follower index replicates the leader index, your application can use a disaster recovery data center if the production data center becomes unavailable.

Multiple disaster recovery data centers
You can replicate data from one data center to multiple data centers. This configuration provides disaster recovery and high availability, ensuring that data is replicated to both data centers should the primary data center fail or become unavailable.
In the diagram below, Data Center A's data is replicated to Data Centers B and C, both of which have read-only copies of Data Center A's leader index.

chain replication
You can replicate data across multiple data centers to form a replication chain. In the diagram below, Datacenter A contains the leader index. Data center B replicates data from data center A, and data center C replicates data from the follower index in data center B. The connections between these data centers form a chained replication pattern.

two-way replication
In a two-way replication setup, all clusters have access to see all data, and all clusters have a single index that they can write to without manual failover. Applications can write to local indexes within each data center and read a global view of all information across multiple indexes.
This configuration does not require manual intervention when the cluster or datacenter is unavailable. In the diagram below, if datacenter A becomes unavailable, you can continue to use datacenter B without manual failover. When Datacenter A comes online, replication between the clusters resumes.

This configuration is especially useful for index-only workloads, where document values are not updated. In this configuration, documents indexed by Elasticsearch are immutable. Clients are located in each datacenter next to the Elasticsearch cluster and do not communicate with clusters in different datacenters.
data locality
Having data closer to the user or application server reduces latency and response times. This method also works when replicating data in Elasticsearch. For example, you can replicate a product catalog or reference dataset to 20 or more data centers around the world to minimize the distance between the data and the application server.
In the diagram below, data is replicated from one data center to three other data centers, each in its own region. The central datacenter contains the leader index, and the other datacenters contain follower indexes that replicate the data in that particular region. This configuration brings data closer to the applications accessing it.

centralized reporting
Using a centralized reporting cluster is useful when querying across a large network is inefficient. In this configuration, you replicate data from many smaller clusters to a centralized reporting cluster.
For example, a large multinational bank might have 100 Elasticsearch clusters around the world, spread across different regions in each bank branch. Using cross-cluster replication, a bank can replicate events for all 100 banks to a central cluster so events can be analyzed and aggregated locally for reporting. Instead of maintaining mirrored clusters, banks can use cross-cluster replication to replicate specific indexes.
In the diagram below, data from three data centers in different regions is replicated to a centralized reporting cluster. This configuration enables you to replicate data from a regional center to a central cluster where you can run all reports locally.

replication mechanism
While you set up cross-cluster replication at the index level, Elasticsearch implements replication at the shard level. When a follower index is created, each shard in that index pulls changes from the corresponding shard in the leader index, which means a follower index has the same number of shards as its leader index. All operations on the leader are replicated by the followers, such as operations to create, update, or delete documents. These requests can be served from any replica of the leader shard (primary or replica).
When a follower shard sends a read request, the leader shard responds to any new operations, subject to the read parameters you established when configuring the follower index. If no new operations are available, the leader shard will wait for the configured timeout for new operations. If the timeout elapses, the leader shard responds to the follower shards that there are no new operations. The follower shard updates the shard statistics and immediately sends another read request to the leader shard. This communication model ensures that the network connection between the remote cluster and the local cluster is continuously in use and avoids being forcibly terminated by external sources such as firewalls.
If the read request fails, check the reason for the failure. If the cause of the failure is considered recoverable (such as a network failure), the follower shard will enter a retry loop. Otherwise, the follower shard will be suspended until you resume it .
process updates
You cannot manually modify follower index mappings or aliases. To make changes, you must update the leader index. Because they are read-only, follower indexes deny writes in all configurations.
Note : Although alias changes on leader indices are replicated to follower indices, write indices are ignored. Follower indexes cannot accept direct writes, so if any leader aliases have is_write_index set to true, the value will be forced to false.
For example, if you index a document named doc_1 in data center A, the document will be replicated to data center B. If a client connects to data center B and tries to update doc_1, the request will fail. To update doc_1, a client must connect to datacenter A and update the document in the leader's index.
When a follower shard receives operations from the leader shard, it puts those operations in the write buffer. Follower shards submit bulk write requests with operations in the write buffer. If the write buffer exceeds its configured limit, no further read requests will be sent. This configuration provides back-pressure on read requests, allowing follower shards to resume sending read requests when the write buffer is no longer full.
To manage how operations are replicated from the leader index, you can configure settings when creating the follower index .
Changes to the index mapping on the leader index are replicated to the follower indexes as soon as possible. This behavior also applies to index settings, with the exception of some settings local to the leader index. For example, changing the number of replicas on the leader index will not be replicated by the follower indexes, so the setting may not be retrieved.
If you apply a non-dynamic settings change to a leader index that is required by a follower index , the follower index will shut itself down, apply the settings update, and then turn itself back on. During this period, the follower index is not available for reads, nor can it replicate writes.
Initialize follower using remote recovery
When you create a follower index, you cannot use it until it is fully initialized. The remote recovery process builds new copies of shards on follower nodes by copying data from the primary shard in the leader cluster.
Elasticsearch uses this remote recovery process to bootstrap follower indexes using data from the leader index. This process provides followers with a copy of the current state of the leader's index, even if the full change history is not available on the leader due to Lucene segment merges.
Remote recovery is a network-intensive process that transfers all Lucene segment files from the leader cluster to the follower cluster. A follower requests to start a recovery session on the primary shard in the leader cluster. Followers then simultaneously request file blocks from the leader. By default, a process requests five 1MB file chunks simultaneously. This default behavior is designed to support high network latency between leader and follower clusters.
Tip : You can modify the dynamic remote recovery settings to limit the rate at which data is transferred and manage the resources consumed by remote recovery.
Use the recovery API on a cluster containing follower indexes to obtain information about ongoing remote recovery. Since Elasticsearch uses snapshot and recovery ( snapshot and restore ) infrastructure for remote recovery, running remote recovery is marked as snapshot type in the recovery API.
Replication leaders require soft deletes
Cross-cluster replication works by replaying the history of individual write operations performed on the leader index shard. Elasticsearch needs to keep a history of these operations on the leader shard so that follower shard tasks can pull them. The underlying mechanism used to preserve these operations is soft delete.
A soft delete occurs whenever an existing document is deleted or updated. By persisting these soft deletes up to a configurable limit, the operation history can be persisted on the leader shard and made available to follower shard tasks as they replay the operation history.
The index.soft_deletes.retention_lease.period setting defines the maximum time a shard history retention lease is kept before it is considered expired. This setting determines how long the cluster containing your follower index can be offline, by default it is 12 hours. If a shard replica recovers after its reserved lease expires, but the lost operations are still available on the leader index, Elasticsearch will establish a new lease and replicate the lost operations. However Elasticsearch does not guarantee to retain unreleased operations, so it is also possible that some missing operations have been discarded by the leader and are now completely unavailable. If this happens, the follower cannot be automatically restored, so you must recreate it .
Soft delete must be enabled for the index to be used as the leader index. Soft deletes are enabled by default on new indexes created in Elasticsearch 7.0.0 or later.
Important : Cross-cluster replication will not work with existing indexes created with Elasticsearch 7.0.0 or earlier, where soft deletes are disabled. You have to reindex the data into a new index with soft delete enabled.
Practical
Install Elasticsearch and Kibana
If you have not installed your own Elasticsearch and Kibana, you can refer to the following articles to install it:
When installing, we need to pay special attention: we follow the Elastic Stack 8.x guide to install. In today's exercise, I will use Elastic Stack 8.8.1 to demonstrate. We will demonstrate with the following architecture:

Above, we created two different clusters on two machines respectively. During installation, we need to do some special configuration on config/elasticsearch.yml:
config/elasticsearch.yml - macOS

config/elasticsearch.yml - ubuntu

Installation for non-keystore and truststore
We first refer to the previous article " Elasticsearch: How to establish mutual trust between clusters without updating certificates ". If you do not install the Elasticsearch cluster in the default way, such as non-keystore and trustore installations, refer to my previous article "Security: How to install Elastic SIEM and EDR " to install, then you can directly install another cluster The certificate can be added to the configuration of the corresponding config/elasticsearch.yml:
config/elasticsearch.yml
xpack.security.transport.ssl.enabled: true
xpack.security.transport.ssl.verification_mode: certificate
xpack.security.transport.ssl.key: /etc/elasticsearch/certs/elasticsearch.key
xpack.security.transport.ssl.certificate: /etc/elasticsearch/certs/elasticsearch.crt
xpack.security.transport.ssl.certificate_authorities: [ "/etc/elasticsearch/certs/ca/ca.crt", "certificate_from_another_cluster.crt ]
For installing an Elasticsearch cluster with a custom certificate, see the article " Elasticsearch: How to install the Elastic Stack 8.x with a custom certificate ".
Establish mutual trust between clusters
For the two Elasticsearch clusters installed using keystore and truststore, in order to enable them to establish mutual trust, we need to do some configuration for their configuration files. Their certificates are present in the Elasticsearch installation directory:
macOS
$ pwd
/Users/liuxg/elastic/elasticsearch-8.8.1
$ ls config/certs/
http.p12      http_ca.crt   transport.p12
Ubuntu OS
parallels@ubuntu2004:~/elastic/elasticsearch-8.8.1$ pwd
/home/parallels/elastic/elasticsearch-8.8.1
parallels@ubuntu2004:~/elastic/elasticsearch-8.8.1$ ls config/certs/
http_ca.crt  http.p12  transport.p12
In order to obtain the certificate information installed in the default Elasticsearch, we use the following steps to obtain it, taking macOS as an example:
$ pwd
/Users/liuxg/elastic/elasticsearch-8.8.1
$ ./bin/elasticsearch-keystore list
keystore.seed
xpack.security.http.ssl.keystore.secure_password
xpack.security.transport.ssl.keystore.secure_password
xpack.security.transport.ssl.truststore.secure_password
$ ./bin/elasticsearch-keystore show xpack.security.transport.ssl.truststore.secure_password
ABFwaZgkTaiE-WrMvXy9Tw
$ cd config/certs/
$ openssl pkcs12 -in transport.p12 -out macOS.crt -clcerts -nokeys
Enter Import Password:
$ ls
http.p12      http_ca.crt   macOS.crt     transport.p12
When prompted to enter a password above, please enter the password obtained in the above steps. This way we get the certificate for Elasticsearch installed on macOS.
We copy this macOS.crt certificate to the Elasticsearch installation directory in Ubuntu OS:
scp macOS.crt parallels@ubuntu2004:/home/parallels/elastic/elasticsearch-8.8.1/config/certsWe can check it on the Ubuntu OS machine:
parallels@ubuntu2004:~/elastic/elasticsearch-8.8.1/config/certs$ pwd
/home/parallels/elastic/elasticsearch-8.8.1/config/certs
parallels@ubuntu2004:~/elastic/elasticsearch-8.8.1/config/certs$ ls
http_ca.crt  http.p12  macOS.crt  transport.p12
In the same way, we can get the certificate ubuntu.crt installed by Elasticsearch on Ubuntu OS:
parallels@ubuntu2004:~/elastic/elasticsearch-8.8.1$ pwd
/home/parallels/elastic/elasticsearch-8.8.1
parallels@ubuntu2004:~/elastic/elasticsearch-8.8.1$ ls config/certs/
http_ca.crt  http.p12  transport.p12
parallels@ubuntu2004:~/elastic/elasticsearch-8.8.1$ ./bin/elasticsearch-keystore list
keystore.seed
xpack.security.http.ssl.keystore.secure_password
xpack.security.transport.ssl.keystore.secure_password
xpack.security.transport.ssl.truststore.secure_password
parallels@ubuntu2004:~/elastic/elasticsearch-8.8.1$ ./bin/elasticsearch-keystore show xpack.security.transport.ssl.truststore.secure_password
Npb620rZQbuqyKvw1DT0xw
parallels@ubuntu2004:~/elastic/elasticsearch-8.8.1$ cd config/certs/
parallels@ubuntu2004:~/elastic/elasticsearch-8.8.1/config/certs$ openssl pkcs12 -in transport.p12 -out ubuntu.crt -clcerts -nokeys
Enter Import Password:
parallels@ubuntu2004:~/elastic/elasticsearch-8.8.1/config/certs$ ls
http_ca.crt  http.p12  transport.p12  ubuntu.crt
From the above output, we can see that we have got the certificate ubuntu.crt on the Ubuntu OS machine.
We copy the above ubuntu.crt certificate to the Elasticsearch installation directory on the macOS machine:
scp parallels@ubuntu2004:/home/parallels/elastic/elasticsearch-8.8.1/config/certs/ubuntu.crt .$ pwd
/Users/liuxg/elastic/elasticsearch-8.8.1/config/certs
$ scp parallels@ubuntu2004:/home/parallels/elastic/elasticsearch-8.8.1/config/certs/ubuntu.crt .
ubuntu.crt 100% 2060 3.4MB/s 00:00
$ ls
http.p12 http_ca.crt macOS.crt transport.p12 ubuntu.crtWe can use the following command to view the certificate information of transport.p12 in the current macOS:
$ pwd
/Users/liuxg/elastic/elasticsearch-8.8.1
$ ./bin/elasticsearch-keystore list
keystore.seed
xpack.security.http.ssl.keystore.secure_password
xpack.security.transport.ssl.keystore.secure_password
xpack.security.transport.ssl.truststore.secure_password
$ ./bin/elasticsearch-keystore show xpack.security.transport.ssl.truststore.secure_password
ABFwaZgkTaiE-WrMvXy9Tw
$ cd config/certs/
$ ls
http.p12      http_ca.crt   macOS.crt     transport.p12 ubuntu.crt
$ keytool -keystore transport.p12 -list
Enter keystore password:
Keystore type: PKCS12
Keystore provider: SUN

Your keystore contains 2 entries

transport, Jun 13, 2023, PrivateKeyEntry,
Certificate fingerprint (SHA-256): BB:F1:F4:71:A3:19:0B:48:7A:E8:23:1A:DB:F1:01:3A:02:61:B7:C7:08:E1:68:1B:1E:2A:55:D1:D6:66:39:E2
transport_ca, Jun 29, 2023, trustedCertEntry,
Certificate fingerprint (SHA-256): E8:2B:C2:5F:B2:30:30:AC:AA:C9:DE:DE:E6:FB:C2:EC:47:E7:C7:D6:21:8F:4B:63:9D:58:C1:1C:75:CF:9C:04
From the above, we can see that there are two certificates in it. Now we use the following method to add the ubuntu.crt certificate to the transport.p12 truststore.
$ pwd
/Users/liuxg/elastic/elasticsearch-8.8.1
$ ./bin/elasticsearch-keystore list
keystore.seed
xpack.security.http.ssl.keystore.secure_password
xpack.security.transport.ssl.keystore.secure_password
xpack.security.transport.ssl.truststore.secure_password
$ ./bin/elasticsearch-keystore show xpack.security.transport.ssl.truststore.secure_password
ABFwaZgkTaiE-WrMvXy9Tw
$ cd config/certs/
$ ls
http.p12      http_ca.crt   macOS.crt     transport.p12 ubuntu.crt
$ keytool -keystore transport.p12 -list
Enter keystore password:
Keystore type: PKCS12
Keystore provider: SUN

Your keystore contains 2 entries

transport, Jun 13, 2023, PrivateKeyEntry,
Certificate fingerprint (SHA-256): BB:F1:F4:71:A3:19:0B:48:7A:E8:23:1A:DB:F1:01:3A:02:61:B7:C7:08:E1:68:1B:1E:2A:55:D1:D6:66:39:E2
transport_ca, Jun 29, 2023, trustedCertEntry,
Certificate fingerprint (SHA-256): E8:2B:C2:5F:B2:30:30:AC:AA:C9:DE:DE:E6:FB:C2:EC:47:E7:C7:D6:21:8F:4B:63:9D:58:C1:1C:75:CF:9C:04
$ keytool -importcert -trustcacerts -noprompt -keystore transport.p12 -storepass ABFwaZgkTaiE-WrMvXy9Tw -alias ubuntu -file ubuntu.crt
Certificate was added to keystore
$ keytool -keystore transport.p12 -list
Enter keystore password:
Keystore type: PKCS12
Keystore provider: SUN

Your keystore contains 3 entries

transport, Jun 13, 2023, PrivateKeyEntry,
Certificate fingerprint (SHA-256): BB:F1:F4:71:A3:19:0B:48:7A:E8:23:1A:DB:F1:01:3A:02:61:B7:C7:08:E1:68:1B:1E:2A:55:D1:D6:66:39:E2
transport_ca, Jun 29, 2023, trustedCertEntry,
Certificate fingerprint (SHA-256): E8:2B:C2:5F:B2:30:30:AC:AA:C9:DE:DE:E6:FB:C2:EC:47:E7:C7:D6:21:8F:4B:63:9D:58:C1:1C:75:CF:9C:04
ubuntu, Jun 29, 2023, trustedCertEntry,
Certificate fingerprint (SHA-256): 1B:69:D9:26:F2:4A:3C:91:CD:01:9F:DC:70:9D:3E:BA:97:FE:B2:67:FC:E9:62:46:AD:8A:74:41:F5:BB:CF:D3 
In the same way, we add the macOS.crt certificate on the Ubuntu OS machine:
parallels@ubuntu2004:~/elastic/elasticsearch-8.8.1$ pwd
/home/parallels/elastic/elasticsearch-8.8.1
parallels@ubuntu2004:~/elastic/elasticsearch-8.8.1$ ./bin/elasticsearch-keystore list
keystore.seed
xpack.security.http.ssl.keystore.secure_password
xpack.security.transport.ssl.keystore.secure_password
xpack.security.transport.ssl.truststore.secure_password
parallels@ubuntu2004:~/elastic/elasticsearch-8.8.1$ ./bin/elasticsearch-keystore show xpack.security.transport.ssl.truststore.secure_password
Npb620rZQbuqyKvw1DT0xw
parallels@ubuntu2004:~/elastic/elasticsearch-8.8.1$ cd config/certs/
parallels@ubuntu2004:~/elastic/elasticsearch-8.8.1/config/certs$ ls
http_ca.crt  http.p12  macOS.crt  transport.p12  ubuntu.crt
parallels@ubuntu2004:~/elastic/elasticsearch-8.8.1/config/certs$ keytool -keystore transport.p12 -list
Enter keystore password:
Keystore type: PKCS12
Keystore provider: SUN

Your keystore contains 2 entries

transport, Jun 27, 2023, PrivateKeyEntry,
Certificate fingerprint (SHA-256): 1B:69:D9:26:F2:4A:3C:91:CD:01:9F:DC:70:9D:3E:BA:97:FE:B2:67:FC:E9:62:46:AD:8A:74:41:F5:BB:CF:D3
transport_ca, Jun 29, 2023, trustedCertEntry,
Certificate fingerprint (SHA-256): 53:ED:41:99:06:24:1D:86:37:07:0D:19:9B:7B:73:00:09:A8:D3:5D:E7:EF:DC:A4:CE:C7:26:6E:12:F2:A9:32
parallels@ubuntu2004:~/elastic/elasticsearch-8.8.1/config/certs$ ls
http_ca.crt  http.p12  macOS.crt  transport.p12  ubuntu.crt
parallels@ubuntu2004:~/elastic/elasticsearch-8.8.1/config/certs$ keytool -importcert -trustcacerts -noprompt -keystore transport.p12 -storepass Npb620rZQbuqyKvw1DT0xw -alias mac -file macOS.crt
Certificate was added to keystore
parallels@ubuntu2004:~/elastic/elasticsearch-8.8.1/config/certs$ keytool -keystore transport.p12 -list
Enter keystore password:
Keystore type: PKCS12
Keystore provider: SUN

Your keystore contains 3 entries

mac, Jun 29, 2023, trustedCertEntry,
Certificate fingerprint (SHA-256): BB:F1:F4:71:A3:19:0B:48:7A:E8:23:1A:DB:F1:01:3A:02:61:B7:C7:08:E1:68:1B:1E:2A:55:D1:D6:66:39:E2
transport, Jun 27, 2023, PrivateKeyEntry,
Certificate fingerprint (SHA-256): 1B:69:D9:26:F2:4A:3C:91:CD:01:9F:DC:70:9D:3E:BA:97:FE:B2:67:FC:E9:62:46:AD:8A:74:41:F5:BB:CF:D3
transport_ca, Jun 29, 2023, trustedCertEntry,
Certificate fingerprint (SHA-256): 53:ED:41:99:06:24:1D:86:37:07:0D:19:9B:7B:73:00:09:A8:D3:5D:E7:EF:DC:A4:CE:C7:26:6E:12:F2:A9:32
We need to restart Elasticsearch in both operating systems.
Test mutual trust between clusters
We next use Kibana to test the mutual trust between the clusters. Follow the steps below:


The above shows that our connection is successful. Of course, we can also connect the installation on macOS with Elasticsearch installed on the Ubuntu machine, and it should also be successful:


From the above display, we can see that the Elasticsearch cluster on Ubuntu OS can also be successfully connected to the macOS machine.
test CCR
Next, let's do some simple tests to see how CCR works. We do the following in Kibana on macOS. Since CCR is a paid function, we need to activate the Platinum Edition trial function. This operation needs to be performed separately in the two clusters.

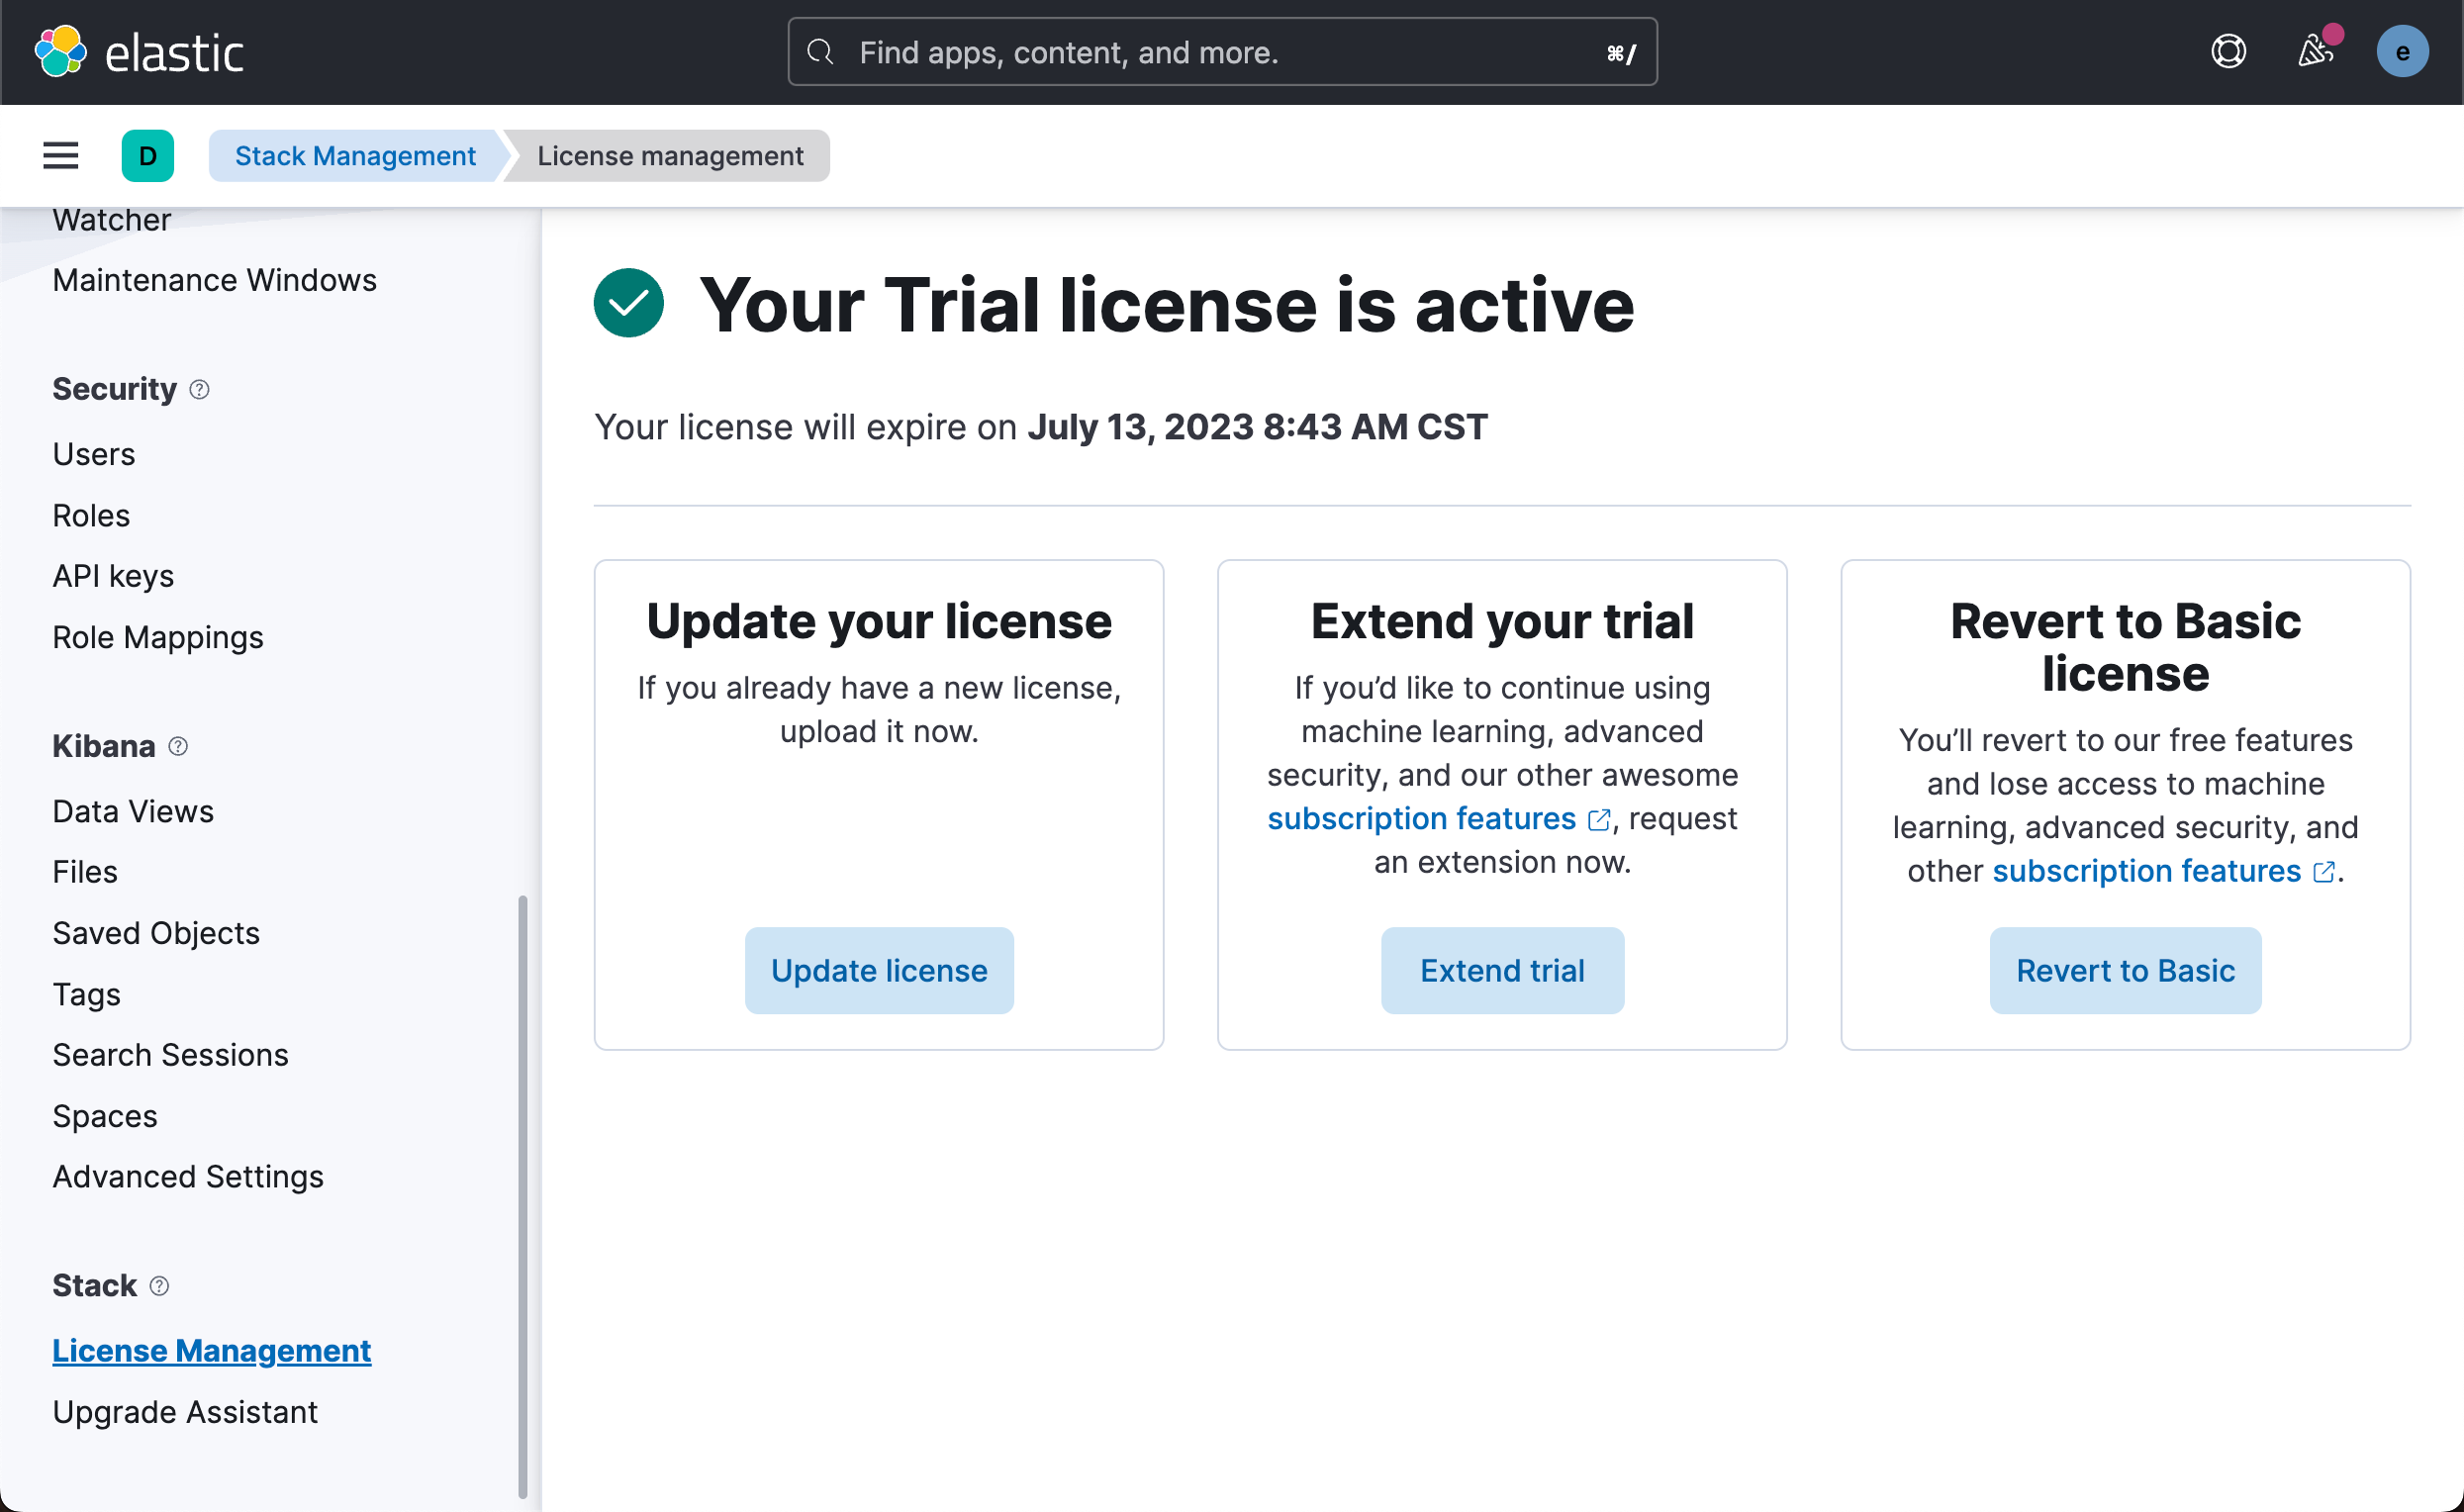
We can also start the trial function with the following command:
$ curl -k -u elastic -X POST "https://localhost:9200/_license/start_trial?acknowledge=true"
Enter host password for user 'elastic':
{"acknowledged":true,"trial_was_started":false,"error_message":"Operation failed: Trial was already activated."}
Or directly enter the following command in Dev Tools:
POST _license/start_trial?acknowledge=trueWe enter the following command in the Elasticsearch cluster of macOS:
PUT twitter/_doc/1
{
  "content": "This is Xiaoguo from Elastic"
}
Let's go to the Ubuntu OS machine and perform the following operations:


After a while:


We go to the Dev Tools of Ubuntu OS and perform the following operations:

We can see that the documents in twitter_follower are exactly the same as the twitter index in macOS. We can add another document to the Elasticsearch cluster on macOS:
PUT twitter/_doc/2
{
  "content": "Xiaoguo is doing community work in Elastic"
}
Let's check it in the Dev Tools of Ubuntu OS:
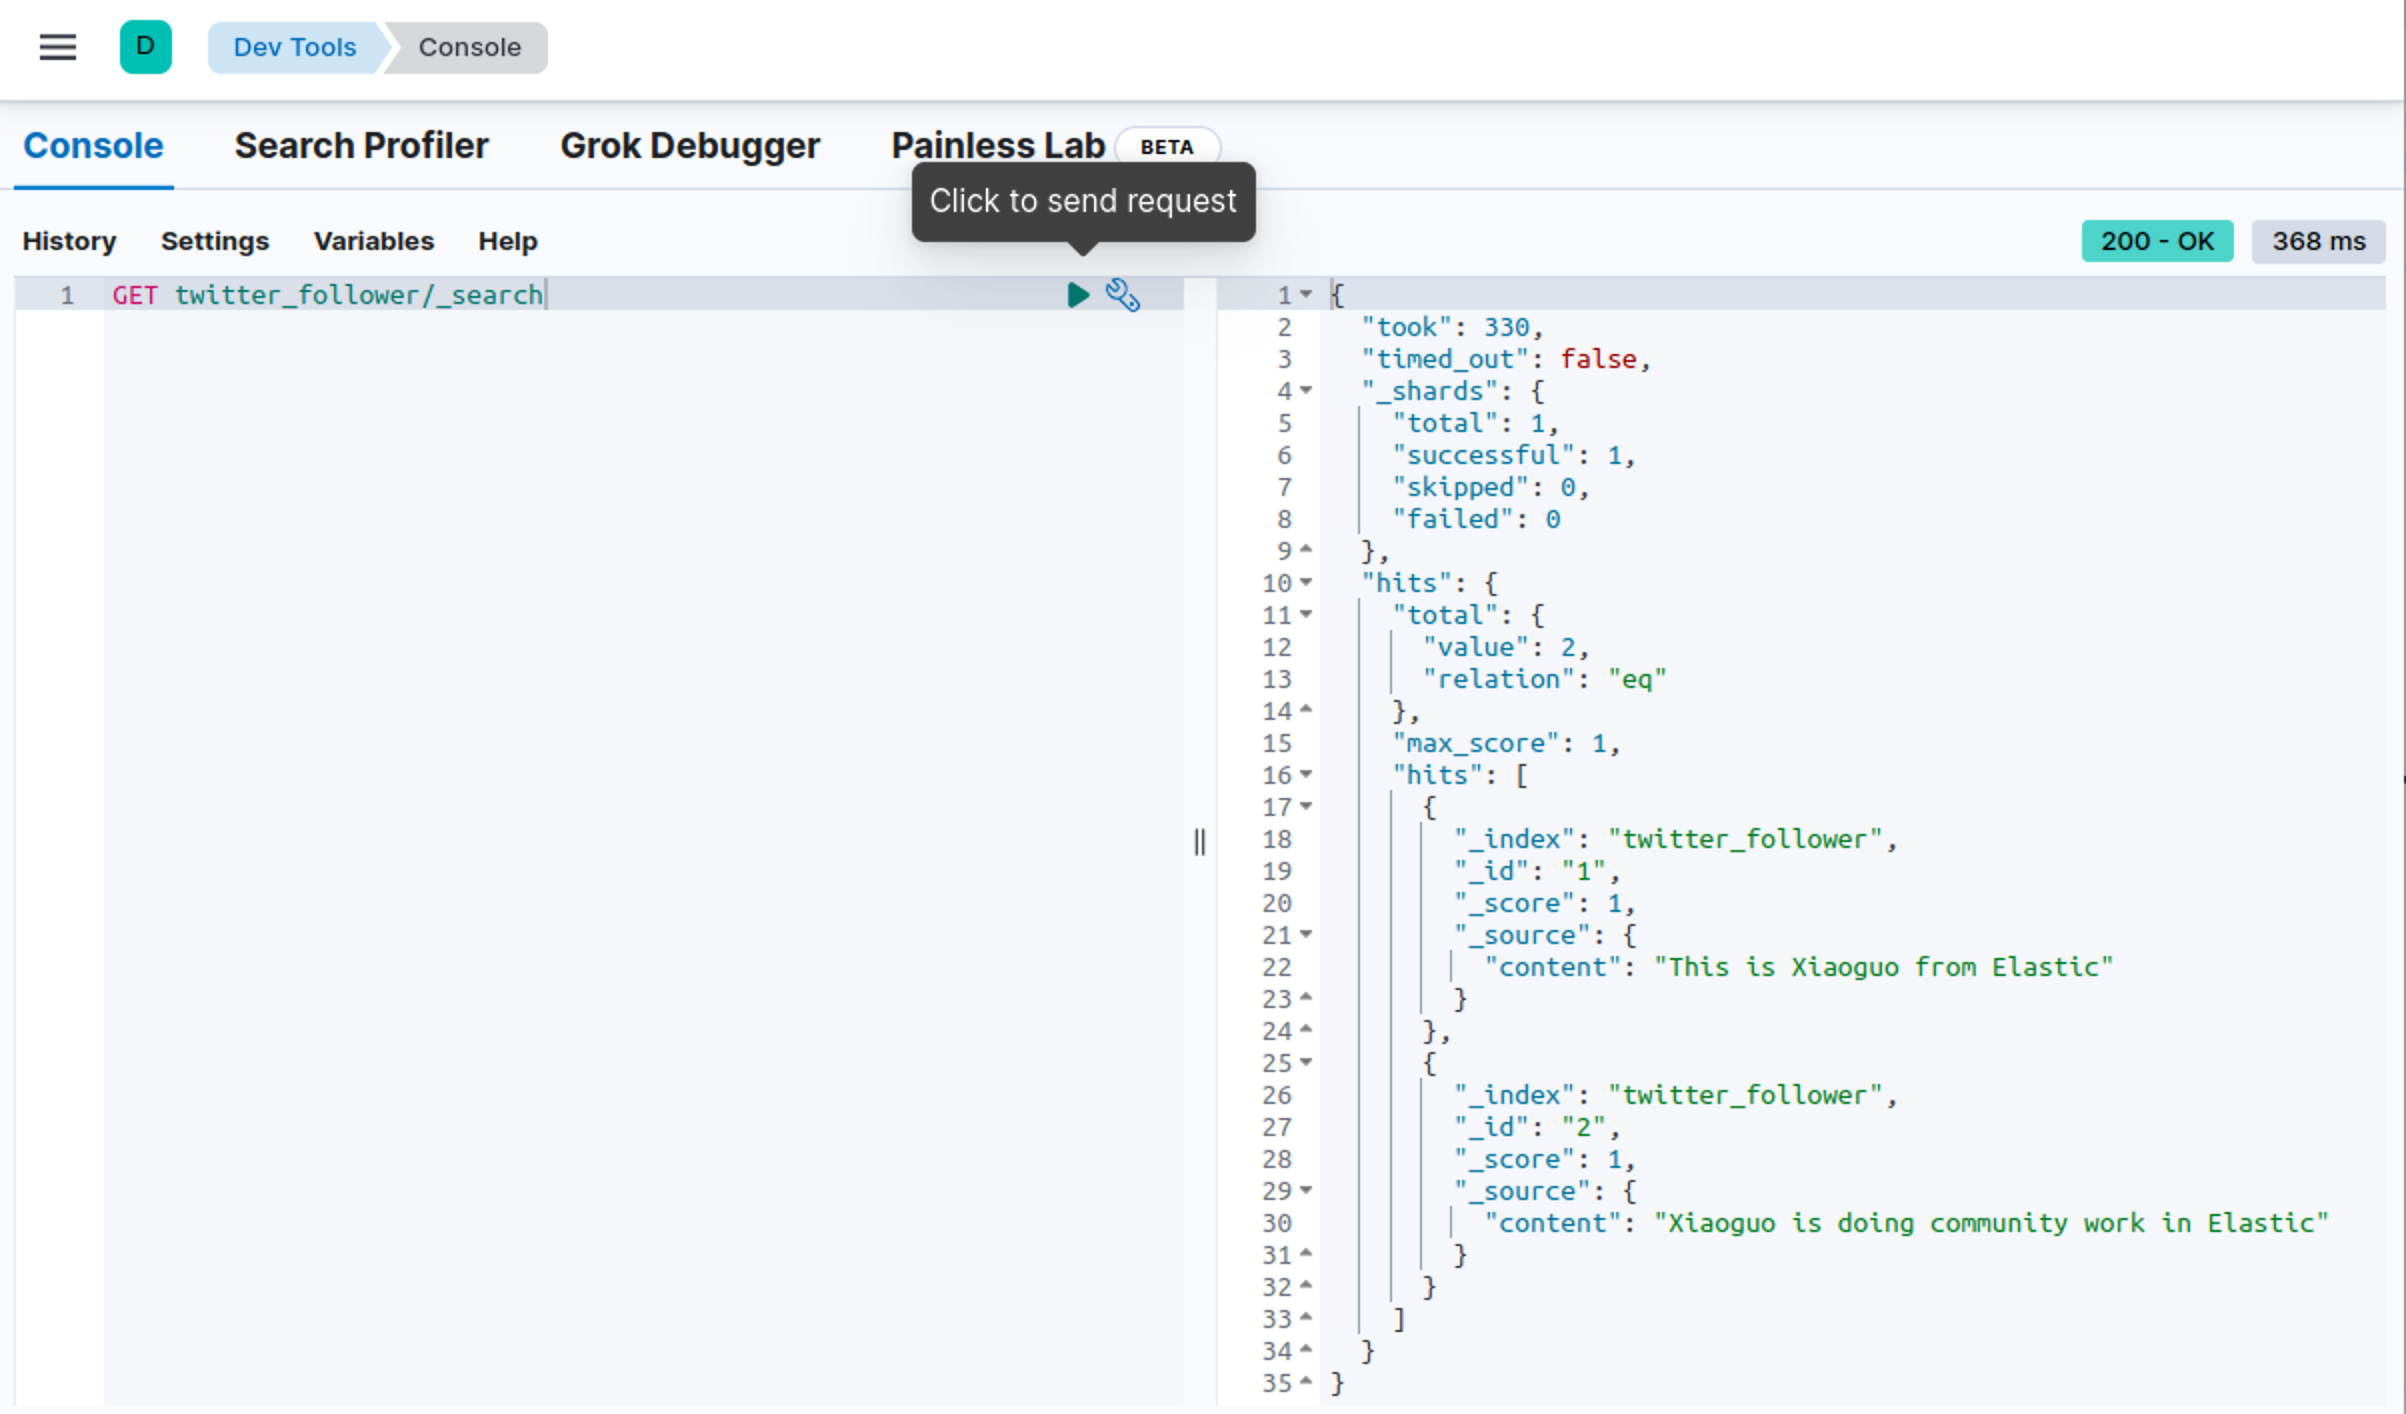
Obviously, we have two documents this time.
Hooray! We are finally responsible in two clusters. Of course, you can also try two-way replication. Copy the index in Ubuntu OS in macOS. This is left as a developer to try it yourself.