stm32cubemx configuration mpu6050 - 10 minutes 0 basic to flexible use
10 minutes speed pass! You read that right, it is 10 minutes, from 0 basics to flexible use of mpu6050.
Do not believe? If you look down, you will: Oh~ So that's it
first step
Download the github open source code.
https://github.com/leech001/MPU6050
First of all, I declare that this code is not written by me, but provided by a certain Russian boss.
Don't worry if you can't access github, I attach the downloaded file at the end of the article
second step
software
According to the Readme content of the github open source project, perform project configuration:
-
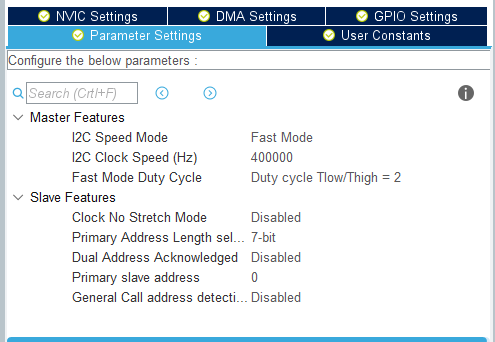
enable i2c
-
Add the downloaded .c and .h files to the project. (Students who need to use mpu6050 should know how to do this, right?
-
Where the mpu6050 interface needs to be called, just include mpu6050.h. Here, like the project author, in the "third step", call in main.c as an example to illustrate.
hardware
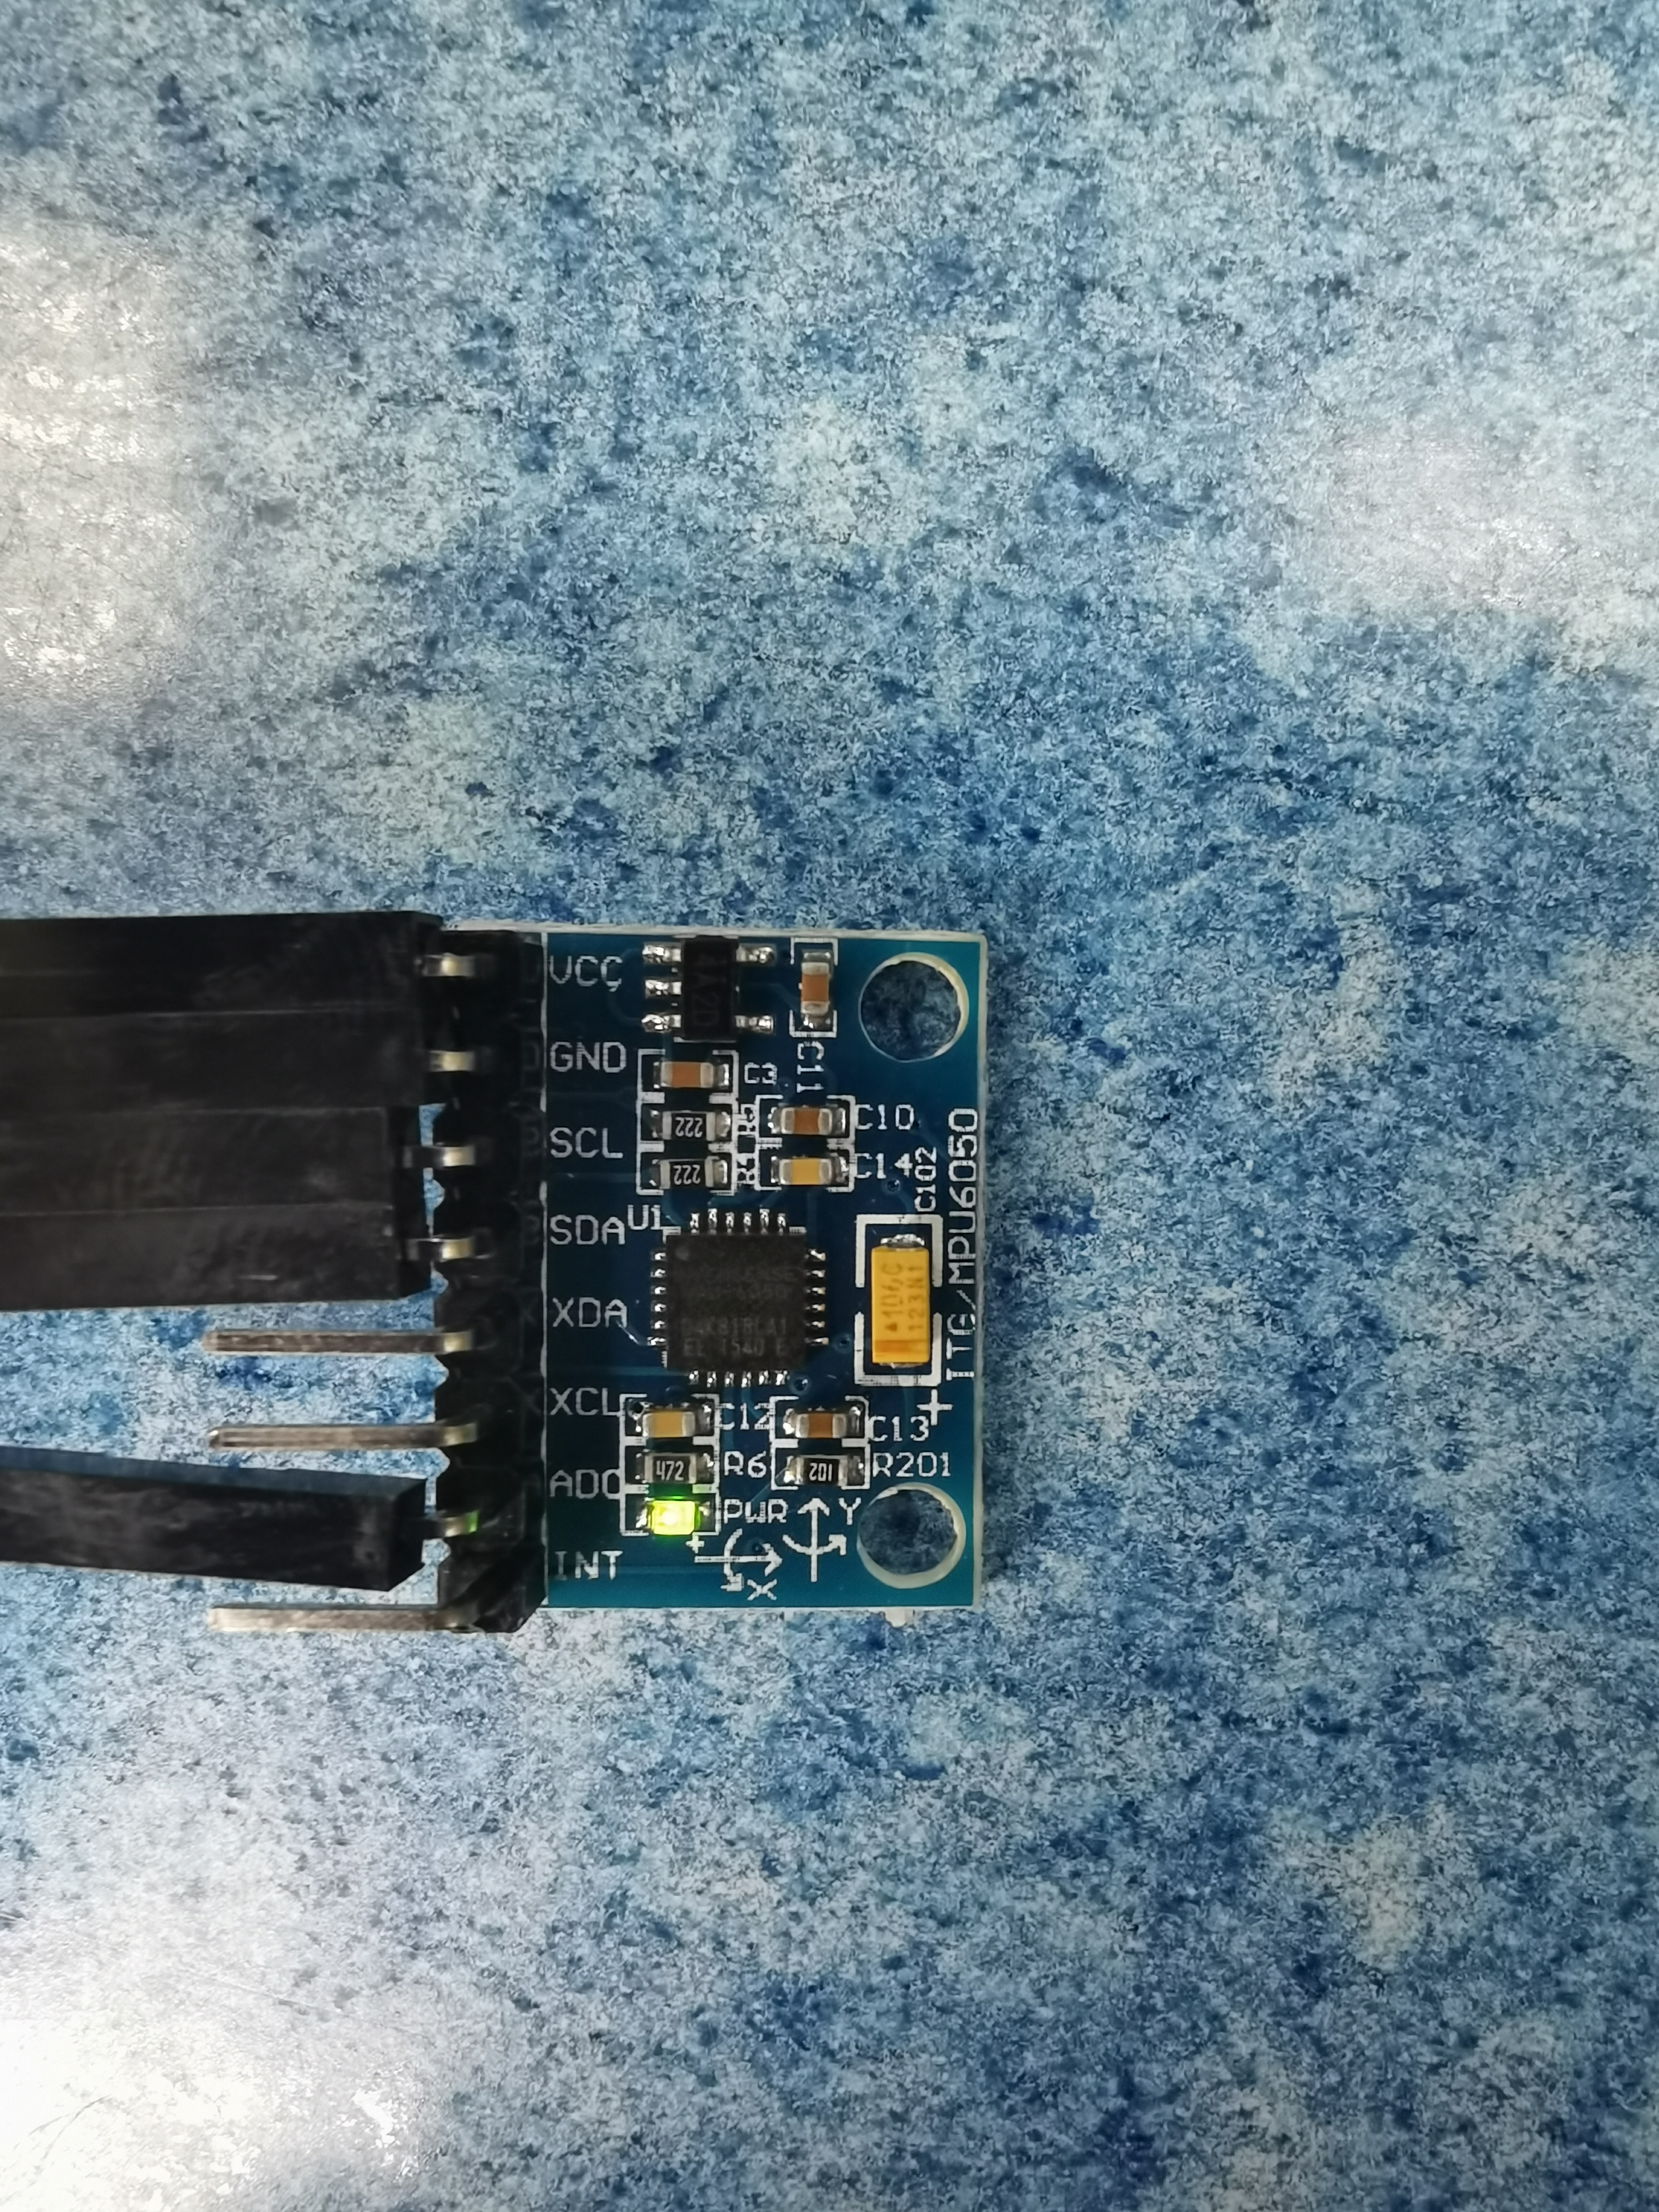
Next, I will touch my hands and lead you to connect the circuit
| MCU pin | 6050 pins | |
|---|---|---|
| 3.3V | VCC | 3.3V power supply |
| GND | GND | land |
| B10 | SCL | I2C Clock |
| B11 | SDA | I2C data |
| GND | AD0 | AD0 is the 6050 address control pin, just ground it |
third step
code configuration
Include mpu6050.h header file
/ * USER CODE BEGIN Includes * /
#include "mpu6050.h"
/ * USER CODE END Includes * /
Define the mpu6050 structure
/ * USER CODE BEGIN PV * /
MPU6050_t MPU6050;
/ * USER CODE END PV * /
At the beginning of the main function, initialize the mpu6050
/ * USER CODE BEGIN 2 * /

while (MPU6050_Init(&hi2c1) == 1);

/ * USER CODE END 2 * /
Call the MPU6050_Read_All function to read all parameters
/ * USER CODE BEGIN WHILE * /
while (1)
{


/ * USER CODE END WHILE * /

/ * USER CODE BEGIN 3 * /
  MPU6050_Read_All(&hi2c1, &MPU6050);
  HAL_Delay (100);
}
/ * USER CODE END 3 * /
So the question is, how do I access these parameters? For example, read the z-axis acceleration.
This depends on the MPU6050_t structure in mpu6050.h.
typedef struct
{


    int16_t Accel_X_RAW;	// 原始数值,忽略
    int16_t Accel_Y_RAW;
    int16_t Accel_Z_RAW;
    double Ax;				// x方向加速度,单位为重力加速度g (也就是9.8)
    double Ay;				// y方向加速度
    double Az;				// z方向加速度

    int16_t Gyro_X_RAW;
    int16_t Gyro_Y_RAW;
    int16_t Gyro_Z_RAW;
    double Gx;				// x方向陀螺仪加速度
    double Gy;				// y方向陀螺仪加速度
    double Gz;				// z方向陀螺仪加速度

    float Temperature;		// 温度

    double KalmanAngleX; 	// 卡尔曼滤波过后的角度
    double KalmanAngleY; 	// 卡尔曼滤波过后的角度
} MPU6050_t;
So how do you access the z-axis acceleration?
a = MPU6050.Az;
In addition to the MPU6050_Read_All function that reads all parameters in one go, the author also provides other functions, there is always one that suits you. See mpu6050.h for details
| Function name | effect |
|---|---|
| MPU6050_Read_All | read all parameters |
| MPU6050_Read_Accel | Read acceleration parameters |
| MPU6050_Read_Gyro | Read gyroscope data |
| MPU6050_Read_Temp | read temperature |
sample code
Before the main function
#include "mpu6050.h"

MPU6050_t MPU6050;
inside the main function
while (MPU6050_Init(&hi2c2) == 1)
    ;
// 读取所有参数
MPU6050_Read_All(&hi2c2, &MPU6050);
printf("加速度 x:%.2f \t y:%.2f \t z:%.2f\n",MPU6050.Ax,MPU6050.Ay,MPU6050.Az);
printf("陀螺仪 x:%.2f \t y:%.2f \t z:%.2f\n",MPU6050.Gx,MPU6050.Gy,MPU6050.Gz);
printf("温度 %.2f\n",MPU6050.Temperature);

// 读取加速度
MPU6050_Read_Accel(&hi2c2, &MPU6050);
printf("只更新加速度 x:%.2f \t y:%.2f \t z:%.2f\n",MPU6050.Ax,MPU6050.Ay,MPU6050.Az);

// 读取陀螺仪
MPU6050_Read_Gyro(&hi2c2, &MPU6050);
printf("只更新陀螺仪 x:%.2f \t y:%.2f \t z:%.2f\n",MPU6050.Gx,MPU6050.Gy,MPU6050.Gz);

// 读取温度
MPU6050_Read_Temp(&hi2c2, &MPU6050);
printf("只更新温度 %.2f\n",MPU6050.Temperature);
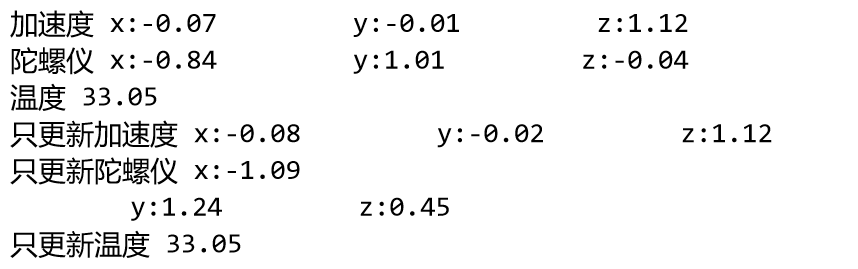
The meaning of the acceleration parameter is explained below
加速度: The accelerometer can measure the acceleration of an object in three-dimensional space, and the unit is usually m/s². MPU6050 can measure the acceleration of the object on three axes respectively. When the object is at rest, the accelerometer will be affected by gravity and display a constant value of 9.8m/s². When an object is in motion, the accelerometer displays the change in the object's acceleration along each axis.
The mpu6050 is placed flat on the table here, so the measured acceleration in the xy direction is almost 0, and there is a gravitational acceleration of g in the z direction, which is 9.8m/s². (It shows 1.12 instead of 1, because I didn't really put the level)
What still don't understand? Well, I really can't help you, I created a simple project for reference. It's in the file at the end of the article.
If the hair is blown by the wind
This article aims to use the mpu6050 as quickly as possible, which is very utilitarian. To be honest, I don’t like this kind of speed pass. It deprives the joy and achievement of conquering the mpu6050 module step by step, and reading the data manual Ability to master modules.
If the mpu6050 is successfully debugged according to this blog, the author hopes that you can understand that you have not really mastered the mpu6050. Its communication time, register configuration, etc. are all unknown to you. Readers must refer to the data manual and others. The tutorial breaks down one by one. Guard against arrogance and impetuosity!