foreword
The essence of a tool is an instruction
Before introducing tools, introduce the Internet ecology

Linux package manager yum
1. What is a software package
A common way to install software under Linux is to download the source code of the program and compile it to obtain an executable program.
But this is too troublesome, so some people compile some commonly used software in advance and make it into a software package ( It can be understood as an installer on windows) placed on a server, and the compiled software package can be easily obtained through the package manager and installed directly. The software package and the package manager are like "App" and "Application Store".
Yum (Yellow dog Updater, Modified) is a very commonly used package manager under Linux. It is mainly used in Fedora, RedHat, Centos and other distributions.
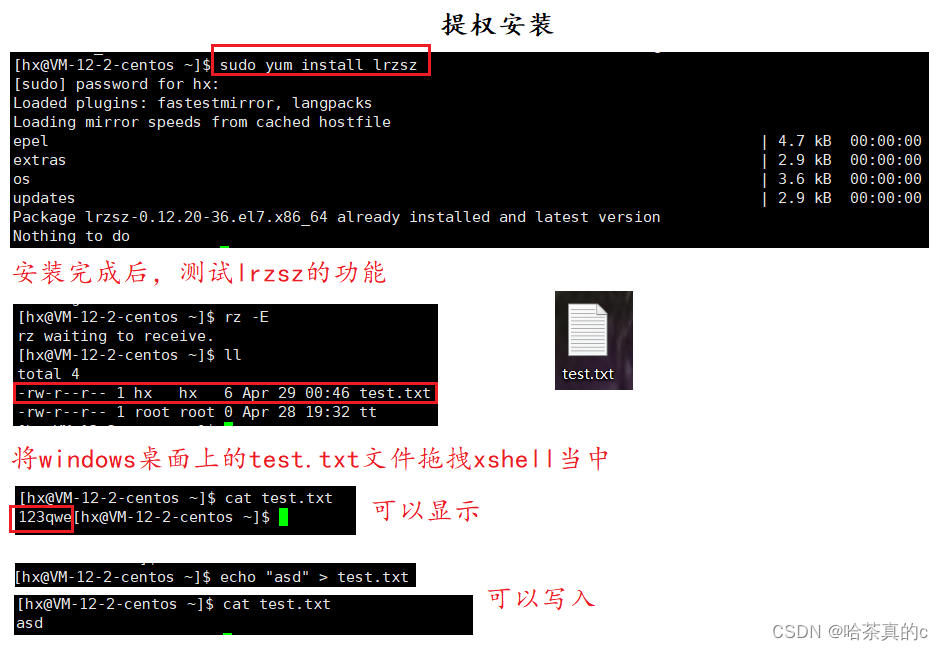
About
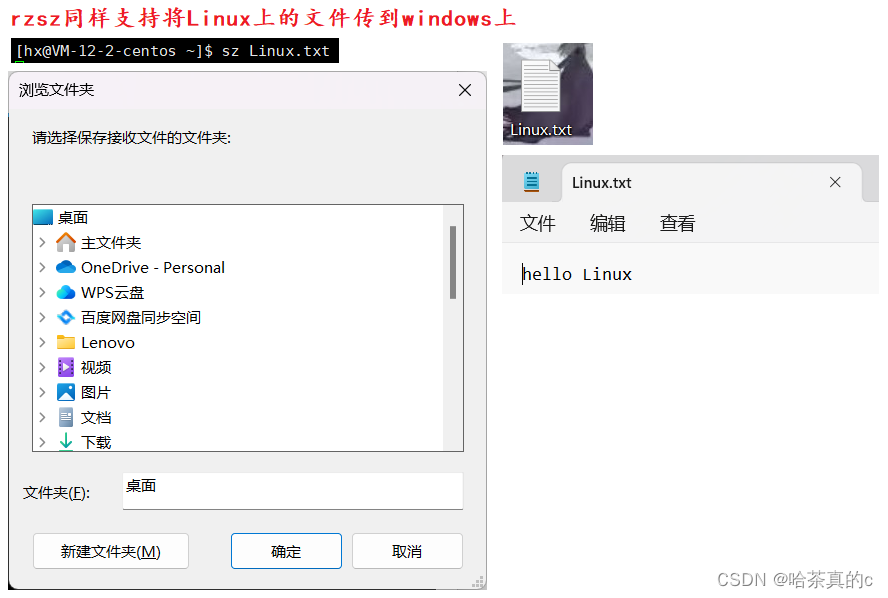
This tool is used for Windows machines and remote Linux machines to transfer files through XShell.
After installation, you can upload files by dragging and dropping.
Notes
All operations on yum must ensure that the host (virtual machine) network is unblocked!!!
Yes Verify by ping commandping www.baidu.com
(Of course, you can connect to the cloud server, in fact, it means that you are already connected to the Internet)
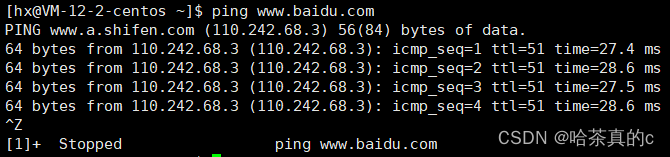
The ping is successful
2. yum list View packages
The yum list command can list the current packages.
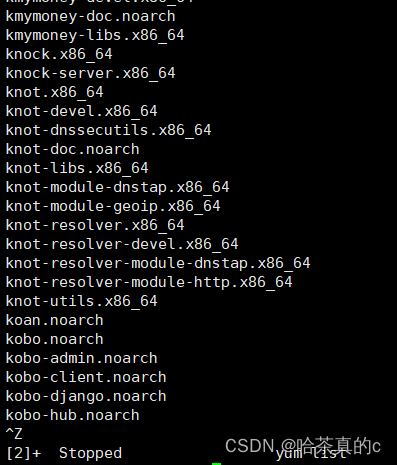
Since the number of packages may be very large, here we need to use the grep command to filter out only the packages we care about. (Connected by pipeline)
For example:

Note:
Software package name: major version number. Minor version number. Source program release number-software release number. Host platform.cpu architecture. The "x86_64" suffix
indicates the installation package for a 64-bit system, and the "i686" suffix indicates a 32-bit system Bit system installation package. Match the system when selecting the package. "el7" indicates the version of the operating system distribution. "
el7" indicates centos7/redhat7. "el6" indicates centos6/redhat6. The last column, base indicates " The name of "Software Source" is similar to the concept of "Xiaomi App Store", "Huawei App Store"
3. yum install install
Precautions:
- When installing software, because it needs to write content to the system directory, it usually needs sudo or cut to the root account to complete.
- The yum installation software can only install one after the other is installed. In the process of installing a software with yum, if you try to install another software with yum, yum will report an error.
- If yum reports an error, please find "Du Niang"
The default installation path of yum is /etc, where configuration files are placed; executable files and dynamic libraries are placed in the user/ path, and bin and lib are two subdirectories for executable programs and dynamic libraries
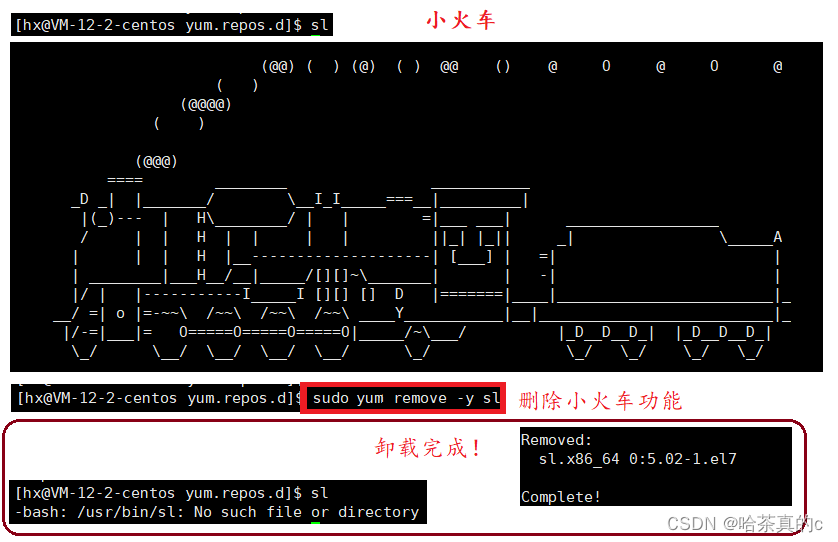
4. yum remove uninstall
sudo yum remove XXX
5. yum extension
- When we execute the yum command, we just tell yum the name of the package we want to download, but we don't tell yum where to download the package. How does yum find the corresponding package download address?
Answer: source configuration file of yum

- Some software has not been included in the official software collections of centos, Ubuntu, kali and other related ecological platforms, and is stored in unofficial software collection lists (for example: sl train). The unofficial software collection list is also the reserve pool of official software collections
( Complement each other)

epel is an unofficial collection of software - Does yum install software A simply install software A?
Answer: No, there is a certain coupling between software and software, but yum will automatically solve the problem of coupling (interdependence) between software and software. For example:
install vs2019 on windows, including editors, compilers, debugging, etc.
Linux development tools
Linux editor-vim uses
1. The basic concept of vim
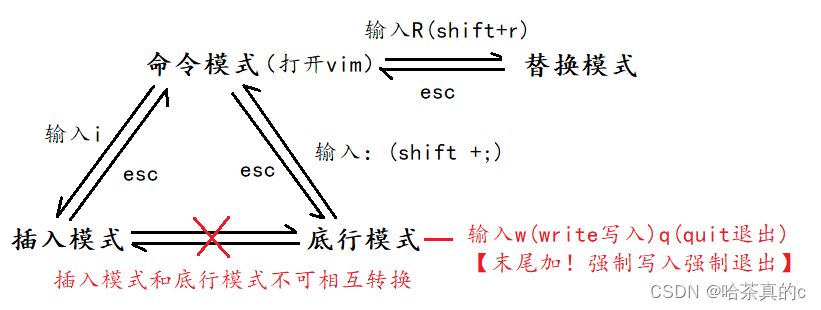
The first thing to master is the three modes of vim, which are command mode, insert mode and last line mode.
The functions of each mode are distinguished as follows:
- Normal/Normal/Command mode (Normal mode)
Control the movement of the screen cursor, delete characters, words or lines, move and copy a section and enter Insert mode, or go to last line mode
- Insert mode
Only in Insert mode, text input can be done, press "ESC" key to return to the command line mode. This mode is the most frequently used editing mode.
- last line mode
Save or exit the file, you can also perform file replacement, find character strings, list line numbers and other operations. In command mode, press shift+: to enter this mode
. To view all your modes: open vim, enter the bottom line mode directly: help vim-modesI have a total of 12 modes here: six BASIC modes and six ADDITIONAL modes
2. Vim normal mode command set (more practice)
insert mode
- Press "i" to switch to the insert mode "insert mode", and press "i" to enter the insert mode to start inputting the file from the current position of the cursor;
- After pressing "a" to enter the insert mode, the text will be entered from the position next to the current cursor position;
- After pressing "o" to enter the insert mode, a new line is inserted, and the text is entered from the beginning of the line;
Switch from insert mode to command mode
- Press the "ESC" key.
move cursor
- Vim can directly use the cursor on the keyboard to move up, down, left, and right, but regular vim uses lowercase English letters "h", "j", "k", and "l" to control the cursor to move left, down, up, and right. grid
- Press "G": move to the end of the article
- Press "$": Move to the "end of line" of the line where the cursor is located
- Press "^": Move to the "beginning" of the line where the cursor is located
- Press "w": the cursor jumps to the beginning of the next word
- Press "e": the cursor jumps to the end of the next word
- Press "b": the cursor returns to the beginning of the previous word
- Press "#l": the cursor moves to the #th position of the line, such as: 5l, 56l
- Press [gg]: go to the beginning of the text
- Press [shift+g]: enter the end of the text
- Press "ctrl" + "b": move the screen to "back" by one page
- Press "ctrl" + "f": the screen moves "forward" by one page
- Press "ctrl" + "u": the screen moves half a page "backward"
- Press "ctrl" + "d": the screen moves half a page "forward"
delete text
- "x": Each time you press, delete a character at the cursor position
- "#x": For example, "6x" means to delete the 6 characters "behind (including yourself)" where the cursor is located
- "X": uppercase X, each time you press it, delete a character "in front" of the cursor position
- "#X": For example, "20X" means to delete the "before" 20 characters where the cursor is located
- "dd": delete the line where the cursor is located
- "#dd": Delete # line from the line where the cursor is located
copy
- "yw": Copy the characters from the cursor position to the end of the word into the buffer.
- "#yw": copy # words to the buffer
- "yy": Copy the line where the cursor is located to the buffer.
- "#yy": For example, "6yy" means to copy 6 lines of text "counting down" from the line where the cursor is located.
- "p": Paste the characters in the buffer to the position of the cursor. Note: All copy commands related to "y" must cooperate with "p" to complete the copy and paste functions.
replace
- "r": Replace the character where the cursor is located.
- "R": Replace the character where the cursor is, until the "ESC" key is pressed.
undo last action
- "u": If you execute a command by mistake, you can immediately press "u" to return to the previous operation. Press "u" multiple times to perform multiple replies.
- "ctrl + r": undo redo
Change
- "cw": Change the word where the cursor is to the end of the word
- "c#w": For example, "c3w" means change 3 characters
jump to the specified line
- "ctrl" + "g" lists the line number of the line where the cursor is located.
- "#G": For example, "15G", means to move the cursor to the beginning of the 15th line of the article.
3. Vim last line mode command set (more practice)
Before using the end-line mode, please remember to press the "ESC" key to confirm that you are already in the normal mode, and then press the ":" colon to enter the end-line mode.
list line numbers
- "set nu": After entering "set nu", the line number will be listed in front of each line in the file.
jump to a line in a file
- "#": "#" means a number, enter a number after the colon, and then press the Enter key to jump to the line. For example, enter the number 15, and then press Enter, it will jump to the 15th line of the article .
find character
- "/Keyword": Press the "/" key first, and then enter the character you want to find. If the keyword you find for the first time is not what you want, you can keep pressing it
- "n" will search until the keyword you want is found.
- "? Keyword": Press the "?" key first, and then enter the character you want to find. If the keyword you find for the first time is not what you want, you can keep pressing "n" to find the key you want up to the word.
Question: / and ? Find the difference between have and ? Operate it
save document
- "w": Enter the letter "w" in the colon to save the file
leave vim
- "q": Press "q" to quit. If you can't leave vim, you can force to leave vim with a "!" after "q".
- "wq": It is generally recommended to use it together with "w" when leaving, so that the file can be saved when exiting.
Just understand these instructions, and practice more when using them (remember not to memorize them by rote)
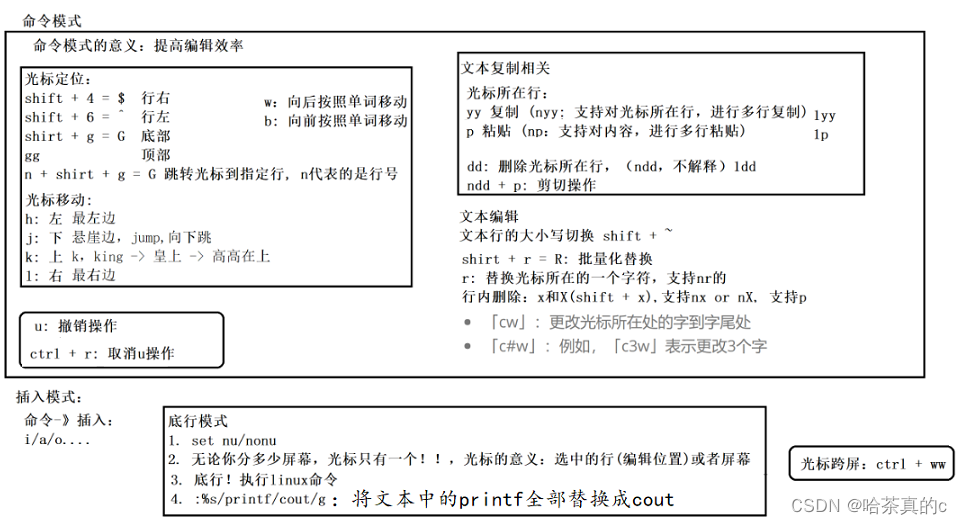

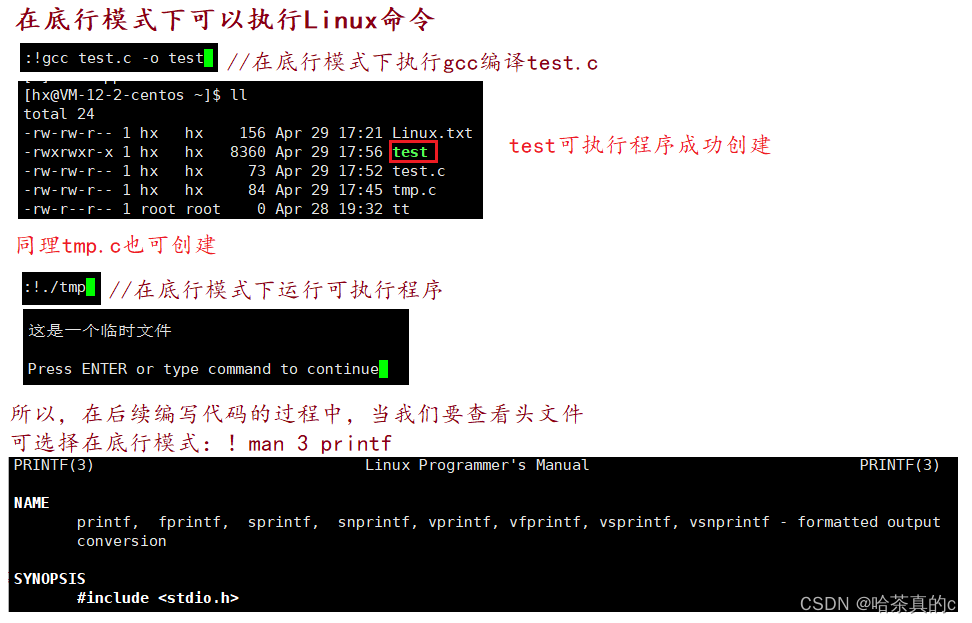
Bottom row mode with! Is to execute the Linux command
4. Simple vim configuration
4.1 Location of configuration files
Under the directory /etc/, there is a file named vimrc, which is a public vim configuration file in the system and is valid for all users. (Usually this file is not configured)
Instead, each user configures its own corresponding .vimrc file
. In each user's home directory, you can create your own private configuration file, named: ".vimrc". For example, under the /root directory,
there is usually a .vimrc file, and if it does not exist, it will be created.
Switch users to become yourself and execute su, enter your main working directory, execute cd ~
open the .vimrc file in your own directory, and execute vim .vimrc
4.2 Common configuration options
Set syntax highlighting: syntax on
Display line numbers: set nu
Set the number of spaces for indentation to 4: set shiftwidth=4
... There are many options - configure according to your own needs
4.3 One-key configuration
It is too expensive to study how to configure and learn by yourself. Take a simple way to configure with one click
Search vimforcpp on gitee, link:
Find the installation method and copy it directly to xshell