Compile Android7.0 version source code
foreword
First of all, let me talk about why we need to compile the source code of Android 7.0, because when we do system custom development, we need to do this. For example, a customer of your company is a TV set-top box, and now he bought your company's For products, your company is required to provide related Android system drivers, such as audio drivers, video drivers and other files, so that this file can be used normally on the customer's set-top box. What should we do to solve this problem?
text
The first thing we need to do is to get the Android version of the customer's set-top box, which is very important, because each version of Android is different, try to keep the version consistent, now I know for sure that it is Android 7.0, so what should we do first Woolen cloth?
One word, do it! The question is how to start? We can't be like a headless chicken. I'm talking about my previous self. If you think about the span from application development to Android driver development, I'm confused. First, let's talk about the prerequisites for compilation.
1. Preconditions
Compiling the Android source code requires some preconditions, which is very important. If you want to do a good job, you must first sharpen your tools and prepare in advance.
- Desktop PC
- System: Linux. For Linux, you can use Arch Linux or Ubuntu version. If you are using the Window version, then install a virtual machine and install Ubuntu in the virtual machine. The Ubuntu version is above 15.04. I am currently doing this.
- Model: Try not to assemble it by yourself, it is best to buy a branded desktop computer, which is guaranteed in case of a problem.
- Monitor: Ordinary 1920x1080 resolution is fine.
- Running memory: at least 16G, 32G is a normal level.
- Physical memory: SSD, at least 1T, 2T is a normal level.
- Processor: i7 or higher.
- Core: 12 cores and above.
If the above conditions are met, you can consider compiling the Android source code.
Two, compilation preparation
Assuming you are ready now, then we can open Ubuntu's Term (command line terminal).
Install the required packages:
sudo apt-get install git-core gnupg flex bison gperf build-essential zip curl zlib1g-dev gcc-multilib g++-multilib libc6-dev-i386 lib32ncurses5-dev x11proto-core-dev libx11-dev lib32z-dev ccache libgl1-mesa-dev libxml2-utils xsltproc unzip
JDK, here is the Android7.0 source code, just install JDK1.8, the lower version of the Android source code is version 1.7.
sudo apt-get install openjdk-8-jdk
3. Download and compile the source code
Downloading and compiling the Android source code is divided into several steps, let's take a look at them one by one.
1. Download Repo
Here, we download Repo, open Ubuntu Terminal(终端), first create a bin directory in the root directory, and enter the command:
mkdir ~/bin
Then add the path and enter the command:
PATH=~/bin:$PATH
Download the Repo tool. There are two addresses here. The first one is the official one of Google. The domestic visit may not be so smooth. The first one is a source address of Tsinghua University, which is easier to use. Choose one of the two, and the command is as follows :
curl https://storage.googleapis.com/git-repo-downloads/repo > ~/bin/repo
curl https://mirrors.tuna.tsinghua.edu.cn/git/git-repo -o ~/bin/repo
After downloading the Repo tool, grant executable permission, the command is as follows:
chmod a+x ~/bin/repo
2. Initialize the warehouse
Next, we initialize the warehouse. Here you need to set your email address and name. The commands are as follows:
git config --global user.email "Your email"
Change to your own email
git config --global user.name "Your Name"
change to your own name
Configure the repo below. If you need to compile multiple versions of Android source code, you must classify it at the beginning. For example, I may need two versions of Android7 and Android10. Then we can create one in the root directory of ubuntu Project folder, enter the command:
mkdir Project
Press Enter to create a folder, then enter the Project folder, and enter the command:
cd Project
Press Enter to enter under Project, then create a Android7 folder, and enter the command:
mkdir Android7
Go to the Android7 folder and enter the command:
cd Android7
3. Synchronize remote code
In the Android7 directory, initialize the repo. Depending on the download source, the speed will be different. Each version of the Android source code has multiple branches. -b indicates a branch. The download here is under the android-7.0.0_r1 branch Source code, there are also two sources, Google's source and Tsinghua's source, it is recommended that you use the second one, the speed will be faster, the command is as follows:
repo init -u https://android.googlesource.com/platform/manifest -b android-7.0.0_r1
repo init -u https://mirrors.tuna.tsinghua.edu.cn/git/AOSP/platform/manifest -b android-7.0.0_r1
After the Repo initialization is complete, we can synchronize the remote code, enter the command:
repo sync
Press Enter and wait for the synchronization to complete. The synchronization time here is related to the source you choose and the network speed. I completed the synchronization in 1 hour. It is recommended that you synchronize when you get off work in the evening. The synchronization may be completed when you go to work the next day.
4. Compile the source code
When the source code synchronization is completed, there will be a green text prompt, which will show how long the synchronization has taken. If you are red, it means that there is an error, then you need to solve it.
If there is no error, we can compile. You can enter the command to view the files in Android7. The command is as follows:
ls
This is to view the file. If you want to view the modification time, the command is as follows:
ls -al
This allows you to view the file permissions, modification time and other information. Next, we enter the command to clean it up. The command is as follows:
clear
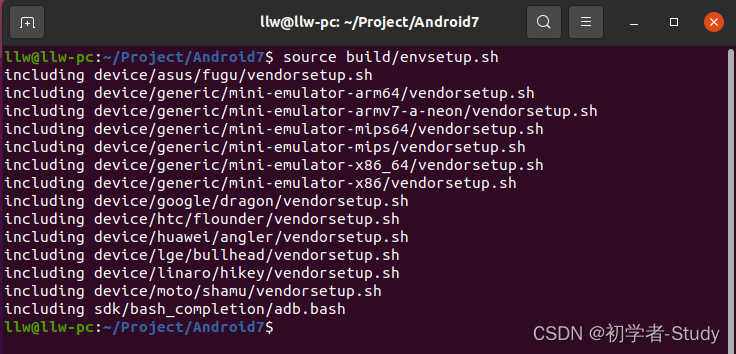
After cleaning, it is very clean. Let's compile the source code, use the envsetup.sh script to initialize the environment, and enter the command:
source build/envsetup.sh
The source here can be ·replaced by dots, the command is as follows:
. build/envsetup.sh
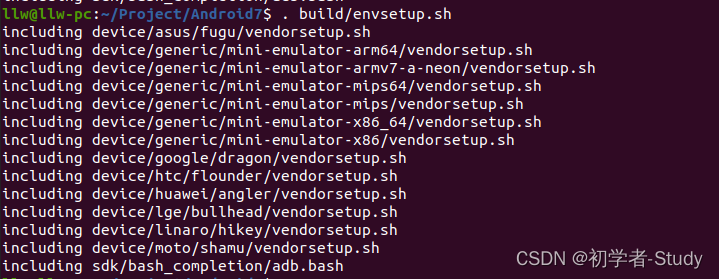
The effect is the same, the only advantage is that you can type a few letters less, and the dog's head is funny. Next, we need to select the target of compilation and enter the command:
lunch
After entering, press Enter to see that there are many compiled architecture versions. This is related to the Android source version you use. It may be more or less than this, as shown in the figure below.
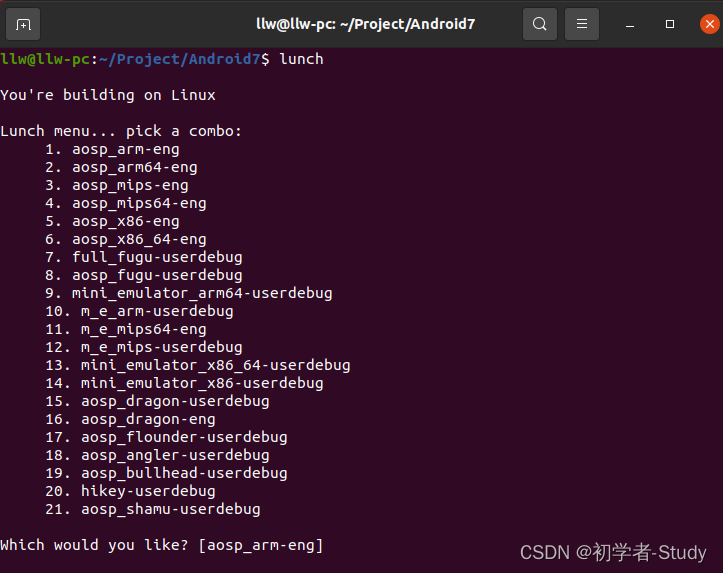
Then choose the target version. Here you need to pay attention to what version of the source code the customer you are connecting with is used. Then you can keep it consistent. The system architecture here is also consistent. Press Enter after the above number That's it, do not enter, press enter is the first one, here I will directly press enter.
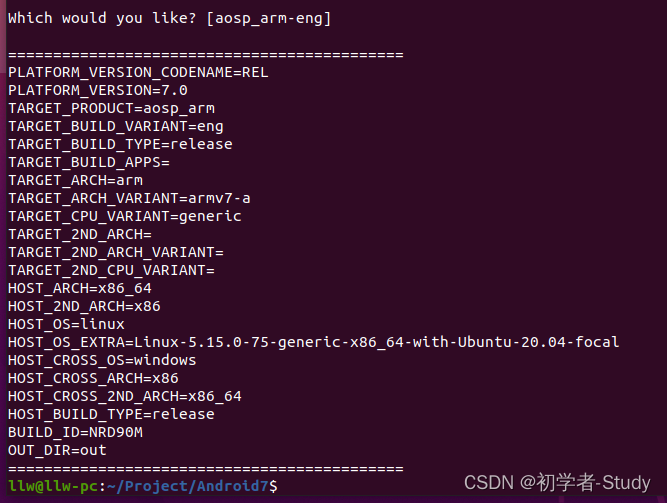
After pressing Enter, you can see some information to be compiled. If you can clearly know which architectures are in your Android source code, and you can clearly know the required architectures, then you can enter this way, the command is as follows:
lunch aosp_arm-eng
There is only one selection process missing, and we can formally compile the source code below, and there are many compiled statements, such as
m
or
make -j8
Use m to build everything. m can use the -jN parameter to handle parallel tasks. If you do not supply the -j parameter, the build system will automatically choose the parallel task count that you think is best for your system. -j indicates the number of threads, the following 8 is 8 threads, you can change it to other threads, preferably within the tolerance range of your computer, here refers to the threads allocated by your virtual machine.
Press Enter to start compiling. Of course, compiling is not smooth sailing. You may encounter problems of one kind or another. You can mention them in the comment area. I have seen them and will answer them for you.
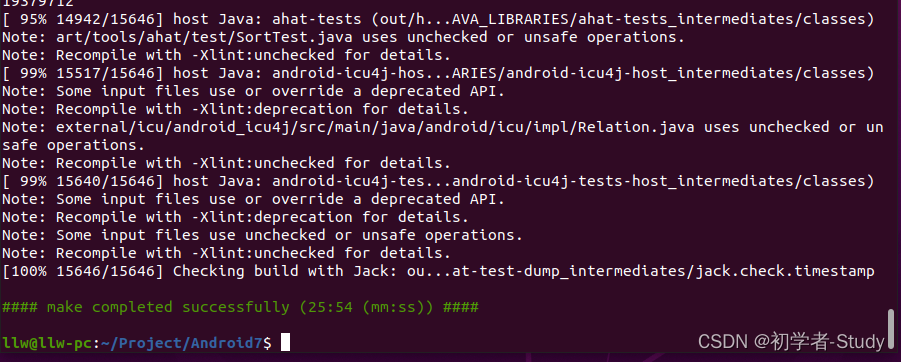
Compilation is completed, 25 minutes, actually not very fast, this is because half of the previous compilation reported an error, and then continued to compile after solving the error message, the overall time is about 1 hour, let's start the virtual machine.
5. Start the emulator
emulator
Enter and wait for the virtual machine to start.
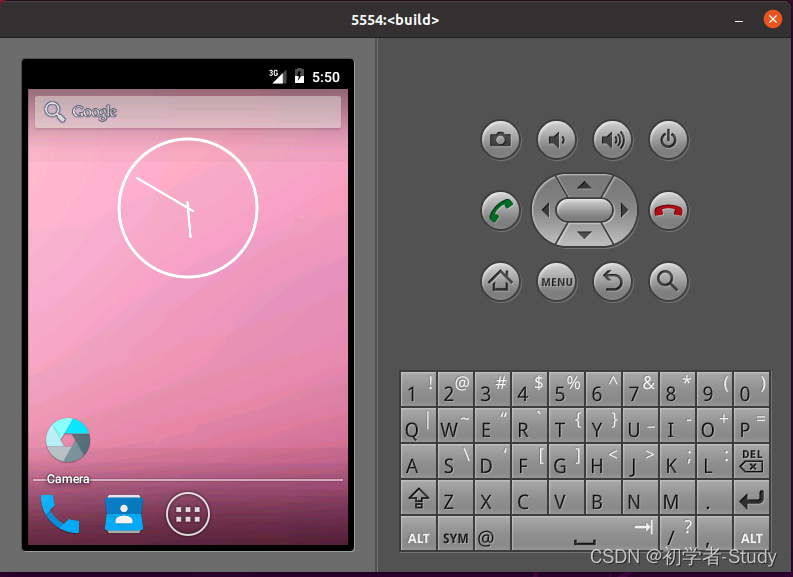
That's it.
4. Problems in compilation
First of all, you need to know that different Android versions have different ways of compiling source code. For example, you can compile Android 10.0, but not necessarily Android 7.0. You need to adapt to local conditions.
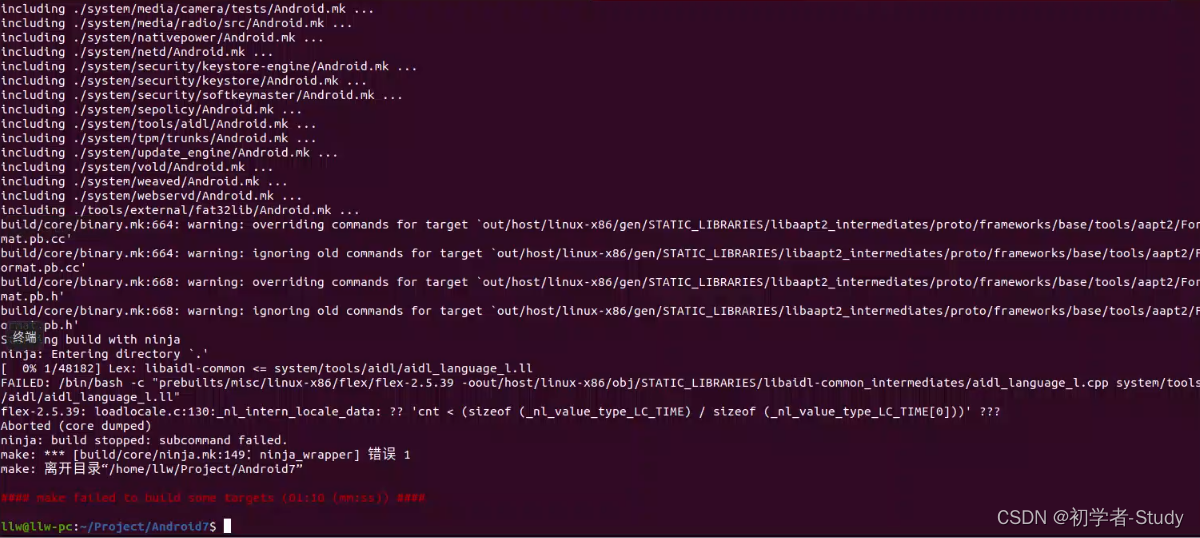
For example, for this problem, there may be multiple solutions. I will list them below. You can set one to compile, or you can set all of them and then compile.
① Jack-Server
The Jack compiler tool is a new set of Android compilation tools used to convert Java code into Android dex byte code. This tool is included in the 7.0 source code you downloaded. Switch to the root directory of the project and enter the following command to check whether the service is currently started:
./prebuilts/sdk/tools/jack-admin list-server
If not, you can execute
cd prebuilts/sdk/tools
Go to the tools directory and execute this command:
./jack-admin install-server jack-launcher.jar jack-server-4.8.ALPHA.jar
Then start the service and execute the command:
./jack-admin start-server
After starting, check again and execute the command:
./jack-admin list-server
Stop command:
./jack-admin stop-server
② Localization settings
Go back to the Android7 directory and execute the command:
export LC_ALL=C
Enter, this is to remove all localized settings so that the command can be executed correctly.

③ Communication error with Jack server (35), try ‘jack-diagnose’ or see Jack server log
This error is prompted when starting Jack-Server. The reason is that the new Java version disables TLSv1, which is caused by TLSv1.1. To modify the java.securityfile, the command is as follows:
sudo vim /etc/java-8-openjdk/security/java.security
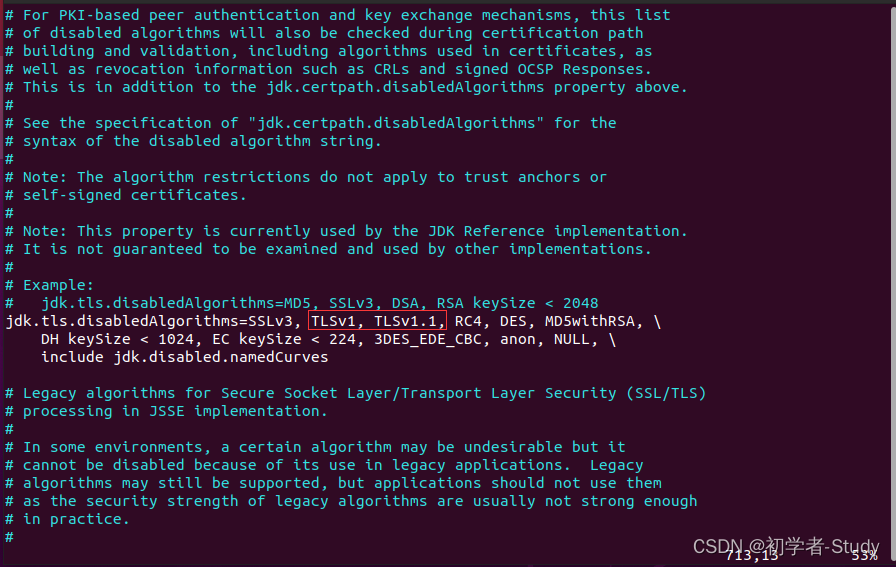
Next, we will delete the TLSv1 and TLSv1.1, press the A key to enter the edit mode, as shown in the figure below after deletion:

press the Esc key to exit the edit mode, enter the following command to write the exit file:
:wq
Then restart the service and execute it in the Android7 directory
cd /prebuilts/sdk/tools/
Go to the tools directory and execute:
./jack-admin kill-server && ./jack-admin start-server
This is to kill the service first, and then start the service.

The service is started successfully, let's go back to the Android7 directory and enter the command:
cd ~/Project/Android7
Then enter the command to recompile:
make -j8