Hot and cold data separation
Business continue to grow, cluster slice of data will increase over time, of which a considerable portion of the data is rarely used, for example, a few years ago in order records, transaction records, product reviews and other data . This data is referred to as the cold section data, contrast is often used is called thermal data.
We all know that when the amount of single-table data of MySQL over twenty million, read and write performance drops precipitously. If thermal data stored mostly high-value, better said, can spend money to expand the cluster fragmentation, because these data can bring in revenue. But if it is cold low-value data, there is no need to spend this money.
So we want cold data slice is peeled off from the cluster out of memory dedicated to the archive database to free up storage space, reduce the storage pressure of the cluster fragments. Let cluster fragmentation only as much data stored heat to maintain a good read and write performance, without having to waste storage space in the cold data on:
On the archive database is not suitable for use InnoDB engine, because InnoDB instantaneous write performance is not high. Often they use Percona produced TokuDB as the archive database storage engine. Because the engine has the following characteristics:
- High compression ratio, high write performance
- You can create indexes and fields online
- It supports transaction characteristics
- Support master-slave synchronization
Replication cluster structures
The last section introduces the concept of separation of hot and cold data, this section we have to build a high-availability cluster Replication cold for archiving data. Although the archive library, but they have allowed high availability, after all, the database is not allowed single point of failure in the actual enterprise. And data archiving library is not not used to, but it is the use of probability is not high.
Article Replication cluster architecture design as follows: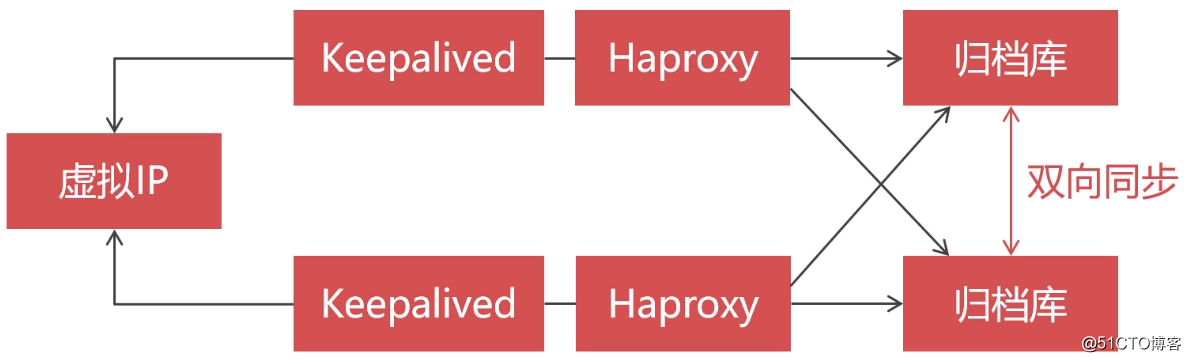
The so-called cluster Replication is what we often say that the master-slave architecture, the Replication cluster nodes are divided into Master and Slave two roles. Master mainly offer writing services, Slave provides reading services, and generally will be set to Slave read_only.
主从节点之间的数据同步是异步进行的,Slave使用一个线程监听Master节点的binlog日志,当Master的binlog日志发生变化时,该线程就会读取Master的binlog日志内容并写入到本地的relay_log中。然后mysql进程会定时读取relay_log并将数据写入到本地的binlog文件,这样就实现了主从之间的数据同步。如下图所示:
为了保证Replication集群的高可用,我们需要让两个数据库节点之间互为主从关系,实现双向的数据同步。这样才能在主节点挂掉时进行主从切换,否则主节点在恢复后不会向从节点同步数据,会导致节点之间的数据不一致: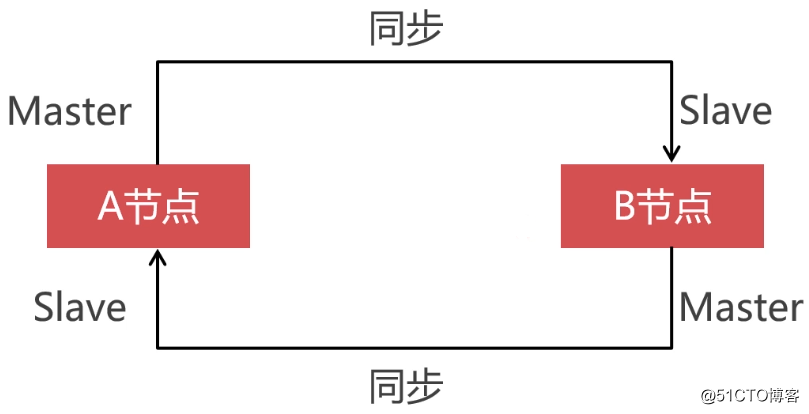
准备工作
接下来开始准备集群搭建的前置环境,首先需要创建4台虚拟机,其中两台安装Percona Server做Replication集群,两台安装Haproxy和Keepalived做负载均衡和双机热备:
| 角色 | Host | IP |
|---|---|---|
| Haproxy+Keepalived | HA-01 | 192.168.190.135 |
| Haproxy+Keepalived | HA-02 | 192.168.190.143 |
| Percona Server | node-A | 192.168.190.142 |
| Percona Server | node-B | 192.168.190.131 |
每台虚拟机的配置如下: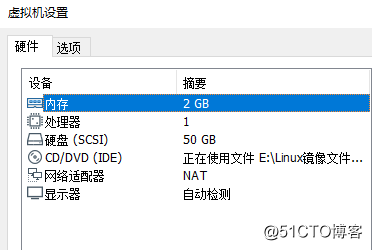
环境版本说明:
- 操作系统:CentOS 8
- Percona Server:8.0.18
- TokuDB:8.0.18
- Haproxy:1.8.15-5.el8
- Keepalived:2.0.10-4.el8_0.2
安装TokuDB
之前说了InnoDB因为其特性不适合作为归档数据库的存储引擎,而应采用TokuDB。TokuDB可以安装在任意MySQL的衍生版本上,本文采用的是Percona Server这个MySQL衍生版作为演示。
我这里已经事先在192.168.190.142和192.168.190.131两个虚拟机上安装好了Percona Server,如不了解其安装方式的话,可参考:安装Percona Server数据库(in CentOS 8)。接下来,我们就开始为Percona Server安装TokuDB。
首先,在安装TokuDB前确保系统中已有jemalloc库,没有的话可以使用如下命令安装:
[root@node-A ~]# yum install -y jemalloc
[root@node-A ~]# ls /usr/lib64/ |grep jemalloc  # 库文件所在路径
libjemalloc.so.1
[root@node-A ~]#
在配置文件中添加jemalloc库文件所在路径的配置:
[root@node-A ~]# vim /etc/my.cnf
...

[mysql_safe]
malloc-lib=/usr/lib64/libjemalloc.so.1
完成配置文件的修改后,重启数据库服务:
[root@node-A ~]# systemctl restart mysqld为了保证TokuDB的写入性能,我们需要调整一下Linux系统的大页内存管理的设置,命令如下:
# 采用动态分配内存而不是预先分配内存
[root@node-A ~]# echo never > /sys/kernel/mm/transparent_hugepage/enabled
# 开启内存的碎片整理
[root@node-A ~]# echo never > /sys/kernel/mm/transparent_hugepage/defrag通过官方提供的yum仓库安装TokuDB引擎:
[root@node-A ~]# yum install -y https://repo.percona.com/yum/percona-release-latest.noarch.rpm
[root@node-A ~]# percona-release setup ps80
[root@node-A ~]# yum install -y percona-server-tokudb.x86_64接着使用ps-admin命令将TokuDB引擎安装到MySQL上:
[root@node-A ~]# ps-admin --enable-tokudb -uroot -p重启数据库服务:
[root@node-A ~]# systemctl restart mysqld数据库重启完成后,再执行一次ps-admin命令以激活TokuDB引擎:
[root@node-A ~]# ps-admin --enable-tokudb -uroot -p最后使用show engines;语句验证一下MySQL上是否已成功安装了TokuDB引擎: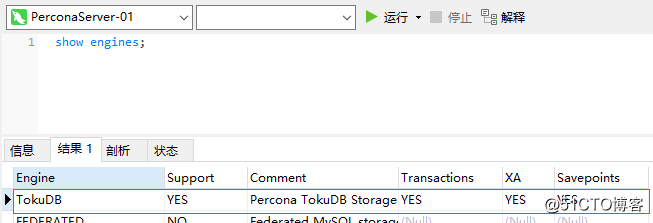
配置主从关系
首先在两个节点上分别创建用于同步的数据库账户:
create user 'backup'@'%' identified by 'Abc_123456';
grant super, reload, replication slave on *.* to 'backup'@'%';
flush privileges;- Tips:创建好账户后,需要使用该账户在两个节点互相登录一下,以确保账户是可用的
然后修改MySQL配置文件:
[root@node-A ~]# vim /etc/my.cnf
[mysqld]
# 设置节点的id
server_id=101
# 开启binlog
log_bin=mysql_bin
# 开启relay_log
relay_log=relay_bin另外一个节点也是同样的配置,只不过server_id不能是一样的:
[root@node-B ~]# vim /etc/my.cnf
[mysqld]
server_id=102
log_bin=mysql_bin
relay_log=relay_bin
修改完配置文件后,重启MySQL服务:
[root@node-A ~]# systemctl restart mysqld
[root@node-B ~]# systemctl restart mysqld配置node-B对node-A的主从关系
进入node-B的MySQL命令行终端,分别执行如下语句:
mysql> stop slave;  -- 停止主从同步
mysql> change master to master_host='192.168.190.142', master_port=3306, master_user='backup', master_password='Abc_123456';  -- 配置Master节点的连接信息
mysql> start slave; -- 启动主从同步使用show slave status\G;语句查看主从同步状态,Slave_IO_Running和Slave_SQL_Running的值均为Yes才能表示主从同步状态是正常的: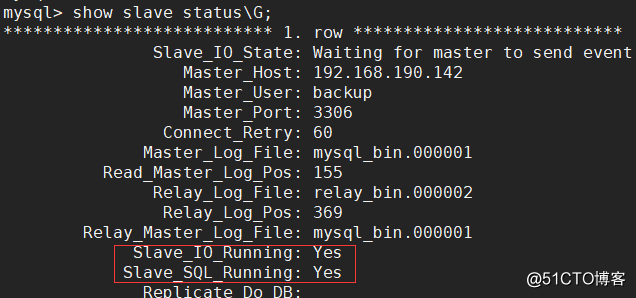
配置node-A对node-B的主从关系
为了实现双向同步,node-A和node-B需要互为主从关系,所以还需要配置node-A对node-B的主从关系。进入node-A的MySQL命令行终端,分别执行如下语句,注意这里的master_host需要为node-B的ip:
mysql> stop slave;  -- 停止主从同步
mysql> change master to master_host='192.168.190.131', master_port=3306, master_user='backup', master_password='Abc_123456';  -- 配置Master节点的连接信息
mysql> start slave; -- 启动主从同步同样配置完成后,使用show slave status\G;语句查看主从同步状态,Slave_IO_Running和Slave_SQL_Running的值均为Yes才能表示主从同步状态是正常的:
测试主从同步
配置好两个节点的主从同步关系之后,我们就算是完成了Replication集群的搭建。接下来我们在任意一个节点创建一张归档表,看看两个节点之间是否能正常同步数据。具体的建表SQL如下:
create table t_purchase_201909 (
    id int unsigned primary key,
    purchase_price decimal(10, 2) not null comment '进货价格',
    purchase_num int unsigned not null comment '进货数量',
    purchase_sum decimal(10, 2) not null comment '进货总价',
    purchase_buyer int unsigned not null comment '采购者',
    purchase_date timestamp not null default current_timestamp comment '采购日期',
    company_id int unsigned not null comment '进货企业的id',
    goods_id int unsigned not null comment '商品id',
    key idx_company_id(company_id),
    key idx_goods_id(goods_id)
) engine=TokuDB comment '2019年9月的进货数据归档表';
我这里是能够正常进行同步的,如图两个节点都能看到这张表: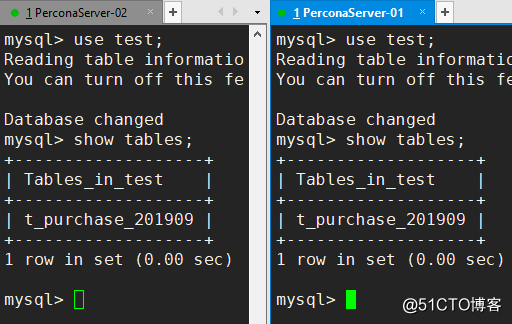
安装Haproxy
到此为止,我们就完成了Replication集群的搭建及测试。接下来就是得让Replication集群具有高可用的特性,这就轮到Haproxy上场了。Haproxy是一款提供高可用性、负载均衡以及基于TCP(第四层)和HTTP(第七层)应用的代理软件。使用Haproxy可以对MySQL集群进行负载均衡,赋予集群高可用性并发挥集群的性能。
Haproxy由于是老牌的负载均衡组件了,所以CentOS的yum仓库中自带有该组件的安装包,安装起来就非常简单。安装命令如下:
[root@HA-01 ~]# yum install -y haproxy安装完成后,编辑Haproxy的配置文件,添加监控界面及需要代理的数据库节点配置:
[root@HA-01 ~]# vim /etc/haproxy/haproxy.cfg
# 在文件的末尾添加如下配置项
# 监控界面配置
listen admin_stats
    # 绑定的ip及监听的端口
    bind 0.0.0.0:4001
    # 访问协议
    mode http
    # URI 相对地址
    stats uri /dbs
    # 统计报告格式
    stats realm Global\ statistics
    # 用于登录监控界面的账户密码
    stats auth admin:abc123456

# 数据库负载均衡配置
listen proxy-mysql
    # 绑定的ip及监听的端口
    bind 0.0.0.0:3306
    # 访问协议
    mode tcp
    # 负载均衡算法
    # roundrobin:轮询
    # static-rr:权重
    # leastconn:最少连接
    # source:请求源ip
    balance roundrobin
    # 日志格式
    option tcplog
    # 需要被负载均衡的主机
    server node-A 192.168.190.142:3306 check port 3306 weight 1 maxconn 2000
    server node-B 192.168.190.131:3306 check port 3306 weight 1 maxconn 2000
    # 使用keepalive检测死链
option tcpka由于配置了3306端口用于TCP转发,以及4001作为Haproxy监控界面的访问端口,所以在防火墙上需要开放这两个端口:
[root@HA-01 ~]# firewall-cmd --zone=public --add-port=3306/tcp --permanent
[root@HA-01 ~]# firewall-cmd --zone=public --add-port=4001/tcp --permanent
[root@HA-01 ~]# firewall-cmd --reload
完成以上步骤后,启动Haproxy服务:
[root@HA-01 ~]# systemctl start haproxy然后使用浏览器访问Haproxy的监控界面,初次访问会要求输入用户名密码,这里的用户名密码就是配置文件中所配置的:
登录成功后,就会看到如下页面:
Haproxy的监控界面提供的监控信息也比较全面,在该界面下,我们可以看到每个主机的连接信息及其自身状态。当主机无法连接时,Status一栏会显示DOWN,并且背景色也会变为红色。正常状态下的值则为UP,背景色为绿色。
另一个Haproxy节点也是使用以上的步骤进行安装和配置,这里就不再重复了。
测试Haproxy
Haproxy服务搭建起来后,我们来使用远程工具测试一下能否通过Haproxy正常连接到数据库。如下: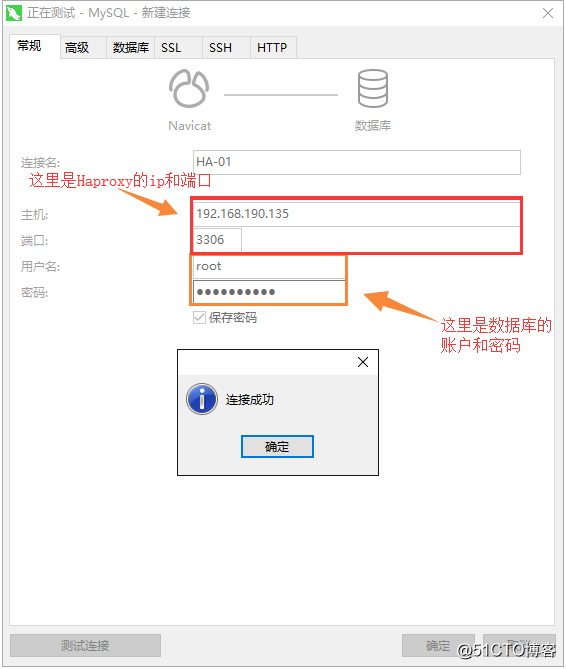
连接成功后,在Haproxy上执行一些SQL语句,看看能否正常插入数据和查询数据: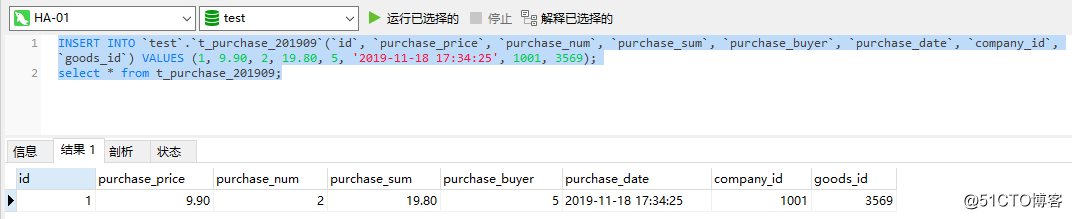
我们搭建Haproxy是为了让Replication集群具备高可用的,所以最后测试一下Replication集群是否已具备有高可用性,首先将其中一个节点给停掉:
[root@node-B ~]# systemctl stop mysqld此时,从Haproxy的监控界面中,可以看到node-B这个节点已经处于下线状态了:
现在集群中还剩一个节点,然后我们到Haproxy上执行一些SQL语句,看看是否还能正常插入数据和查询数据: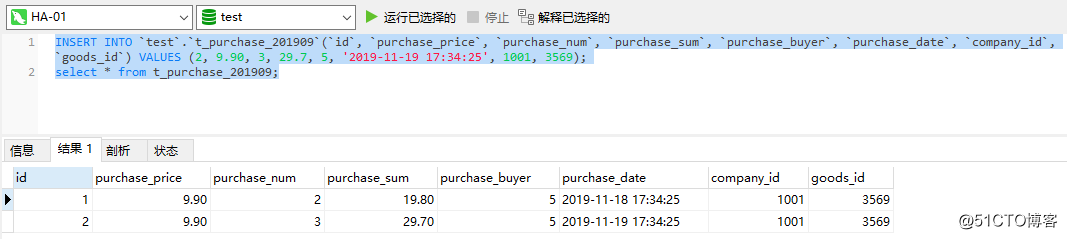
从测试结果可以看到,插入和查询语句依旧是能正常执行的。也就是说即便此时关掉一个节点整个数据库集群还能够正常使用,说明现在Replication集群是具有高可用性了。
利用Keepalived实现Haproxy的高可用
实现了Replication集群的高可用之后,我们还得实现Haproxy的高可用,因为Haproxy作为一个负责接收客户端请求,并将请求转发到后端数据库集群的入口,不可避免的需要具备高可用性。否则Haproxy出现单点故障,就无法访问被Haproxy代理的所有数据库集群节点了,这对整个系统的影响是十分巨大的。
在同一时间只需要存在一个可用的Haproxy,否则客户端就不知道该连哪个Haproxy了。这也是为什么要采用Keepalived的虚拟IP的原因,这种机制能让多个节点互相接替时依旧使用同一个IP,客户端至始至终只需要连接这个虚拟IP。所以实现Haproxy的高可用就要轮到Keepalived出场了,在安装Keepalived之前需要开启防火墙的VRRP协议:
[root@HA-01 ~]# firewall-cmd --direct --permanent --add-rule ipv4 filter INPUT 0 --protocol vrrp -j ACCEPT
[root@HA-01 ~]# firewall-cmd --reload然后就可以使用yum命令安装Keepalived了:
[root@HA-01 ~]# yum install -y keepalived安装完成后,编辑keepalived的配置文件:
[root@HA-01 ~]# mv /etc/keepalived/keepalived.conf /etc/keepalived/keepalived.conf.bak  # 不使用自带的配置文件
[root@HA-01 ~]# vim /etc/keepalived/keepalived.conf
vrrp_instance VI_1 {
   state MASTER
   interface ens32
   virtual_router_id 51
   priority 100
   advert_int 1
   authentication {
       auth_type PASS
       auth_pass 123456
   }

   virtual_ipaddress {
       192.168.190.101
   }
}
配置说明:
state MASTER:定义节点角色为master,当角色为master时,该节点无需争抢就能获取到VIP。集群内允许有多个master,当存在多个master时,master之间就需要争抢VIP。为其他角色时,只有master下线才能获取到VIPinterface ens32:定义可用于外部通信的网卡名称,网卡名称可以通过ip addr命令查看virtual_router_id 51:定义虚拟路由的id,取值在0-255,每个节点的值需要唯一,也就是不能配置成一样的priority 100:定义权重,权重越高就越优先获取到VIPadvert_int 1:定义检测间隔时间为1秒authentication:定义心跳检查时所使用的认证信息auth_type PASS:定义认证类型为密码auth_pass 123456:定义具体的密码
virtual_ipaddress:定义虚拟IP(VIP),需要为同一网段下的IP,并且每个节点需要一致
完成以上配置后,启动keepalived服务:
[root@HA-01 ~]# systemctl start keepalived当keepalived服务启动成功,使用ip addr命令可以查看到网卡绑定的虚拟IP: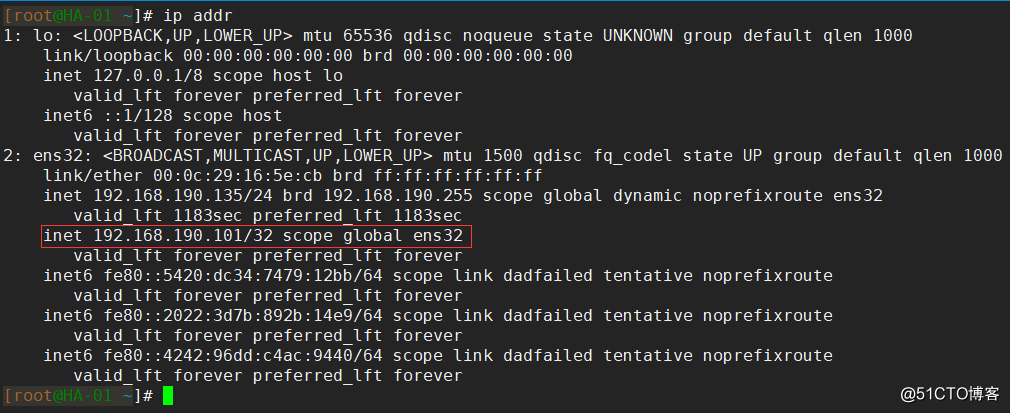
另一个节点也是使用以上的步骤进行安装和配置,这里就不再重复了。不过要注意virtual_router_id不能配置成一样的,而virtual_ipaddress则必须配置成同一个虚拟ip。
测试Keepalived
以上我们完成了Keepalived的安装与配置,最后我们来测试Keepalived服务是否正常可用,以及测试Haproxy是否已具有高可用性。
首先,在其他节点上测试虚拟IP能否正常ping通,如果不能ping通就需要检查配置了。如图,我这里是能正常ping通的: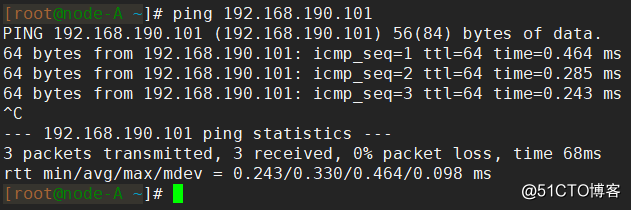
常见的虚拟IP ping不通的情况:
- 防火墙配置有误,没有正确开启VRRP协议
- 配置的虚拟IP与其他节点的IP不处于同一网段
- Keepalived配置有误,或Keepalived根本没启动成功
确认能够从外部ping通Keepalived的虚拟IP后,使用Navicat测试能否通过虚拟IP连接到数据库: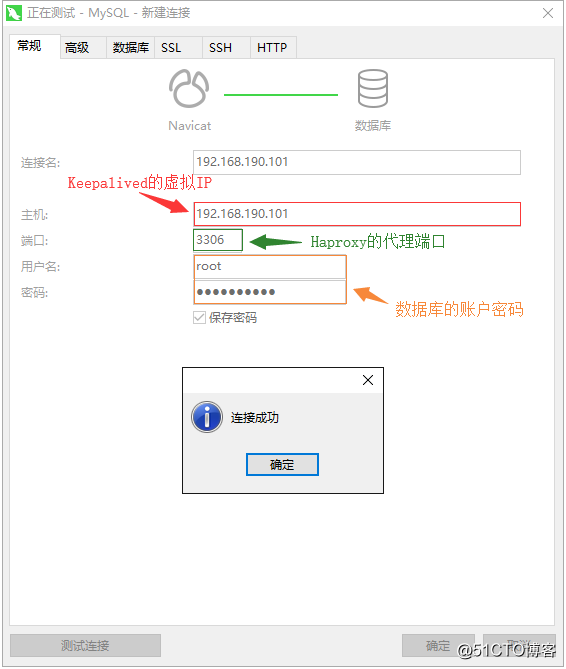
连接成功后,执行一些语句测试能否正常插入、查询数据: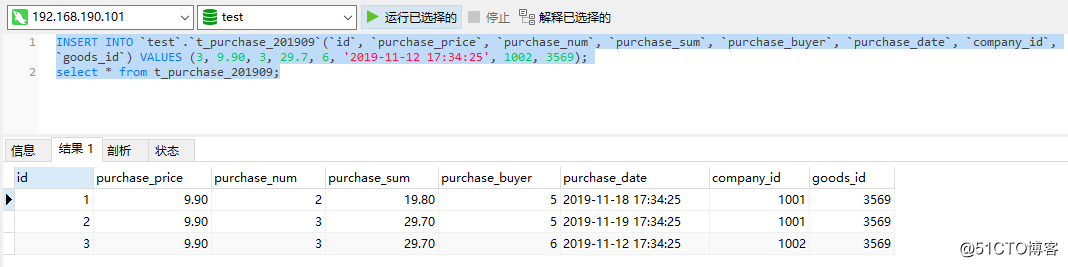
到此就基本没什么问题了,最后测试一下Haproxy的高可用性,将其中一个Haproxy节点上的Keepalived和Haproxy服务给关掉:
[root@HA-01 ~]# systemctl stop keepalived
[root@HA-01 ~]# systemctl stop haproxy
然后再次执行执行一些语句测试能否正常插入、查询数据,如下能正常执行代表Haproxy节点已具有高可用性:
最后将所有的服务恢复成运行状态,验证停止的节点恢复之后数据是否是一致的。如下,我这里两个Replication节点的数据都是一致的:
实践数据归档
到此为止,我们就完成了高可用Replication集群的搭建。接下来就是实践如何将大量的冷数据从PXC集群分片中剥离出来并归档到Replication集群中,我这里有两个PXC集群分片: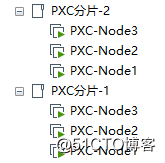
- 关于PXC集群的内容可以参考另一篇文章:为PXC集群引入Mycat并构建完整的高可用集群架构
每个分片里都有一张t_purchase表,其建表SQL如下。
create table t_purchase (
    id int unsigned primary key,
    purchase_price decimal(10, 2) not null comment '进货价格',
    purchase_num int unsigned not null comment '进货数量',
    purchase_sum decimal(10, 2) not null comment '进货总价',
    purchase_buyer int unsigned not null comment '采购者',
    purchase_date timestamp not null default current_timestamp comment '采购日期',
    company_id int unsigned not null comment '进货企业的id',
    goods_id int unsigned not null comment '商品id',
    key idx_company_id(company_id),
    key idx_goods_id(goods_id)
) comment '进货表';
每个分片合计共存储了100w条进货数据: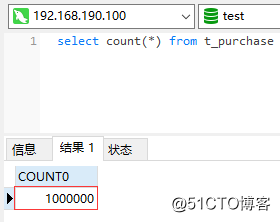
其中有60w条进货数据的采购日期都是2019-11-01之前的: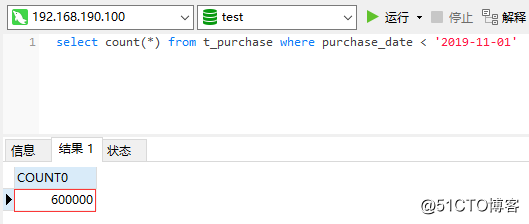
现在的需求是将2019-11-01之前的数据都剥离出来进行归档,这要如何实现呢?自己写代码肯定是比较麻烦的,好在Percona工具包里提供了一个用于归档数据的工具:pt-archiver,使用该工具可以很轻松的完成数据归档,免除了自己写归档程序的麻烦。pt-archiver主要有两个用途:
- 将线上数据导出到线下做数据处理
- 清理过期数据,并把数据归档到本地归档表中,或者远程归档服务器
想要使用pt-archiver首先得安装Percona工具包:
[root@node-A ~]# yum install -y https://repo.percona.com/yum/percona-release-latest.noarch.rpm
[root@node-A ~]# percona-release enable ps-80 release
[root@node-A ~]# yum install -y percona-toolkit安装完成后,验证pt-archiver命令是否可用:
[root@node-A ~]# pt-archiver --version
pt-archiver 3.1.0
[root@node-A ~]# 接着就可以使用pt-archiver命令进行数据的归档了,首先需要在Replication集群中创建一张归档表,表名以归档的数据日期为后缀,存储引擎使用TokuDB。具体的建表SQL如下:
create table t_purchase_201910 (
    id int unsigned primary key,
    purchase_price decimal(10, 2) not null comment '进货价格',
    purchase_num int unsigned not null comment '进货数量',
    purchase_sum decimal(10, 2) not null comment '进货总价',
    purchase_buyer int unsigned not null comment '采购者',
    purchase_date timestamp not null default current_timestamp comment '采购日期',
    company_id int unsigned not null comment '进货企业的id',
    goods_id int unsigned not null comment '商品id',
    key idx_company_id(company_id),
    key idx_goods_id(goods_id)
) engine=TokuDB comment '2019年10月的进货数据归档表';然后使用pt-archiver命令完成数据归档,如下示例:
[root@node-A ~]# pt-archiver --source h=192.168.190.100,P=3306,u=admin,p=Abc_123456,D=test,t=t_purchase --dest h=192.168.190.101,P=3306,u=archive,p=Abc_123456,D=test,t=t_purchase_201910 --no-check-charset --where 'purchase_date < "2019-11-01 0:0:0"' --progress 50000 --bulk-delete --bulk-insert --limit=100000 --statistics- Tips:
pt-archiver命令是使用load data语句进行数据导入的,所以要确保MySQL开启了local_infile。如果没有开启的话归档数据会失败,可以使用set global local_infile = 'ON';语句来开启local_infile。
命令参数说明:
--source:指定从哪个数据库读取数据--dest:指定将数据归档至哪个数据库--no-check-charset:不检查数据的字符集--where:指定将哪些数据进行归档,在本例中就是将2019-09-11之前的数据进行归档--progress:指定当归档完多少条数据时打印一次状态信息--bulk-delete:指定批量删除归档数据。数据的删除有事务保证,不会出现未归档成功就将数据删除了的情况--bulk-insert:指定批量写入归档数据--limit:指定每次归档多少条数据--statistics:归档数据完成后打印统计信息
等待大约15分钟左右数据就归档完成了,输出的统计信息如下: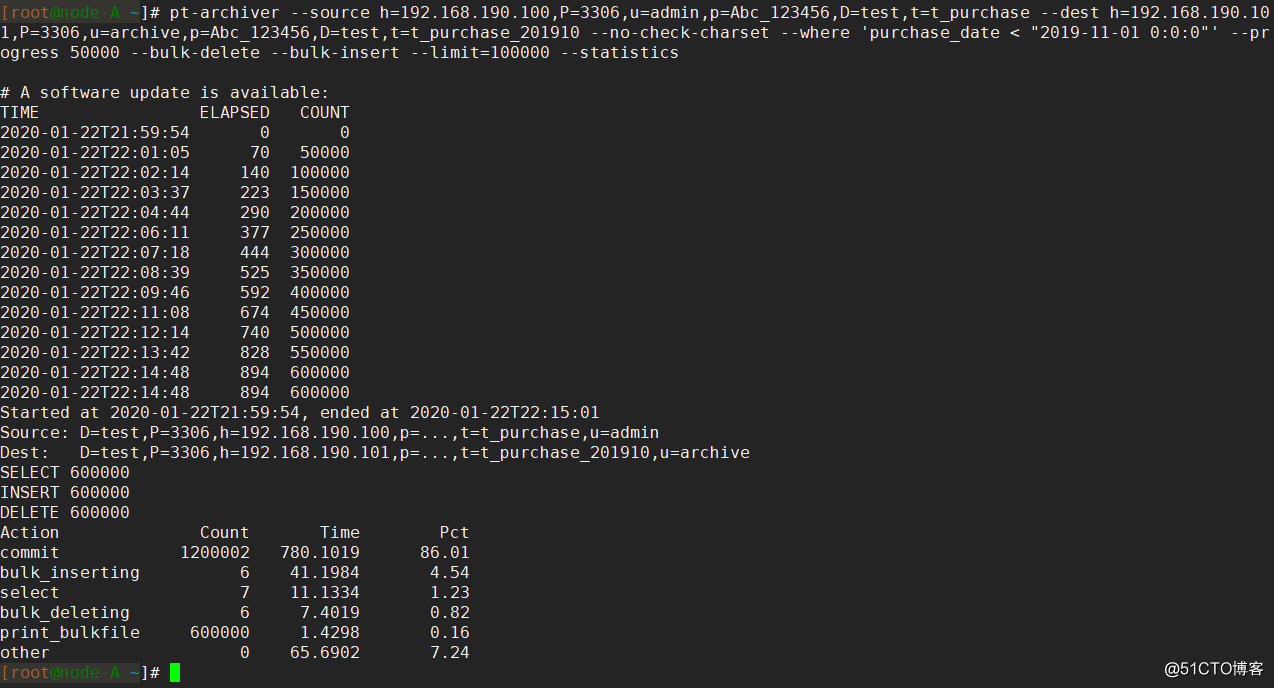
此时在Replication集群上可以看到那60w数据都已经存储到了归档表中: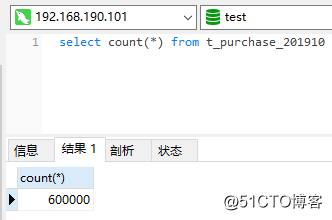
而原本的PXC集群中就只剩40w数据了: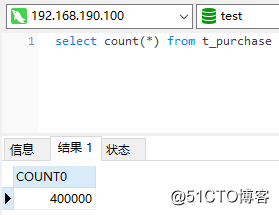
Thus we have completed the separation of hot and cold data, and a large number of cold storage of data to the specified archive database.
to sum up
- Separating the hot and cold data, low-value cold store data to an archive repository to maintain the efficiency of heat data write
- Use TokuDB engine preservation archive data, with high-speed writing characteristics
- Dual use Redundancy archive library structures, high-availability
- Use
pt-archivercan export large amounts of data storage and archiving, and easy