yolov7 trains its own data set
1. Install yolov7 and configure
1. Install Anaconda
Miniconda Tsinghua source: https://mirrors.tuna.tsinghua.edu.cn/anaconda/miniconda/
Miniconda3-py38_4.9.2-Windows-x86_64.exe:https://mirrors.tuna.tsinghua.edu.cn/anaconda/miniconda/Miniconda3-py38_4.9.2-Windows-x86_64.exe
2. Create a virtual environment
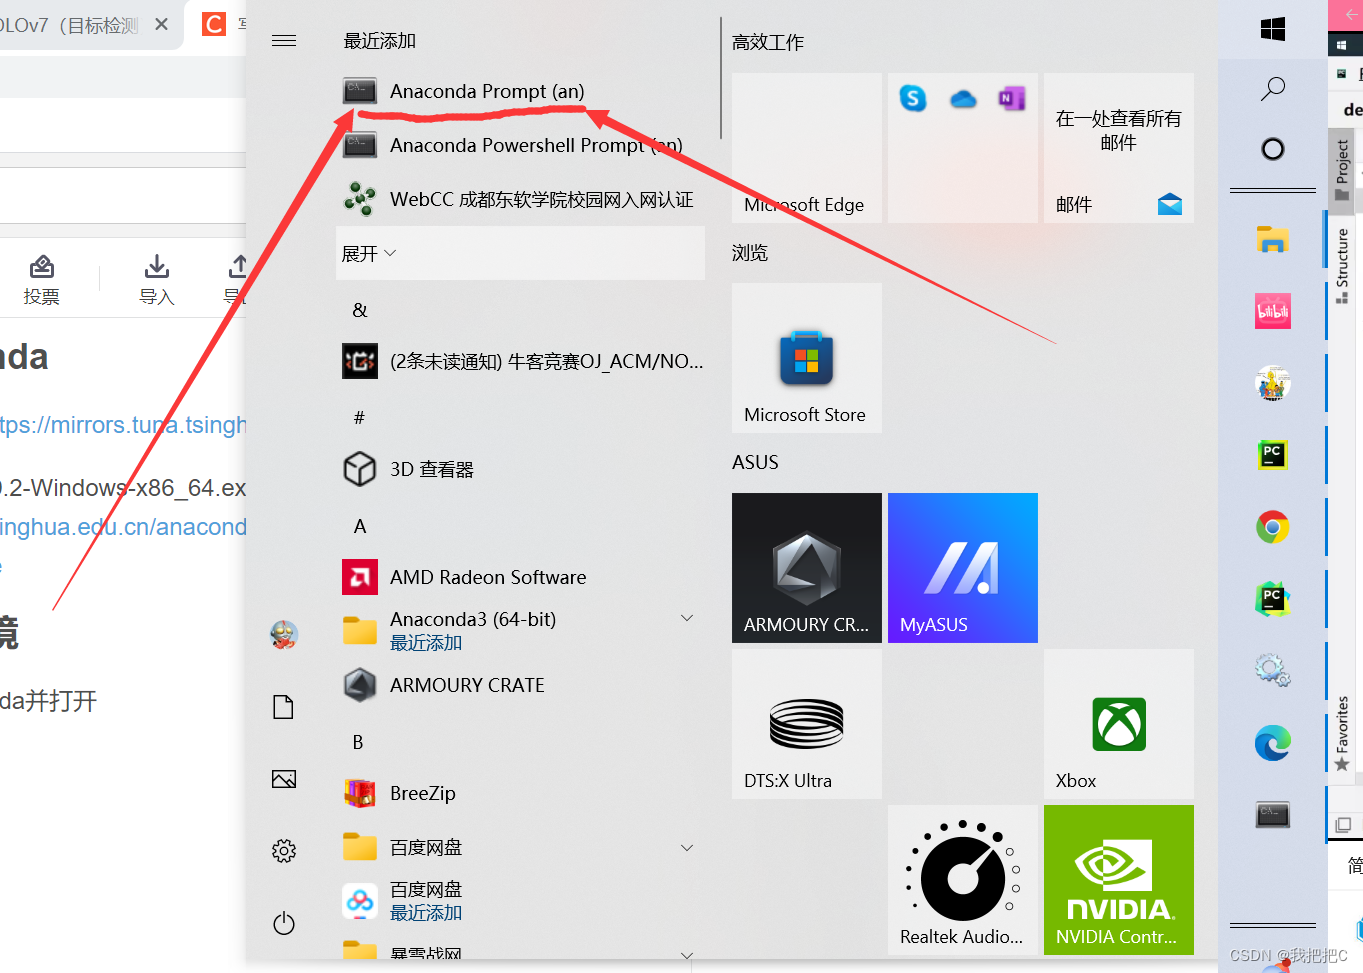
Find Anaconda in the start and open
1. Create
conda create -n yolov7 python=3.7 -y
2. Activate
conda activate yolov7

3. Exit the environment
conda deactivate
3. Download yolov7 source code
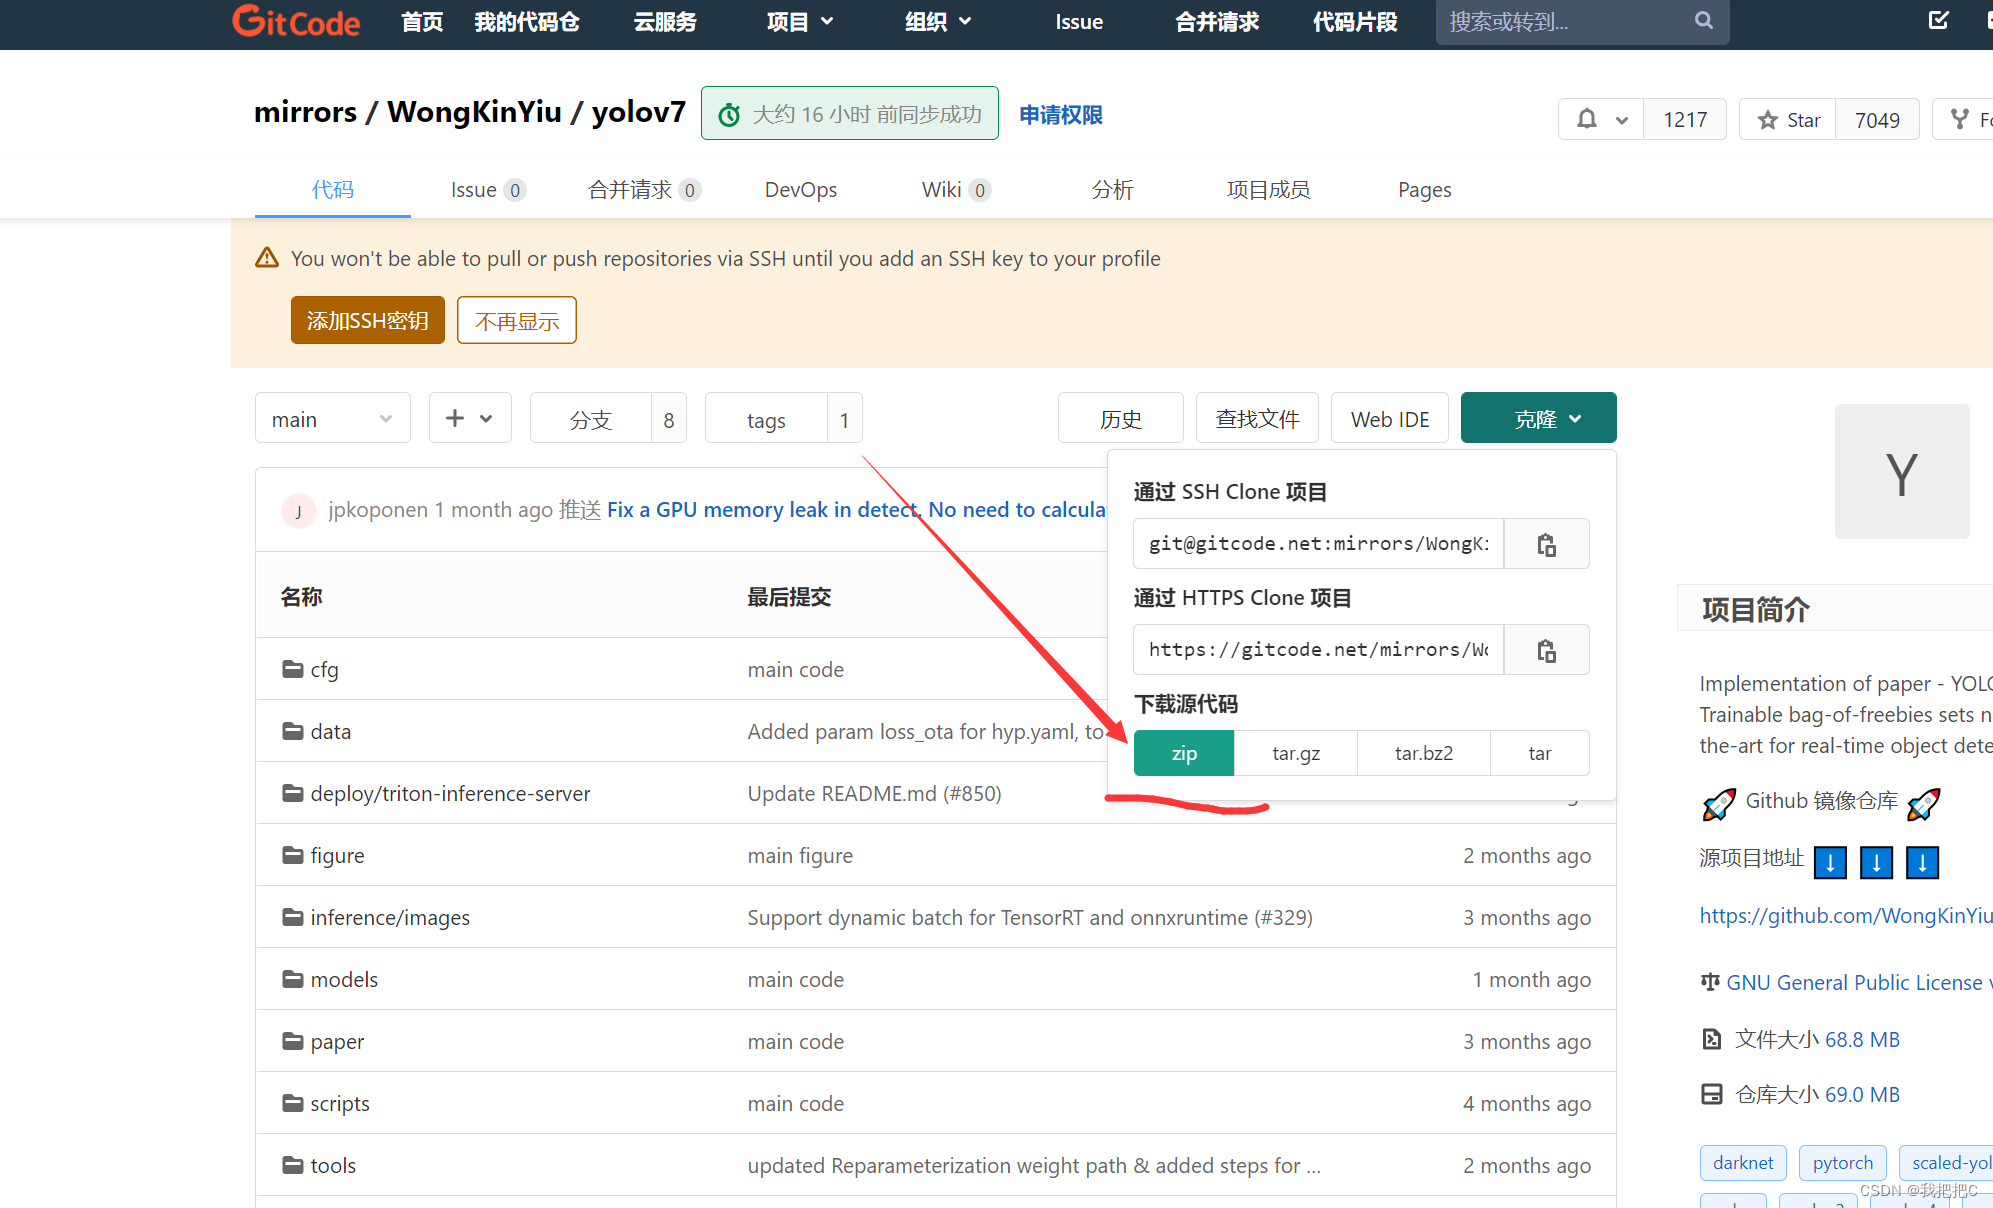
Method 1: yolov7 official website: https://github.com/WongKinYiu/yolov7
Method 2: Open cmd and enter the following command
git clone https://gitee.com/YFwinston/yolov7.git
cd yolov7
4. Download Weight
Method 1: Download from Baidu Netdisk https://pan.baidu.com/s/1DbG5bI_Sm1U62poE9yb5dQ
Extraction code: cvss
Method 2: Download from the official website (very slow and not recommended)
Open the official website and scroll down to find
the official website of Testing yolov7: https:/ /github.com/WongKinYiu/yolov7
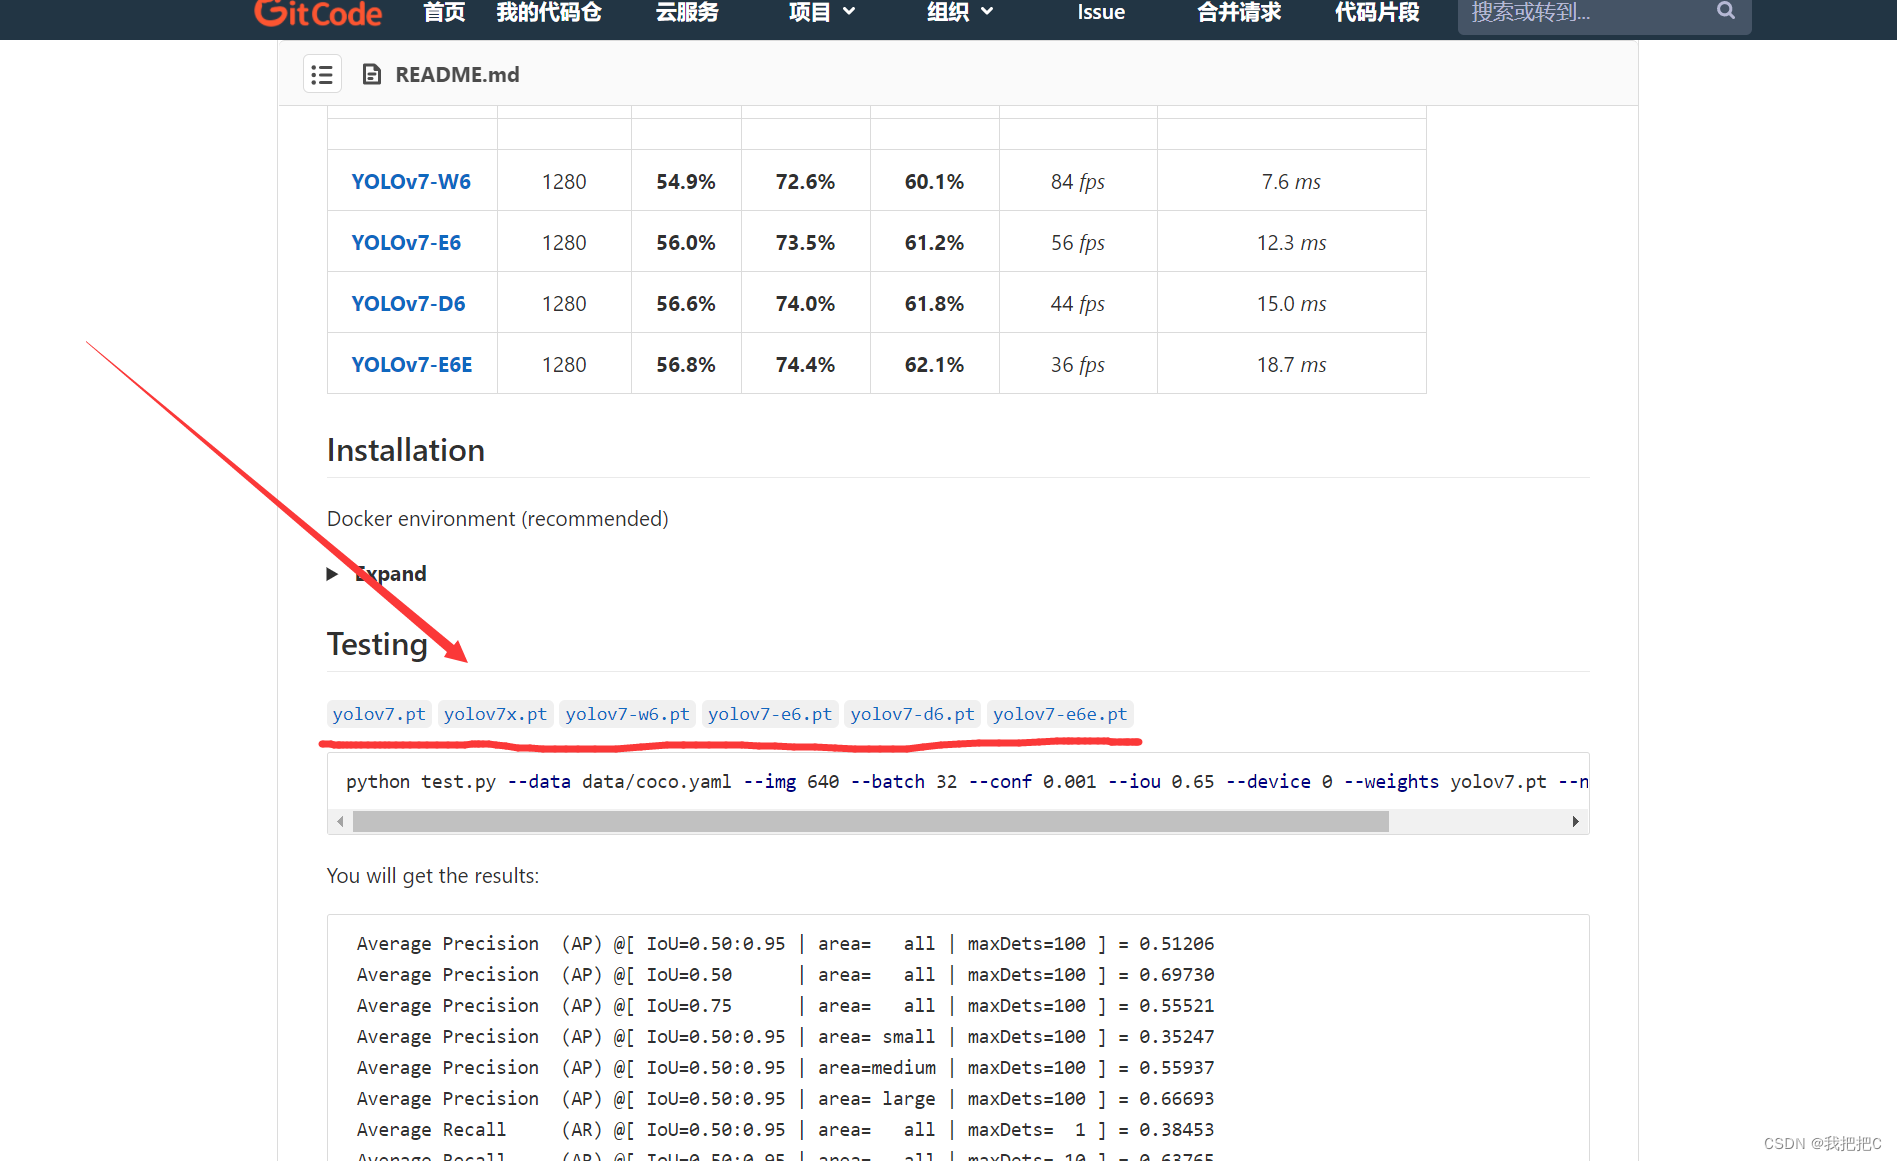
After the weight download is complete, drag it into the downloaded yolov7 folder
5. Install dependencies
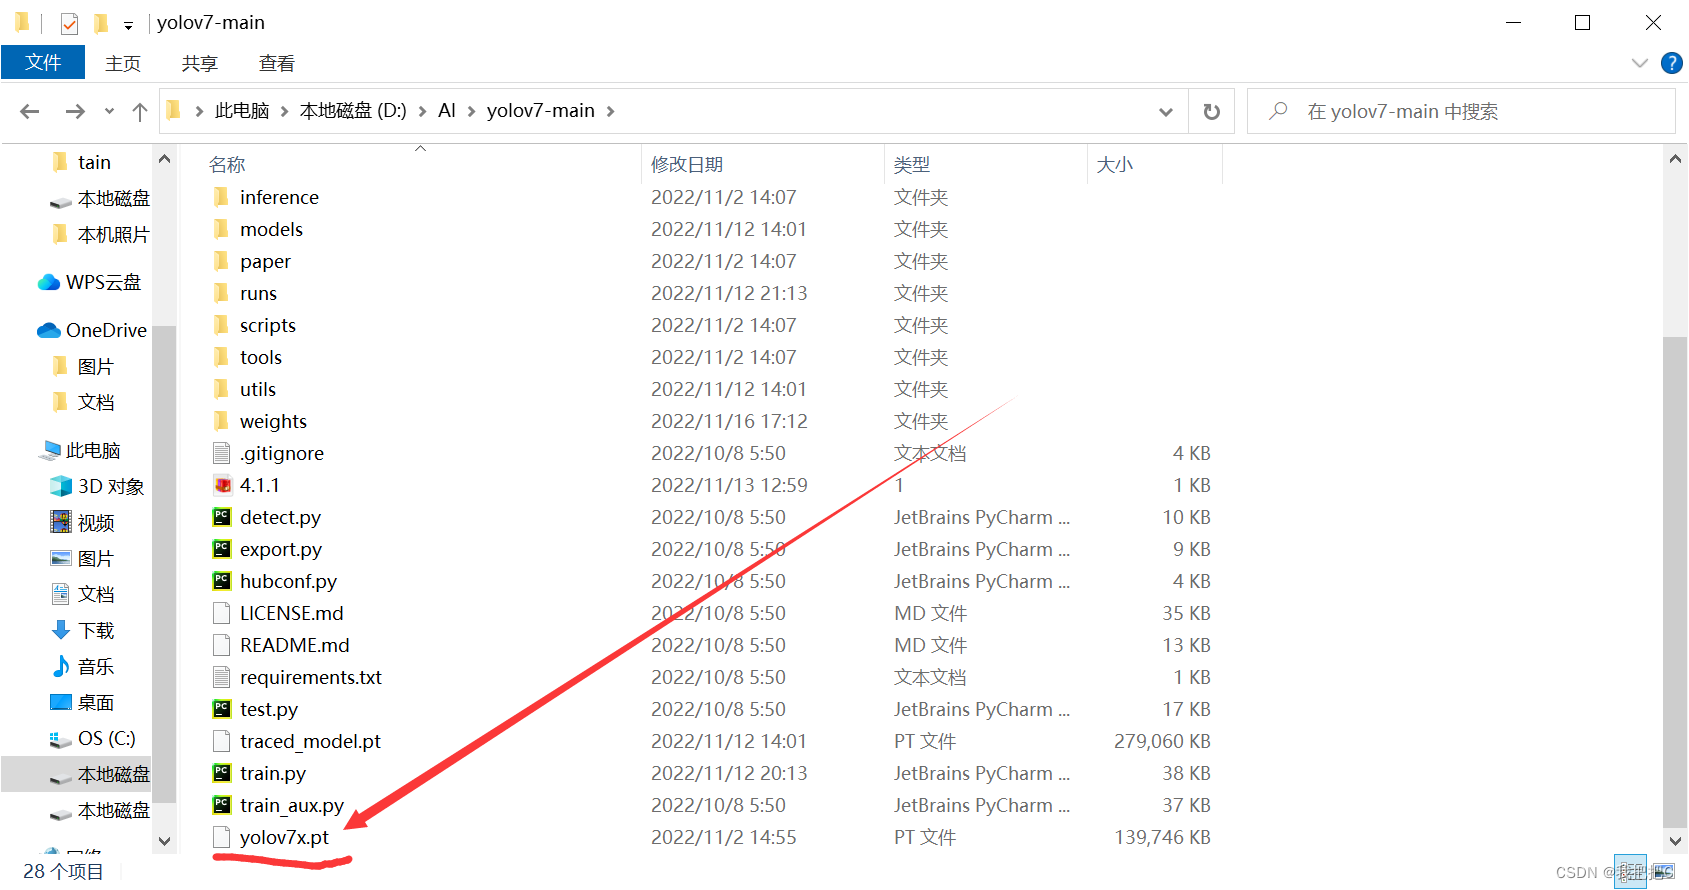
After opening the yolov7 folder, confirm whether there is a requirements.txt document in the folder.
Enter cmd above the folder and press Enter to open it as shown in the figure
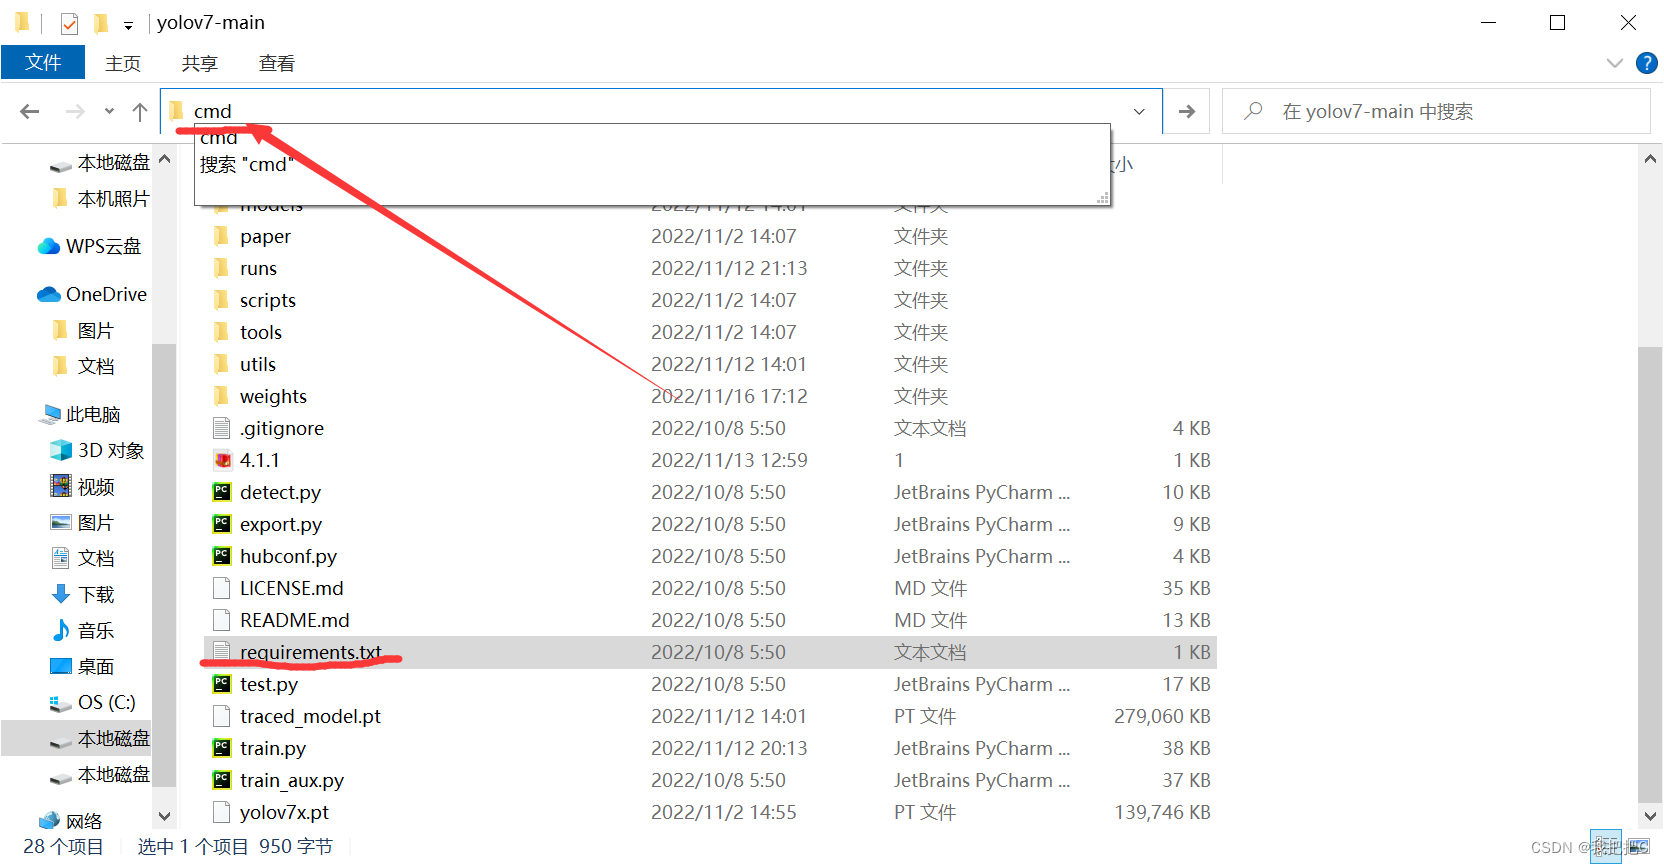
. Enter the following command in the opened cmd (it may take a while to install)
pip install -r requirements.txt -i https://pypi.tuna.tsinghua.edu.cn/simple
2. Run target detection
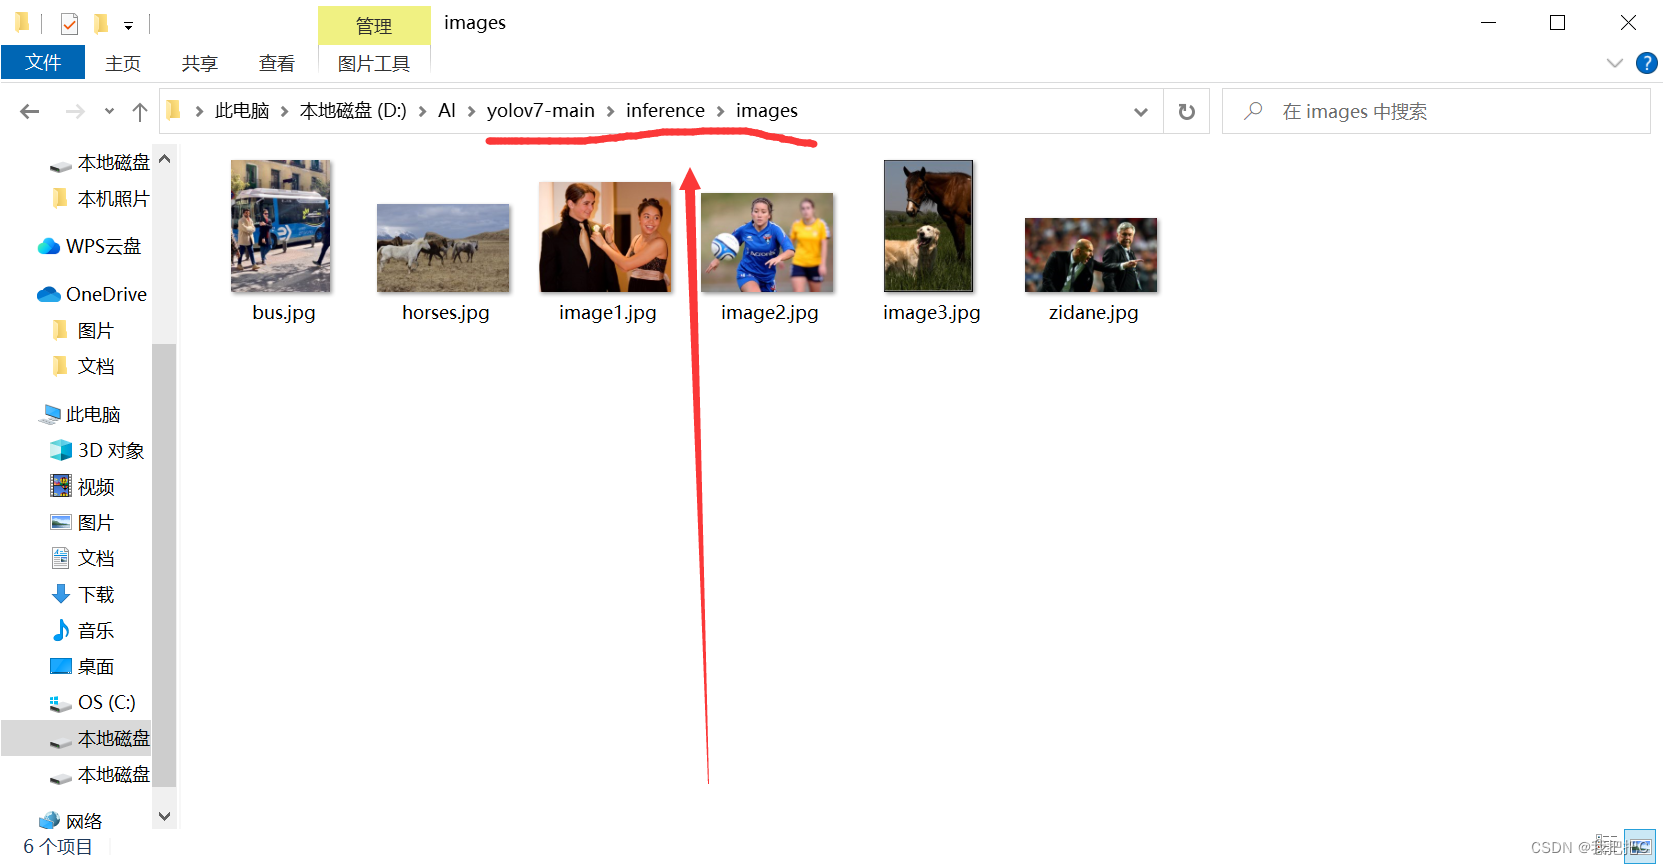
Open the folder where yolov7 is located,
take a handsome photo of yourself and put it in the images folder in the inference folder,
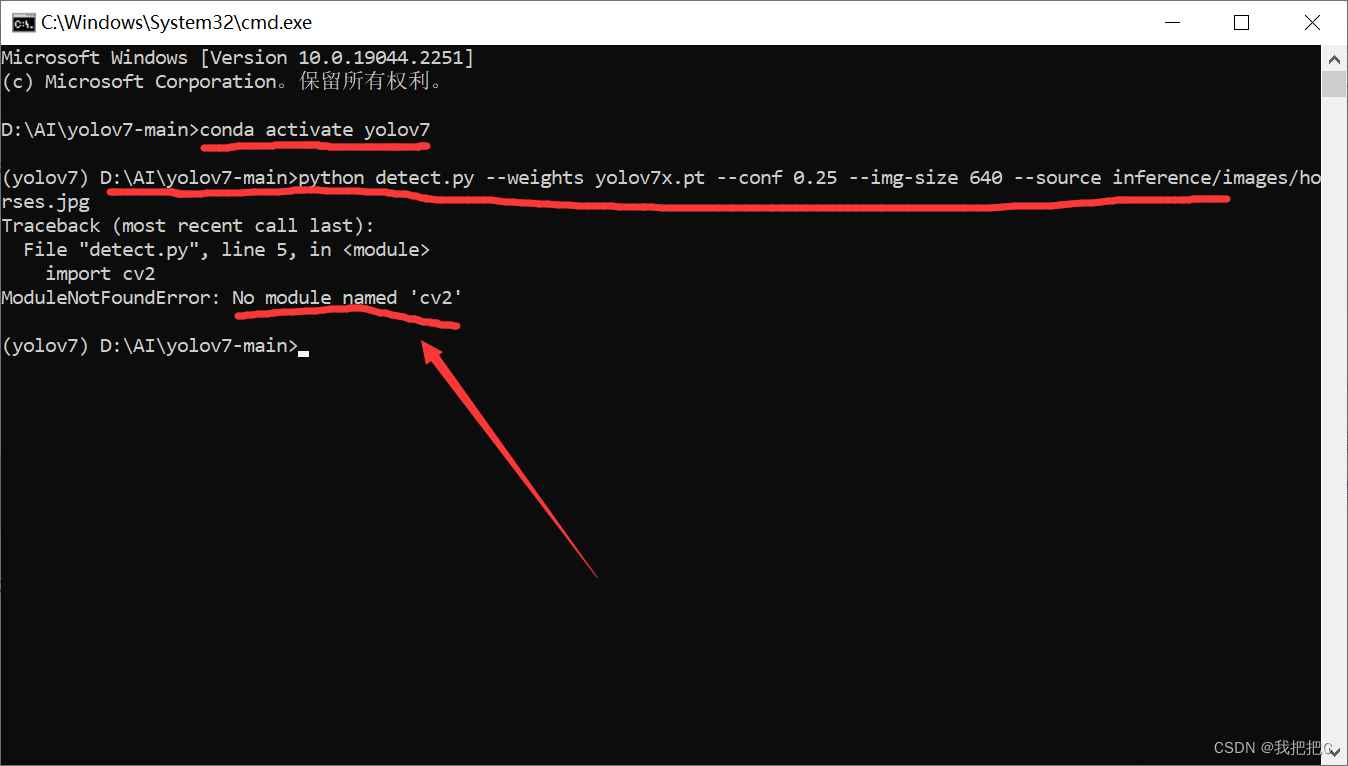
open cmd in the yolov7 folder and activate the yolov7 environment, then run detect.py for detection
conda activate yolov7
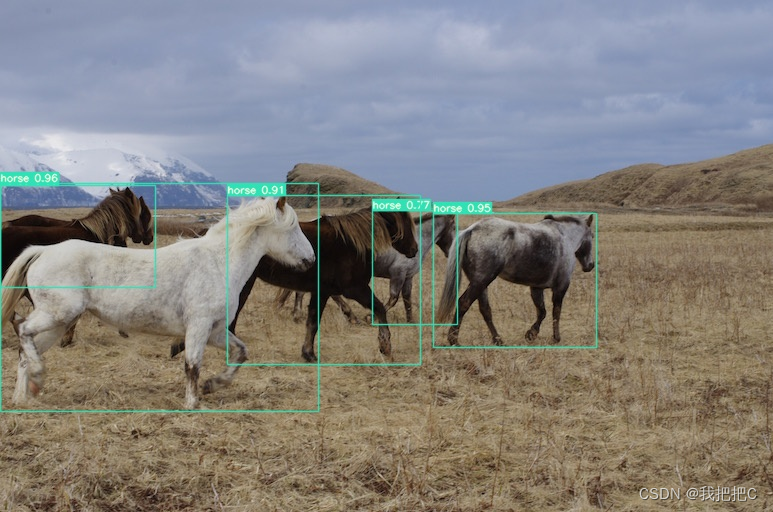
python detect.py --weights yolov7x.pt --conf 0.25 --img-size 640 --source inference/images/horses.jpg
horses.jpg can be changed to your own picture name
If an error is reported: ModuleNotFoundError: No module named 'cv2' input in cmd
pip install opencv-contrib-python
The results of the run are in the runs/detect folder
3. Training from the data set
1. Create the required files
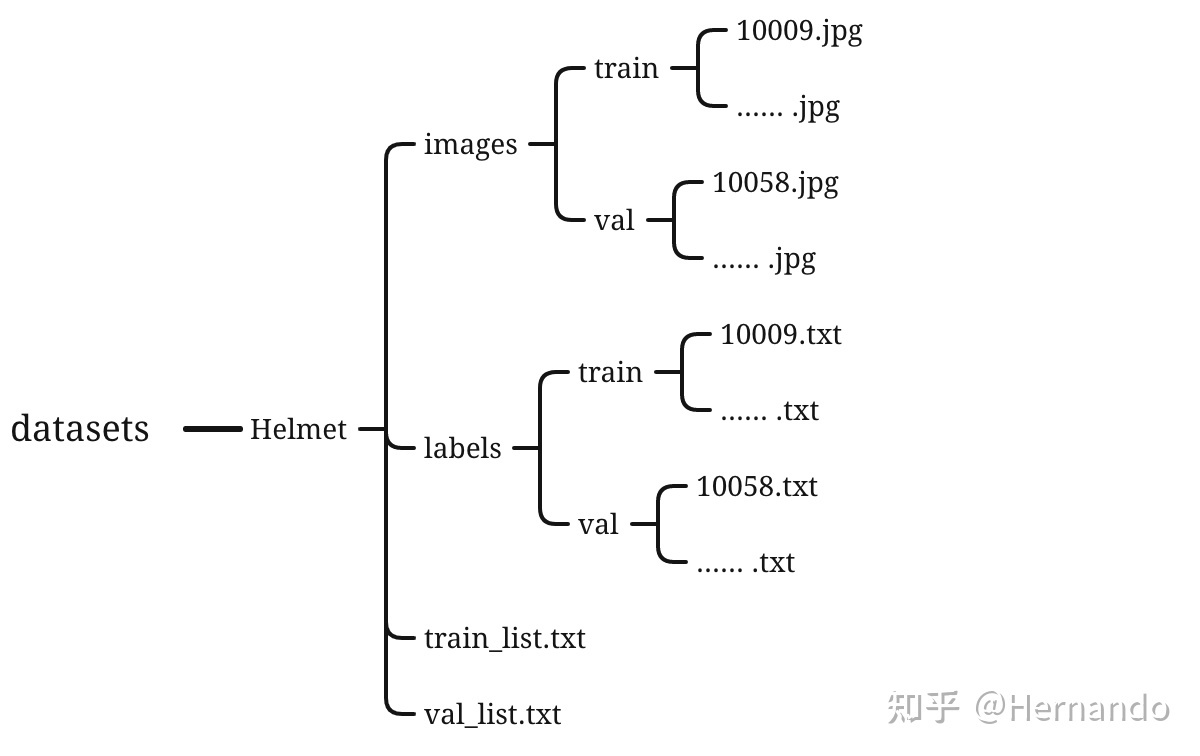
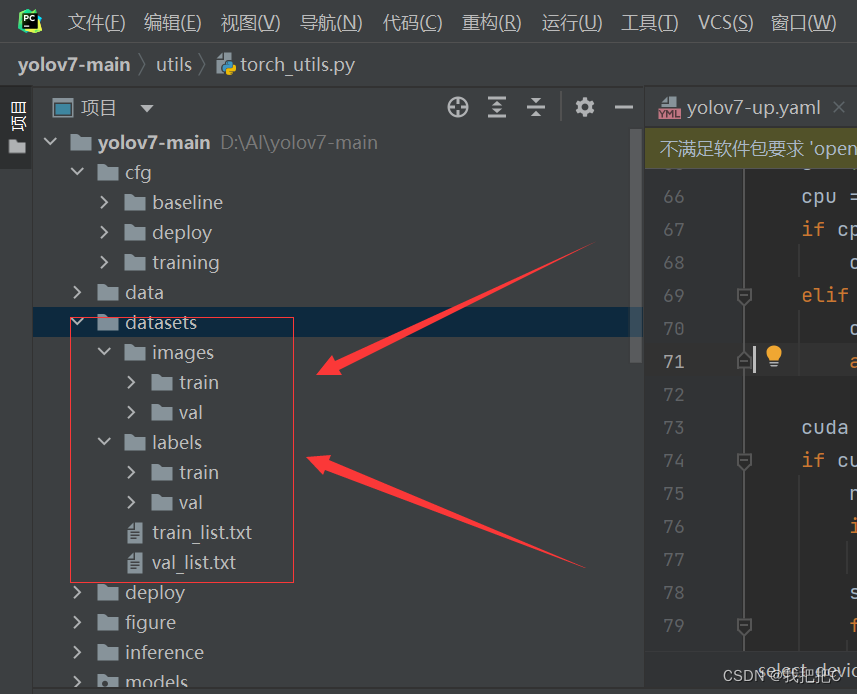
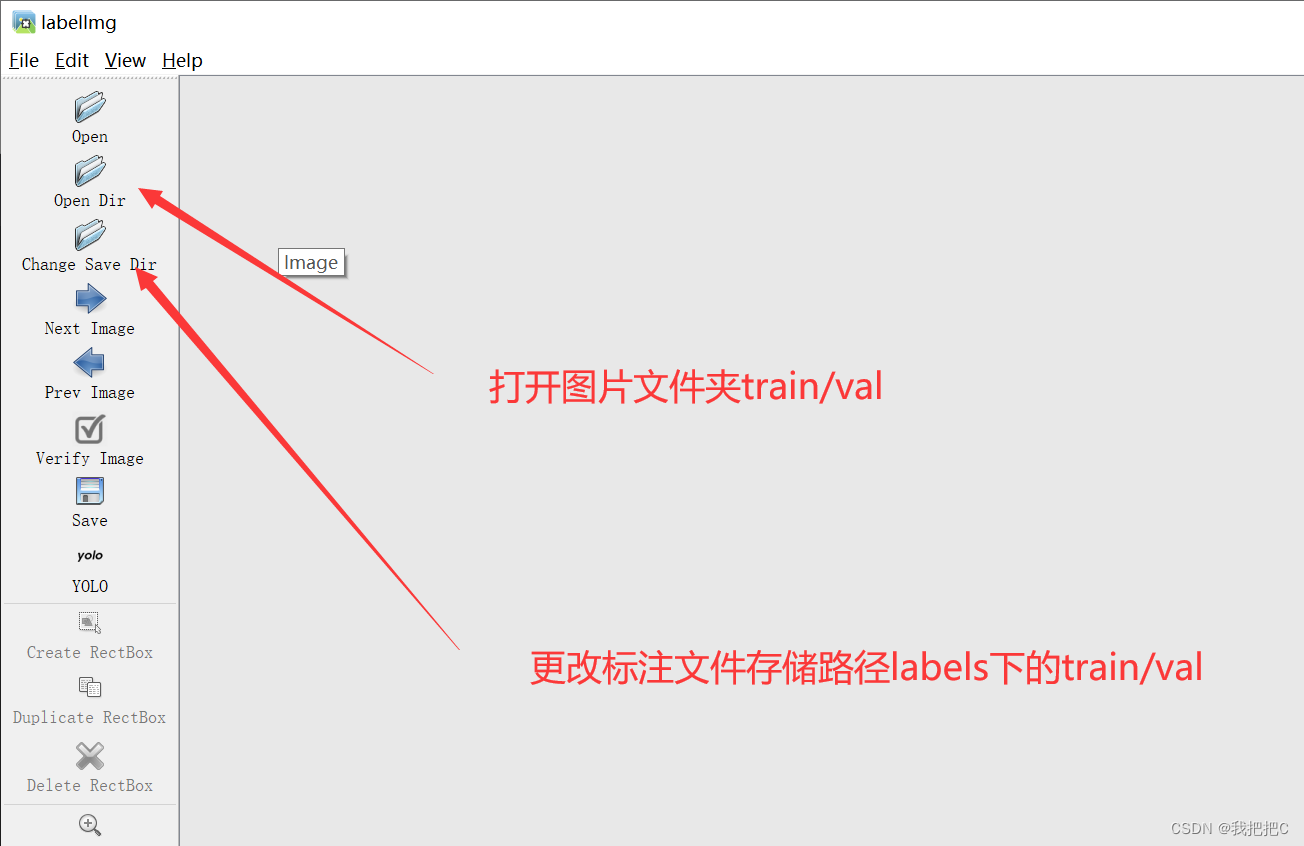
As shown in the figure, we create the datasets folder under yolov7 and then create the images and labels folders. One is used to put pictures, and the other is used to store the txt data after processing jpg pictures in the images folder. Put the pictures you need to
train Put a similar number of pictures into the two folders under images/train and val
2. Download the labelImg labeling tool
Refer to:::: labelImg tutorial,
first open Anaconda
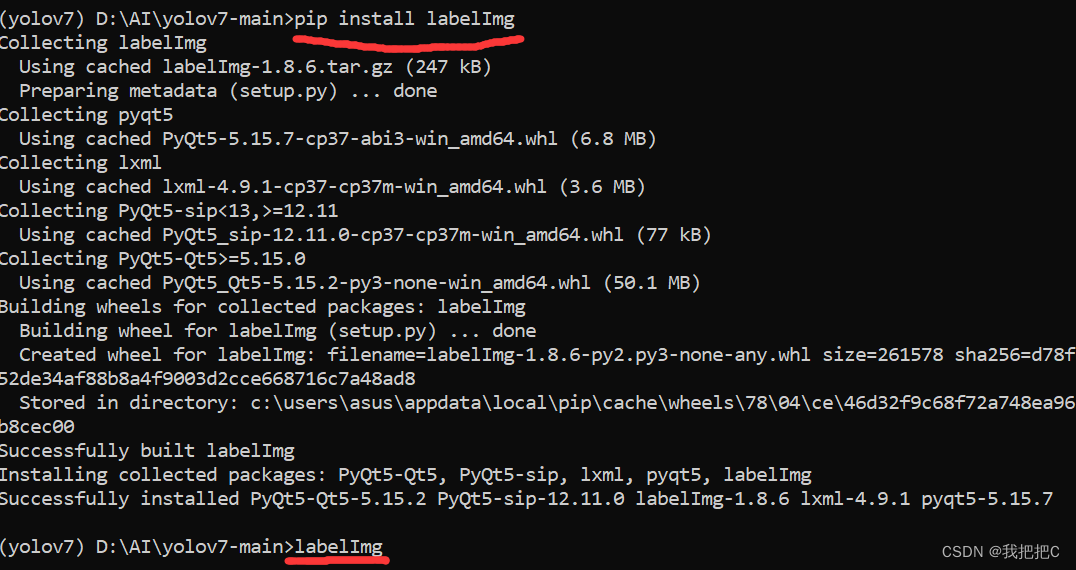
and enter the following command to install
pip install labelImg
After the installation is successful, enter labelImg in cmd to open
labelImg
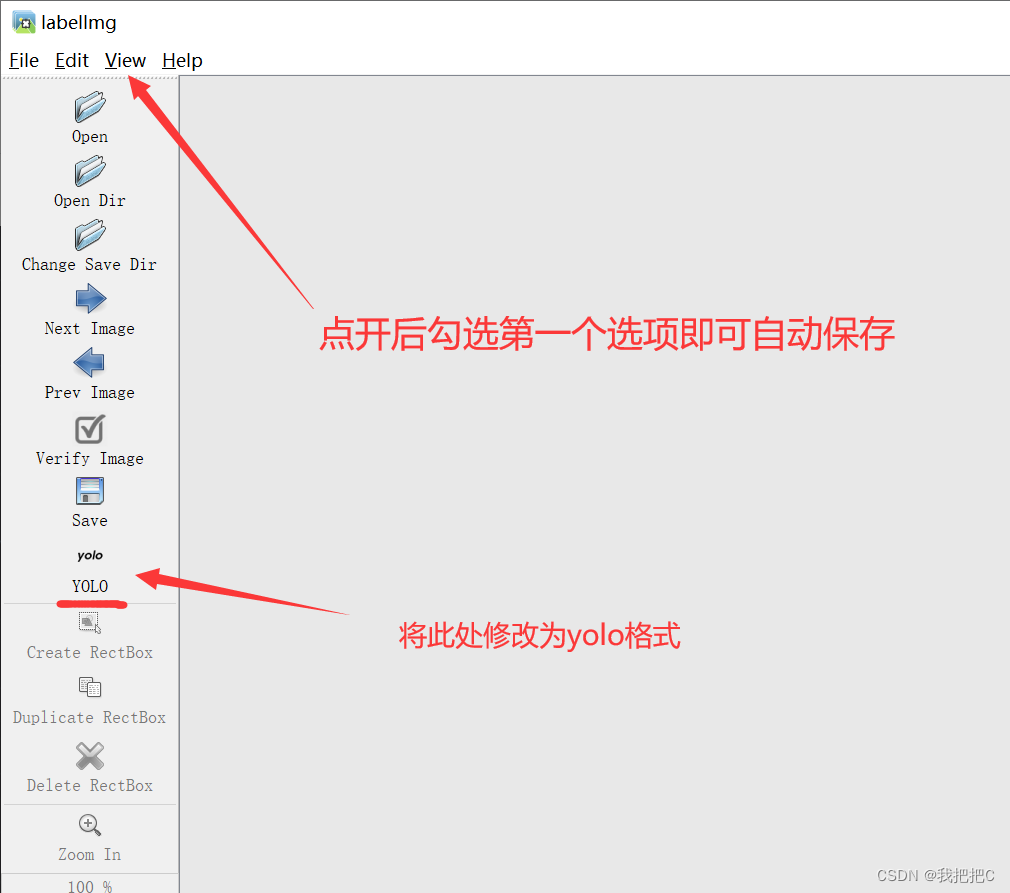
Press w to select the object you want to mark
3. Configure training related files
There are a total of two files that need to be configured, one is /yolov7/cfg/training/yolov7.yaml, which is the configuration file of the model; the other is /yolov7/data/coco.yaml, which is the configuration file of the dataset.
1. The first step is to copy the yolov7.yaml file to the same path, and then rename it, we rename it to yolov7-xxx.yaml (with a name you want) and then open

2. Copy the coco.yaml file to the same Under the path, and then rename it, we named it xxx.yaml. (Choose a name you like) After opening, make changes as shown in the figure below
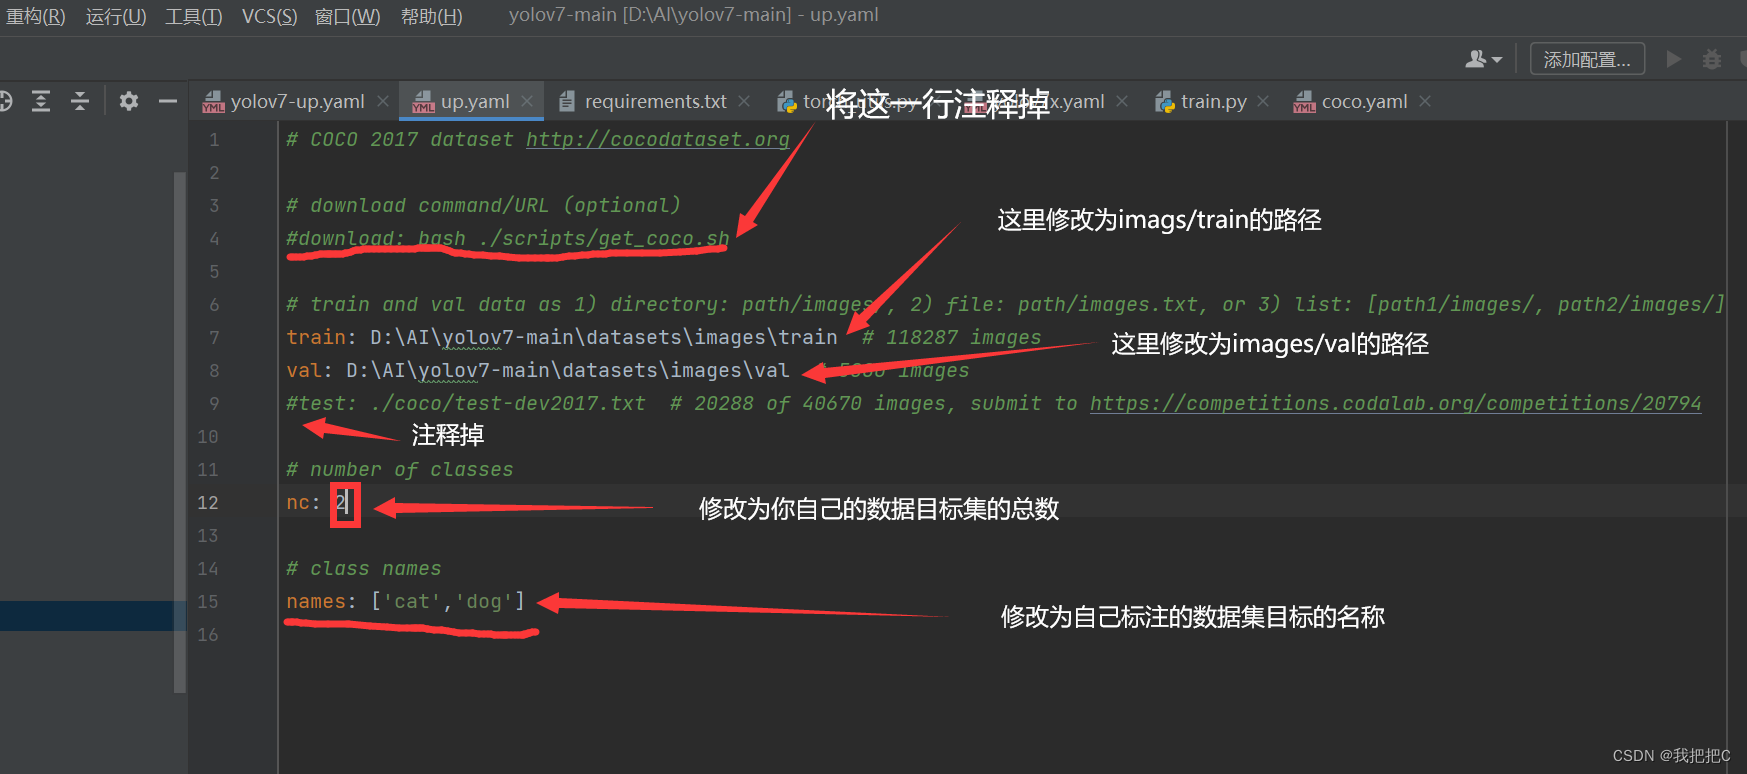
ok
4. Formal training
At this point, we are in cmd under the yolov7 folder path, and activate the virtual environment, and enter the command
conda activate yolov7
After activating the environment, enter
python train.py --weights yolov7x.pt --cfg cfg/training/yolov7-xxx.yaml --data data/xxx.yaml --batch-size 8 --epoch 300 --device 0
Note that you must change xxx to your own file name.
Here we use gpu for training. If you use cpu to remove --device 0
Explanation of parameters
–cfg accepts model configuration parameters
–data receives data configuration parameters
–device 0 training type, I am a GPU so use 0
–batch-size 8 GPU memory size determines
–epoch training times, 300 is recommended
–weights training weight
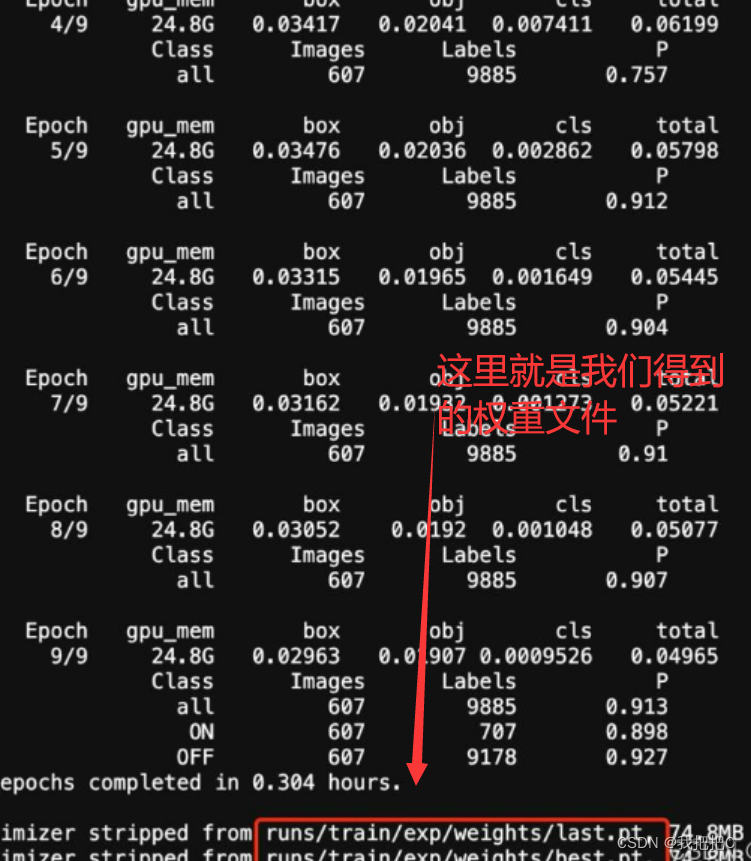
5. Use your own weights
Just like detect, enter the virtual environment and enter the weight path and image path and it will be ok, the command is as follows
I pulled best.pt directly under the path of the yolov7 folder. The command you just trained in runs/train/circle/weights/best.pt is as follows
python detect.py --weights best.pt --source xxx --device 0
Pay attention to replace xxx with your own picture path
ok