1. Model mobile terminal environment deployment
You can refer to:
2. Training model
The yolov5 used in this article is an open source product of Ultralytics, which was implemented by Glenn. Many cooperative developers participated in the project. The development iteration speed is very fast, and there are updates every three days .
The colab of GOOGLE used in this training does not need to configure pytorch in its own environment, which is very convenient.
Of course, this needs to go over the wall. If you need it, you can go and collect it: Login - iKuuu VPN . This is currently free to use. If you can’t afford it, you can also spend 5 yuan a month, which is also cheap: Login — Ari Connect Overseas Acceleration Service
And in order to prevent the official update from changing, this article saves the official code on its own github, so that this tutorial can be used continuously.
1. Link to Google Cloud Disk

In this step, you should upload your data set to Google Cloud Disk. If the amount of data is large, you can refer to:
My picture here is small, uploaded to Google cloud disk as shown in the figure (where Labels and images are the corresponding relationship):

The corresponding format of label is:

If the data set is small, you can directly decompress it on the network disk and open it. If the data set is large, follow the steps below.
2. First copy the official source code:
! git clone https://github.com/ultralytics/yolov5.git
Then run to download the dependent library:
!pip install -r /content/yolov5/requirements.txt
3. Data set preparation (both statements of madir must be run)
!mkdir /content/datasets/!mkdir /content/datasets/coco128
%cp -av /content/drive/MyDrive/yolov5/images.zip /content/datasets/coco128/images %cp -av /content/drive/MyDrive/yolov5/labels.zip /content/datasets/coco128/ Then unzip the two files.
!pip install pyunpack
!pip install patool
from pyunpack import Archive
Archive('/content/datasets/coco128/labels.zip').extractall('/content/datasets/coco128')
Archive('/content/datasets/coco128/images.zip').extractall('/content/datasets/coco128')
After the above is completed, there will be the following interface:

Then modify /content/yolov5/data/coco128.yaml to your own dataset, and comment out the official download dataset code.

At this point, the dataset is ready. You can start training.
4. Training model
! python /content/yolov5/train.py
The trained model will be saved in:

3. Convert the model to a Tflite file:
float16 type
! python /content/yolov5/export.py --weights /content/yolov5/runs/train/exp4/weights/best.pt --include tflite --img 320int 8
python export.py --weights yolov5s.pt --include tflite --int8 --img 320 --data data/coco128.yamlAfter running successfully, there will be the following files:

Right-click and click Download.
4. Move the model to the Android terminal
1. Open android studio (default personal installation is successful, no, refer to Chapter 1)
2. Download the official android environment:
https://github.com/zldrobit/yolov5/tree/tf-android
3. Loading environment


4. Put the tflite file into the project file
Just one thing to note here is the naming of the tflite file. float16 and int8 are named differently.

Then put tflite into a file like this:

Then click run. If there is no virtual machine, please collect online how to install a virtual machine. If you want to deploy to the mobile terminal, please refer to the link in the first chapter.

5. Android mobile result display

5. Supplement
1. The trained model is transferred to the mobile terminal
This is the trained model, which needs to be sent to friends far away, but you will find that the app sent via qq remote cannot be used and cannot be installed. Then you need to change the code a little bit:
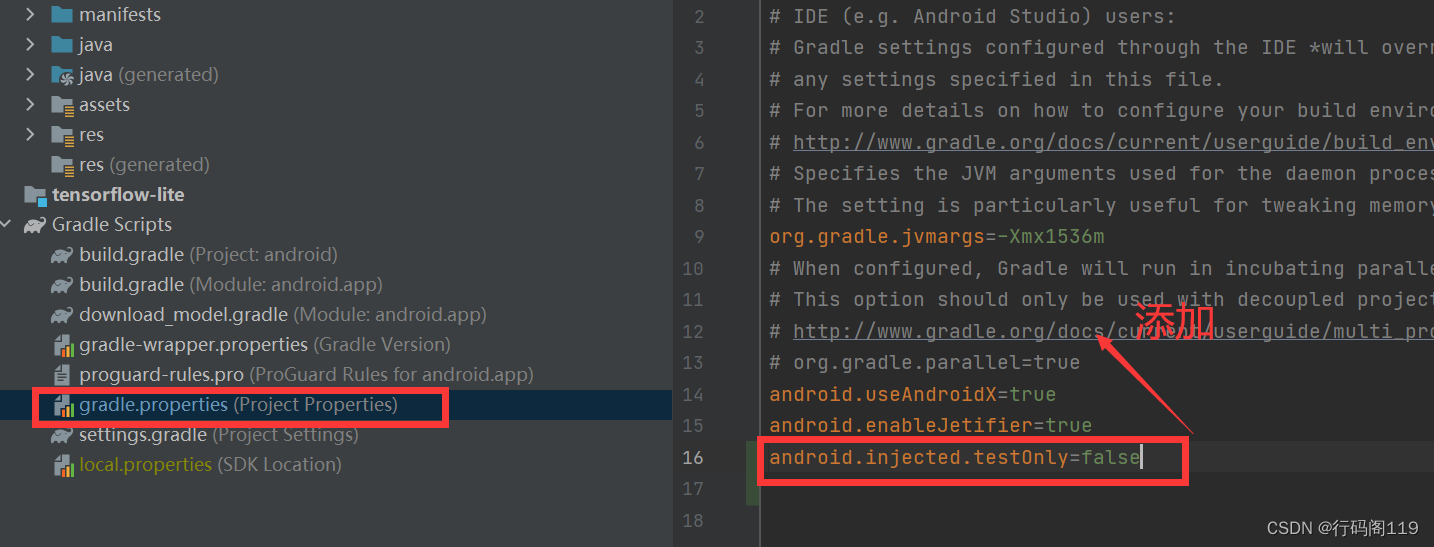
Add to:
android.injected.testOnly=falseand then just send
6. Conclusion
If you have any questions, please leave a message and discuss together.