Main points:
- Image processing summary
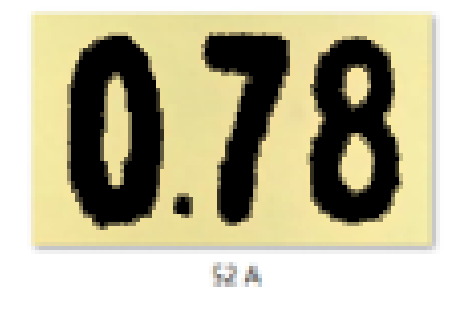
1 The code implements the ps magic wand tool, and takes the area with similar color values in the picture
Detailed code implementation: You can use the pillow and opencv libraries in python to read and process images. It is necessary to convert the picture into a matrix of pixels, and then analyze the color value. Clustering algorithms can be used to divide pixels into several color clusters, and then analyze their color value similarity to determine which clusters should be merged. After merging the pixels, convert them into pictures and output the result.
import cv2
from sklearn.cluster import KMeans
from PIL import Image
# 读取图片
img = cv2.imread('image.jpg')

# 转化为RGB模式
img = cv2.cvtColor(img, cv2.COLOR_BGR2RGB)

# 将图片转化为像素点的矩阵
pixels = img.reshape((-1, 3))

# 聚类算法
kmeans = KMeans(n_clusters=10)
kmeans.fit(pixels)

# 获取聚类的中心
colors = kmeans.cluster_centers_

# 计算相似度,合并颜色簇
tolerance = 50
merged = []
for i, color in enumerate(colors):
    similar = False
    for j, merged_color in enumerate(merged):
        if abs(color[0] - merged_color[0]) < tolerance \
                and abs(color[1] - merged_color[1]) < tolerance \
                and abs(color[2] - merged_color[2]) < tolerance:
            merged[j] = (
                (color[0] + merged_color[0]) / 2,
                (color[1] + merged_color[1]) / 2,
                (color[2] + merged_color[2]) / 2,
            )
            similar = True
            break
    if not similar:
        merged.append(color)

# 将像素点转化为聚类后的颜色
for i, pixel in enumerate(pixels):
    for j, color in enumerate(colors):
        if abs(pixel[0] - color[0]) < tolerance \
                and abs(pixel[1] - color[1]) < tolerance \
                and abs(pixel[2] - color[2]) < tolerance:
            pixels[i] = merged[j]
            break
# 将像素点转化为图片
new_img = Image.fromarray(pixels.reshape(img.shape))

# 显示结果
new_img.show()

# 保存结果
new_img.save('output.jpg')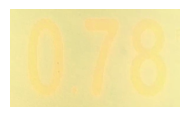
2 Use cv2 detailed code to achieve: according to the size of the yellow pixel value of the picture, set the pixel points above the average value of the image to white, and set the pixels below the average value to black
import cv2
import numpy as np
# 读取图片,并将像素值转换为HSV颜色空间
img = cv2.imread('image.jpg')
hsv = cv2.cvtColor(img, cv2.COLOR_BGR2HSV)

# 将HSV图像拆分成三个通道
h, s, v = cv2.split(hsv)

# 计算黄色像素点的掩膜
yellow_lower = np.array([20, 100, 100], dtype=np.uint8)
yellow_upper = np.array([30, 255, 255], dtype=np.uint8)
yellow_mask = cv2.inRange(hsv, yellow_lower, yellow_upper)

# 计算图像平均亮度,并将高于平均值的像素点设置为白色,低于平均值的像素点设置为黑色
mean_value = np.mean(v)
white_value = 255
black_value = 0
result = np.zeros_like(v)
result[v > mean_value] = white_value
result[v <= mean_value] = black_value
# 将黄色像素点的掩膜与平均亮度的结果合并
result = cv2.bitwise_and(result, yellow_mask)

# 显示结果
cv2.imshow('Original', img)
cv2.imshow('Result', result)
cv2.waitKey(0)
cv2.destroyAllWindows()
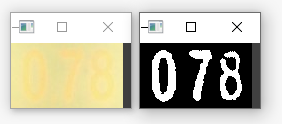
The effect is OK