There is no doubt that using single sign-on (SSO) to access multiple applications in an organization can improve the user experience. If you are responsible for enabling SSO for Amazon Redshift, you can set up SSO authentication using ADFS, PingIdentity, Okta, Azure AD, or other SAML browser-based identity providers.
This article shows you how to set up PingOne as your IdP. Contains the following steps:
- Configure IdP(PingOne) user groups and users – PingOne integrates Microsoft AD to obtain user groups and users
- Configure the IdP(PingOne) application – Create a PingOne application, specify the Amazon IAM Role used in the application, and specify the user group that uses the Role, and the user can use the Role to access the Redshift cluster
- Configure IAM SAML Federation – Set up a role that allows PingOne to access Amazon Redshift by establishing a trust relationship between the PingOne IdP and Amazon
- Create Amazon Redshift DBGroups Configuration Permissions – Create DBGroups in an Amazon Redshift database and authorize the schemas and tables that these DBGroups access.
- Test single sign-on – use the Workbench client tool for SSO login testing and authorization verification
| The Amazon cloud technology developer community provides developers with global development technology resources. There are technical documents, development cases, technical columns, training videos, activities and competitions, etc. Help Chinese developers connect with the world's most cutting-edge technologies, ideas, and projects, and recommend outstanding Chinese developers or technologies to the global cloud community. If you haven't paid attention/favorite yet, please don't rush over when you see this, click here to make it your technical treasure house! |
Solution overview
The process and steps of identity federation are as follows:
- The user logs in with the workbench client
- IdP (PingOne) reads the username and password in Microsoft AD for authentication,
- IDP authentication passes return SAML assertion
- The client uses the Amazon SDK to call Amazon Security Token Service (Amazon STS) to use SAML to assume the role (assume Role)
- Amazon STS returns temporary Amazon credentials
- Clients use temporary Amazon credentials to access Redshift

Federated Identity Single Sign-On Flowchart
configuration steps
premise
(1) Before configuration, if there is no PingOne service purchased in the organization, you need to visit
Try Ping for Free and Secure Your Customers/Workforce with leading SSO and MFA SolutionsSign up for a free account
(2) Microsoft AD needs access to the Internet, and the PingOne AD connector needs to be installed on the AD server to access the PingOne service
Create user groups and users in Microsoft AD domain
Log in to AD to create users and user groups and add users to corresponding user groups
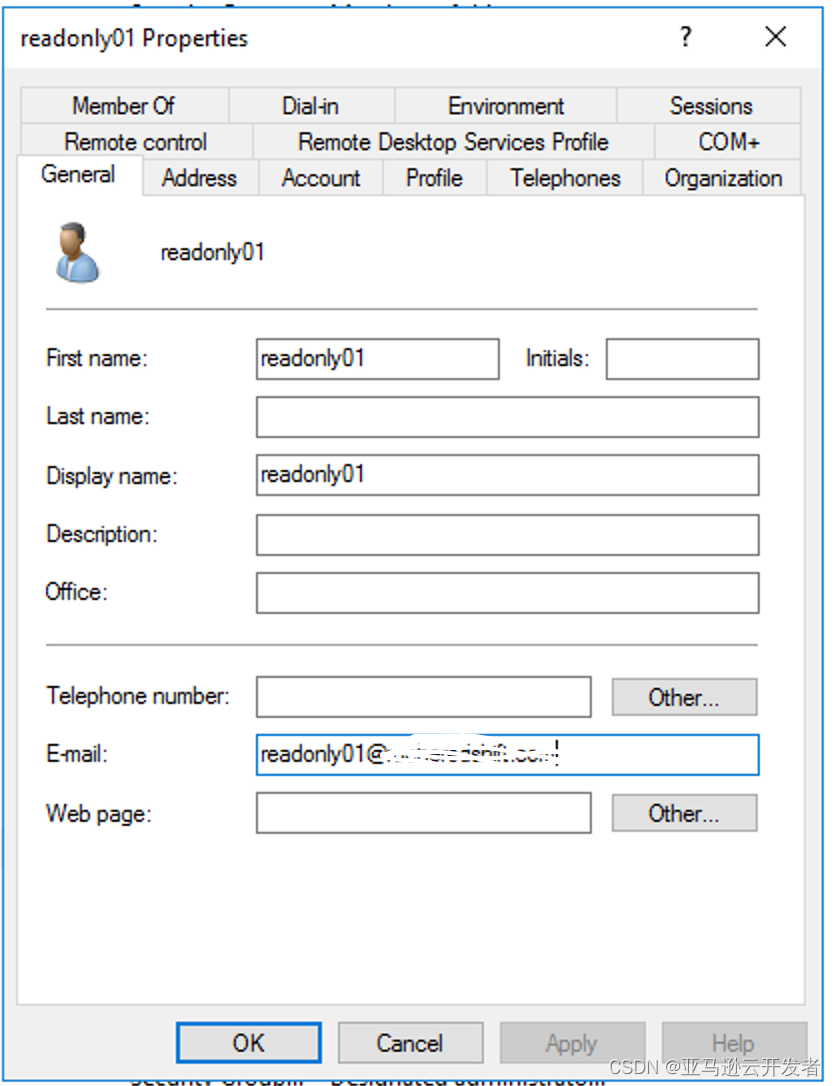
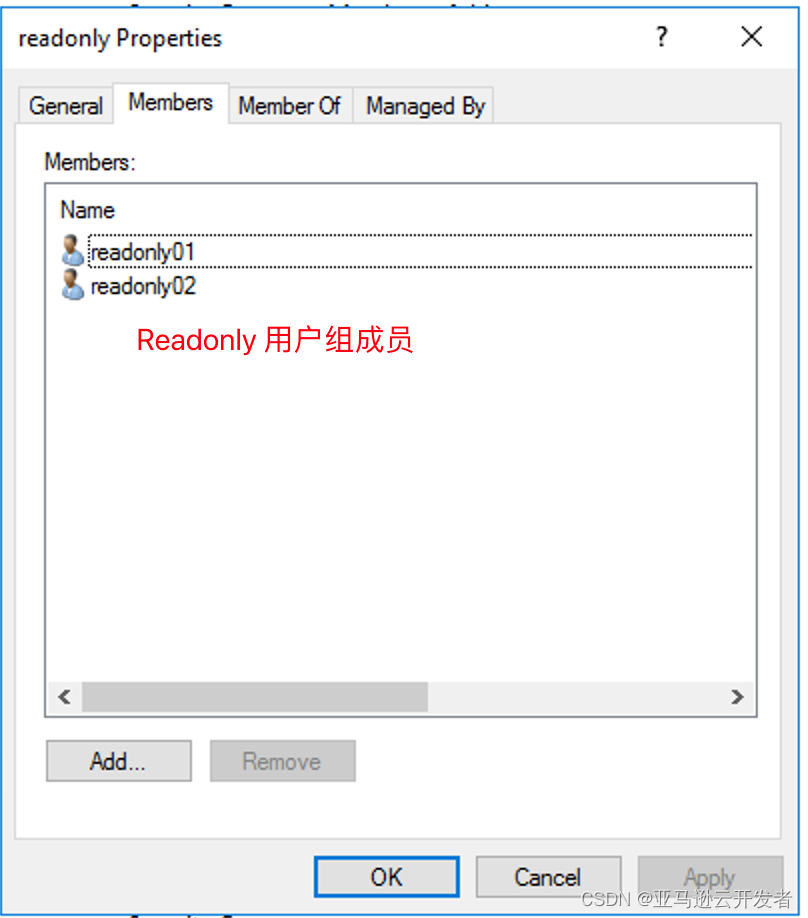
For example: Create four users readonly01 readonly02 readwrite01 readwrite02 Create two user groups readonly readwrite Add users readonly01 readonly02 to user group readonly Add users readwrite01 readwrite02 to user group readwrite
Note: When adding a user, configure the email address for the user
User group members:

Configure PingOne to connect to Microsoft AD
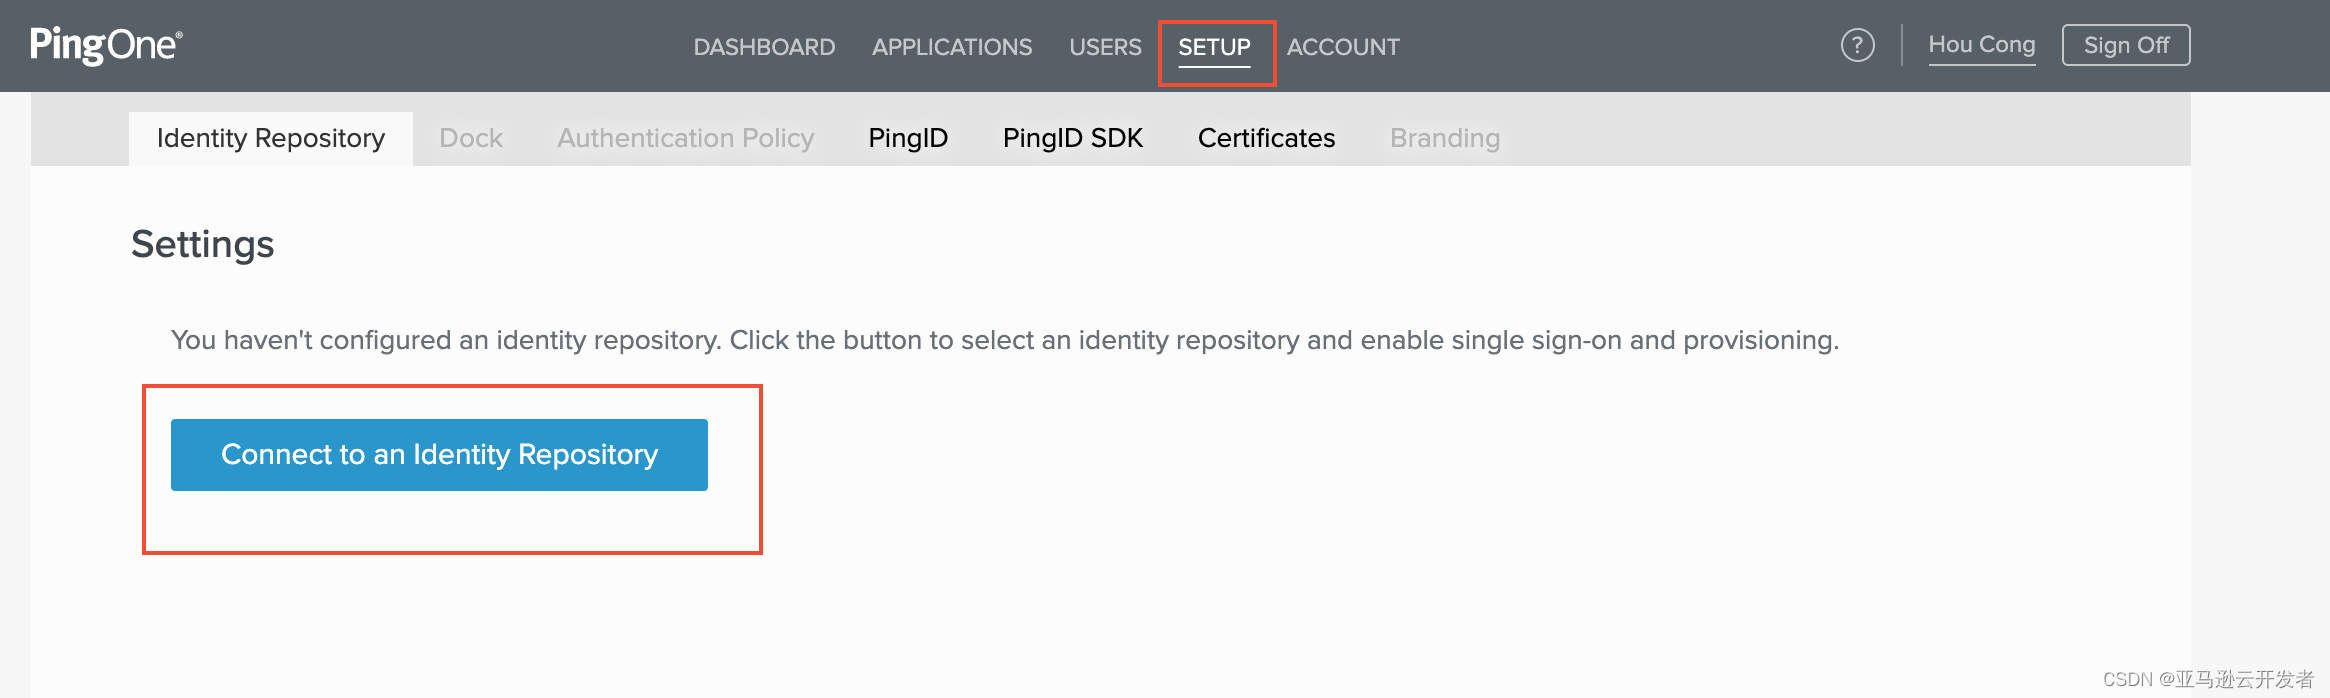
- Login to PingOne Manage Portal PingOne - Login

2. Click "setup" in the navigation bar, select "Identity Repository" and click "Connect to an Identity Repository"
3. Select "Active Directory" as the authentication source
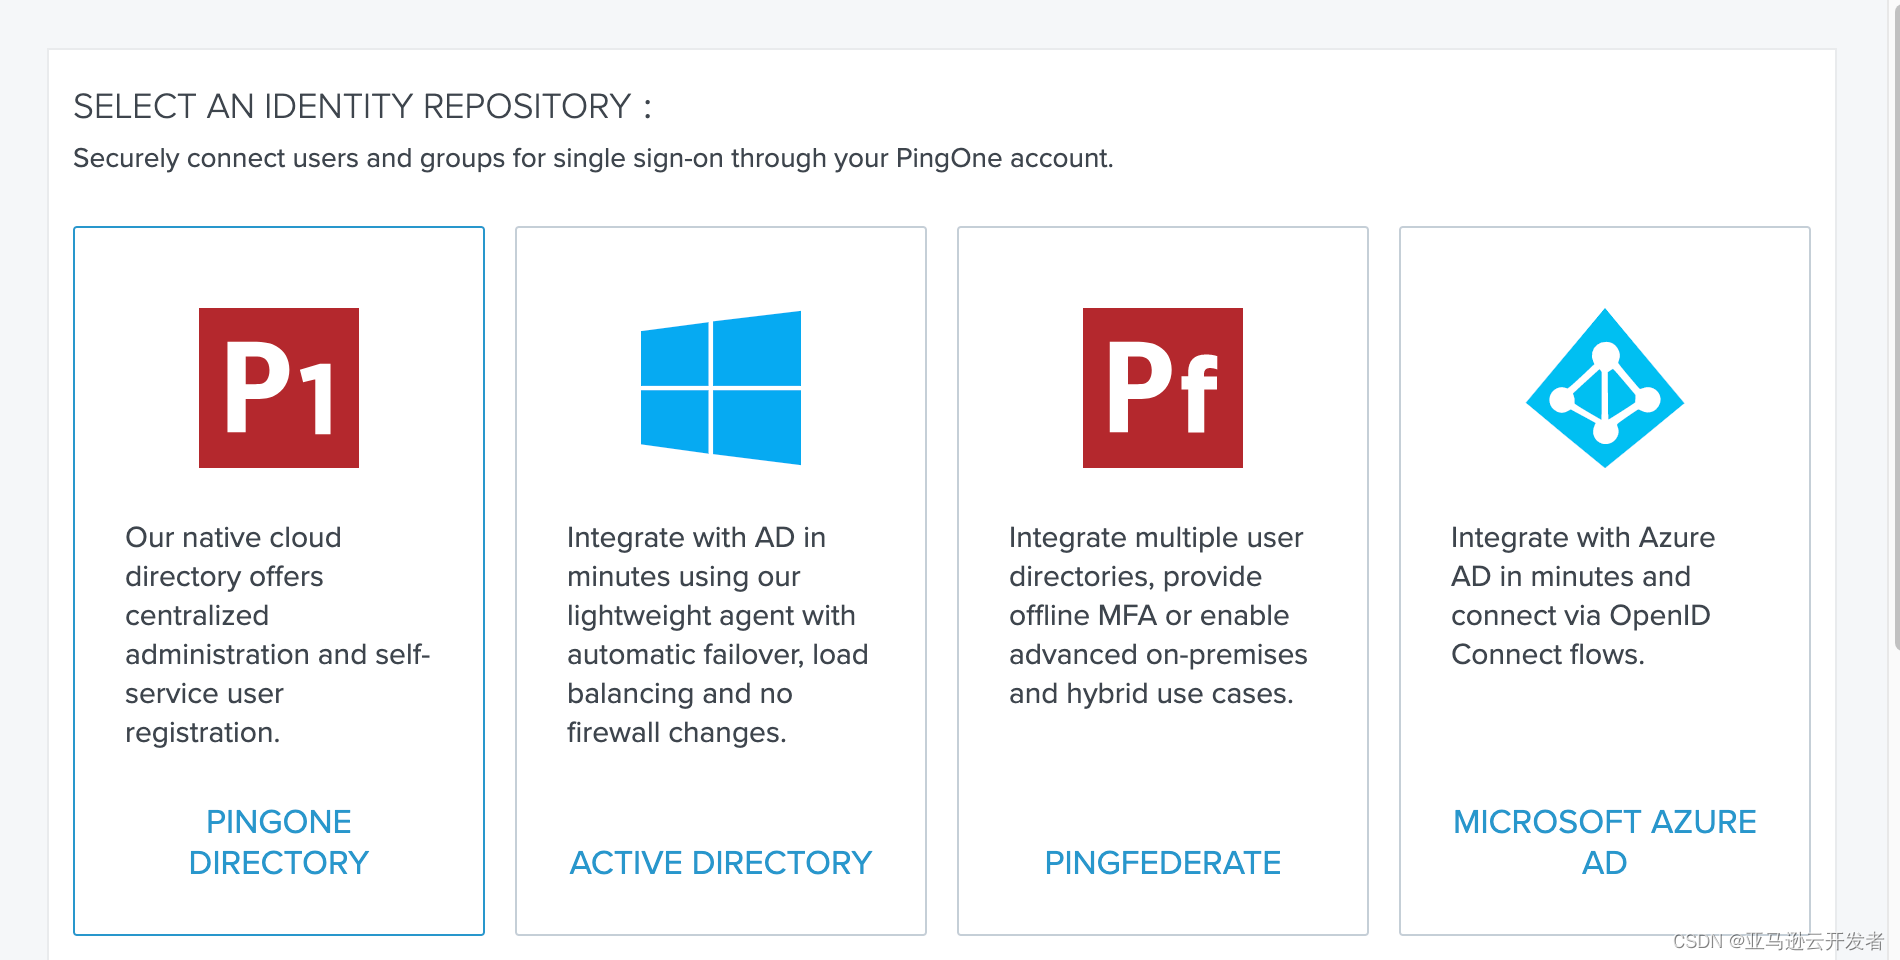
4. Follow the prompt steps to complete AD authentication integration
AD Connector installation steps can refer to the link

5. The configuration is complete
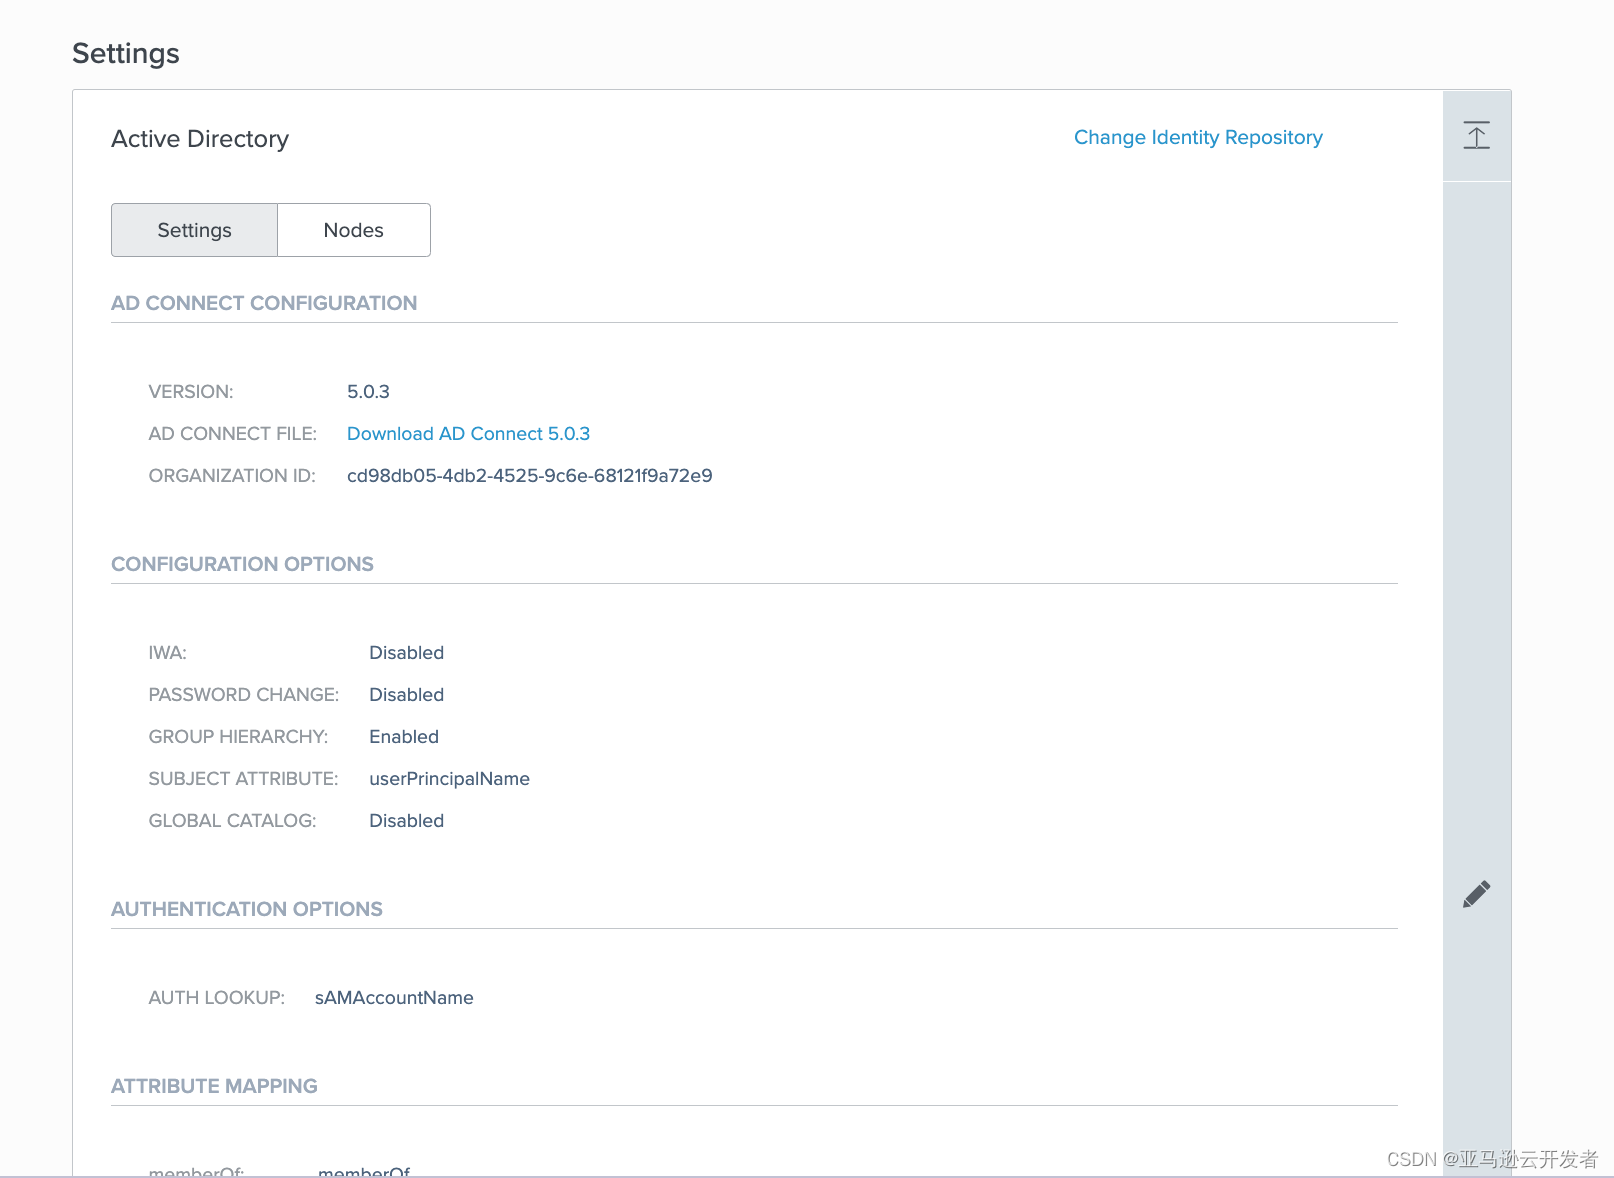
6. Navigate to user to see that PingOne has synchronized Microsoft AD user groups

Configure the IdP(PingOne) application
This step requires the creation of the PingOne application so that members of the user group can access Amazon Redshift, since there are two user groups, we need to create two applications
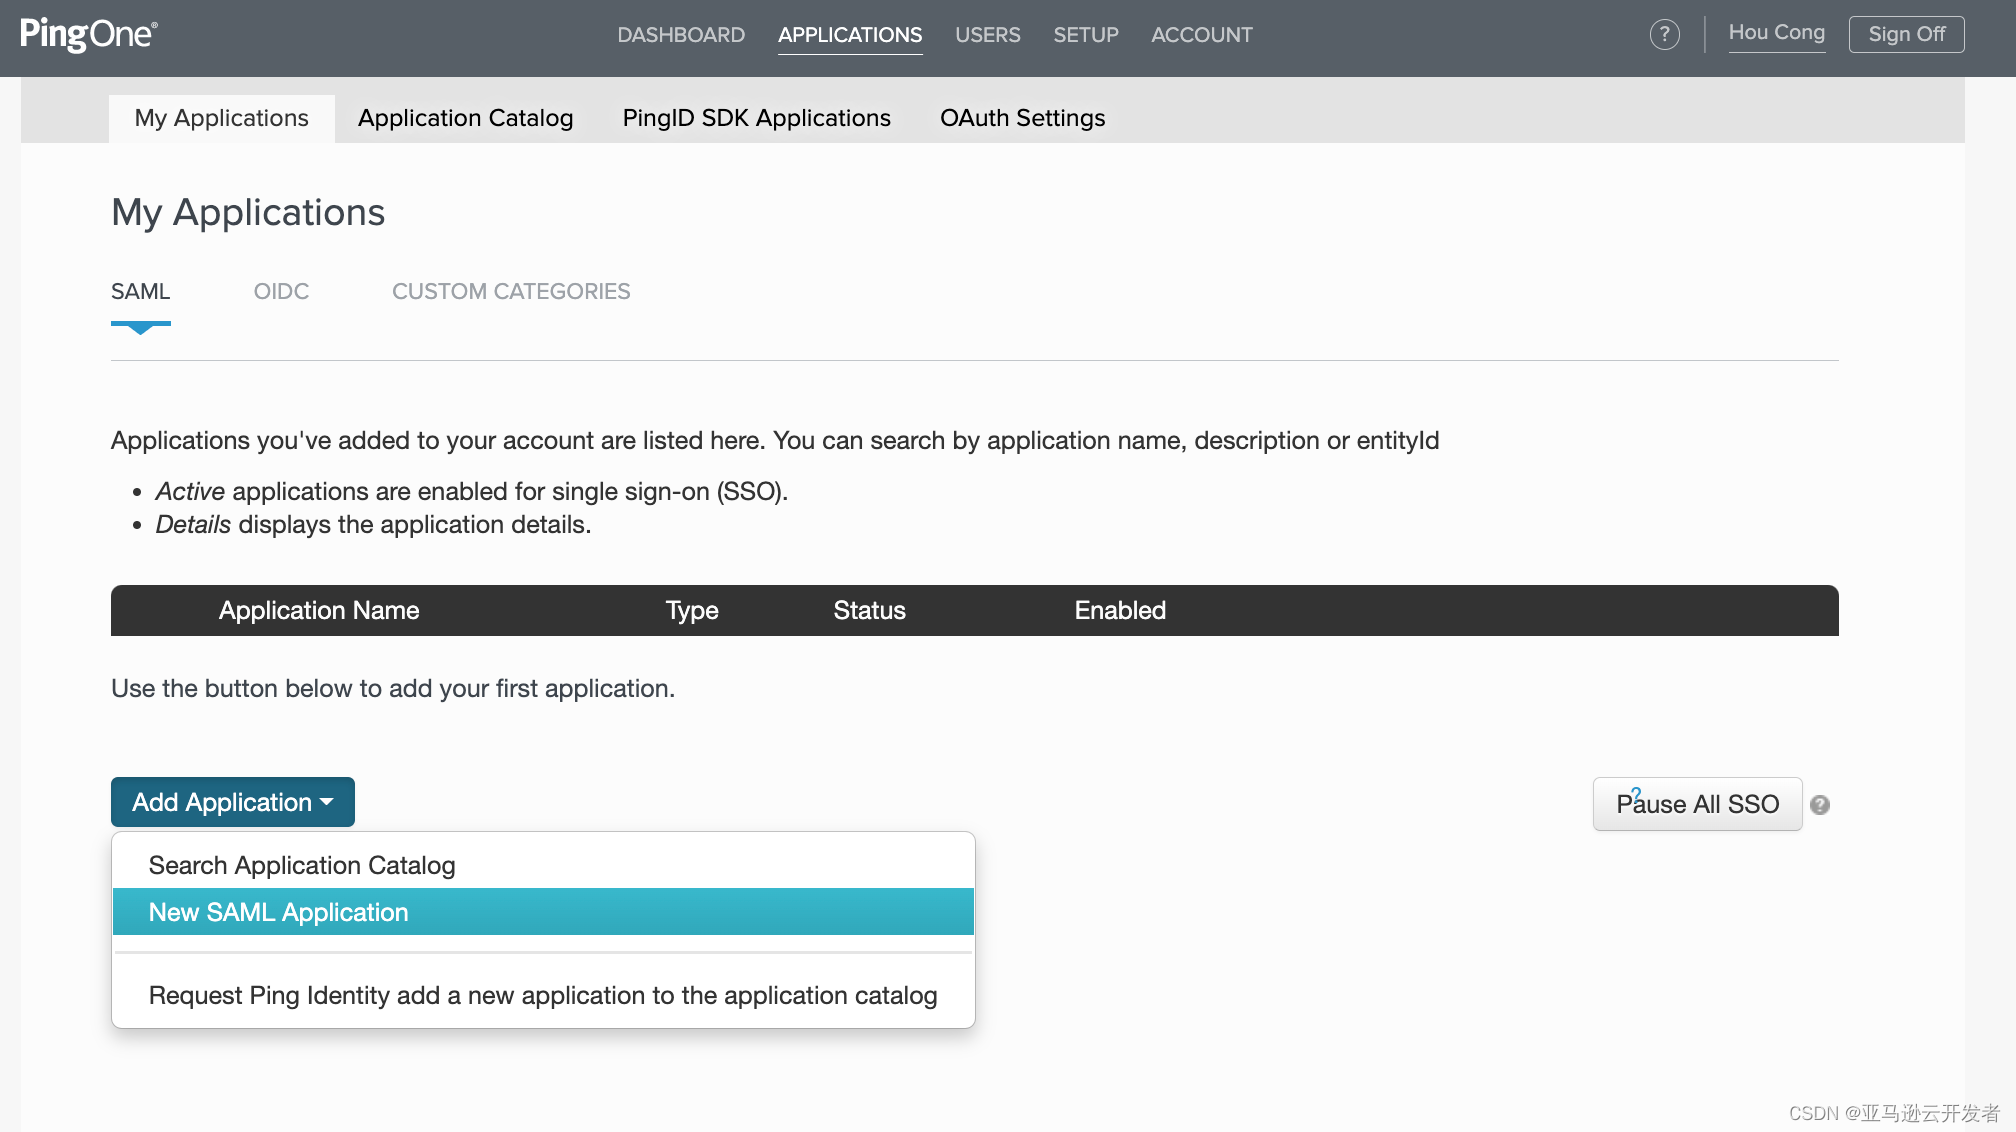
- Log in to the PingOne management interface and navigate to the Application tab

2. Select SAML in the “My Application” column
3. Select "Add Application"
4. Select "New SAML Application"
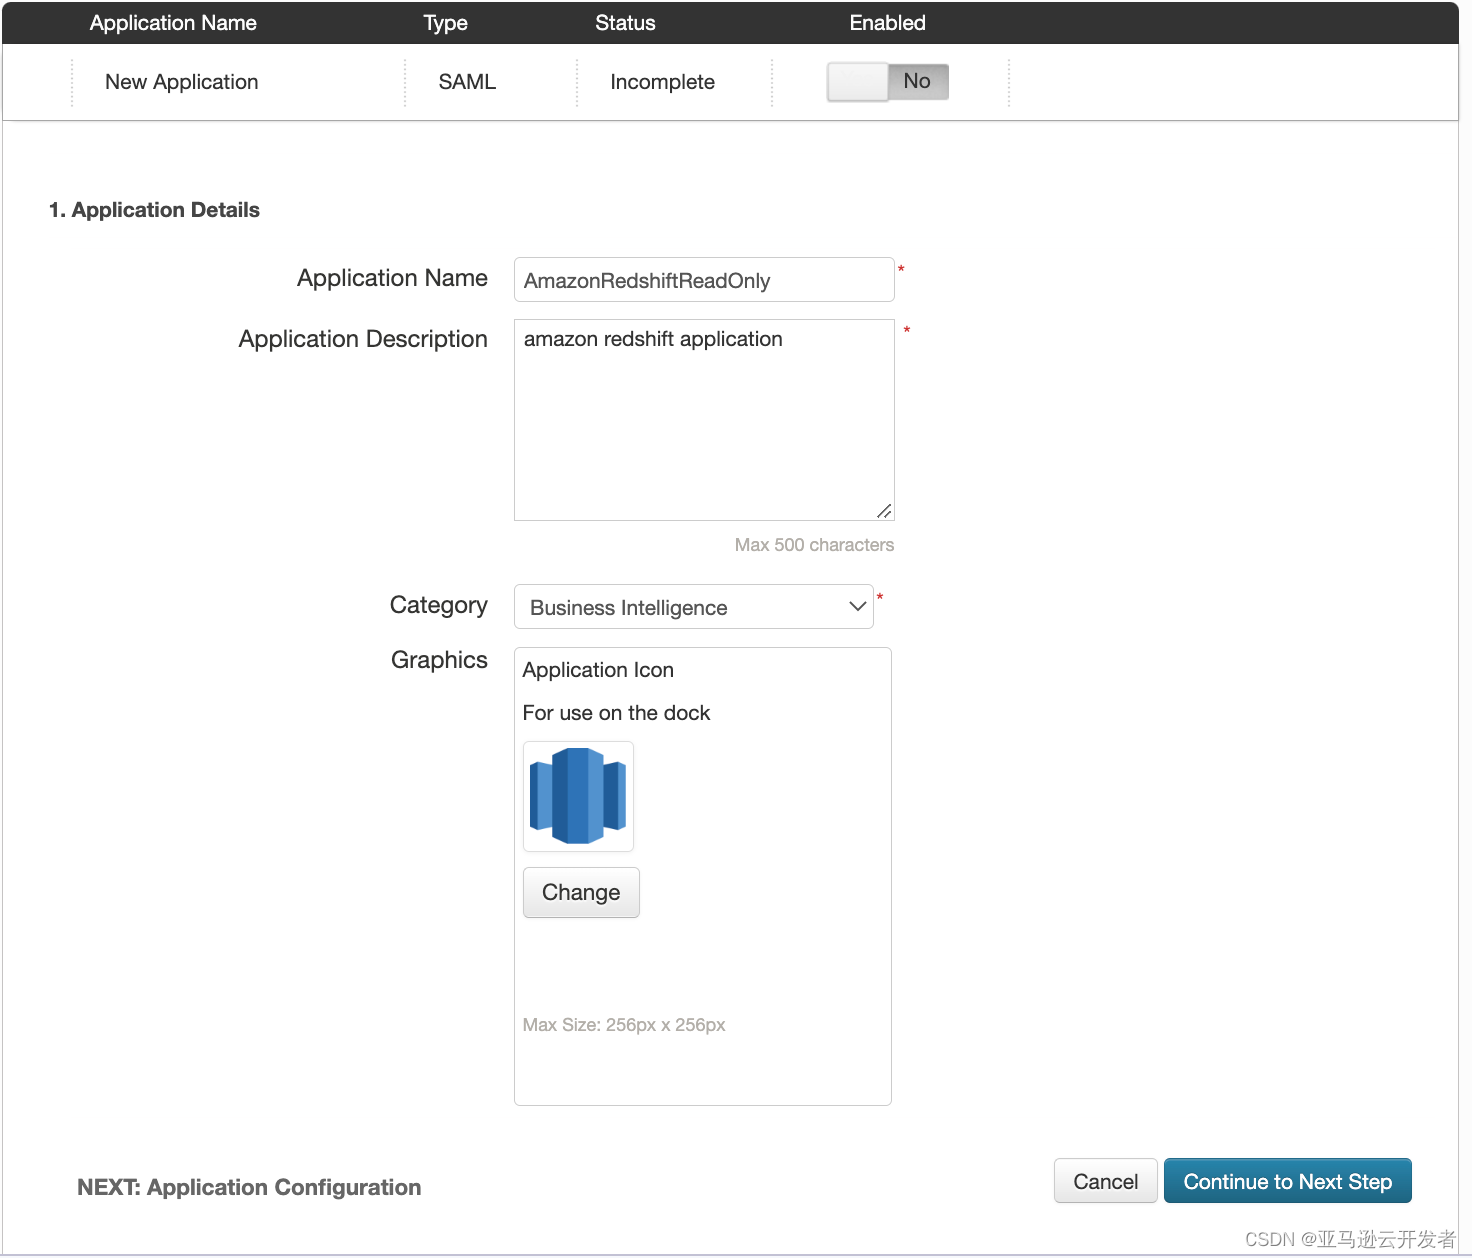
5. Enter the Application name such as: AmazonRedshiftReadOnly
6. Continue to the next step
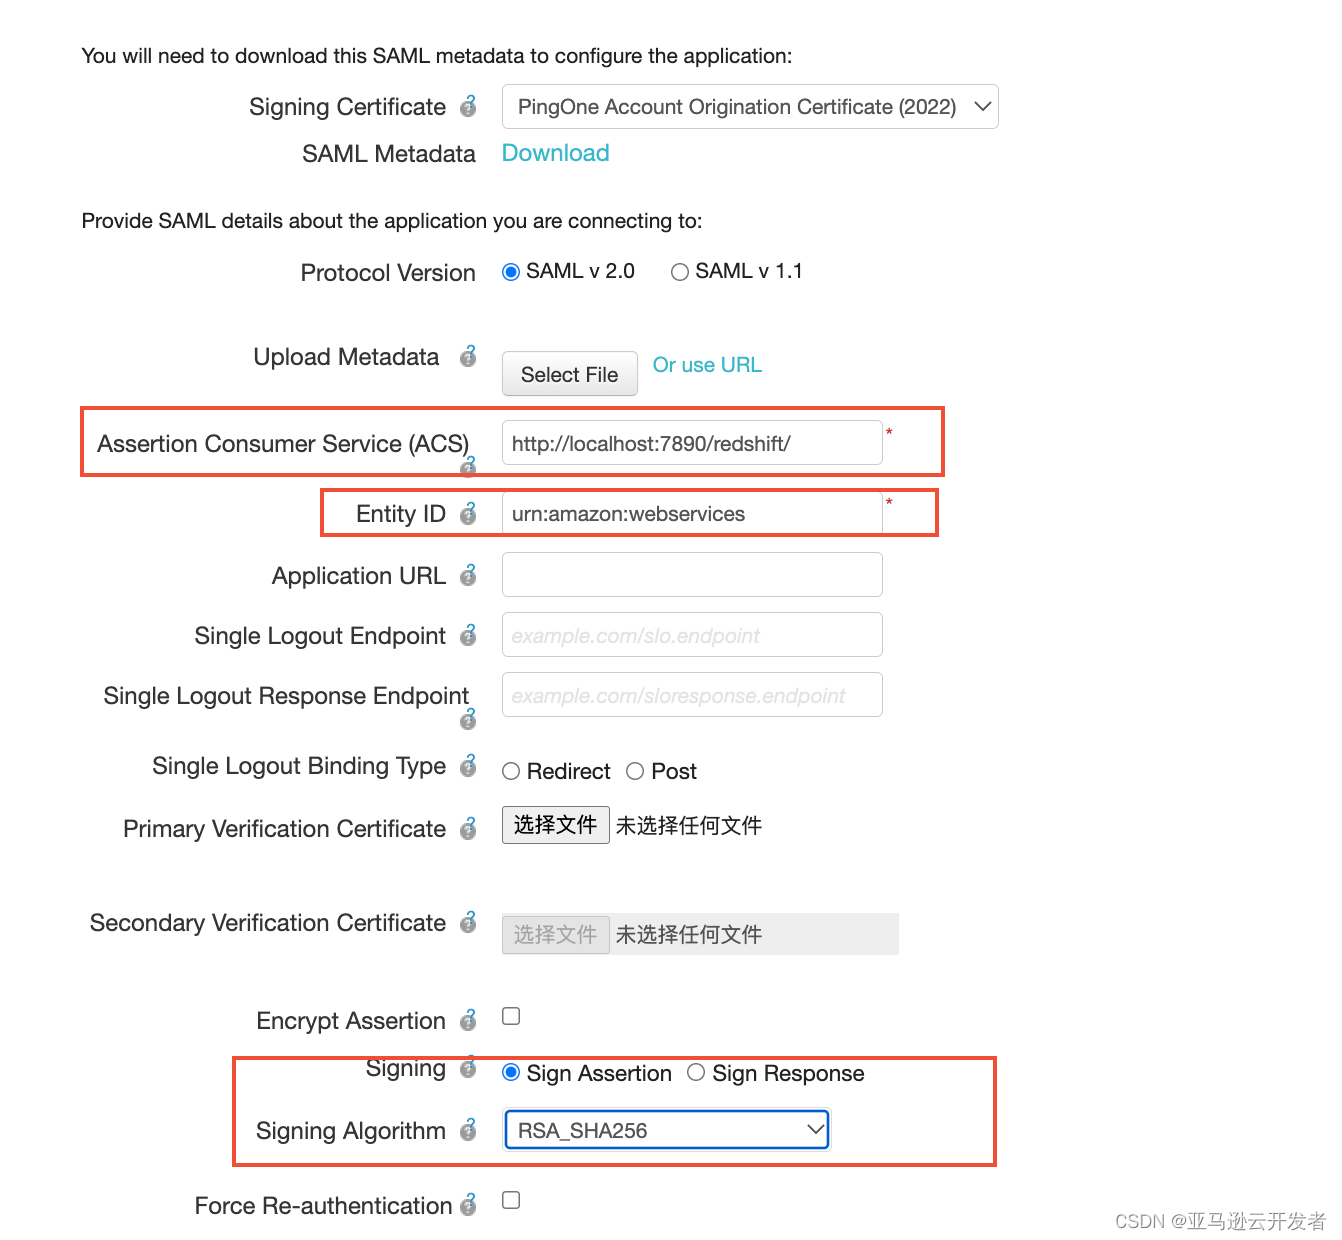
7. Configure the parameters in the “Application Configuration” configuration interface as follows:

8. Click Next
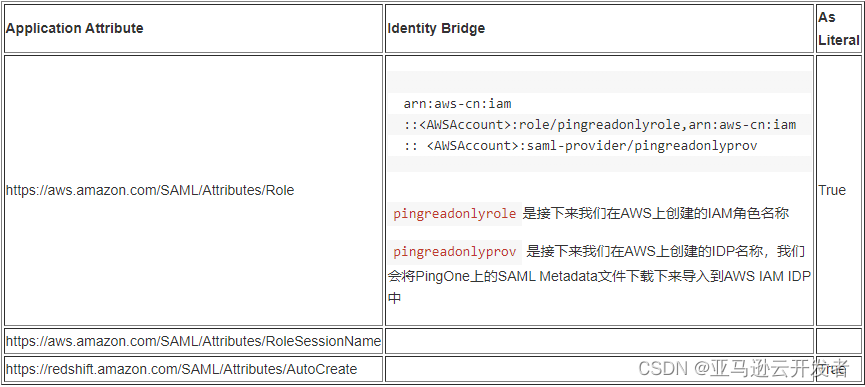
9. In the "SSO Attribute Mapping" configuration interface, enter the following

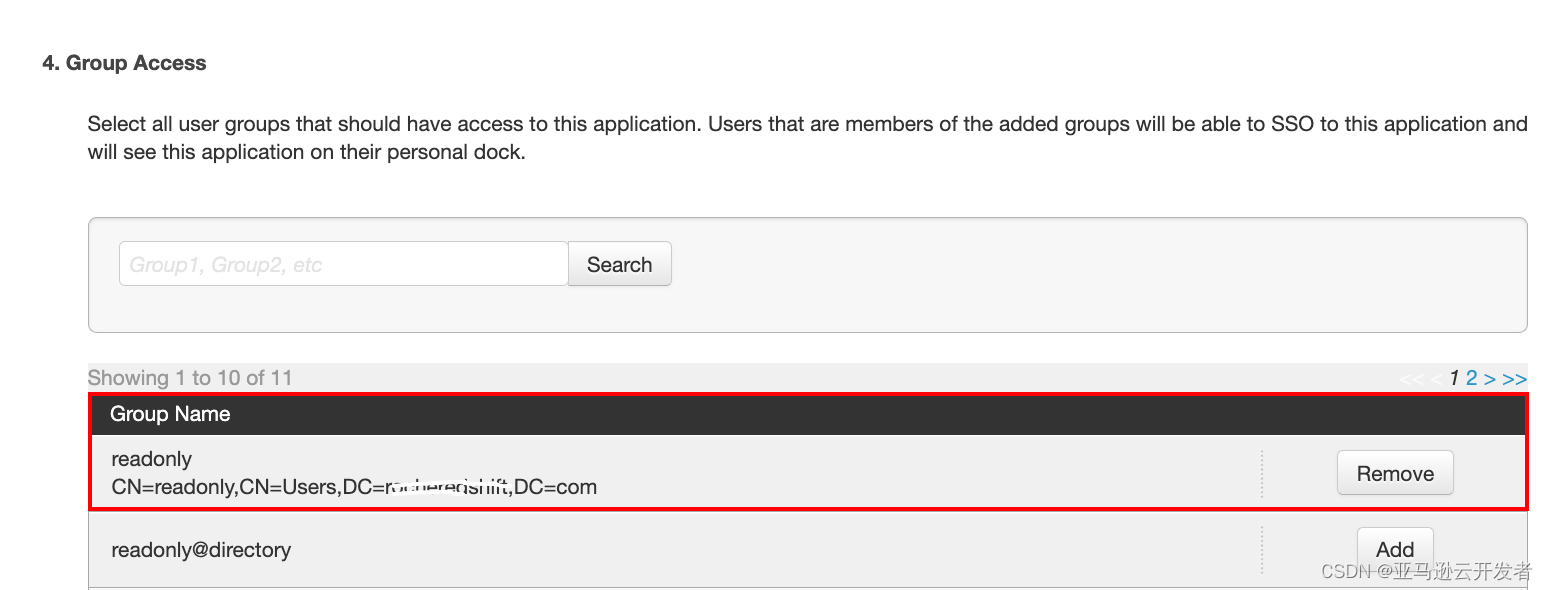
10. On the “Group Access” interface, select the AD user group readonly
11. Click Next
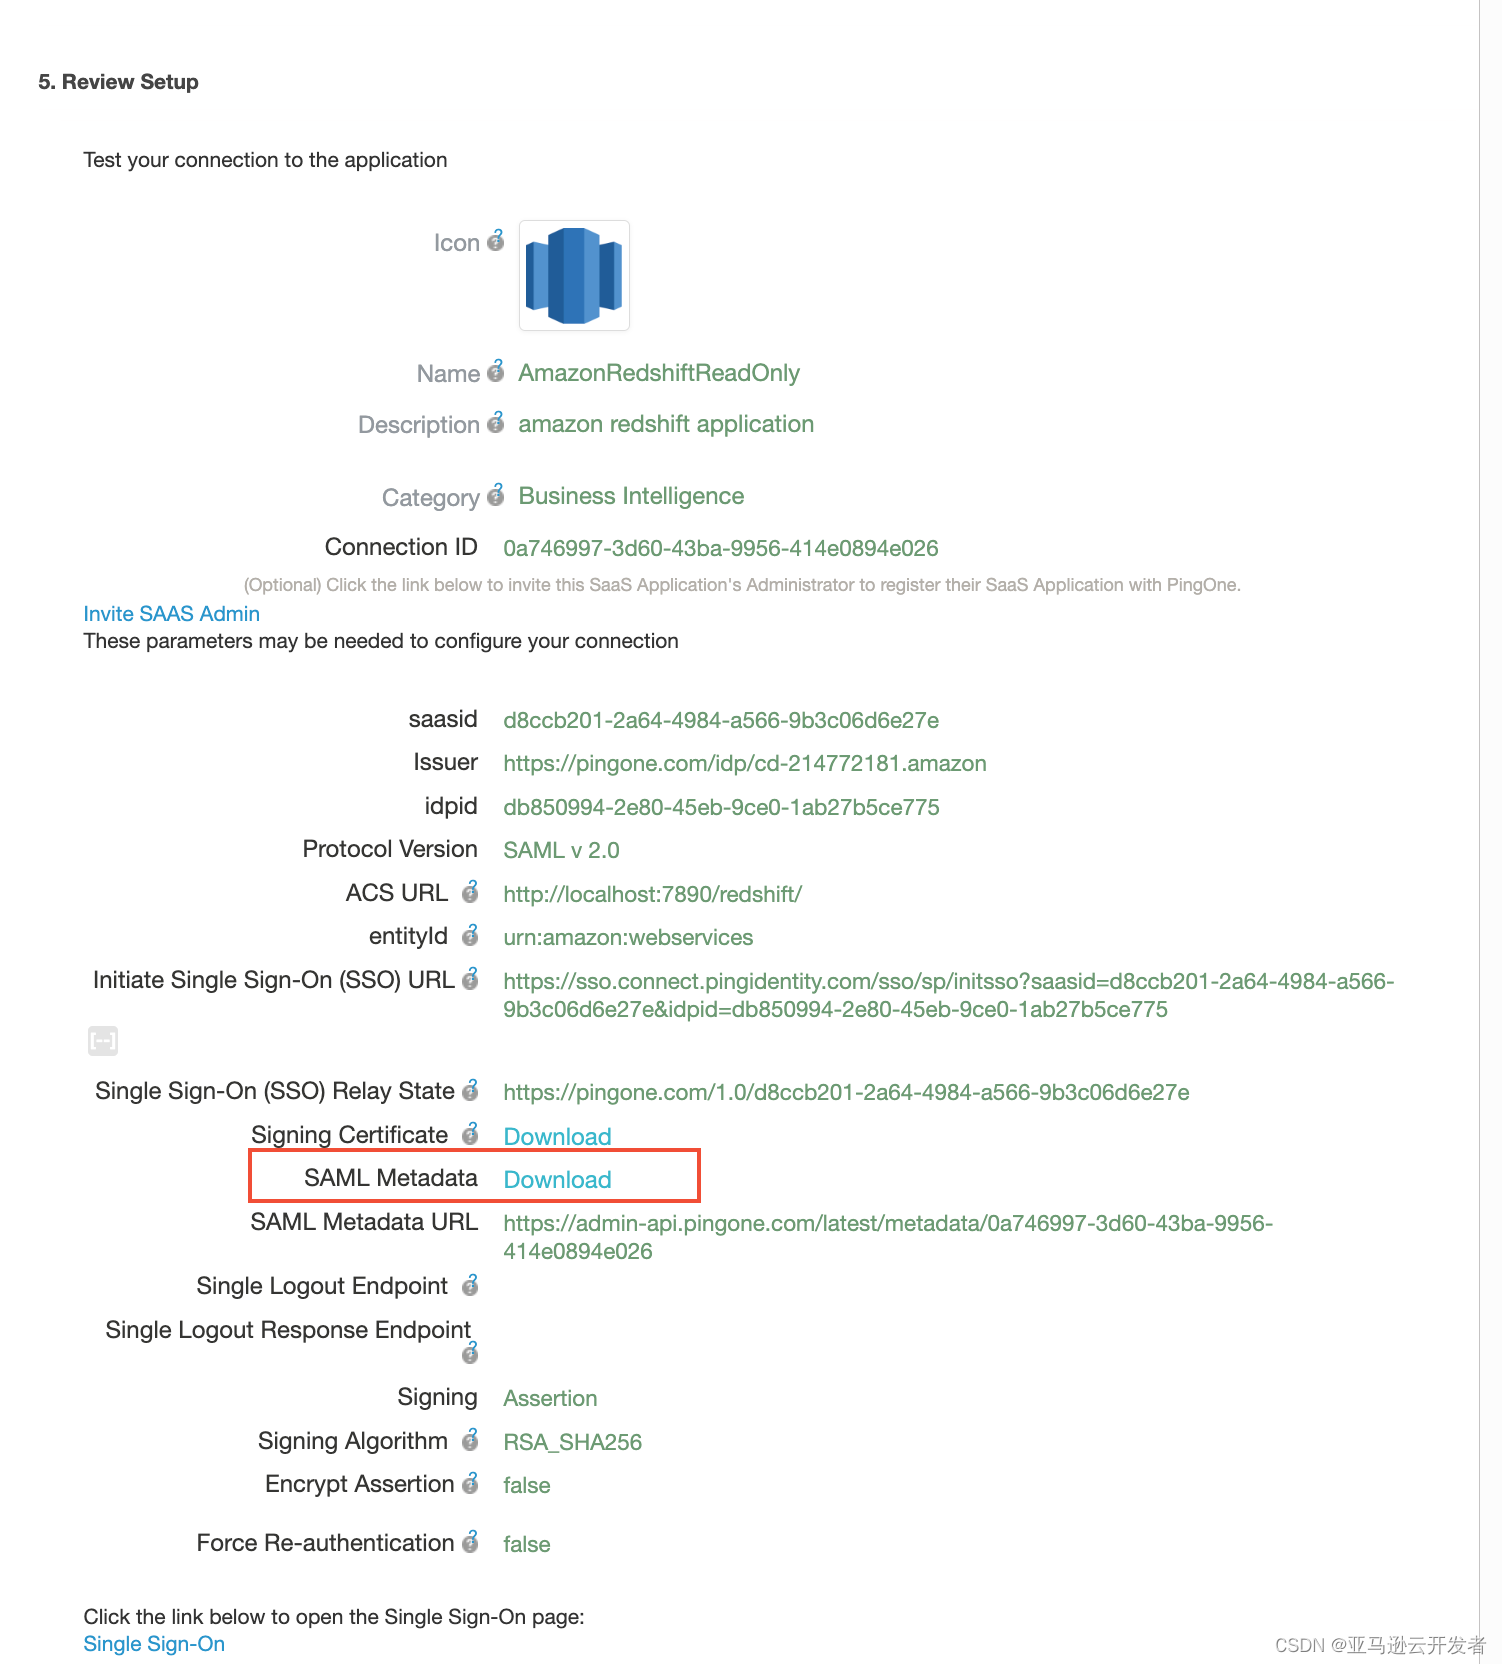
12. View the configuration interface and download the SAML Metadata file to the local, and the next step will be imported into Amazon IDP
13. Record the Initial Single Sign-On (SSO) URL, which is required to configure the Workbench JDBC connection information
14. Click Finish
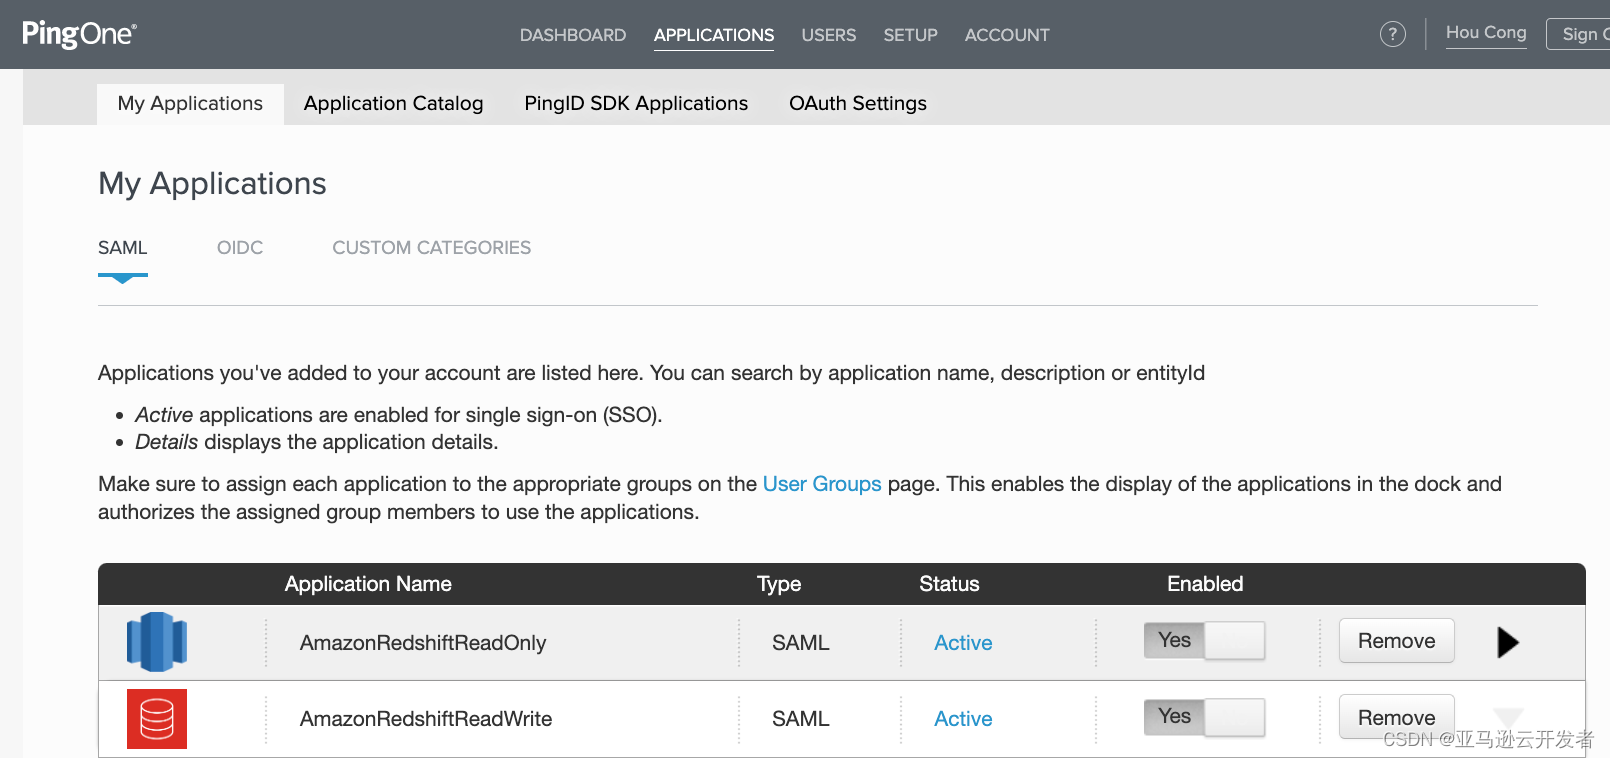
15. Repeat the above steps to create the second application AmazonRedshiftReadWrite, you need to adjust the parameters of the following two parts:
- SSO Attribute mapping: Change the value of https://aws.amazon.com/SAML/Attributes/Role parameter to
arn:aws-cn:iam:::role/pingreadwriterole,arn:aws-cn:iam:::saml-provider/pingreadwriteprov
- Group Access select AD user group readwrite
16. Configured to have two applications
Configure IAM SAML Federated Authentication
Create an IAM SAML IdP
To configure IAM SAML, an IAM IdP needs to be created along with roles and policies.
The configuration steps are as follows:
- Log in to the Amazon Console, select the IAM service and navigate to Identity Provider under Access management

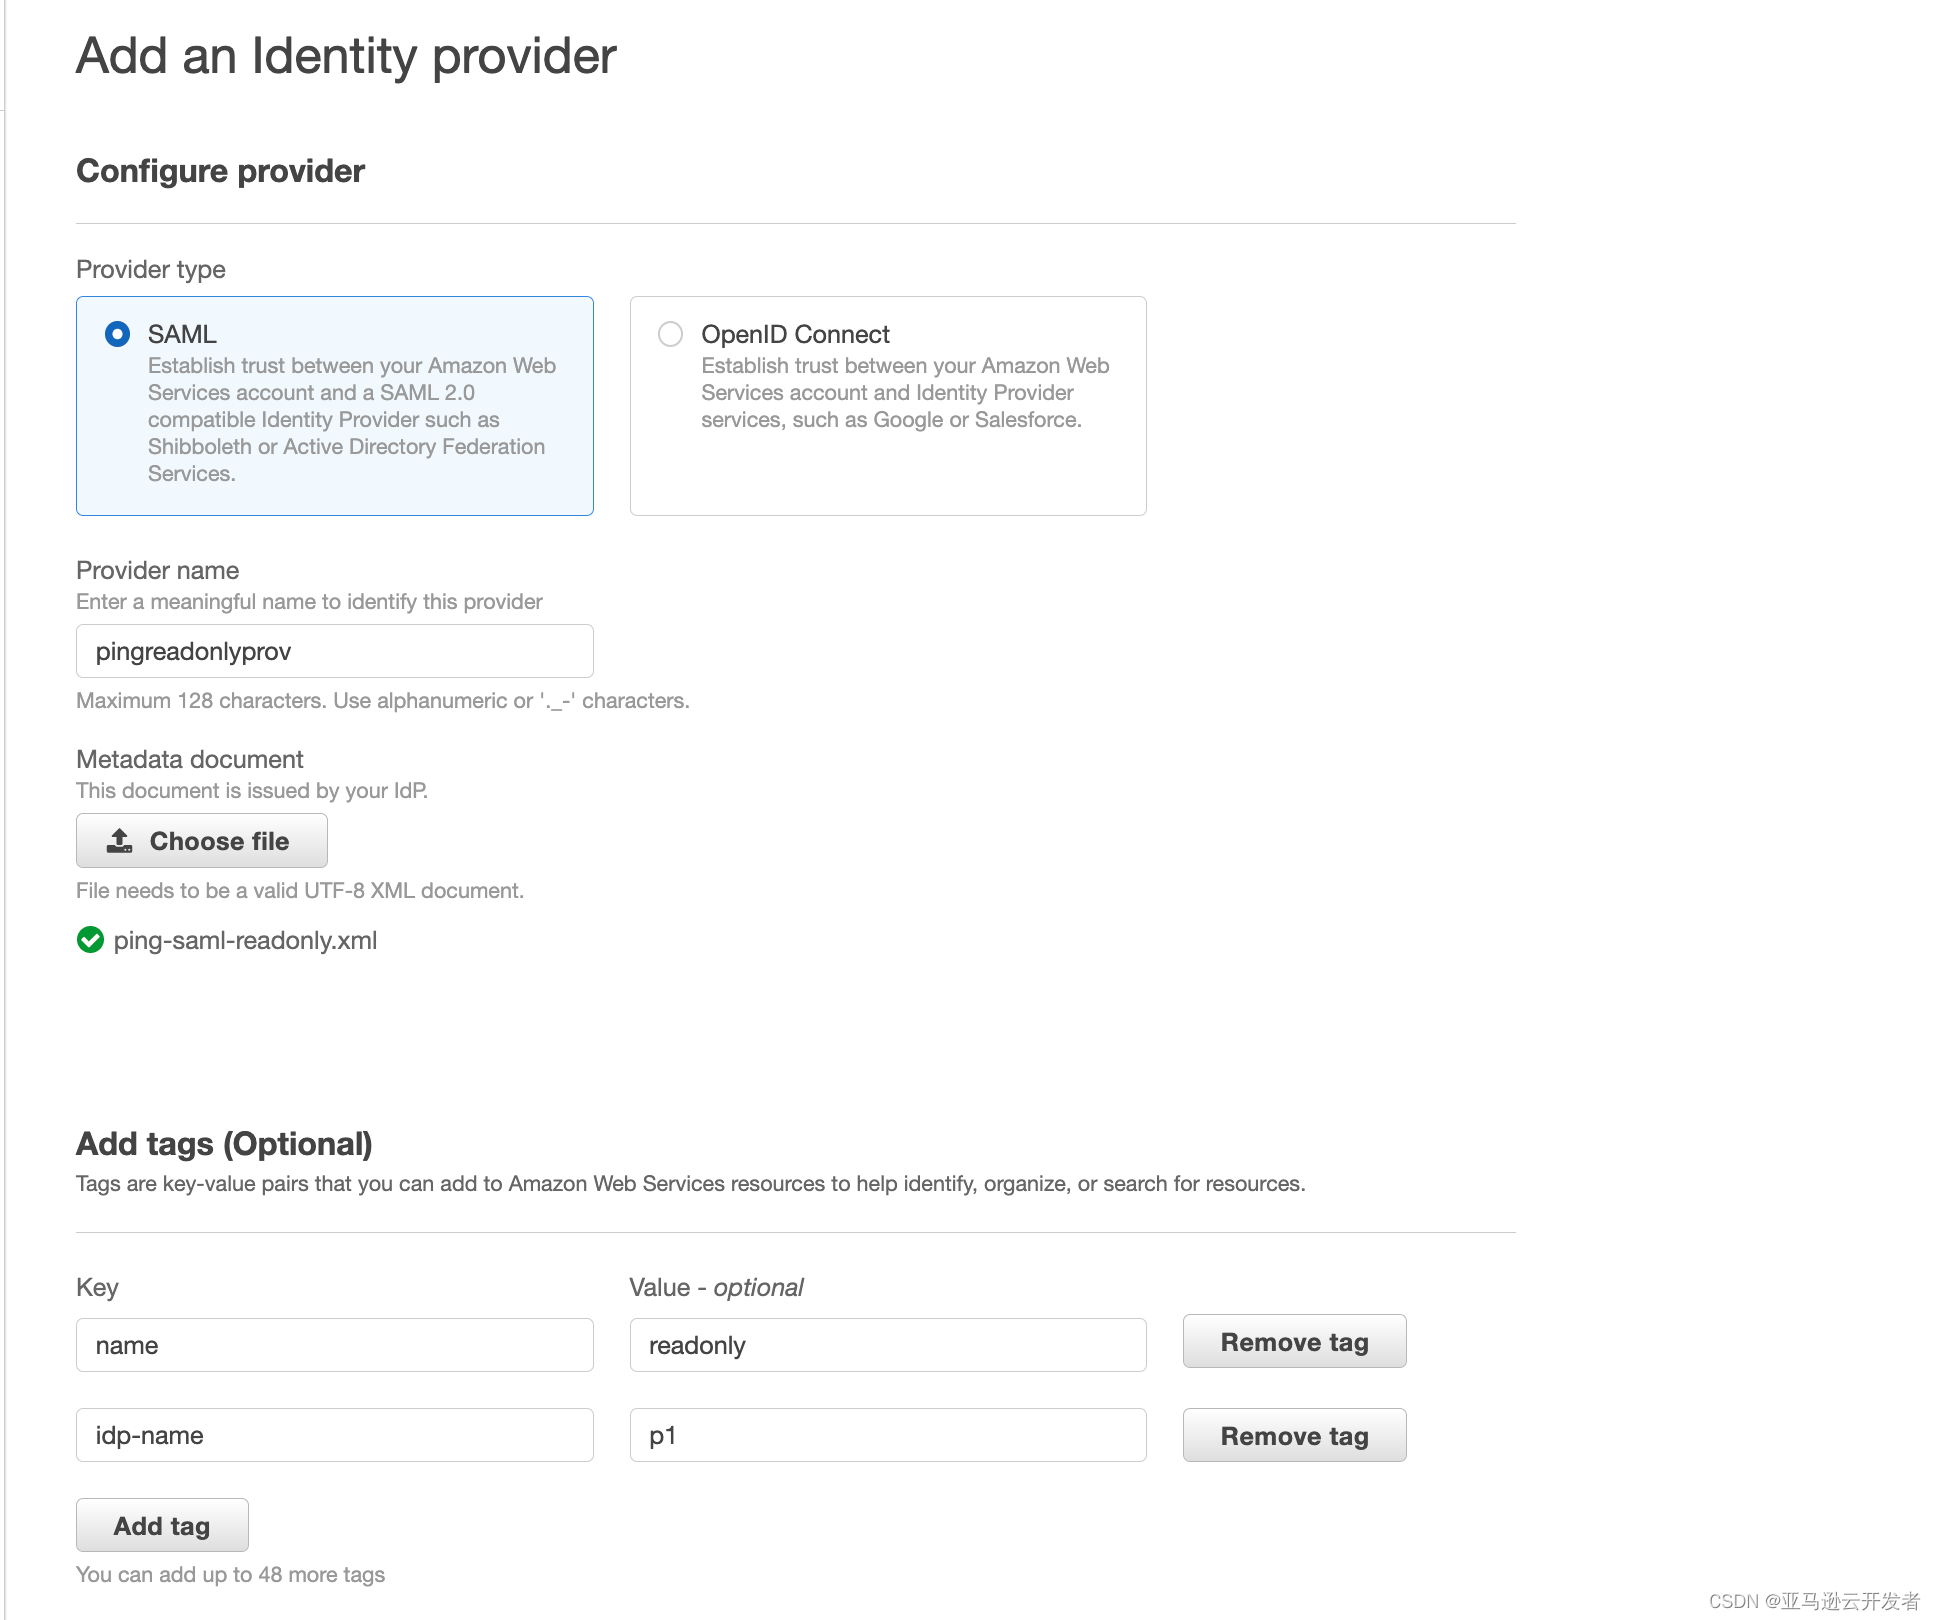
2. Select Add Provider,
3. The type is SAML,
4. Enter the name pingreadonlyprov (the name is consistent with the value entered in the parameter https://aws.amazon.com/SAML/Attributes/Role in PingOne SSO Attribute Mapping)
5. Metadata file select the XML file downloaded by the PingOne application AmazonRedshiftReadOnly
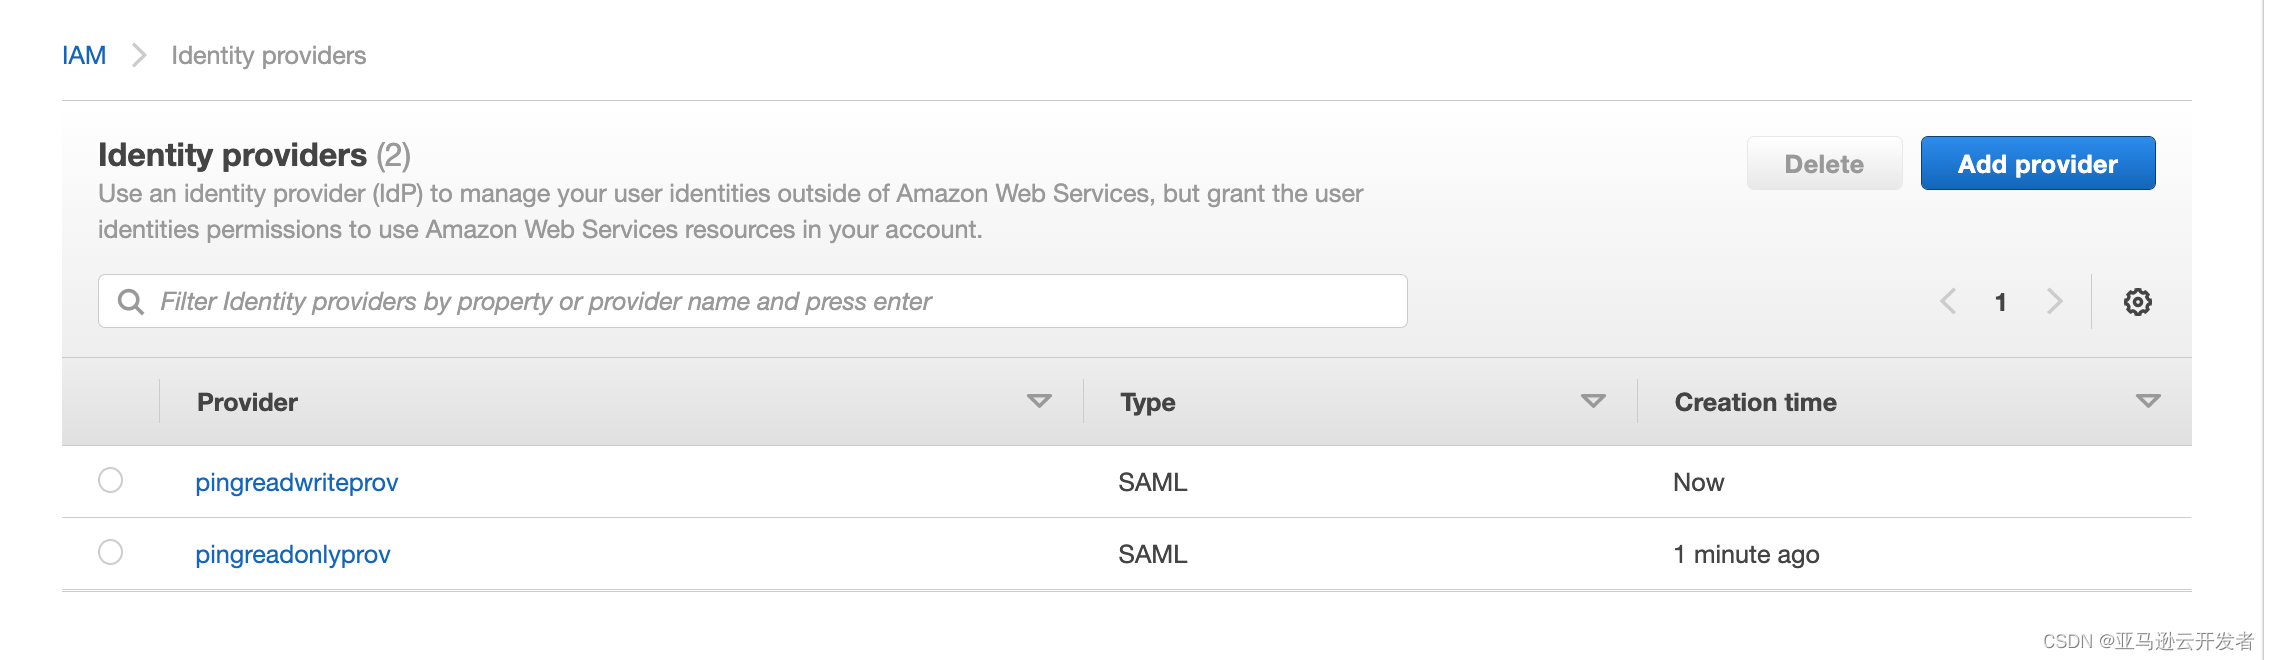
6. Repeat the above steps to create the second IdP (Metadata file select PingOne application AmazonRedshiftReadWrite XML file)
7. After the creation is complete, you can see that there are two IdP Providers
Create IAM Role and Policy
We use IAM Roles to control the permissions of user groups to access the Redshift database. Access to the Redshift database by different user groups is restricted by configuring an IAM Role and binding policies to the Role. This Role allows users to access the Redshift cluster through the IdP.
Before creating an IAM Role, we need to create an IAM Policy that allows users to have joingroup permissions
-
Select policy on the Amazon IAM service configuration interface
-
Select Create Policy
-
Select JSON and create two pingreadonlypolicy and pingreadwritepolicy
- Replace with the Redshift cluster name in your organization
- Replace with the Redshift dbname in your organization
The difference between the configurations of the two policies is the Resource of the JoinGroup.
"JoinGroup": pingreadonlypolicy allows users to join Redshift readonly groups
"JoinGroup": pingreadwritepolicy allows users to join the Redshift readwrite group
Users accessing the Redshift database and automatically joining the Redshift DBGroup are only valid during the session lifetime. This policy does not include the permission to create DbGroups, because creating DBGroups and granting corresponding permissions to DBgroups needs to be done manually in the Redshift database.
The following code shows the content of pingreadonlypolicy:
{
    "Version": "2012-10-17",
    "Statement": [
        {
            "Sid": "VisualEditor0",
            "Effect": "Allow",
            "Action": "redshift:GetClusterCredentials",
            "Resource": [
                "arn:aws-cn:redshift:*:*:cluster:<cluster>",
                "arn:aws-cn:redshift:*:*:dbname:<cluster>/<dbname>",
                "arn:aws-cn:redshift:*:*:dbuser:<cluster>/${redshift:DbUser}"
            ],
            "Condition": {
                "StringLike": {
                    "aws:userid": "*:${redshift:DbUser}"
                }
            }
        },
        {
            "Sid": "VisualEditor1",
            "Effect": "Allow",
            "Action": "redshift:CreateClusterUser",
            "Resource": [
                "arn:aws-cn:redshift:*:*:dbname:<cluster>/<dbname>",
                "arn:aws-cn:redshift:*:*:dbuser:<cluster>/${redshift:DbUser}"
            ]
        },
        {
            "Sid": "VisualEditor2",
            "Effect": "Allow",
            "Action": "redshift:JoinGroup",
            "Resource": "arn:aws-cn:redshift:*:*:dbgroup:<cluster>/readonly"
        }
    ]
}
4. After the configuration is complete, you can view the newly created Policy

5. Select Roles on the IAM Console interface
6. Create Roles
7. Select SAML 2.0 federation for Type.
8. SAML provider selects the IdP created in the above steps
9. Select Allow programmatic access only.
10. Attribute: SAML:aud.
11. Enter http://localhost:7890/redshift/ for Value .

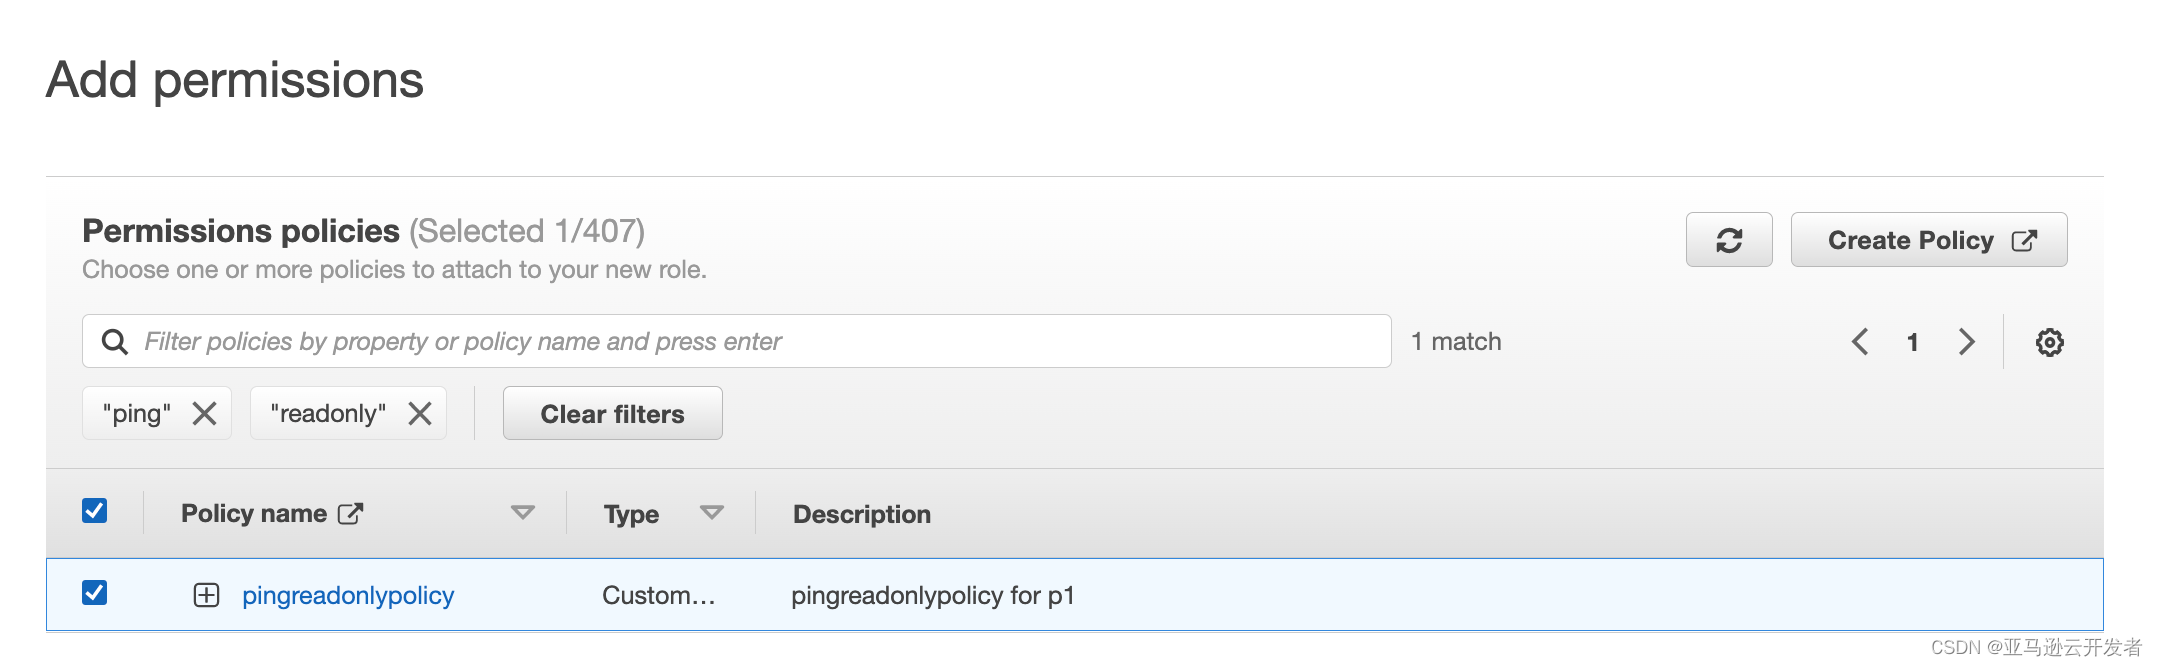
12. Select pingreadonlypolicy for the first Role and pingreadwritepolicy for the second Role
13. Enter a name for the Role (pingreadonlyrole and pingreadwriterole)
14. Create two Roles as shown below

Create Amazon Redshift DBGroups configuration permissions
This step will create DbGroups in the Redshift database. The name of the DbGroups needs to be consistent with the name of the Joingroup in the IAM Policy, and then you need to give the DbGroup the corresponding permissions on the shemale and Table in the Redshift database. You do not need to create a DbUser, because the DbUser is passed PingOne SSO automatically joins the corresponding DbGroup after logging in to Redshift.
- Use the admin account to log in to the Redshift cluster through Workbench
- Use the following command to create DbGroups and grant the corresponding Schema and Table permissions to the Group
CREATE SCHEMA finance;
CREATE TABLE IF NOT EXISTS finance.revenue
(
account INTEGER ENCODE az64,
customer VARCHAR(20) ENCODE lzo,
salesamt NUMERIC(18,0) ENCODE az64
)DISTSTYLE AUTO;
CREATE GROUP readonly;
CREATE GROUP readwrite;
ALTER DEFAULT PRIVILEGES IN SCHEMA finance
GRANT SELECT on TABLES to GROUP readonly;
GRANT USAGE on SCHEMA finance to GROUP readonly;
GRANT SELECT on ALL TABLES in SCHEMA finance to GROUP readonly;
ALTER DEFAULT PRIVILEGES IN SCHEMA finance
GRANT ALL on TABLES to GROUP readwrite;
GRANT USAGE on SCHEMA finance to GROUP readwrite;
GRANT ALL on ALL TABLES in SCHEMA finance to GROUP readwrite;
INSERT INTO finance.revenue values
(101, 'ABC Company', 12000),
(102, 'Tech Logistics', 175400),
(103, 'XYZ Industry', 24355),
(104, 'The tax experts', 186577);
Test single sign-on
This step will use the Microsoft AD user to use the Workbench SQL Client to access the Redshift database through PingOne SSO login.
1. Configure the Workbench SQL client
If the server where the Workbench SQL client is installed has not installed the JDBC Driver, you can download and install it through the link below. download link
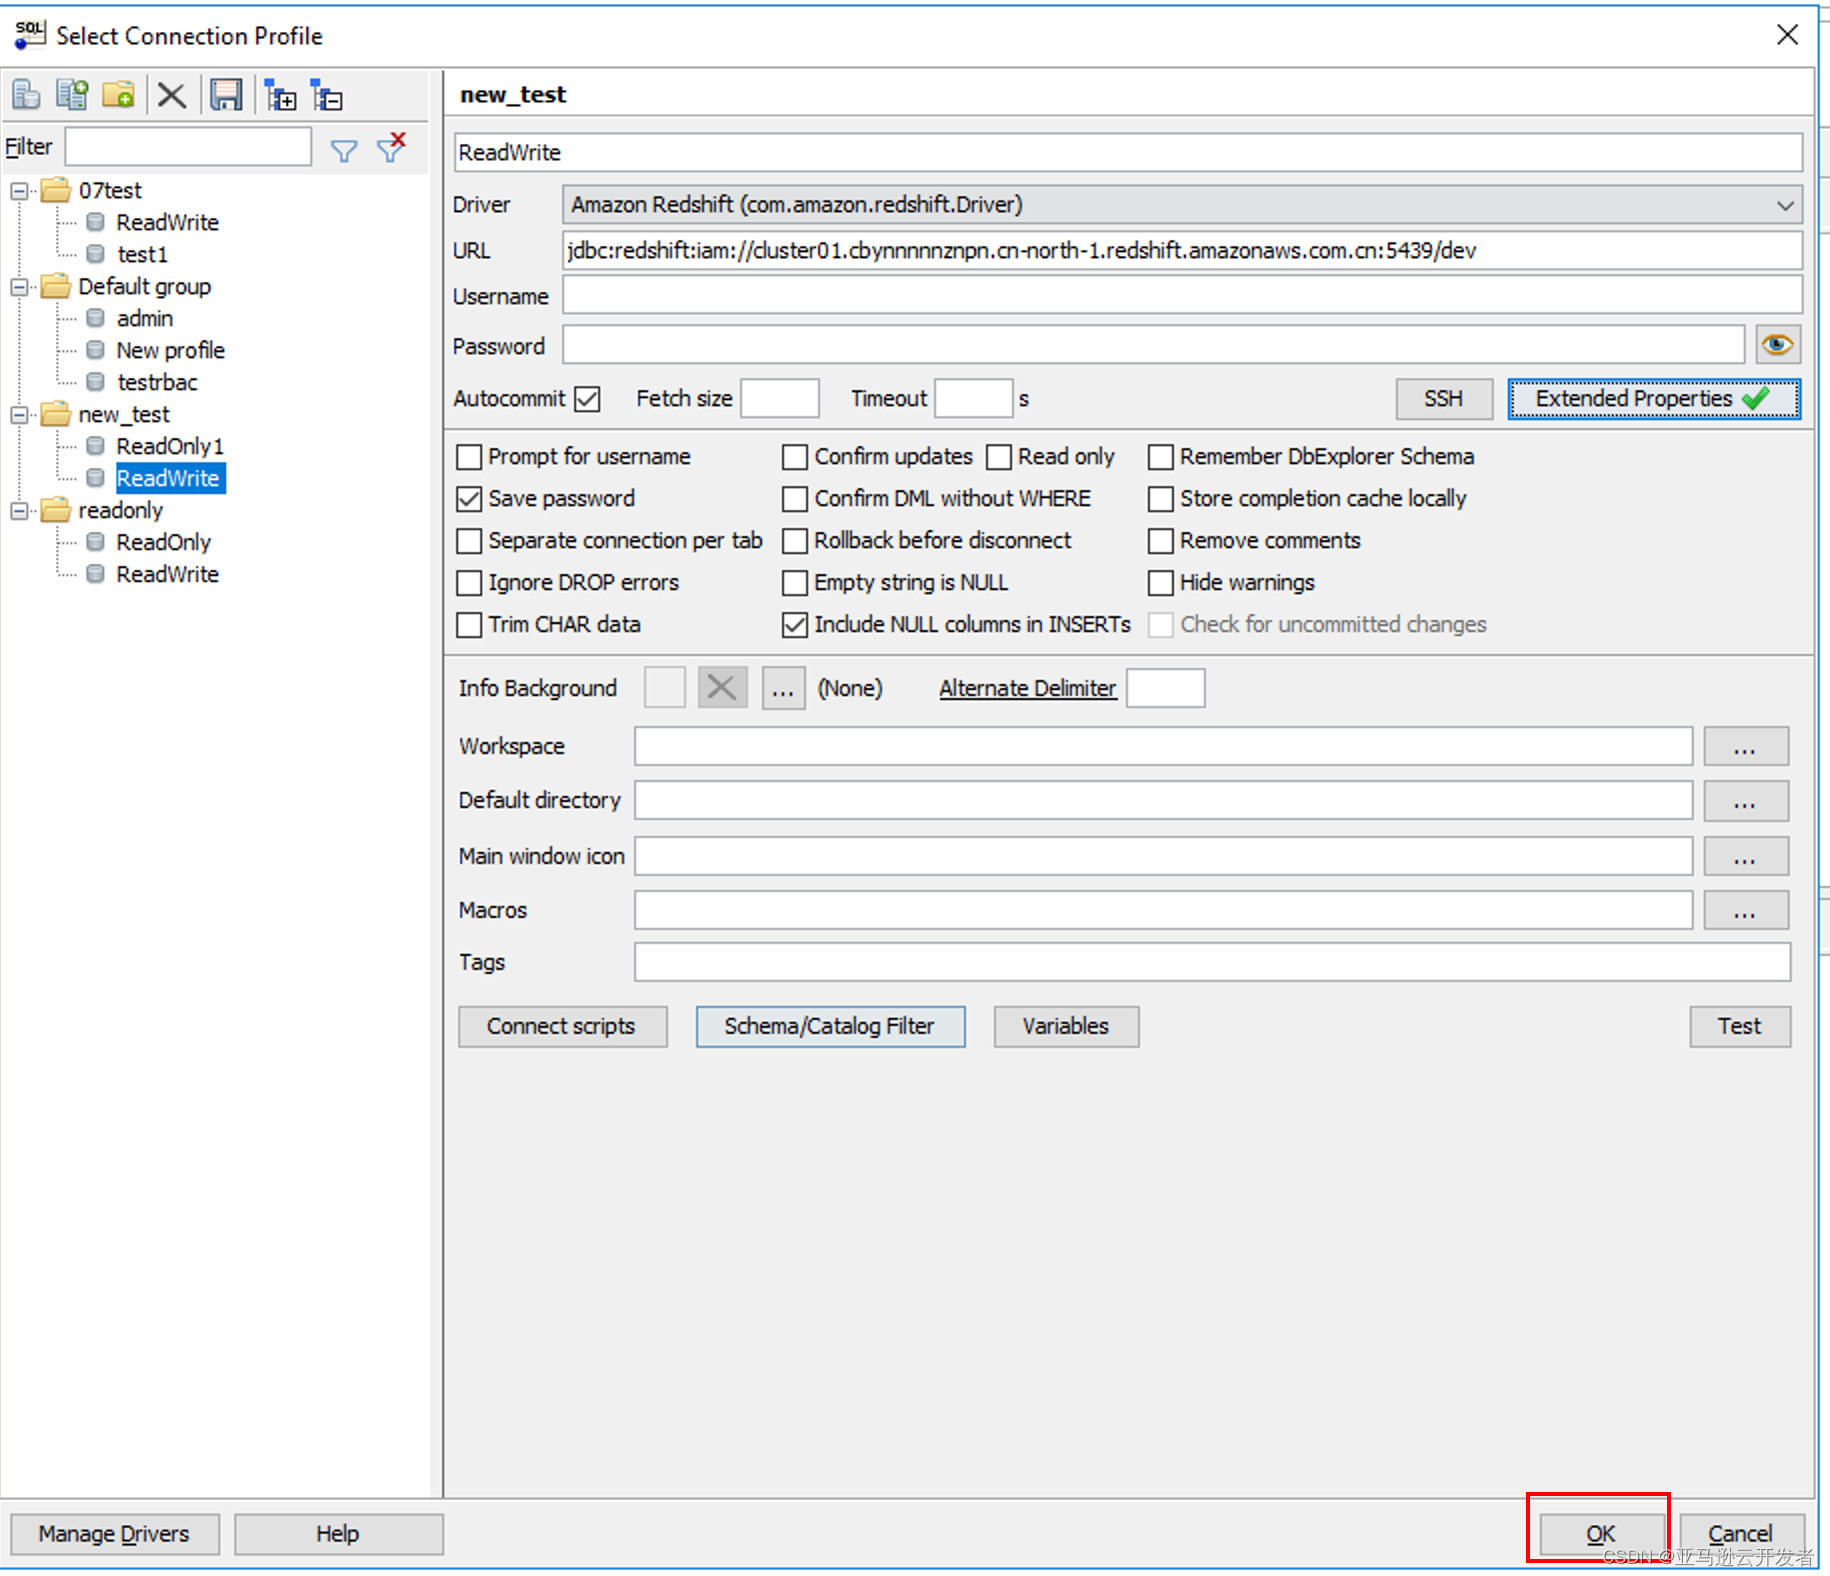
2. Create a Connection Profile (this test will test the ReadWrite permission)
URL:jdbc:redshift:iam://<cluster endpoint>

3. Select Extended Properties and enter SSO related parameters

login_url 输入 PingOne Application Initial Single Sign-On(SSO) URL


4. Click OK
5. Click the OK button on the connection Profile interface
6. The browser will open the PingOne login interface to enter the AD account user name and password
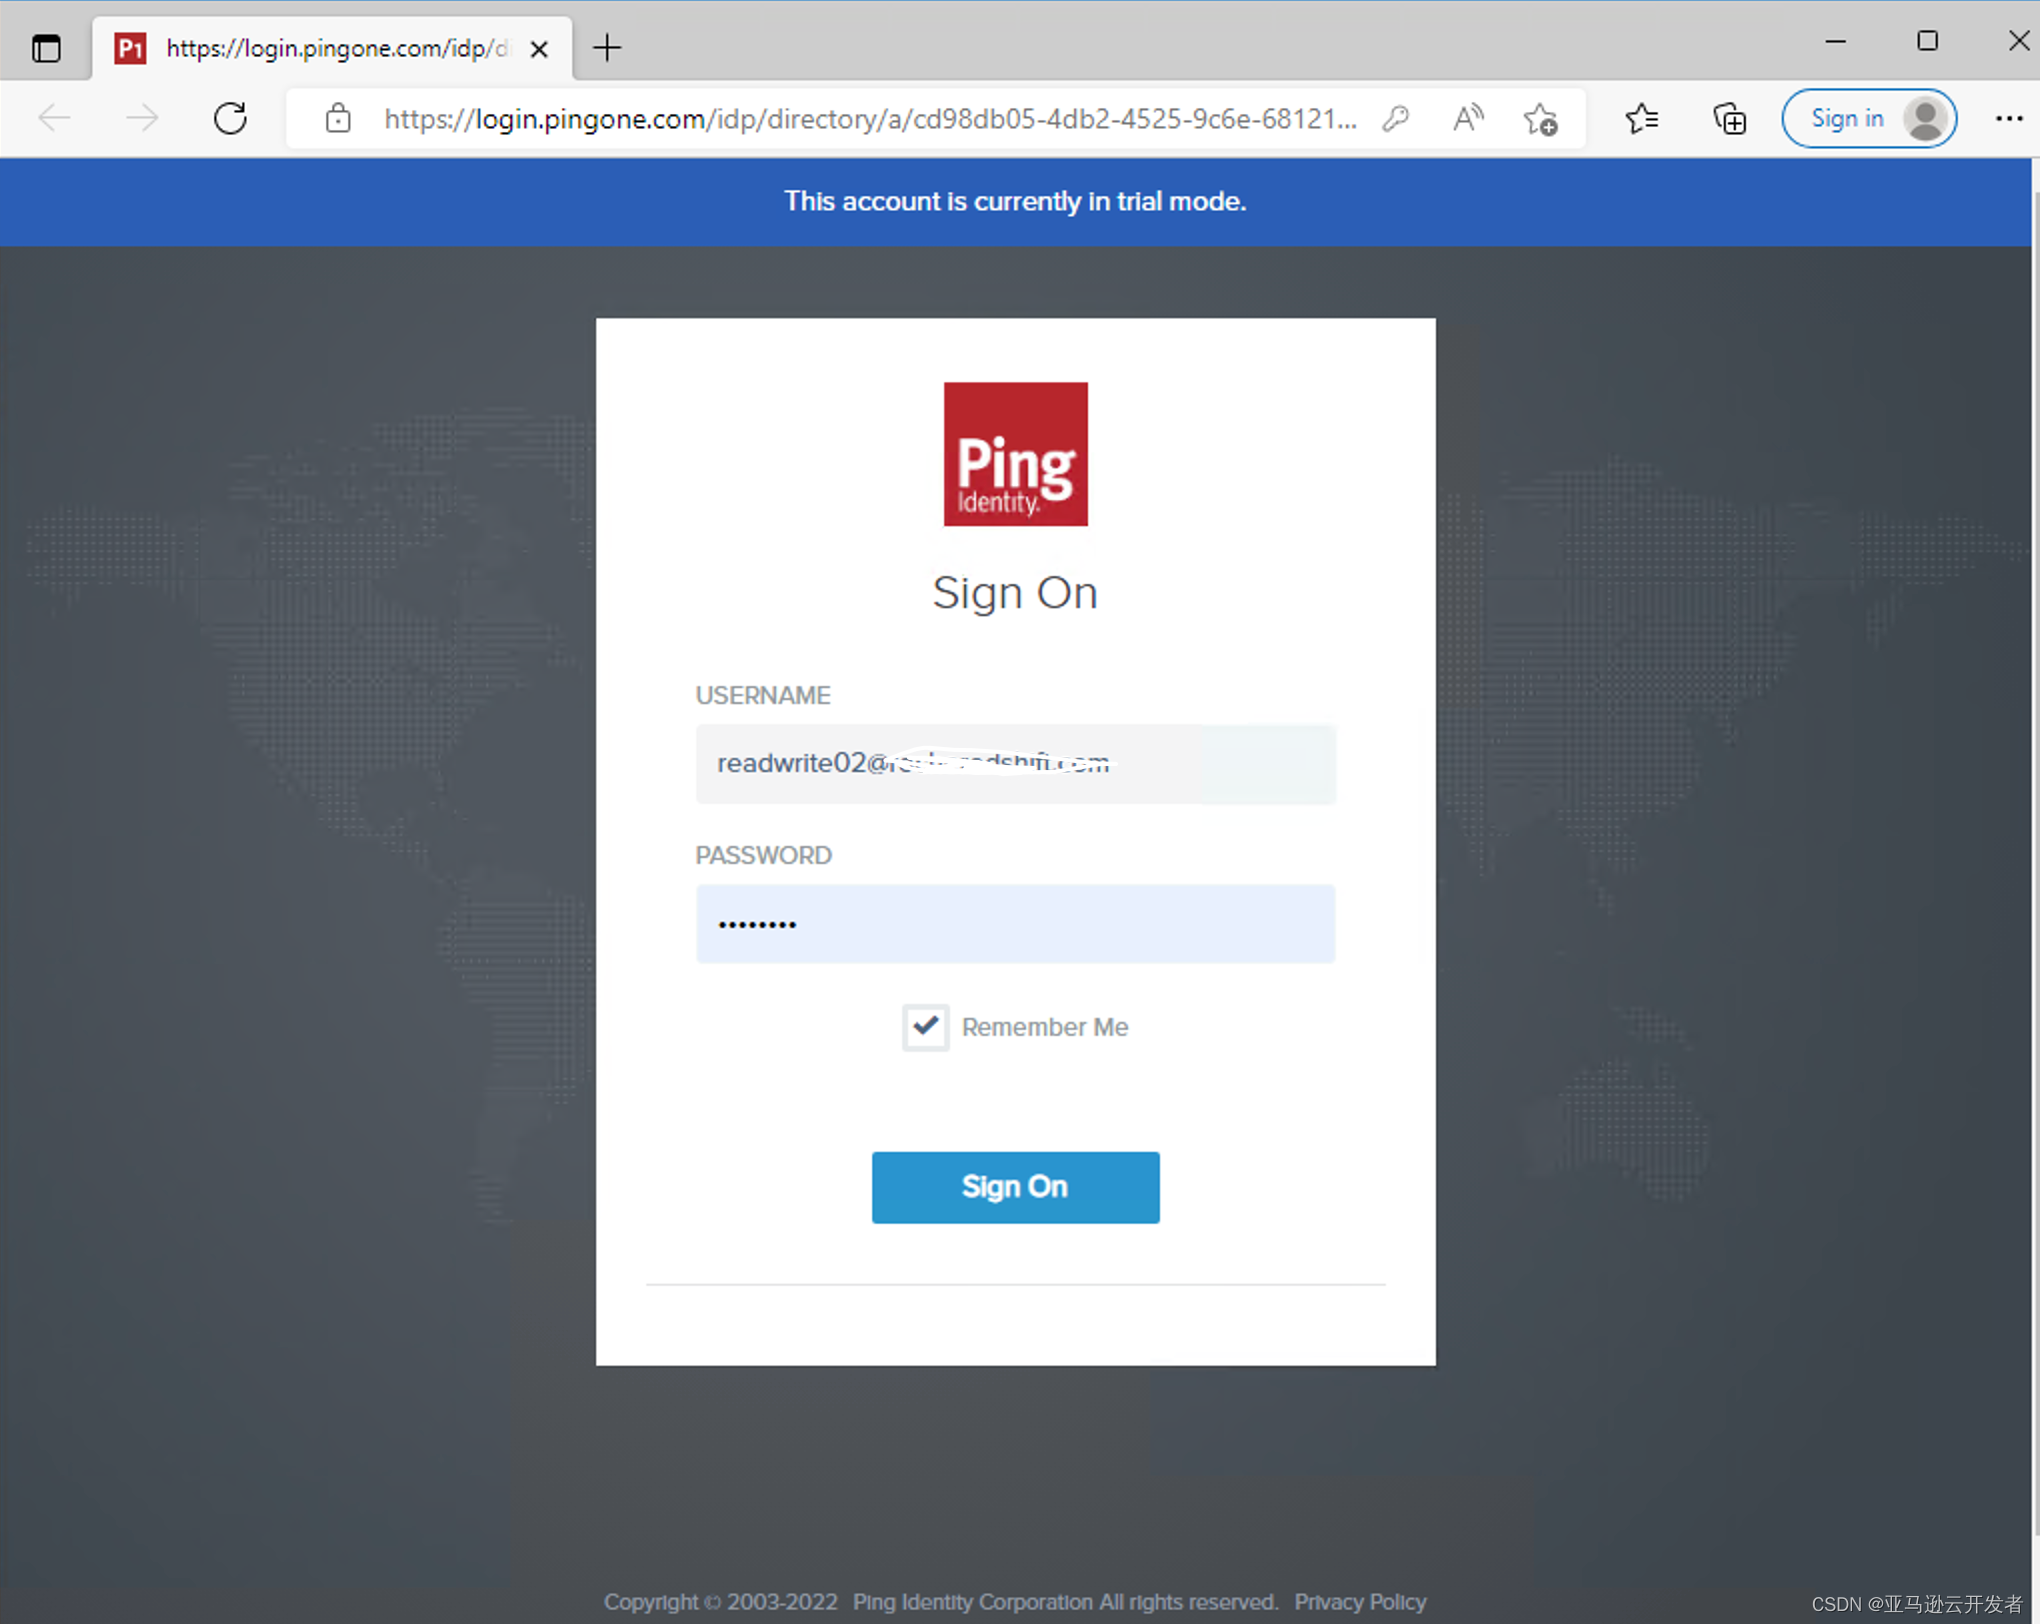
7. Successful login

8. Run the select command: select * from current_user

9. Run the insert command
INSERT INTO finance.revenue values
(1111111111, 'ABCDE Company', 12000);
Other supplements:
- The AD user logged in through SSO will be permanently saved in the Redshift data user list, but cannot log in locally because the user name is the joint user after the integration of the AD user and the IAM Role, and the generated temporary Credentials are not saved in the Redshift database user configuration middle. reference link
- The document specifies the parameter DbGroups in the extended properties in the test step, which can also be specified by configuring the parameters of PingOne Application SSO Attribute Mapping https://redshift.amazon.com/SAML/Attributes/DbGroups
Summarize:
In this blog post, I walk you through a deployment guide on how to configure and use PingOne as your IdP and enable federated SSO for your Amazon Redshift cluster. You can follow these steps to set up federated SSO for your organization and manage access based on read/write permissions or business functions and pass group memberships defined in the PingOne IdP to your Amazon Redshift cluster.
The author of this article

Hou Cong
Cloud operation and maintenance consultant of Amazon professional services team, focusing on consulting and implementation of cloud operation and maintenance and optimization solutions. He has been engaged in the design and delivery of cloud infrastructure for many years, and has in-depth research and enthusiasm for technical fields such as virtualization, SDN, containers, and automated operation and maintenance.

Yinshuo
A cloud operation and maintenance consultant of Amazon's professional services team, he has extensive experience in project delivery such as cloud service construction and operation, DevOps migration and transformation. Responsible for cloud architecture design, automated operation and maintenance on the cloud, and containerized platform design consulting for enterprise-level customers. He has in-depth research and enthusiasm for cloud-native technologies.
Article source: https://dev.amazoncloud.cn/column/article/630a1bc4d4155422a4610a59?sc_medium=regulartraffic&sc_campaign=crossplatform&sc_channel=CSDN