CAS use of the previously described embodiment is native CAS, you can see, the operation is quite cumbersome. After using SpringSecurity integrated, web.xml some listeners may be configured to be transferred to the spring configuration file.
1. Project to build SpringSecurity
1.1 introduced dependence
<project xmlns="http://maven.apache.org/POM/4.0.0" xmlns:xsi="http://www.w3.org/2001/XMLSchema-instance" xsi:schemaLocation="http://maven.apache.org/POM/4.0.0 http://maven.apache.org/xsd/maven-4.0.0.xsd">
  <modelVersion>4.0.0</modelVersion>
  <groupId>com.bjc.cas</groupId>
  <artifactId>cas2Springsecurity</artifactId>
  <version>0.0.1-SNAPSHOT</version>
  <packaging>war</packaging>

  <properties>
		<spring.version>4.2.4.RELEASE</spring.version>
	</properties>

	<dependencies>

		<dependency>
			<groupId>org.springframework</groupId>
			<artifactId>spring-core</artifactId>
			<version>${spring.version}</version>
		</dependency>
		<dependency>
			<groupId>org.springframework</groupId>
			<artifactId>spring-web</artifactId>
			<version>${spring.version}</version>
		</dependency>

		<dependency>
			<groupId>org.springframework</groupId>
			<artifactId>spring-webmvc</artifactId>
			<version>${spring.version}</version>
		</dependency>

		<dependency>
			<groupId>org.springframework</groupId>
			<artifactId>spring-context-support</artifactId>
			<version>${spring.version}</version>
		</dependency>

		<dependency>
			<groupId>org.springframework</groupId>
			<artifactId>spring-test</artifactId>
			<version>${spring.version}</version>
		</dependency>

		<dependency>
			<groupId>org.springframework</groupId>
			<artifactId>spring-jdbc</artifactId>
			<version>${spring.version}</version>
		</dependency>

		<dependency>
			<groupId>org.springframework.security</groupId>
			<artifactId>spring-security-web</artifactId>
			<version>4.1.0.RELEASE</version>
		</dependency>

		<dependency>
			<groupId>org.springframework.security</groupId>
			<artifactId>spring-security-config</artifactId>
			<version>4.1.0.RELEASE</version>
		</dependency>

		<dependency>
			<groupId>javax.servlet</groupId>
			<artifactId>servlet-api</artifactId>
			<version>2.5</version>
			<scope>provided</scope>
		</dependency>


	</dependencies>
	<build>
	  <plugins>
	      <!-- java编译插件 -->
		  <plugin>
				<groupId>org.apache.maven.plugins</groupId>
				<artifactId>maven-compiler-plugin</artifactId>
				<version>3.2</version>
				<configuration>
					<source>1.7</source>
					<target>1.7</target>
					<encoding>UTF-8</encoding>
				</configuration>
		  </plugin>
	      <plugin>
				<groupId>org.apache.tomcat.maven</groupId>
				<artifactId>tomcat7-maven-plugin</artifactId>
				<configuration>
					<!-- 指定端口 -->
					<port>9003</port>
					<!-- 请求路径 -->
					<path>/</path>
				</configuration>
	  	  </plugin>
	   </plugins>
    </build>

</project>
1.2 Configuring web.xml
<?xml version="1.0" encoding="UTF-8"?>
<web-app xmlns:xsi="http://www.w3.org/2001/XMLSchema-instance" xmlns="http://java.sun.com/xml/ns/javaee" xsi:schemaLocation="http://java.sun.com/xml/ns/javaee http://java.sun.com/xml/ns/javaee/web-app_2_5.xsd" version="2.5">
  	<context-param>
		<param-name>contextConfigLocation</param-name>
		<param-value>classpath:spring-security.xml</param-value>
	 </context-param>
	 <listener>
		<listener-class>
			org.springframework.web.context.ContextLoaderListener
		</listener-class>
	 </listener>

	 <filter>
		<filter-name>springSecurityFilterChain</filter-name>
		<filter-class>org.springframework.web.filter.DelegatingFilterProxy</filter-class>
	 </filter>
	 <filter-mapping>
		<filter-name>springSecurityFilterChain</filter-name>
		<url-pattern>/*</url-pattern>
	 </filter-mapping>
</web-app>
1.3 spring configuration
<?xml version="1.0" encoding="UTF-8"?>
<beans:beans xmlns="http://www.springframework.org/schema/security"
xmlns:beans="http://www.springframework.org/schema/beans" xmlns:xsi="http://www.w3.org/2001/XMLSchema-instance"
xsi:schemaLocation="http://www.springframework.org/schema/beans http://www.springframework.org/schema/beans/spring-beans.xsd
http://www.springframework.org/schema/security http://www.springframework.org/schema/security/spring-security.xsd">
<!-- 页面拦截规则 -->
<http pattern="/login.html" security="none"></http>
<http pattern="/error.html" security="none"></http>
<!-- 页面拦截 -->
<http use-expressions="false" >
<!-- 如果启用表达式,那么access的属性值就要写层SPEL表达式了 hasRole('ROLE_USER') -->
<intercept-url pattern="/**" access="ROLE_USER" />
<form-login default-target-url="/index.html" login-page="/login.html" authentication-failure-url="/error.html"/>
<csrf disabled="true"/>
</http>
<!-- 认证管理器 -->
<authentication-manager>
<authentication-provider>
<user-service>
<user name="admin" password="123456" authorities="ROLE_USER"/>
</user-service>
</authentication-provider>
</authentication-manager>
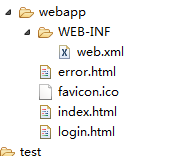
</beans:beans>1.4 prepare the relevant page
2. SpringSecurity integrated with CAS
2.1 introduces dependence
springSecurity integration package with CAS, CAS native package
<!-- 引入cas依赖 -->
<dependency>
	   <groupId>org.springframework.security</groupId>
	   <artifactId>spring-security-cas</artifactId>
	   <version>4.1.0.RELEASE</version>
</dependency>
<dependency>
	<groupId>org.jasig.cas.client</groupId>
	<artifactId>cas-client-core</artifactId>
	<version>3.3.3</version>
	<exclusions>
	    <exclusion>
		<groupId>org.slf4j</groupId>
		<artifactId>log4j-over-slf4j</artifactId>
	    </exclusion>
	</exclusions>
</dependency>
2.2 modify SpringSecurity xml configuration
<?xml version="1.0" encoding="UTF-8"?>
<beans:beans xmlns="http://www.springframework.org/schema/security"
	xmlns:beans="http://www.springframework.org/schema/beans" xmlns:xsi="http://www.w3.org/2001/XMLSchema-instance"
	xsi:schemaLocation="http://www.springframework.org/schema/beans http://www.springframework.org/schema/beans/spring-beans.xsd
						http://www.springframework.org/schema/security http://www.springframework.org/schema/security/spring-security.xsd">

	<!--   entry-point-ref  入口点引用 -->
	<!--
		entry-point-ref:登录点引用。因为我们要集成CAS,那么登录就不会在本地项目中了,所以这时候我们本地的login.html就不需要了
						 ,而是使用的CAS配置的登录页面casProcessingFilterEntryPoint就是下面的CAS入口点配置的id值
	-->
	<http use-expressions="false" entry-point-ref="casProcessingFilterEntryPoint">
        <intercept-url pattern="/**" access="ROLE_USER"/>
        <csrf disabled="true"/>
        <!--
			SpringSecurity过滤器配置,在SpringSecurity中,可以在配置文件中配置过滤器,这样在web.xml中就不需要配置过滤器了
			在springsecurity中内置了很多过滤器,每一个过滤器都有一个别名
			custom-filter为过滤器标签,
			position 表示将过滤器放在指定的位置上,
			before表示放在指定位置之前  ,
			after表示放在指定的位置之后
		-->
		<!-- 表示在当前http拦截当中,配置一个过滤器,这个过滤器在CAS_FILTER上出现 -->
        <custom-filter ref="casAuthenticationFilter"  position="CAS_FILTER" />
		<!-- 请求单点登出过滤器,在过滤器LOGOUT_FILTER的前面执行  该过滤器是CAS原生包提供的 -->
        <custom-filter ref="requestSingleLogoutFilter" before="LOGOUT_FILTER"/>
		<!-- 请求单点登出过滤器,在过滤器CAS_FILTER的位置处执行  该过滤器是SpringSecurity提供的 -->
        <custom-filter ref="singleLogoutFilter" before="CAS_FILTER"/>
    </http>

  	<!-- CAS入口点 开始 -->
    <beans:bean id="casProcessingFilterEntryPoint" class="org.springframework.security.cas.web.CasAuthenticationEntryPoint">
        <!-- 单点登录服务器登录URL -->
        <beans:property name="loginUrl" value="http://localhost:9100/cas/login"/>
        <beans:property name="serviceProperties" ref="serviceProperties"/>
    </beans:bean>
    <beans:bean id="serviceProperties" class="org.springframework.security.cas.ServiceProperties">
        <!--service 配置自身工程的根地址+/login/cas   -->
        <beans:property name="service" value="http://localhost:9003/login/cas"/>
    </beans:bean>
    <!-- CAS入口点 结束 -->


    <!-- 认证过滤器 开始 -->
    <beans:bean id="casAuthenticationFilter" class="org.springframework.security.cas.web.CasAuthenticationFilter">
        <beans:property name="authenticationManager" ref="authenticationManager"/>
    </beans:bean>
		<!-- 认证管理器 -->
	<authentication-manager alias="authenticationManager">
		<authentication-provider  ref="casAuthenticationProvider">
		</authentication-provider>
	</authentication-manager>
		<!-- 认证提供者 -->
	<beans:bean id="casAuthenticationProvider"     class="org.springframework.security.cas.authentication.CasAuthenticationProvider">
        <beans:property name="authenticationUserDetailsService">
            <beans:bean class="org.springframework.security.core.userdetails.UserDetailsByNameServiceWrapper">
                <beans:constructor-arg ref="userDetailsService" />
            </beans:bean>
        </beans:property>
        <beans:property name="serviceProperties" ref="serviceProperties"/>
        <!-- ticketValidator 为票据验证器 -->
        <beans:property name="ticketValidator">
            <beans:bean class="org.jasig.cas.client.validation.Cas20ServiceTicketValidator">
                <beans:constructor-arg index="0" value="http://localhost:9100/cas"/>
            </beans:bean>
        </beans:property>
        <beans:property name="key" value="an_id_for_this_auth_provider_only"/>
    </beans:bean>
   		 <!-- 认证类 -->
	<beans:bean id="userDetailsService" class="cn.bjc.demo.UserDetailServiceImpl"/>

	<!-- 认证过滤器 结束 -->


	<!-- 单点登出  开始  -->
	<!-- 对服务端进行单点登出 -->
    <beans:bean id="singleLogoutFilter" class="org.jasig.cas.client.session.SingleSignOutFilter"/>
	<!-- 主要是用来配置下面的地址信息的
		经过此配置,当用户在地址栏输入本地工程/logout/cas即,在地址栏输入/logout/cas就相当于输入了http://localhost:9100/cas/logout?service=http://www.baidu.com
	-->
    <beans:bean id="requestSingleLogoutFilter" class="org.springframework.security.web.authentication.logout.LogoutFilter">
        <beans:constructor-arg value="http://localhost:9100/cas/logout?service=http://www.baidu.com"/>
        <beans:constructor-arg>
            <beans:bean class="org.springframework.security.web.authentication.logout.SecurityContextLogoutHandler"/>
        </beans:constructor-arg>
        <beans:property name="filterProcessesUrl" value="/logout/cas"/>
    </beans:bean>
    <!-- 单点登出  结束 -->

</beans:beans>
2.3 SpringSecurity certification class
springsecurity prior to certification class needs to query a database of user information, and now after the integration with cas, you do not need, because CAS has been configured data source. Now the role of the certified class has changed, do not play the role of certification, but rather to return a list of roles based on the passed username
Create a certification class that implements the interface UserDetailsService
package com.bjc.demo;

import java.util.ArrayList;
import java.util.List;

import org.springframework.security.core.GrantedAuthority;
import org.springframework.security.core.authority.SimpleGrantedAuthority;
import org.springframework.security.core.userdetails.User;
import org.springframework.security.core.userdetails.UserDetails;
import org.springframework.security.core.userdetails.UserDetailsService;
import org.springframework.security.core.userdetails.UsernameNotFoundException;

/**
 * 认证类
 * @author Administrator
 *
 */
public class UserDetailServiceImpl implements UserDetailsService{


	/*
	 * username  是用户登录的时候输入的用户名
	 * 返回null   就登录失败
	 */
	@Override
	public UserDetails loadUserByUsername(String username) throws UsernameNotFoundException {

		// 获取角色组
		List<GrantedAuthority> authorities = new ArrayList<>();
		// 注意:这里的角色名称要和配置文件中<intercept-url pattern="/**" access="ROLE_USER"/>的角色名称一样
		GrantedAuthority e = new SimpleGrantedAuthority("ROLE_USER");
		authorities.add(e );

		/*
		 * 注意:这里的第二个参数是密码,可以给空,因为这个类已经不做认证了,所以可以随便写什么,关键的是第三个参数,所有的角色列表
		 * */
		return new User(username, "", authorities);
	}

}
note:
1. Because the authentication of the certified class does not need to do so does not substantially involve some logic operations. User return the object of three parameters, the first is the user name, password is the second, and the third is a list of roles, which can give an empty password, you can also give any other string, the third parameter is the key the list of roles must match the profile name of the role.
2. Certification class name must match the configuration file to configure the authentication class
<!-- 认证类 -->
<beans:bean id="userDetailsService" class="com.bjc.demo.UserDetailServiceImpl"/>
3. Get a login name
In the security user name may be acquired through SecurityContextHolder, since the integrated security and cas, we must also get the user security approach to the SecurityContextHolder the package, i.e. may be performed according to the acquired user security manner;
At the same time, due to the integration with cas, and in the cas it is possible to get the user's login name of the request object, so you can also use the cas way to get
3.1 Configuration in web.xml SpringMVC
<servlet>
  	<servlet-name>springmvc</servlet-name>
  	<servlet-class>org.springframework.web.servlet.DispatcherServlet</servlet-class>
  	<!-- 指定加载的配置文件 ,通过参数contextConfigLocation加载-->
  	<init-param>
  		<param-name>contextConfigLocation</param-name>
  		<param-value>classpath:springmvc.xml</param-value>
  	</init-param>
  </servlet>

  <servlet-mapping>
  	<servlet-name>springmvc</servlet-name>
  	<url-pattern>*.do</url-pattern>
  </servlet-mapping>
3.2 SpringMVC profile
<?xml version="1.0" encoding="UTF-8"?>
<beans xmlns="http://www.springframework.org/schema/beans"
	xmlns:xsi="http://www.w3.org/2001/XMLSchema-instance" xmlns:p="http://www.springframework.org/schema/p"
	xmlns:context="http://www.springframework.org/schema/context"
	xmlns:dubbo="http://code.alibabatech.com/schema/dubbo" xmlns:mvc="http://www.springframework.org/schema/mvc"
	xsi:schemaLocation="http://www.springframework.org/schema/beans http://www.springframework.org/schema/beans/spring-beans.xsd
        http://www.springframework.org/schema/mvc http://www.springframework.org/schema/mvc/spring-mvc.xsd
        http://code.alibabatech.com/schema/dubbo http://code.alibabatech.com/schema/dubbo/dubbo.xsd
        http://www.springframework.org/schema/context http://www.springframework.org/schema/context/spring-context.xsd">
    <context:property-placeholder location="classpath:config/application.properties" />


	<context:component-scan base-package="com.bjc.demo" />
	<mvc:annotation-driven />

</beans>
3.3 controller
package com.bjc.demo;

import javax.servlet.http.HttpServletRequest;

import org.springframework.security.core.context.SecurityContextHolder;
import org.springframework.web.bind.annotation.RequestMapping;
import org.springframework.web.bind.annotation.RestController;

@RestController
public class UserController {

	@RequestMapping("/getname")
	public void getName(HttpServletRequest request){
		String username = request.getRemoteUser();
		System.out.println("当前登录用户是(cas):" + username);

		// 使用security的方式
		String name = SecurityContextHolder.getContext().getAuthentication().getName();
		System.out.println("当前登录用户是(security):" + username);
	}
}
Test Results:

4. Log
1) Add an exit connected to the page
<a href="logout/cas">退出</a>2) modify SpringSecurity configuration file, set logout page visits
<beans:constructor-arg value="http://localhost:9100/cas/logout?service=http://localhost:9003/logout.html"/> 
We try to try to quit on the page, found that after the exit, jump directly to login.html, this is because SpringSecurity intercepted logout.html page, so we need to release the page
3) Release exit pages
Add release configuration in the configuration file SpringSecurity
<http pattern="/logout.html" security="none"></http>
