ps: Long time no see, everyone, I'm home! I finally have time to sort out some of the previous things (well, I was too lazy before), today I will share a python web combat project with simple functions, and the later functions can be enriched by myself.
first look at the effect
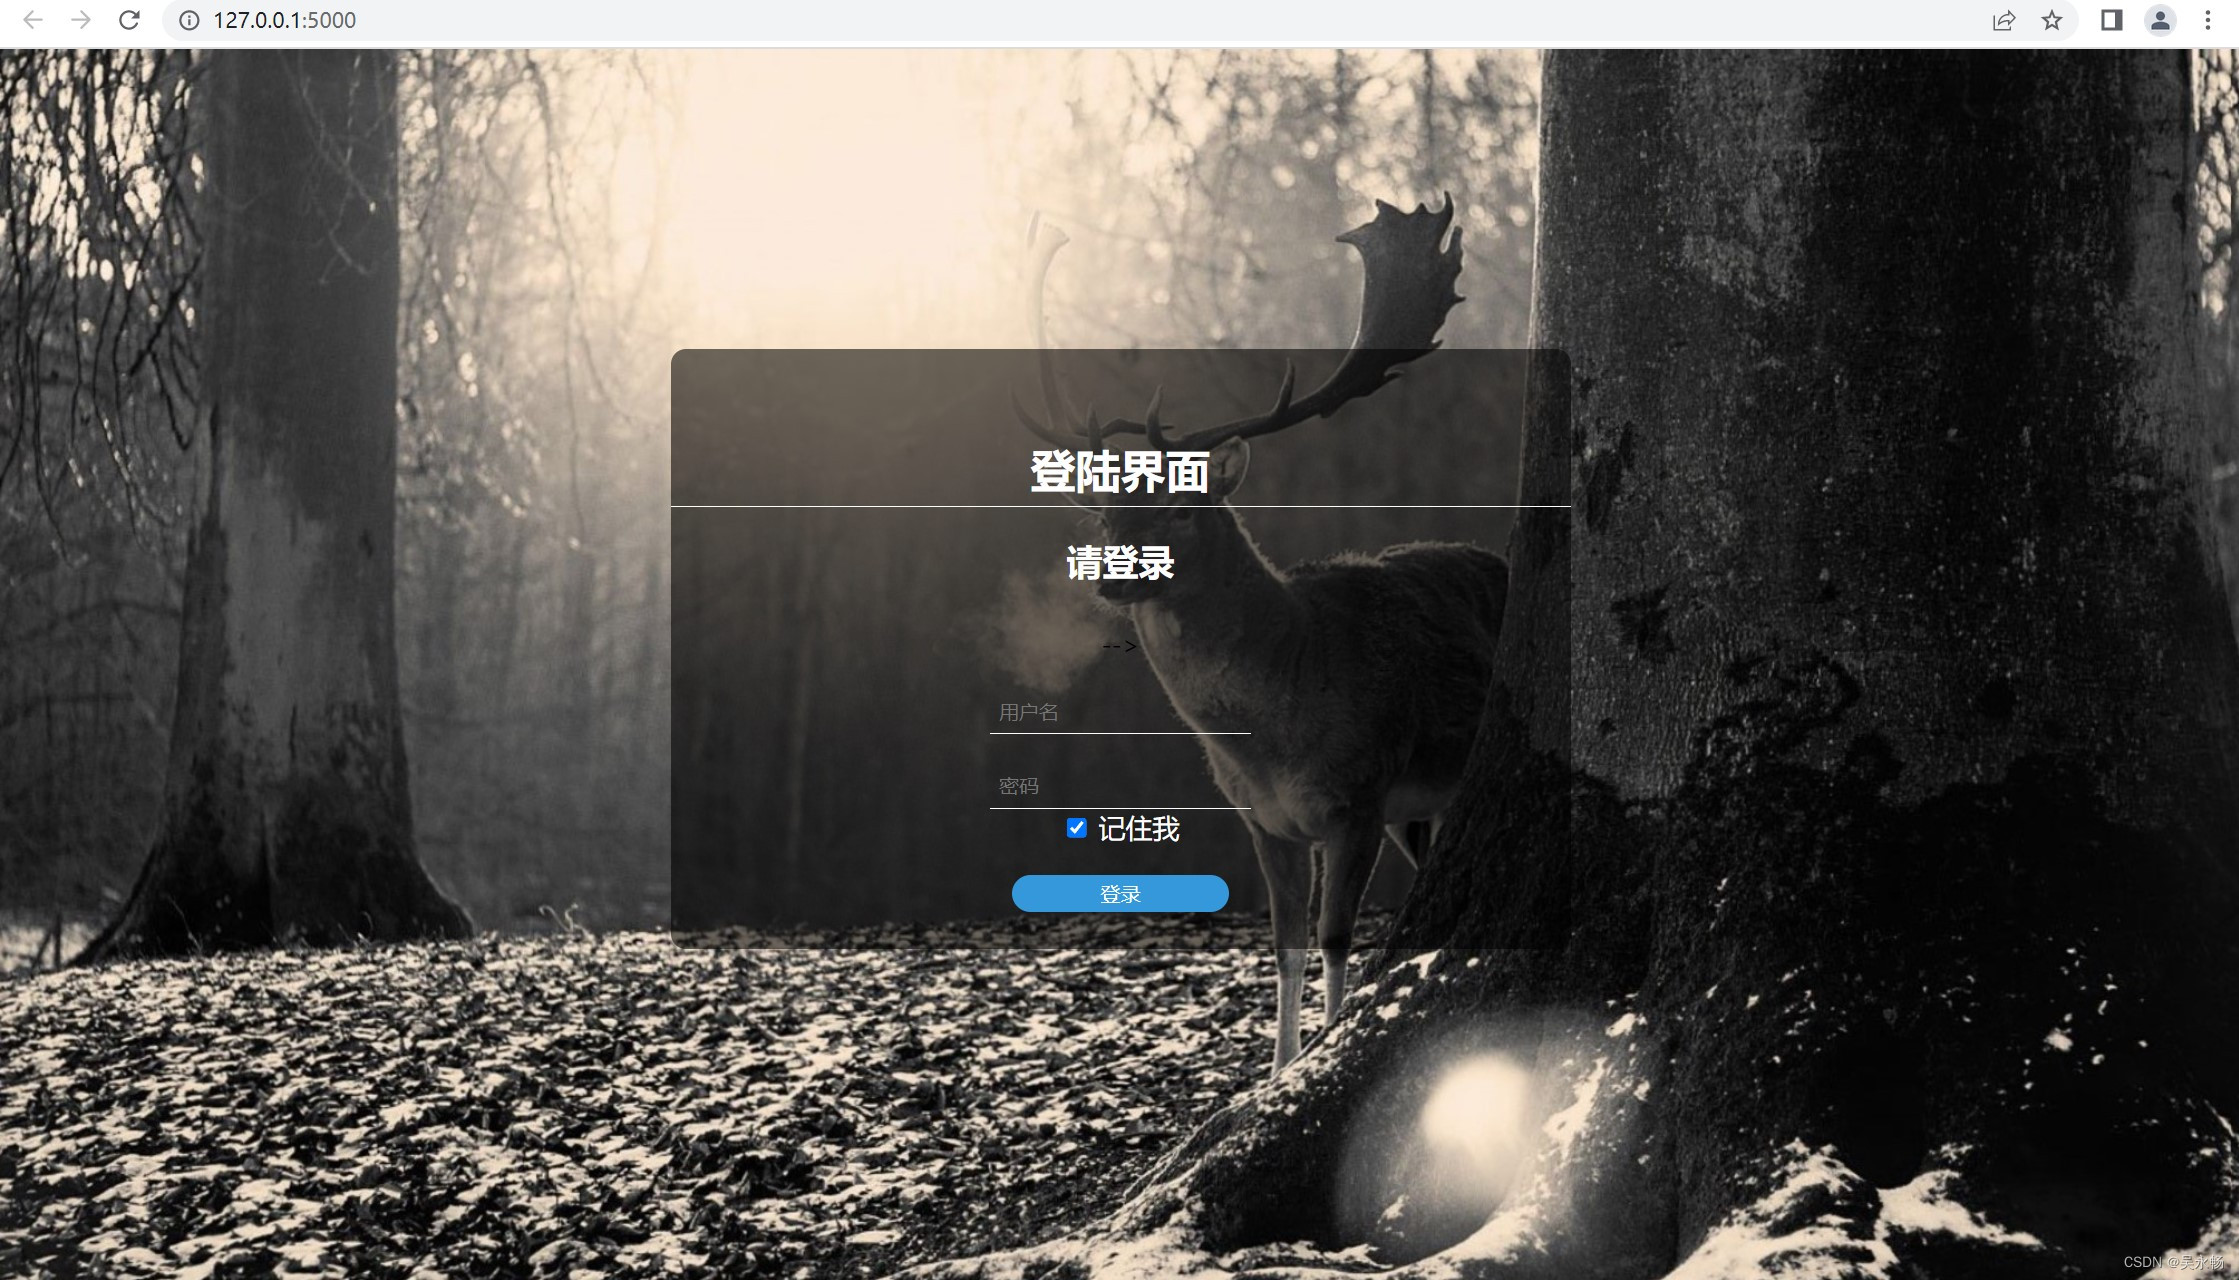
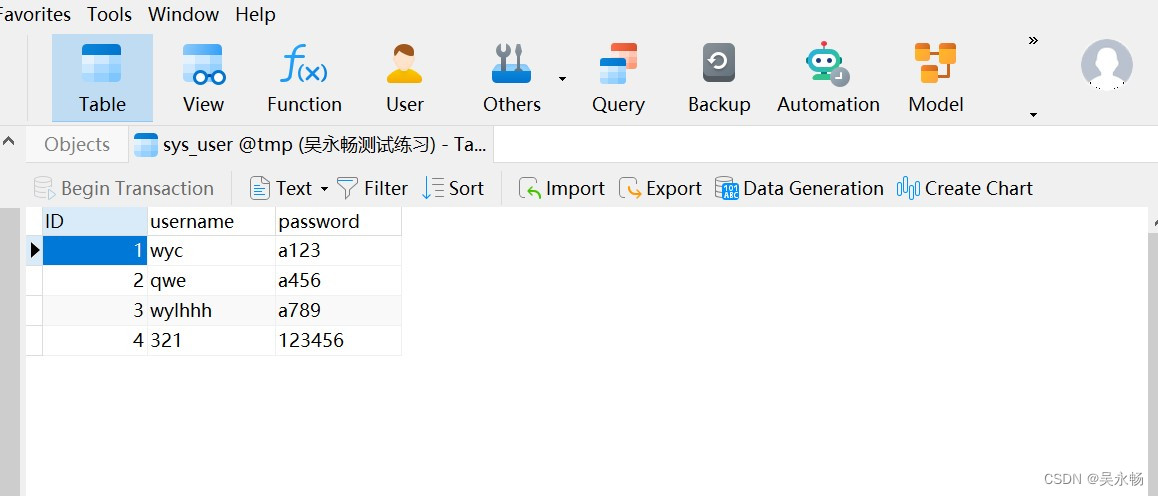
Enter the correct user name and password to log in successfully (the following figure is the form for storing data)

text
1. Import module
from flask import Flask, render_template, request
import pymysql
2. Create a web program and connect to the database
app = Flask(__name__)


def get_conn():
    # 建立与mysql连接
    conn = pymysql.connect(host="localhost", user="root", password="root", db="tmp", charset="utf8")
    # c创建游标A
    cursor = conn.cursor()
    return conn, cursor
localhost: local database.
user: The database user name set.
password: The database password, which is root by default, if you modify it later, you can change it to the corresponding one.
db: The name of the database to be connected.
1. Close the module (close the database connection, close the cursor)
code show as below:
def close_conn(conn, cursor):  # 关闭模块
    if cursor:
        cursor.close()
    if conn:
        conn.close()
2. Query module (for querying information from the database)
code show as below:
def query(sql, *args):  # 查询模块

    conn, cursor = get_conn()
    cursor.execute(sql, args)
    res = cursor.fetchall()
    conn.commit()
    close_conn(conn, cursor)
    return res


def get_user(username, password):  # 从数据库中查询用户名和密码
    sql = "select id from sys_user where username= '" + username + "' and password= '" + password + "'"
    res = query(sql)
    return res
sys_user: A table that stores user names and passwords.
3. Write a function to handle the request sent by the browser, and the request to / is to automatically execute this function.
@app.route('/')  # 必须加上路由,否则访问和函数没有关联,当访问到127.0.0.1:5000/,执行函数
def index():
    return render_template('login.html')


@app.route('/login', methods=['post'])
def login():
    username = request.form.get('username')  # 接收form表单传参
    password = request.form.get('password')
    res = get_user(username, password)
    if res:
        return render_template('xxx.html',msg='登陆成功')
    else:
        return render_template('login.html', msg='登录失败')
Enter the xxx page after successful login, stay on this page and give a prompt if the login fails.
The login interface is to pass parameters for the form, and a POST request is used here.
In the request type of the HTTP protocol:
-
GET: Get resources or data from the server
-
POST: Submit data to the server
When a GET request sends data, the request data is generally sent to the server in the url string, so from a security point of view, it is relatively less secure than a POST request, so a GET request is generally not used to compare private data Transmission, while POST requests put the request data in the request body, so it is generally used for the transmission of form data, login data and other data.
4. Start the application
if __name__ == '__main__':  # 固定的写法,程序的入口
    app.run()  # 启动应用程序,
Five, complete code
-
myflask.py
from flask import Flask, render_template, request
import pymysql

# 创建web应用程序


app = Flask(__name__)


def get_conn():
    # 建立与mysql连接
    conn = pymysql.connect(host="localhost", user="root", password="root", db="tmp", charset="utf8")
    # c创建游标A
    cursor = conn.cursor()
    return conn, cursor

def close_conn(conn, cursor):  # 关闭模块
    if cursor:
        cursor.close()
    if conn:
        conn.close()


def query(sql, *args):  # 查询模块
    conn, cursor = get_conn()
    cursor.execute(sql, args)
    res = cursor.fetchall()
    conn.commit()
    close_conn(conn, cursor)
    return res


def get_user(username, password):  # 从数据库中查询用户名和密码
    sql = "select id from sys_user where username= '" + username + "' and password= '" + password + "'"
    res = query(sql)
    return res


# 写一个函数来处理浏览器发送过的请求,请求到/是自动执行这个函数
@app.route('/')  # 必须加上路由,否则访问和函数没有关联,当访问到127.0.0.1:5000/,执行函数
def index():
    return render_template('login.html')


@app.route('/login', methods=['post'])
def login():
    username = request.form.get('username')  # 接收form表单传参
    password = request.form.get('password')
    res = get_user(username, password)
    if res:
        return render_template('game.html',msg='登陆成功')
    else:
        return render_template('login.html', msg='登录失败')


if __name__ == '__main__':  # 固定的写法,程序的入口
    app.run()  # 启动应用程序,
-
Front-end page code (you can take it yourself if you need it, remember to give it a thumbs up)
<!DOCTYPE html>
<html>

<head>
    <meta charset="utf-8" />
    <title>登陆界面</title>
    <link rel="icon" href="http://v3.bootcss.com/favicon.ico">
    <style>

 li {
            list-style: none;
        }

        body {
            margin: 0;
            padding: 0;
            box-sizing: border-box;
            background-image: url(static/img/鹿3.jpg);
            /* background-image: url(/static/img/1.jpg); */
            background-repeat: no-repeat;
            /*这里的100% auto 表示将背景图片的长度100%显示,高度自适应*/
            background-size: 100% auto;
        }

        #maxbox {
            margin: 0 auto;
            margin-top: 200px;
            padding: 20px, 50px;
            /*这里的90表示以不透明度90%显示*/
            background-color: #00000090;
            text-align: center;
            width: 600px;
            height: 400px;
            border-radius: 10px;
        }

        #maxbox h1 {
            padding: 0;
            padding-top: 60px;
            color: white;
            font-size: 30px;
            padding-bottom: 4px;
            border-bottom: solid 1px white;
        }

        #maxbox h2 {
            font-weight: 700;
            color:white;
        }

        #maxbox .inputbox {
            margin-top: 30px;

        }

        #maxbox .inputText {
            margin-top: 20px;

        }

        #maxbox .inputText span {
            color: white;
            font-size: 18px;


        }

        #maxbox .inputText input {
            border: 0;
            padding: 6px;
            border-bottom: 1px solid white;
            /*这里的00表示不透明度为0,即透明显示*/
            background-color: #FFFFFF00;
            color: white;
        }

        #maxbox .inputbox .inputButton {
            margin: 0;
            border: 0;
            margin-top: 20px;
            width: 145px;
            height: 25px;
            /*给这个按钮变为圆角边角*/
            border-radius: 25px;
            color: white;
            background-color: #3498db;
        }

        #sign_up {
            margin-top: 50px;
            color: white;
            font-size: 17px;
        }

        #sign_up a {
            color: #3498db;
        }
    </style>

</head>

<body>
    <div id="maxbox">
        <h1>登陆界面</h1>
        <h2>请登录</h2>
        <div class="inputbox">
<!--            <form name="frm" action="" method="post">-->
            <form  action="/login" method="post">-->
                <div class="inputText">
                    <span class="iconfont icon-mine"></span>
                    <input class="username" type="text" placeholder="用户名" name="username" style="color:while" />
                </div>
                <div class="inputText">
                    <span class="iconfont icon-lock"></span>
                    <input type="password" placeholder="密码" name="password" style="color:white" />
                    <br>
                    <input class="remember" name="remember" type="checkbox" value="" checked="checked">
                    <span style="color:rgb(255, 255, 255)">记住我</span>

                </div>
                <input class="inputButton" type="submit" value="登录" />
                    {

   {msg}}
            </form>
        </div>
    </div>
</body>

</html>
Summarize
The above is what I want to share today, a practical small project of python+web+flask lightweight framework. Subsequent functions can be enriched by themselves, and the principles are similar.