1. Load the BMP file
#include <Windows.h>
#include <fstream>
#include <iostream>
unsigned char* LoadDataFromDisk(const char* path)
{
    unsigned char* content = nullptr;
    FILE * file= fopen(path,"rb");
    if (file)
    {
        int ret = fseek(file, 0, SEEK_END);    //fseek 函数只返回执行的结果是否成功,并不返回文件的读写位置

        int len = ftell(file);                 //ftell 取得当前文件的读写位置

        if (len > 0)
        {
            rewind(file);                      //rewind 函数用于将文件内部的位置指针重新指向一个流(数据流或者文件)的起始位置

            content = new unsigned char[len + 1];

            fread(content, sizeof(unsigned char), len, file);

            content[len] = '\0';
        }

        fclose(file);
    }
    return content;
}
1. Notes:
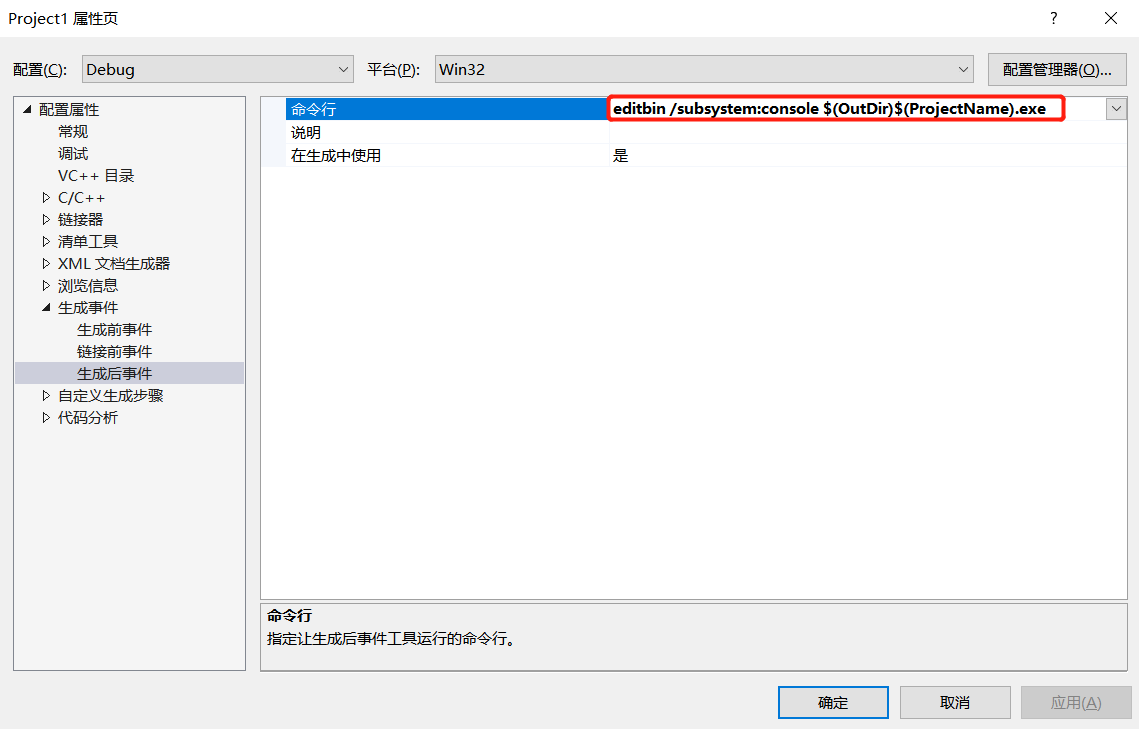
(1) After creating a windows desktop application, if you want to see the console output, you can add the following setting "editbin /subsystem:console $(OutDir)$(ProjectName).exe" to the "post-build event" command line:
(2) After assigning a value to unsigned char*, if there are other unexpected characters such as "?" in the string at runtime, you can use NotePad++ to modify the encoding format to solve this problem.
(3) Adding #define _CRT_SECURE_NO_WARNINGS in the first line of the source file and adding /D_CRT_SECURE_NO_WARNINGS in "Properties" -> "C/C++" -> "Command Line" can solve the insecurity problem.
#define _CRT_SECURE_NO_WARNINGS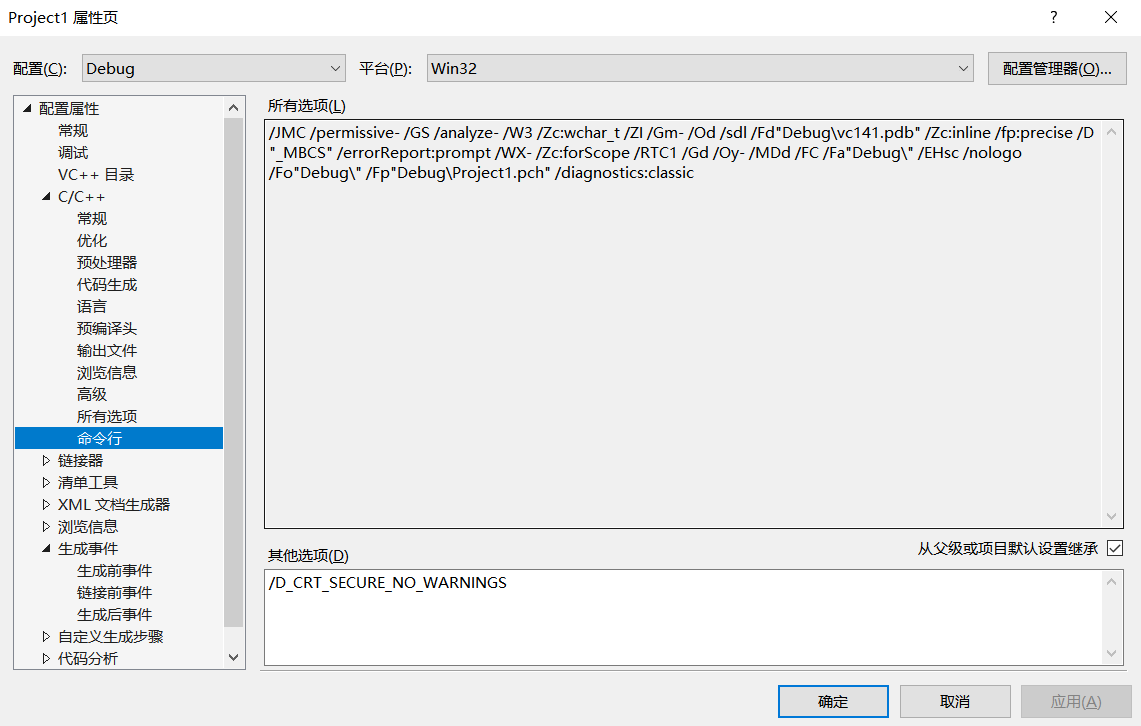
2. Decoding BMP pictures
1. Use Notepad++ to view BMP files
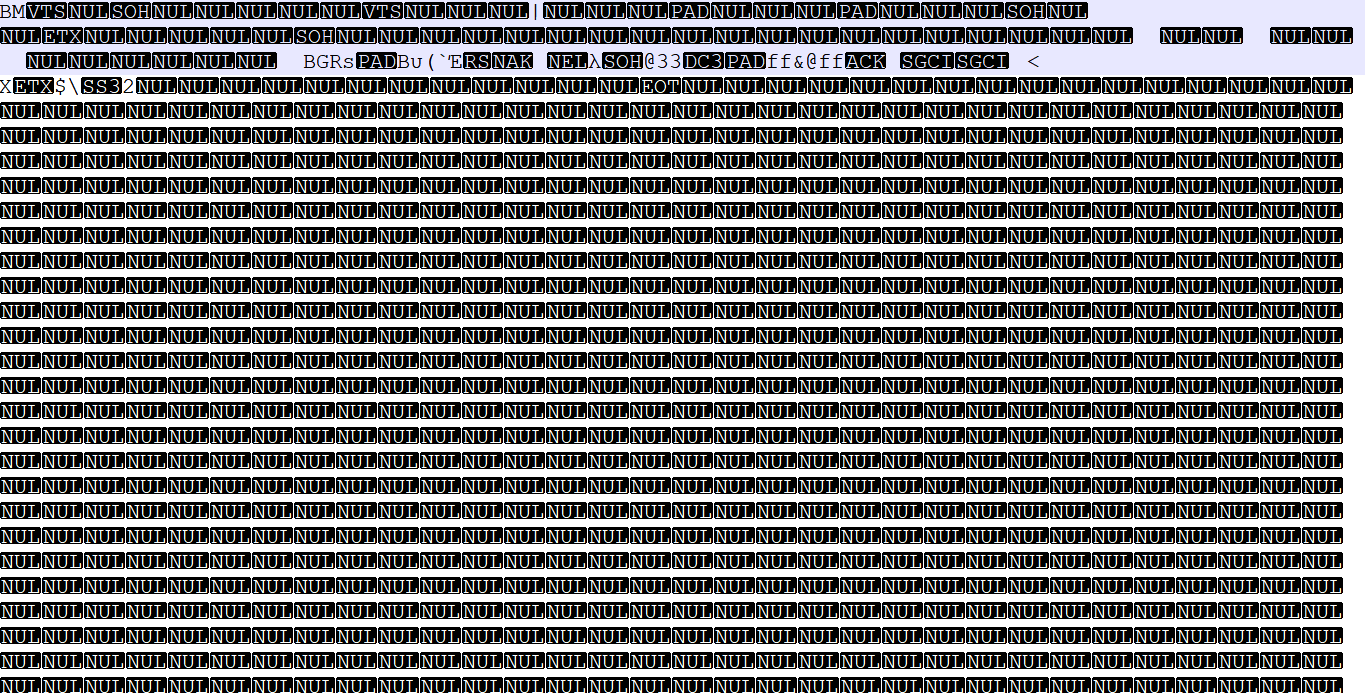
When we open the bmp file with Notepad++, we may see a bunch of garbled characters like the one below. Don't worry, a plugin can solve this problem.
HexEditor download
HexEditor is a plug-in for Notepad++, which supports viewing bmp image data in hexadecimal format. Download it at https://download.csdn.net/download/weixin_39766005/87570339 as needed (I use the x86 version) , and you can get a HexEditor.dll file after downloading.
HexEditor installation
Create a HexEditor folder under the plugins directory under the Notepad++ installation directory, and drag the downloaded HexEditor.dll file into it.
Open Notepad++, find Settings->Import->Import Plug-in under the menu bar, and locate the HexEditor.dll file. Restart Notepad++.
Open a bmp file (don’t worry, it must still be garbled at this time), in the Notepad++ interface, select Plugins -> select HexEditor -> View in Hex to see the data similar to the figure below.
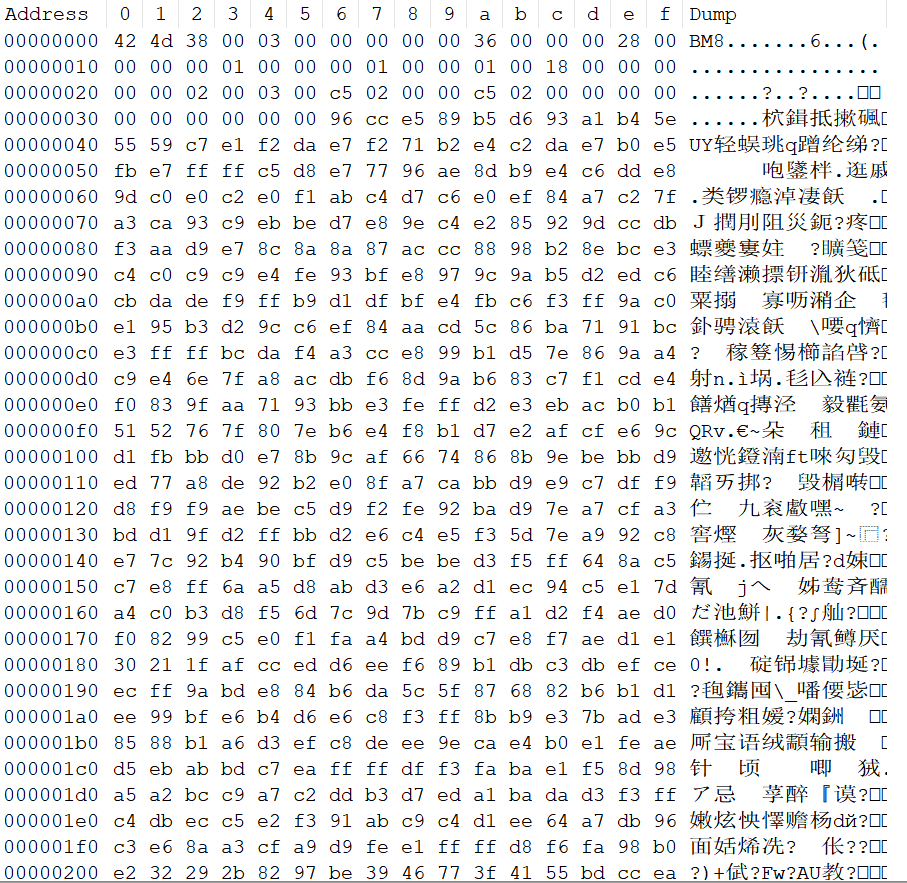
2. Detailed explanation of BMP format
BMP文件存储数据时,图像的扫描方式是按从左到右、从下到上的顺序,RGB数据也是倒着念的,原始数据是按B、G、R的顺序排列的。BMP格式的文件从头到尾依次是如下信息:bmp文件头(bmp file header)、位图信息头(bitmap information header)、调色板(color palette)、位图数据。接下来详细说明一下bmp文件头与位图信息头。
bmp文件头(bmp file header)
位图文件头包含有关于文件类型、文件大小、存放位置等信息,共14字节。在Windows 3.0以上版本的位图文件中用BITMAPFILEHEADER结构来定义:
typedef struct tagBITMAPFILEHEADER {
    UINT bfType;
    DWORD bfSize;
    UINT bfReserved1;
    UINT bfReserved2;
    DWORD bfOffBits;
} BITMAPFILEHEADER;
bfType:2字节,文件类型,BMP格式的文件这两个字节是0x4D42,10进制就是19778,字符显示就是‘BM’。
bfSize:4字节,文件大小。
bfReserved1:2字节,保留,必须设置为0。
bfReserved2:2字节,保留,必须设置为0。
bfOffBits:4字节,从头到位图数据的偏移。
位图信息头(bitmap information)
位图信息头包含有位图文件的大小、压缩类型和颜色格式,共40字节。其结构定义为:
typedef struct tagBITMAPINFOHEADER {
    DWORD biSize;
    LONG biWidth;
    LONG biHeight;
    WORD biPlanes;
    WORD biBitCount;
    DWORD biCompression;
    DWORD biSizeImage;
    LONG biXPelsPerMeter;
    LONG biYPelsPerMeter;
    DWORD biClrUsed;
    DWORD biClrImportant;
} BITMAPINFOHEADER;
biSize:4字节,信息头的大小,即40;
biWidth:4字节,以像素为单位说明图像的宽度;
biHeight:4字节,以像素为单位说明图像的高度,同时如果为正,说明位图倒立(即数据表示从图像的左下角到右上角),如果为负说明正向;
biPlanes:2字节,为目标设备说明颜色平面数,总被设置为1;
biBitCount:2字节,说明比特数/像素数,值有1、2、4、8、16、24、32;
biCompression:4字节,说明图像的压缩类型,最常用的就是0(BI_RGB),表示不压缩;
biSizeImages:4字节,说明位图数据的大小,当用BI_RGB格式时,可以设置为0;
biXPelsPerMeter:4字节,表示水平分辨率,单位是像素/米,有符号整数;
biYPelsPerMeter:4字节,表示垂直分辨率,单位是像素/米,有符号整数;
biClrUsed:4字节,说明位图使用的调色板中的颜色索引数,为0说明使用所有;
biClrImportant:4字节,说明对图像显示有重要影响的颜色索引数,为0说明都重要;
3.解码BMP图片
unsigned char* DecodeTexture(unsigned char * data, int& width, int& height)
{
    if (0x4D42 == *((unsigned short*)data))
    {
        int pixelDataOffset = *((int*)(data + 10));
        width = *((int*)(data + 18));
        height = *((int*)(data + 22));

        unsigned char* pixelData = data + pixelDataOffset;   //位图数据

        //bgr->rgb
        for (size_t i = 0; i < width*height*3; i+=3)
        {
            unsigned char temp = pixelData[i];
            pixelData[i] = pixelData[i + 2];
            pixelData[i + 2] = temp;
        }
        return pixelData;
    }
    else {
        return nullptr;
    }
}
三、生成纹理
GLuint textureId;
void Init(const char * imagePath)
{
    //加载纹理图片
    unsigned char* data = LoadDataFromDisk(imagePath);

    //解码图片
    int width = 0, height = 0;
    unsigned char* pixelData= DecodeTexture(data, width, height);

    //生成openGl纹理:textureId
    glGenTextures(1, &textureId);

    //操作该纹理
    glBindTexture(GL_TEXTURE_2D, textureId);
    glTexParameteri(GL_TEXTURE_2D, GL_TEXTURE_MAG_FILTER, GL_LINEAR);
    glTexParameteri(GL_TEXTURE_2D, GL_TEXTURE_MIN_FILTER, GL_LINEAR);
    glTexParameteri(GL_TEXTURE_2D, GL_TEXTURE_WRAP_S, GL_CLAMP);
    glTexParameteri(GL_TEXTURE_2D, GL_TEXTURE_WRAP_T, GL_CLAMP);

    //将纹理从内存传到显存
    glTexImage2D(GL_TEXTURE_2D, 0, GL_RGB, width, height, 0, GL_RGB, GL_UNSIGNED_BYTE, pixelData);

    glBindTexture(GL_TEXTURE_2D, 0);

    delete data;
}
四、进行纹理贴图
void Draw()
{
glClearColor(1, 1, 0, 1.0f);
glClear(GL_COLOR_BUFFER_BIT);
Init("C:\\Users\\fengchujun\\Downloads\\272.bmp");
glEnable(GL_TEXTURE_2D);//开启纹理
glBindTexture(GL_TEXTURE_2D,textureId);
glBegin(GL_TRIANGLES); //注意是逆时针绘制(CCW),可以通过 glFrontFace(GL_CW); 改成顺时针绘制
glTexCoord2f(0.0f, 0.0f);
glVertex3f(-0.2f, -0.2f, -1.0f);
glTexCoord2f(1.0f, 0.0f);
glVertex3f(0.2f, -0.2f, -1.0f);
glTexCoord2f(0.5f, 1.0f);
glVertex3f(0.0f, 0.2f, -1.0f);
glEnd();
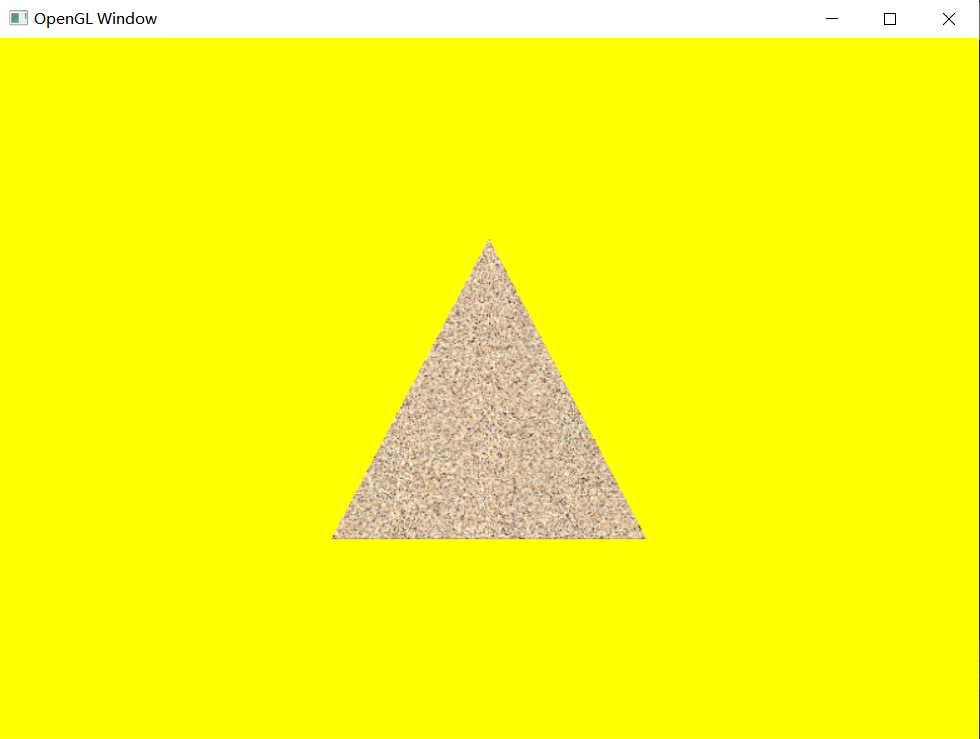
}五、绘制效果
(在跟随课程学习时,发现有的bmp文件贴图不正确)