0. Overview
Record the mac system installation git environment
First, let's see if our mac system has git.
Open the terminal and enter git --version
2. We enter the git official website
git official website download interface https://git-scm.com/download/mac
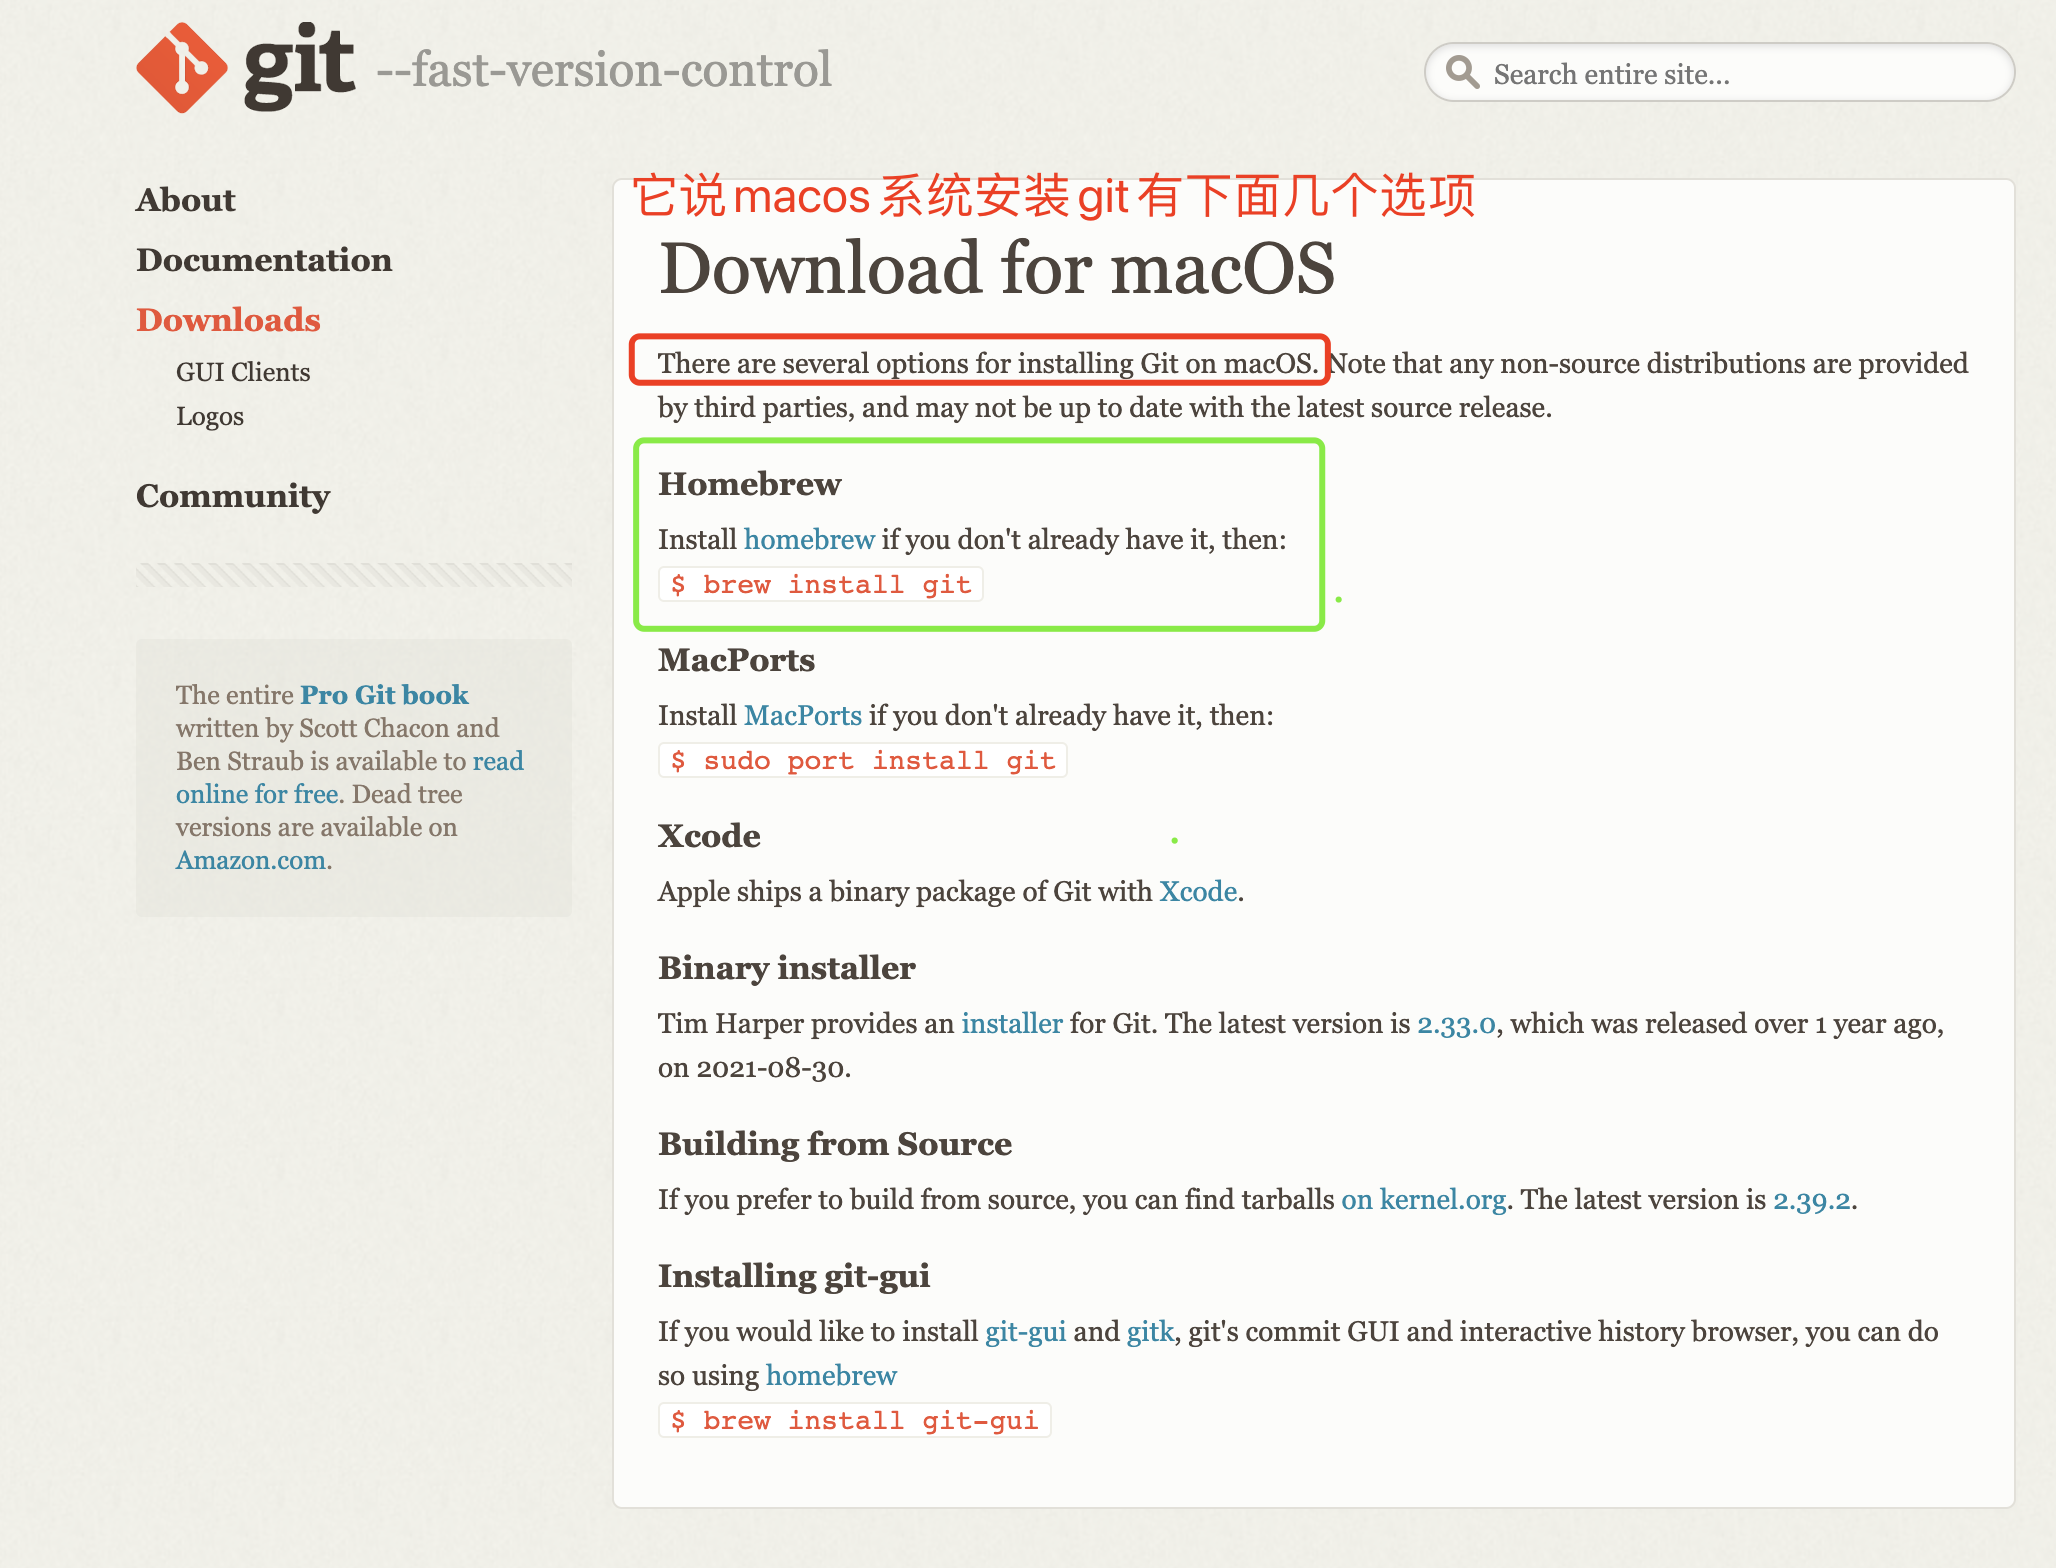
Through the introduction on the official website, we learned that there are several ways to install git, and we will install it through Homebrew below.
3. Install Homebrew
You can refer to the first article I wrote http://t.csdn.cn/XlZ1M mac m1 chip installation Homebrew, which has detailed introduction

4. Install git via Homebrew
#通过brew 中的search 可以查询git
brew search git

#通过brew 安装git
brew install git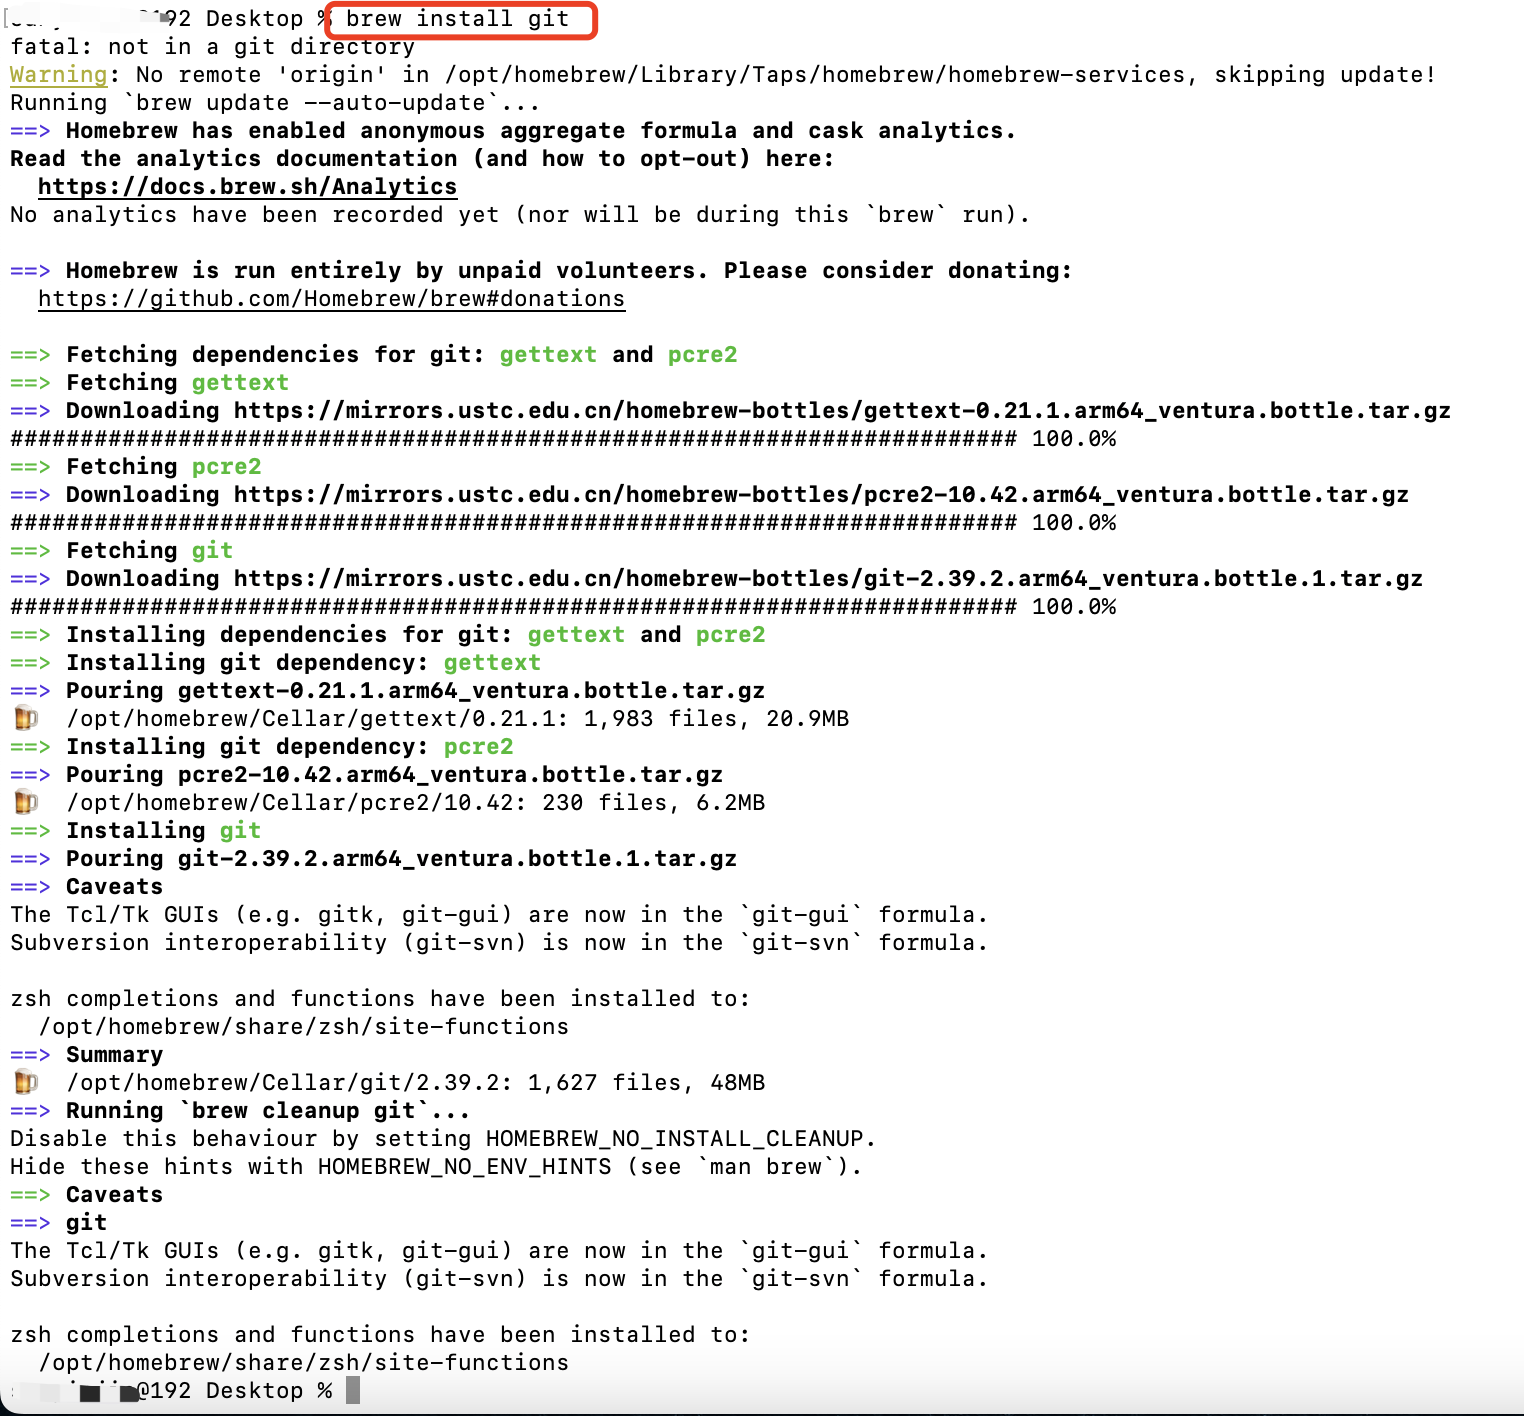
#通过brew 更新git
brew upgrade git
The M1 chip ARM version Homebrew will install the program to the /opt/homebrew/Cellar path
5. Next, let's configure the git environment
 vim ~/.zshrc
#输入i进入编辑模式
#添加下面这句话,版本需要进入/opt/homebrew/Cellar/git/目录下查看
export GIT=/opt/homebrew/Cellar/git/2.39.2
#然后按esc,在输入:wq退出编辑模式并保存
#通过source命令更新~/.zshrc文件
source ~/.zshrc
#现在就可以通过git --version查看一下安装的版本了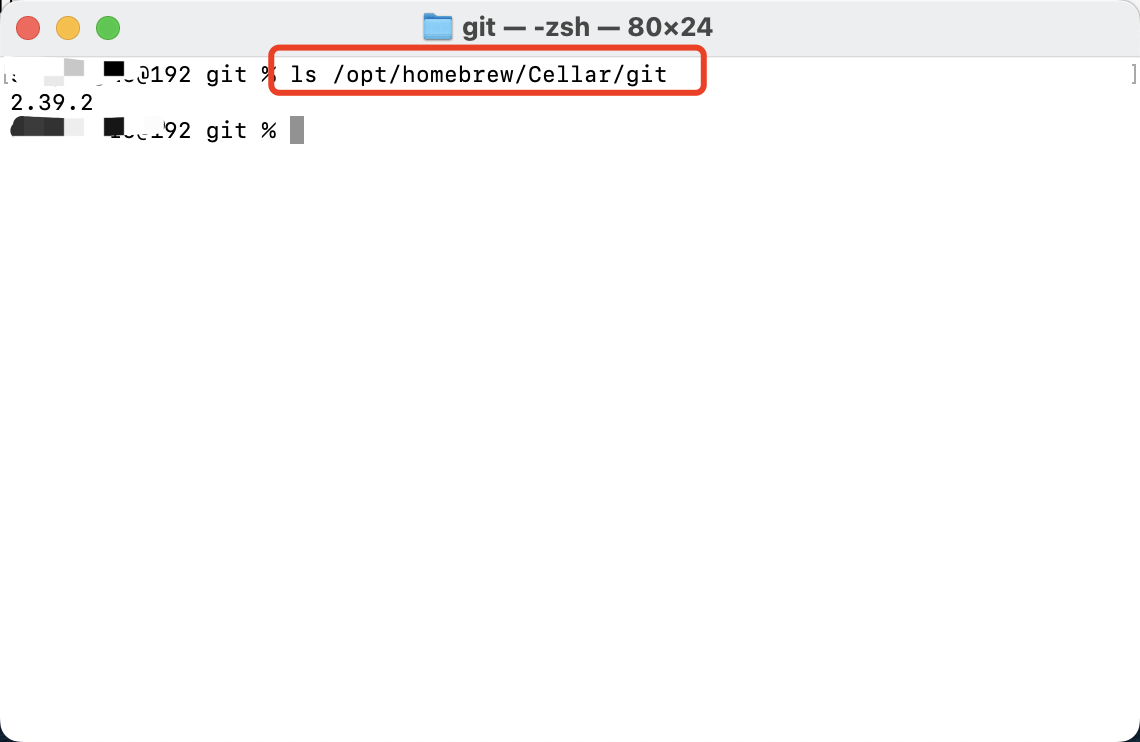

6. Set git information
git config --global user.name "git账号"
git config --global user.email "git邮箱"
#通过git config --list来查看配置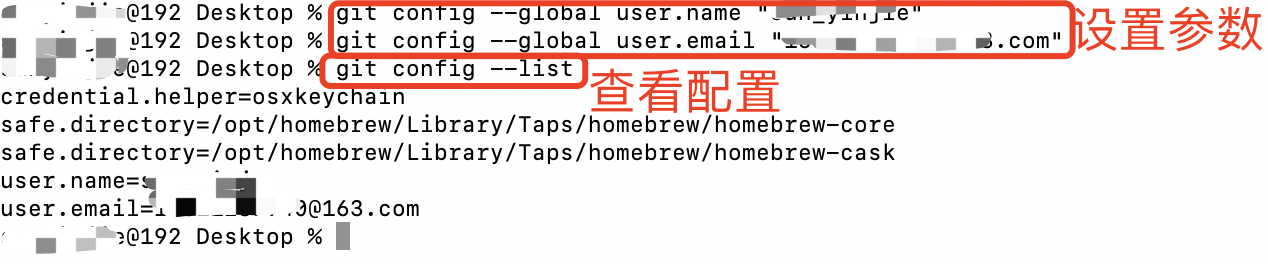
At this point our git installation is over! For your reference only