Git installation
-
Official website address: https://git-scm.com/
-
To view the GNU agreement, you can directly click Next.

3. Select the Git installation location, requiring a non-Chinese directory without spaces, and then the next step.

- Git option configuration, recommended default settings, and then the next step.

- Git installation directory name, do not need to modify, just click Next.

- Git's default editor, it is recommended to use the default Vim editor, and then click Next.

- The default branch name setting, choose to let Git decide, the default branch name is master, next step.

8. Modify the environment variables of Git, choose the first one, do not modify the environment variables, and only use Git in Git Bash.

9. Select the background client connection protocol, select the default value of OpenSSL, and then the next step.

10. Configure the newline at the end of the Git file, Windows uses CRLF, Linux uses LF, select the first automatic conversion, and then continue to the next step.

11. Select the Git terminal type, select the default Git Bash terminal, and proceed to the next step.

-
Select the mode of Git pull merge, select the default, and then the next step.

-
Select Credential Manager for Git, choose the default cross-platform credential manager, and then Next.

-
Other configurations, select the default settings, and then the next step.

-
Lab function, the technology is immature, there are known bugs, do not check, and then click the Install
button in the lower right corner to start installing Git.

-
Click the Finsh button, Git installation is successful!

17. Right-click anywhere and select Git Bash Here in the right-click menu to open the Git Bash command line terminal.

-
Enter git --version in the Git Bash terminal to view the git version, as shown in the figure, indicating that Git is installed successfully.

-
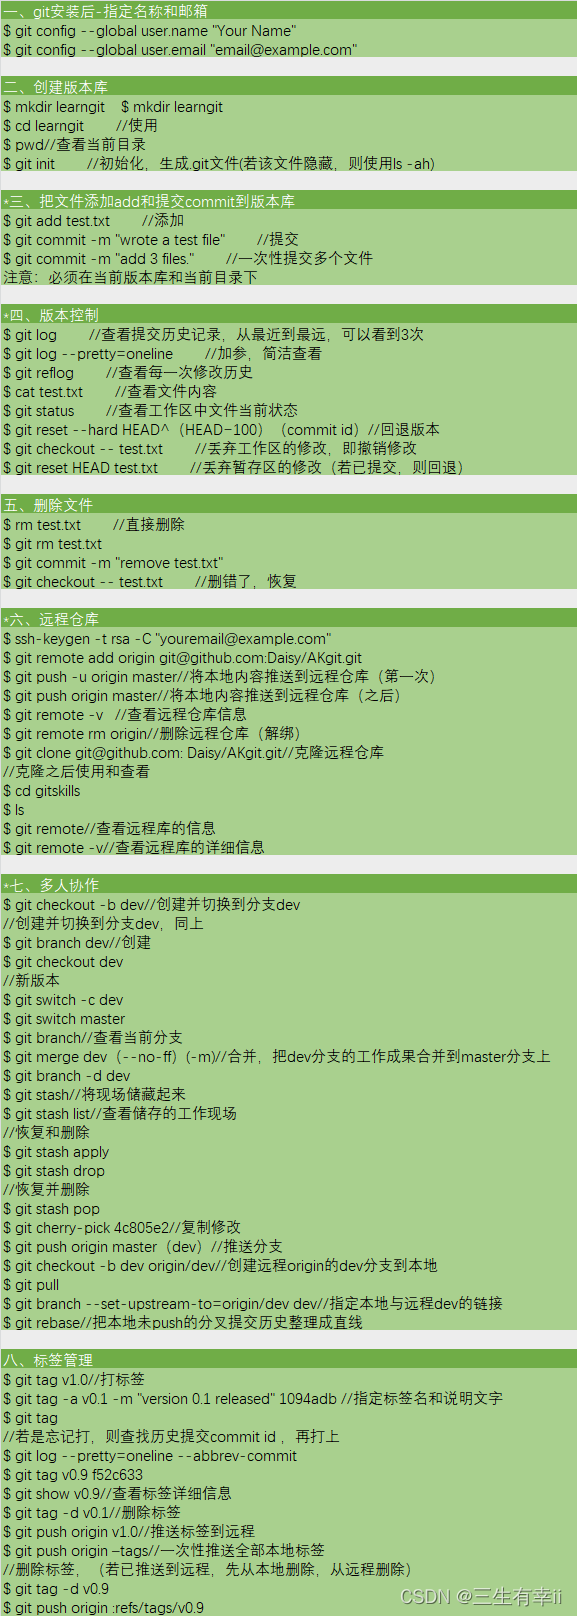
Git Commands Encyclopedia