1. Download Jmeter and configure environment variables

After downloading, unzip it.
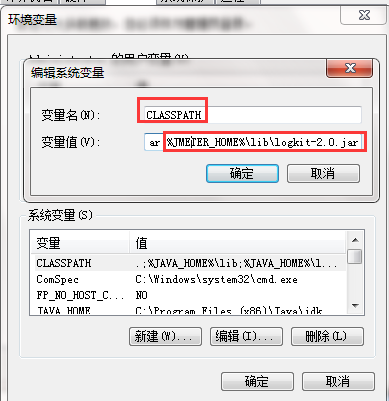
Environment variable configuration:
-------Add new variable JMETER_HOME:D:\jmeter\apache-jmeter-4.0 in environment variables
------- Configure JMETER_HOME to CLASSPATH

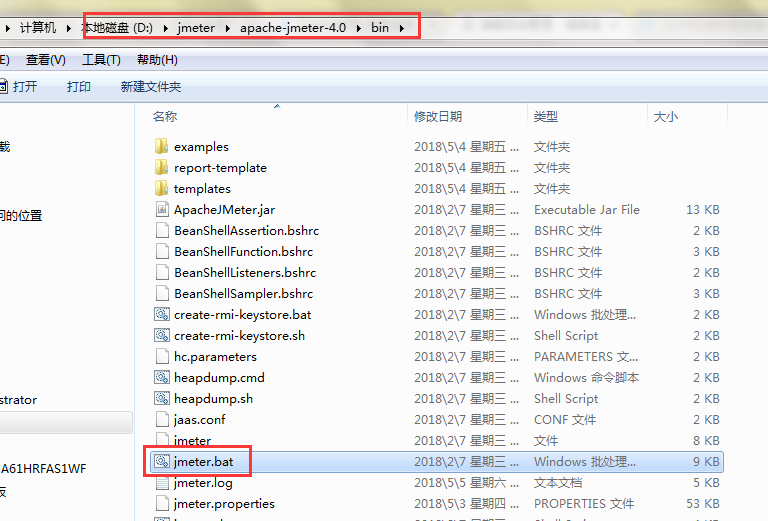
------Jmeter's startup file jmeter.bat
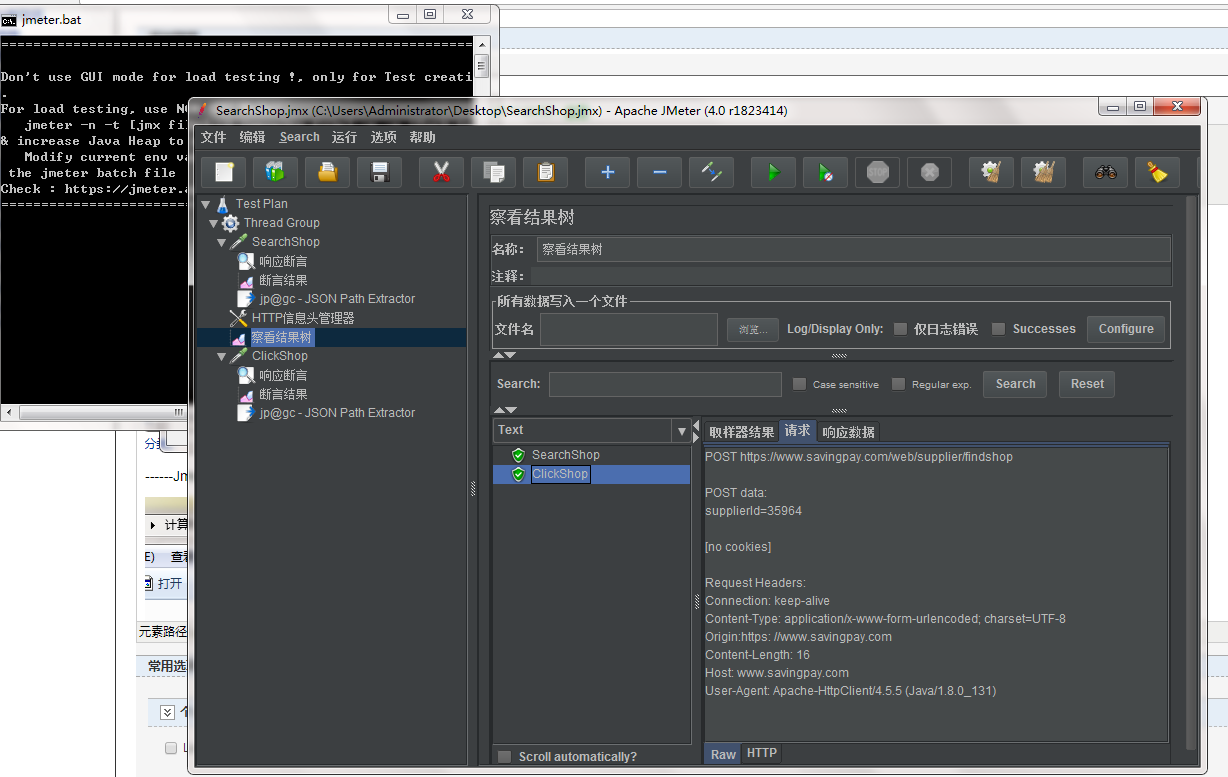
------After startup, as shown below
Second, the basic use of Jmeter
1. Add request request
Add the thread group first (the first step, must), and add the request in the thread group

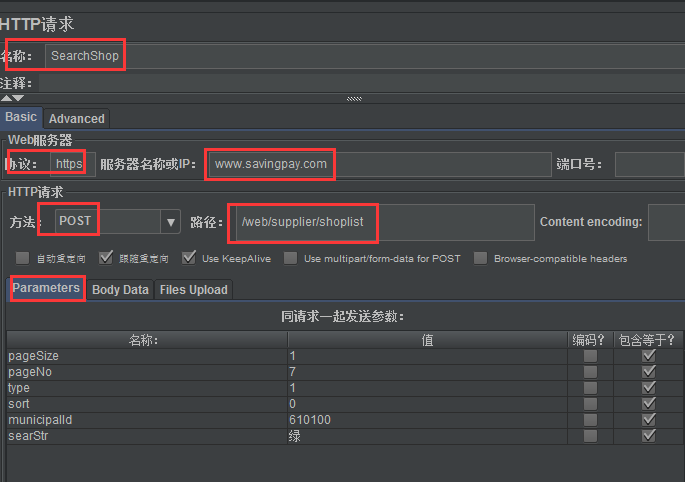
2. Fill in the request page information
The request is mainly divided into POST and GET methods
POST: When initiating a request to the server, you must carry parameters
GET: get information from the server
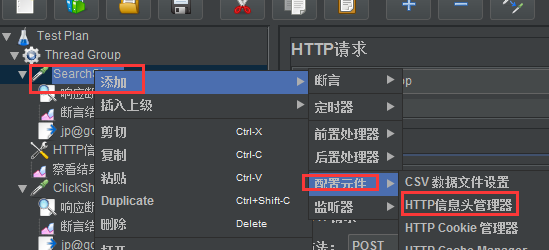
3. Add the header information of the request
4. Add view result tree
To view the running results of each request

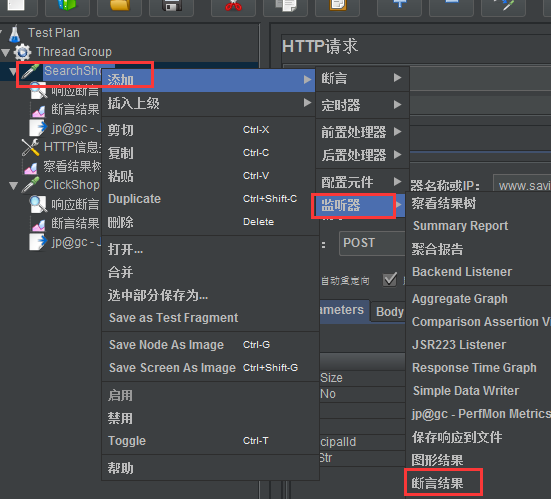
5. Add response assertions and view assertion results

Add assertion result
6. Run, view the running results in the result tree and assertion results
Click the green arrow above to start running

View the number of results results

Check the assertion result. If there is only the response name in the assertion result on the right, it means that the assertion passes. If there is FAIL information in the assertion result on the right in addition to the response name, it indicates that the assertion failed.
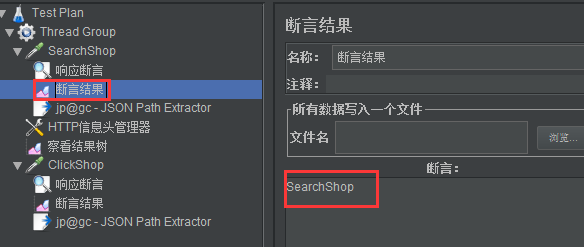
Assertion failed

7. Data association
Association means that when there are multiple requests, when the next request 2 is initiated, some data in the response of the previous request 1 is required, so it is necessary to obtain some data in the response of request 1 for use by other requests
Multiple requests in the same test group are executed sequentially from top to bottom.
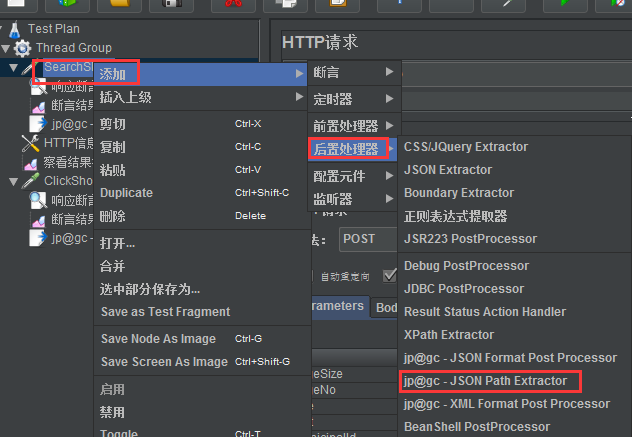
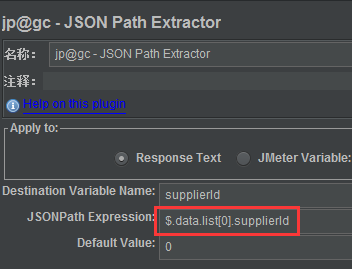
7.1 Get the data in the response of request 1
Use  json extractor to extract data
json extractor, JSONPATH expression when extracting data, data and extraction format are as shown below

7.2. Associate the obtained variable in request 2
The variable name is defined as supplierId in 7.1, so when using ¥{variable name supplierId}
