Flash
- Mirror (3B and 4B mirrors are not the same, there are general mirrors if they are not enough)
- SD card (generally above 16G)
- Card reader
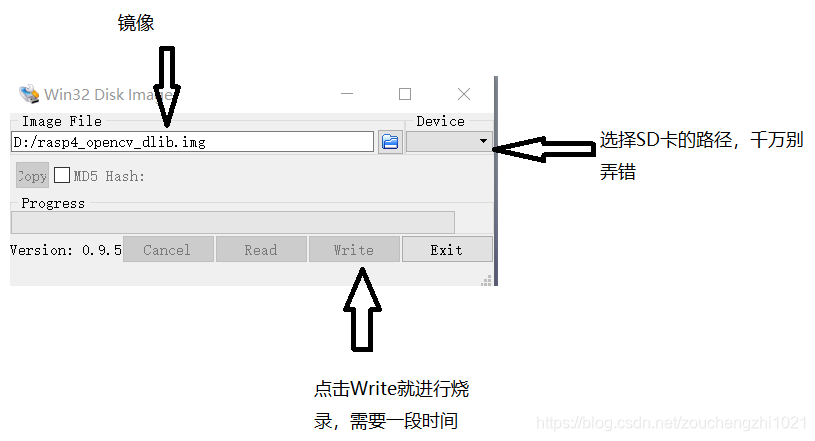
- Win32DiskImager (the software that burns the image to the SD card); this software may make your SD card capacity smaller, so you can install another memory card repair software.
Nowadays, people who buy Raspberry Pi will burn the image directly to the SD card, but if you need to change the image, you need the above steps.
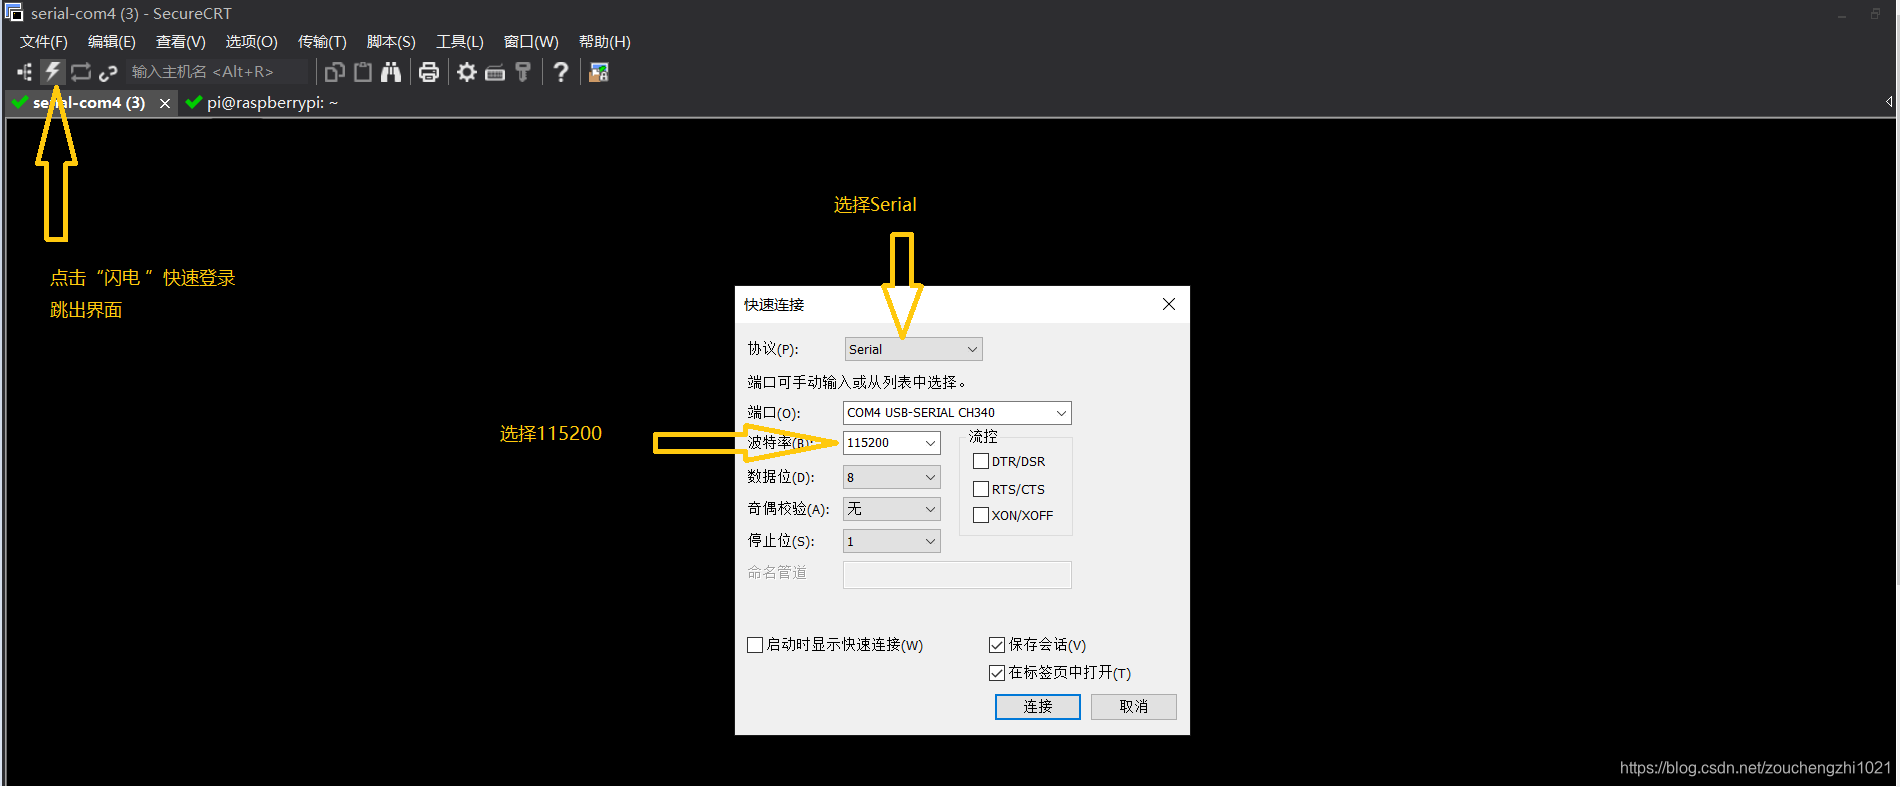
Serial port login
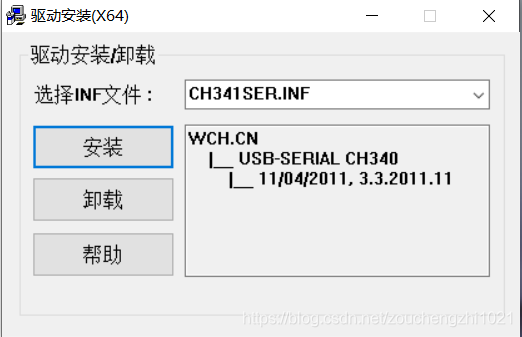
install driver
To use the USB to serial port module, you need to install the driver CH340_341 in advance
USB-TTL conversion module (USB to serial port module)
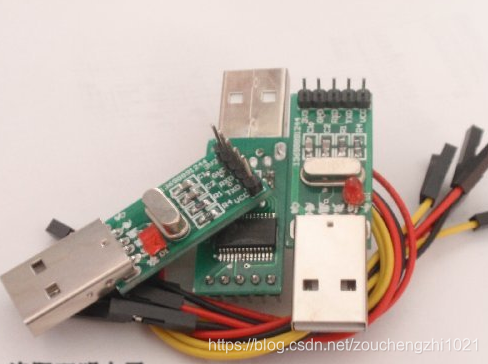
USB-TTL connects to the serial port of Raspberry Pi
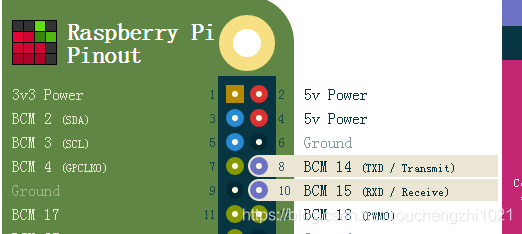
Connect the TXD line of the module to the RXD pin of the Raspberry Pi (the Raspberry Pi is the fifth pin on the outside) , and connect the module RXD to the TXD pin (the Raspberry Pi is the fourth pin on the outside)
Modify the system configuration and enable the serial port to log in to the Raspberry Pi
1. Open the "config.txt" file in the root directory of the SD card, add the following content at the end and save it. (In this way, the Bluetooth is stopped and the occupation of the serial port is lifted)
dtoverlay=pi3-miniuart-bt
2. Then modify the "cmdline.txt" of the root directory and replace all the contents with the following contents, just in case, please back up the original contents of this file first.
dwc_otg.lpm_enable=0 console=tty1 console=serial0,115200 root=/dev/mmcblk0p2 rootfstype=ext4 elevator=deadline fsck.repair=yes rootwait
Start the Raspberry Pi and use the related software to log in through the serial port (SecureCRT)
Default account: pi
Default password: raspberry
SSH login
After logging in through the serial port:
Configure the network
-
Input command:
sudo nano /etc/wpa_supplicant/wpa_supplicant.conf -
Start to configure WIFI:
Assign the following commands to the opened editor
 network={


        ssid="wifi名字"

        psk="密码"
        }
- ctrl+o to save (press enter afterwards)
ctrl+x to exit the nano document editor (you can write when you enter it) - Restart (sudo reboot)
- Enter ifconfig to see if there is an IP address
- Fixed IP address input
sudo nano /etc/rc.local

- Turn on the SSH function and input:
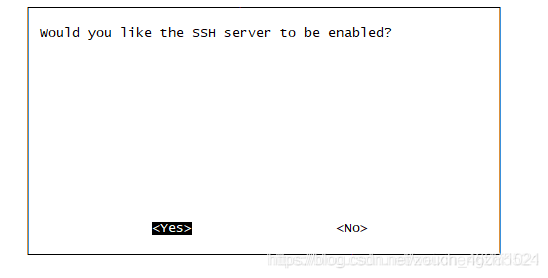
sudo raspi-config
arrow keys up and down to select the 5th,
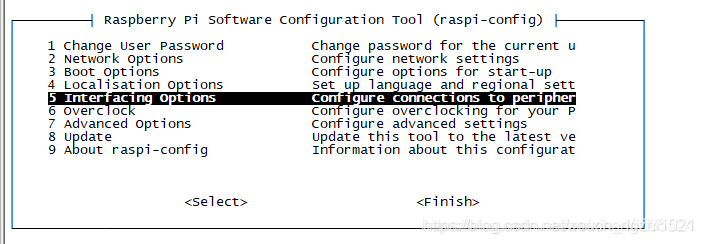
press Enter to confirm: arrow keys up and down to select the second,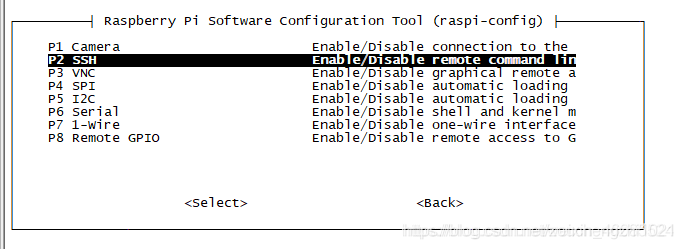
press enter to confirm. Arrow keys left and right to select Yes, press enter to confirm
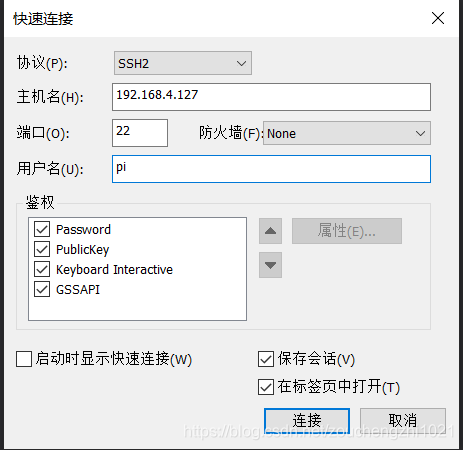
- Select "Lightning" on the SecurCRT page to quickly log in,
- Protocol selection SSH
- Host name enter IP address
- Username: pi
After setting up SSH, you can also choose Xshell to log in, as you like.
remote Desktop connection
Install xrdp on Raspberry Pi
-
Input:
sudo apt-get install xrdpinstall xrdp environment -
win+r Open the command window and enter mstsc to start the remote desktop service
-
Then enter the Raspberry Pi ip to enter the Raspberry Pi interface.
-
Enter username: pi password raspberry
-
Enter the desktop