Article directory
Preface
Recently when using CM4, I2C and multiple UARTs were used.
At the same time, there are some problems in configuring port mapping.
Let’s focus on recording here.
1. Enable I2C and UART serial port login on Raspberry Pi
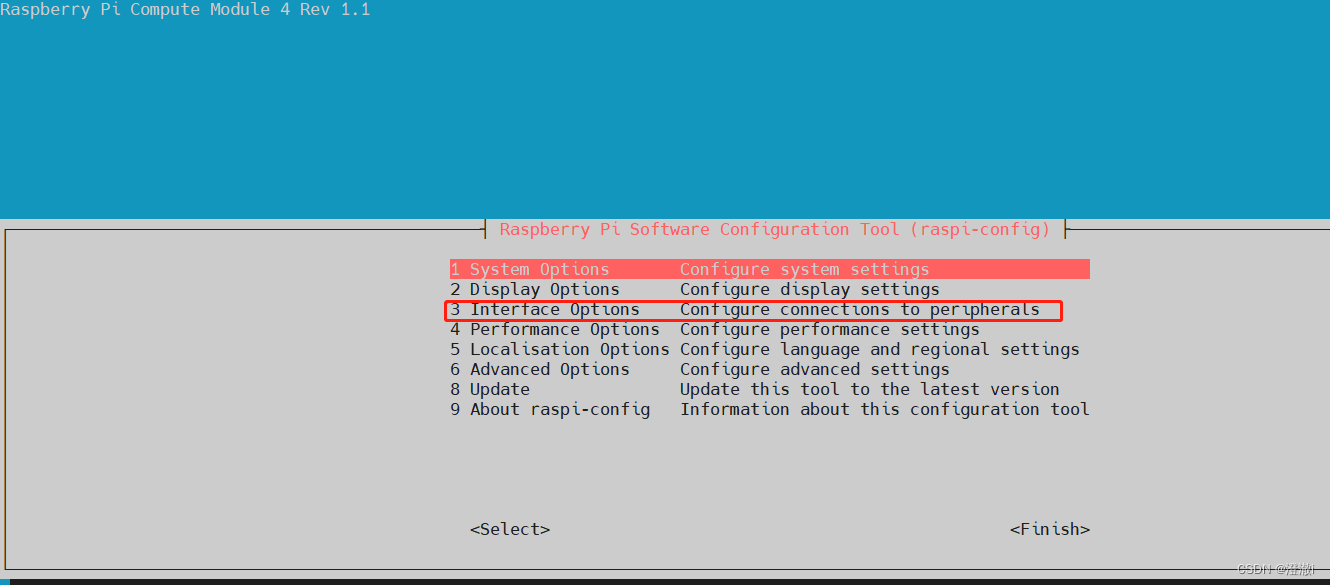
Enter the command sudo raspi-config
to jump to the following interface:
select Interface Optionsthis column, ↑↓switch up and down by pressing the button, and press Enter to select.
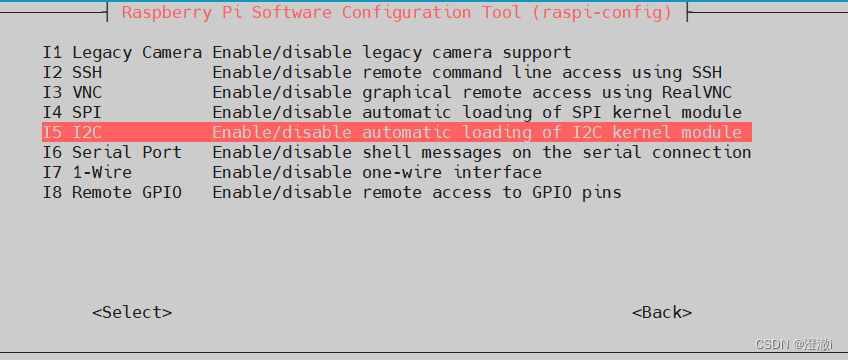
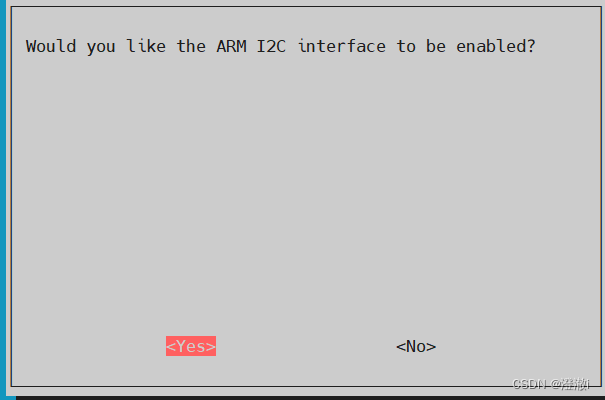
Select the I2C option, and then select Yes
this to turn on the I2C function.
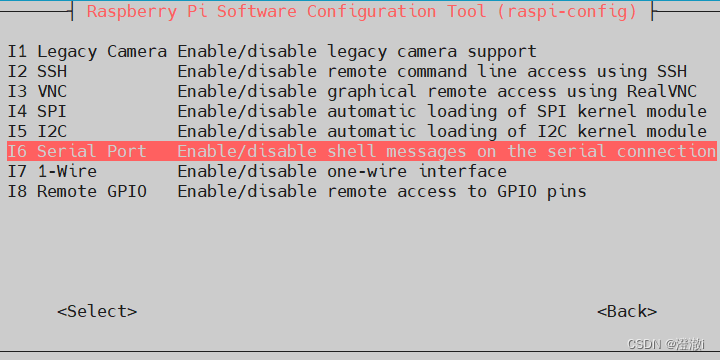
Select again in the same way Serial Portand select yes.
This option allows you to print shell information through UART, which is serial port login.
There are also other functions enabled, you can explore them yourself. Finally, select
left and right to return to the initial interface and select again .↔<Back><Finish>
Here is one 坑点, if the serial port login is enabled, then we have to use this uart1, and the data received through the RX1 pin may be abnormal.
Therefore, if we need to use the pins of this serial port 1, we need to close the serial port login.
Finally, just restart.
After logging in, ls /devyou can see the rendering as shown below, showing the i2c related interface.
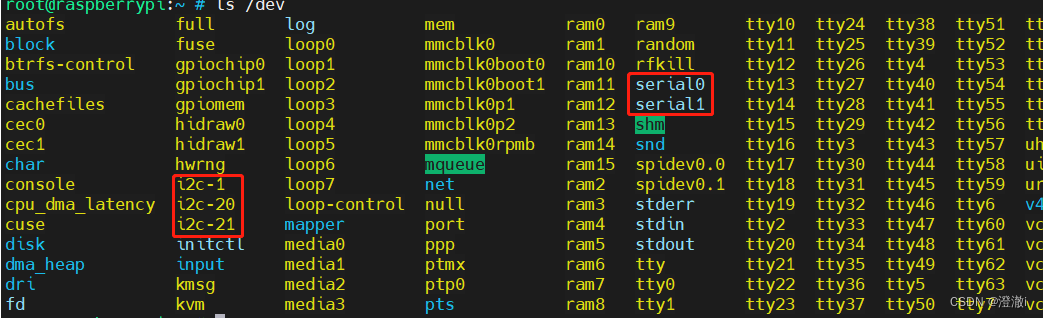
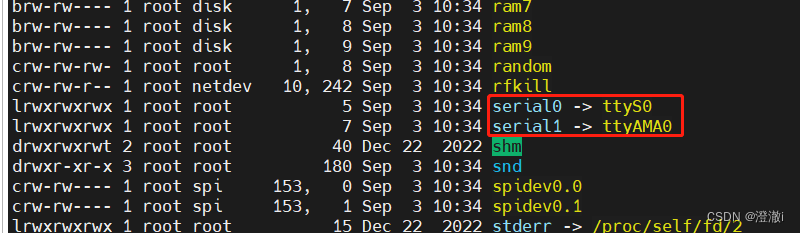
You can see that ls -l /devthis serial port is mapped to ttyS0
2. Enable multiple serial ports
For the use of serial ports, more than one serial port may be used. When multiple serial ports are needed, other serial ports need to be opened at this time.
CM4 only turns on UART0 by default. The UART serial port login just written actually turns on serial port 1.
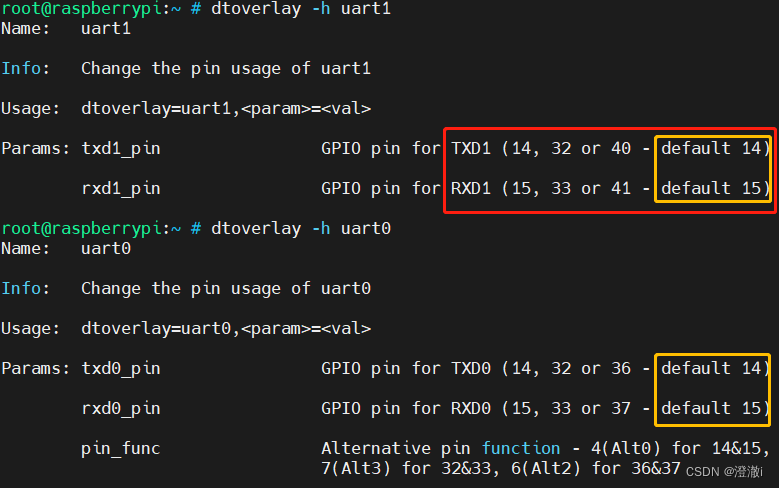
But here we will find that uart0 and uart1 use the same pair of pins. If you want to use uart1 and the default pin configuration is 14 and 15 pins, you need to turn it on according to the raspi-config above.
Raspberry Pi CM4 uses GPIO14 and GPIO15 pins by default for the UART0 serial port for built-in Bluetooth and console communication. Under the default configuration, the console communicates with the Raspberry Pi through this serial port. It can be connected to the Raspberry Pi through the serial port and output startup logs, command line output, etc.
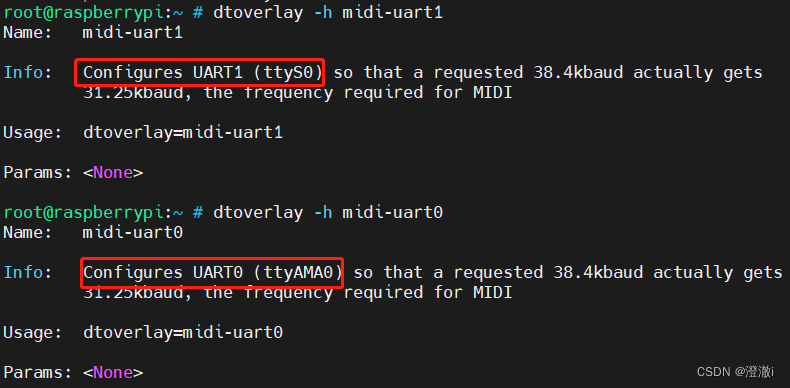
To open multiple serial ports, you only need to /boot/config.txtadd it dtoverlay=uartx, where x is the number corresponding to the serial port.
For example, if I want to enable uart3, I only need to add it to the bottom line of the config.txt file dtoverlay=uart3.
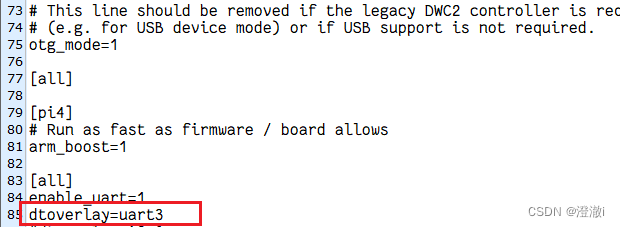
Just restart after the configuration is complete.
After the configuration is completed, ls /devyou can see that there is one more ttyAMA1.
One thing to note here is that although CM4 enables uart0 and uart1 by default, they correspond to ttyAMA0 and ttyS0 respectively. If we turn on all uarts, then uart2 corresponds to ttyAMA1, uart3 corresponds to ttyAMA2, and so on.
But we see that here I configure uart3, but through the ls command, the mapped port seen is ttyAMA1. This shows that the mapping of ttyAMAx is actually allocated sequentially. That is to say, if I enable uart0 and 1, if it is not uart2 but uart3, 4, 5, etc., the ttyAMAx will be mapped next. Instead of saying ttyAMA1 fixed mapping uart2.
Summarize:
This blog is mainly about some configuration-related issues that are often encountered during daily use. Here we mainly make a record to prevent forgetting.