Preface
This time we will briefly describe how Django connects to Mysql .
By default, Django connects to its own sqlitedatabase.
The advantage of this kind of database is that it is convenient and does not require remote connection . The packaged project is moved to another computer to install the dependency and it will run after a while.
But the disadvantage is that various inexplicable problems may occur, so as much as possible at the beginning, configure the connection to Mysql.
Connect to Mysql
Django connects to Mysql in three steps
-
Mysql creates the database in advance.
-
Modify the Django
settings.pyfile. -
Modify the files in the project folder
__init.py.
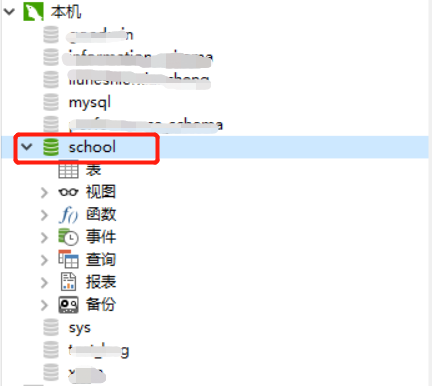
1. Mysql creates the database in advance
First of all, I am using the local Mysq, and I created a schooldatabase on Mysq .
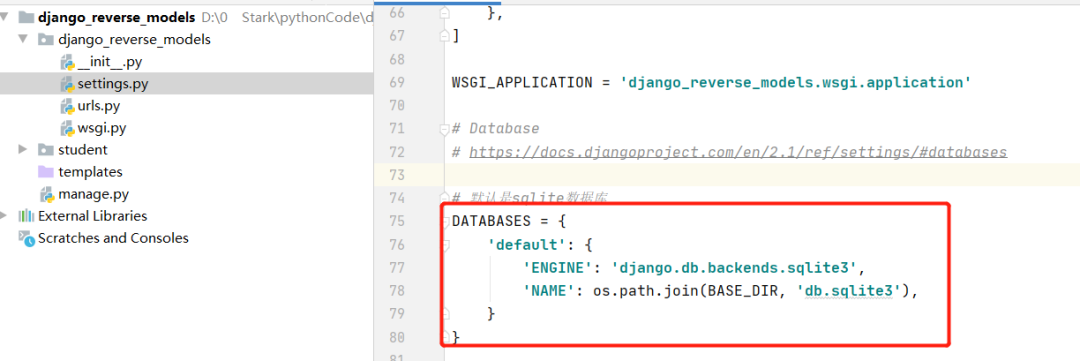
2. Modify Django settings.pyfiles
Create a Django project and find the original configuration file under the project folder .settings.pysqlite
Log out or delete the sqliteconfiguration and add the following configuration.
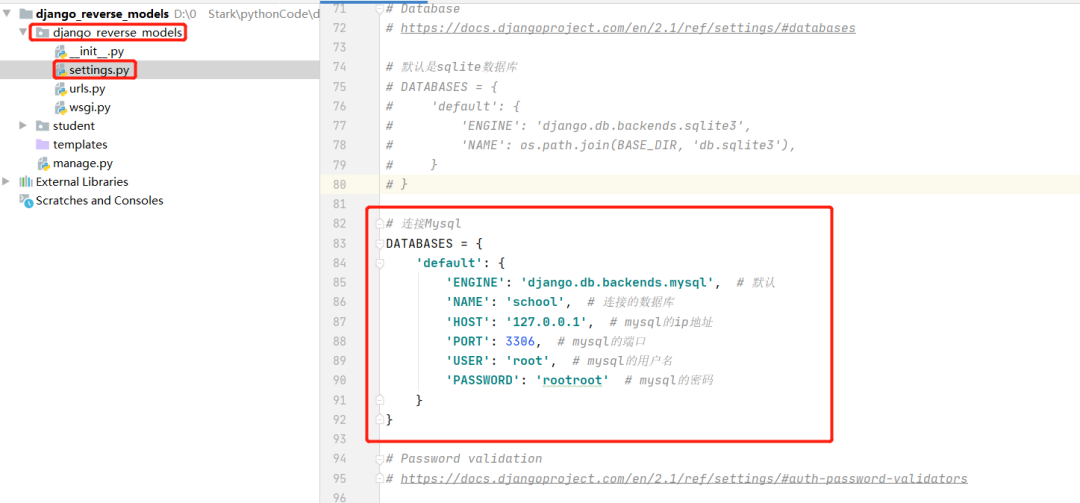
Copy the following code
DATABASES = {'default': {'ENGINE': 'django.db.backends.mysql', # 默认'NAME': 'school', # 连接的数据库'HOST': '127.0.0.1', # mysql的ip地址'PORT': 3306, # mysql的端口'USER': 'root', # mysql的用户名'PASSWORD': 'rootroot' # mysql的密码}}
3. Modify the project folder __init.pyfile
Thanks to a Mysql, so to replace the default database engine, in the project folder under __init__.py, add the following content.
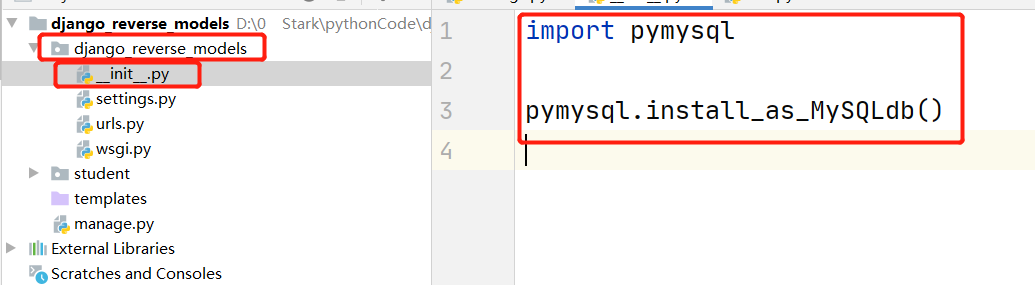
Copy the following code
import pymysqlpymysql.install_as_MySQLdb()
If not pymysql, remember to install it, the command: pip install pymysql.
Migrate the database
If all of the above are okay, let's write a small Demo to run it.
Migration database process.
-
Create app (Django must rely on app to create tables).
-
settings.pyAdd the created app. -
migrate.
Many people learn python and don't know where to start.
Many people learn python and after mastering the basic grammar, they don't know where to find cases to get started.
Many people who have done case studies do not know how to learn more advanced knowledge.
For these three types of people, I will provide you with a good learning platform, free to receive video tutorials, e-books, and course source code!
QQ group: 721195303
1. Create app (Django must rely on app to create table)
First of all, we need to create an app in Django. The command is as follows:
python manage.py startapp web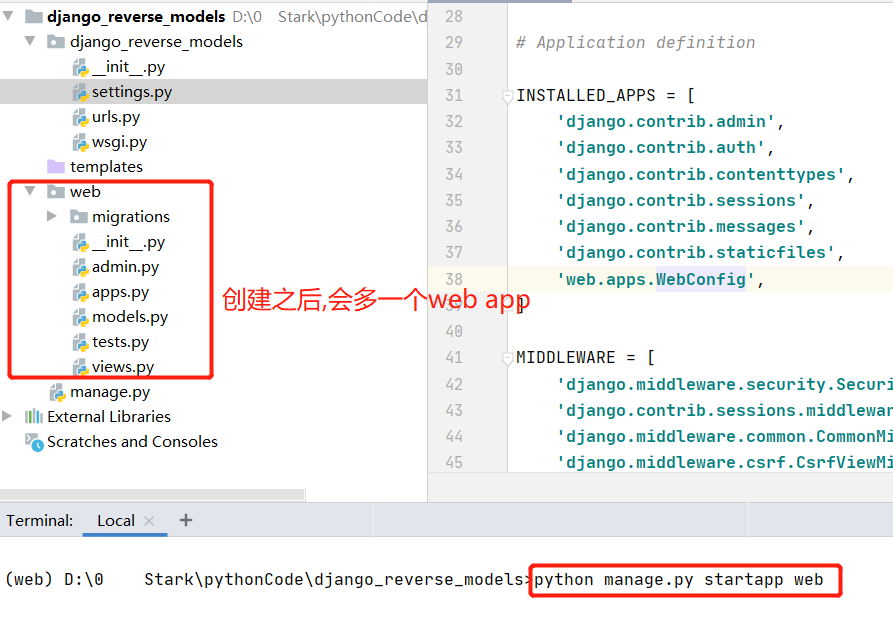
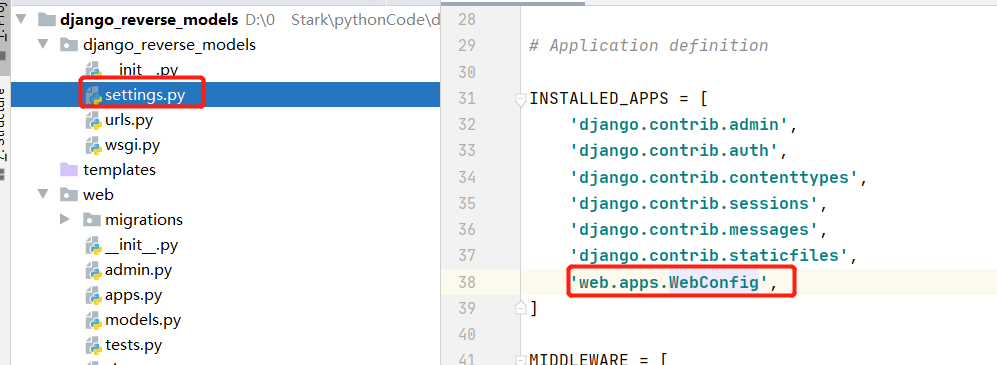
2. settings.pyAdd the created app
After creation, we need settings.pyto configure the app we just created.
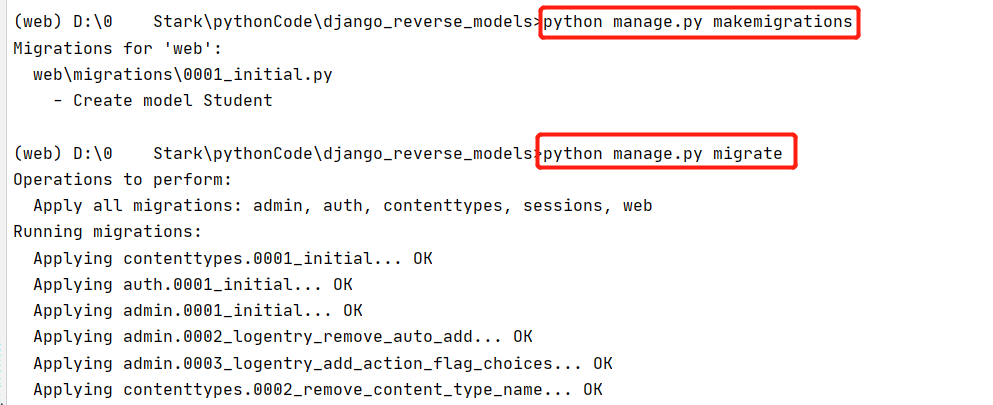
3. Migration
Then execute the command to migrate the database to Mysql.
python manage.py makemigrationspython manage.py migrate
The generated table.
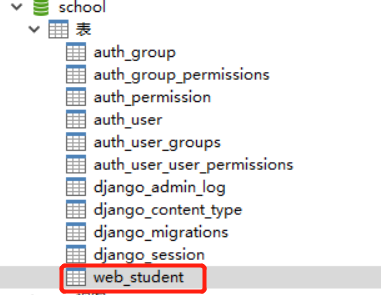
Many other tables will be generated, don't care about them, as long as we want them.
Here I directly manually add some data to the table I just created.
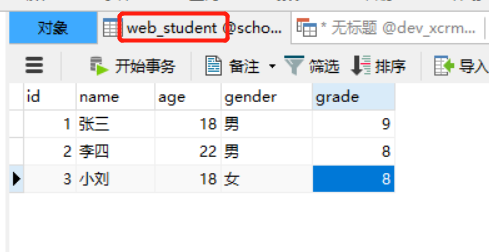
Display content
The display content is roughly divided into the following parts.
-
Write url.
-
Write views.
-
Write html (templates).
-
Start the web.
1. Write URL
urls.py
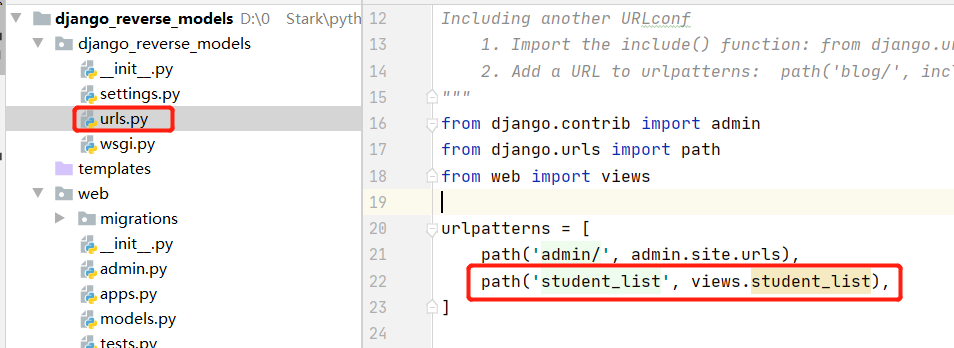
urlpatterns = [path('admin/', admin.site.urls),path('student_list', views.student_list),]
2. Write views (views)
web/views.py
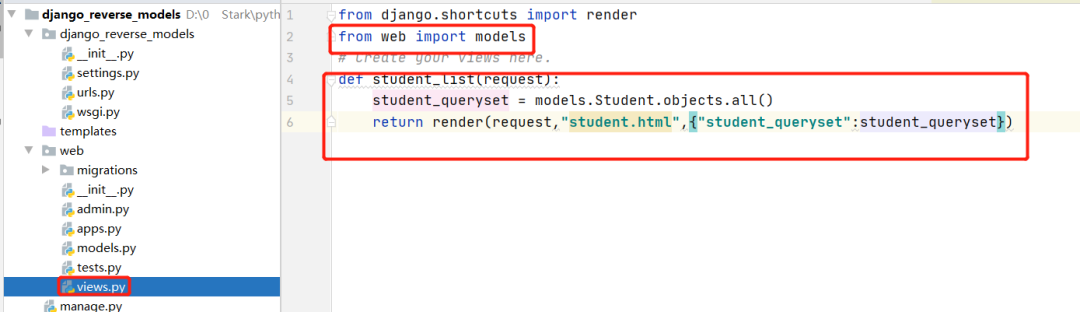
def student_list(request):student_queryset = models.Student.objects.all()return render(request,"student.html",{"student_queryset":student_queryset})
3. Write html (templates)
templates/student.html
<!DOCTYPE html><html lang="en"><head><meta charset="UTF-8"><title>Title</title></head><body><table border="1"><thead><tr><td>id</td><td>姓名</td><td>年龄</td><td>性别</td><td>年纪</td></tr></thead><tbody>{% for student in student_queryset %}<tr><td>{ { student.id }}</td><td>{ { student.name }}</td><td>{ { student.age }}</td><td>{ { student.gender }}</td><td>{ { student.grade }}</td></tr>{% endfor %}</tbody></table></body></html>
4. Start the web
command
python manage.py runserver 127.0.0.1:8000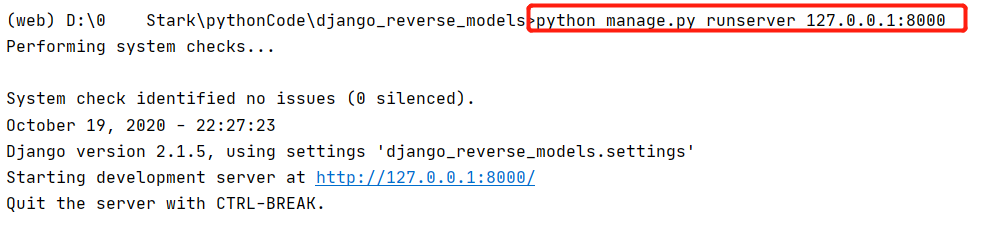
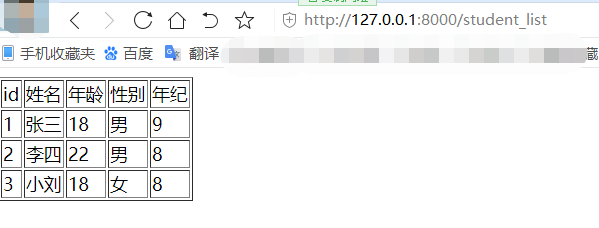
Open the browser and enter http://127.0.0.1:8000/student_list
as the picture shows!
to sum up
This time I mainly talk about how Django connects to Mysql. And by the way, I made a small test Demo to show how a web works. If the foundation is not good, I believe the latter are still very useful.
The version of pymysql is not recommended to be installed too high, mine is the version of pymysql, and the version of 0.9.2Django is 2.1.5.
If you think the article is ok, remember to like and leave a comment to support us. Thank you for reading, please remember to leave a comment below if you have any questions~
------------------- End -------------------