Write in front
Because Windows itself is difficult to say about the compatibility of these software, and the process of re-loading the virtual machine is too troublesome, so I took a different approach, using WSL on the Microsoft Store to complete the configuration of the Linux environment, and combined with VS Code to avoid graphical interface Installation, try to make the Linux environment as lightweight as possible, while also ensuring a more professional and friendly development environment such as code highlighting.
The specific installation steps are mainly divided into the following steps:
- Download and install Ubuntu WSL in the Microsoft Store
- Configure VS Code
- Configure GmSSL on Ubuntu
Download and install Ubuntu WSL in the Microsoft Store
Search the control panel, enter 控制面板, select 程序, click 启用或关闭Windows功能, check 适用于Linux的Windows子系统, as follows:


Restart the system as prompted.
After restarting, search in the Microsoft Store Ubuntu, download and install version 18.04, as follows:
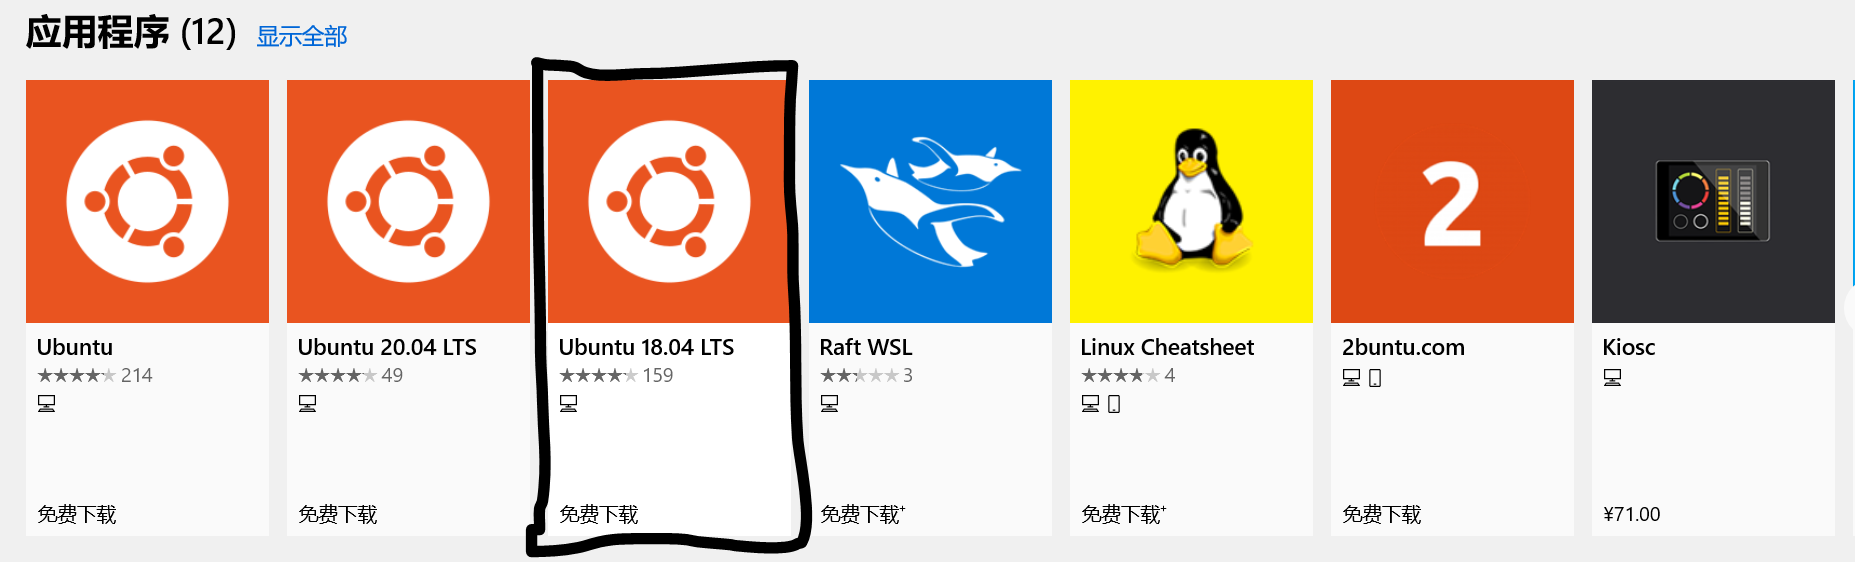
Start after installation, set the computer name and password according to the prompts, which will be the user name and password later, please 务必记住.
Use the following command to change the software source:
sudo cp /etc/apt/sources.list /etc/apt/sources.list.bak
sudo vim /etc/apt/sources.list
/etc/apt/sources.listAfter commenting out all sources in the file , add the following information:
deb https://mirrors.tuna.tsinghua.edu.cn/ubuntu/ bionic main restricted universe multiverse
deb-src https://mirrors.tuna.tsinghua.edu.cn/ubuntu/ bionic main restricted universe multiverse
deb https://mirrors.tuna.tsinghua.edu.cn/ubuntu/ bionic-updates main restricted universe multiverse
deb-src https://mirrors.tuna.tsinghua.edu.cn/ubuntu/ bionic-updates main restricted universe multiverse
deb https://mirrors.tuna.tsinghua.edu.cn/ubuntu/ bionic-backports main restricted universe multiverse
deb-src https://mirrors.tuna.tsinghua.edu.cn/ubuntu/ bionic-backports main restricted universe multiverse
deb https://mirrors.tuna.tsinghua.edu.cn/ubuntu/ bionic-security main restricted universe multiverse
deb-src https://mirrors.tuna.tsinghua.edu.cn/ubuntu/ bionic-security main restricted universe multiverse
deb https://mirrors.tuna.tsinghua.edu.cn/ubuntu/ bionic-proposed main restricted universe multiverse
deb-src https://mirrors.tuna.tsinghua.edu.cn/ubuntu/ bionic-proposed main restricted universe multiverse
After saving and exiting, use the command to update, which is necessary , as follows:
sudo apt-get update
Configure VS Code
Download and install VS Code
Download and install the latest VS Code, official website link
Download the required plugin
After completing the installation of the plug-in to download the official website needs, including specific plug-in Remote WSL, Remote SSH, Remote Development, official website links , as follows:
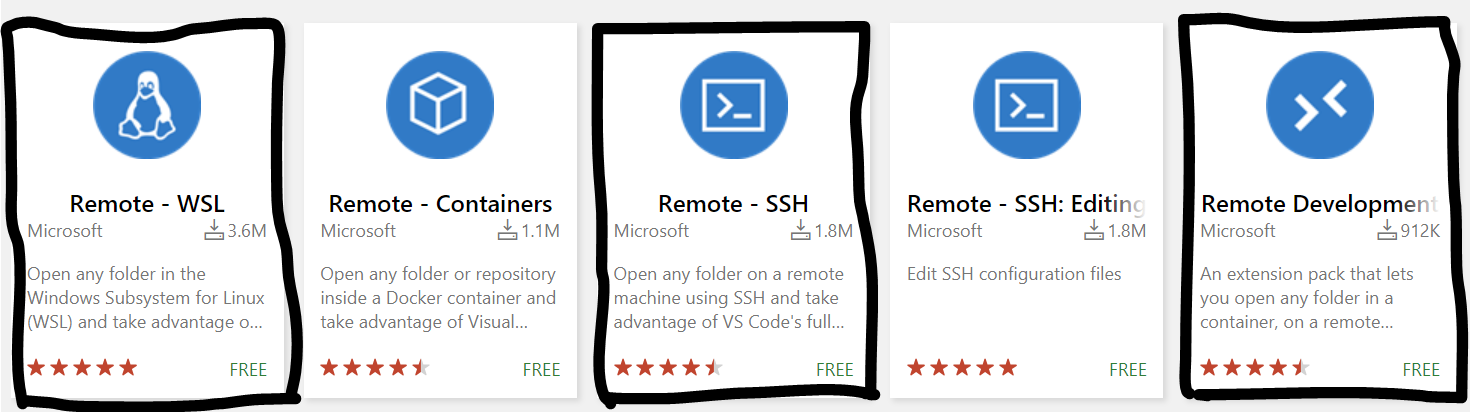
After searching, click to open, there are Download Extensionwords on the right , click to download, as follows:

Install plugin
Open VS Code, click Extensionsthe icon at the bottom on the left, three dots appear on the top of the left column ..., click to select Install from VSIX, and then select the three plugins you just downloaded to install, as follows:

Configure GmSSL on Ubuntu
Download the GmSSL compressed package
Use wget to download the compressed GmSSL package from the web page. The parameter after wget is the download link. Since the link may be updated with the version, you need to check the link address. The official website of GmSSL provides the download path of the Linux version, which can be viewed on the official website http://gmssl.org . After clicking it Download, it will jump to the GitHub interface. After finding the Linux version below, right-click to copy the link, as shown below:
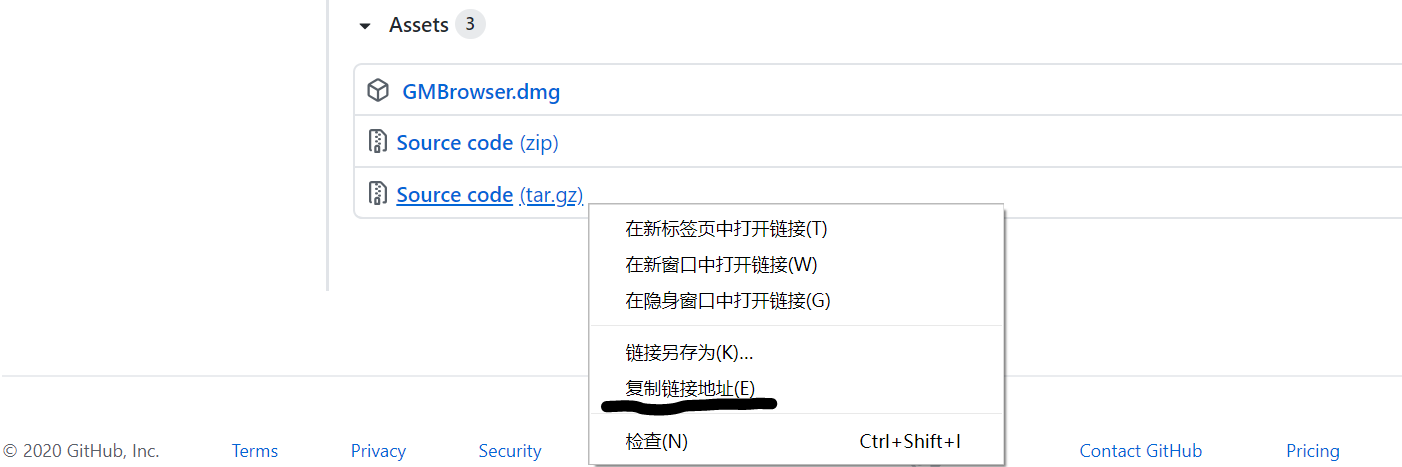
Use the wget command to download the compressed package as follows:
sudo wget https://github.com/guanzhi/GmSSL/archive/gmbrowser-v0.1.tar.gz
Unzip and install on Ubuntu
Create a new folder on the path where you want to install GmSSL:
sudo mkdir -p /opt/GmSSL
Decompress the compressed package in the installation package download directory, -Cand the decompression directory after the parameter:
sudo tar -zxvf gmbrowser-v0.1.tar.gz -C /opt/GmSSL
By cdentering the extracted directory, due GmSSL archive might have been as a folder, so use lsto view the file directory, and enter the directory, as follows:

Use the following commands in order in the installation directory: (Some errors may appear during the installation process, some ideas are provided below)
sudo ./config
sudo make
sudo make install
Error resolution:
- Prompt that there is no make, just
sudo apt install makeinstall it with the command according to the prompt - If there is an error
make[1]: *** [crypto/aes/aes-x86_64.o] Error 127, according to the error tracking, it is found that the reason is that there is no C language-based compiler, just use the command tosudo apt install gccinstall gcc - It will appear after make
make[1]: Leaving directory '/opt/GmSSL/GmSSL-gmbrowser-v0.1', don’t care about this error, just go to the next step
Configure GmSSL dynamic link library and static link library
Copy the configuration file to the target directory.
First cdto /usr/libReview, directory, as follows:
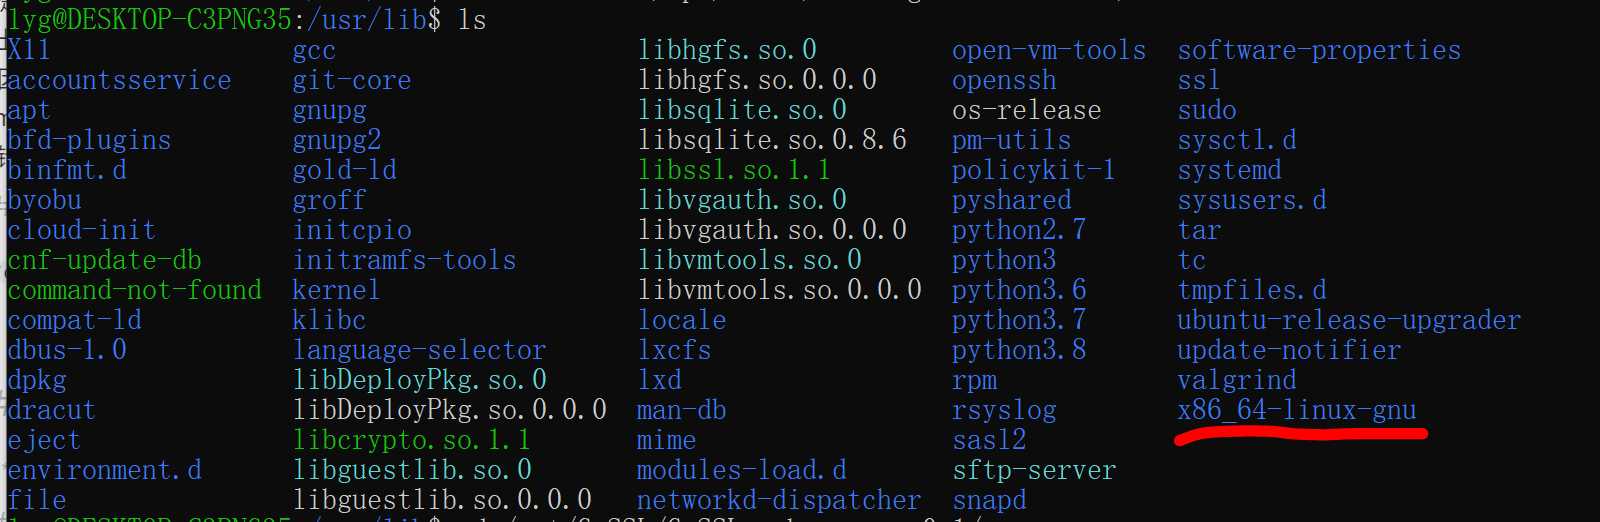
Observe whether there is a x86_64-linux-gnufolder, if there is, copy the target to this directory, otherwise copy it to the /usr/libfollowing, specifically:
# 如果有上述文件夹
sudo cp libcrypto.so /usr/lib/x86_64-linux-gnu
sudo cp libssl.so /usr/lib/x86_64-linux-gnu
sudo cp libcrypto.so.1.1 /usr/lib/x86_64-linux-gnu
sudo cp libssl.so.1.1 /usr/lib/x86_64-linux-gnu

# 如果没有上述文件夹
sudo cp libcrypto.so /usr/lib
sudo cp libssl.so /usr/lib
sudo cp libcrypto.so.1.1 /usr/lib
sudo cp libssl.so.1.1 /usr/lib
Since the static link library needs to be used in the process of calling the relevant header files to complete the self-written program, the static link library needs to be configured as follows:
sudo cp libssl.a /usr/lib
sudo cp libcrypto.a /usr/lib
Then use the following command to configure the environment variable, .bashrcadd LD_LIBRARY_PATH=$LD_LIBRARY_PATH:/usr/libit to the file and make it effective, as follows:
cd
vi .bashrc
source .bashrc
Use and test
Test the installation of GmSSL
gmsslIf you enter the following interface after using the command , it means that gmssl is successfully installed and ready to use.

Test the connection between VS Code and Ubuntu
After using the command in Ubuntu, code .VS Code prompts that the plug-in is being installed. This is the installation and initialization process during the first use. After that, it will not be so slow, but the actual process is not slow. After completion, the file organization structure in Ubuntu appears on the left side of VS Code, and the path of the C drive of Windows is /mnt/csimilar to other drives.
The above description indicates a successful connection.

how to use?
Every time you start Ubuntu, use the code .command in the specified folder to complete the connection creation. Then use the shortcut key Ctrl + ` (the one with ~) to open the terminal in VS Code, and then you can use Linux commands in the terminal to use GmSSL.
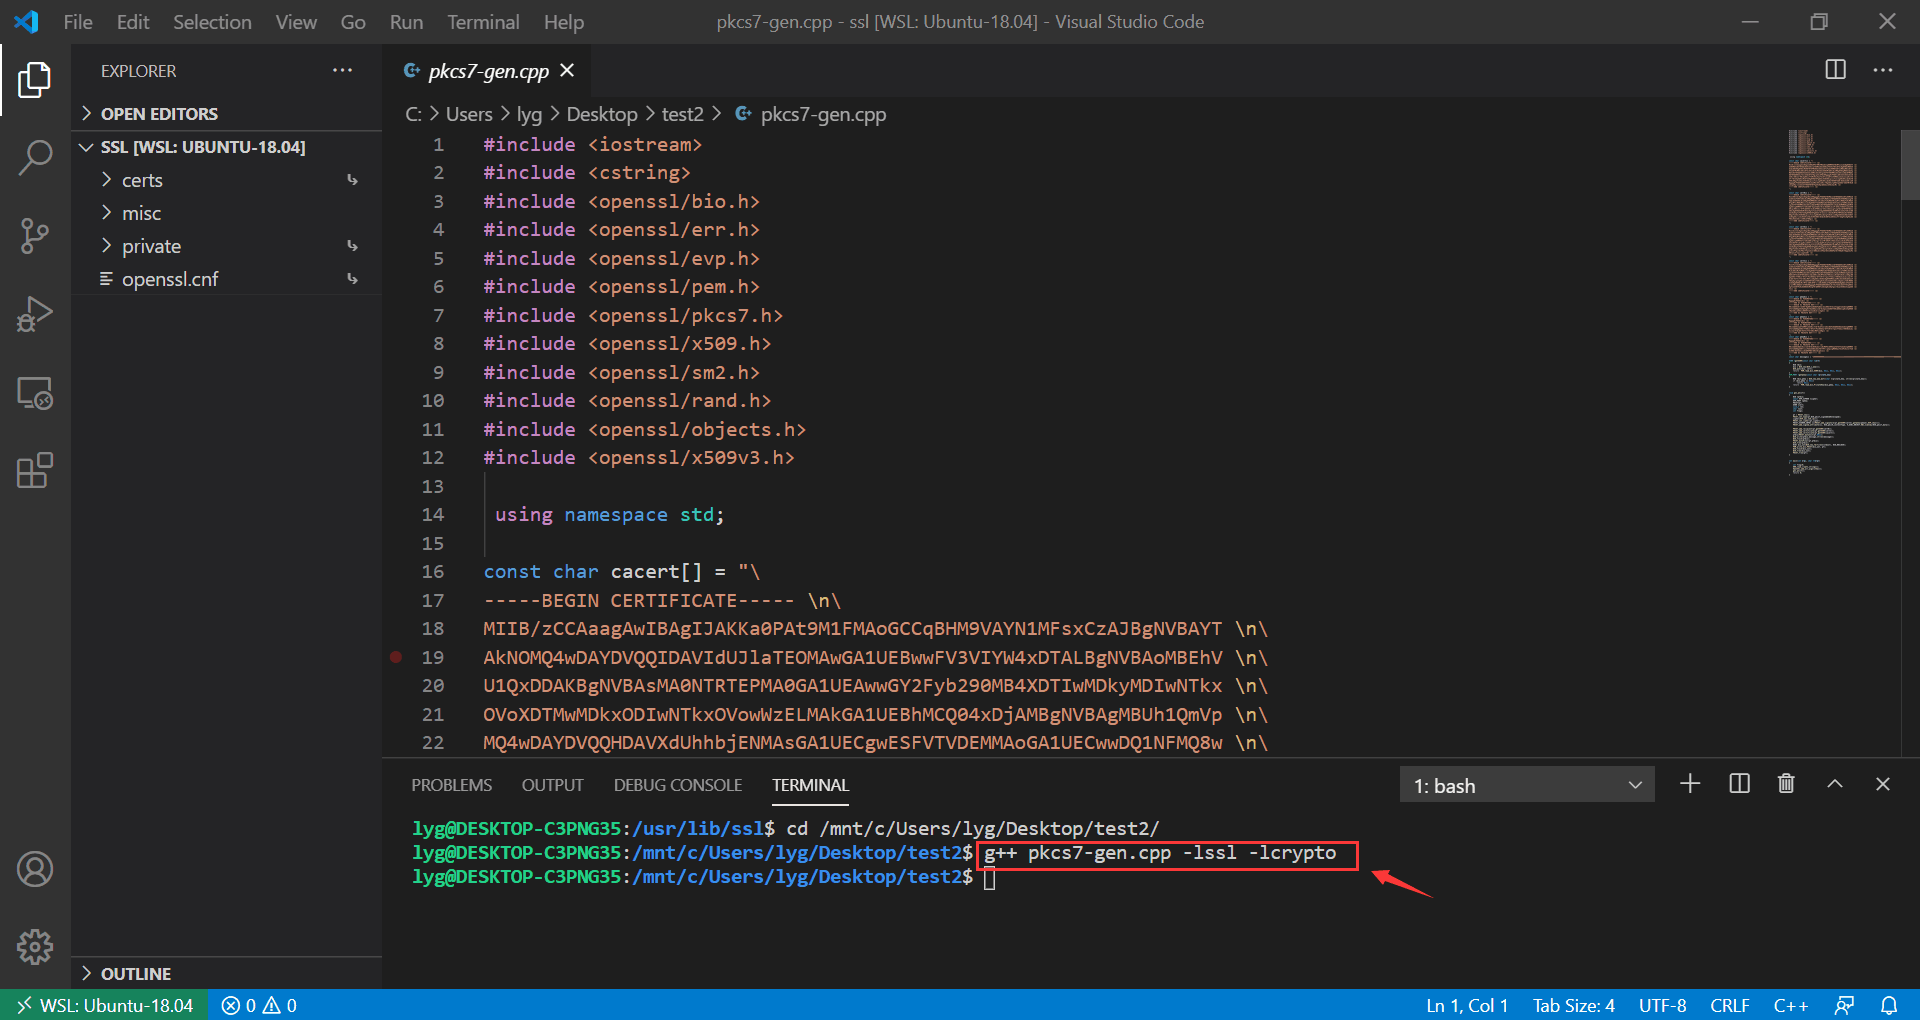
The following is the VS Code terminal:

When you call the gmssl header file to write a program, you need to compile it, and use the command in the source file directory g++ filename.cpp -lssl -lcryptoto complete the compilation. as follows:
Reference
https://www.jianshu.com/p/2bcf5eca5fbc
http://gmssl.org/docs/quickstart.html
https://zhuanlan.zhihu.com/p/100952557
https://www.cnblogs.com/wangzihong0213/p/10856875.html