table of Contents
-
- Graphics card computing power query
- Correspondence between tensorflow-gpu version and cuda version
- CUDA download
- cudnn download
- tensorflow2.0-gpu
- PyTorch-gpu
- GitHub upload code tutorial
- Clone GitHub code with Git
- Anaconda creates a new environment
- Jupyter notebook select conda local python environment and modify the default path
- Common function library installation
To avoid forgetting, it is recorded here.
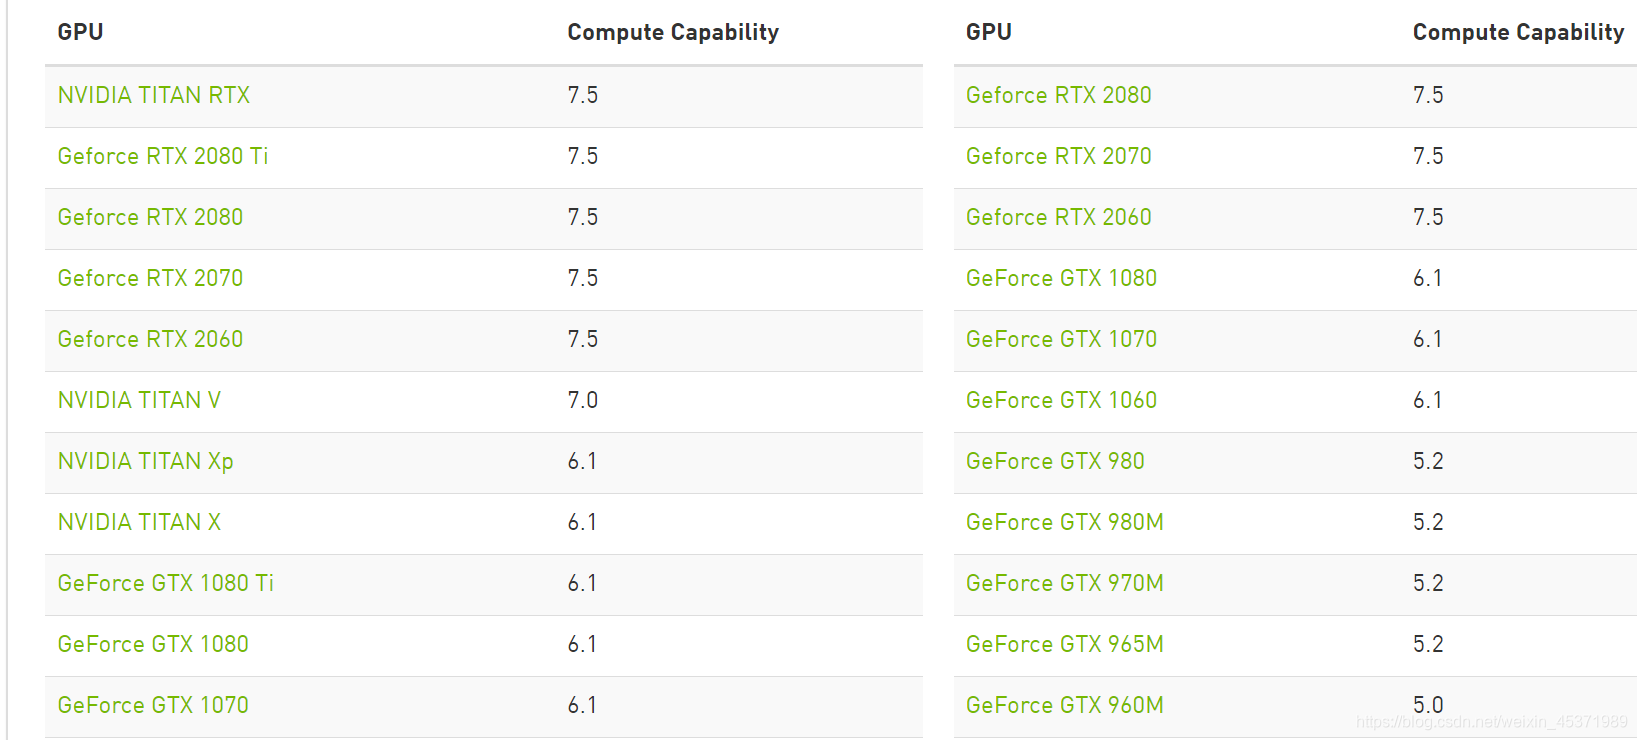
Graphics card computing power query
Correspondence between tensorflow-gpu version and cuda version

CUDA download
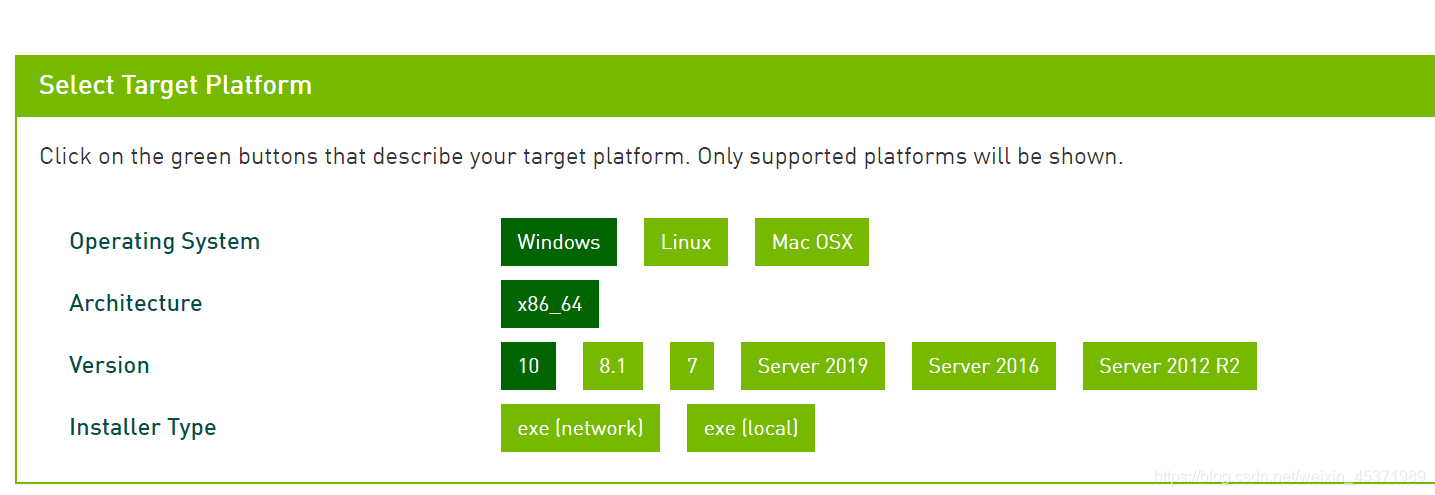
GTX1650 supports up to cuda10.2. In addition, you need to download the driver cudnn.
cudnn download
(You need to register an account to download)
cudnn 7.6.5 corresponds to CUDA10.0 version.
After the download and installation is complete, enter nvidia-msi on the cmd interface to query the GPU usage.
cudnn and CUDA version correspondence table

tensorflow2.0-gpu
The gpu version of tensorflow2.0 needs 2.0.0, do not download the latest version, because 2.1.0 requires CUDA10.1 version. In addition, the GPU version cannot exist at the same time as the CPU version, otherwise it will conflict.
The mirror source Douban is very easy to use, the installation command:
pip install tensorflow-gpu==2.0.0 -i https://pypi.doubanio.com/simple
Tsinghua mirror source address: https://pypi.tuna.tsinghua.edu.cn/simple
pip, if you download the library, replace the two with one, and change one if it is not easy to use.
PyTorch-gpu
First add the pytorch mirror source:
conda config --add channels https://mirrors.tuna.tsinghua.edu.cn/anaconda/cloud/pytorch/
install:
conda install pytorch torchvision cudatoolkit=10.0
GitHub upload code tutorial
https://www.cnblogs.com/cxk1995/p/5800196.html
requires a client to upload the code, the official website of foreign countries is too slow to download, the domestic download source: Git download
Clone GitHub code with Git
Just use git clone +GitHub library address;
git clone https://github.com/...
But because the download speed is generally slow, it can be changed to:
git clone https://github.com.cnpmjs.org/...
Anaconda creates a new environment
For example, create a virtual environment called tf20 and install python3.7 version.
conda create -n tf20 python=3.7
The created environment can be seen in the envs folder under the anaconda directory, or you can view it with the following command:
conda info --envs
Jupyter notebook select conda local python environment and modify the default path
You can choose to install ipykernel first, the environment here is named tf20
conda install -n tf20 ipykernel
Then activate the environment:
activate tf20
Then enter:
python -m ipykernel install --user --name tf20 --display-name tf20
Refresh Jupyter, you can find the corresponding environment named tf20.
Modify the default path:
refer to the blog
Another method:
Open Anaconda Prompt, install nb_conda: conda install nb_conda, and then activate the required environment: such as activate tf20, enter jupyter notebook in the tf20 environment, and enter the URL to select the current environment. And next time you open jupyter directly, you can select the environment instead of opening jupyter in the tf20 environment.
In addition, in jupyter, you can view the python version through the following statement:
import sys
sys.version
Common function library installation
- opencv:
pip install opencv-python -i https://pypi.doubanio.com/simple
verification:
import cv2
print(cv2.__version__)