Install SoftEther *** Server
One. Install SoftEther Server and
download the SoftEther Server package
https://www.softether-download.com/ official website to choose the version
link you need : https://pan.baidu.com/s/1bxBiBi4bFSyH609NLkCgvA extraction code: nen7
download and upload to the linux server
cd / usr / local /
mv softether- server-v4.31-9727-beta-2019.11.18-linux-x64-64bit.tar.gz / usr / local
tar zxvf softether- server-v4.31-9727-beta- 2019.11.18-linux-x64-64bit.tar.gz
cd server
make
input all the way [1] cp hamcore.se2 / usr / local /
server / hamcore.se2
cp cmd / usr / local / server / cmd
cp after compiling and installing server / usr / local / server / server
*** server is installed
启动和停止
[root@ server]# /usr/local/server/server start
The SoftEther *** Server service has been started.
Access test:
https://192.168.8.128:5555/
or
https://192.168.8.128/
super simple interface of a 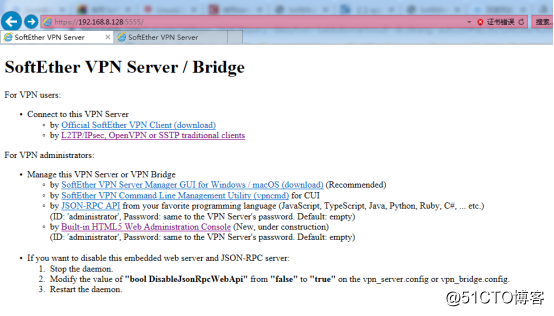
reference document reference: https://www.mivm.cn/softether-***-lan/
if You want to use systemd to manage it and start it up, execute the following command:
curl https://cdn.mivm.cn/www.mivm.cn/archives/softether-***-lan/***server.service -o / lib / systemd / system / server.service
starts to run: systemctl start server
stops running: systemctl stop server
starts to start: systemctl enable server
cancels start to start: systemctl disable server to
check the running status: systemctl status server
Note that L2TP does not support custom ports, The server must open ports 500 and 4500. For servers sharing IP, L2TP cannot be used.
two. Install SoftEther Server management program
Next install SoftEther Server management program, based on Windows for easy management.
Visit the SoftEther Download Center: https://www.softether-download.com/
Choose a component: SoftEther Server Manager for Windows
Choose a system: Windows
choose CPU: Intel (x86 and x64) When
asking what component to install, just choose [ SoftEther Server management tool (only management tool)].
After the installation is complete, open the management tool and click [New Settings] to add a server.
[Setting name] Fill in at will, [Host name] Fill in the IP address of the server, [Port number] Can fill in 443, 992, 1194, 5555, that can be done, make sure that these ports are not occupied by other programs and can be accessed, management mode Select [Server Management Mode], there is no password by default, no need to input.
The first connection will let you set a new password, and then the [SoftEther *** Server Simple Installation] window will pop up, just close it. Then you will be asked if you need to set up IPsec / L2TP, click [No].
Basic Settings SoftEther Server
Click [Open / MS-SSTP Settings], uncheck [Enable Open Clone Server Function] and [Enable MS-SSTP Clone Server Function].
Click [Encryption and Network] and uncheck [Use and maintain Internet connection].
Delete the redundant port in the [list of listeners] in the lower left corner, and just keep one. If you want to change the port, first create a new port, then use the new port to connect to the server, and then delete the old port.
Turn off dynamic DNS
SoftEther *** Server comes with dynamic DNS function, this function is generally useless, you need to edit the configuration file to turn it off.
Click [Edit Configuration File] in the lower right corner, click [Save to File] to save to local, and open the saved file.
Find declare DDnsClient in the first few lines, and then change the bool Disabled false below it to bool Disabled true to save the file.
Click [Import File and Apply] in the [Edit Configuration File] window to import the file you just modified.
SoftEther *** Server will automatically restart, and the management program will also be automatically closed.
After completing the above, the basic settings of SoftEther *** Server are completed. Next, start to create a virtual local area network.
In creating a virtual local area network
SoftEther ***, each virtual local area network corresponds to a virtual HUB, and all devices in the same HUB can access each other, but different HUBs cannot access each other.
Generally only need to create a virtual HUB.
SoftEther *** Server will create a virtual hub named [DEFAULT] by default and delete it.
Then create a new virtual HUB, click [Create Virtual HUB] → [Virtual Hub Name], fill in whatever you want. For example, I use it to play a game, call it [GameLAN] → Fill in the password or leave it blank. If you fill in the password, you can use This password manages the HUB alone instead of the entire server → select [Do not enumerate to anonymous users] → [OK].
After creating, click [Manage Virtual HUB].
First, open the DHCP server, so the connection will automatically assign IP addresses after, click on [Virtual NAT and Virtual DHCP Server] → [Enable SecureNAT] → [SecureNAT Configuration] → deselect [use virtual NAT function], if not unchecked, After the client connects to SoftEther , all network traffic will pass through SoftEther *** Server. Then clear [Default Gateway Address] and [DNS Server Address] → [OK] → close the [Virtual NAT and Virtual DHCP Server] window.
The last step is to create users. Click [Manage User] → [New] → fill in the user name and password → complete the creation. If you only use it by yourself, you can create one user. If it is used by multiple people, it is best to have one user per person.
Then close the [Manage User] and [Manage Virtual HUB] windows
Since SoftEther *** does not have an official mobile client, in order to use it on a mobile phone, you need to enable the L2TP function in order to connect on the mobile phone.
Click [IPsec / L2TP Settings] → select [Enable L2TP server function (L2TP over IPsec)] → Fill in 8 characters in the [IPsec pre-shared key] below, preferably random → [OK]
Note that L2TP does not support custom ports. The server must open ports 500 and 4500. For servers that share IP, L2TP cannot be used.
At this point, the virtual local area network is fully available, and then teach you how to use SoftEther *** on Windows and Android.
three. Windows Client Use
Windows to use SoftEther *** Very convenient, because there is an official client.
Visit the SoftEther download center: https://www.softether-download.com/
Choose a component: SoftEther *** Client
Select system: Windows
Select CPU: Intel (x86 and x64)
Download the latest version of the installation package
After the installation is complete, open the client, click [add new *** connection], the first time you will be prompted to create a virtual network card, wait for the creation to be completed.
[Connection setting name] Fill in at will, [host name] fills in the server IP, [port number] fills in the server ’s listening port, [virtual HUB name] fills in the virtual HUB name just created, fill in the user name and password on the right, uncheck [disconnect Automatically reconnect afterwards].
Click [Advanced Settings] and set [TCP Connections] to 8.
After the creation is complete, double-click to connect, the connection is successful and you are prompted to assign an IP address.
Note that use under Windows, the default is public network, if you want the service to access the program, Windows Firewall allows the time of the visit, remember to check the public network.
Android settings
Since there is no official Android client can only use the system's capabilities to create L2TP connections, the method is simple, following to Android Pie example.
Find the phone's settings, create a new connection.
*** Type / protocol selection [L2TP / IPsec PSK], [Server address] Fill in the server IP, [L2TP key] and [IPSec identifier] do n’t care, [IPsec pre-shared key] Fill in the pre-shared password just set key.
The user name is filled in the format of [user name @ virtual HUB name], for example, the virtual HUB I just created is called [GameLAN], and the new user name is [test], then my L2TP user name is [test @ GameLAN], and the password is still The password when the user was just created.
Select [Show advanced options], [Forward route] fill in the IP segment of the virtual HUB, which is the IP segment set by the DHCP server, the default is 192.168.30.0/24, [Forward route] must be set, otherwise all traffic will go through *** .
After all the settings are completed, you can connect.
four. Install the client
1. Download the client
link: https://pan.baidu.com/s/1i4B-ra2Jlm1p5UYNdMyJqg extraction code: bipx
2. Install *** client 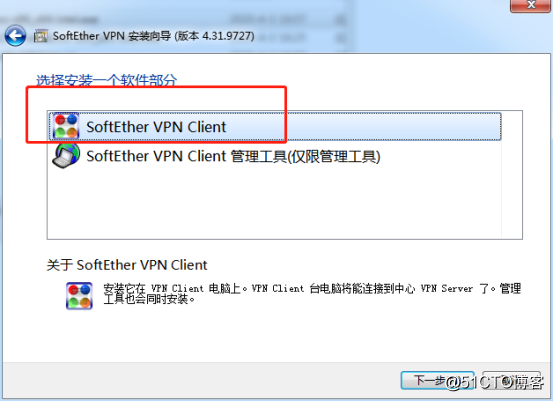
3. All the way to the next step until completed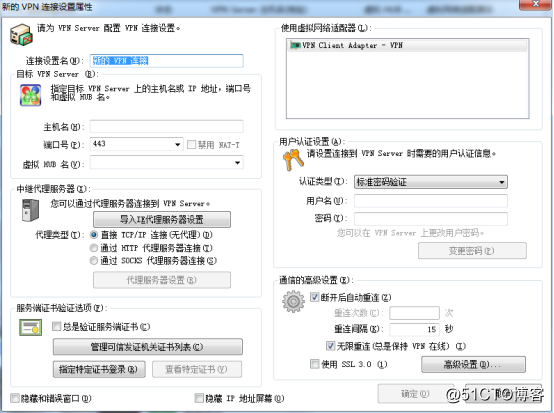
two. Login *** Client
ip: public IP
port: 5555
user: user1
passwd: 123456
vhub: V1
access test: http://192.168.8.146:8080/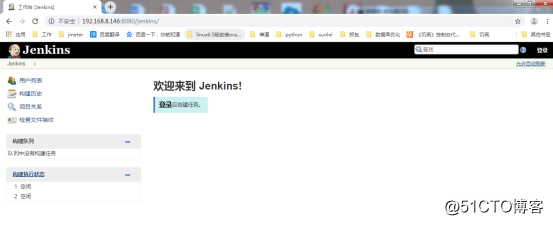
test connection is successful.
Fives. Install the server
1. Download the server
link: https://pan.baidu.com/s/1JraJA2SQ0yhm6nrccq99FA extraction code: eay3 2.
2. Install the server, the next step is to complete 
3. Create the connection 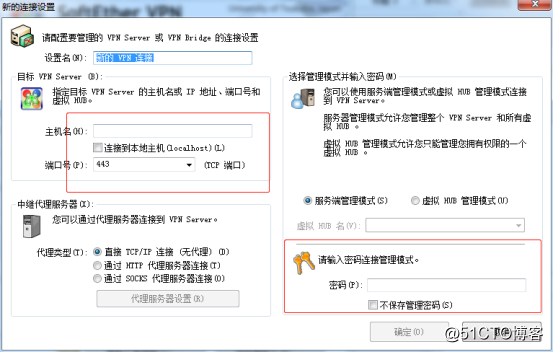
password 123456
4. Create a virtual HUB 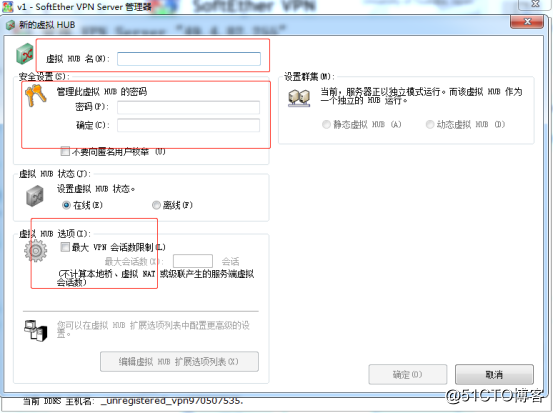
like these functions knows a little bit, all are Chinese characters. 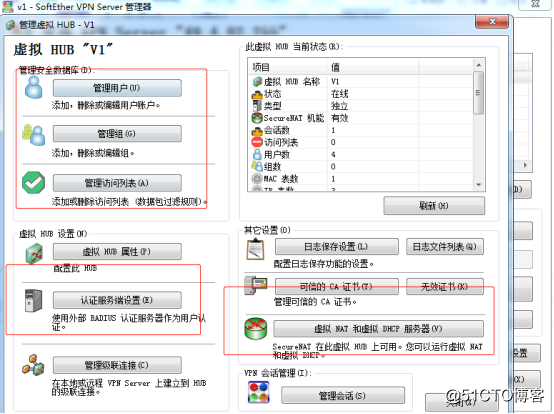
Because this can only be verified by password and anonymous access, and then decided to give up the use of this open source software, 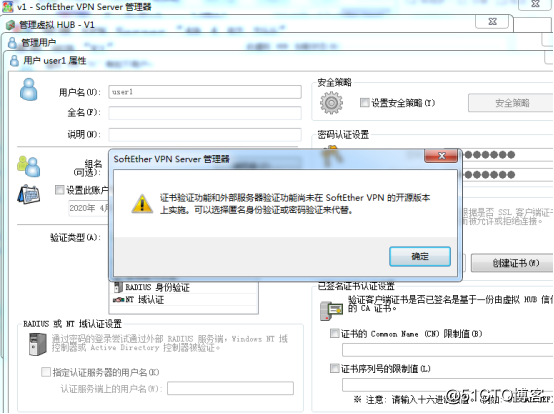
enter the server management page, 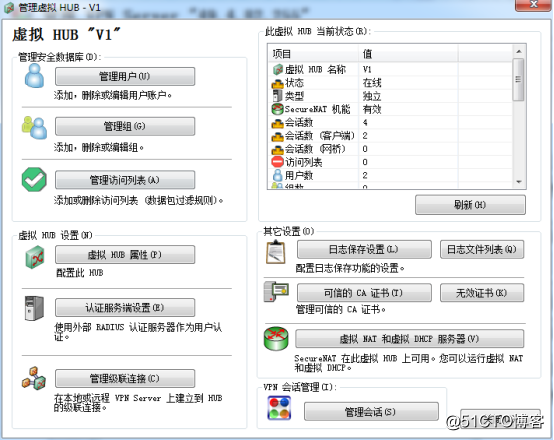
enter the hub management interface,
manage users and control access can be done on this interface .