参考资料:
首先 ,构建这个项目我们需要:
- arduino物联网模块(ESP8266WIFI芯片)
- 非接触式水位检测传感器
- Thing Speak IOT平台免费账户
- IFTTT 账户
该项目的设计理念是在饮水机与水桶的结合处设置传感器,传感器监测饮水桶中的水量变化并上传数据给水厂商;当水位达到设定的阈值时,发送用户信息(地址、电话等等)给水厂商,并规划配送水路线规划。为用户省去了打电话订水这一繁琐的步骤。
方案一:基于ESP8266 WiFi芯片物联网模块设计,其中运用Thing Speak IOT免费平台采集数据,IFTTT 事件触发发送邮件到手机端。
第一步、基于ESP8266WIFI 物联网开发板模块购买指南。
- Arduino物联网开发板 ESP8266 WIFI芯片非模块 OLED 可刷NodeMCU(附:此开发板 “Heltec 惠特自动化开发板”技术文档GitHub中详细介绍了开发环境配置、开发板管理、库文件下载等等)
- ESP8266 物联网开发模块 适用于 Arduino 编译器 物联网套件CH-3
第二步、Arduino IDE 基于Node MCU开发环境搭建。在开发板管理器中搜索 “ esp8266 ” 会出现相应的开发板信息。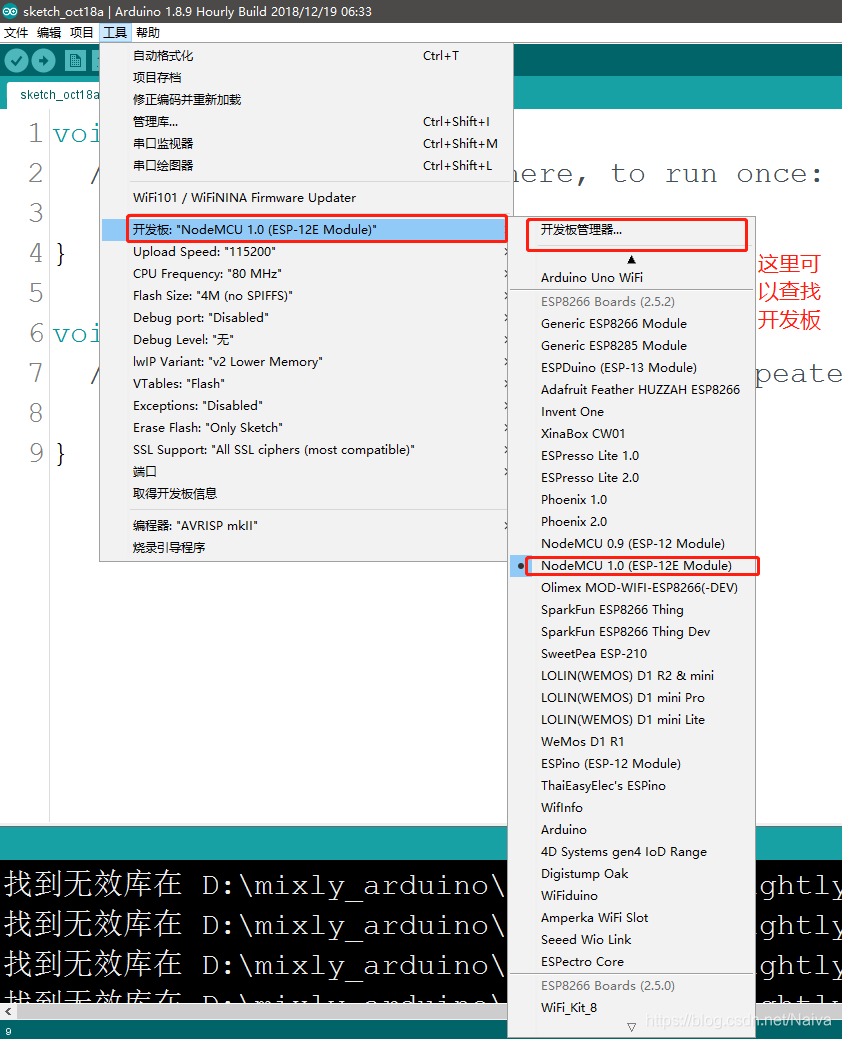

注意:这一步的时候可能会出现 “下载平台索引失败 ” !!!

解决方案:
arduino 下载 https://downloads.arduino.cc/packages/package_index.json error 出错的解决方法
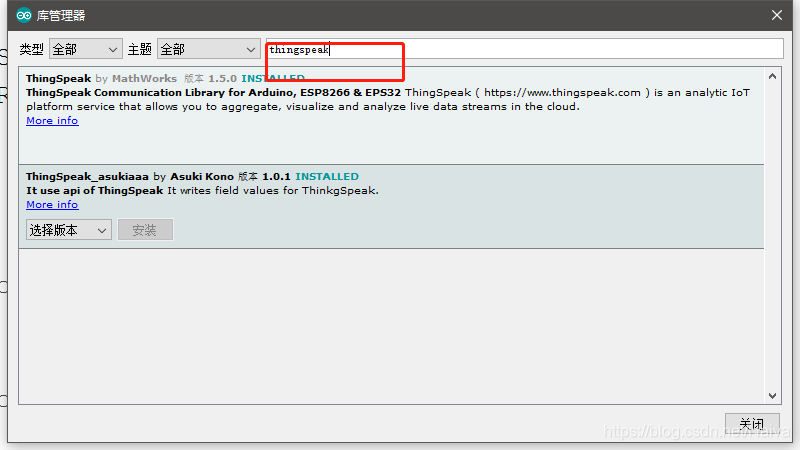
第三步、Arduino IDE 基于Node MCU库文件配置。在库管理器中 搜索 “ ThingSpeak ” ,下载安装第一个库。
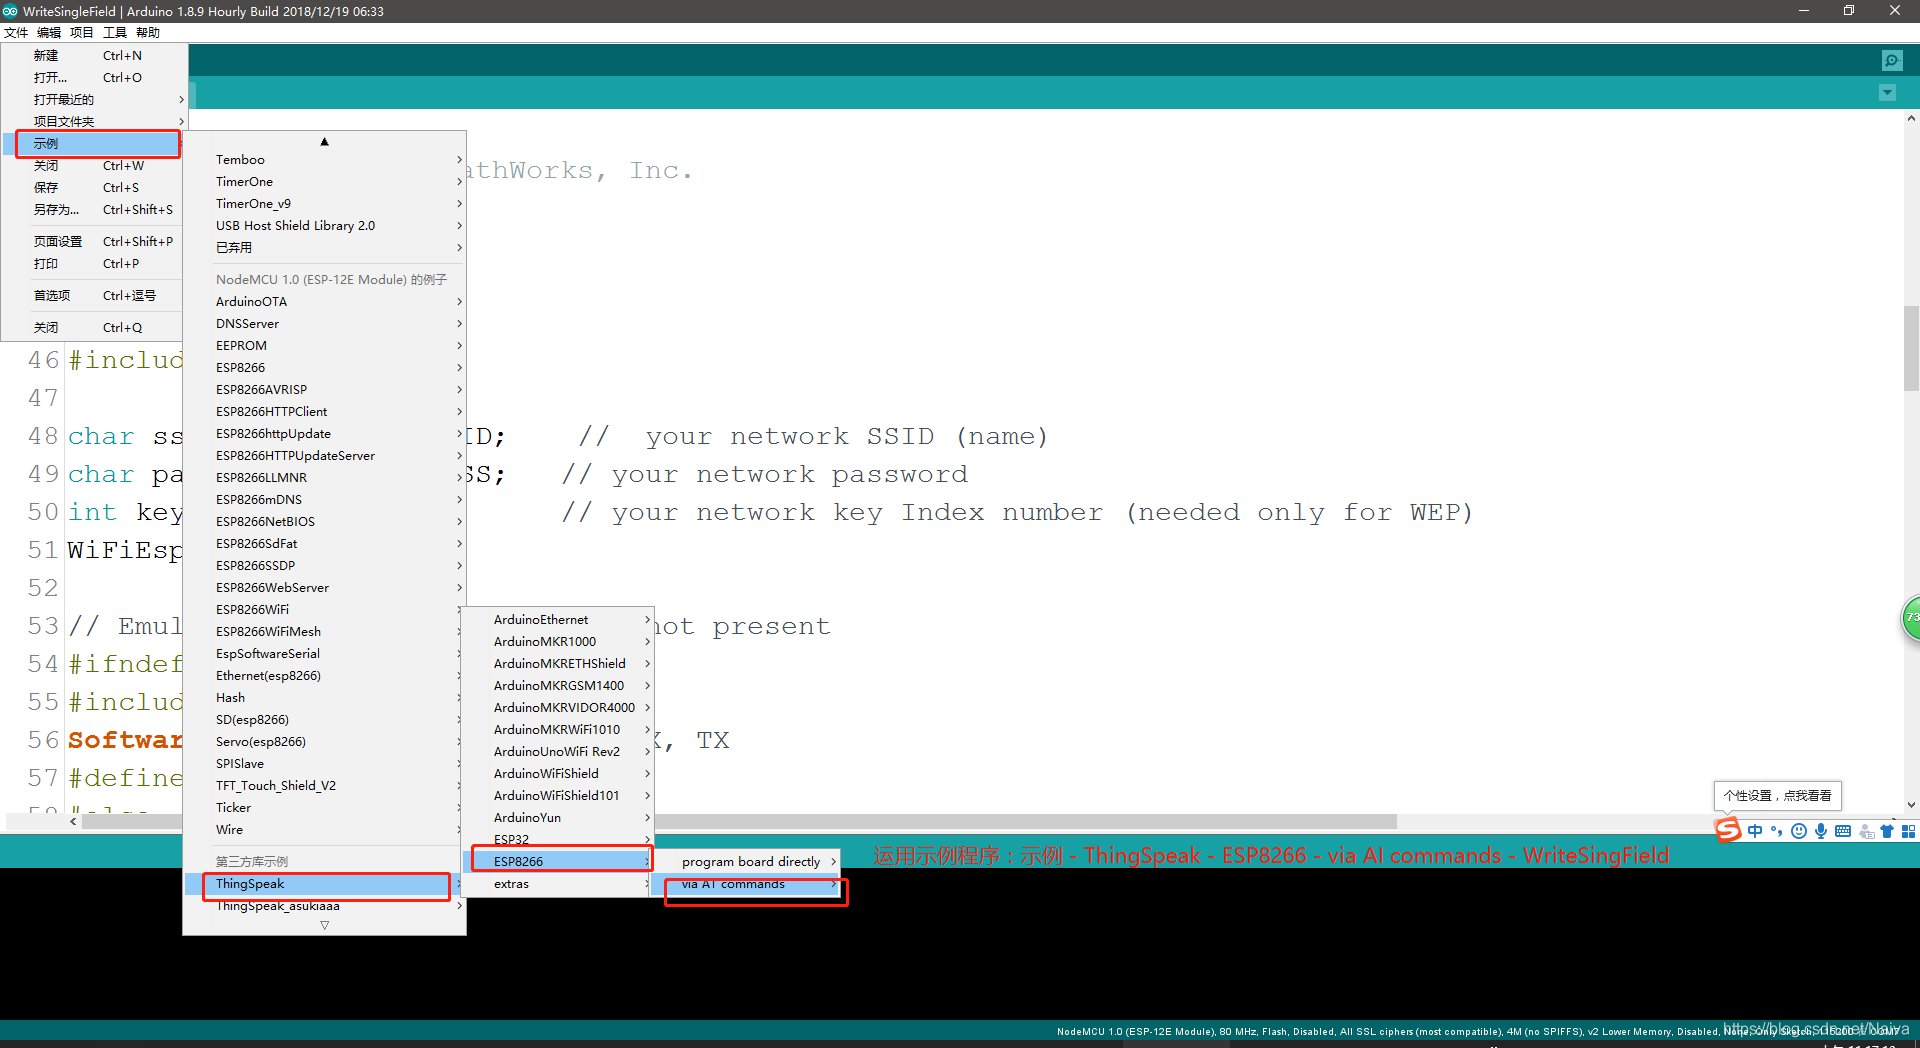
第四步、程序测试。选择示例ThingSpeak 中的示例程序。
 关键代码:主要是修改WiFi账号、密码以及ThinkSpeak 的频道ID、密钥(后面介绍)
char ssid[] = "DengHongji";   // your network SSID (name) WIFI账号//
char pass[] = "denghongji123";   // your network password WIFI密码//
int keyIndex = 0;            // your network key Index number (needed only for WEP)
WiFiClient  client;

unsigned long myChannelNumber = 864372;//ThingSpeak 频道号码//
const char * myWriteAPIKey = "T6KJBZ0LLRV29SN1";//ThingSpeak Write API Key 密钥//
完整代码如下:
/*
  WriteSingleField

  Description: Writes a value to a channel on ThingSpeak every 20 seconds.

  Hardware: ESP8266 based boards

  !!! IMPORTANT - Modify the secrets.h file for this project with your network connection and ThingSpeak channel details. !!!

  Note:
  - Requires ESP8266WiFi library and ESP8622 board add-on. See https://github.com/esp8266/Arduino for details.
  - Select the target hardware from the Tools->Board menu
  - This example is written for a network using WPA encryption. For WEP or WPA, change the WiFi.begin() call accordingly.

  ThingSpeak ( https://www.thingspeak.com ) is an analytic IoT platform service that allows you to aggregate, visualize, and
  analyze live data streams in the cloud. Visit https://www.thingspeak.com to sign up for a free account and create a channel.

  Documentation for the ThingSpeak Communication Library for Arduino is in the README.md folder where the library was installed.
  See https://www.mathworks.com/help/thingspeak/index.html for the full ThingSpeak documentation.

  For licensing information, see the accompanying license file.

  Copyright 2018, The MathWorks, Inc.
*/

#include "ThingSpeak.h"
#include "secrets.h"
#include <ESP8266WiFi.h>

//char ssid[] = "CMCC-R6Qs";   // your network SSID (name) WIFI账号//
//char pass[] = "qmt2fx3q";   // your network password WIFI密码//

char ssid[] = "DengHongji";   // your network SSID (name) WIFI账号//
char pass[] = "denghongji123";   // your network password WIFI密码//
int keyIndex = 0;            // your network key Index number (needed only for WEP)
WiFiClient  client;

unsigned long myChannelNumber = 864372;//ThingSpeak 频道号码//
const char * myWriteAPIKey = "T6KJBZ0LLRV29SN1";//ThingSpeak Write API Key 密钥//

int number = 20;

void setup() {
  Serial.begin(9600);  // Initialize serial

  WiFi.mode(WIFI_STA);
  ThingSpeak.begin(client);  // Initialize ThingSpeak
}

void loop() {

  // Connect or reconnect to WiFi

  if(WiFi.status() != WL_CONNECTED){
    Serial.print("Attempting to connect to SSID: ");
    Serial.println(SECRET_SSID);
    delay(1000);
    while(WiFi.status() != WL_CONNECTED){
      WiFi.begin(ssid, pass);  // Connect to WPA/WPA2 network. Change this line if using open or WEP network
      Serial.print(".");
      delay(5000);
    }
    Serial.println("\nConnected.");
  }

  // Write to ThingSpeak. There are up to 8 fields in a channel, allowing you to store up to 8 different
  // pieces of information in a channel.  Here, we write to field 1.
  int x = ThingSpeak.writeField(myChannelNumber, 1, number, myWriteAPIKey);
  if(x == 200){
    Serial.println("Channel update successful.");
  }
  else{
    Serial.println("Problem updating channel. HTTP error code " + String(x));
  }

  // change the value
  number--;
  if(number < 10){

    ThingSpeak.writeField(myChannelNumber, 2, "Warning~~~", myWriteAPIKey);

    if(number < 1){

    number = 20;
  }
  }

  delay(1000); // Wait 20 seconds to update the channel again
}
第五步、关于ThingSpeak IOT平台以及IFTTT平台的应用。
参考文章/视频:
- 【什么是IFTTT?】IFTTT自訂觸發條件,當發生A,則做B,讓網路自動幫你作事 - YouTube
- 【ThingSpeak with Arduino】How to Use ThingSpeak with Arduino - YouTube
- 【ESP8266+ThingSpeak+IFTTT】Tutorial #4 ESP8266 - Integración de IFTTT con ThingSpeak - YouTube
- 文章:使用ESP8266和Arduino的基于物联网的患者监护系统

方案二: 此方案的优点在于软/硬件设计简单且能实现作品的部分功能。所需材料如下:
- Arduino nano
- 水位检测电路
- 蓝牙CH-06
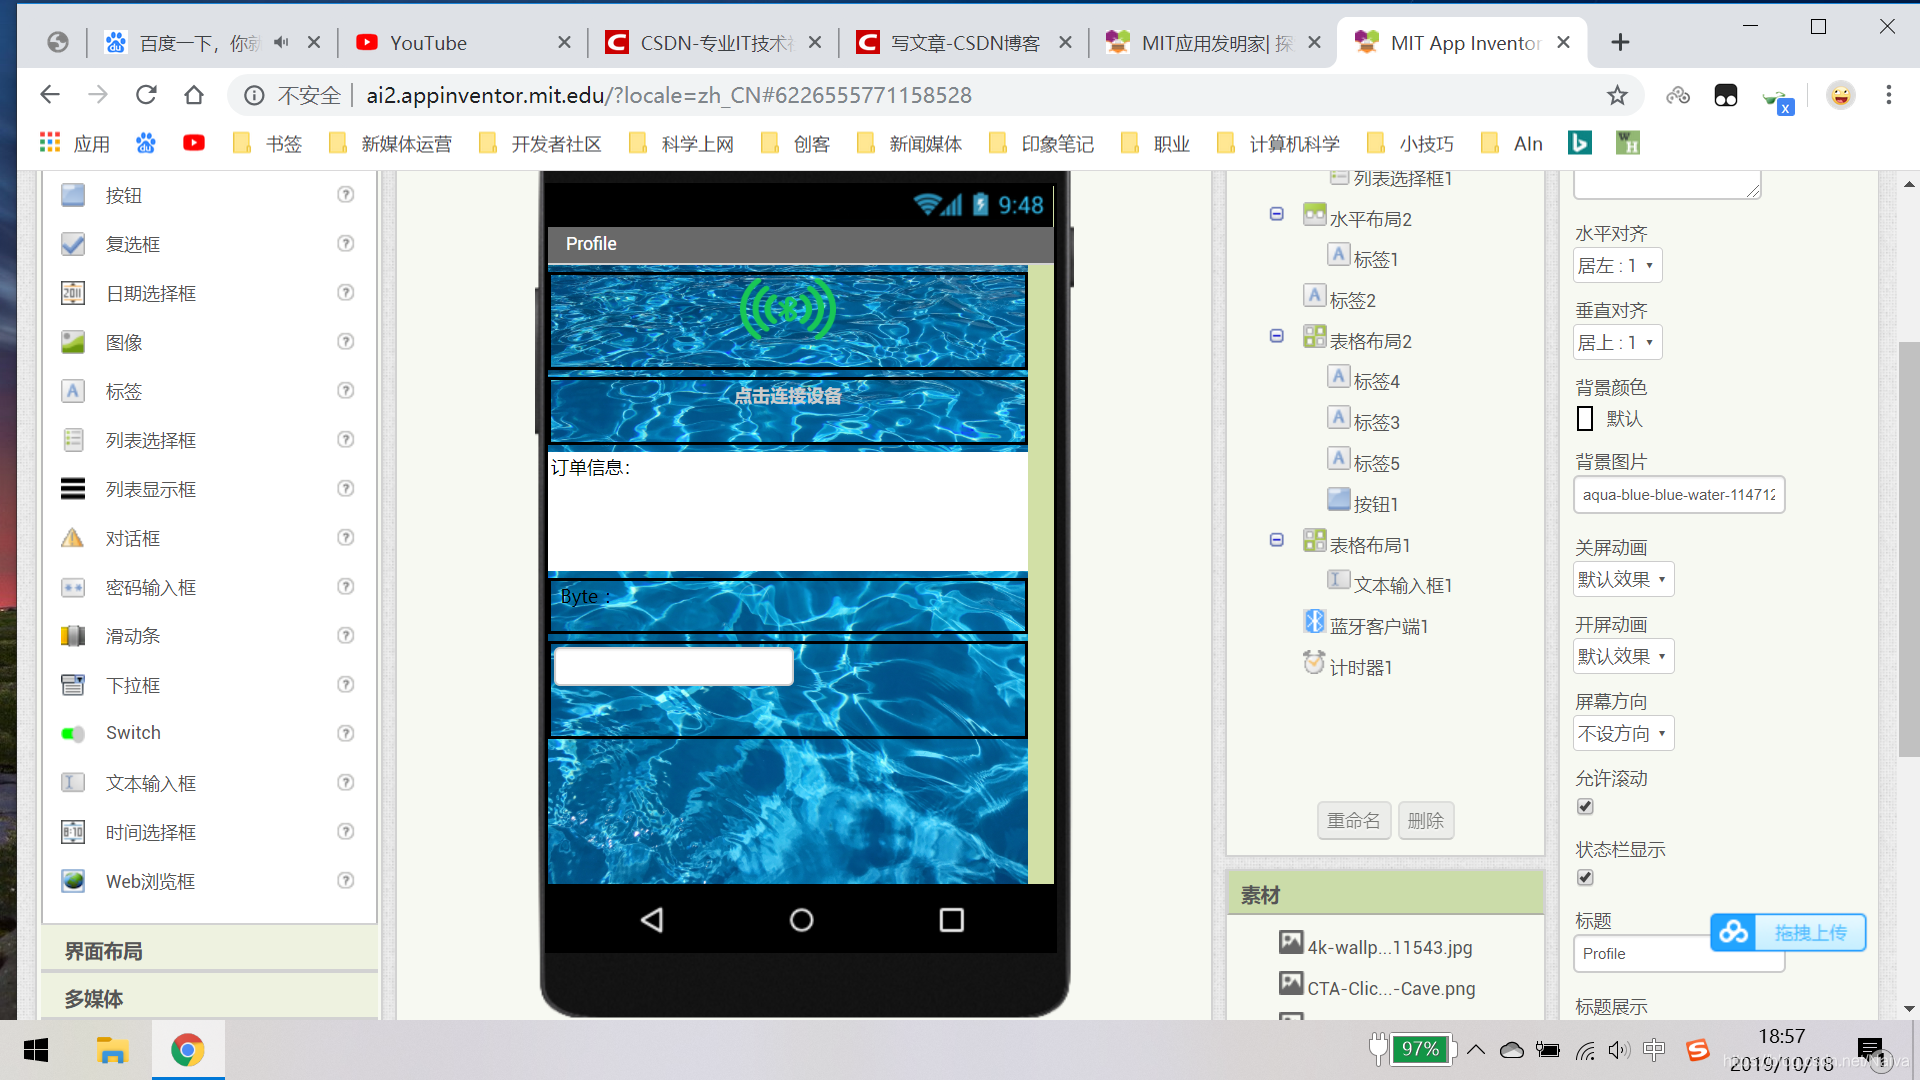
- 手机APP(MIT APP Inventor)

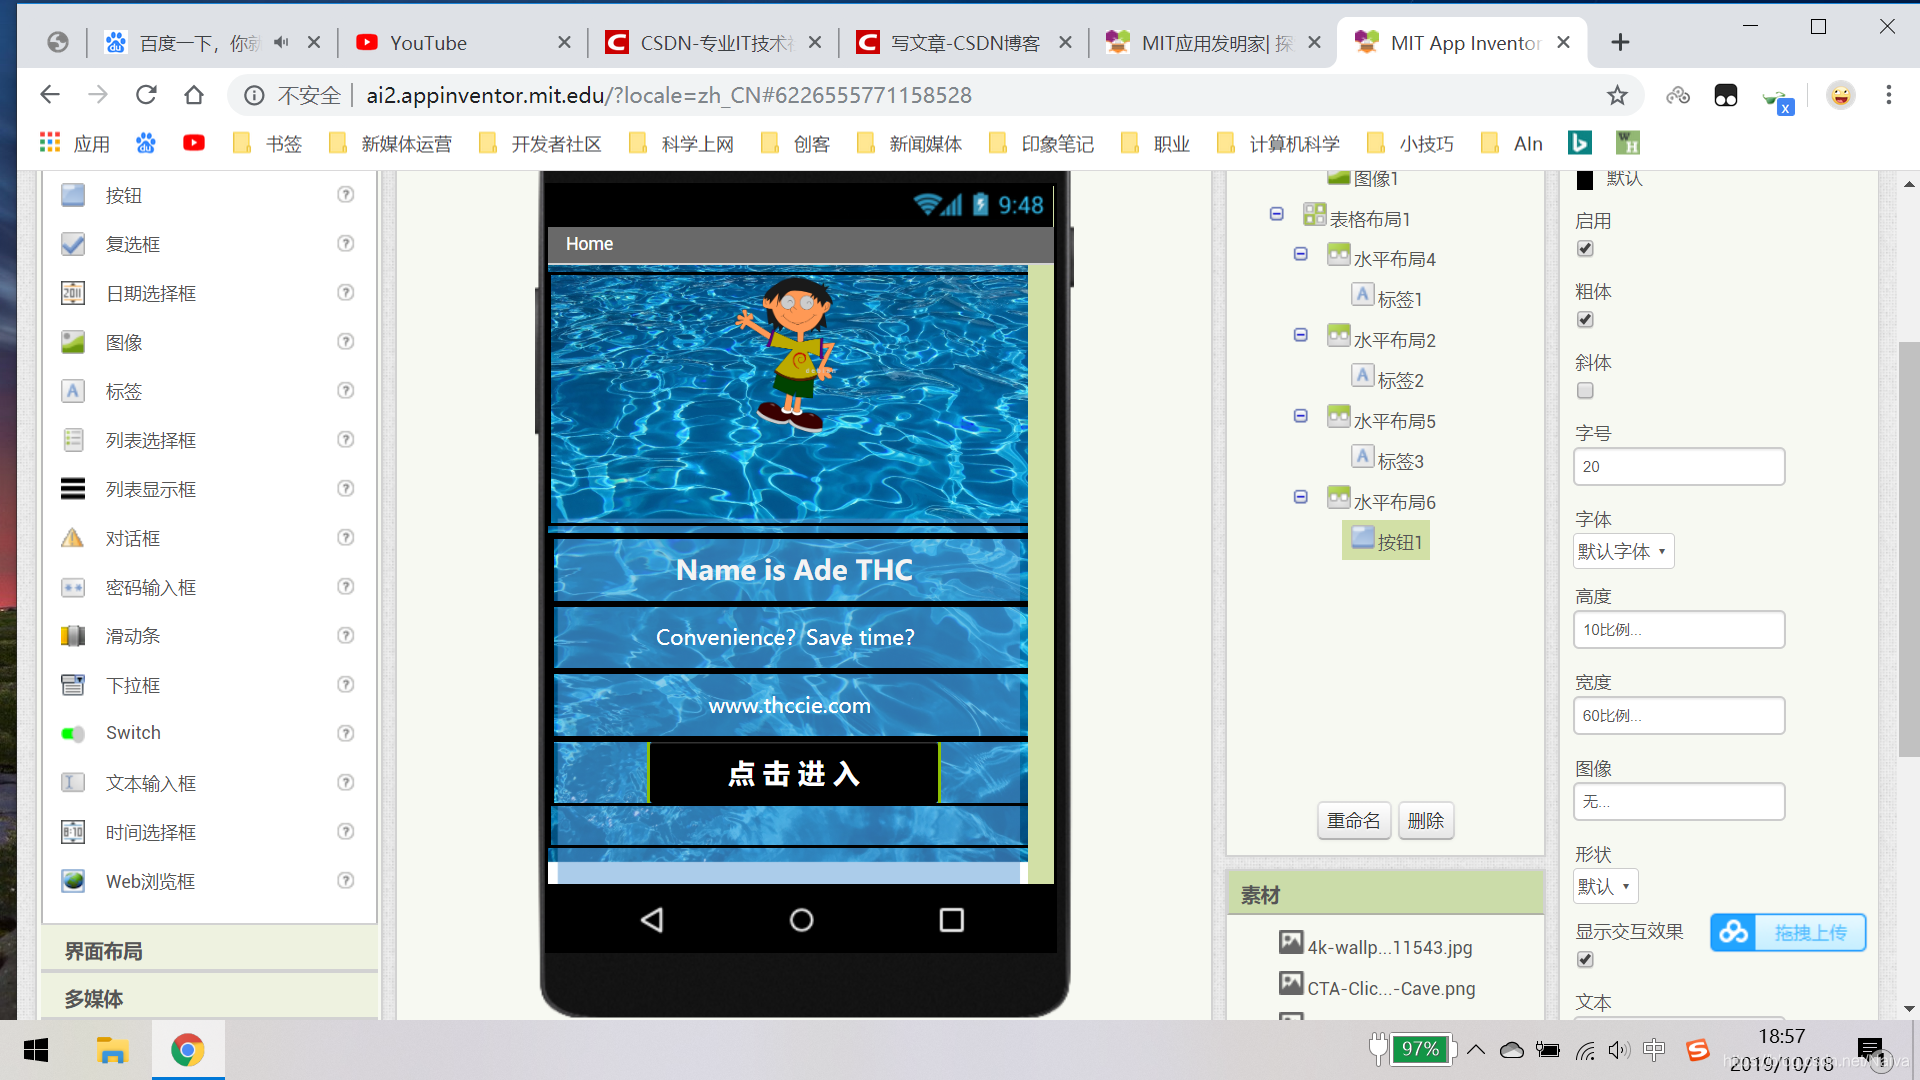
安卓手机客户端 APP 下载链接
参考代码如下:当感应探头侦测到水桶中没有水的时候,蓝牙 函数 BT.print(1) 发送 信号给手机APP
/*
arduino数字口引脚与蓝牙引脚连接:
RX(接收)---------------9(发送)
TX(发送)---------------- 8(接收)
*/

#include <SoftwareSerial.h>
//使用软件串口,能讲数字口模拟成串口
SoftwareSerial BT(8, 9);  //新建对象,接收脚为8,发送脚为9
char val;  //存储接收的变量

#define  READ_PIN   13

 int var = 1;
 int var0 = 0;

void setup() {
  Serial.begin(9600); //与电脑的串口连接
  pinMode(READ_PIN,INPUT);
  Serial.println("BT is ready!");
  BT.begin(9600);  //设置波特率


}

void loop() {

  /*
  //如果串口接收到数据,就输出到蓝牙串口
  if (Serial.available()) {
    val = Serial.read();
    BT.print(val);
  }

  //如果接收到蓝牙模块的数据,输出到屏幕
  if (BT.available()) {
    val = BT.read();
    Serial.print(val);
  }*/


  /*
 if (BT.available()) {
    val = BT.read();

    if(val == '1')
    {
      digitalWrite(led,HIGH);
    }
    if(val == '0')
    {
      digitalWrite(led,LOW);
    }

    Serial.print("massage is:");
    Serial.println(val);
  }*/


    Serial.println(digitalRead(READ_PIN));

    if(digitalRead(READ_PIN) == 1)

  {
    BT.print(1);

    Serial.println("Send  successful1!");

    }


   delay(500);


}
