一、linux安装.net core运行环境,笔者是在虚拟机安装的CenOS 7 。
- 安装.net core 的SDK。步骤如下(此处安装的是2.2的版本)
1、首先需要注册该机器的秘钥,每太机器只需要注册一次既可。
sudo rpm -Uvh https://packages.microsoft.com/config/centos/7/packages-microsoft-prod.rpm
注意:1,笔者是虚拟机部署安装的CentOs 7 网络默认没有打开,所以需要配置网络
2、sudo yum install dotnet-sdk-2.2
这个格局项目需求,笔者此处安装的是 core 2.2的sdk
以上第二步可能会消耗一段时间,不妨喝杯茶改改BUG。。。。。。。。
安装完毕

3、查看是否安装成功
dotnet --version
- 此时linux系统上.net core sdk已经安装完成了。
部署项目:
因为此处我是虚拟机,有界面的linux系统所以我直接拖入或者复制进我的项目:


现在开始运行项目


此时已经可以预览了:
1) 解决绘图问题。
在.net时期绘图使用GDI,System.Drawing。但是在.net core上此时就失效了。
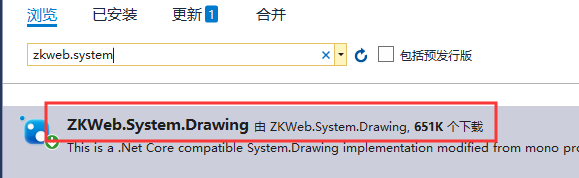
直到.net core 2.2 开始又再一次支持System.Drawing但是此时不再是System.Drawing而是System.DrawingCore
NUGet引入:
此时就可以开始绘图了。
---------------------------------------------------------------------------------------------------------------------------------------
**
注意:
**
linux上面绘图必须安装!!!
你在windows上使用图像组件没有任务问题,但部署到linux之后,将注意以下几点:
安装gdiplus插件,这个需要根据linux类型不同,有不同的方法
快捷方法:
yum whatprovides libgdiplus && yum install -y epel-release && yum install -y libgdiplus-2.10-9.el7.x86_64 && yum install -y libgdiplus-devel
官方的方法:
yum install autoconf automake libtool
yum install freetype-devel fontconfig libXft-devel
yum install libjpeg-turbo-devel libpng-devel giflib-devel libtiff-devel libexif-devel
yum install glib2-devel cairo-devel
yum install git
git clone https://github.com/mono/libgdiplus
cd libgdiplus
yum -y install ftp
./autogen.sh
yum -y install gcc automake autoconf libtool make
yum -y install gcc gcc-c++
make
make install
cd /usr/lib64/
ln -s /usr/local/lib/libgdiplus.so gdiplus.dll
安装起来比较慢,你可以直接下载:https://github.com/mono/libgdiplus ,自己安装在linux。
最后要执行下:yum install libgnomeui-devel (很重要的一行代码)
等等我还有话说…
此时部署的项目只能是http://localhost:5000访问,你需要配置一下nginx做一个代理。
过程如下:
*
*
*
*
*
*
*
*
--建立nginx的yum仓库
[root@localhost ~]# rpm -Uvh http://nginx.org/packages/centos/7/noarch/RPMS/nginx-release-centos-7-0.el7.ngx.noarch.rpm
--下载并安装nginx
[root@localhost ~]# yum install nginx
--启动nginx服务
[root@localhost ~]# systemctl start nginx
或者[root@localhost ~]# service nginx start命令也可以
--设置nginx的开机启动(linux宕机、重启会自动运行nginx不需要连上去输入命令)
[root@localhost ~]# systemctl enable nginx
或者[root@localhost ~]# chkconfig nginx on
配置nginx:
--配置nginx 默认路径如下所示 如果是多站点 需要在/etc/nginx/conf.d/目录下 建多个.conf文件
[root@localhost webapph]# vi /etc/nginx/conf.d/default.conf
--文件内容如下
server {
    listen       80;
    server_name  192.168.88.106;
    location / {
          proxy_pass http://localhost:5000;
    }
}
--重新加载Nginx配制文件
--nginx -t 测试配制文件是否正确
[root@localhost ~]# nginx -t
--命令:nginx -s reload 重新加载nginx配制文件,不用重启nginx
[root@localhost ~]# nginx -s reload
检测nginx配置是否有问题(nginx可正常运行时,请忽略)
--配置好上面的nginx.conf/default.conf后,检查一下是否正确。
[root@localhost /]# whereis nginx
nginx: /usr/sbin/nginx /etc/nginx /usr/share/nginx /usr/share/man/man3/nginx.3pm.gz /usr/share/man/man8/nginx.8.gz
--检测配置是否有问题
[root@localhost /]# /usr/sbin/nginx -t
nginx: [emerg] invalid URL prefix in /etc/nginx/nginx.conf:49
nginx: configuration file /etc/nginx/nginx.conf test failed
[root@localhost /]# /usr/sbin/nginx -t
nginx: the configuration file /etc/nginx/nginx.conf syntax is ok
nginx: configuration file /etc/nginx/nginx.conf test is successful

--重启nginx服务,
[root@localhost /]# sudo service nginx restart
Redirecting to /bin/systemctl restart nginx.service
[root@localhost /]#

#或者使用reload
[root@localhost /]# /usr/sbin/nginx -t
nginx: the configuration file /etc/nginx/nginx.conf syntax is ok
nginx: configuration file /etc/nginx/nginx.conf test is successful
[root@localhost /]# sudo nginx -s reload
[root@localhost /]#
配置防火墙:
--开放80端口
[root@localhost ~]# firewall-cmd --zone=public --add-port=80/tcp --permanent
--重启防火墙以使配置即时生效
[root@localhost ~]# systemctl restart firewalld
在浏览器输入服务器地址192.168.88.106(这是我的地址)

