环境: Centos 7 mysql 5.7
mysql-5.7.23-1.el6.x86_64.rpm-bundle.tar下载:
链接: https://pan.baidu.com/s/1dGsP-LvIHnuD4FZ2VmsLAw 提取码: qu66
或者连接网络下载:
命令: [root@centos-linux ~]# wget http://dev.mysql.com/get/Downloads/MySQL-5.7/mysql-5.7.16-1.el7.x86_64.rpm-bundle.tar
一、安装前工作
在安装前需要确定现在这个系统有没有 mysql,如果有那么必须卸载(在 centos7 自带的是 mariaDb 数据库,所以第一步是卸载数据库)。
1.卸载已安装的mysql:(没有安装过的,或者已经卸载干净的跳过)
查看 mysql 数据库:
rpm -qa | grep -i mysql
卸载 mysql 数据库:
rpm -e --nodeps mysql-libs-5.1.71-1.el6.x86_64
删除etc目录下的my.cnf文件:
|
|
2.卸载系统自带的Mariadb:
查看mariadb数据库:
-
[root@centos-linux ~]# rpm -qa|grep mariadb
-
mariadb-libs-5.5.44-2.el7.centos.x86_64
-
卸载 mysql 数据库:(注意数据库的版本可能不一样 ,tab键补全)
-
[root@centos-linux ~]# rpm -e mariadb-libs-5.5.44-2.el7.centos.x86_64 --nodeps
-
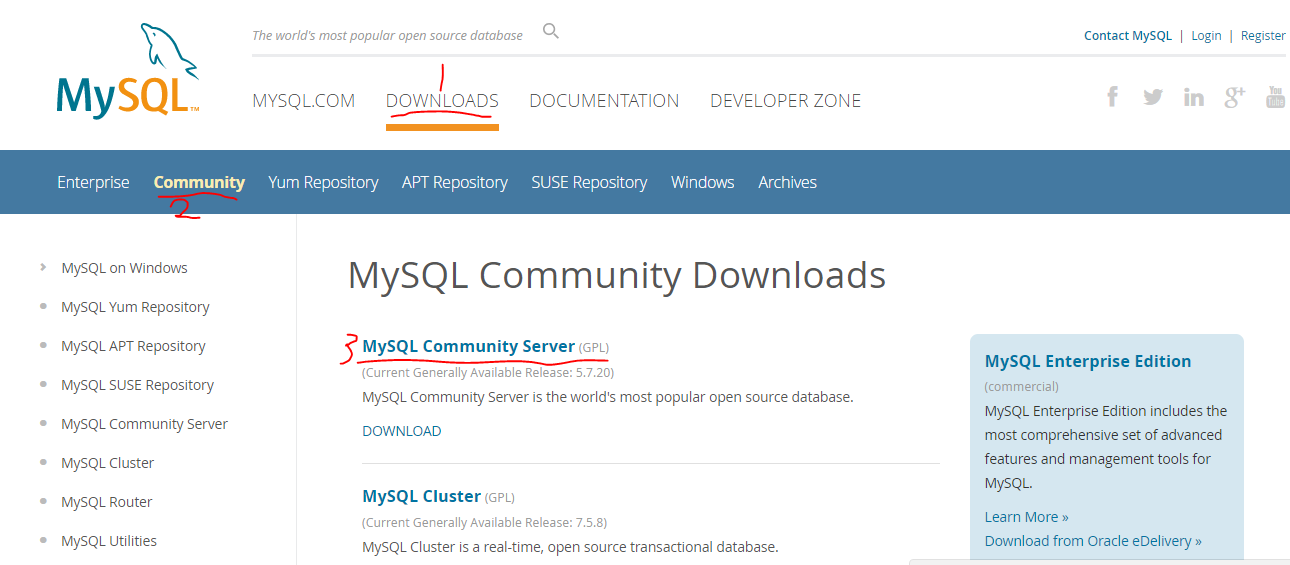
官网下载截图路径:
-
下载离线包:mysql官网(https://www.mysql.com/)→DOWNLOADS、Community、MySQL Community Server
-
-
→下拉选择系统版本。
-

-
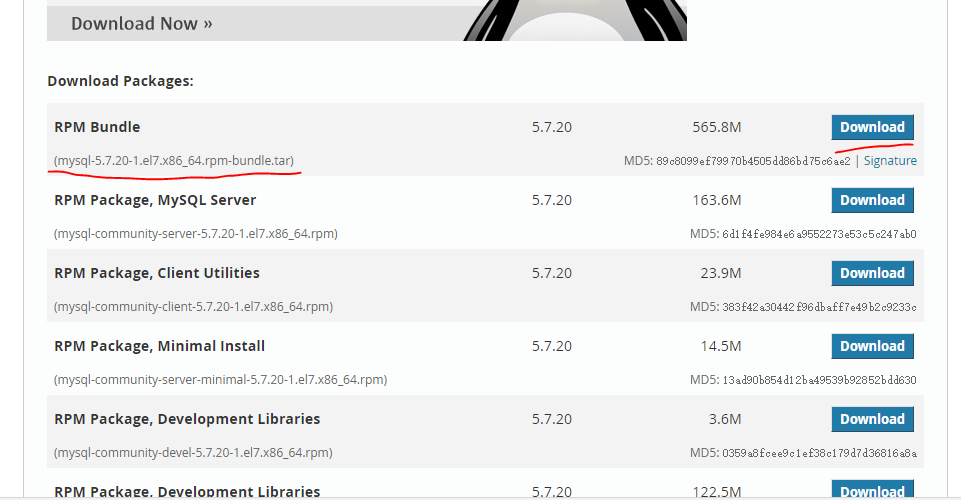
→选择形如mysql-5.7.20-1.el7.x86_64.rpm-bundle.tar的包下载,这个是总包,下面是子包,为避免yum源找不到镜像,推荐下载总包。
-
1、解压 :tar xvf mysql-5.7.23-1.el6.x86_64.rpm-bundle.tar
2、安装(按照依赖顺序执行,一定要看对自己的版本使用tab键补全即可)
rpm -ivh mysql-community-common-5.7.23-1.el6.x86_64.rpm
rpm -ivh mysql-community-libs-5.7.23-1.el6.x86_64.rpm
rpm -ivh mysql-community-devel-5.7.23-1.el6.x86_64.rpm
rpm -ivh mysql-community-client-5.7.23-1.el6.x86_64.rpm
rpm -ivh mysql-community-server-5.7.23-1.el6.x86_64.rpm
3、启动mysql
service mysqld start
4、登录
1)使用my.cnf文件中自动生成一个密码
# cat /var/log/mysqld.log | grep password
2017-05-13T05:39:44.497086Z 1 [Note] A temporary password is generated for root@localhost: pKsO:Jin<4f%
密码:pKsO:Jin<4f%
2)使用root登录
#mysql -u root -p
Enter password:pKsO:Jin<4f%
3)修改密码
mysql>set password for root@localhost = password(‘asd123’);
4)修改安全级别
mysql> set global validate_password_policy=0;//0最低,1中级,2最强验证级别
5)创建普通用户:
create user ‘jirauser’ identified by ‘jiara123a’
用户jirauser,密码jira123a
五、授权远程连接
mysql>GRANT ALL PRIVILEGES ON . TO ‘root’@’%’ IDENTIFIED BY ‘Mysql5718%’ WITH GRANT OPTION;
Query OK, 0 rows affected, 1 warning (0.01 sec)
mysql> FLUSH PRIVILEGES;
Query OK, 0 rows affected (0.01 sec)
这样,我们就可以在其他电脑上的mysql客户端远程连接linux上的mysql数据库了:(例如在win cmd里面)
C:\Program Files (x86)\MySQL\MySQL Server 5.0\bin>mysql -u root -pMysql5718% -h 192.168.231.8 -D roger
Welcome to the MySQL monitor. Commands end with ; or \g.
Your MySQL connection id is 18
Server version: 5.7.18 MySQL Community Server (GPL)
Copyright (c) 2000, 2011, Oracle and/or its affiliates. All rights reserved.
Oracle is a registered trademark of Oracle Corporation and/or its
affiliates. Other names may be trademarks of their respective
owners.
Type ‘help;’ or ‘\h’ for help. Type ‘\c’ to clear the current input statement.
mysql>
(如果连不上,看看是不是防火墙开着的。)
linux mysql密码修改后登录失败的话请看这位仁兄的解决方案:
https://blog.csdn.net/xxmonstor/article/details/80456122
唯一值得区别的就是 centos 7 以后修改密码的语法变成:
update mysql.user set authentication_string=password('root') where user='root'; 后回车,不要忘了最后的分号。
其他是一样的。