上一篇教程我们使用了application.properties和application.yml进行项目的配置,这篇博客将告诉你更多Spring Boot项目配置的方式
0.项目结构及代码

配置文件application.yml的内容如下:
student:
  name: zg
  is-female: false
  birth: 2019/04/12
  teachers: [zhang,wang]
  grade: {English: 87, Math: 100}
  pets:
    spices: Dog
    age: 1
Student.java代码如下,内容仅含成员变量,请自动生成toString()方法、get()方法和set()方法。
@Component
@ConfigurationProperties(prefix="student")
public class Student {
    private String name;
    private Boolean isFemale;

    @Value("2014/3/12")
    private Date birth;

    private List<Object> teachers;
    private Map<String, Object> grade;

    private Pet pets;
}
Pet.java代码如下,内容仅含成员变量,请自动生成toString()方法、get()方法和set()方法。
public class Pet {
    private String spices;
    private Integer age;
}
主配置类Application.java是自动生成的代码如下:
@SpringBootApplication
public class Application {

    public static void main(String[] args) {
        SpringApplication.run(Application.class, args);
    }

}
测试类ApplicationTests.java代码如下.
@RunWith(SpringRunner.class)
@SpringBootTest
public class ApplicationTests {
    @Autowired
    Student student;

    @Test
    public void contextLoads() {
        System.out.println(student);
    }

}
1.使用@Value进行配置
1.1 简介
1、@Value用于将外部的值动态地注入Bean中,相当于使用.xml中的如下的代码。通常用于对某个值进行单个的注入,毕竟如果对整个Bean内的值进行注入我们有更好用的@ConfigurtionProperties可以使用。
<bean class="类名">
    <property name="需要注入值的变量名" value="注入的值"></properties>
</bean>
2、我们可以点进去看一下@Value的源码,如下,我们发现它其中只包括一个String类型的变量,也就是说我们@Value注解后面只能接一个String类型的变量,无论什么内容都必须包括在双引号之下。
@Target({ElementType.FIELD, ElementType.METHOD, ElementType.PARAMETER, ElementType.ANNOTATION_TYPE})
@Retention(RetentionPolicy.RUNTIME)
@Documented
public @interface Value {
    String value();
}
1.2 可注入类型
1.2.1 注入类型和注入方法
1、一共有7种可注入类型。字面量、数组(List)、键值对(Map)、其他bean属性、URL资源、文件资源、系统属性。可通过字符串或SpEL(Spring表达式语言,如计算表达式),也可以与配置文件一起配合使用。
(1)字符串:@Value("字符串内容")。适用于一般的自变量、数组、文件资源和URL资源,Spring Boot会根据配置的变量类型对字符串内容进行转换。
(2)SpEL:@Value("#{SpEL内容}")。通常SpEL内的字符串使用单引号''括起来。适用于需要计算的自变量、特殊数组、键值对、其他bean属性等。
(3)如果需要引入配置文件:${配置文件中的变量:默认值}.可以与字符串和SpEL进行组合,可设置默认值。如:
    @Value("${web.blog:false}")
    private Boolean blog;
在blog变量做值的注入,从配置文件中找是否有web.blog变量,如果没有,为其赋默认值false。
2、 接下来我将给出一些实例,方便进行理解。
首先我们构建一个新的bean,内容如下,请自动生成toString()方法、get()方法和set()方法。注意Resource的库文件的选择,有很多Resource,选择springframework的那个。
import org.springframework.core.io.Resource;
import java.util.Date;
import java.util.List;
import java.util.Map;

@Component
public class Website {
    //点击次数
    private Integer clickNum;
    //网站名称
    private String webName;
    //是不是博客
    private Boolean blog;
    //构建时间
    private Date buildDate;
    //构建的人
    private String buildPerson;
    //关键字
    private List<String> key;
    //其他属性
    private Map<String,String> otherProperties;
    //网址
    private Resource address;
    //介绍
    private Resource intro;
}
然后我们修改一下ApplicationTests的内容,方便输出结果进行查看,执行的时候右键->Run就可以了。
public class ApplicationTests {
    @Autowired
    Website web;

    @Test
    public void contextLoads() {
        System.out.println(web);
    }

}
1.2.2 字面量:包括布尔、数值型、字符串等。
1、比较简单的使用@Value("字符串")即可。
    @Value("true")
    private Boolean blog;
2、可以通过SpEL注入,我们这里以整型的变量clickNum为例。代码和二者执行后的结果如下。
    @Value("#{12*15}")
    private Integer clickNum;
3、 可以通过@Value结合配置文件进行注入。配置文件可以使用".properties"和".yml",配置文件内容和注入方式如下所示。这里展示了使用配置文件的方式,所以之后如果非必要,我就不再展示这一部分的配置,并非无法使用。
#如果使用.properties文件配置
date=2011/6/11
#如果使用.yml进行配置
date: 2011/6/11 @Value("${date}")
private Date buildDate;![]()
![]()
![]()
1.2.3 数组(List)
1、字符串:与字面量类似,字符串之间使用英文的“,”隔开。
    @Value("Spring Boot, IDEA")
    private List<String> key;
运行结果:
![]()
2、SpEL:比如我们需要字符串中有逗号的时候,使用SpEL就会更合适一些。代码如下:
    @Value("#{'Spring Boot;IDEA'.split(';')}")
    private List<String> key;
运行结果如下,与我们前一种方式注入的结果一样。
![]()
1.2.4 键值对(Map)
对于键值对我们不能直接使用字符串,可以使用SpEL,也可以配合配置文件来进行使用。
1、SpEL,注意第二层的括号一定要有:
    @Value("#{{color:'red', language:'Chinese'}}")
    private Map<String,String> otherProperties;
2、如果结合配置文件使用,我们这里使用.properties格式和.yml格式的配置的方式有些不同,先来看.properties配置文件代码:
valuesMap={color:'red', language:'Chinese'}我们在上一篇博客讲到过.yml在进行单行键值对赋值的时候使用{},所以需要加上双引号"",因为单引号会将字符串内容转义,所以我们这里使用双引号。.yml配置文件代码:
valuesMap: "{color:'red', language:'Chinese'}"进行注入:
    @Value("#{${valuesMap}}")
    private Map<String,String> otherProperties;
1.2.5 其他bean属性
只能使用SpEL。这里我们将Student类型的student的name的值注入到otherProperties中。
首先我们通过.properties文件为student的name注入值:
student.name=你猜呢然后在Student文件中使用注解告诉Spring Boot为其自动注入配置文件中student开头的值,与上一篇博客一样。

然后我们在Website.java文件中进行值注入。
    @Value("#{student.name}")
    private String buildPerson;
我们看一下输出的结果:
![]()
1.2.6 URL资源
与字面量中的字符串类型变量的注入差不多,支持多种形式,我们只示例字符串的形式:
    @Value("http://www.baidu.com")
private Resource address;![]()
1.2.7 文件资源
与字面量中的字符串类型变量的注入差不多,支持多种形式,我们只示例一种。注意这里我们一定要在文件路径前面加上classpath,并且将路径从文件夹处复制过来的时候,最好更改格式,把里面的“\\”和“\”改为“/”。当然你也可以不改,Spring Boot也能够识别:
    @Value("classpath:D:/code/application/a.txt")
private Resource intro;![]()
1.2.8 系统属性
这里我们只能使用SpEL的形式进行注入,这里演示的例子是把系统参数的值注入到webName中。
    @Value("#{systemProperties['sun.desktop']}")
private String webName;![]()
二、@Value和@ConfigurationProperties比较
2.1 作用范围
我们分别打开两个的源码看一下,都很简单。主要看@Target后面的参数内容,可以发现二者的作用范围不同。@Value的作用范围,但通过上面的例子可以看出,@Value主要作用到变量上,而@ConfigurationProperties,主要用于方法。具体下面的的ElementType是什么意思,请自行百度,或者看https://blog.csdn.net/zhanggonglalala/article/details/89137065,篇幅有点大,不赘述。
@Target({ElementType.FIELD, ElementType.METHOD, ElementType.PARAMETER, ElementType.ANNOTATION_TYPE})
@Retention(RetentionPolicy.RUNTIME)
@Documented
public @interface Value {
    String value();
}
@Target({ElementType.TYPE, ElementType.METHOD})
@Retention(RetentionPolicy.RUNTIME)
@Documented
public @interface ConfigurationProperties {
@AliasFor("prefix")
String value() default "";
@AliasFor("value")
String prefix() default "";
boolean ignoreInvalidFields() default false;
boolean ignoreUnknownFields() default true;
}
2.2 获取值的方式
我们先看一个表格然后对其中内容详细描述
| @ConfigurationProperties | @Value | |
| 功能 | 对配置文件中的值进行批量注入 | 一个个根据变量的需求进行指定 |
| 松散绑定 | 支持 | 不支持 |
| SpEL | 不支持 | 支持 |
| JSR303数据校验 | 支持 | 不支持 |
| 复杂类型封装 | 支持 | 不支持 |
1、@ConfigurationProperties的属性名匹配规则(Relaxed binding):Spring Boot可以对下面四种类型的命名进行自动匹配,也就是说配置文件和类文件中的名称不需要完全相同,使用下面的任意两种,系统就会将二者匹配上
- 标准方式:变量之间通过下一个单词的首字母大写的方式隔开,eg:student.isFemale
- 使用“-”进行单词之间的连接:eg:student.is-female
- 使用“_”进行单词之间的连接:eg:student.is_female
- 全部大写,使用“_”连接:通常对系统属性变量推荐这种写法。eg:STUDENT_IS_FEMALE
2、@ConfigurationProperties不支持SpEL,所以对获取系统属性,或者进行比较复杂的操作(比如按照某个特殊字符对字符串进行分割)的时候会无法操作。
3、JSR303是一种校验规范,通过在类前加注解@Validated来实现。更加完整的关于JSR303的介绍在这里。我们可以使用javax.validation.constraints包下的所有注解为变量进行限制,展示一下我当前的这个包下的22个注解并进行解释:@AssertFalse、@AssertTrue、@DecimalMax、@DecimalMin、@Digits、@Email、@Future、@FutureOrPresent、@Max、@Min、@Negative、@NegativeOrZero、@NotBlank、@NotEmpty、@NotNull、@Null、@Past、@PastOrPresent、@Pattern、@Positive、@PositiveOrZero、@Size。

我们这里举一个例子,加入我们在配置文件中为Website进行配置。为了简单我们这里仅配置clickNum一个参数,.properties配置文件代码如下:
website.clickNum=15Website.java的部分代码如下,其他代码与教程前面相同。我们要求clickNum不超过10,但是又在配置文件中为其赋值15.
@Component
@ConfigurationProperties(prefix = "website")
@Validated
public class Website {
    @Max(value = 10)
    private Integer clickNum;
执行后报错,错误原因如图,出错位置和原因通过非常简明的方式在日志中说明了。

4、对于复杂类型封装我们使用@ConfigurationProperties,比如在Student中我们有一个Pet类型的变量,这个时候我们无法通过@Value对Pet类型的变量进行直接赋值。
2.3 使用场景
@Value通常用于对某个位置获取配置文件中的的某一个变量的时候,而@ConfigurationProperties用于javaBean和配置文件进行整体映射。上述的使用场景只是说通常情况,具体的使用,还是要根据@Value和@ConfigurationProperties各自的特点来进行判断。
三、@PropertySource、@ImportResource、@bean
大多数情况,项目需要配置的内容会比较复杂,这时候需要使用多个文件进行配置,这时需要注解@PropertySource、@ImportResource和@bean。我们先来看一下这三个注解在使用上有什么不同,然后再来详细说明每一个。
- @PropertySource:用于注解类,告诉当前类使用什么配置文件,配置文件必须是.property或者.xml类型。
- @ImportResource:通过配置文件注入bean,用于注解主配置类,导入一个或多个定义bean的配置文件,配置文件必须是.xml类型。
- @bean:直接通过配置类注入bean。用于注解方法,这个方法只会被Spring调一次用,并且会生成一个Bean对象,然后将这个对象放到Spring的ioc中进行管理。是Spring Boot推荐的创建Bean的方法。
2.1 @PropertySource
2.1.1 源码及参数解释
由Spring框架提供。源码如下,官方解释在这里,比较长,我们这里就一些主要内容进行简单地翻译和解释。
@Target({ElementType.TYPE})
@Retention(RetentionPolicy.RUNTIME)
@Documented
@Repeatable(PropertySources.class)
public @interface PropertySource {
    String name() default "";

    String[] value();

    boolean ignoreResourceNotFound() default false;

    String encoding() default "";

    Class<? extends PropertySourceFactory> factory() default PropertySourceFactory.class;
}
接下来我们来详细说一下四个参数都是什么用处。
1、value={"classpath:相对路径","file:绝对路径"}。配置文件的路径及名称,String数组类型,无默认值,必须配置。也就是说,可以有多个配置文件。并且必须以“classpath”或者“file”开头。可以添加.property或者.xml类型的配置文件,如果添加其他类型的文件,不会报错,但不会读取里面的内容,比如.yml。YAML文件如何配置,已经在上一篇博客讲到了
当我们仅需要添加一个配置文件,并且其他参数都是默认值的时候可以直接写@PropertySource("classpath:相对路径")或者@PropertySource("file:绝对路径")。但还是建议各位同学把内容写全,方便未来进行修改。
比如,我们在resources文件下有一个新建的student.properties配置文件,我们可以使用@PropertySource("classpath:student.properties")或者@PropertySource("file:项目路径/src/main/resources/student.properties")。
因为是以classpath/file开头的,所以最终Spring知道使用的是它封装类中Resource类的子类ClasspathResource类还是URLResource类,通过其中的getFileName()方法来获得。
2、name="配置文件名称"。指定属性源的名称,默认为空,如果不指定,就会根据value内的每一个字符串来生成。官方文档中说是调用org.springframework.core.env包中的PropertySource类的getName()方法和org.springframework.core.env包中的Resource类的getFilename()方法。
但是这两个方法基本上没有什么内容。实际上它是由Resource类的子类ClasspathResource类或者URLResource类方法中继承的getFilename()方法来获得,有兴趣的同学可以在org.springframework.core.io包下看到这整个的底层实现。
3、ignoreResourceNotFound:布尔类型,默认为false。如果找不到value路径下的文件时,ignoreResourceNotFound为false时会报错,否则忽略
4、encoding:编码方式。
2.1.2 项目实践
1、编写配置文件,这里我们新建两个配置文件:student.properties和student.xml,直接在resources右键新建file就可以,注意不要只写名字,还要带上后缀。
student.birth = 2019/04/12
student.isfemale = true
student.grade = {Art: 87, Math: 100}
<?xml version="1.0" encoding="UTF-8"?>
<!DOCTYPE properties SYSTEM "http://java.sun.com/dtd/properties.dtd">
<properties>
<entry key="student.name">王二小</entry>
<entry key="student.birth">2019/04/13</entry>
<entry key="student.isFemale">false</entry>
</properties>同时,我们在默认的配置文件application.yml中进行配置,如下:
student:
  birth: 2019/04/11
  teachers: [zhang,wang]
  grade: {English: 87, Math: 100}
  pets:
    spices: Dog
    age: 1
2、编写Student.java文件,Student.java成员和方法不变,确认类前有下面的注解内容,注意我的file后面写的时绝对路径,你的内容要根据你项目的具体情况而定。
@ConfigurationProperties(prefix="student")
@PropertySource(value = {"classpath:student.properties","file:D:\\code\\application\\src\\main\\resources\\student.xml"})
3、编写测试类,并进行测试:
@RunWith(SpringRunner.class)
@SpringBootTest
public class ApplicationTests {
    @Autowired
    Student student;

    @Test
    public void contextLoads() {
        System.out.println(student);
    }
}
4、分析结果输出结果是:
Student{name='王二小', isfemale=false, birth=Thu Apr 11 00:00:00 CST 2019, teachers=[zhang, wang], grade={English=87, Math=100}, pets=Pet{spices='Dog', age=1}}我们可以看到当这三类配置文件的属性发出冲突的时候优先级顺序是:其他.yml文件>application>配置的.xml>配置的properties。但是List类型的变量冲突,且冲突的文件是其他.yml文件和默认application文件时,会综合二者的结果。
2.2 @ImportResource
2.2.1 源码及参数解释
仍然是有Spring框架提供,用来注解主配置文件。代码如下:
@Retention(RetentionPolicy.RUNTIME)
@Target({ElementType.TYPE})
@Documented
public @interface ImportResource {
    @AliasFor("locations")
    String[] value() default {};

    @AliasFor("value")
    String[] locations() default {};

    Class<? extends BeanDefinitionReader> reader() default BeanDefinitionReader.class;
}
其实仅有一个字符串数组的变量locations(),别名为value(),内容填充的规则与@PropertySource相同,只不过我们这里只能添加.xml的配置文件。
2.2.2 项目实践
1、在resources目录下创建一个Spring配置文件,名字为beans.xml

为其填充内容使其如下。
<?xml version="1.0" encoding="UTF-8"?>
<beans xmlns="http://www.springframework.org/schema/beans"
xmlns:xsi="http://www.w3.org/2001/XMLSchema-instance" xmlns:util="http://www.springframework.org/schema/util"
xsi:schemaLocation="http://www.springframework.org/schema/beans http://www.springframework.org/schema/beans/spring-beans.xsd http://www.springframework.org/schema/util http://www.springframework.org/schema/util/spring-util.xsd">
<bean id="pet" class="com.springboot.application.bean.Pet"></bean>
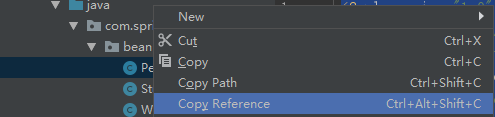
</beans>注意class那里填充的内容根据你定义的项目结构而定的Reference,比如我们如果需要Pet的Reference,我们就可以在文件名称那里右键Copy,如下
2、在主配置类上面填充注释@ImportResource(locations = "classpath:beans.xml"),如下
@ImportResource(locations = "classpath:beans.xml")
@SpringBootApplication
public class Application {

    public static void main(String[] args) {
        SpringApplication.run(Application.class, args);
    }

}
3、在测试类中填充代码并进行测试:
@RunWith(SpringRunner.class)
@SpringBootTest
public class ApplicationTests {
    @Autowired
    //应用容器
    ApplicationContext ioc;

    @Test
    public void testApplicationService(){
        //容器中是否包括名字为pet的bean
        Boolean res = ioc.containsBean("pet");
        System.out.println(res);
    }
}
输出结果为“true”
2.3 @Bean
2.2.1 源码及参数解释
Spring Boot推荐使用配置类代替配置文件来添加bean,除了@Bean还需要@Configuration。@Configuration用来注解类,表明当前类为一个配置类;@Bean用于注解方法,该方法返回一个bean,且如果@Bean未配置任何参数,该组件在容器中的id是方法名。我们来看一下@Bean的源码
@Target({ElementType.METHOD, ElementType.ANNOTATION_TYPE})
@Retention(RetentionPolicy.RUNTIME)
@Documented
public @interface Bean {
    @AliasFor("name")
    String[] value() default {};

    @AliasFor("value")
    String[] name() default {};

    Autowire autowire() default Autowire.NO;

    String initMethod() default "";

    String destroyMethod() default "(inferred)";
}
接下来我们来详细说一下几个参数都是什么用处。
1、value与name互为别名。配置bean的id,String数组类型,默认值为空。也就是说,可以有多个名字。注意,一个@Bean注解只能生成一个组件,所以如果有多个名字也是一个组件的多个别名,而第一个名字作为这个bean的主名,在日志信息中主要使用这个名字。并且如果设置了这个参数,那么它的id将不会是方法名。
2、autowire这个参数当前不推荐使用,我们先不讲。
3、initMethod=“方法名”:默认值为“”,@Bean可以指定组件的初始方法,这个方法必须为无参函数。
4、destroyMethod=“方法名”:默认值为“”,@Bean可以指定组件的销毁方法,这个方法必须为无参函数。
2.2.2 项目实践
1、对Student的内容进行修改,添加初始化和销毁方法,仍然需要你自己使用IDEA自动生成toString、get和set方法
public class Student {
    private String name;

    private Boolean isFemale;

    private Date birth;

    private List<Object> teachers;

    private Map<String, Integer> grade;

    private Pet pets;

    public void initStudent(){
        System.out.println("Student init method called");
    }

    public void destroyStudent(){
        System.out.println("Student destroy method called");
    }

    //使用IDEA自动生成toString、get和set方法
}
2、在主目录下增加文件夹config用于存放配置类,然后在这个文件夹下创建MyAppConfig方法,用于生成bean。
@Configuration
public class MyAppConfig {
    @Bean(name={"cuteStu1","stu","aStu"},initMethod = "initStudent",destroyMethod = "destroyStudent")
    public Student cuteStu(){
        return new Student();
    }
}
3、编写测试类用于测试,我们看一下使用不同别名输出的bean的内容是否相同。
@RunWith(SpringRunner.class)
@SpringBootTest
public class ApplicationTests {
    @Autowired
    ApplicationContext ioc;

    @Test
    public void testApplicationService(){
        //Boolean res = ;
        Object stu1=ioc.getBean("aStu");
        Object stu2=ioc.getBean("cuteStu1");

        System.out.println(stu1);
        System.out.println(stu2);
    }
}
4、输出结果:结果如下,我们对结果分析一下。可以看到使用不同别名输出的内容相同,并且在构建bean之前调用了我们指定的构建方法,在项目准备结束之前调用了指定的销毁方法。
