solr介绍
Solr是一个高性能,采用Java5开发,基于Lucene的全文搜索服务器。同时对其进行了扩展,提供了比Lucene更为丰富的查询语言,同时实现了可配置、可扩展并对查询性能进行了优化,并且提供了一个完善的功能管理界面,是一款非常优秀的全文搜索引擎。
solr安装说明
1.拷贝dist目录中的solr-4.10.3.war包到tomcat的webapps目录
2.拷贝example/lib/ext的所有jar包到tomcat中的solr的\WEB-INF\lib目录下
3.拷贝example/solr目录下的所有文件到本地硬盘改名为solrhome
4.修改web.xml文件,将evn-entry注释放开,改路径为e:\solrhome
windows测试
http://地址:端口号/solr/#/collection1/query
linux测试(本次没有安装在linux中)
http://地址:端口号/solr/#/
中文ik分词器配置
1.将jar包拷贝到\WEB-INF\lib目录下
2.\WEB-INF创建classes目录,并拷贝mydict.dic、IKAnalyzer.cfg.xml、ext_stopword.dic
3.在solrhome\collection1\conf修改schema.xml加入配置
<fieldType name="text_ik" class="solr.TextField">
     <analyzer class="org.wltea.analyzer.lucene.IKAnalyzer"/>
</fieldType>
4.测试http://localhost:9090/solr/#/collection1/analysis将FieldType改成text_ik查看效果
solr域的说明(三种域 )
在本地solrhome目录的collection1的conf下的schema.xml中增加
普通域
	//name:字段名称  type:字段类型 stored:是否存储分词前内容(复制域选择false) required:是否必填  indexed:索引(是否进行查询)
	<field name="item_goodsid" type="long" indexed="true" stored="true"/>
	<field name="item_title" type="text_ik" indexed="true" stored="true"/>
	<field name="item_price" type="double" indexed="true" stored="true"/>
	<field name="item_image" type="string" indexed="false" stored="true" />
	<field name="item_category" type="string" indexed="true" stored="true" />
	<field name="item_seller" type="text_ik" indexed="true" stored="true" />
	<field name="item_brand" type="string" indexed="true" stored="true" />
复制域 (不占用存储空间,只是逻辑上等于其他几个域的总和)
	//multiValued 是否有多值  stored="false" 不需要存储
<field name="item_keywords" type="text_ik" indexed="true" stored="false" multiValued="true"/>
<copyField source="item_title" dest="item_keywords"/>
<copyField source="item_category" dest="item_keywords"/>
<copyField source="item_seller" dest="item_keywords"/>
<copyField source="item_brand" dest="item_keywords"/>
动态域
//因为数据中的item_spec_后面的内容不固定所以用*号代替
<dynamicField name="item_spec_*" type="string" indexed="true" stored="true" />
注意:配置好各种域信息,需要重新启动tomcat
solr的demo演示
1、新建一个模块,不需要使用模板

2、在pom文件中引入依赖
<?xml version="1.0" encoding="UTF-8"?>
<project xmlns="http://maven.apache.org/POM/4.0.0"
         xmlns:xsi="http://www.w3.org/2001/XMLSchema-instance"
         xsi:schemaLocation="http://maven.apache.org/POM/4.0.0 http://maven.apache.org/xsd/maven-4.0.0.xsd">
    <modelVersion>4.0.0</modelVersion>

    <groupId>cn.itcast</groupId>
    <artifactId>SolrDemo</artifactId>
    <version>1.0-SNAPSHOT</version>

    <dependencies>
        <dependency>
            <groupId>org.springframework.data</groupId>
            <artifactId>spring-data-solr</artifactId>
            <version>1.5.5.RELEASE</version>
        </dependency>
        <dependency>
            <groupId>org.springframework</groupId>
            <artifactId>spring-test</artifactId>
            <version>4.2.4.RELEASE</version>
        </dependency>
        <dependency>
            <groupId>junit</groupId>
            <artifactId>junit</artifactId>
            <version>4.9</version>
        </dependency>
    </dependencies>
</project>
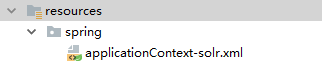
3、在resources中新建spring文件夹和applicationContext-solr.xml配置文件
4、applicationContext-solr.xml配置文件中配置如下信息:
<?xml version="1.0" encoding="UTF-8"?>
<beans xmlns="http://www.springframework.org/schema/beans"
	xmlns:xsi="http://www.w3.org/2001/XMLSchema-instance" xmlns:p="http://www.springframework.org/schema/p"
	xmlns:context="http://www.springframework.org/schema/context"
	xmlns:solr="http://www.springframework.org/schema/data/solr"
	xsi:schemaLocation="http://www.springframework.org/schema/data/solr
  		http://www.springframework.org/schema/data/solr/spring-solr-1.0.xsd
		http://www.springframework.org/schema/beans
		http://www.springframework.org/schema/beans/spring-beans.xsd
		http://www.springframework.org/schema/context
		http://www.springframework.org/schema/context/spring-context.xsd">

	<!-- solr服务器地址 -->
	<solr:solr-server id="solrServer" url="http://127.0.0.1:8080/solr" />

	<!-- solr模板,使用solr模板可对索引库进行CRUD的操作 -->
	<bean id="solrTemplate" class="org.springframework.data.solr.core.SolrTemplate">
		<constructor-arg ref="solrServer" />
	</bean>
</beans>
5、添加一个pojo类,注意类中的对应参数需要手动添加映射注解

import java.io.Serializable;
import java.math.BigDecimal;
import java.util.Date;
import java.util.Map;

import org.apache.solr.client.solrj.beans.Field;
import org.springframework.data.solr.core.mapping.Dynamic;

public class TbItem implements Serializable{
	@Field
    private Long id;

	@Field("item_title")
    private String title;

    private String sellPoint;

    @Field("item_price")
    private BigDecimal price;

    private Integer stockCount;

    private Integer num;

    private String barcode;

    @Field("item_image")
    private String image;

    private Long categoryid;

    private String status;

    private Date createTime;

    private Date updateTime;

    private String itemSn;

    private BigDecimal costPirce;

    private BigDecimal marketPrice;

    private String isDefault;

    @Field("item_goodsid")
    private Long goodsId;

    private String sellerId;

    private String cartThumbnail;

    @Field("item_category")
    private String category;

    @Field("item_brand")
    private String brand;

    private String spec;

    @Dynamic
    @Field("item_spec_*")
    private Map<String,String> specMap;

    public Map<String, String> getSpecMap() {
		return specMap;
	}

	public void setSpecMap(Map<String, String> specMap) {
		this.specMap = specMap;
	}

	@Field("item_seller")
    private String seller;

    public Long getId() {
        return id;
    }

    public void setId(Long id) {
        this.id = id;
    }

    public String getTitle() {
        return title;
    }

    public void setTitle(String title) {
        this.title = title == null ? null : title.trim();
    }

    public String getSellPoint() {
        return sellPoint;
    }

    public void setSellPoint(String sellPoint) {
        this.sellPoint = sellPoint == null ? null : sellPoint.trim();
    }

    public BigDecimal getPrice() {
        return price;
    }

    public void setPrice(BigDecimal price) {
        this.price = price;
    }

    public Integer getStockCount() {
        return stockCount;
    }

    public void setStockCount(Integer stockCount) {
        this.stockCount = stockCount;
    }

    public Integer getNum() {
        return num;
    }

    public void setNum(Integer num) {
        this.num = num;
    }

    public String getBarcode() {
        return barcode;
    }

    public void setBarcode(String barcode) {
        this.barcode = barcode == null ? null : barcode.trim();
    }

    public String getImage() {
        return image;
    }

    public void setImage(String image) {
        this.image = image == null ? null : image.trim();
    }

    public Long getCategoryid() {
        return categoryid;
    }

    public void setCategoryid(Long categoryid) {
        this.categoryid = categoryid;
    }

    public String getStatus() {
        return status;
    }

    public void setStatus(String status) {
        this.status = status == null ? null : status.trim();
    }

    public Date getCreateTime() {
        return createTime;
    }

    public void setCreateTime(Date createTime) {
        this.createTime = createTime;
    }

    public Date getUpdateTime() {
        return updateTime;
    }

    public void setUpdateTime(Date updateTime) {
        this.updateTime = updateTime;
    }

    public String getItemSn() {
        return itemSn;
    }

    public void setItemSn(String itemSn) {
        this.itemSn = itemSn == null ? null : itemSn.trim();
    }

    public BigDecimal getCostPirce() {
        return costPirce;
    }

    public void setCostPirce(BigDecimal costPirce) {
        this.costPirce = costPirce;
    }

    public BigDecimal getMarketPrice() {
        return marketPrice;
    }

    public void setMarketPrice(BigDecimal marketPrice) {
        this.marketPrice = marketPrice;
    }

    public String getIsDefault() {
        return isDefault;
    }

    public void setIsDefault(String isDefault) {
        this.isDefault = isDefault == null ? null : isDefault.trim();
    }

    public Long getGoodsId() {
        return goodsId;
    }

    public void setGoodsId(Long goodsId) {
        this.goodsId = goodsId;
    }

    public String getSellerId() {
        return sellerId;
    }

    public void setSellerId(String sellerId) {
        this.sellerId = sellerId == null ? null : sellerId.trim();
    }

    public String getCartThumbnail() {
        return cartThumbnail;
    }

    public void setCartThumbnail(String cartThumbnail) {
        this.cartThumbnail = cartThumbnail == null ? null : cartThumbnail.trim();
    }

    public String getCategory() {
        return category;
    }

    public void setCategory(String category) {
        this.category = category == null ? null : category.trim();
    }

    public String getBrand() {
        return brand;
    }

    public void setBrand(String brand) {
        this.brand = brand == null ? null : brand.trim();
    }

    public String getSpec() {
        return spec;
    }

    public void setSpec(String spec) {
        this.spec = spec == null ? null : spec.trim();
    }

    public String getSeller() {
        return seller;
    }

    public void setSeller(String seller) {
        this.seller = seller == null ? null : seller.trim();
    }
}
6、在java文件夹中编写一个测试类
package com.MyTest.test;

import org.junit.Test;
import org.junit.runner.RunWith;
import org.springframework.beans.factory.annotation.Autowired;
import org.springframework.data.solr.core.SolrTemplate;
import org.springframework.test.context.ContextConfiguration;
import org.springframework.test.context.junit4.SpringJUnit4ClassRunner;

@RunWith(SpringJUnit4ClassRunner.class)
@ContextConfiguration("classpath:spring/applicationContext-solr.xml")
public class SolrTest {

    @Autowired
    private SolrTemplate solrTemplate;

    @Test
    public void addTbItem(){
        TbItem item = new TbItem();
        item.setId(1L);
        item.setBrand("测试品牌");
        item.setCategory("测试规格");
        item.setTitle("测试标题");

        solrTemplate.saveBean(item);
        solrTemplate.commit();
    }

    @Test
    public void getTbItem(){
        TbItem tbItem = solrTemplate.getById(1L, TbItem.class);
        System.out.println(tbItem.getTitle());
    }

    @Test
    public void deleTbItem(){
        solrTemplate.deleteById("change.me");
        solrTemplate.commit();
    }
}
solr的批量导入
1、在父工程下搭建一个solrutil模块,搭建流程同上。
注意:在resources中的applicationContext-solr.xml中有一个特殊的设置。
	 不是这个模块必需的设置,而是我们的业务流程造成。

2、在java文件夹中新建一个SolrUtil类进行批量的向solr中设置值
package com.myApplication.solrutil;

import com.myApplication.mapper.TbItemMapper;
import com.myApplication.pojo.TbItem;
import org.springframework.beans.factory.annotation.Autowired;
import org.springframework.context.ApplicationContext;
import org.springframework.context.support.ClassPathXmlApplicationContext;
import org.springframework.data.solr.core.SolrTemplate;
import org.springframework.stereotype.Component;

import java.util.List;

//这里使用Component注解,目的是能够让TbItemMapper成功注入,同时在配置文件中添加扫描这个类的配置项。
@Component
public class SolrUtil {
    @Autowired
    private SolrTemplate solrTemplate;

    @Autowired
    private TbItemMapper itemMapper;

    public void importItemData(){
    	//在example中传入null,表示查找所有的数据。
        List<TbItem> itemList = itemMapper.selectByExample(null);
        //下面这个循环只是为了可以将保存的数据打印出来,看一下。
        for (TbItem item : itemList) {
            System.out.println(item.getId()+" "+item.getTitle()+" "+item.getPrice());
        }
        //保存集合
        solrTemplate.saveBeans(itemList);
        //保存完数据值后需要进行提交
        solrTemplate.commit();
    }

//定义一个main 方法用来加载配置文件并执行上边的批量保存
    public static void main(String[] args) {
    //这里括号里填写的必需是("classpath*:spring/applicationContext*.xml"),一共两个*。表示不只加载本类中的配置信息,将所有的配置信息都加载。目的是可以使TbItemMapper 成功注入。
        ApplicationContext applicationContext = new ClassPathXmlApplicationContext("classpath*:spring/applicationContext*.xml");
        SolrUtil solrUtil = (SolrUtil) applicationContext.getBean("solrUtil");
        solrUtil.importItemData();
    }
}
测试从demo中批量查询
1、使用这个方法,需要将刚才配置的扫描包的配置注掉。

2、定义一个SolrTest方法来测试获取所有的数据
//注意在这里添加spring整合junit的配置,以及加载配置文件
@RunWith(SpringJUnit4ClassRunner.class)
@ContextConfiguration("classpath:spring/applicationContext-solr.xml")
public class SolrTest {

    @Autowired
    private SolrTemplate solrTemplate;

    @Test
    public void findAll(){
    	//这里没有使用高亮查找,使用的是simpleQuery 方法,需要在括号里添加查询条件
        SimpleQuery simpleQuery = new SimpleQuery("*:*");
        //执行查询的语句
        ScoredPage<TbItem> items = solrTemplate.queryForPage(simpleQuery, TbItem.class);
        //从查询出来的item中获取list集合
        List<TbItem> content = items.getContent();
        //遍历打印
        for (TbItem item : content) {
            System.out.println(item.getTitle());
        }
    }

}
前端输入关键字后端返回并显示
一、前端部分
1、在父工程下新建三个子模块
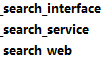
**三个模块的配置文件在下文都有说到。**
2、在web模块中引入静态原型和js文件等。
①在页面引入js文件
略
②页面模型绑定和init方法
页面模型绑定

init默认方法
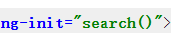
搜索框方法绑定

③在js文件中添加对应的方法
js的controller中:

④、web模块的WEB-INF中的web.xml配置如下 :
<?xml version="1.0" encoding="UTF-8"?>
<web-app xmlns:xsi="http://www.w3.org/2001/XMLSchema-instance"
	xmlns="http://java.sun.com/xml/ns/javaee"
	xsi:schemaLocation="http://java.sun.com/xml/ns/javaee http://java.sun.com/xml/ns/javaee/web-app_2_5.xsd"
	version="2.5">
	<!-- 解决post乱码 -->
	<filter>
		<filter-name>CharacterEncodingFilter</filter-name>
		<filter-class>org.springframework.web.filter.CharacterEncodingFilter</filter-class>
		<init-param>
			<param-name>encoding</param-name>
			<param-value>utf-8</param-value>
		</init-param>
		<init-param>
			<param-name>forceEncoding</param-name>
			<param-value>true</param-value>
		</init-param>
	</filter>
	<filter-mapping>
		<filter-name>CharacterEncodingFilter</filter-name>
		<url-pattern>/*</url-pattern>
	</filter-mapping>

	<servlet>
		<servlet-name>springmvc</servlet-name>
		<servlet-class>org.springframework.web.servlet.DispatcherServlet</servlet-class>
		<!-- 指定加载的配置文件 ,通过参数contextConfigLocation加载 -->
		<init-param>
			<param-name>contextConfigLocation</param-name>
			<param-value>classpath:spring/springmvc.xml</param-value>
		</init-param>
	</servlet>

	<servlet-mapping>
		<servlet-name>springmvc</servlet-name>
		<url-pattern>*.do</url-pattern>
	</servlet-mapping>
	<welcome-file-list>
		<welcome-file>search.html</welcome-file>
	</welcome-file-list>
</web-app>
⑤在resources的配置文件 spring/springmvc.xml中,配置如下:
<?xml version="1.0" encoding="UTF-8"?>
<beans xmlns="http://www.springframework.org/schema/beans"
	xmlns:xsi="http://www.w3.org/2001/XMLSchema-instance" xmlns:p="http://www.springframework.org/schema/p"
	xmlns:context="http://www.springframework.org/schema/context"
	xmlns:dubbo="http://code.alibabatech.com/schema/dubbo" xmlns:mvc="http://www.springframework.org/schema/mvc"
	xsi:schemaLocation="http://www.springframework.org/schema/beans http://www.springframework.org/schema/beans/spring-beans.xsd
        http://www.springframework.org/schema/mvc http://www.springframework.org/schema/mvc/spring-mvc.xsd
        http://code.alibabatech.com/schema/dubbo http://code.alibabatech.com/schema/dubbo/dubbo.xsd
        http://www.springframework.org/schema/context http://www.springframework.org/schema/context/spring-context.xsd">

	<mvc:annotation-driven>
		<mvc:message-converters register-defaults="true">
			<bean
				class="com.alibaba.fastjson.support.spring.FastJsonHttpMessageConverter">
				<property name="supportedMediaTypes" value="application/json" />
				<property name="features">
					<array>
						<value>WriteMapNullValue</value>
						<value>WriteDateUseDateFormat</value>
					</array>
				</property>
			</bean>
		</mvc:message-converters>
	</mvc:annotation-driven>

	<!-- 引用dubbo 服务 -->
	<dubbo:application name="本模块名称" />
	<dubbo:registry address="zookeeper://192.168.25.128:2181" />		//注意地址别写错
	<dubbo:annotation package="本模块的controller层全限定包名" />
</beans>
js的service中:

二、后端部分
1、在web模块中,按照dubbo配置中的controller包名新建controller类
注意:传入参数需要使用RequestBody注解
@RestController
@RequestMapping("/itemSearch")
public class ItemSearchController {

    @Reference
    private ItemSearchService itemSearchService;

    @RequestMapping("/search")
    public Map search(@RequestBody Map searchMap) {
        return itemSearchService.search(searchMap);
    }

}
2、在serviceImpl中需要特殊处理
在search-service模块中需要配置文件:
①webapp中的WEB-INF中web.xml文件全文如下:
<?xml version="1.0" encoding="UTF-8"?>
<web-app xmlns:xsi="http://www.w3.org/2001/XMLSchema-instance"
	xmlns="http://java.sun.com/xml/ns/javaee"
	xsi:schemaLocation="http://java.sun.com/xml/ns/javaee http://java.sun.com/xml/ns/javaee/web-app_2_5.xsd"
	version="2.5">

	<!-- 加载spring容器 -->
	<context-param>
		<param-name>contextConfigLocation</param-name>
		<param-value>classpath*:spring/applicationContext*.xml</param-value>
	</context-param>
	<listener>
		<listener-class>org.springframework.web.context.ContextLoaderListener</listener-class>
	</listener>


</web-app>
②在resources中有两个配置文件
applicationContext-service.xml配置如下:
<?xml version="1.0" encoding="UTF-8"?>
<beans xmlns="http://www.springframework.org/schema/beans"
	xmlns:xsi="http://www.w3.org/2001/XMLSchema-instance" xmlns:p="http://www.springframework.org/schema/p"
	xmlns:context="http://www.springframework.org/schema/context"
	xmlns:dubbo="http://code.alibabatech.com/schema/dubbo" xmlns:mvc="http://www.springframework.org/schema/mvc"
	xsi:schemaLocation="http://www.springframework.org/schema/beans http://www.springframework.org/schema/beans/spring-beans.xsd
        http://www.springframework.org/schema/mvc http://www.springframework.org/schema/mvc/spring-mvc.xsd
        http://code.alibabatech.com/schema/dubbo http://code.alibabatech.com/schema/dubbo/dubbo.xsd
        http://www.springframework.org/schema/context http://www.springframework.org/schema/context/spring-context.xsd">

    <!-- 访问dubbo要占用的当前主机端口,默认端口不写是20880 -->
    <dubbo:protocol name="dubbo" port="20884"></dubbo:protocol>
	<dubbo:application name="myApplication-search-service"/>
    <dubbo:registry address="zookeeper://192.168.25.128:2181"/>
    <dubbo:annotation package="com.myApplication.search.service.impl" />  //注意建立包时,需要和这个路径相同
</beans>
applicationContext-solr.xml的配置如下:
<?xml version="1.0" encoding="UTF-8"?>
<beans xmlns="http://www.springframework.org/schema/beans"
	xmlns:xsi="http://www.w3.org/2001/XMLSchema-instance" xmlns:p="http://www.springframework.org/schema/p"
	xmlns:context="http://www.springframework.org/schema/context"
	xmlns:solr="http://www.springframework.org/schema/data/solr"
	xsi:schemaLocation="http://www.springframework.org/schema/data/solr
  		http://www.springframework.org/schema/data/solr/spring-solr-1.0.xsd
		http://www.springframework.org/schema/beans
		http://www.springframework.org/schema/beans/spring-beans.xsd
		http://www.springframework.org/schema/context
		http://www.springframework.org/schema/context/spring-context.xsd">

	<!-- solr服务器地址 -->
	<solr:solr-server id="solrServer" url="http://127.0.0.1:8080/solr" />


	<!-- solr模板,使用solr模板可对索引库进行CRUD的操作 -->
	<bean id="solrTemplate" class="org.springframework.data.solr.core.SolrTemplate">
		<constructor-arg ref="solrServer" />
	</bean>
</beans>
ItemSearchServiceImpl类全文如下:
@Service
public class ItemSearchServiceImpl implements ItemSearchService {

    @Autowired
    private SolrTemplate solrTemplate;

    @Override
    public Map search(Map searchMap) {
        String keywords = (String) searchMap.get("keywords");
        //System.out.println(keywords);

        //高亮查询
        SimpleHighlightQuery highlightQuery = new SimpleHighlightQuery();//如果使用的是HightLight,不需要提添加查询的条件(如*:*等)
        Criteria criteria = new Criteria("item_keywords");//域的名字
        criteria = criteria.contains(keywords);//查询条件:有关键字的内容
        //封装高亮查询条件
        highlightQuery.addCriteria(criteria);

        //通过查询返回page对象
        HighlightPage<TbItem> page = solrTemplate.queryForHighlightPage(highlightQuery, TbItem.class);

        //从page中获取list集合
        List<TbItem> items = page.getContent();

        //封装返回对象
        Map map = new HashMap();

        map.put("content", items);
        return map;
    }
}
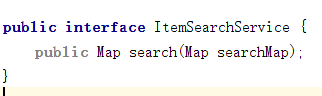
3、在interface中没有配置文件需要配置,只需要写对应的接口即可
在这里写成map接口,方便下一步项目功能实现。