SpringBoot
文章目录
九、扩展默认的SprinMVC功能
1.说明
以前在SpringMVC中通过如下代码实现视图跳转和拦截器
<mvc:view-controller path="/showLogin" view-name="login"/>
<mvc:interceptors>
	<mvc:interceptor>
		<mvc:mapping path="/hello"/>
		<bean class="cn.cz.interceptor.HelloInterceptor"/>
	</mvc:interceptor>
</mvc:intercep
而SpringBoot自动配置默认并没有提供以上功能配置,需要自己扩展,使用WebMvcConfigure接口
2.操作
-
定义一个配置类,实现WebMvcConfigure接口
-
根据需要实现相应的方法
代码:
CustomMvcConfig.java
package cn.cz.config;

import cn.cz.interceptor.MyInterceptor;
import org.springframework.context.annotation.Configuration;
import org.springframework.web.servlet.config.annotation.InterceptorRegistry;
import org.springframework.web.servlet.config.annotation.ViewControllerRegistry;
import org.springframework.web.servlet.config.annotation.WebMvcConfigurer;

/**
 * 扩展默认的SpringMVC功能
 *
 * @author czzhao2
 * @created 2019年02月16日 16:05:30
 * @lastModified
 * @history
 * 要求:
 * 1.使用Configuration标注为配置类
 * 2.实现WebMvcConfigurer接口
 * 3.根据需要实现相应的方法
 * 注:这个接口中的方法都添加了jdk8中的default方法修饰,不强制实现所有的方法
 * 在SpringBoot1.0中是继承WebMvcConfigurerAdapter类,在SpringBoot2.0中已过时
 */
@Configuration
public class CustomMvcConfig implements WebMvcConfigurer{
    //添加ViewController
    @Override
    public void addViewControllers(ViewControllerRegistry registry) {
        //访问showLogin时跳转到login视图
        registry.addViewController("/showLogin").setViewName("login");
    }

    //添加Interceptors
    @Override
    public void addInterceptors(InterceptorRegistry registry) {
        registry.addInterceptor(new MyInterceptor()).addPathPatterns("/**").excludePathPatterns("/showLogin");
    }
}
MyInterceptor.java
package cn.cz.interceptor;

import org.springframework.web.servlet.HandlerInterceptor;
import org.springframework.web.servlet.ModelAndView;

import javax.servlet.http.HttpServletRequest;
import javax.servlet.http.HttpServletResponse;

/**
 * 拦截器
 *
 * @author czzhao2
 * @created 2019年02月16日 16:15:02
 * @lastModified
 * @history
 */
public class MyInterceptor implements HandlerInterceptor{
    @Override
    public boolean preHandle(HttpServletRequest request, HttpServletResponse response, Object handler) throws
            Exception {
        System.out.println("MyInterceptor.preHandle");
        return true;
    }

    @Override
    public void postHandle(HttpServletRequest request, HttpServletResponse response, Object handler, ModelAndView
            modelAndView) throws Exception {
        System.out.println("MyInterceptor.postHandle");
    }

    @Override
    public void afterCompletion(HttpServletRequest request, HttpServletResponse response, Object handler, Exception ex) throws Exception {

    }
}
十、全局异常处理
1.简介
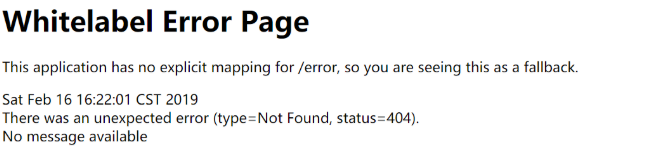
当程序出现异常时进行全局处理,SpringBoot默认的异常提示: Whitelabel Error Pag
两种方式:
- 定义错误码页面
- 定义异常通知
2.定义错误码页面
创建 错误状态码.html 页面,放在templates/error目录中,当发生错误时会自动到该目录下查找对应的错误页面。
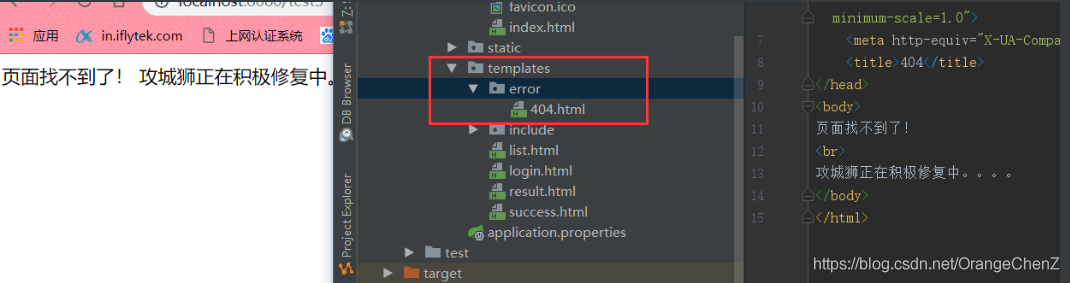
可以创建如 4xx.html 或 5xx.html 页面,用来通配所有该类型的错误(会先进行精确匹配)
测试代码:
package cn.cz.controller;
import org.springframework.stereotype.Controller;
import org.springframework.web.bind.annotation.RequestMapping;
/**
* 功能
*
* @author czzhao2
* @created 2019年02月16日 16:29:05
* @lastModified
* @history
*/
@Controller
@RequestMapping("exception")
public class ExceptionController {
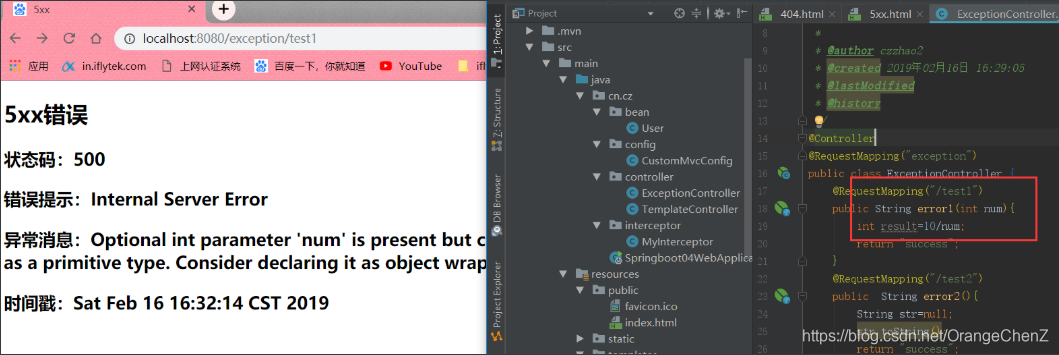
@RequestMapping("/test1")
public String error1(int num){
int result=10/num;
return "success";
}
@RequestMapping("/test2")
public String error2(){
String str=null;
str.toString();
return "success";
}
}
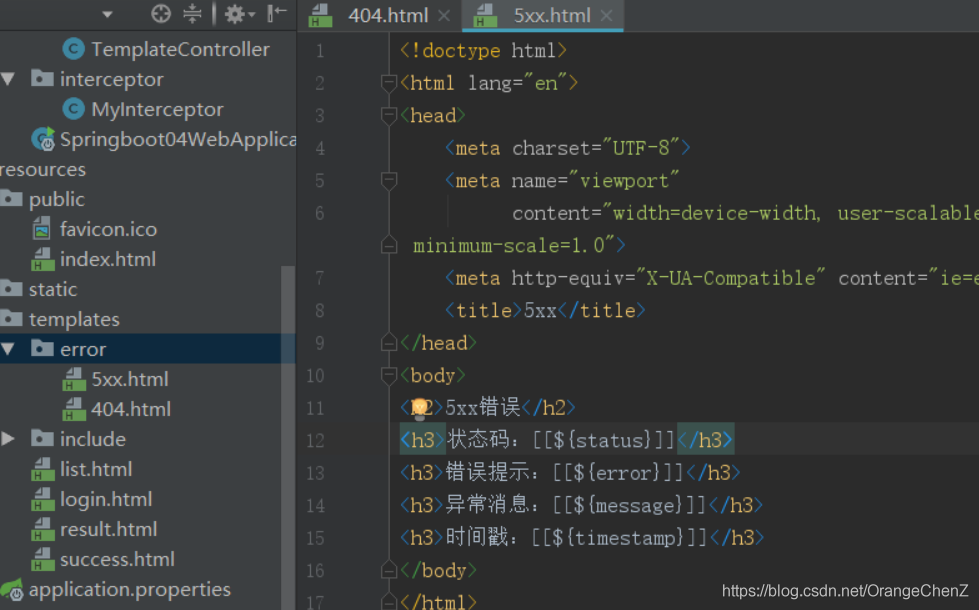
5xx.html
<!doctype html>
<html lang="en">
<head>
<meta charset="UTF-8">
<meta name="viewport"
content="width=device-width, user-scalable=no, initial-scale=1.0, maximum-scale=1.0, minimum-scale=1.0">
<meta http-equiv="X-UA-Compatible" content="ie=edge">
<title>5xx</title>
</head>
<body>
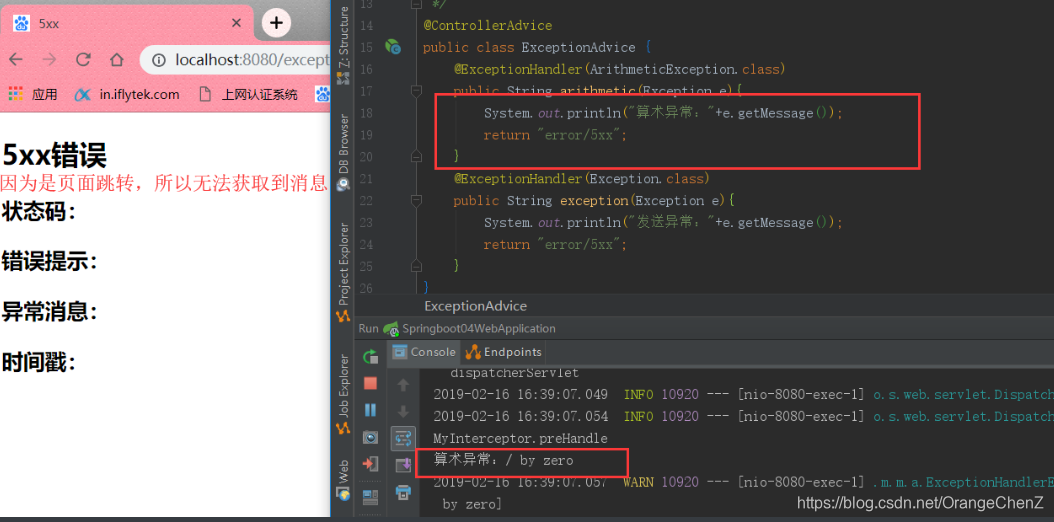
<h2>5xx错误</h2>
<h3>状态码:[[${status}]]</h3>
<h3>错误提示:[[${error}]]</h3>
<h3>异常消息:[[${message}]]</h3>
<h3>时间戳:[[${timestamp}]]</h3>
</body>
</html>
3.定义异常通知
ExceptionAdvice.java
@ControllerAdvice
public class ExceptionAdvice {
    @ExceptionHandler(ArithmeticException.class)
    public String arithmetic(Exception e){
        System.out.println("算术异常:"+e.getMessage());
        return "error/5xx";
    }
    @ExceptionHandler(Exception.class)
    public String exception(Exception e){
        System.out.println("发送异常:"+e.getMessage());
        return "error/5xx";
    }
}
十一、关于Servlet容器
1.简介:
SpringBoot中默认内置了Servlet容器:Tomcat
- 问题:SpringBoot默认是以jar包的方式启动内置的Servlet容器,没有web.xml文件,如何注册Servlet三大组件:Servlet、Filter、Listener?
- 解决:通过自定义Servlet配置,使用ServletRegistrationBean、FilterRegistrationBean、ListenerRegistrationBean
2.注册Servlet组件
-
定义一个配置类
-
自定义一个方法,用来注册组件
package cn.cz.config;

import cn.cz.filter.MyFilter;
import cn.cz.listener.MyListener;
import cn.cz.servlet.Myservlet;
import org.springframework.boot.web.servlet.FilterRegistrationBean;
import org.springframework.boot.web.servlet.ServletListenerRegistrationBean;
import org.springframework.boot.web.servlet.ServletRegistrationBean;
import org.springframework.context.annotation.Bean;
import org.springframework.context.annotation.Configuration;

/**
 * 自定义servlet配置
 *
 * @author czzhao2
 * @created 2019年02月16日 16:45:30
 * @lastModified
 * @history
 */
@Configuration
public class CustomServletConfig {
    //注册Servlet
    @Bean
    public ServletRegistrationBean myservlet(){
        ServletRegistrationBean<Myservlet> registrationBean=new ServletRegistrationBean<>();
        registrationBean.setServlet(new Myservlet());
        registrationBean.addUrlMappings("/myServlet");
        return registrationBean;
    }
    //过滤器
    @Bean
    public FilterRegistrationBean myFilter(){
        FilterRegistrationBean<MyFilter> registrationBean=new FilterRegistrationBean<>();
        registrationBean.setFilter(new MyFilter());
        registrationBean.addUrlPatterns("/showLogin","/test1");
        return registrationBean;
    }
    //监听器
    @Bean
   public ServletListenerRegistrationBean myListener(){
        ServletListenerRegistrationBean<MyListener> registrationBean=new ServletListenerRegistrationBean<>();
        registrationBean.setListener(new MyListener());
        return registrationBean;
    }


}
Myservlet.java
package cn.cz.servlet;

import javax.servlet.ServletException;
import javax.servlet.http.HttpServlet;
import javax.servlet.http.HttpServletRequest;
import javax.servlet.http.HttpServletResponse;
import java.io.IOException;

/**
 * 功能
 *
 * @author czzhao2
 * @created 2019年02月16日 16:43:22
 * @lastModified
 * @history
 */
public class Myservlet extends HttpServlet{
    @Override
    protected void doGet(HttpServletRequest req, HttpServletResponse resp) throws ServletException, IOException {
        System.out.println("Myservlet.doGet");
        doPost(req,resp);
    }

    @Override
    protected void doPost(HttpServletRequest req, HttpServletResponse resp) throws ServletException, IOException {
        System.out.println("Myservlet.doPost");
    }
}
MyFilter.java
package cn.cz.filter;

import javax.servlet.*;
import java.io.IOException;

/**
 * 功能
 *
 * @author czzhao2
 * @created 2019年02月16日 16:51:20
 * @lastModified
 * @history
 */
public class MyFilter implements Filter{
    @Override
    public void init(FilterConfig filterConfig) throws ServletException {

    }

    @Override
    public void doFilter(ServletRequest servletRequest, ServletResponse servletResponse, FilterChain filterChain) throws IOException, ServletException {
        System.out.println("MyFilter.doFilter");
        filterChain.doFilter(servletRequest,servletResponse);
    }

    @Override
    public void destroy() {

    }
}
MyListener.java
package cn.cz.listener;

import javax.servlet.ServletContextEvent;
import javax.servlet.ServletContextListener;

/**
 * 功能
 *
 * @author czzhao2
 * @created 2019年02月16日 16:56:28
 * @lastModified
 * @history
 */
public class MyListener implements ServletContextListener{
    @Override
    public void contextInitialized(ServletContextEvent sce) {
        System.out.println("MyListener.contextInitialized");
    }

    @Override
    public void contextDestroyed(ServletContextEvent sce) {
        System.out.println("MyListener.contextDestroyed");
    }
}
3.使用外部的Servlet容器
使用内置Servlet容器:将应用打成可执行的jar包,直接运行
- 优点:简单、方便
- 缺点:不支持JSP、可定制性差
使用外部Servlet容器:将应用打成war包,然后部署到外部的Tomcat
- 优点:支持JSP、可定制性强
步骤:
-
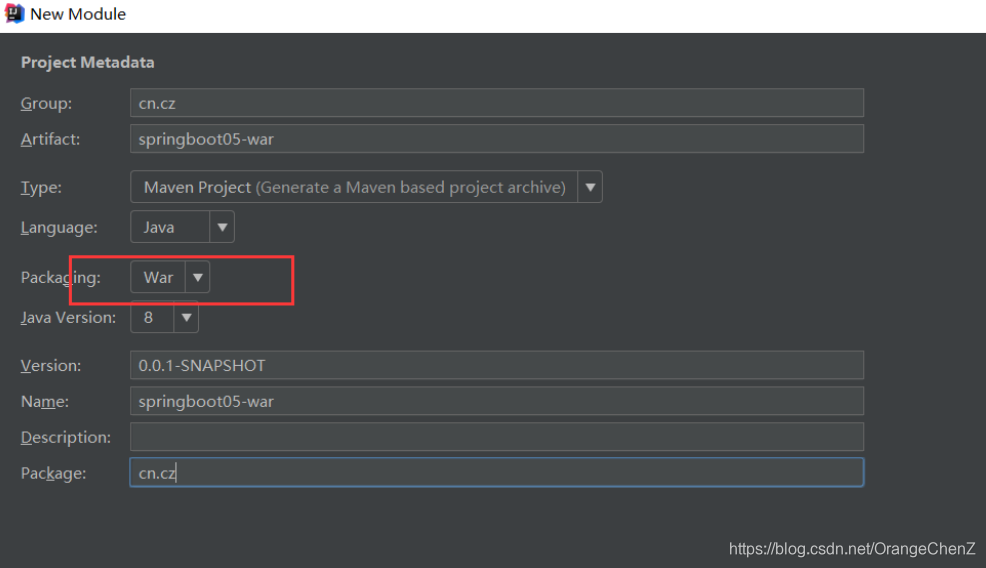
1.创建一个Maven的war工程
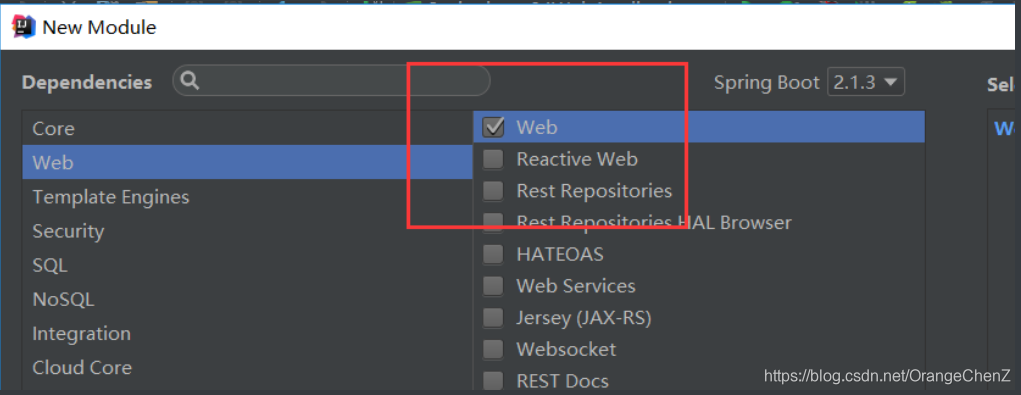
-
有三个变化:
-
<packaging>war</packaging> -
<!--将内置Tomcat的scope配置为provided--> <dependency> <groupId>org.springframework.boot</groupId> <artifactId>spring-boot-starter-tomcat</artifactId> <scope>provided</scope> </dependency> -
定义了一个SpringBootServletInitializer的子类

分析:
package cn.cz; import org.springframework.boot.builder.SpringApplicationBuilder; import org.springframework.boot.web.servlet.support.SpringBootServletInitializer; /** * 1.继承ServletInitializer类 * 2.重写configure()方法 * 3.调用SpringApplicationBuilder的sources()方法,传入springBoot应用的主程序类 */ public class ServletInitializer extends SpringBootServletInitializer { @Override protected SpringApplicationBuilder configure(SpringApplicationBuilder application) { //传入主程序类 return application.sources(Springboot05WarApplication.class); } } -
-
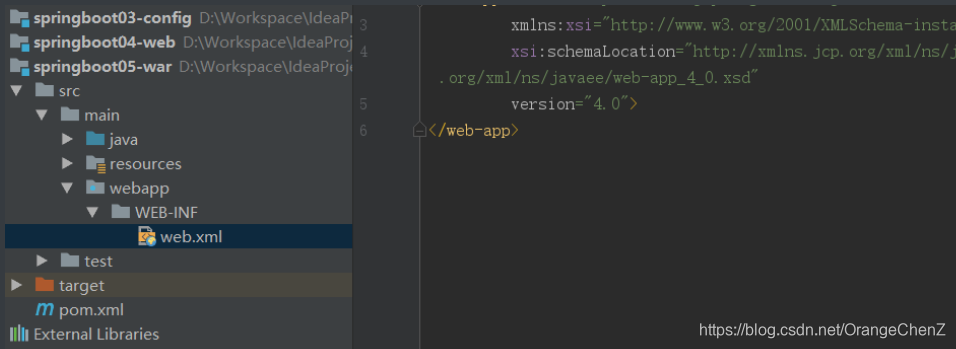
2.创建web目录
-
可以自己新建webapp

-
根据idea自动生成
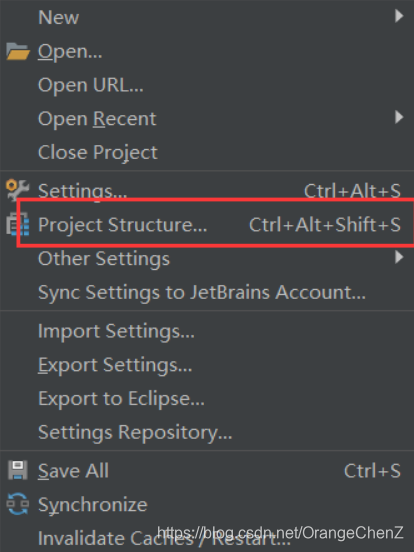
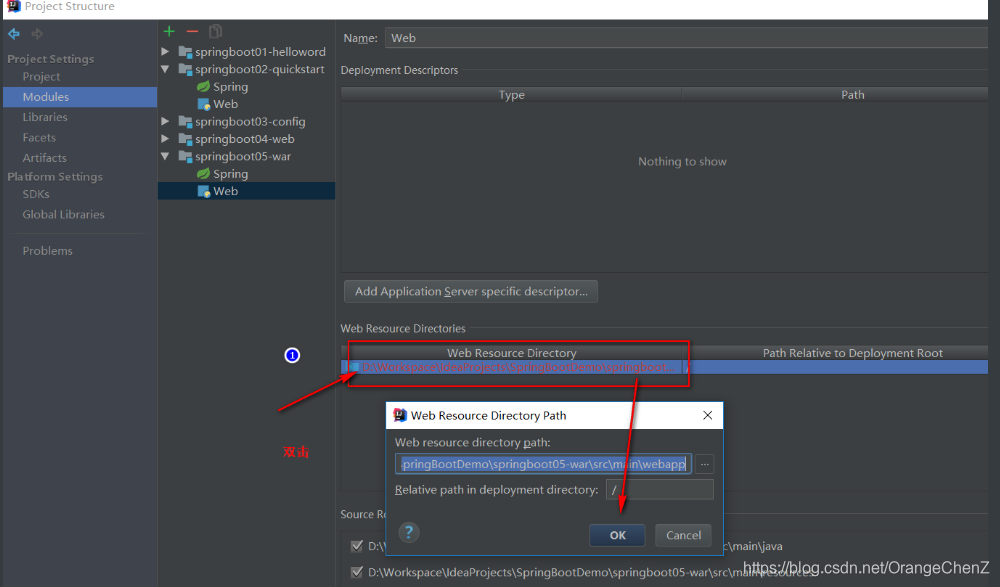


修改路径
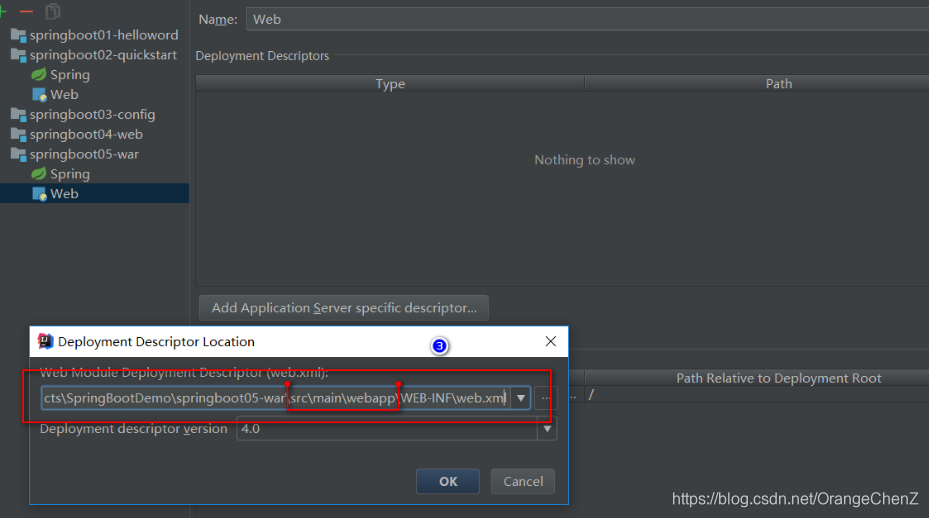
apply—>Ok
配置前缀和后缀 :
spring.mvc.view.prefix=/WEB-INF/views/ spring.mvc.view.suffix=.jsp -
-
下面就可以自己写jsp页面,打包运行或者用内置的tomcat运行!
PS:需要完整版笔记,请评论留下邮箱,我看到后回发给你PDF完整版记录~~~
点击查看分版笔记目录:
【SpringBoot】最新版2019Spring Boot快速入门(速成SpringBoot)——学习笔记版解析【1】
【SpringBoot】最新版2019Spring Boot配置解析,源码解析(速成SpringBoot)——学习笔记版【2】
【SpringBoot】最新版2019Spring Boot之WEB开发——Thymeleaf模板引擎速成(速成SpringBoot)——学习笔记版解析【3】
【SpringBoot】最新版2019Spring Boot之MVC功能,异常处理,servlet容器(速成SpringBoot)——学习笔记版解析【4】
【SpringBoot】最新版2019Spring Boot之连接数据库——JDBC,MyBATIS,分页,MyBatisPlus(速成SpringBoot)——学习笔记版解析【5】