环境
测试部署主机IP:192.168.1.1
Jenkins主机IP:192.168.1.2 Harbor主机IP:192.168.1.3 Gitlab主机IP:192.168.0.10 系统信息: 系统:CentOS 7.5 内核:4.18.7-1.el7.elrepo.x86_64 Docker版本:18.09 docker-compose版本:1.23.1
有道笔记原文,为了防止复制粘贴出来的代码格式有误~~~~
所有主机的Docker安装方式 可用 ansible-roles 快速部署所有主机 https://github.com/gitDream/ansible-roles_jenkins_harbor_gitlab.git
wget -O /etc/yum.repos.d/docker-ce.repo https://mirrors.aliyun.com/docker-ce/linux/centos/docker-ce.repo

yum install -y docker-ce

mkdir /etc/docker/
cat << EOF > /etc/docker/daemon.json
{   "registry-mirrors": ["https://registry.docker-cn.com"],
    "live-restore": true,
    "default-shm-size": "128M",
    "max-concurrent-downloads": 10,
    "oom-score-adjust": -1000,
    "debug": false
}
EOF
systemctl enable docker
systemctl restart docker
安装Gitlab
-
参考这篇文章:
-
Docker方式安装:
https://github.com/JyBigBoss/docker-compose/blob/master/gitlab/docker-compose.yaml
-
安装Harbor
-
参考:
- http://blog.51cto.com/bigboss/2316525
-
安装Jenkins
-
yum install -y python-pip
pip install docker-compose

cd $HOME && mkdir jenkins && cd jenkins
wget https://raw.githubusercontent.com/JyBigBoss/docker-compose/master/jenkins/Dockerfile
wget https://raw.githubusercontent.com/JyBigBoss/docker-compose/master/jenkins/docker-compose.yaml

docker-compose up -d
Jenkins需要安装的插件
-
Gitlab Hook、Build Authorization Token Root、Publish Over SSH、Gitlab Authentication
Gitlab、Git Parameter、Git Tag Message、Pipeline、docker-build-step、Docker Pipeline
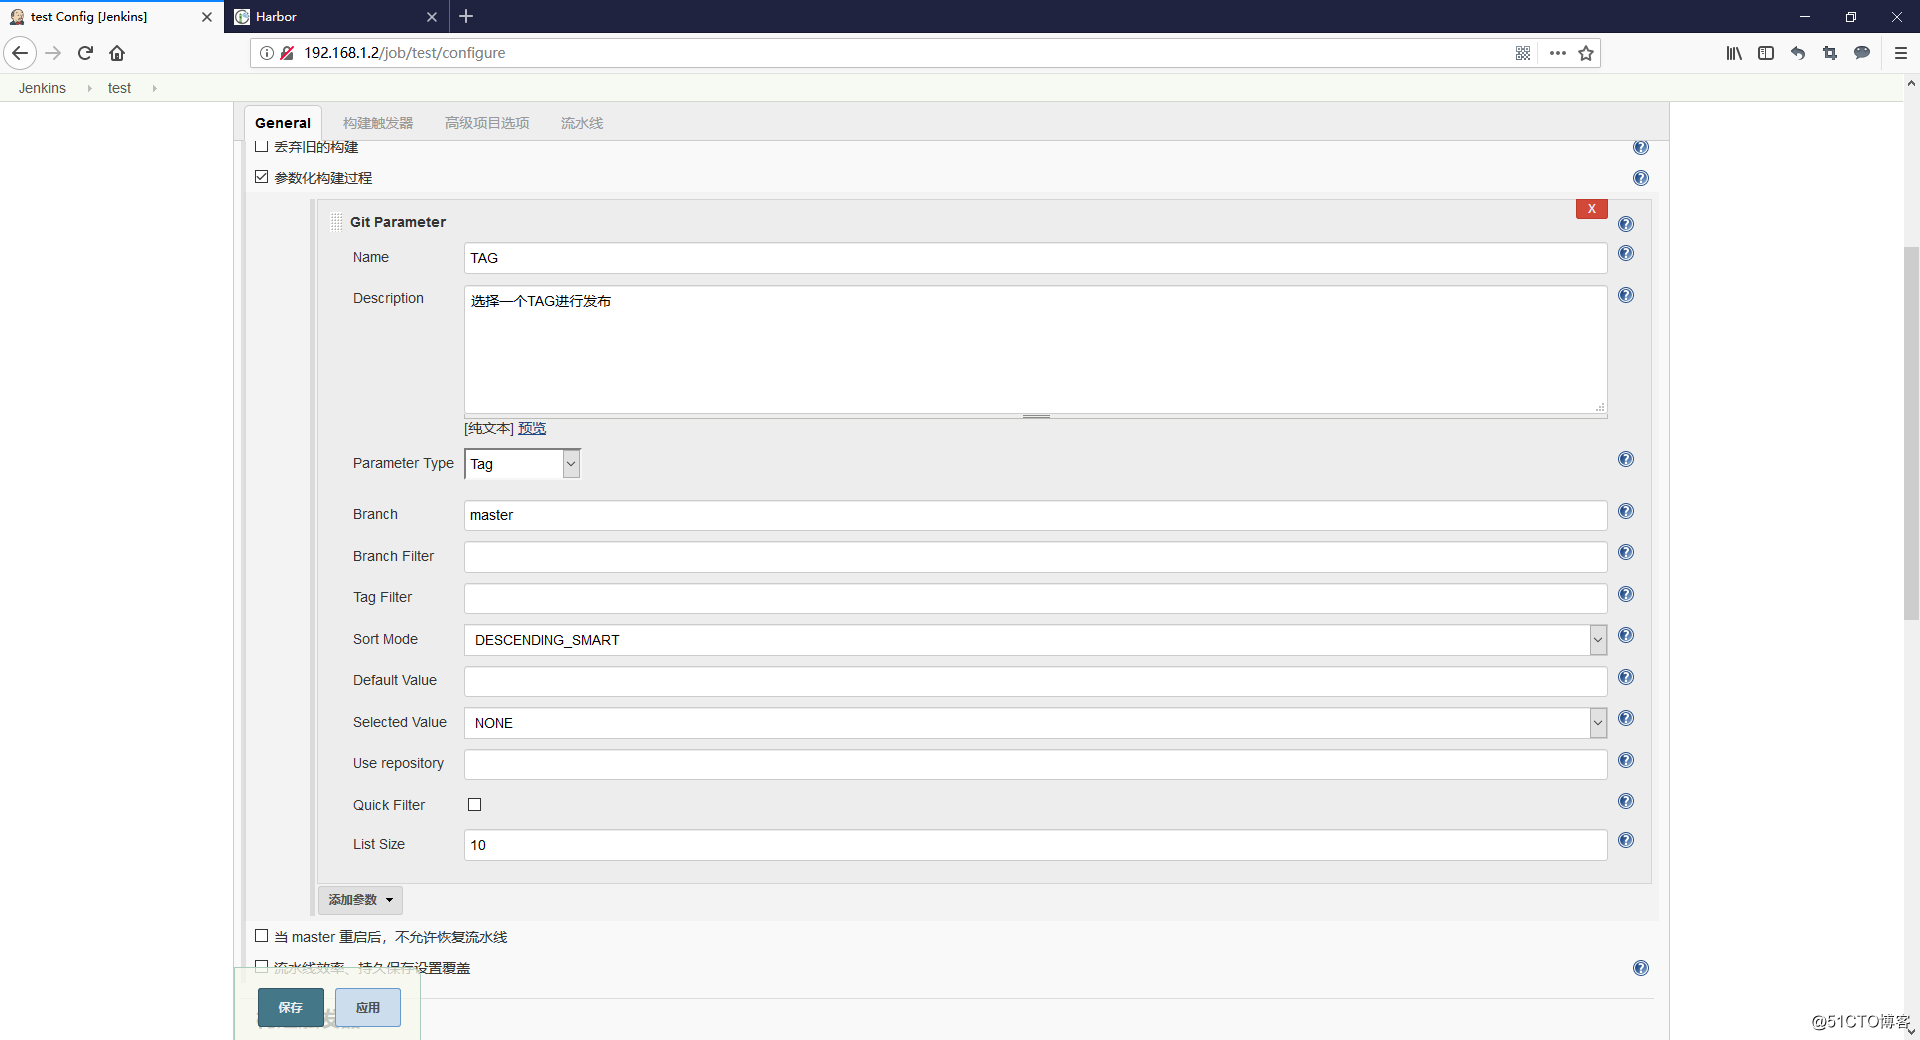
创建git仓库
-
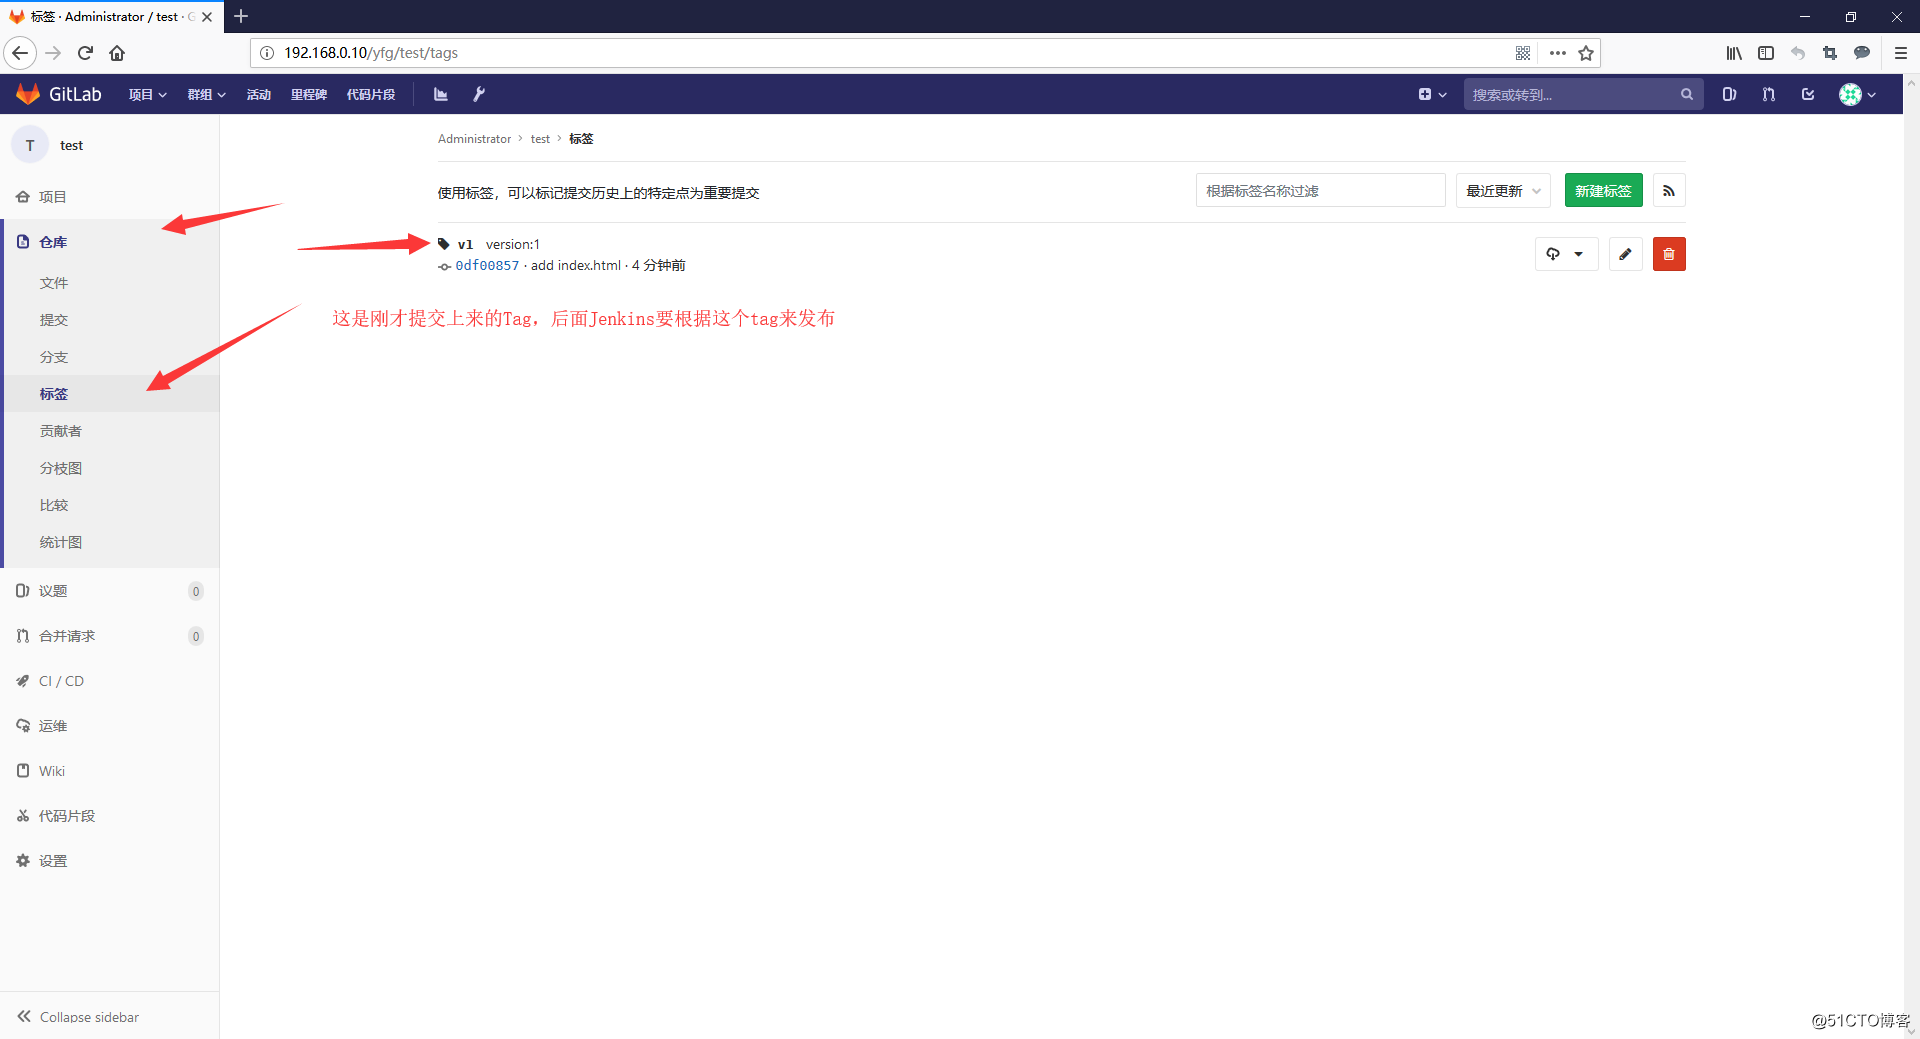
在web页面创建一个test仓库,并在在仓库中新建一个index.html文件
-
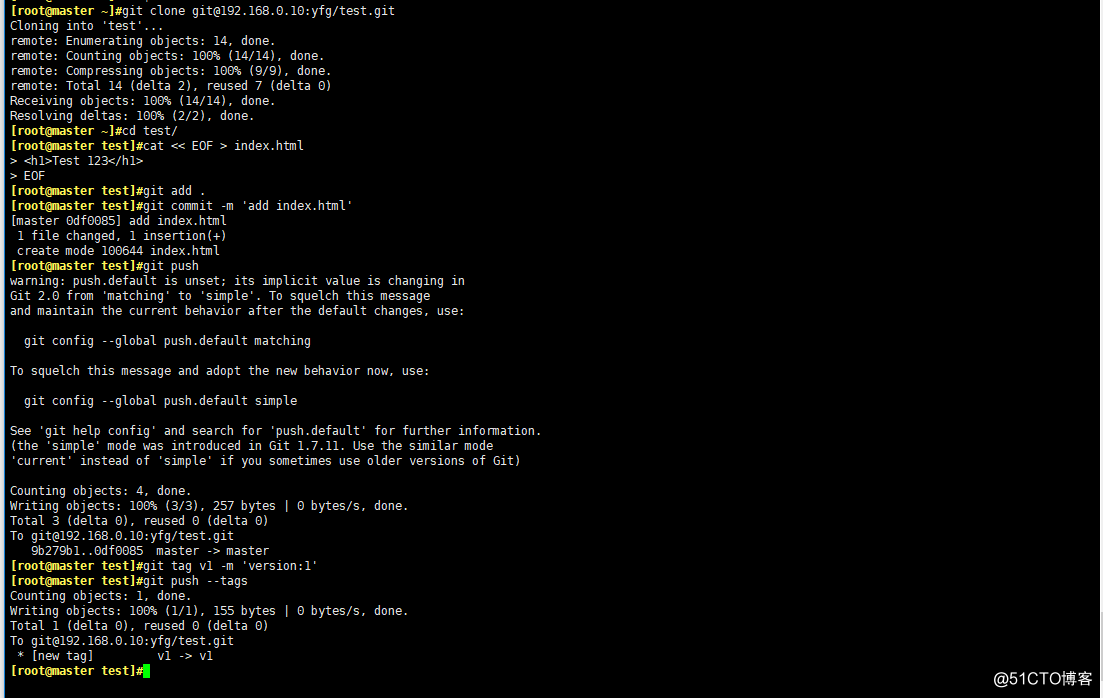
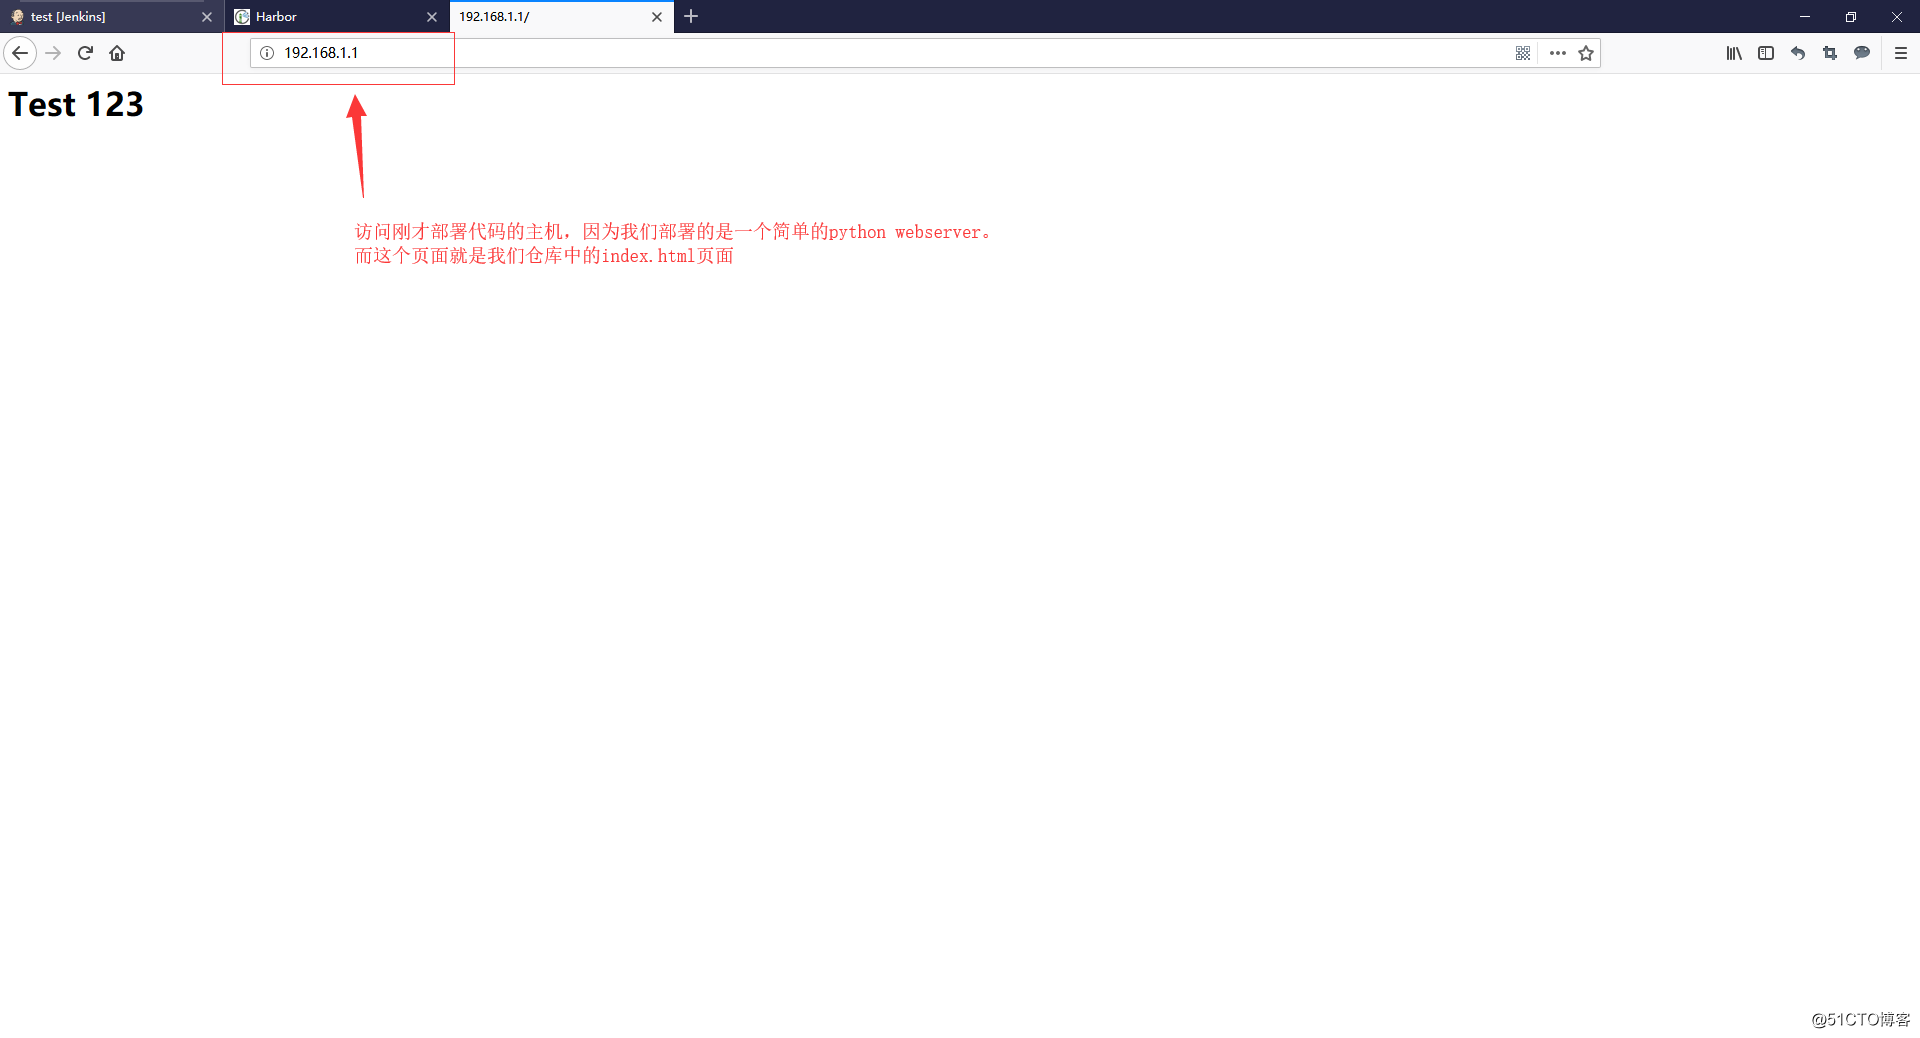
cd $HOME
git clone [email protected]:yfg/test.git
cd test/
cat << EOF > index.html
<h1>Test 123</h1>
EOF
git add .
git commit -m 'add index.html'
git push

#创建两个tag
git tag v1 -m 'version:1'
git push --tags
git tag v2 -m 'version:2'
git push --tags

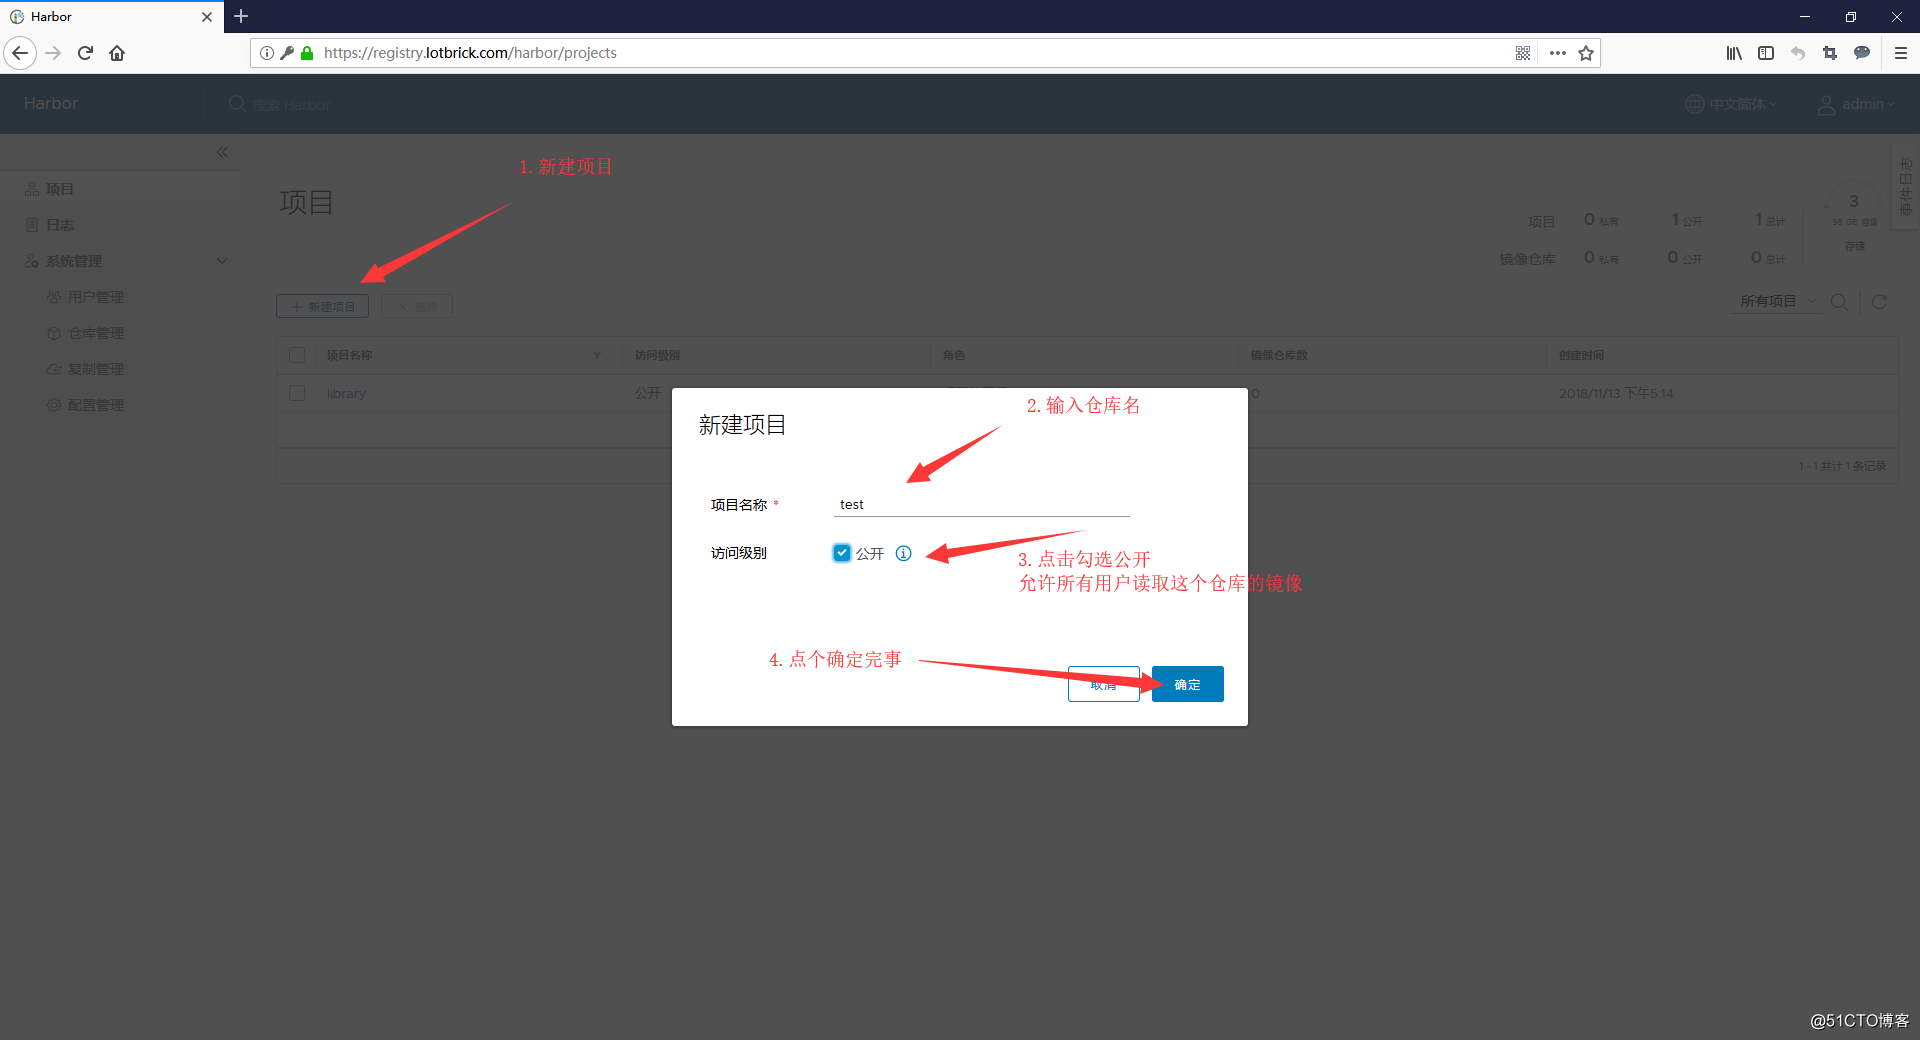
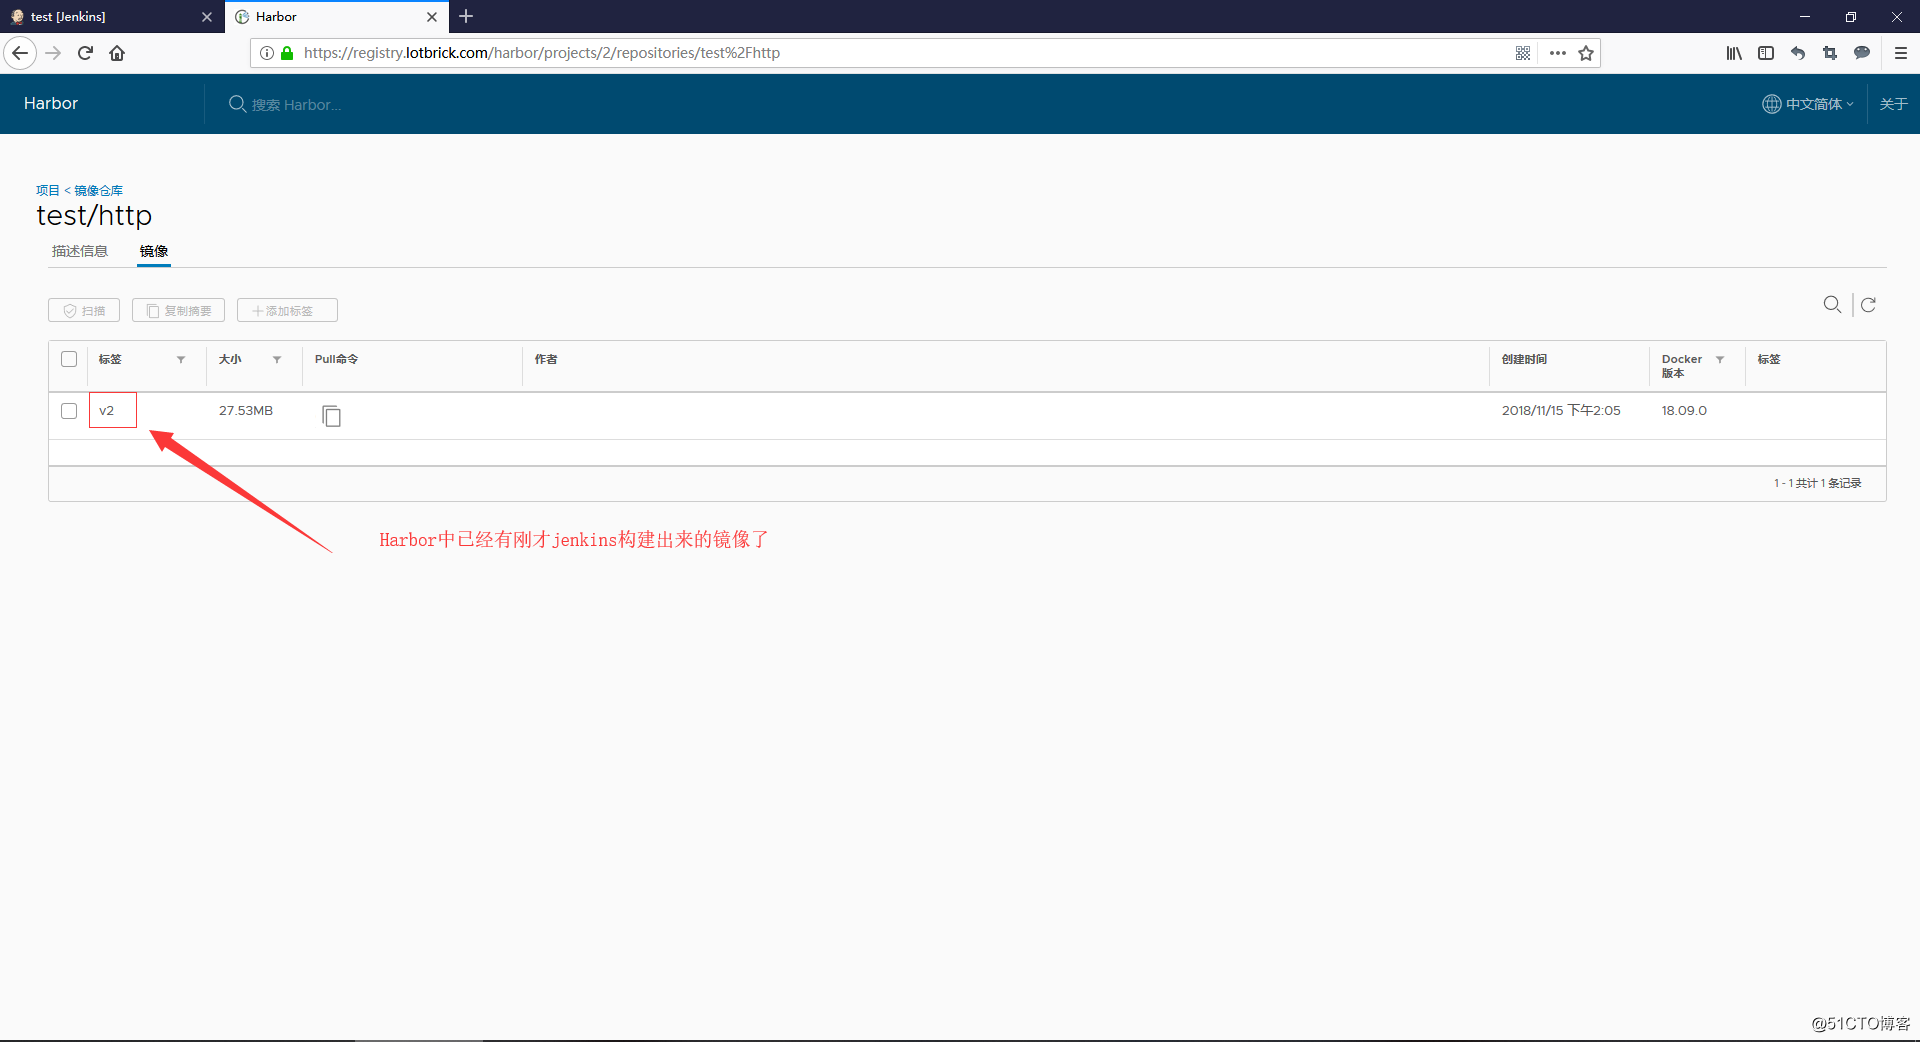
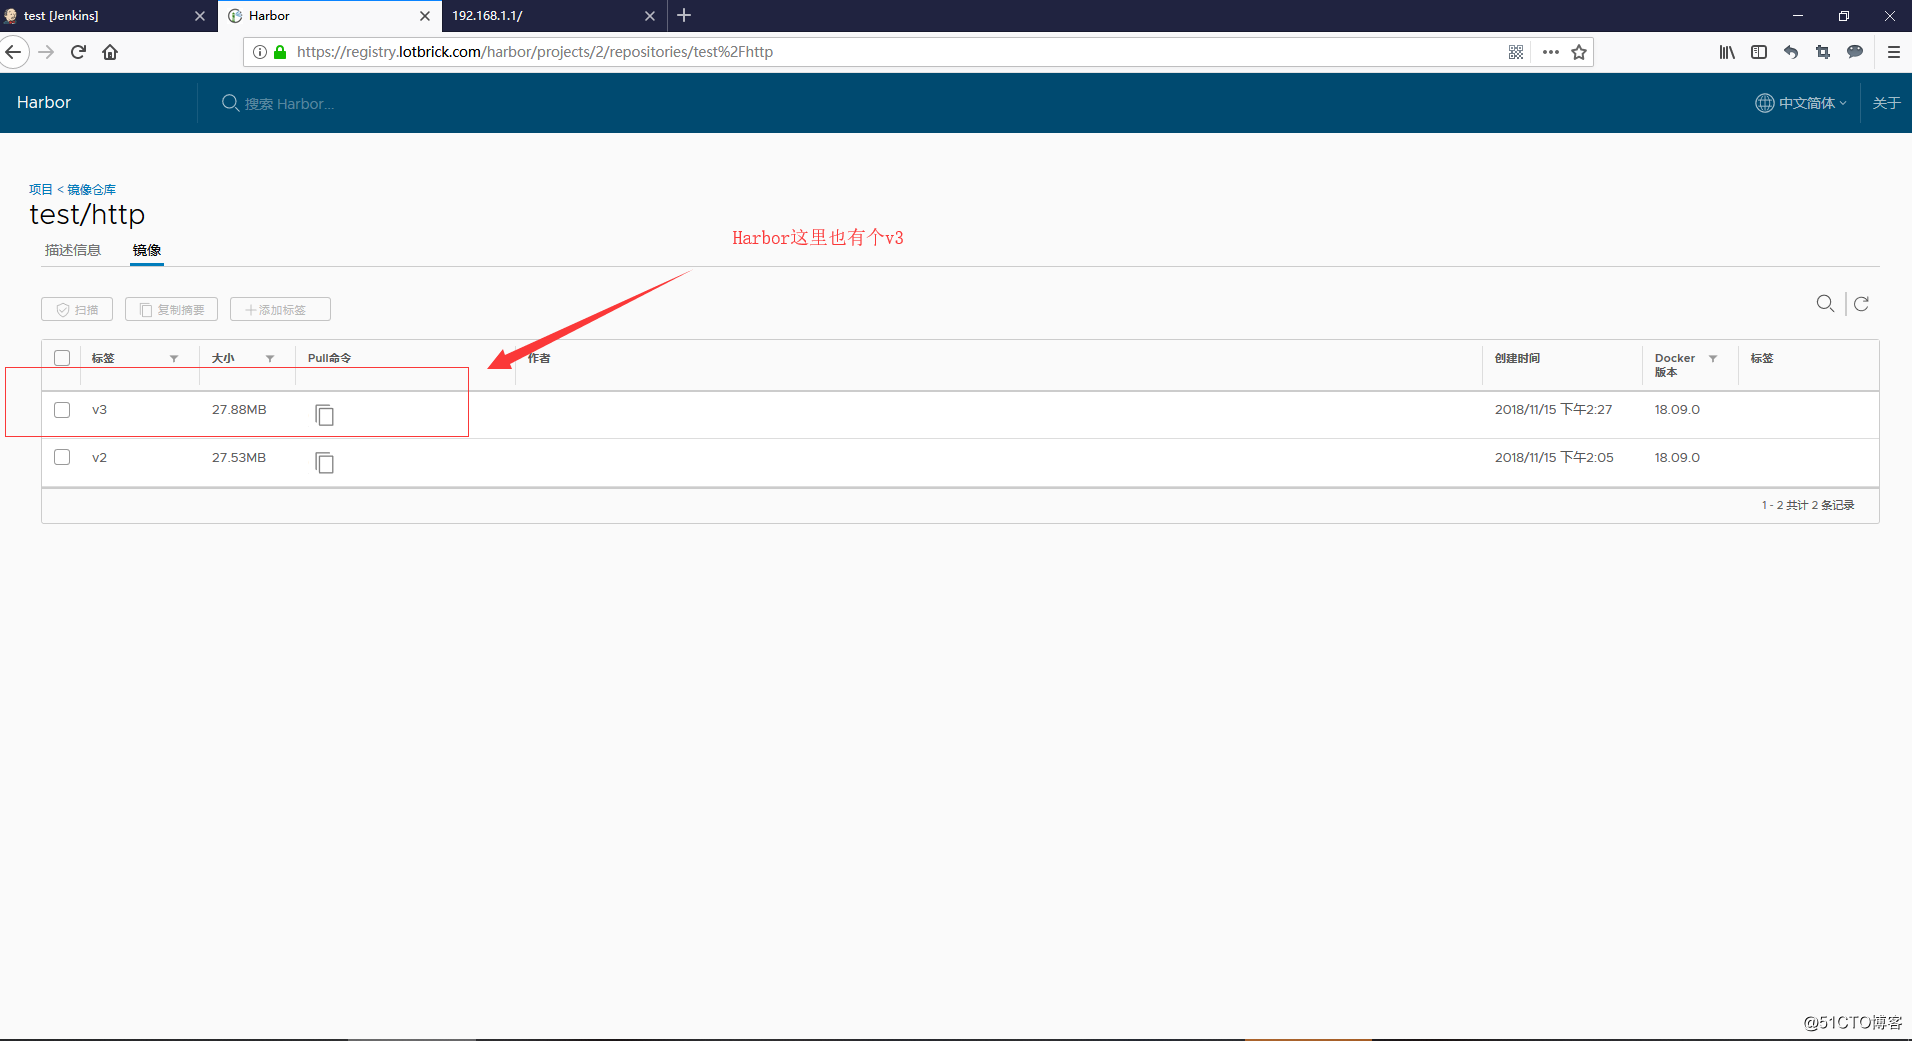
在Harbor上创建一个test仓库
配置Jenkins
-
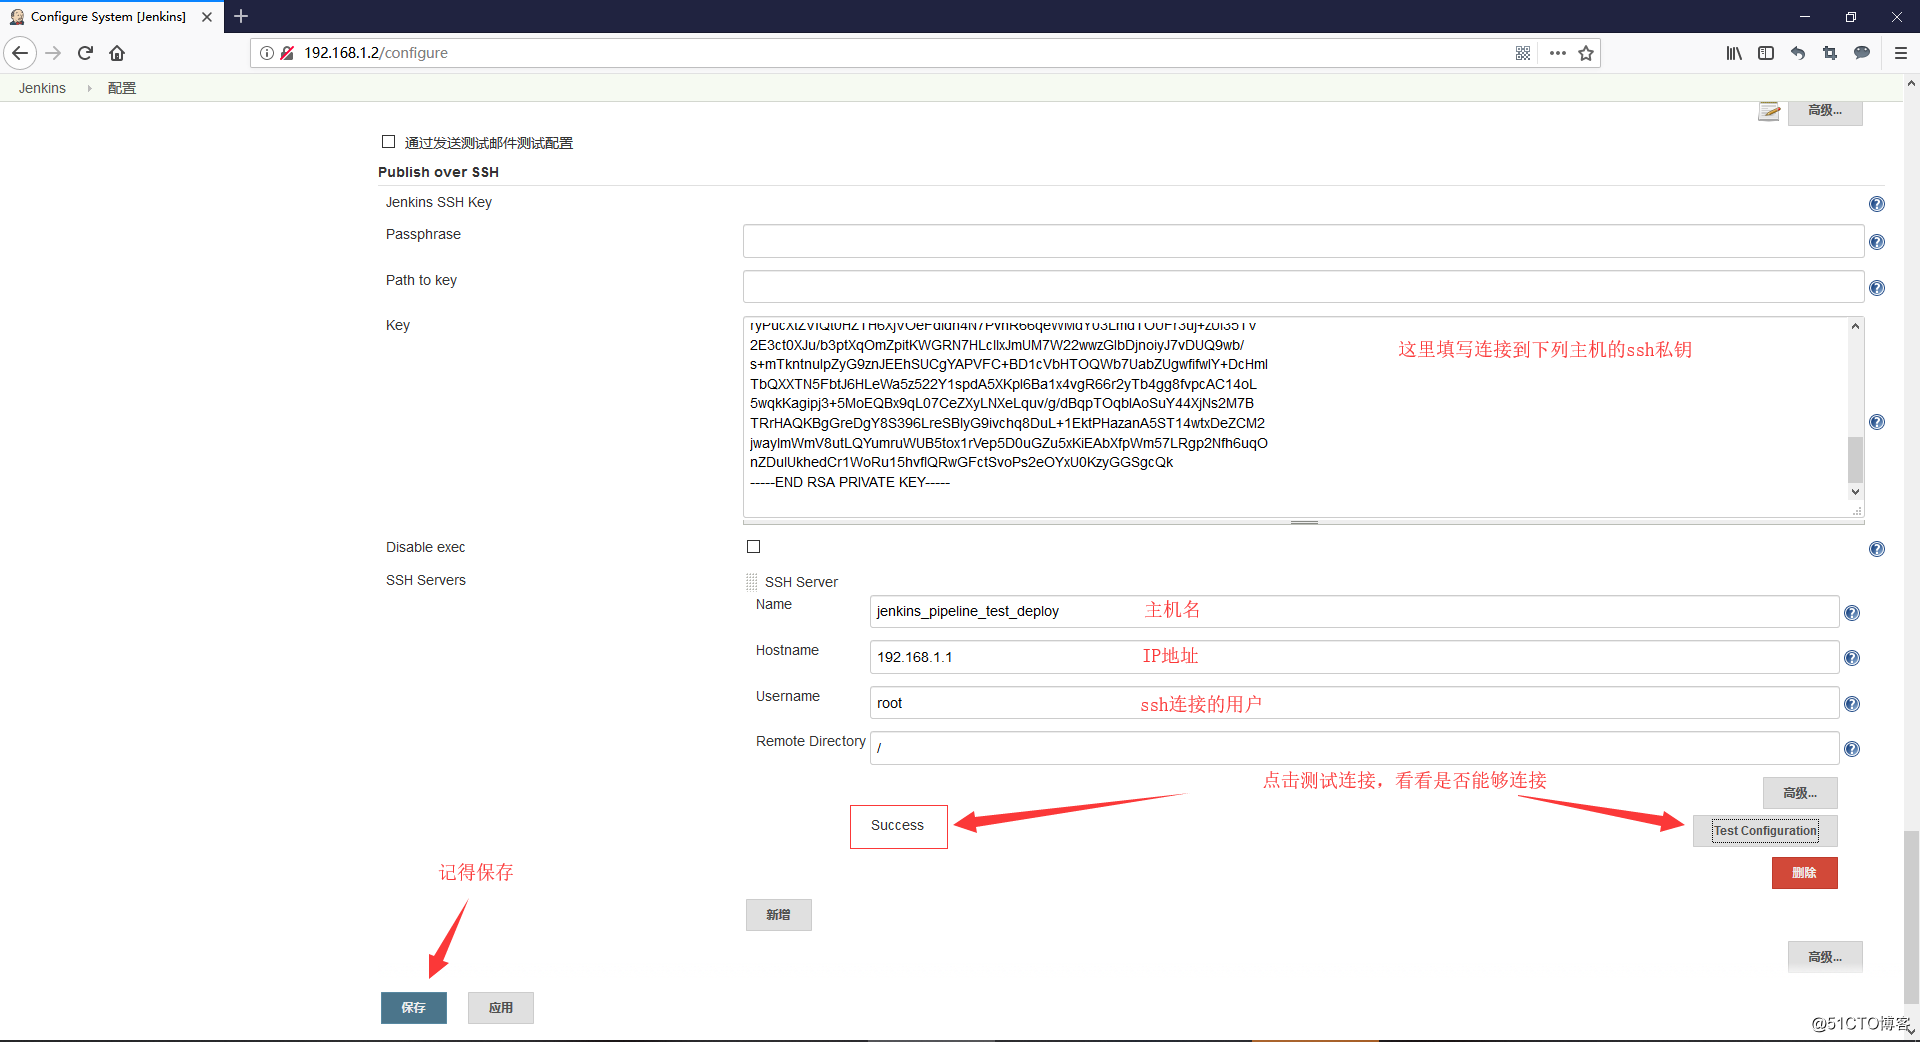
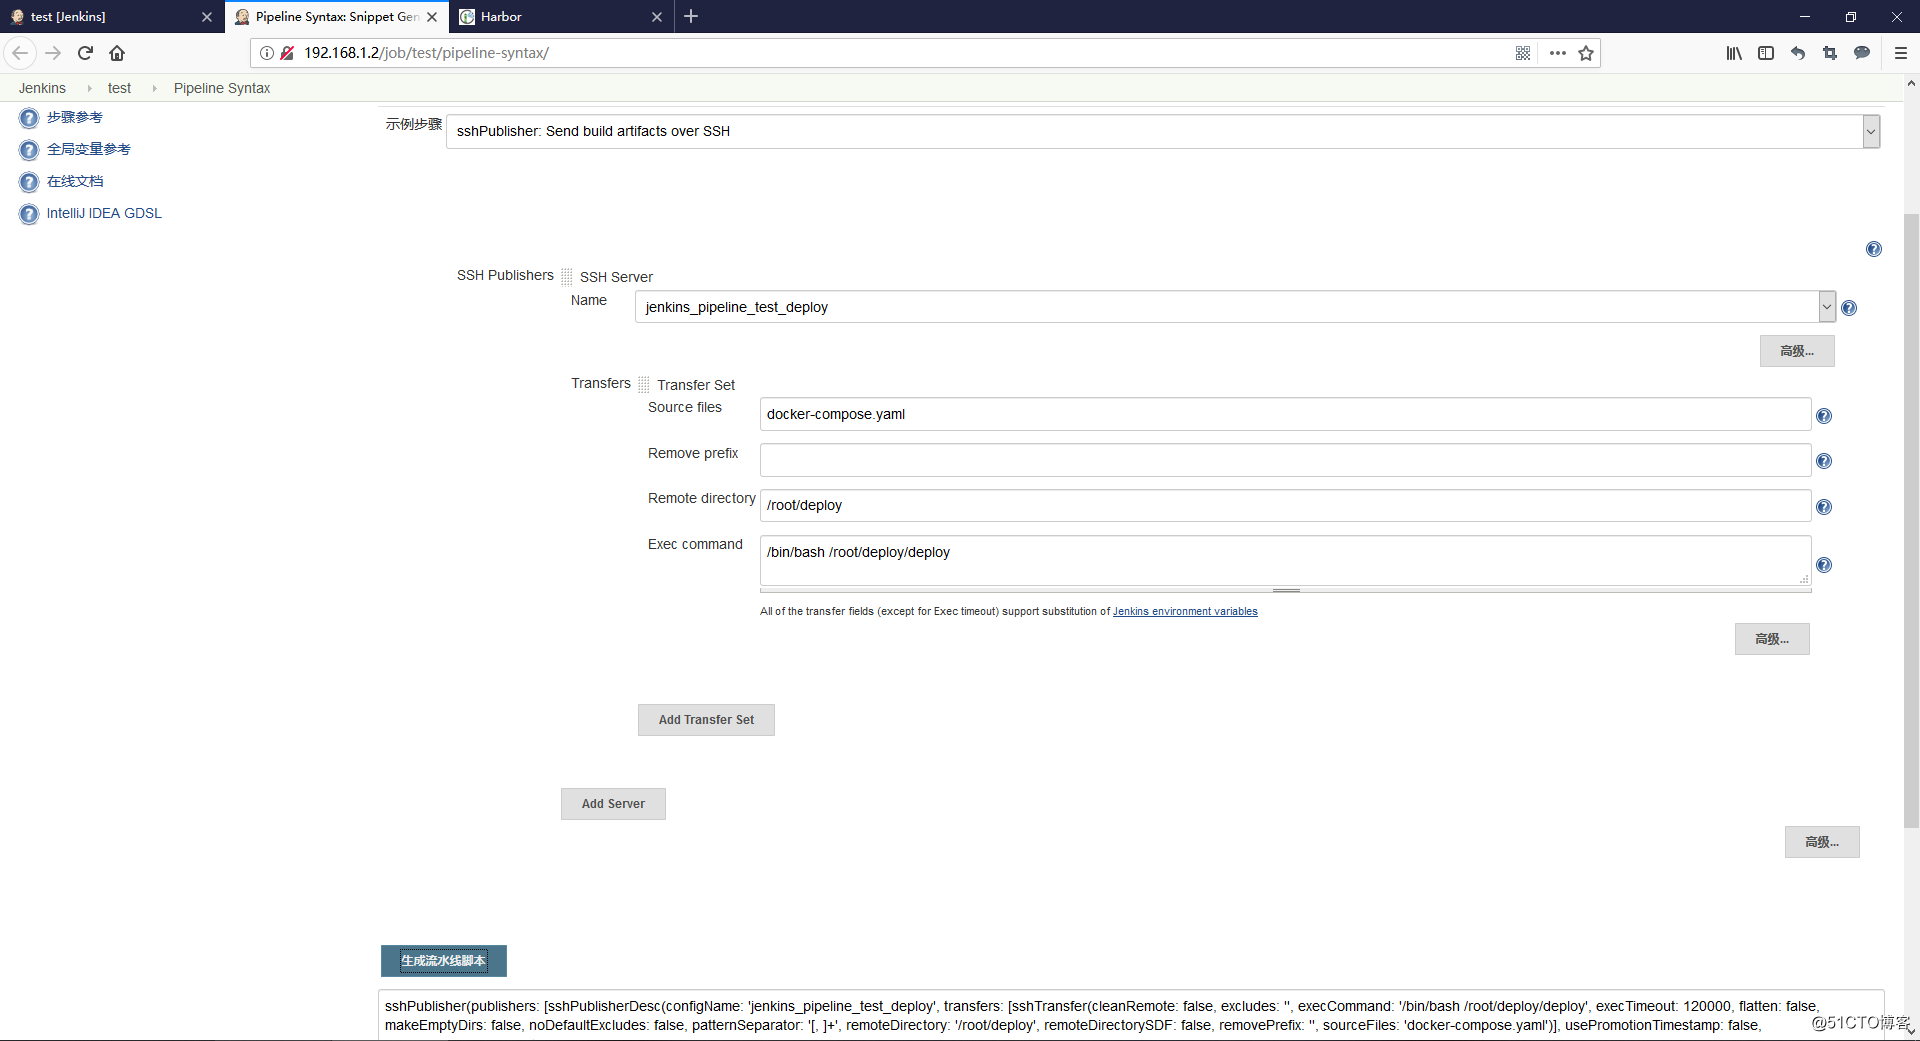
打开Jenkins的设置页面,配置Publish over SSH插件
-
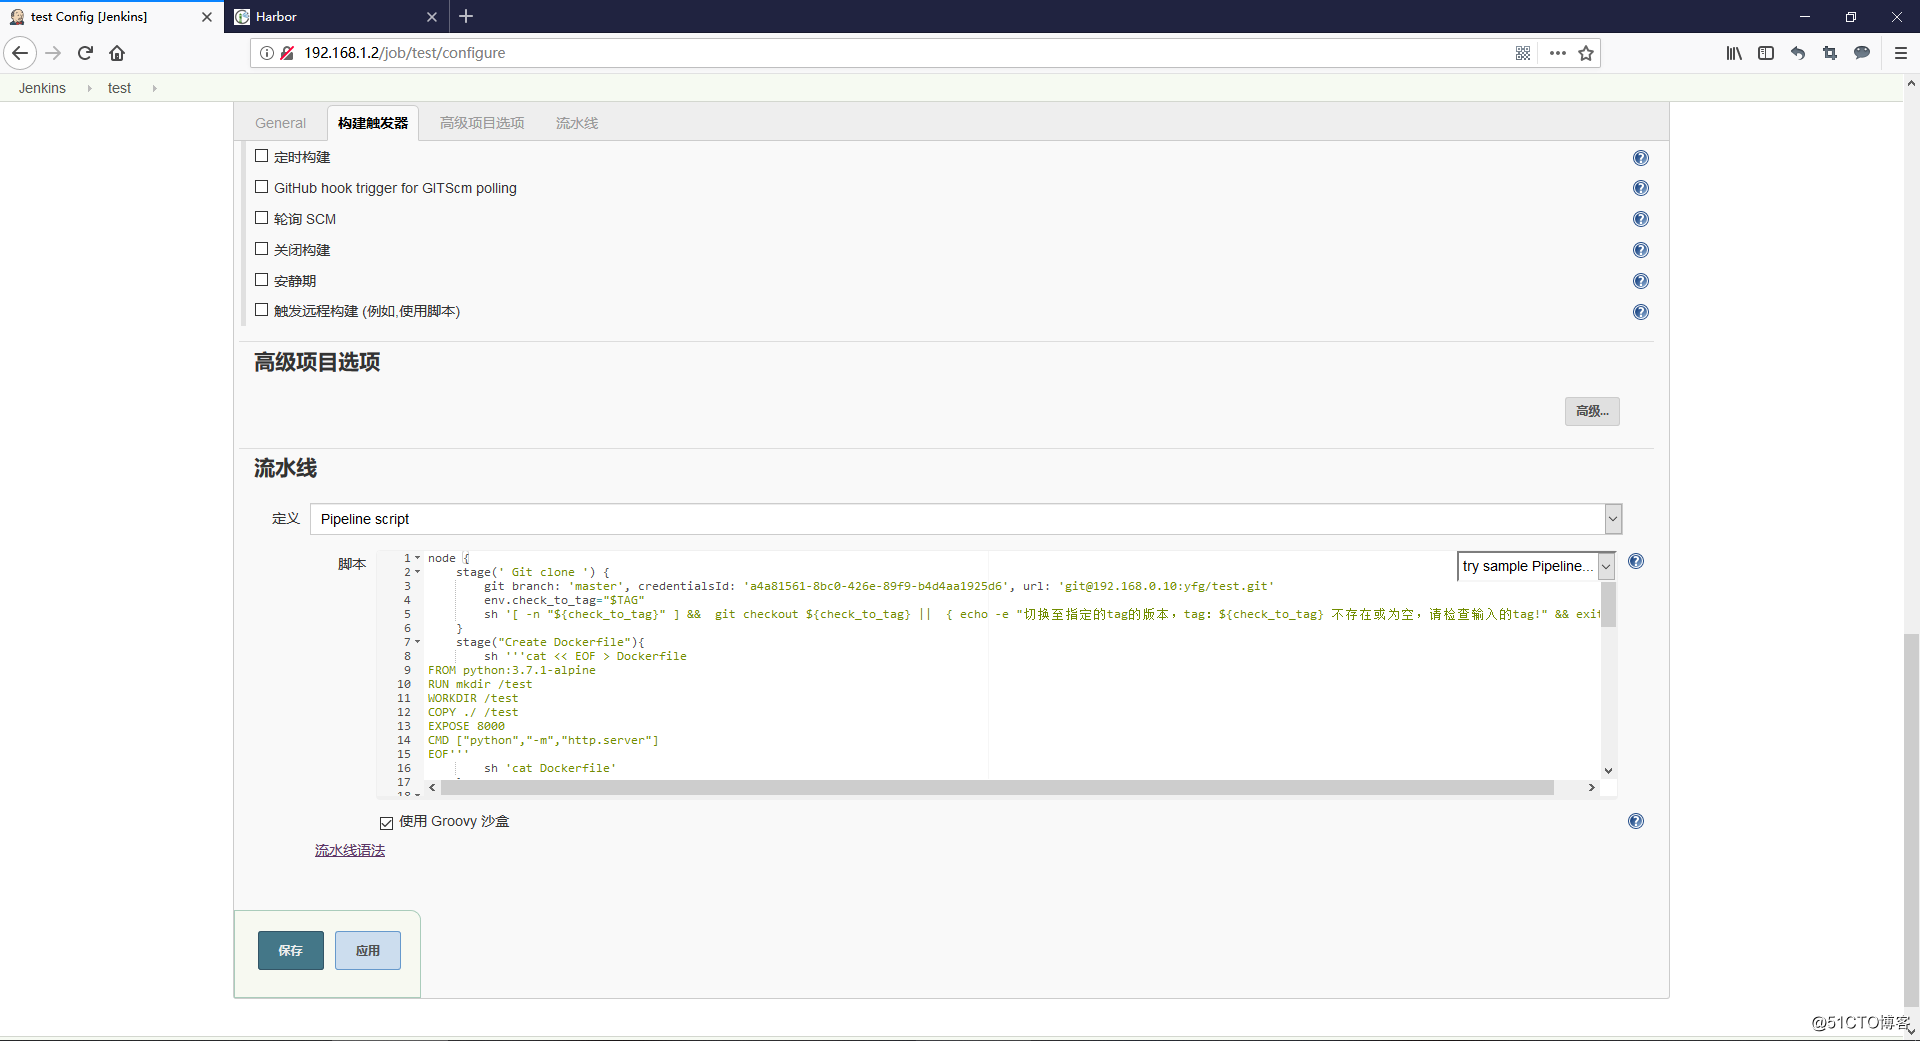
创建一个流水线(pipeline)项目
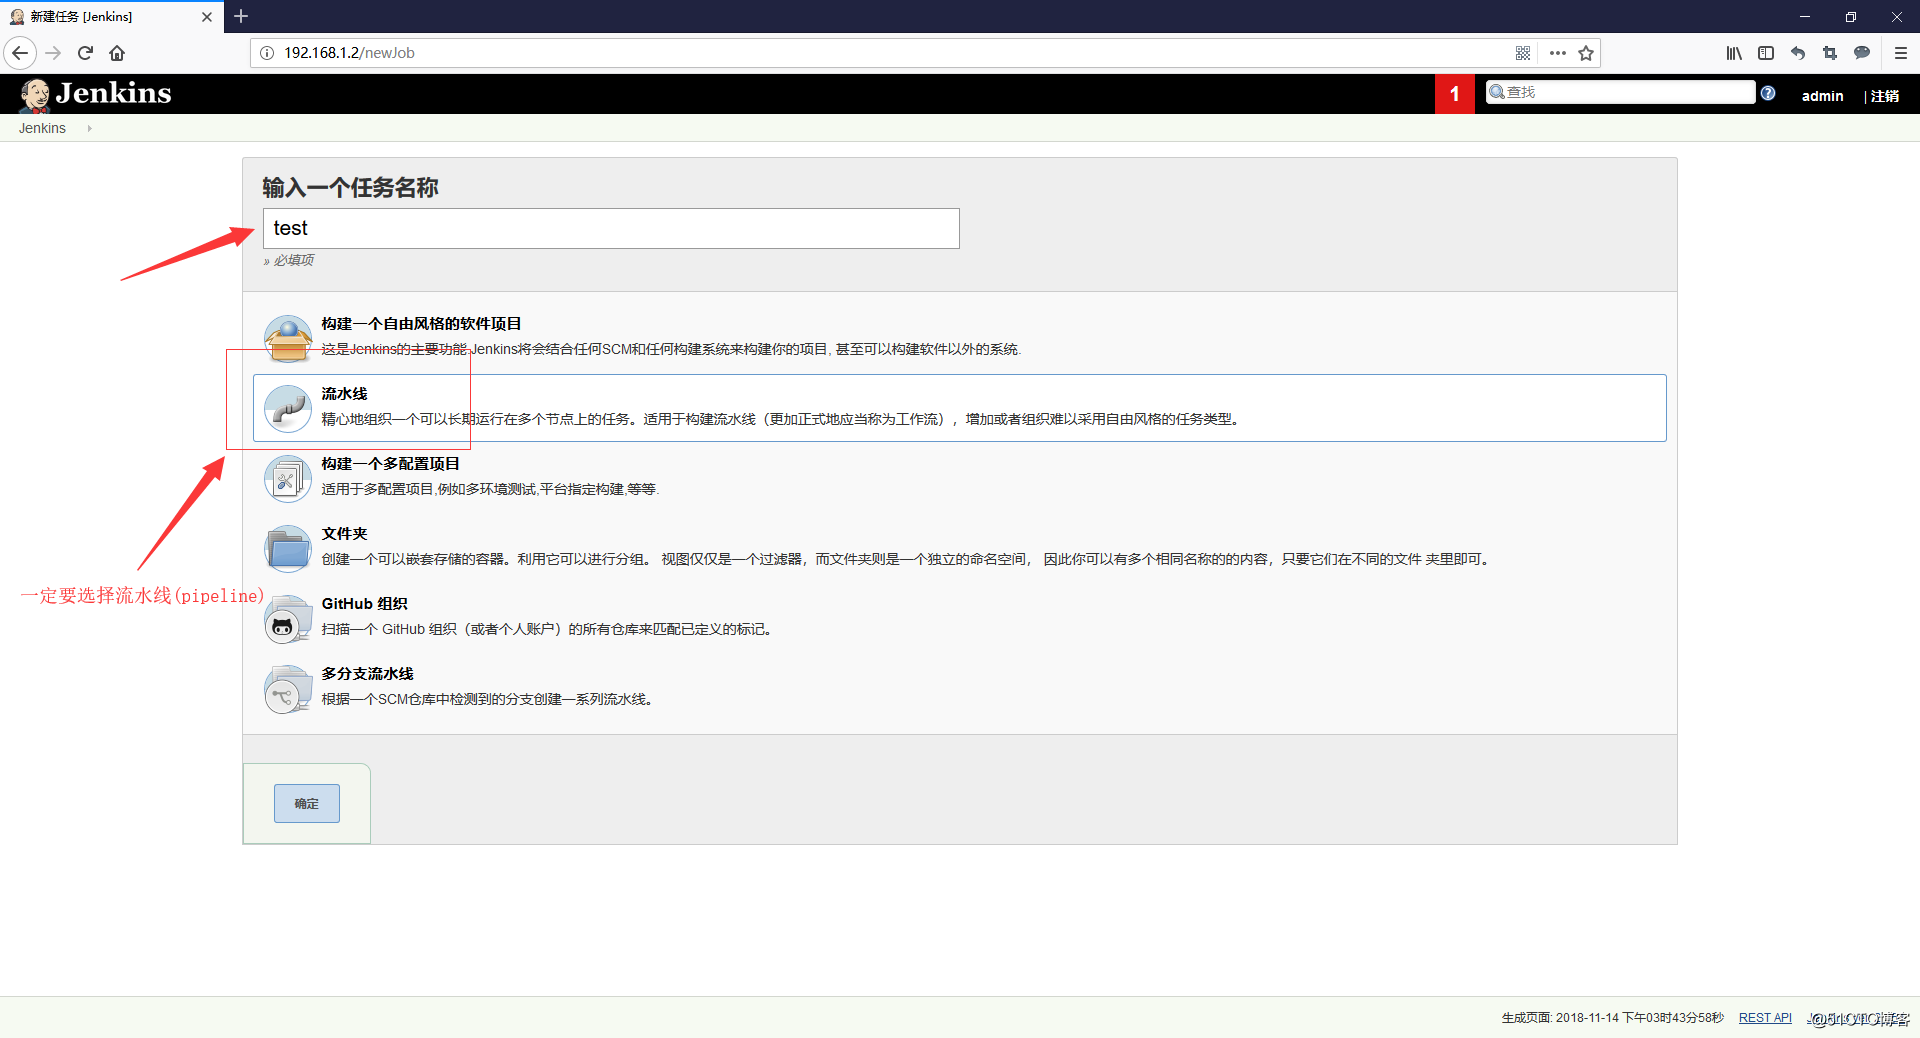
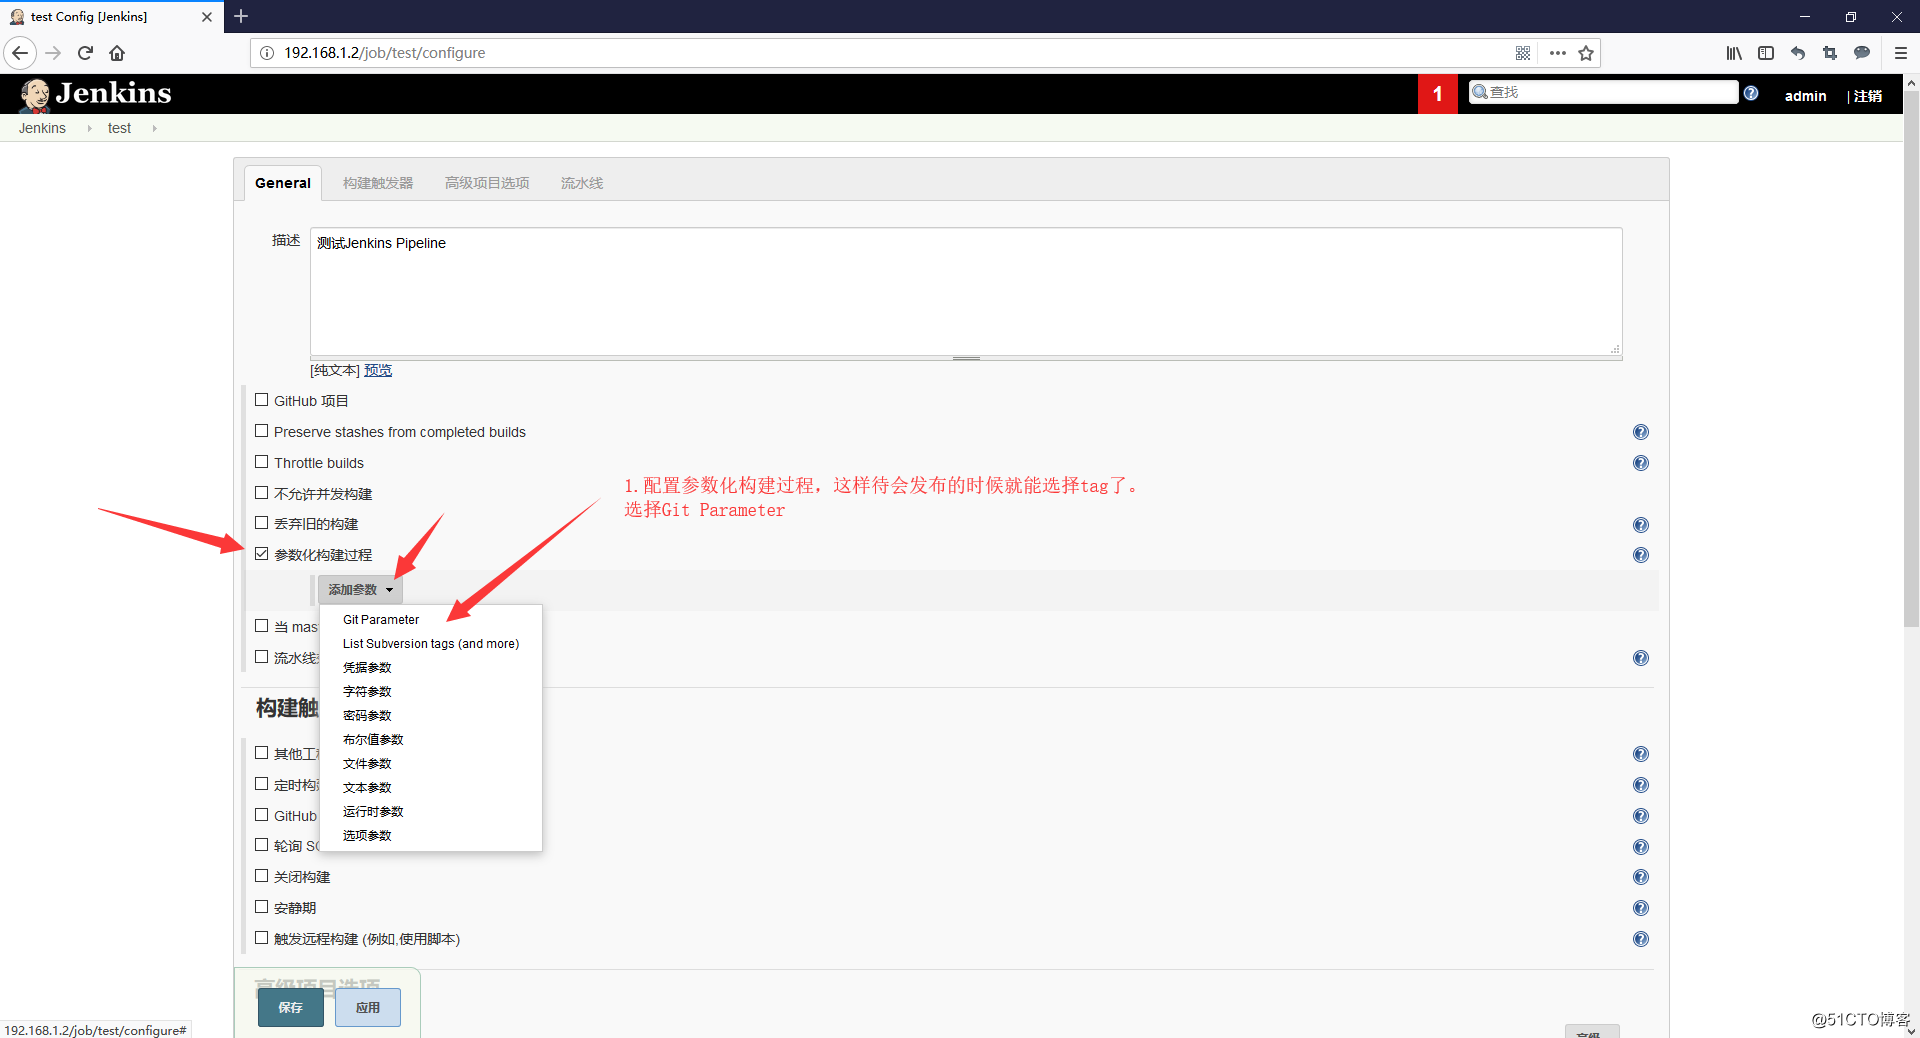
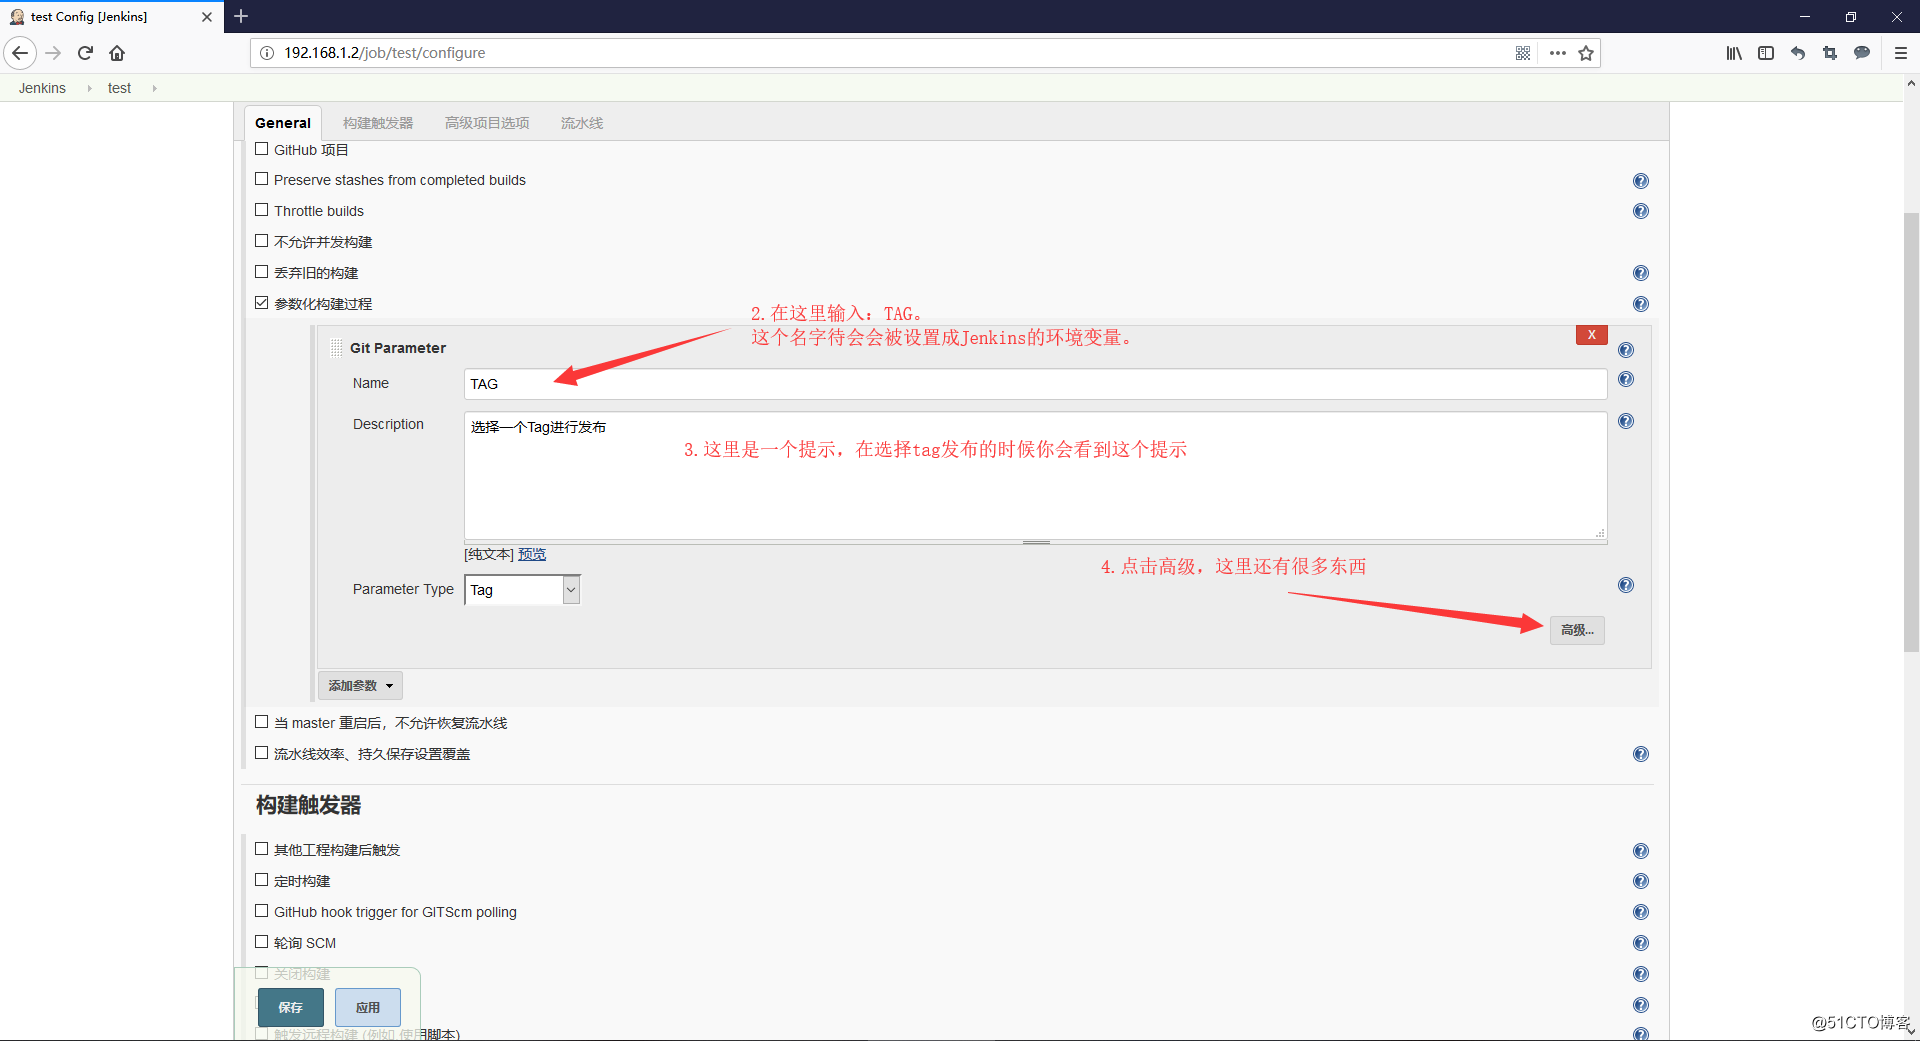
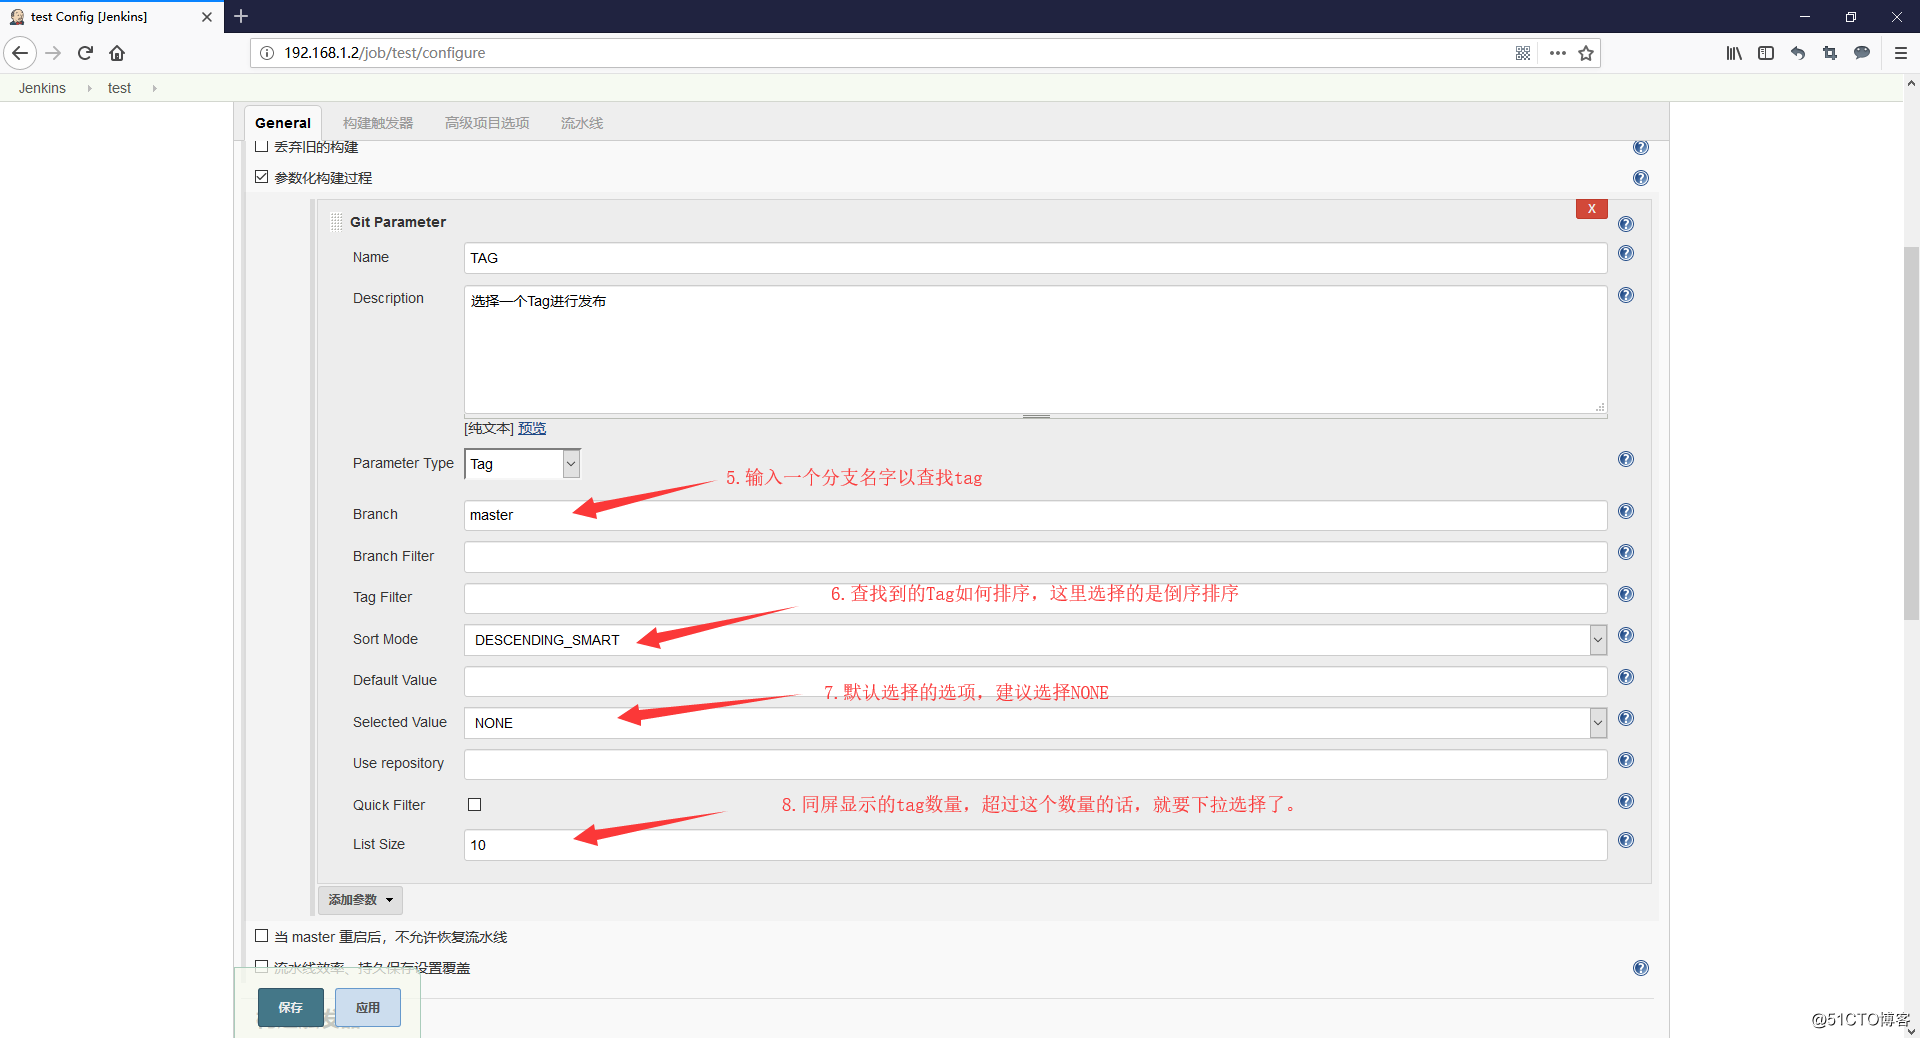
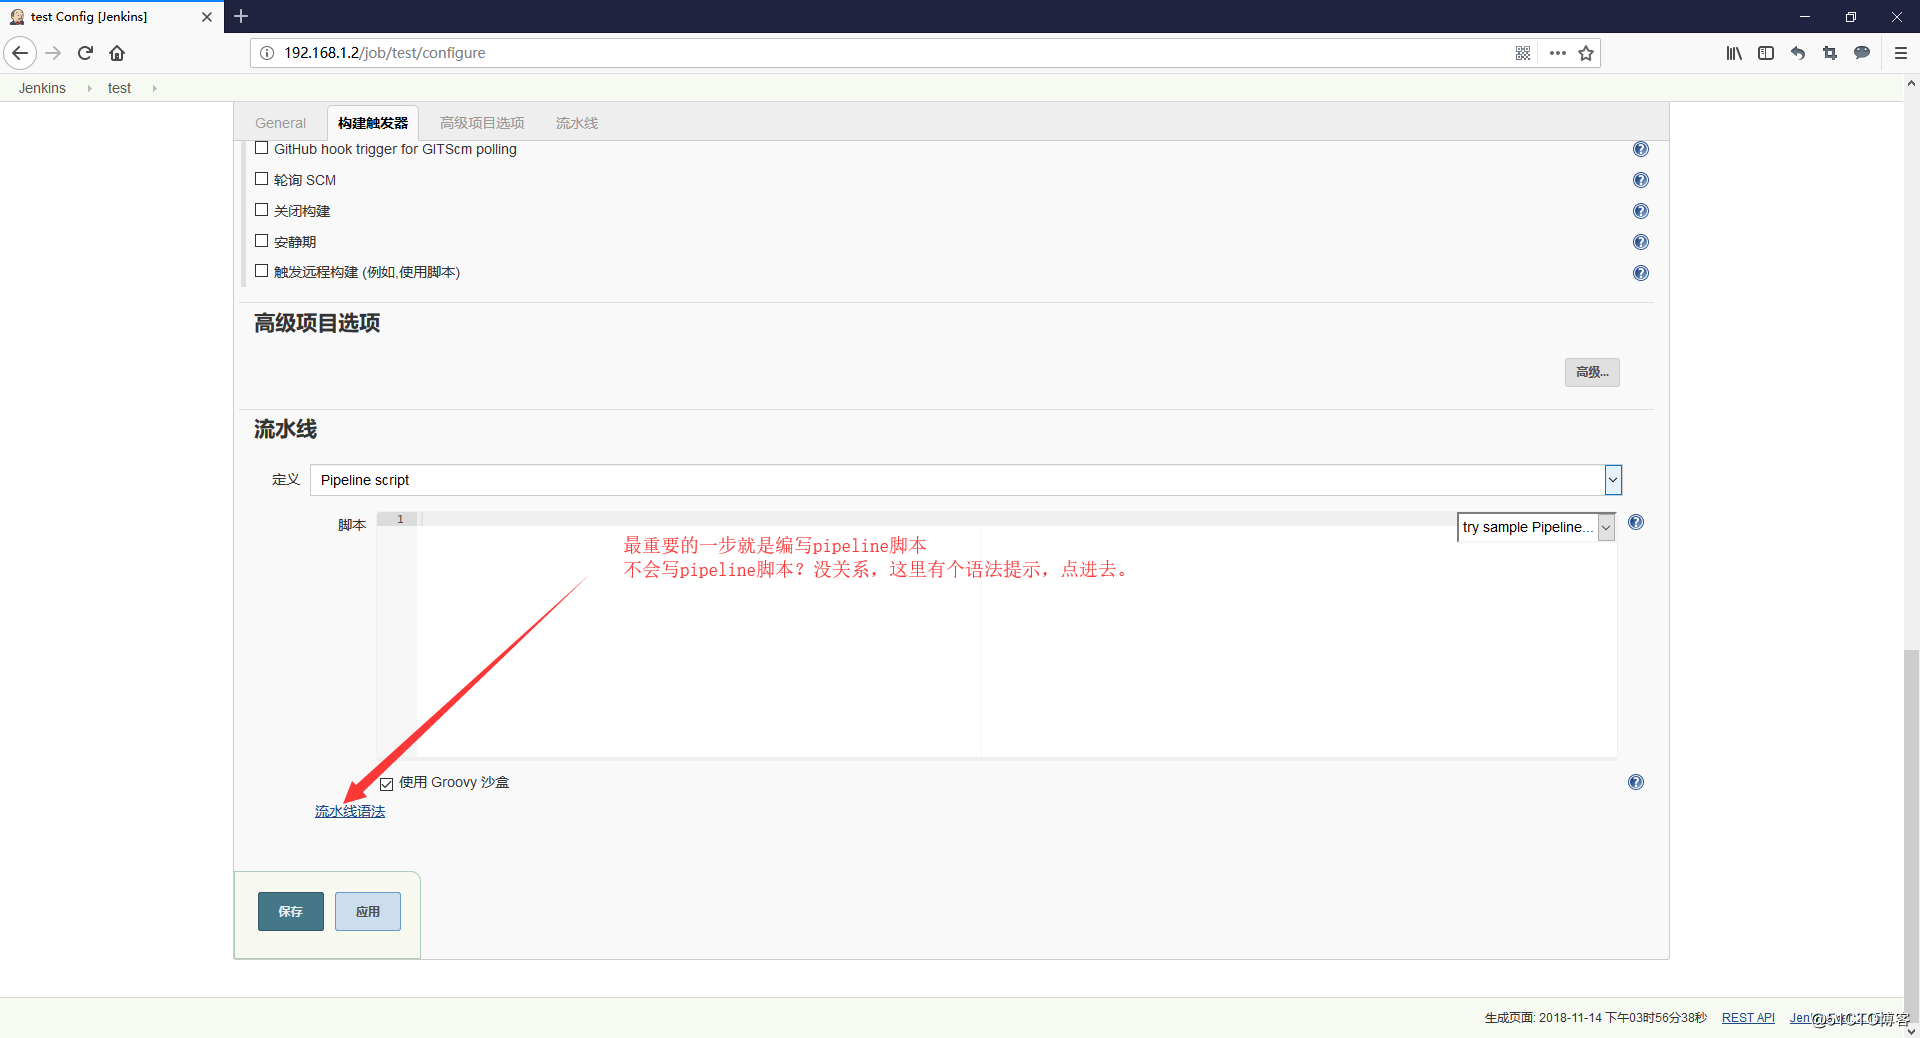

-
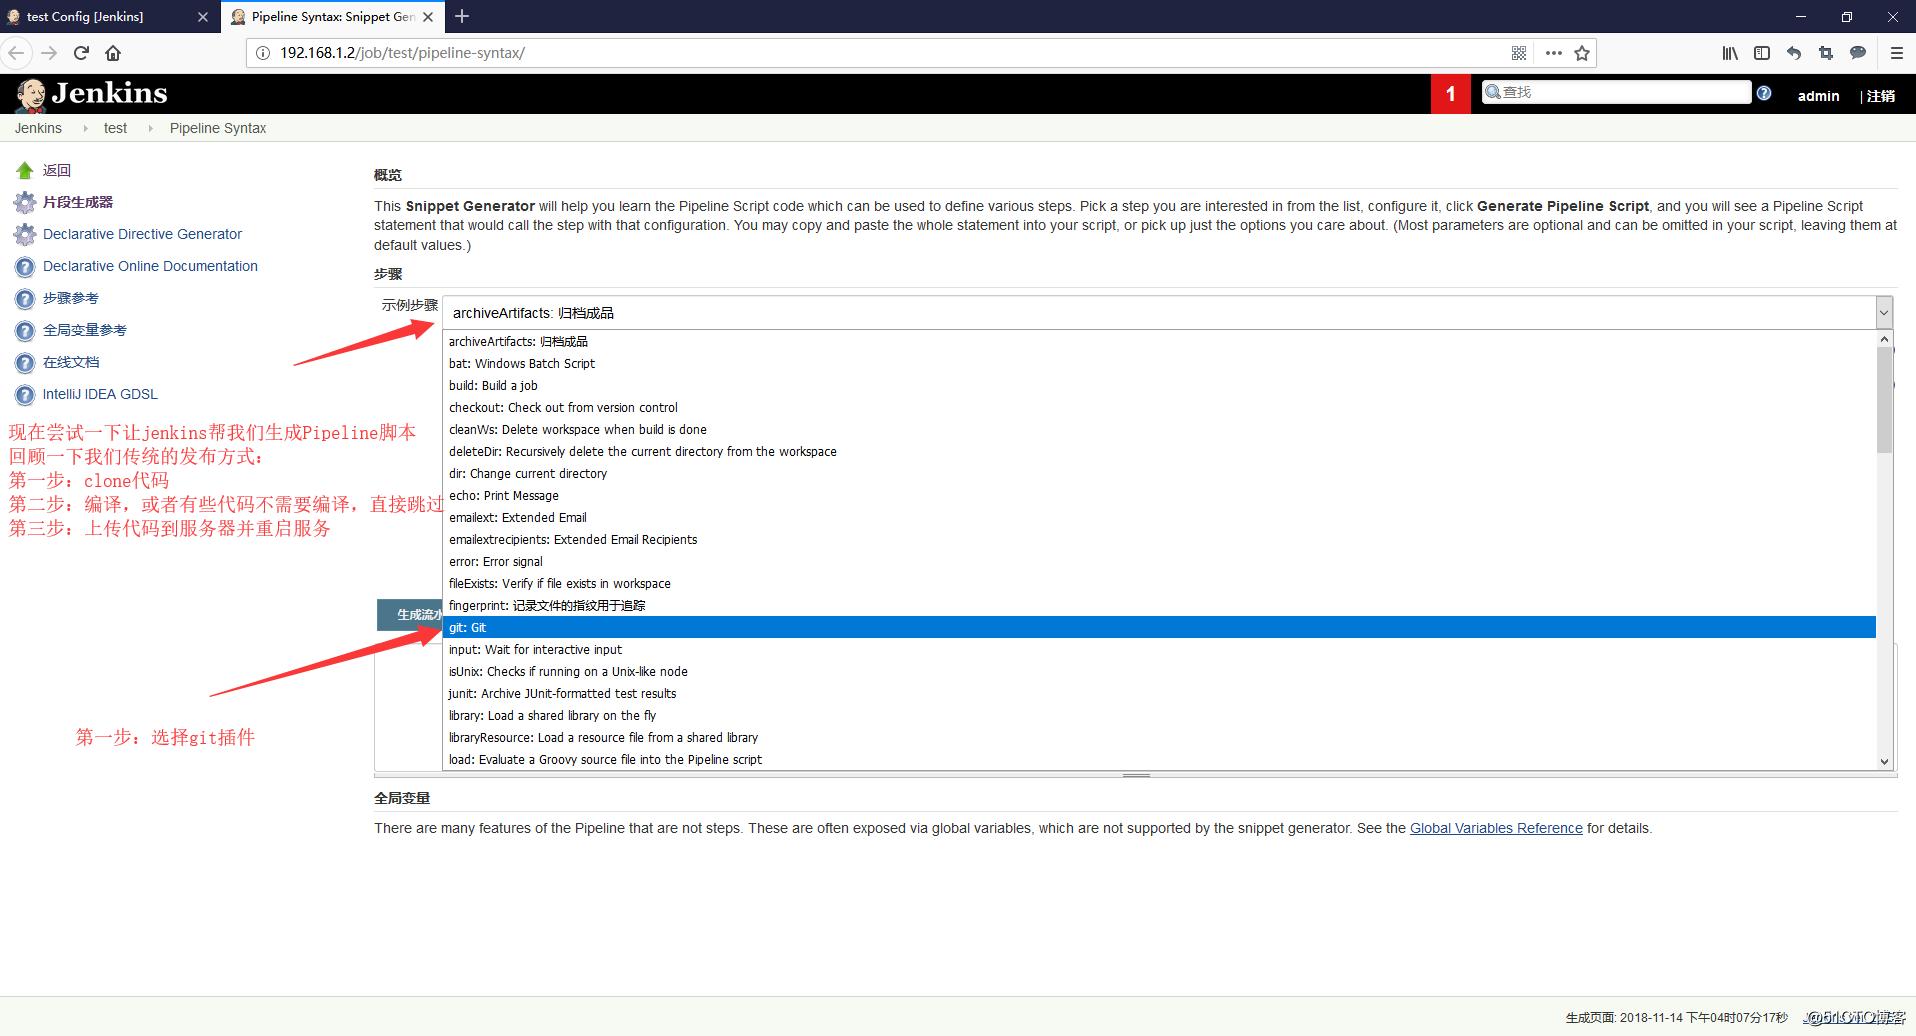
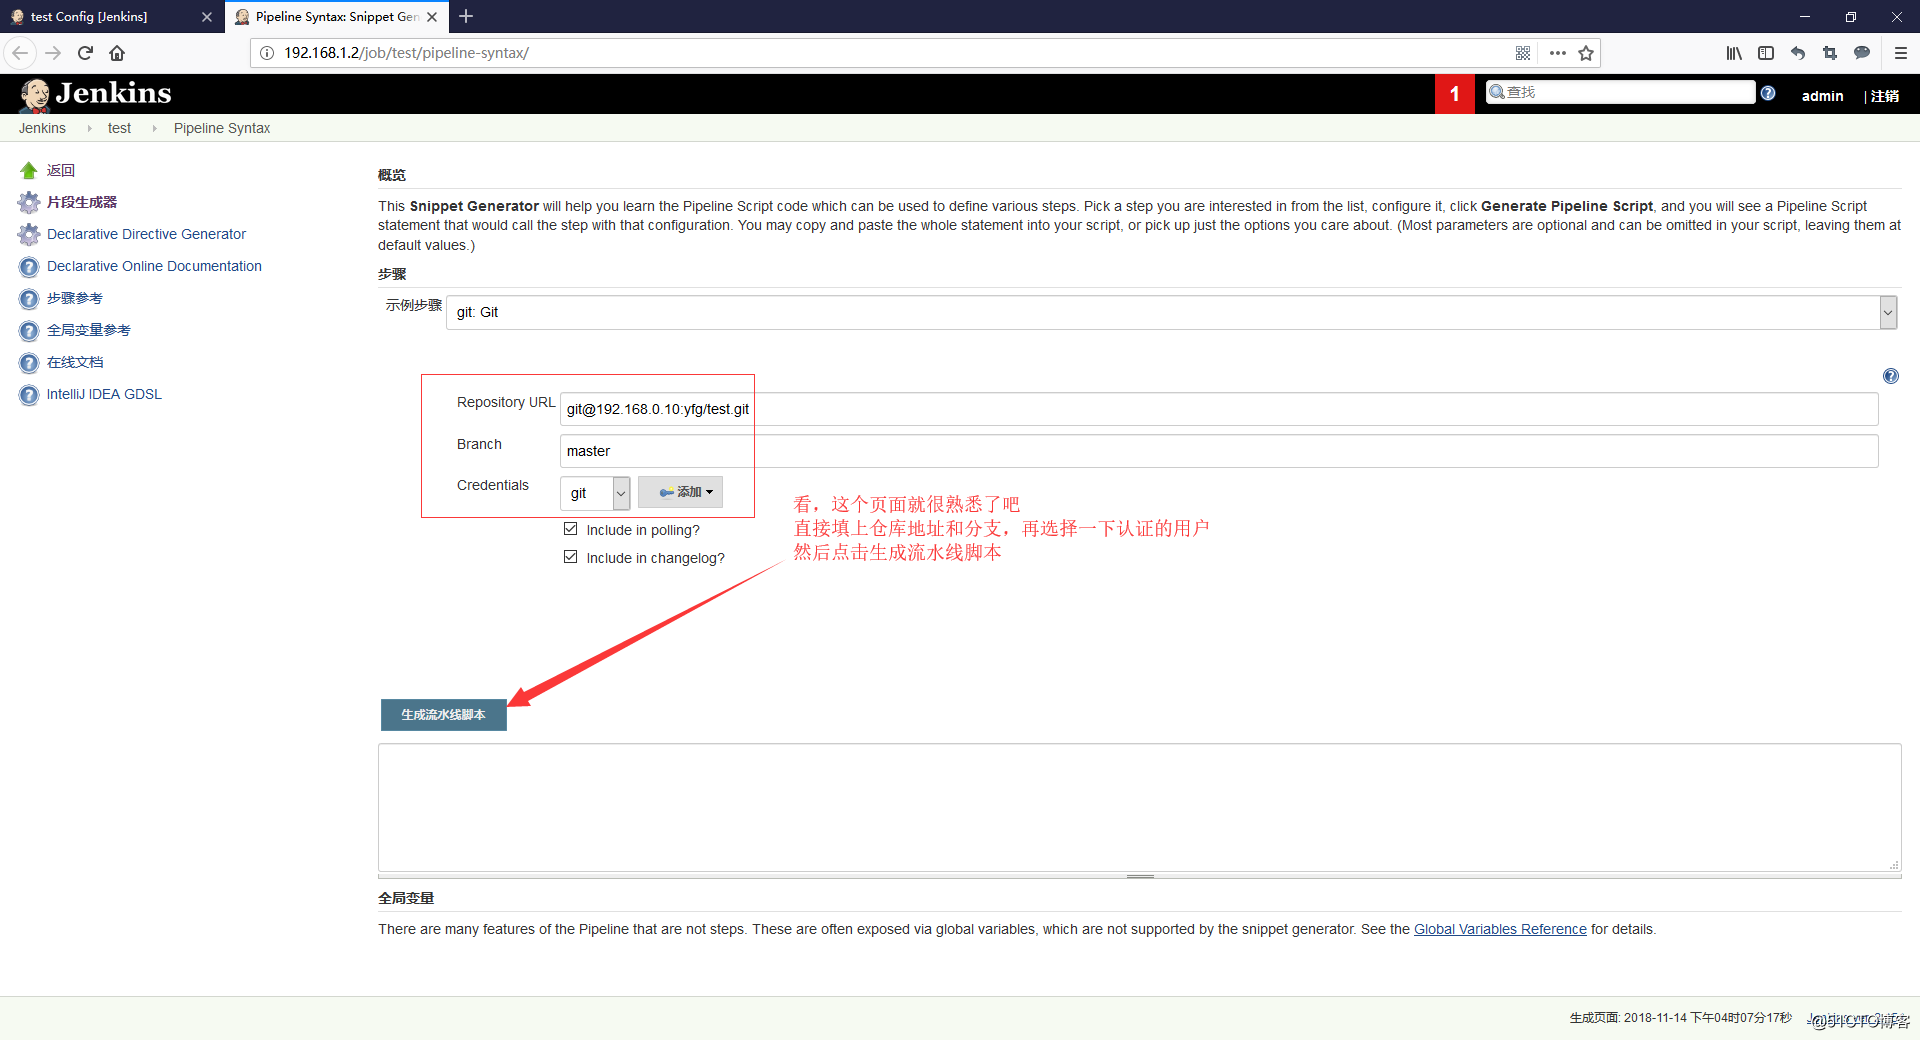
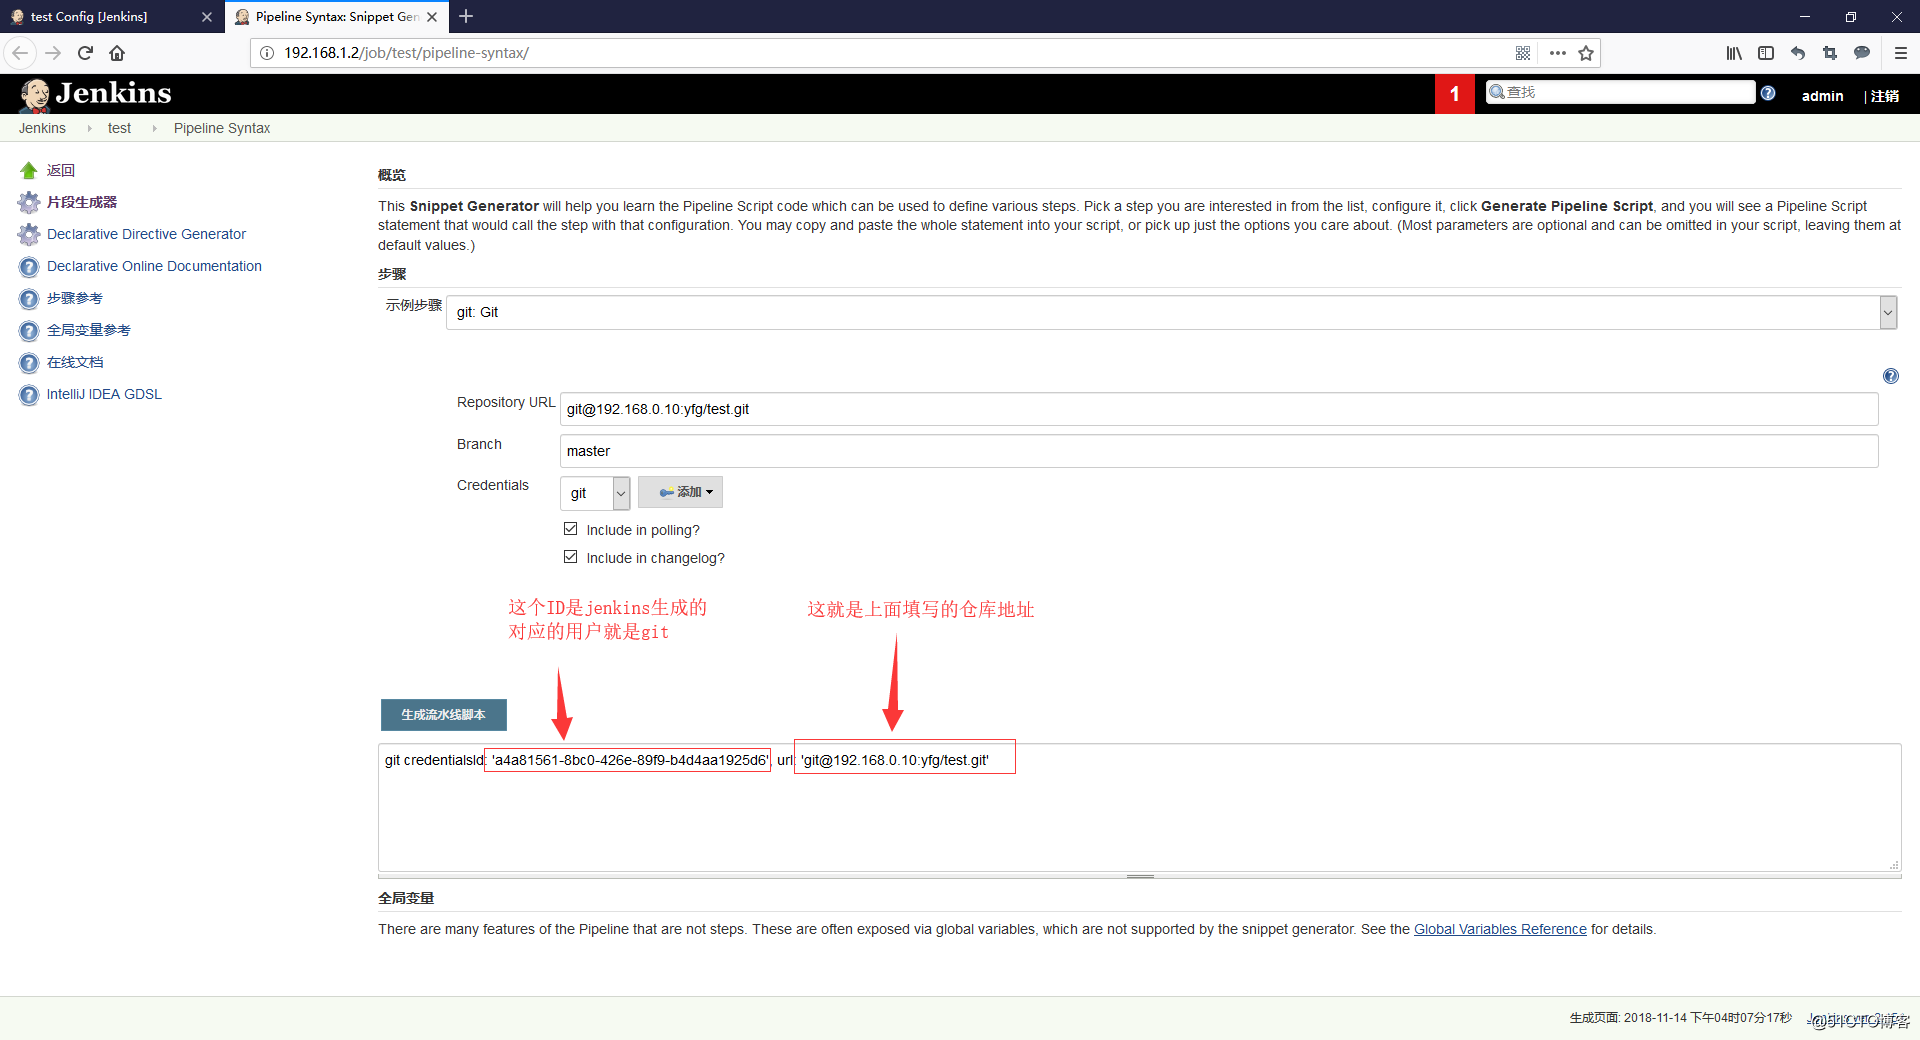
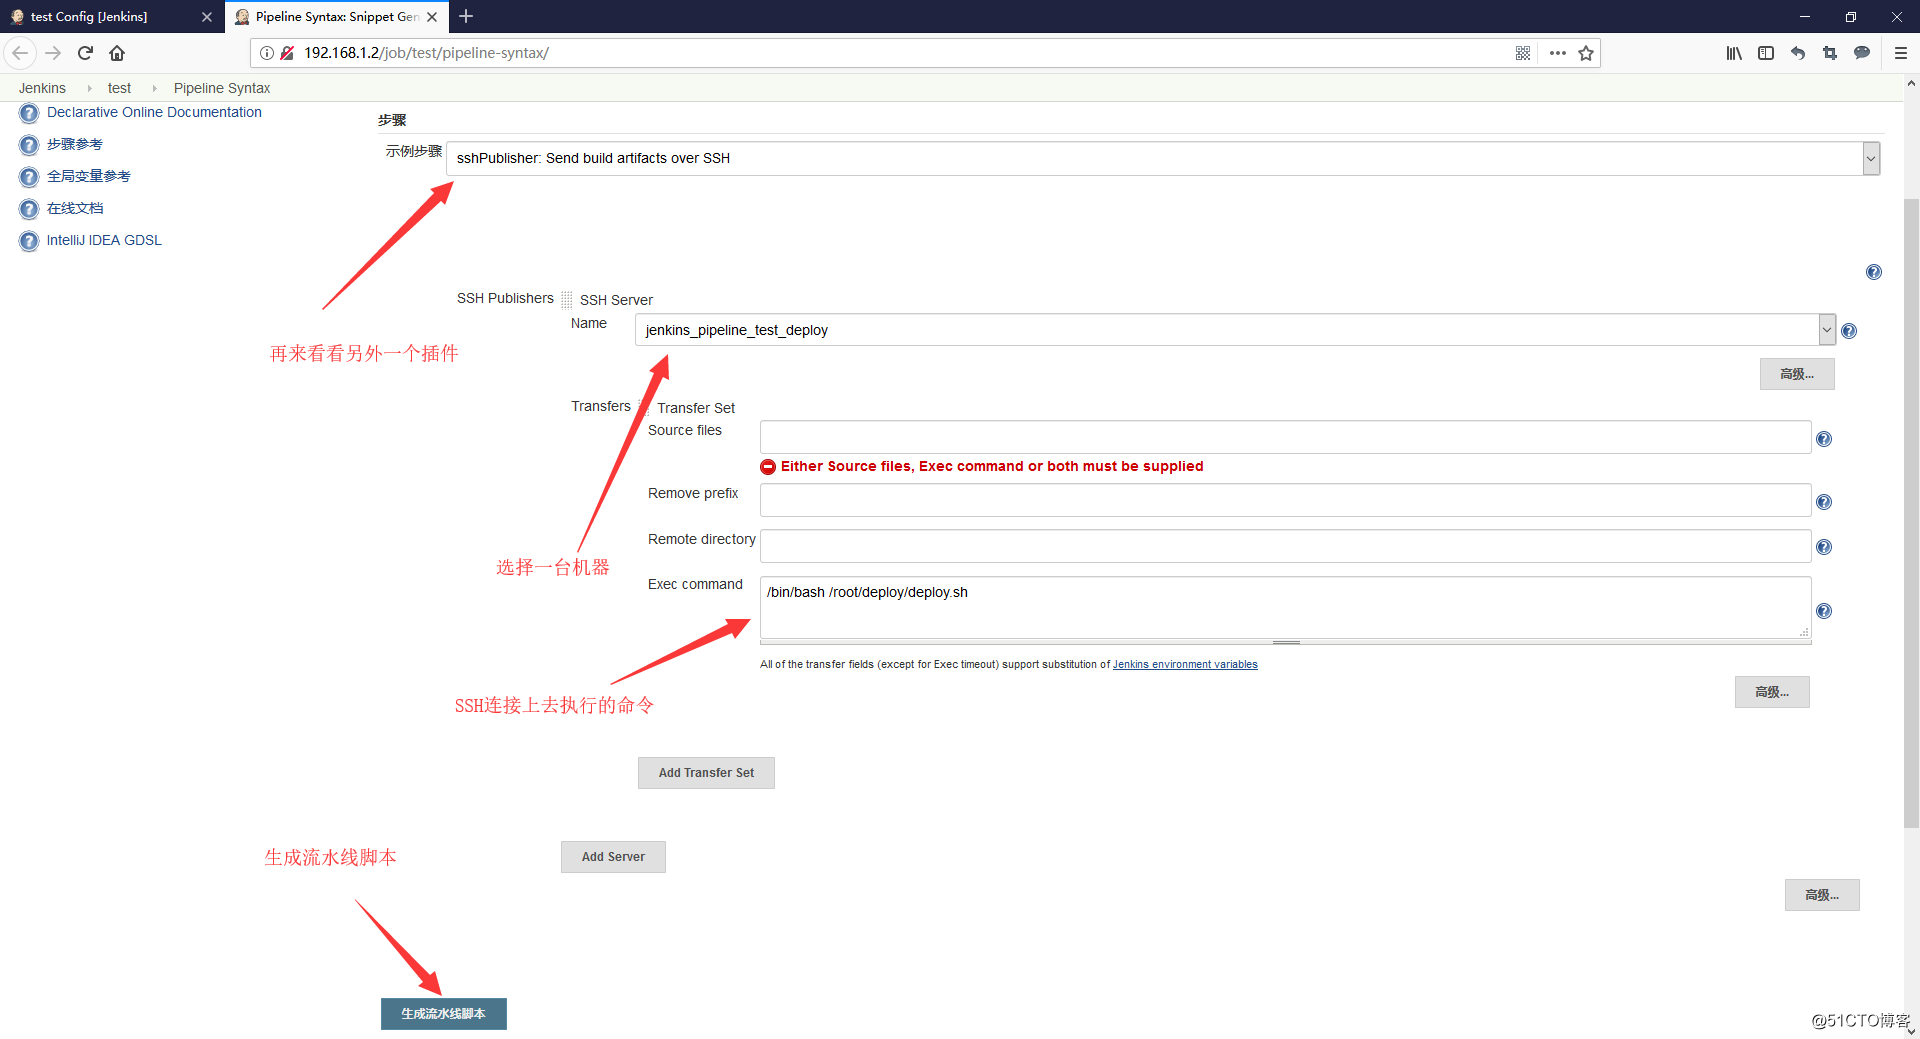
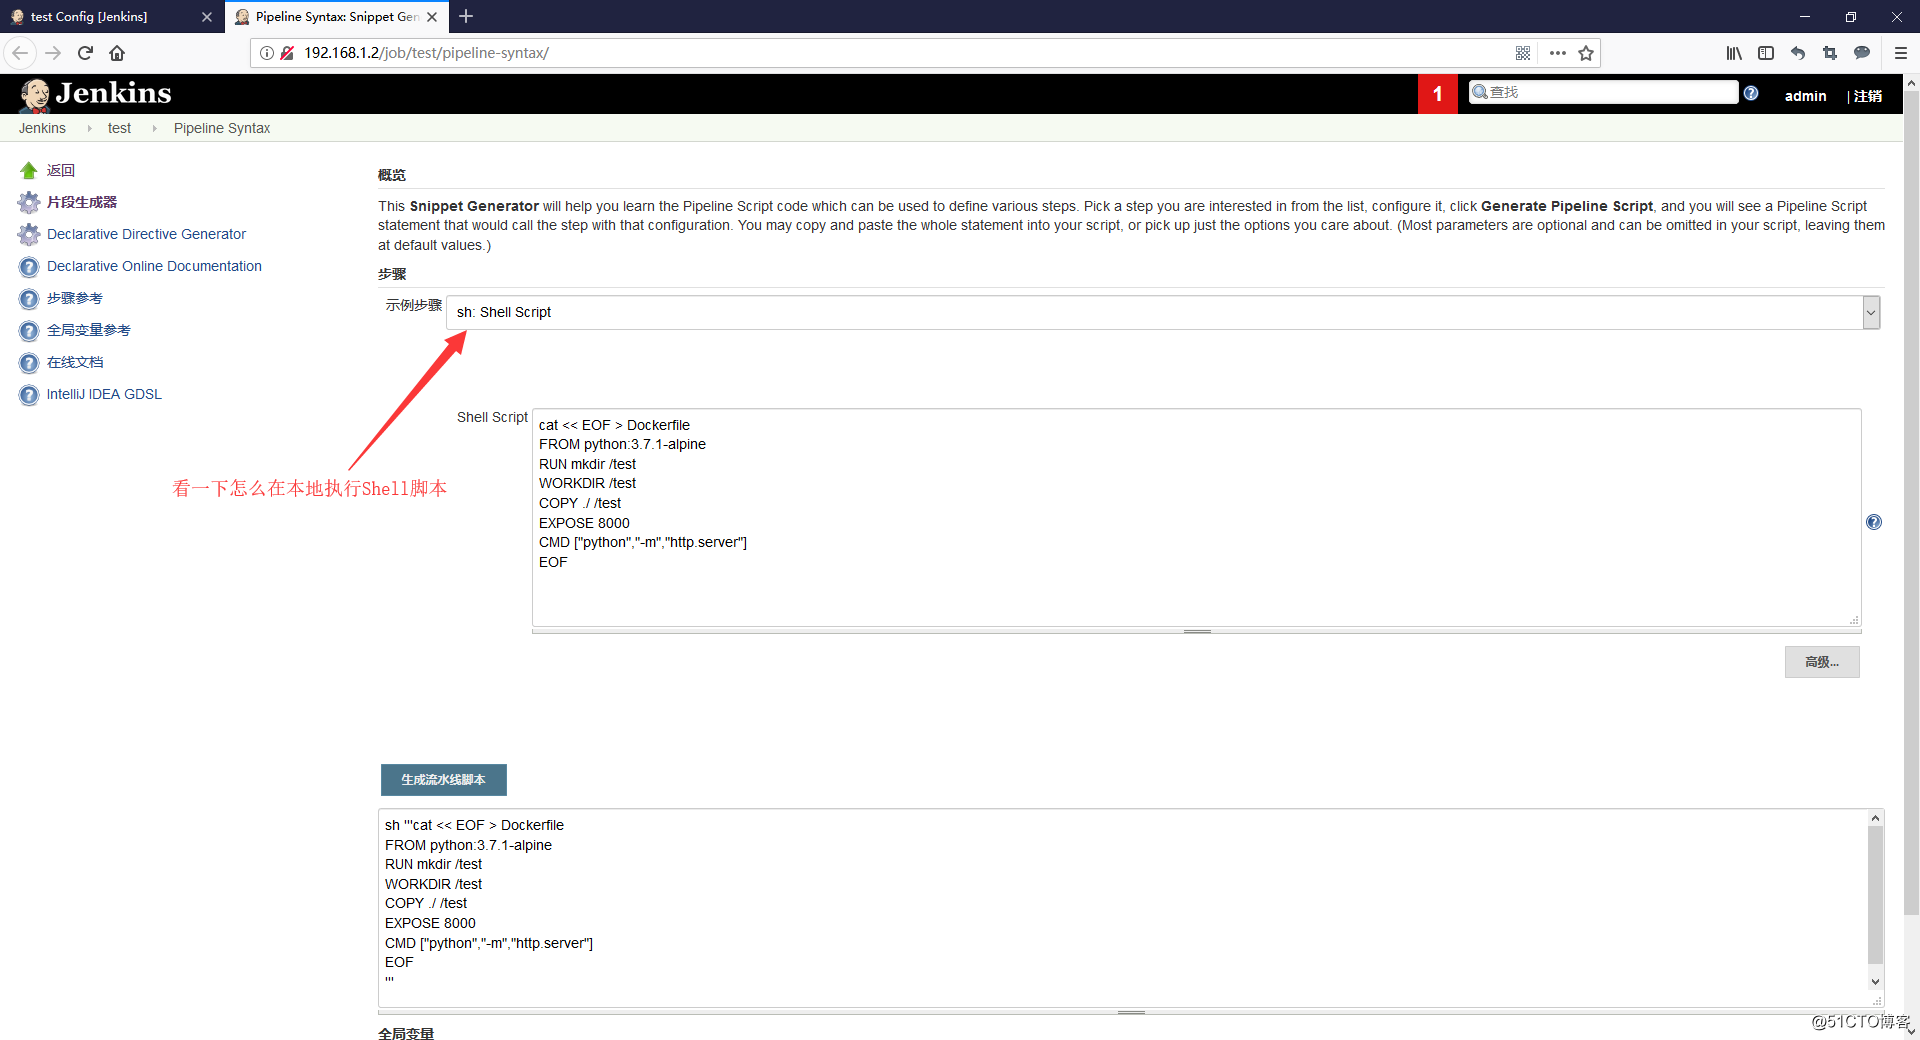
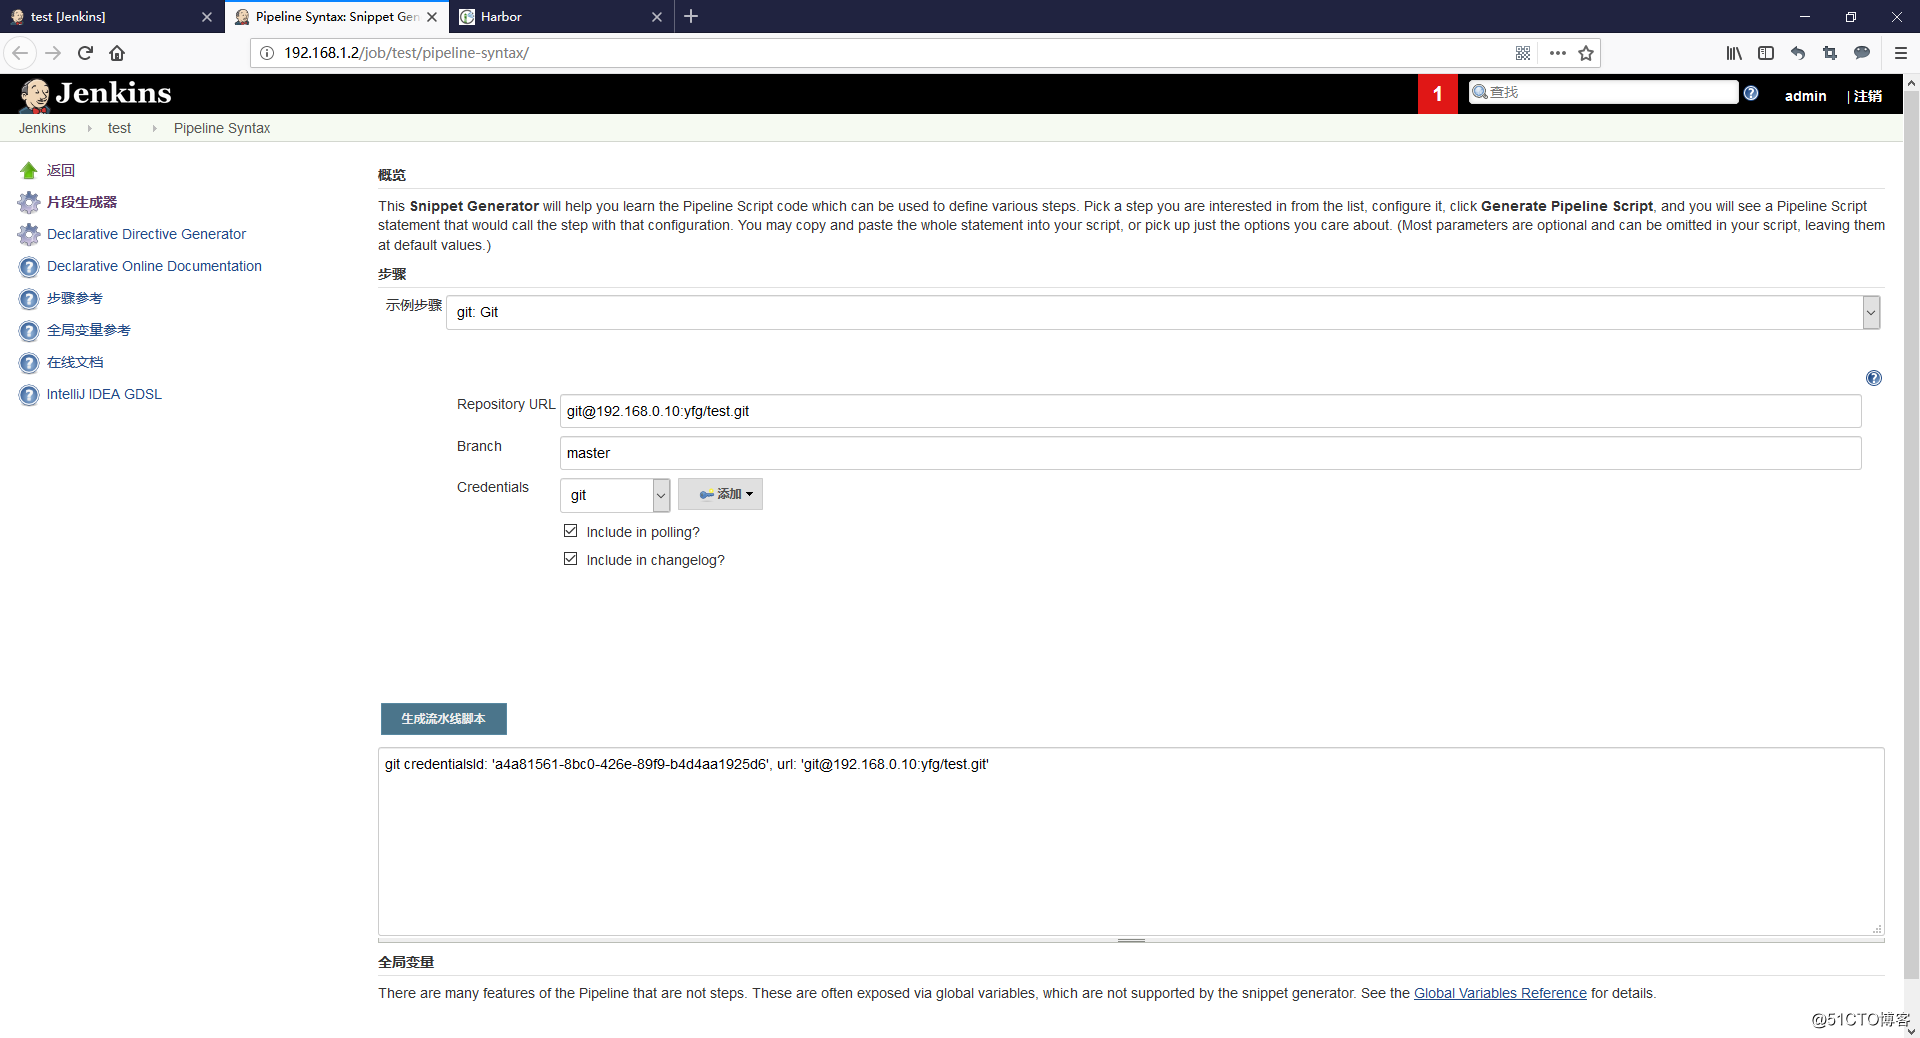
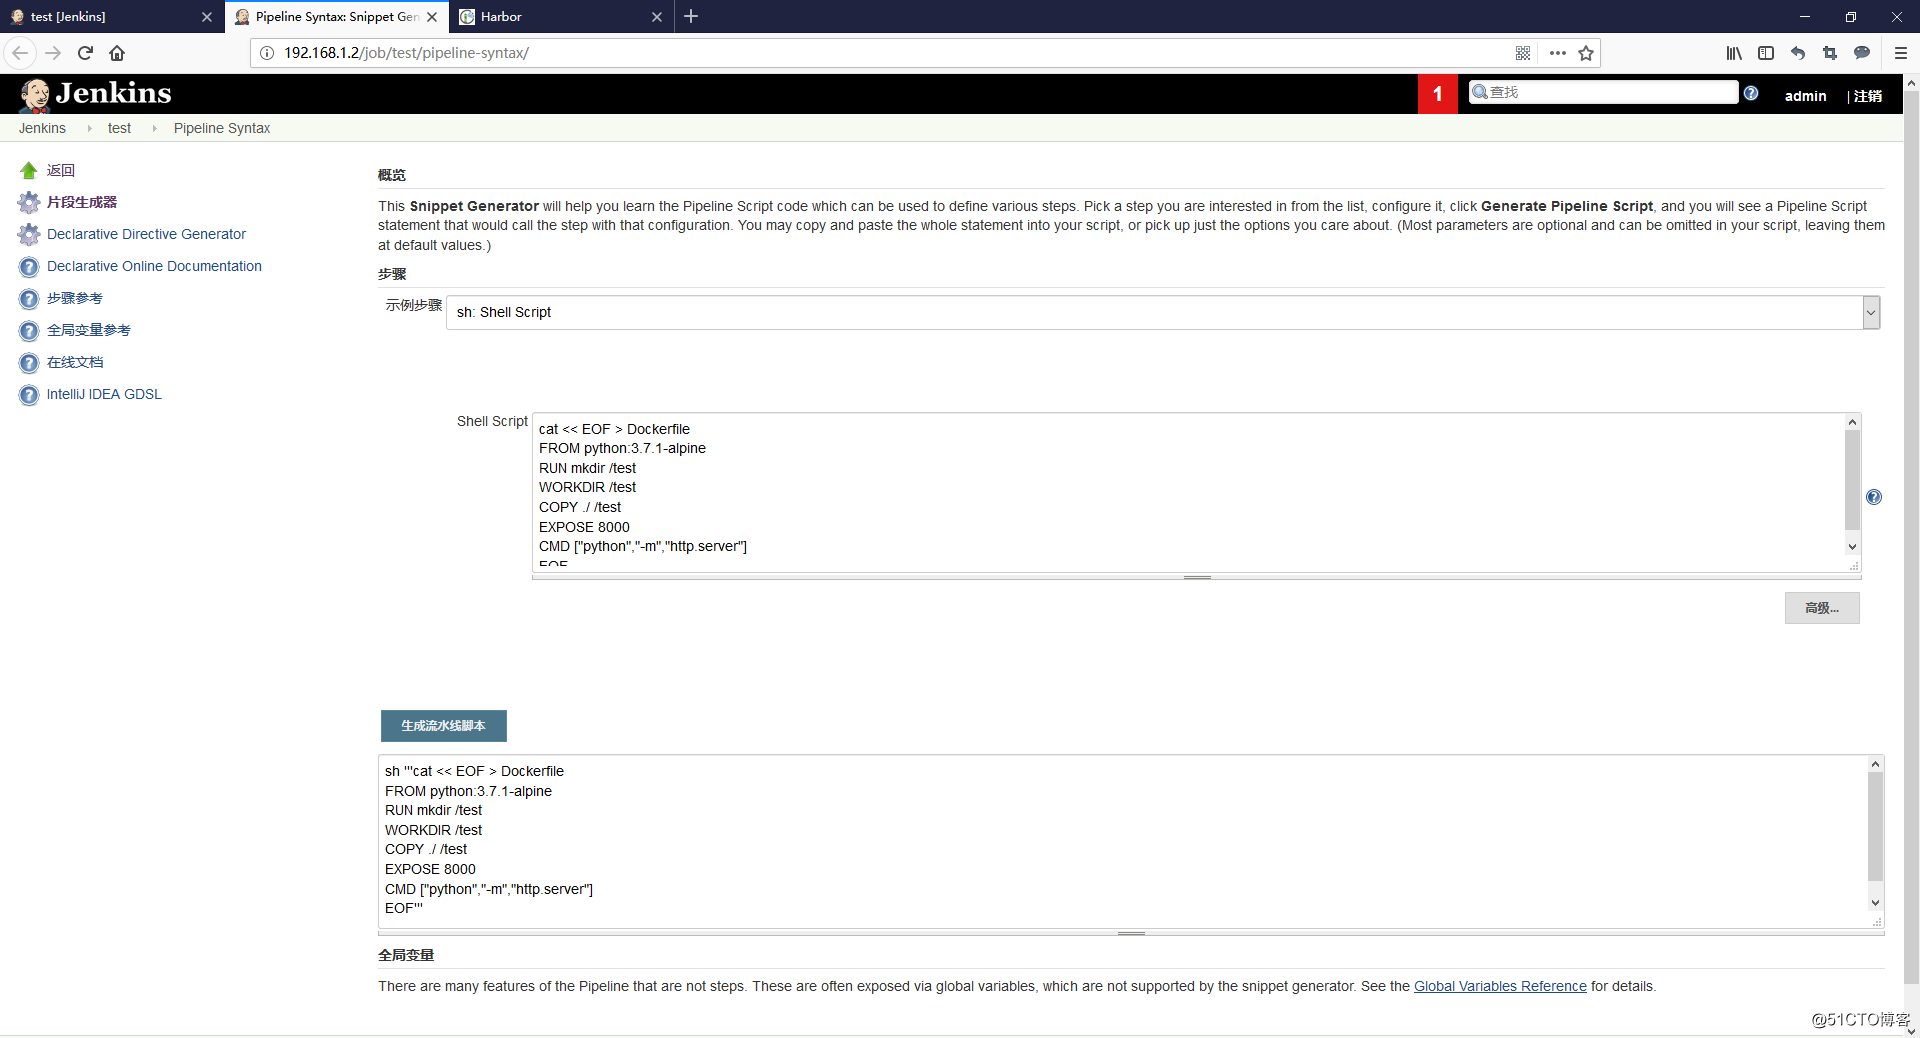
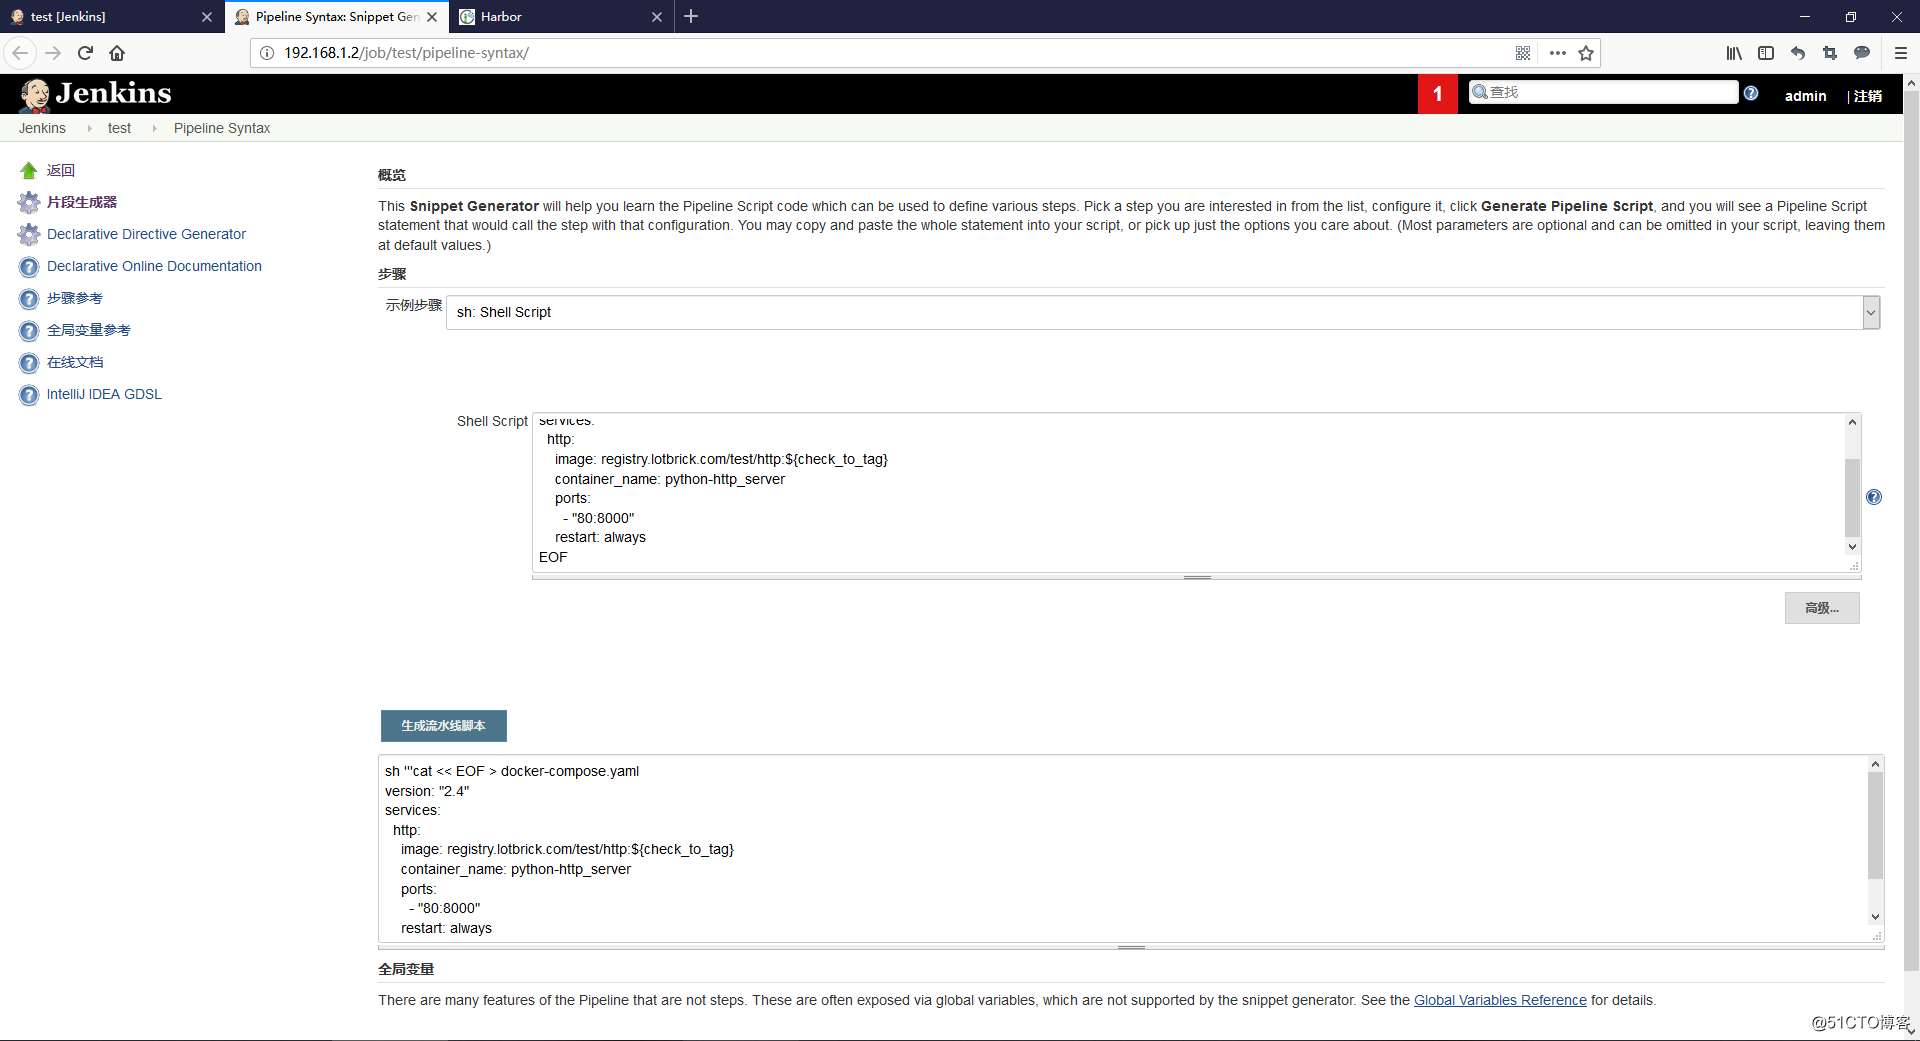
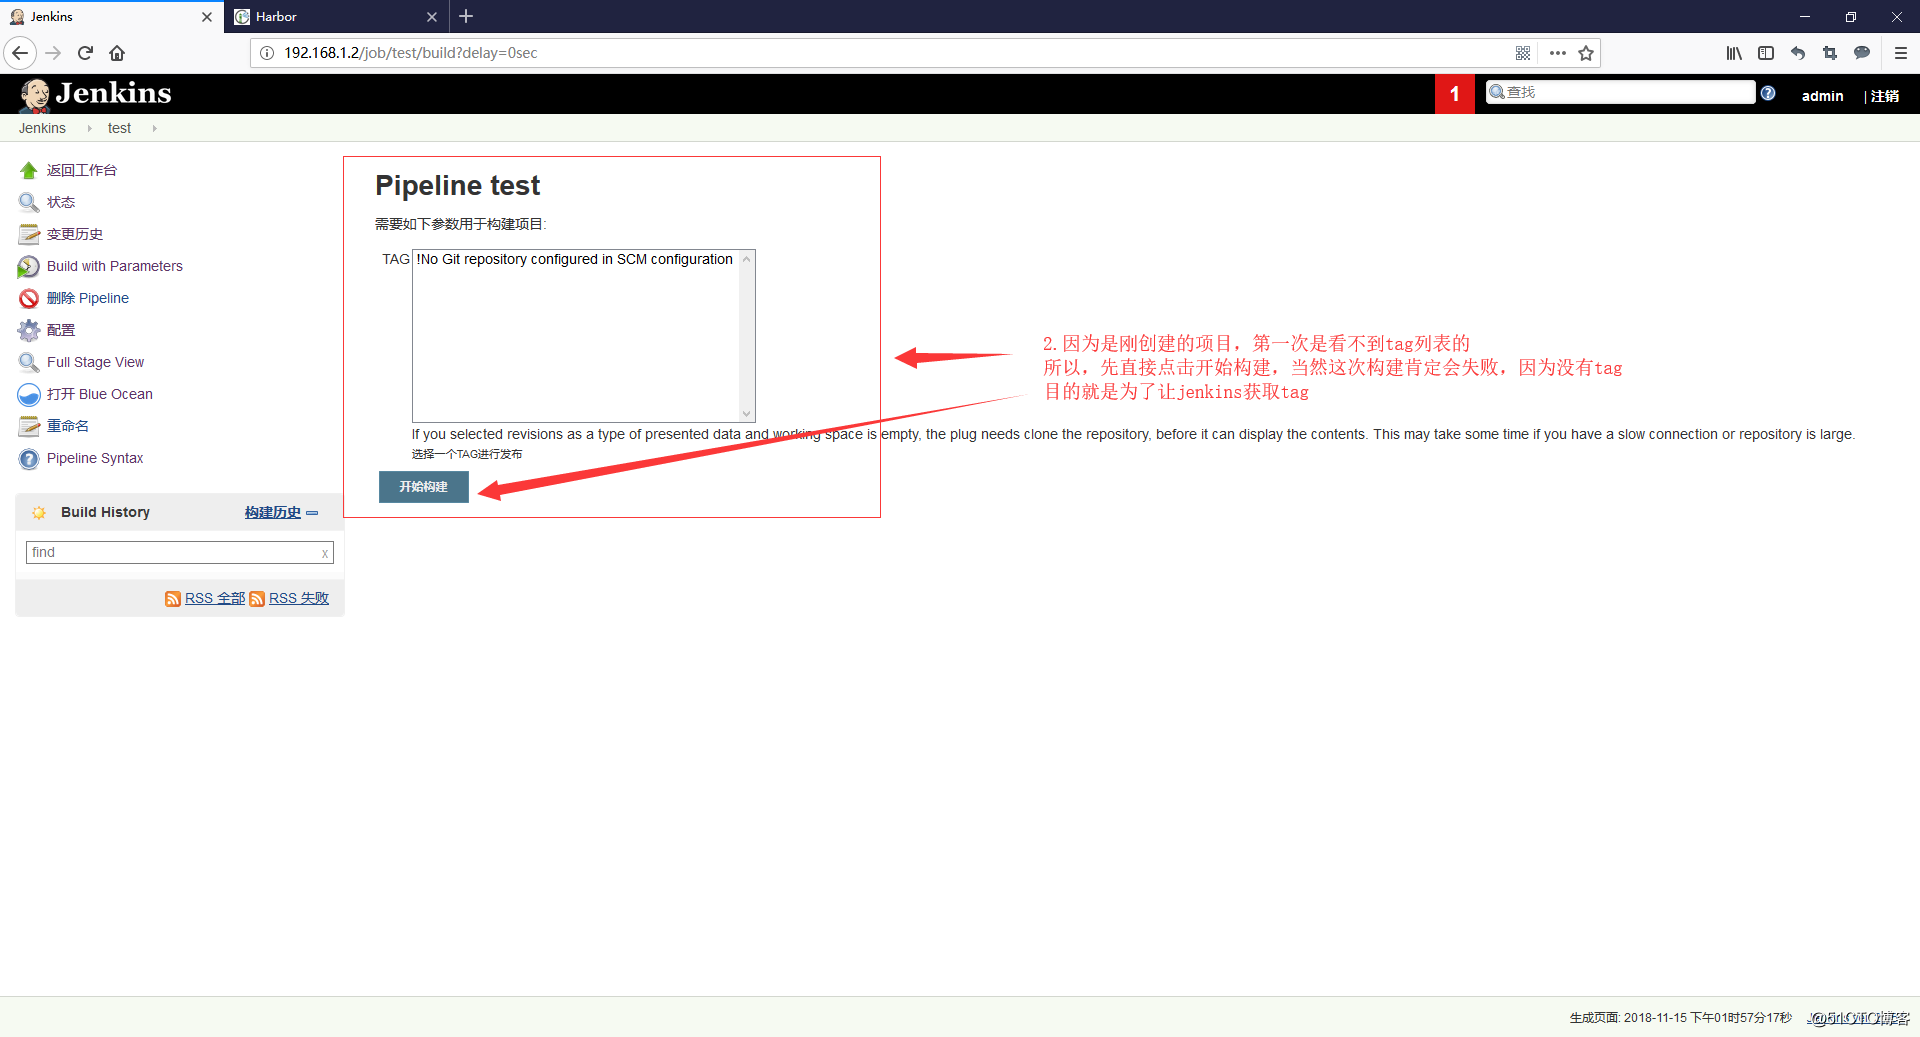
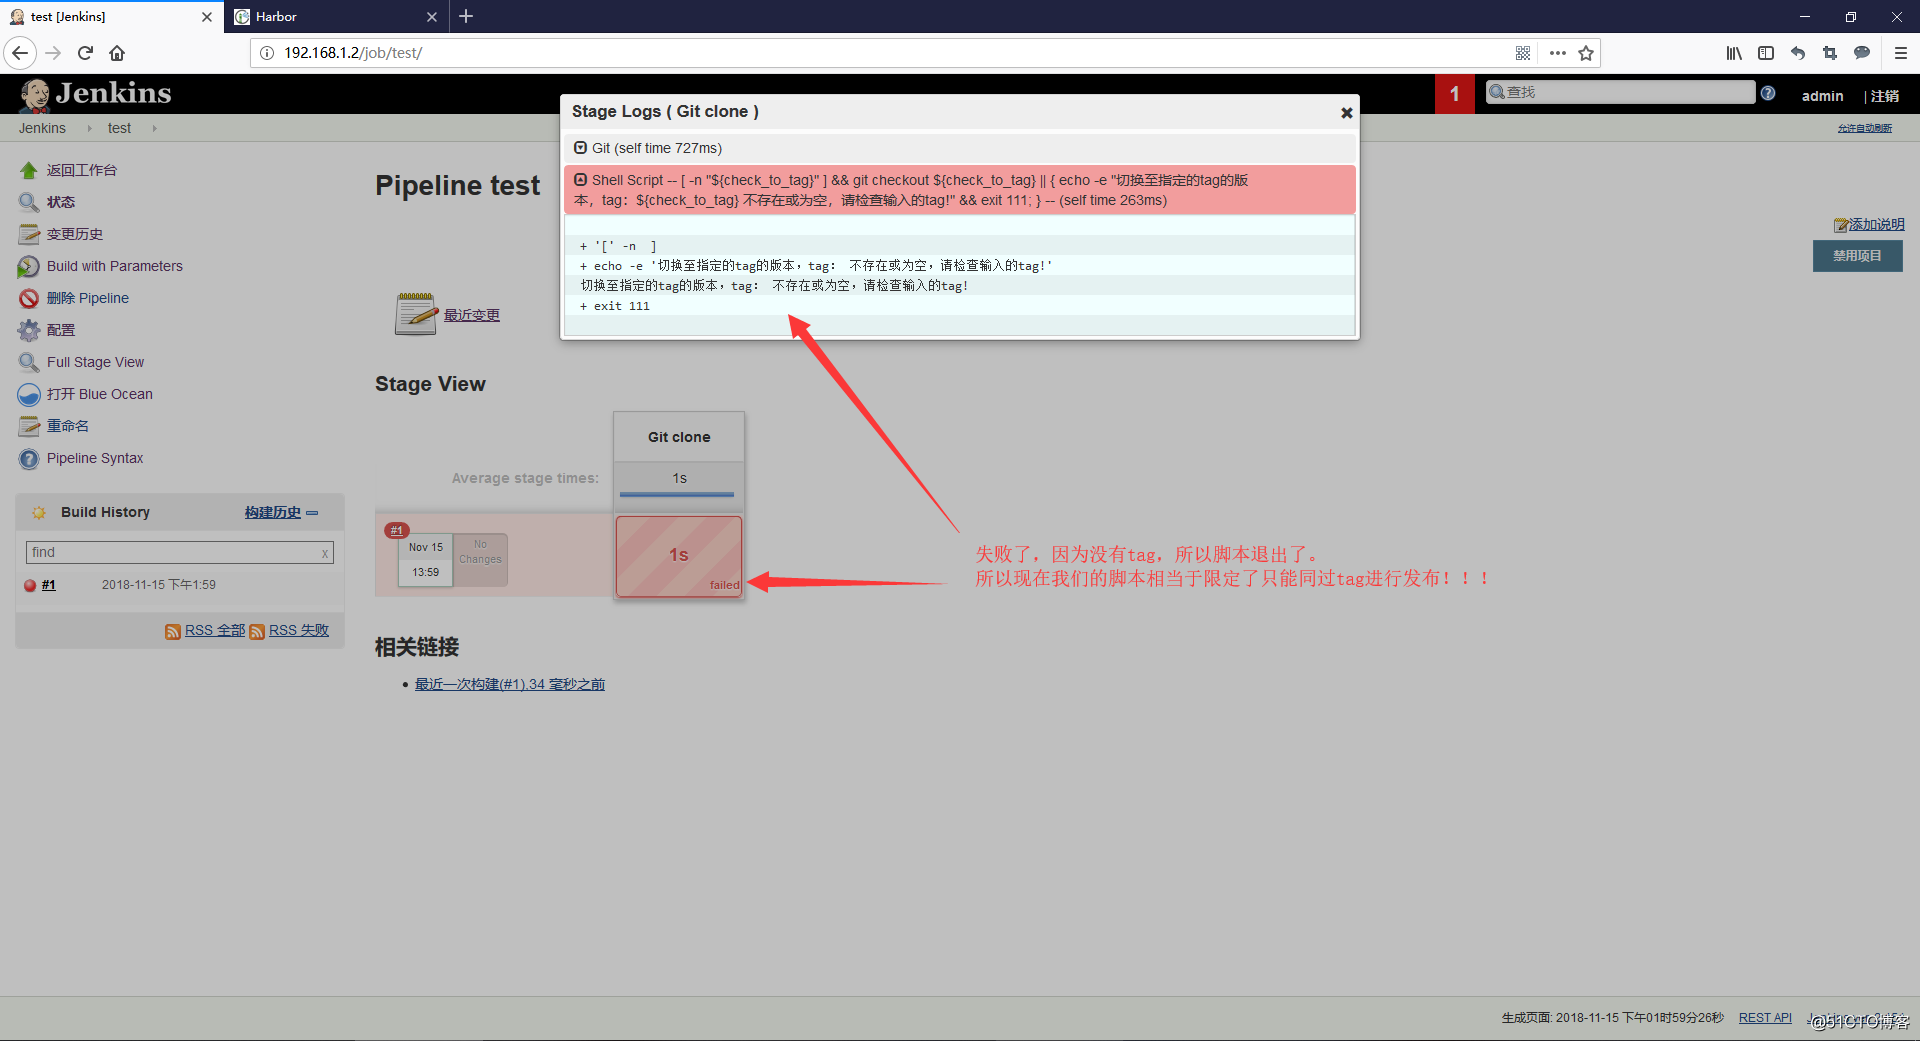
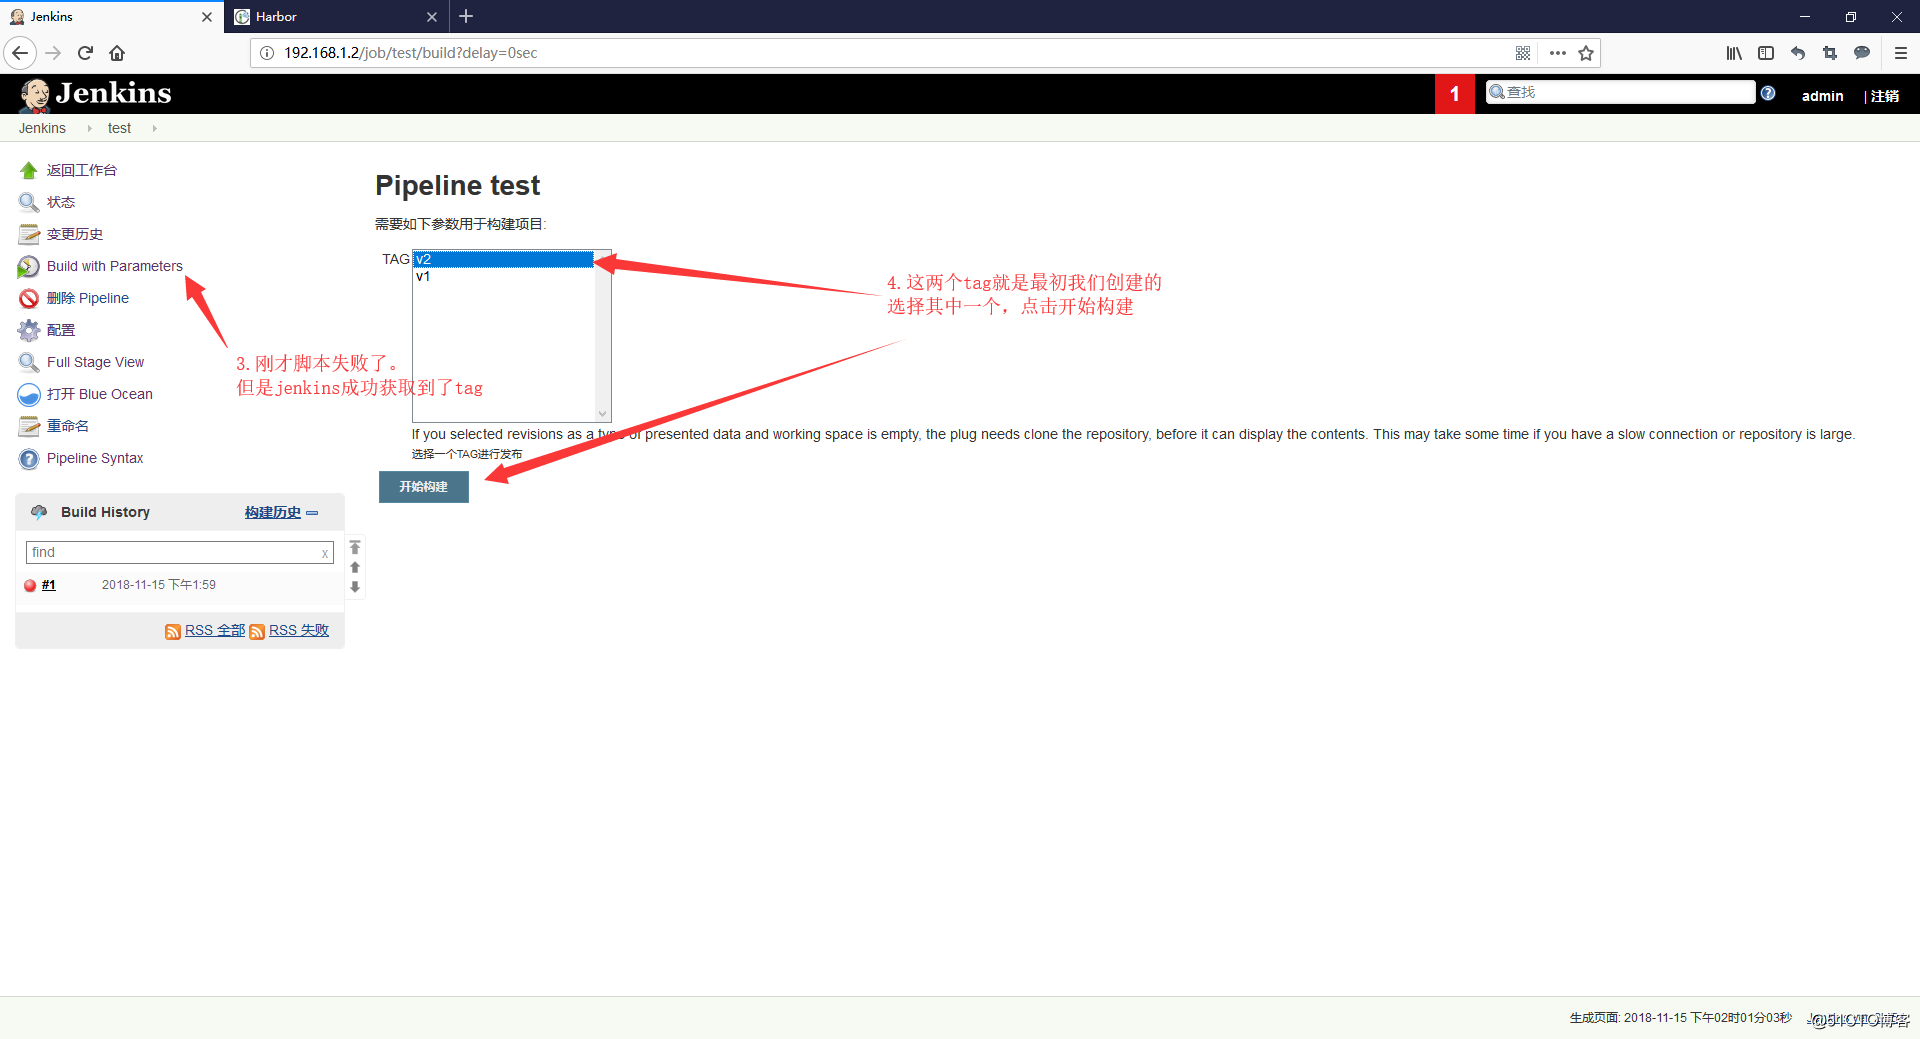
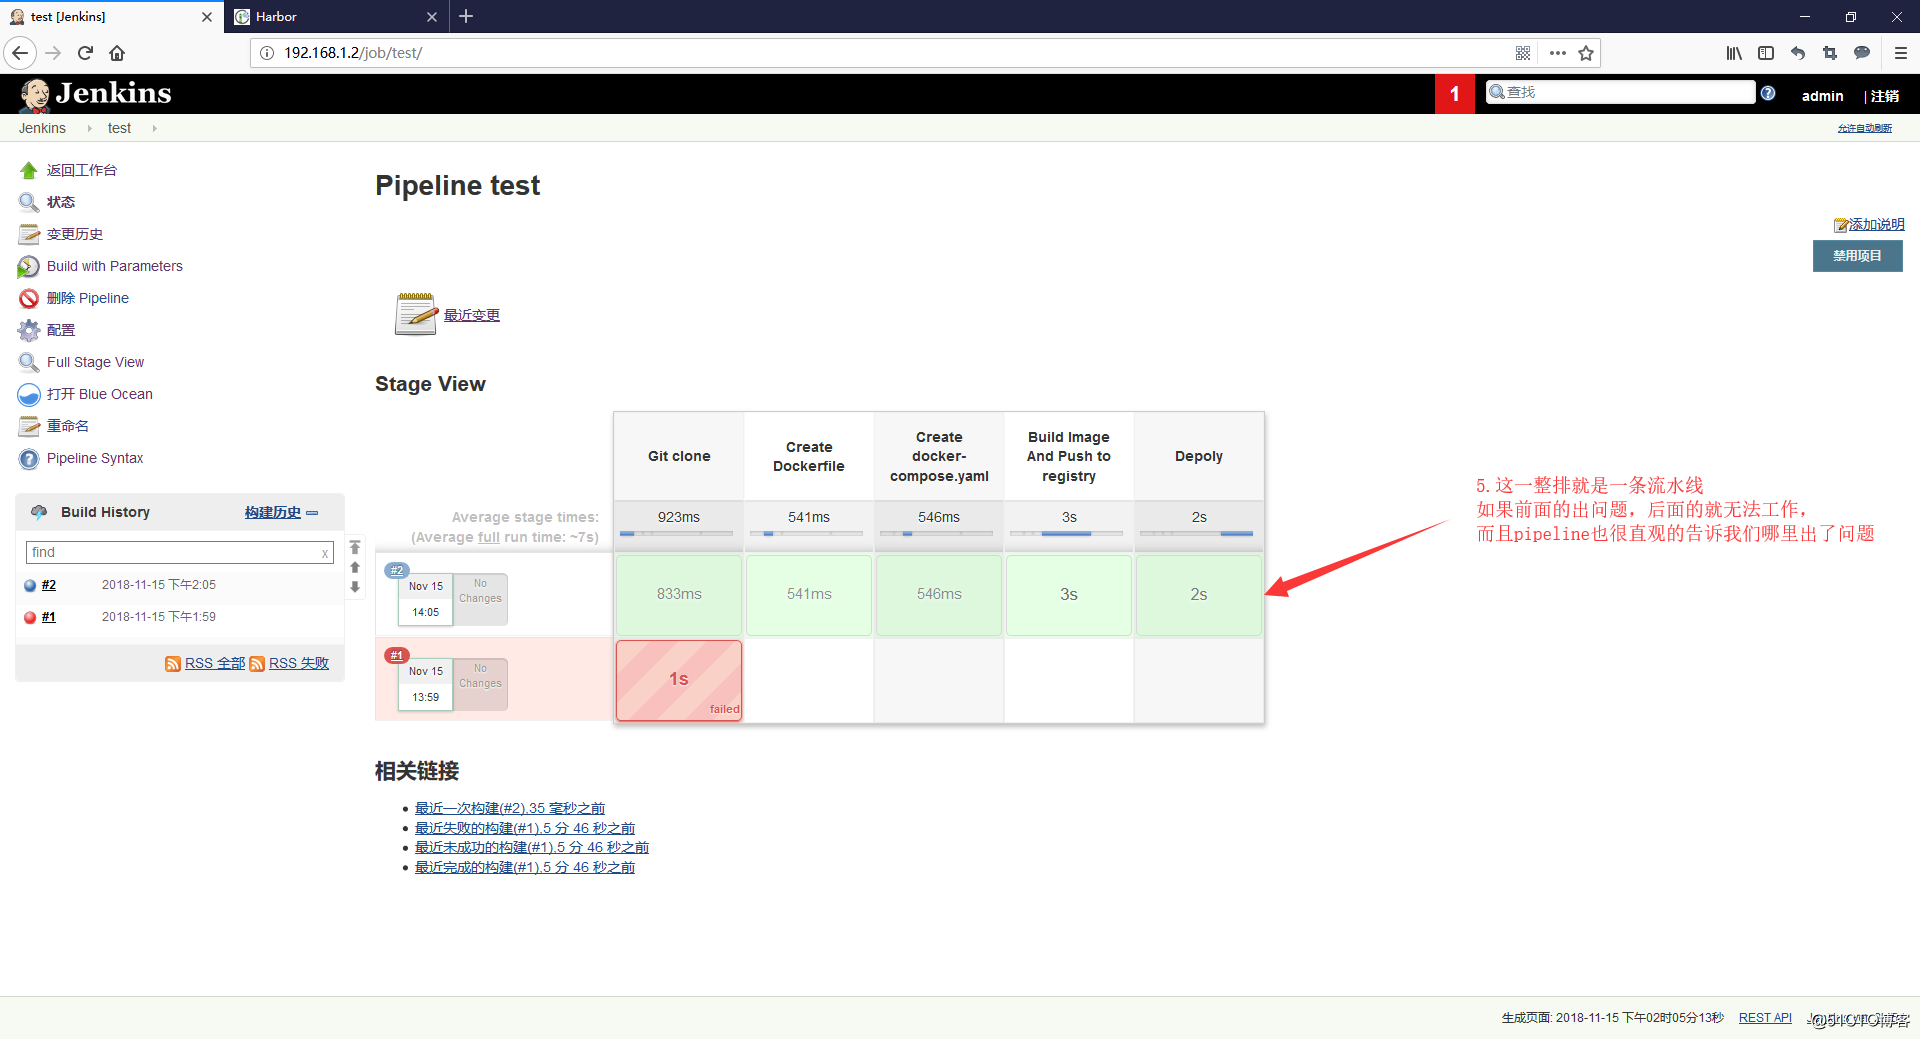
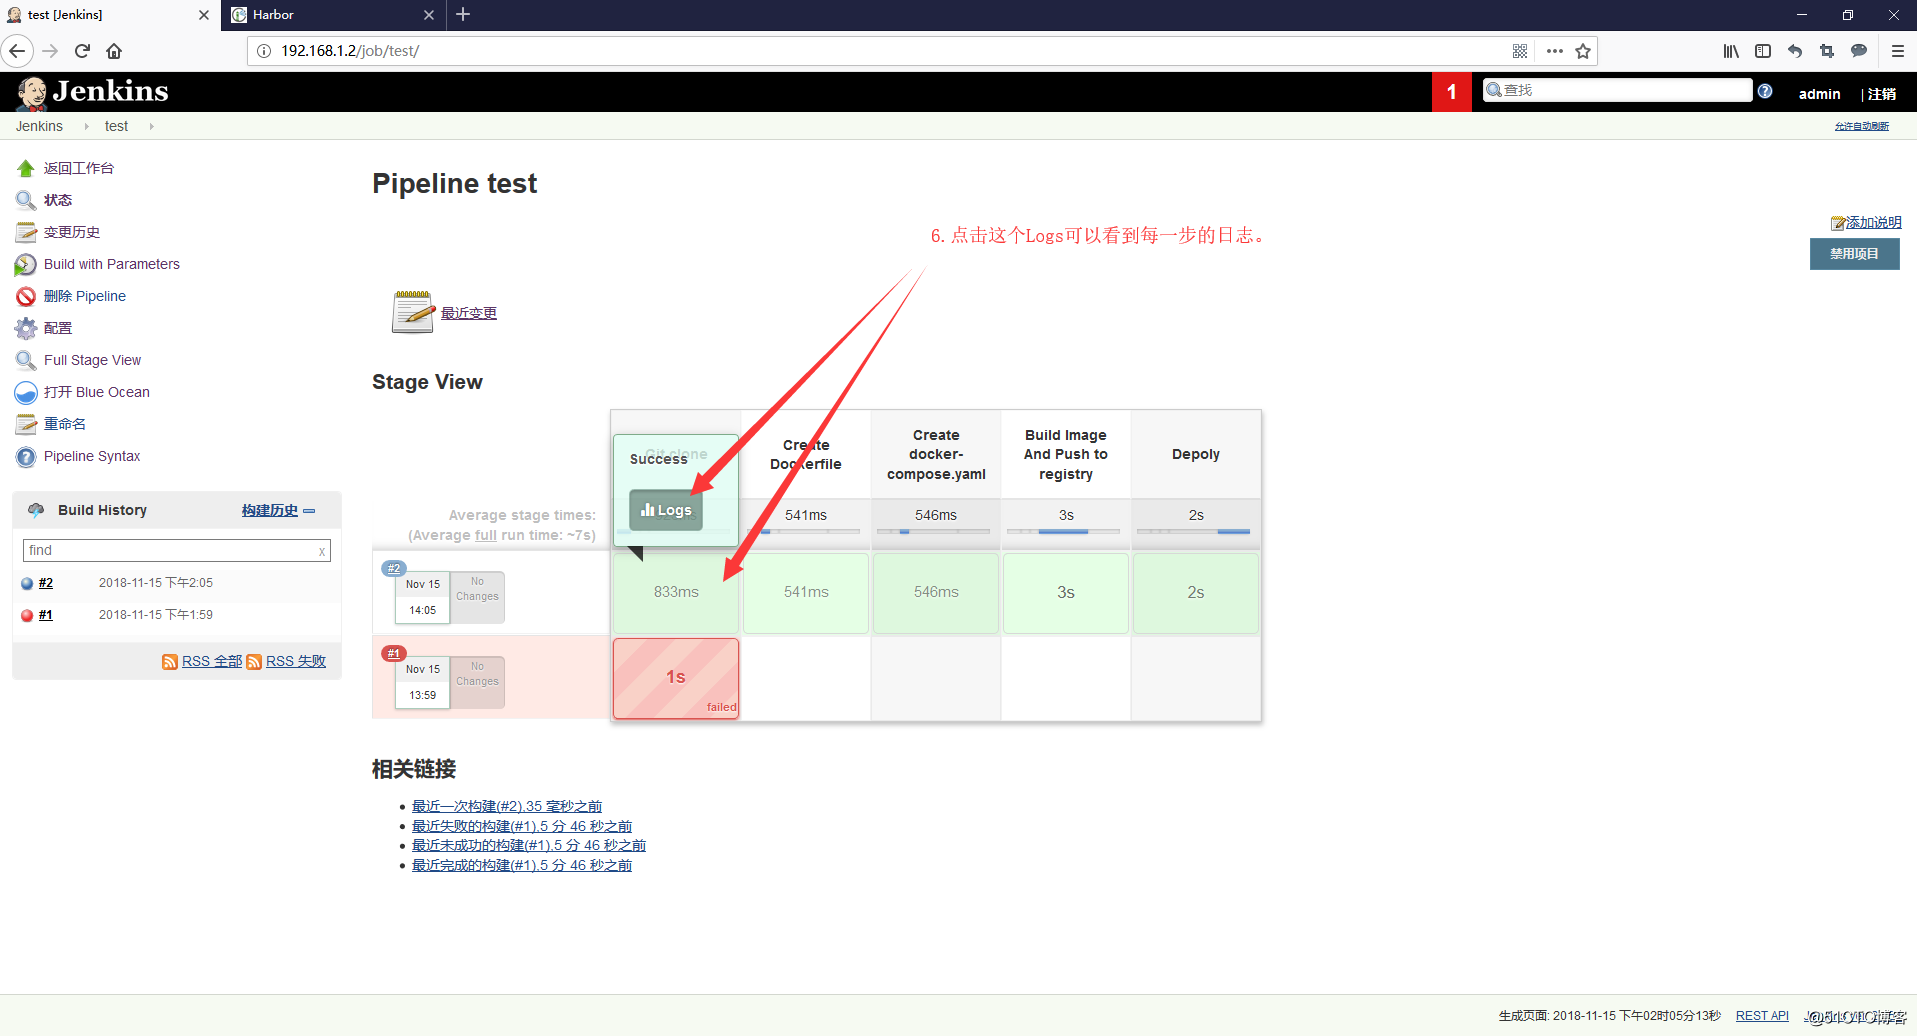
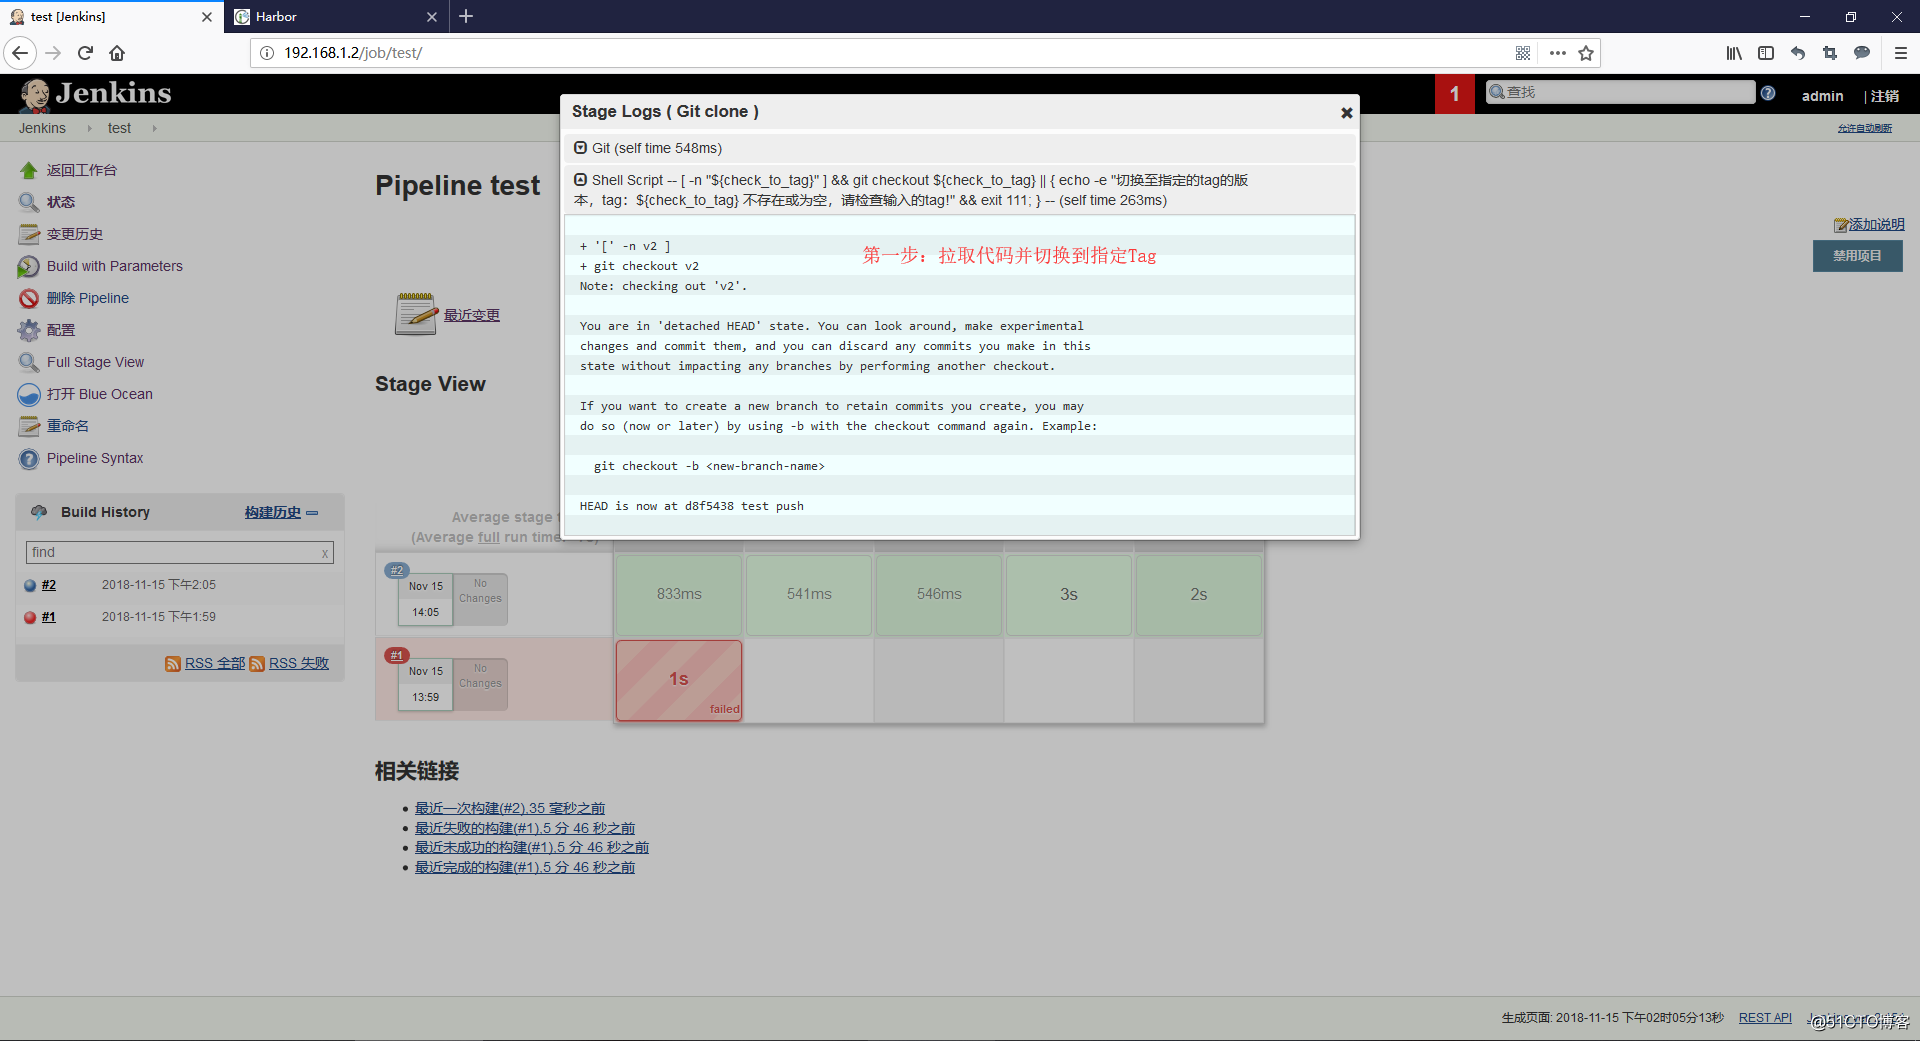
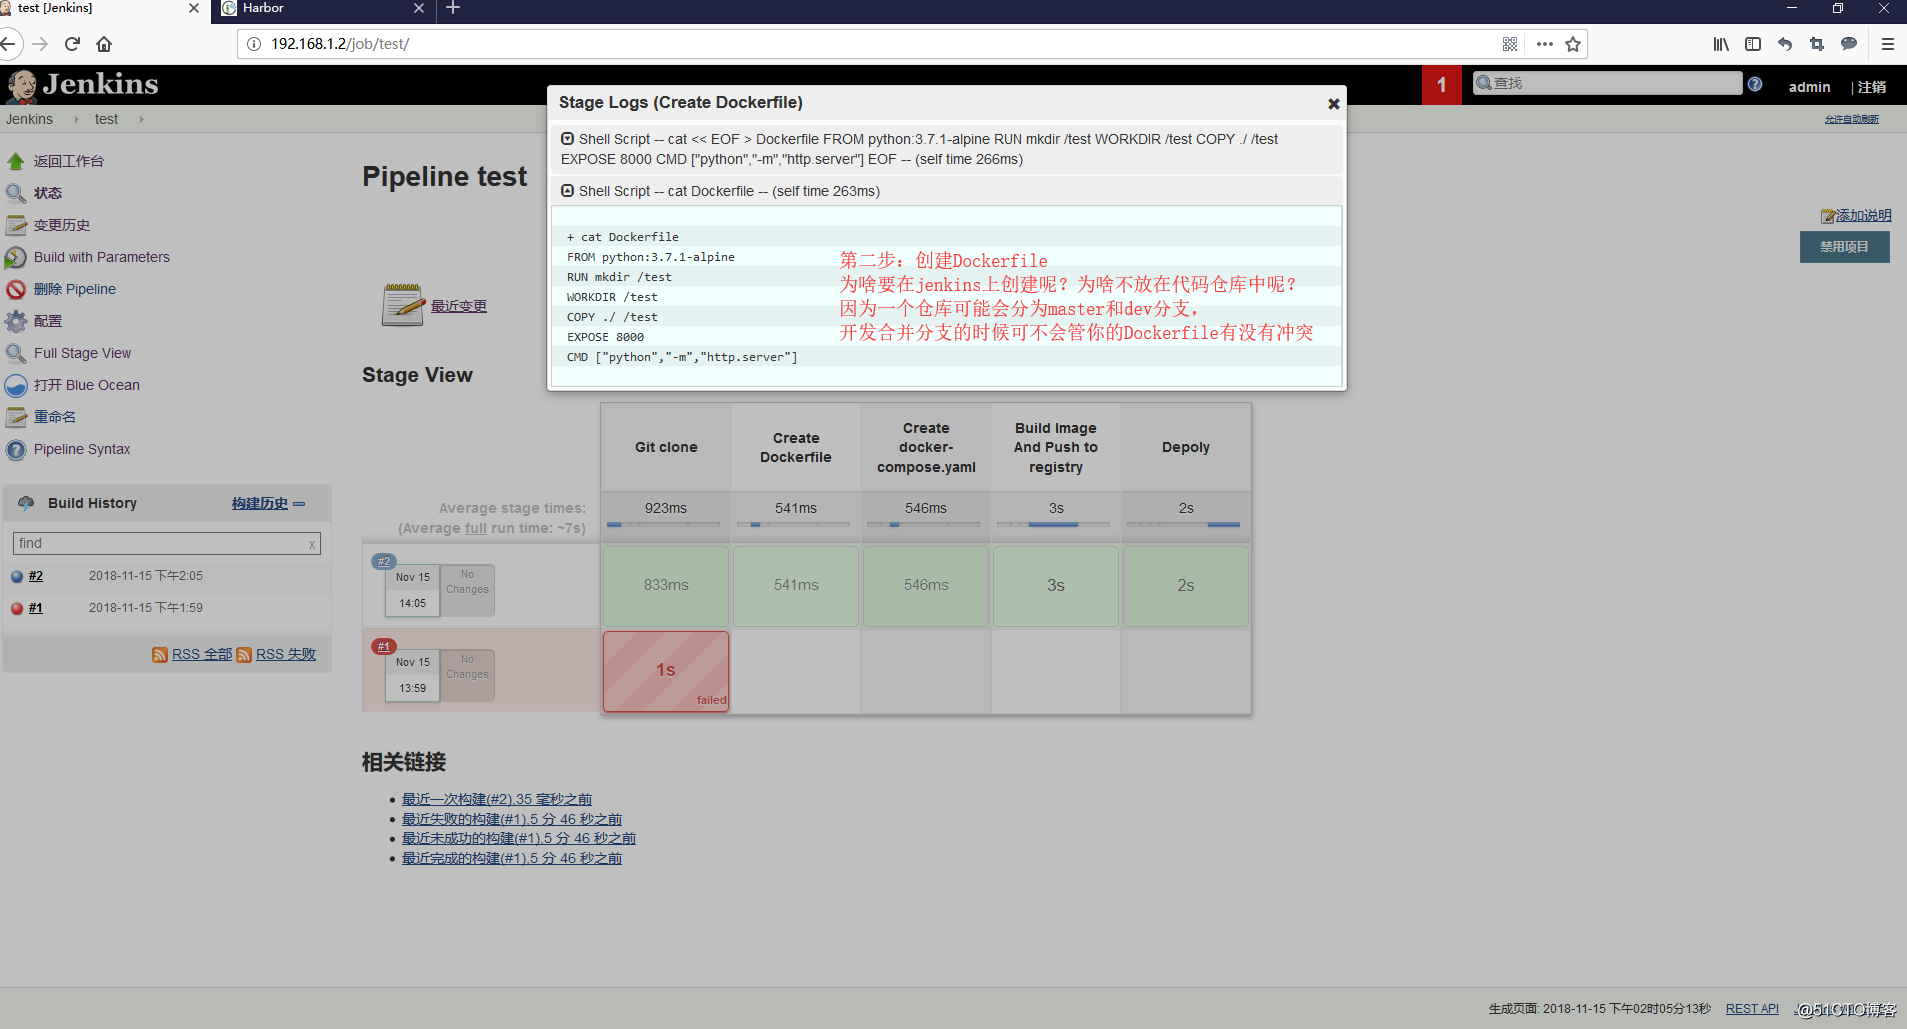
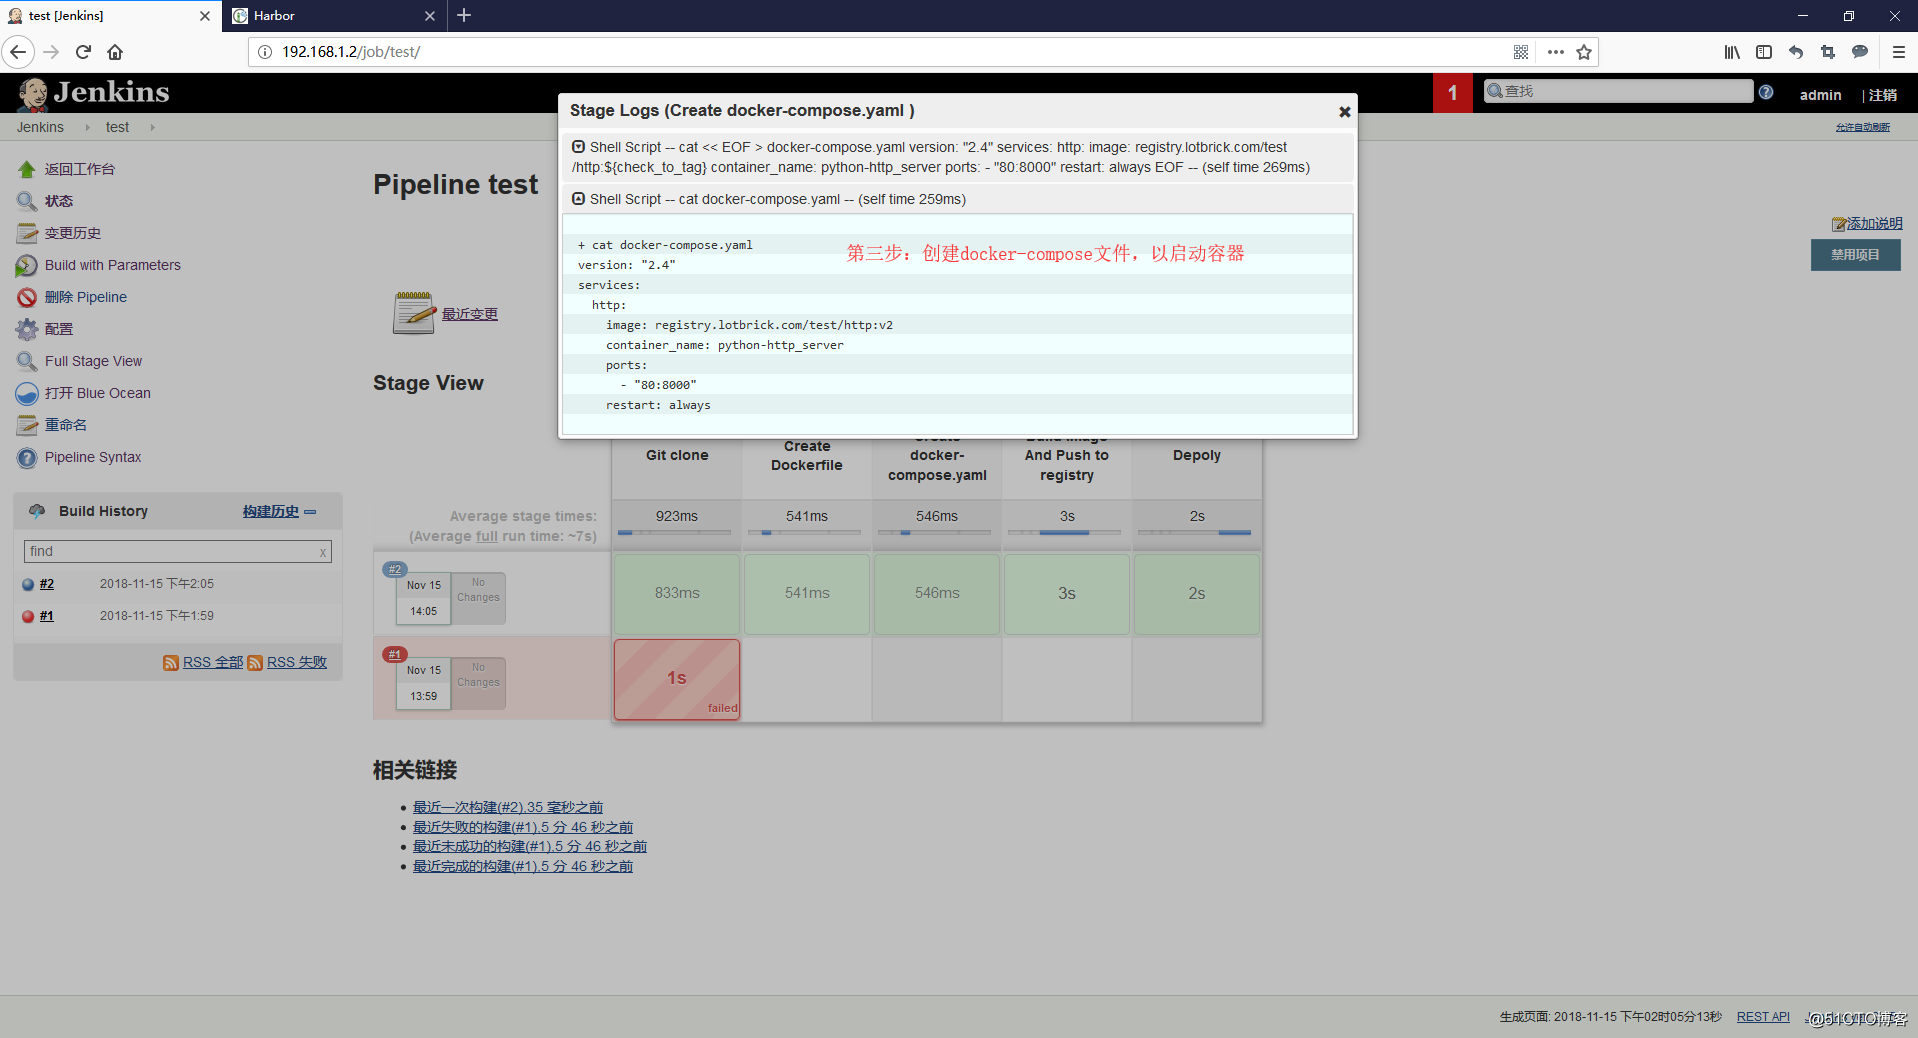
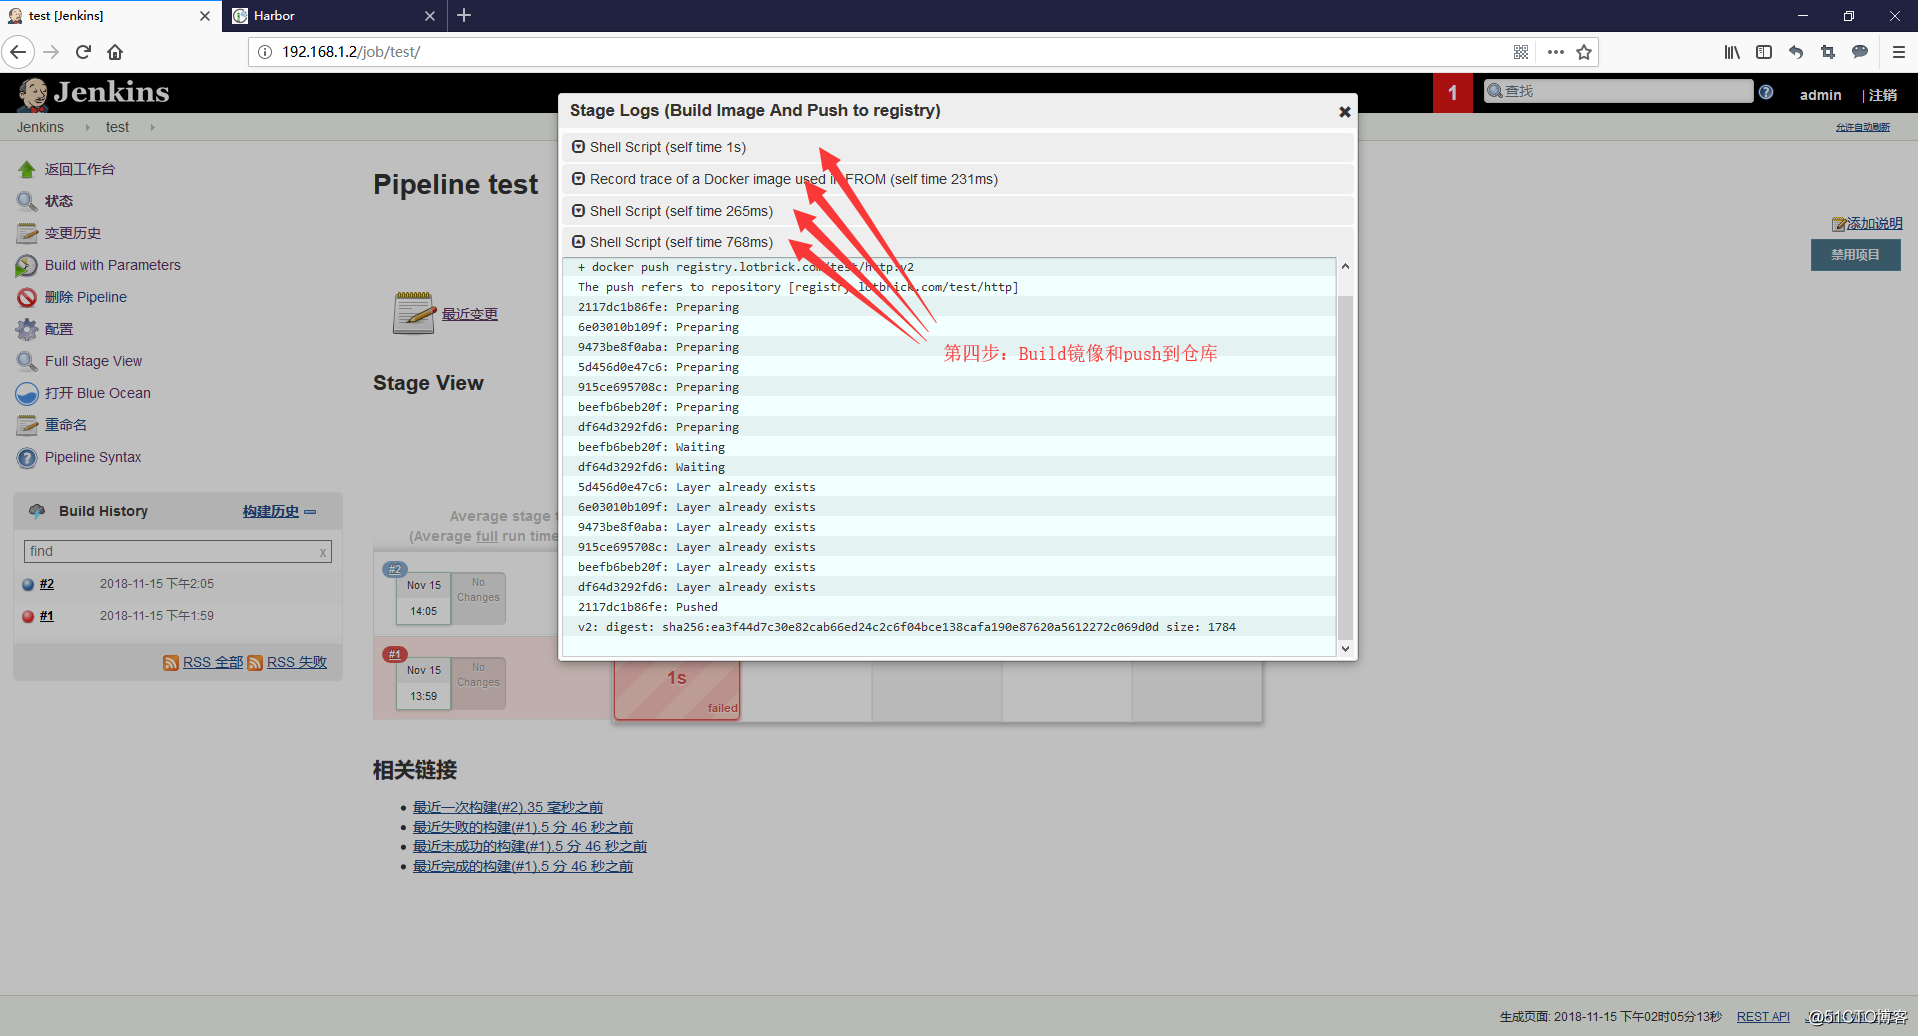
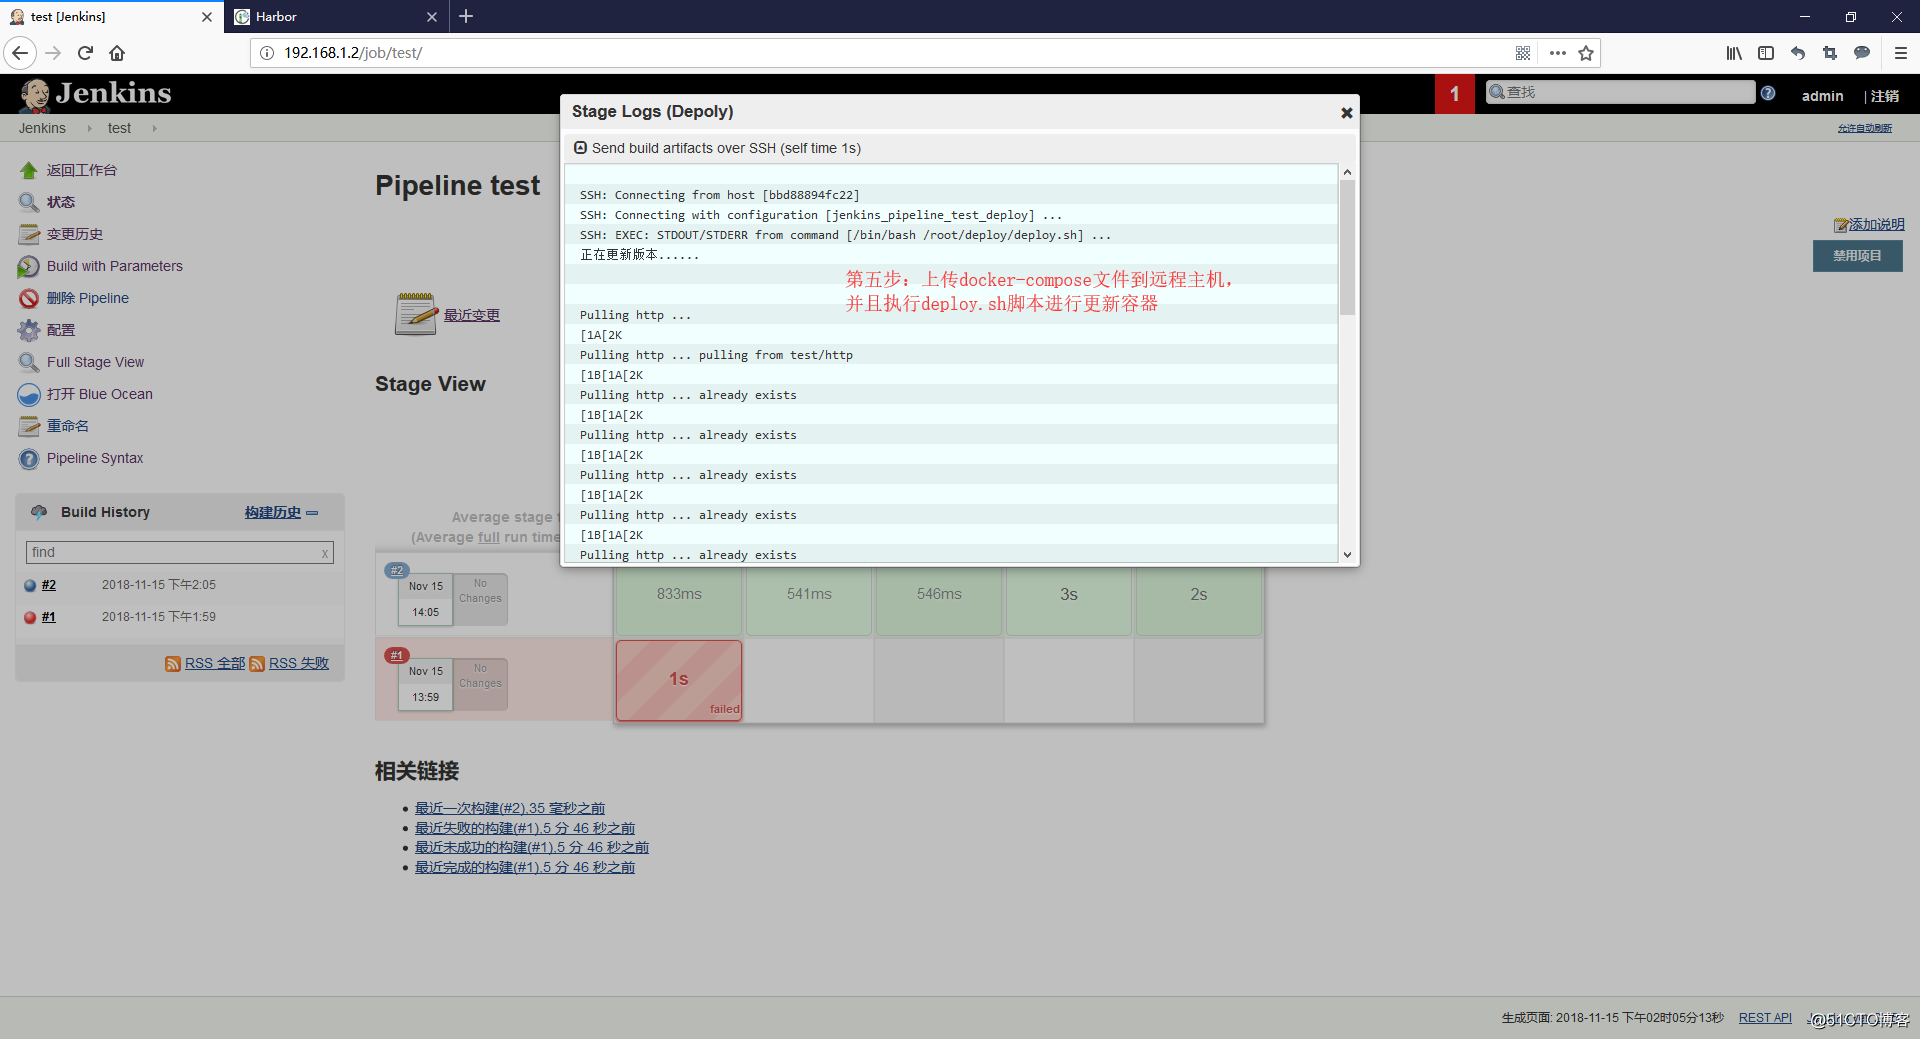
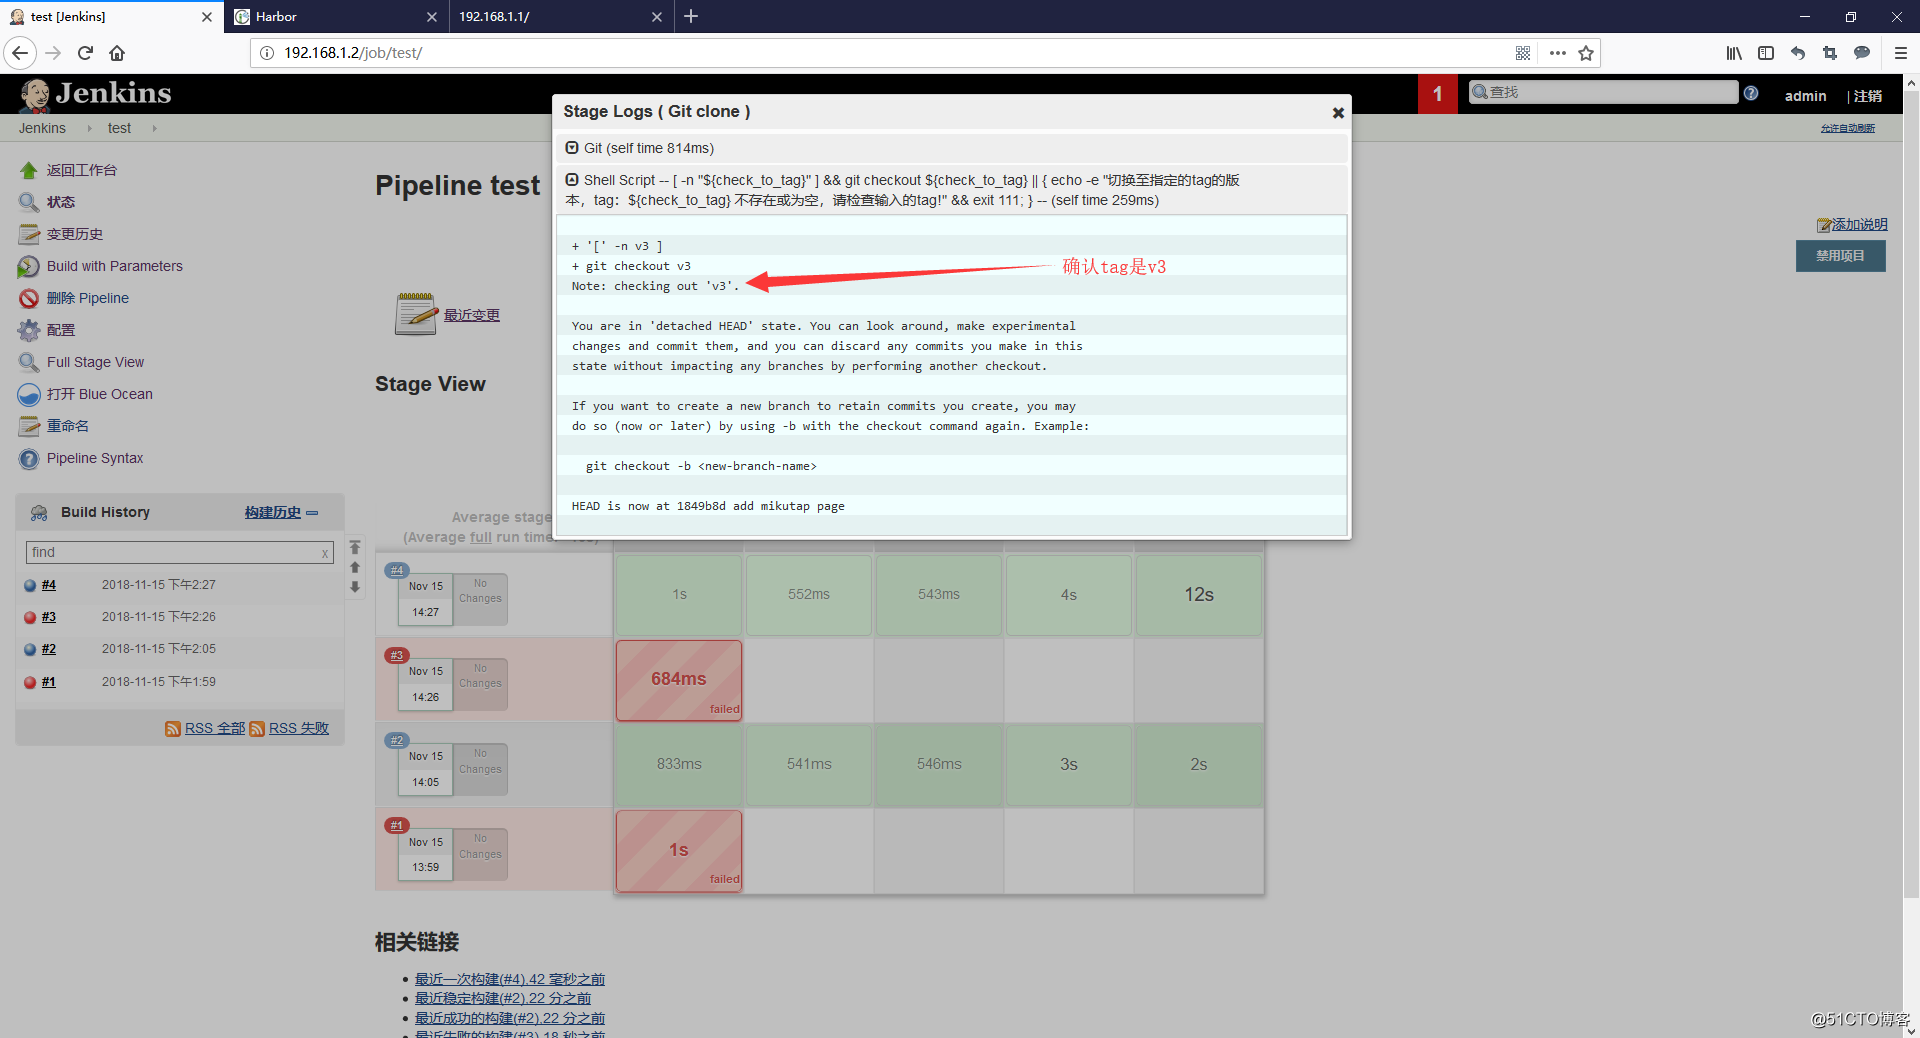
node {
  stage(' Git clone ') {
      git branch: 'master', credentialsId: 'a4a81561-8bc0-426e-89f9-b4d4aa1925d6', url: '[email protected]:yfg/test.git'
      env.check_to_tag="$TAG"
      sh '[ -n "${check_to_tag}" ] &&  git checkout ${check_to_tag} ||  { echo -e "切换至指定的tag的版本,tag:${check_to_tag} 不存在或为空,请检查输入的tag!" && exit 111; }'
  }
  stage("Create Dockerfile"){
      sh '''cat << EOF > Dockerfile
FROM python:3.7.1-alpine
RUN mkdir /test
WORKDIR /test
COPY ./ /test
EXPOSE 8000
CMD ["python","-m","http.server"]
EOF'''
      sh 'cat Dockerfile'
  }
  stage("Create docker-compose.yaml "){
      sh '''cat << EOF > docker-compose.yaml
version: "2.4"
services:
http:
  image: registry.lotbrick.com/test/http:${check_to_tag}
  container_name: python-http_server
  ports:
    - "80:8000"
  restart: always
EOF'''

      sh 'cat docker-compose.yaml'
  }

  stage('Build Image And Push to registry') {
    //withRegistry('仓库地址','jenkins凭据ID')
    docker.withRegistry('https://registry.lotbrick.com', '9ffa7ef5-38c6-49da-8936-ec596359be56'){
        //build当前目录(workspace)下的Dockerfile
        def BuildImage = docker.build("registry.lotbrick.com/test/http:${check_to_tag}")
        //Push刚才Build出来的镜像
        BuildImage.push()
      }
}
stage('Depoly'){
    //调用Publish Over SSH插件,上传docker-compose.yaml文件并且执行deploy脚本
      sshPublisher(publishers: [sshPublisherDesc(configName: 'jenkins_pipeline_test_deploy', transfers: [sshTransfer(cleanRemote: false, excludes: '', execCommand: '/bin/bash /root/deploy/deploy.sh', execTimeout: 120000, flatten: false, makeEmptyDirs: false, noDefaultExcludes: false, patternSeparator: '[, ]+', remoteDirectory: '/root/deploy', remoteDirectorySDF: false, removePrefix: '', sourceFiles: 'docker-compose.yaml')], usePromotionTimestamp: false, useWorkspaceInPromotion: false, verbose: false)])

}
}
-
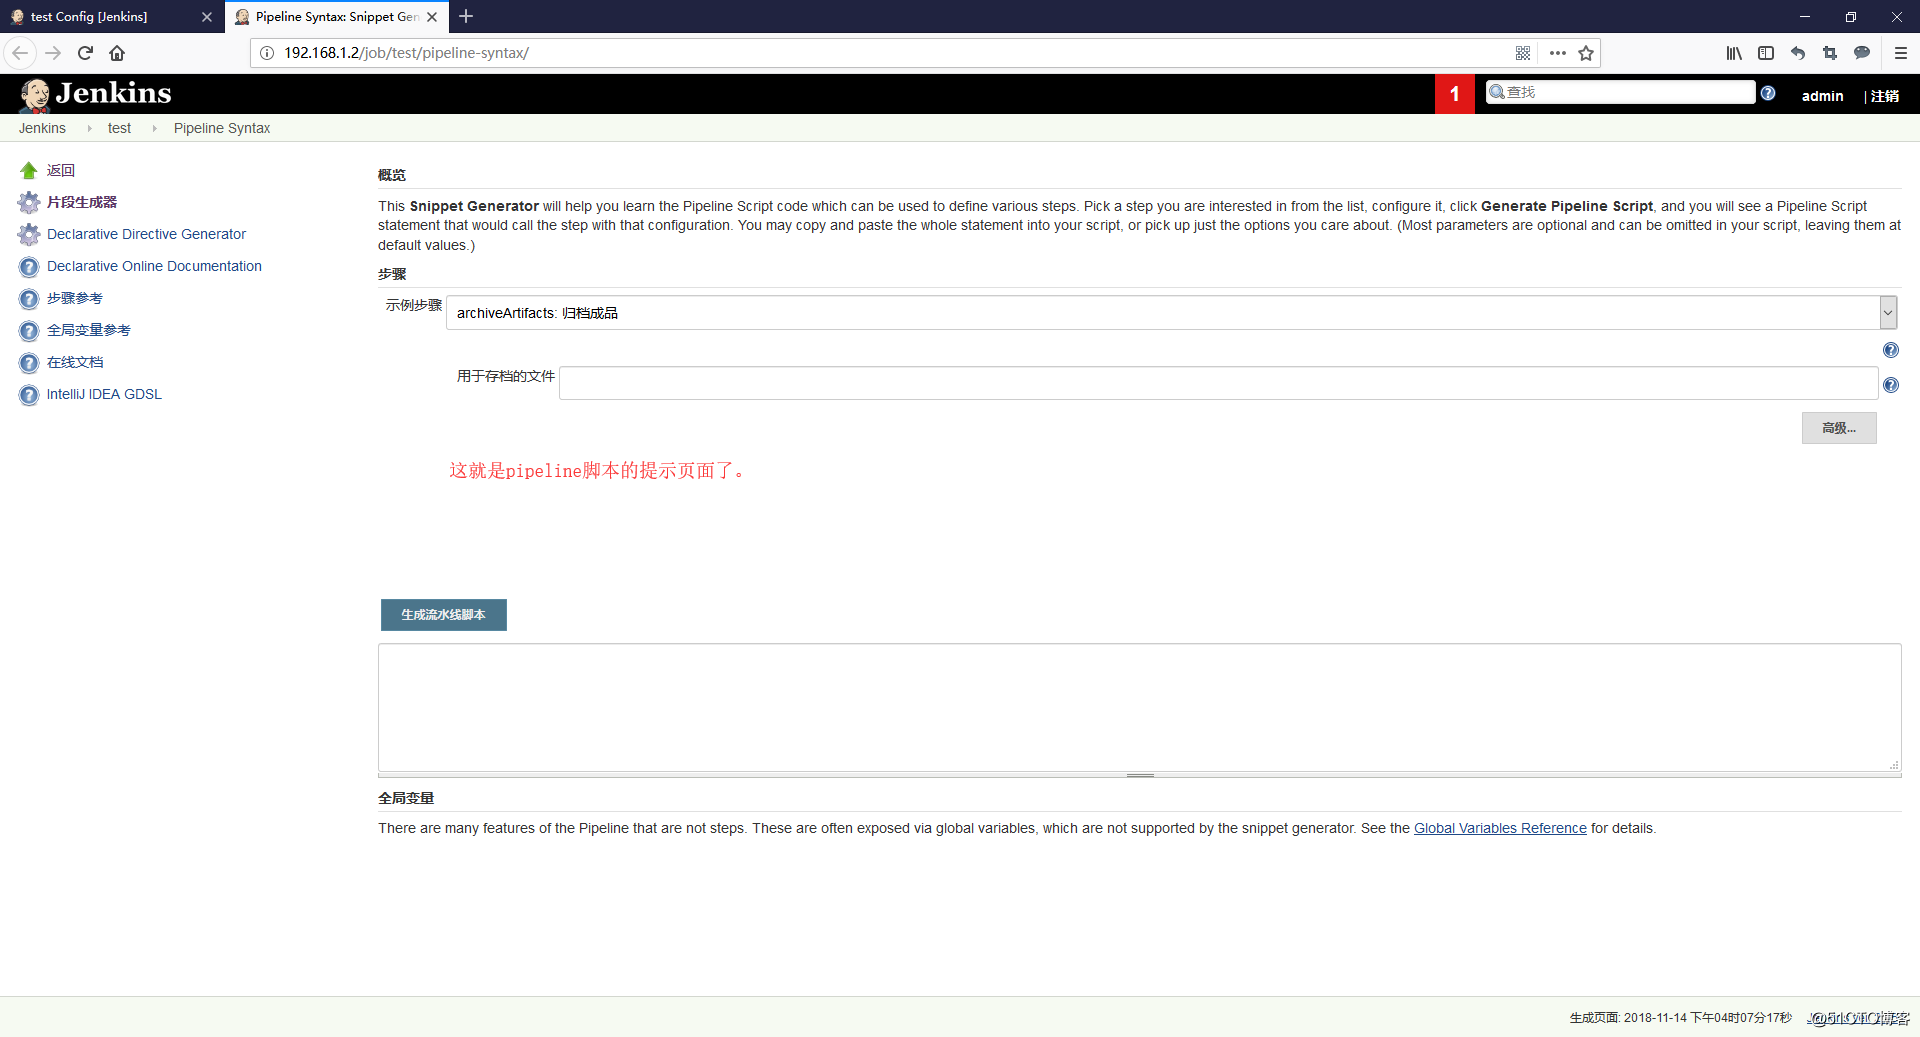
生成流水线脚本的方法
-
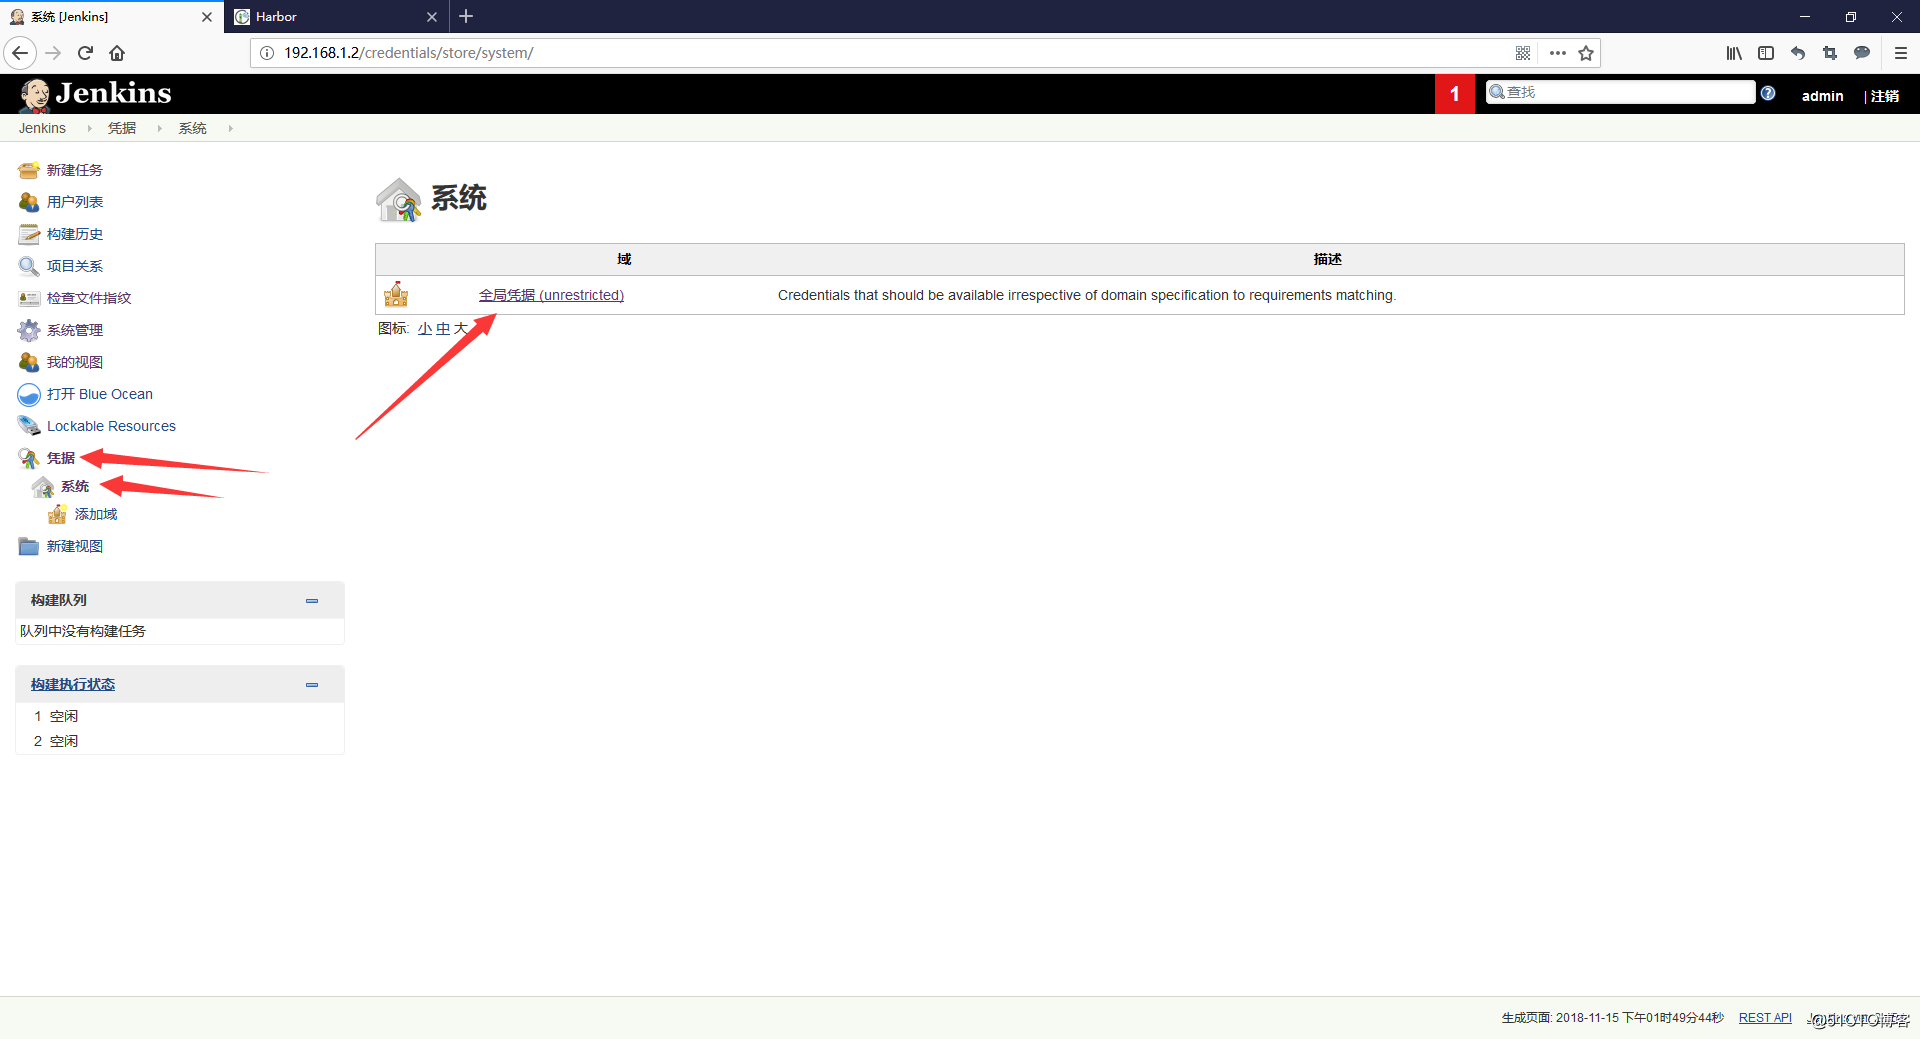
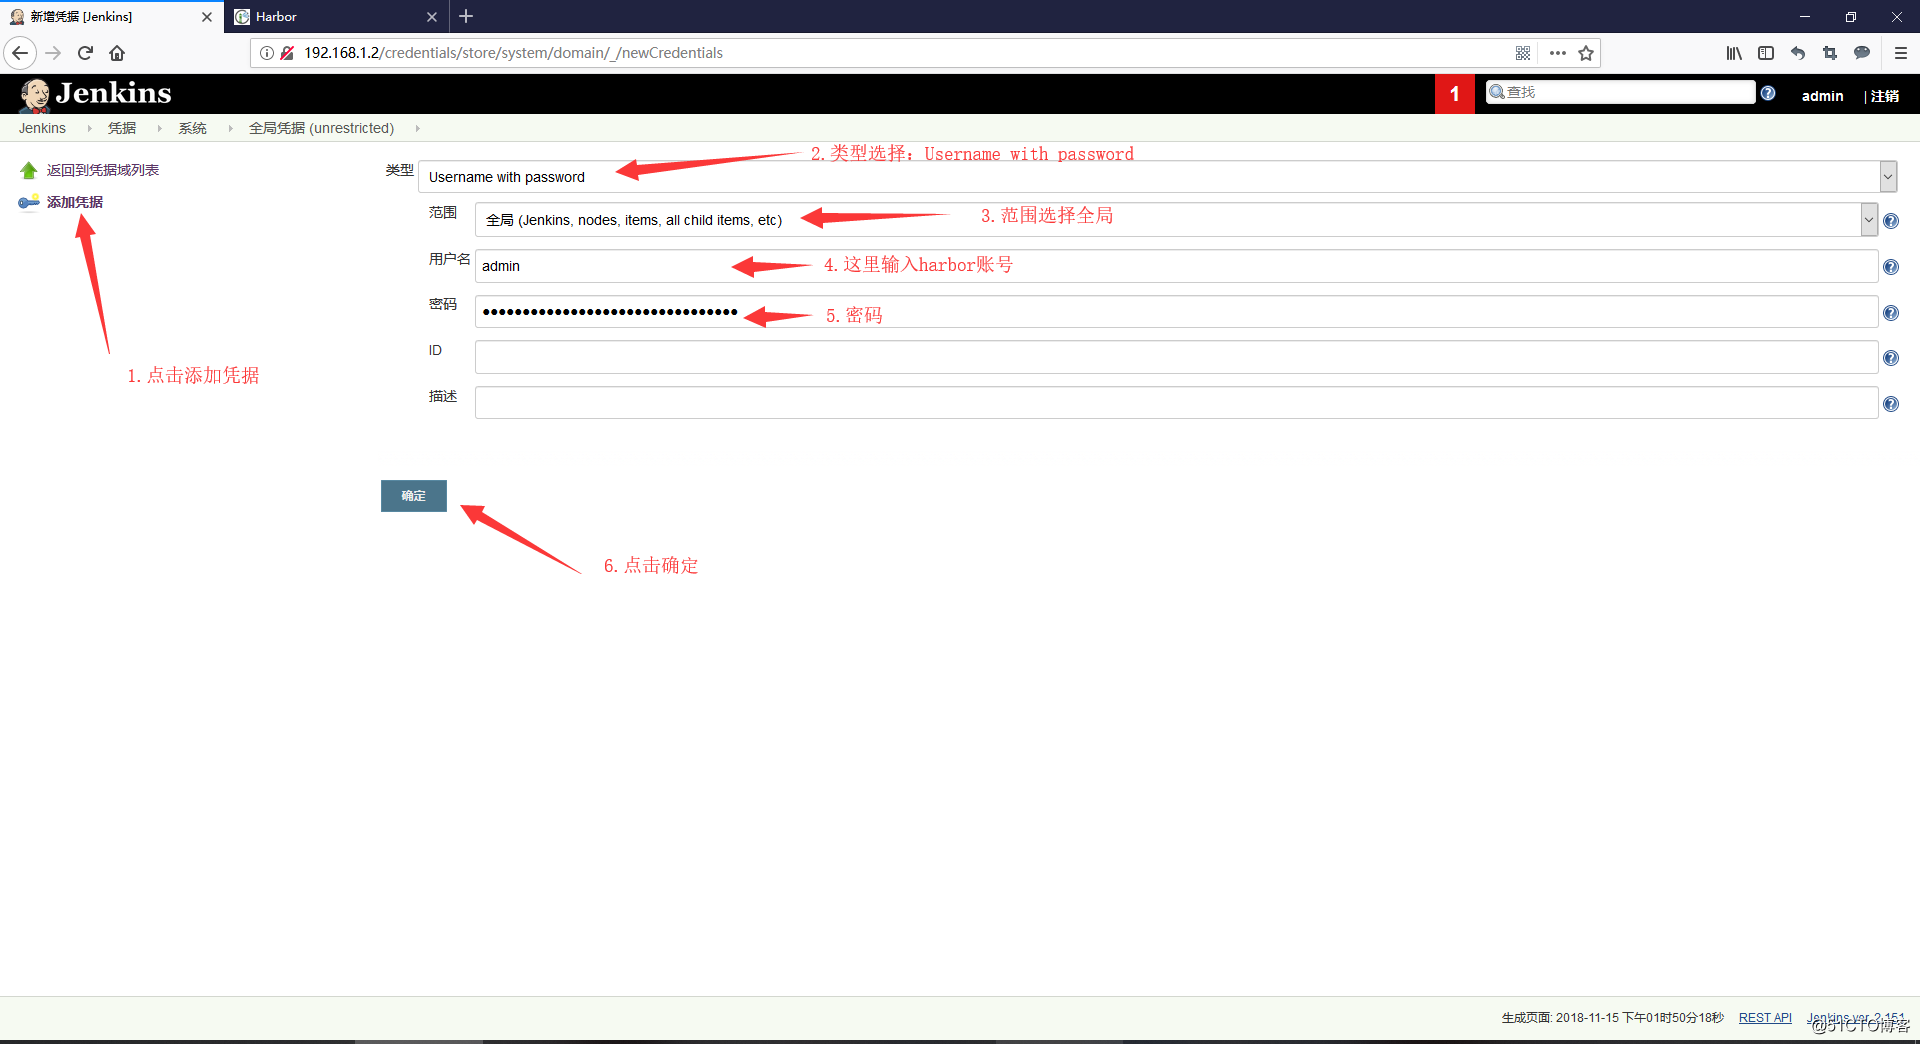
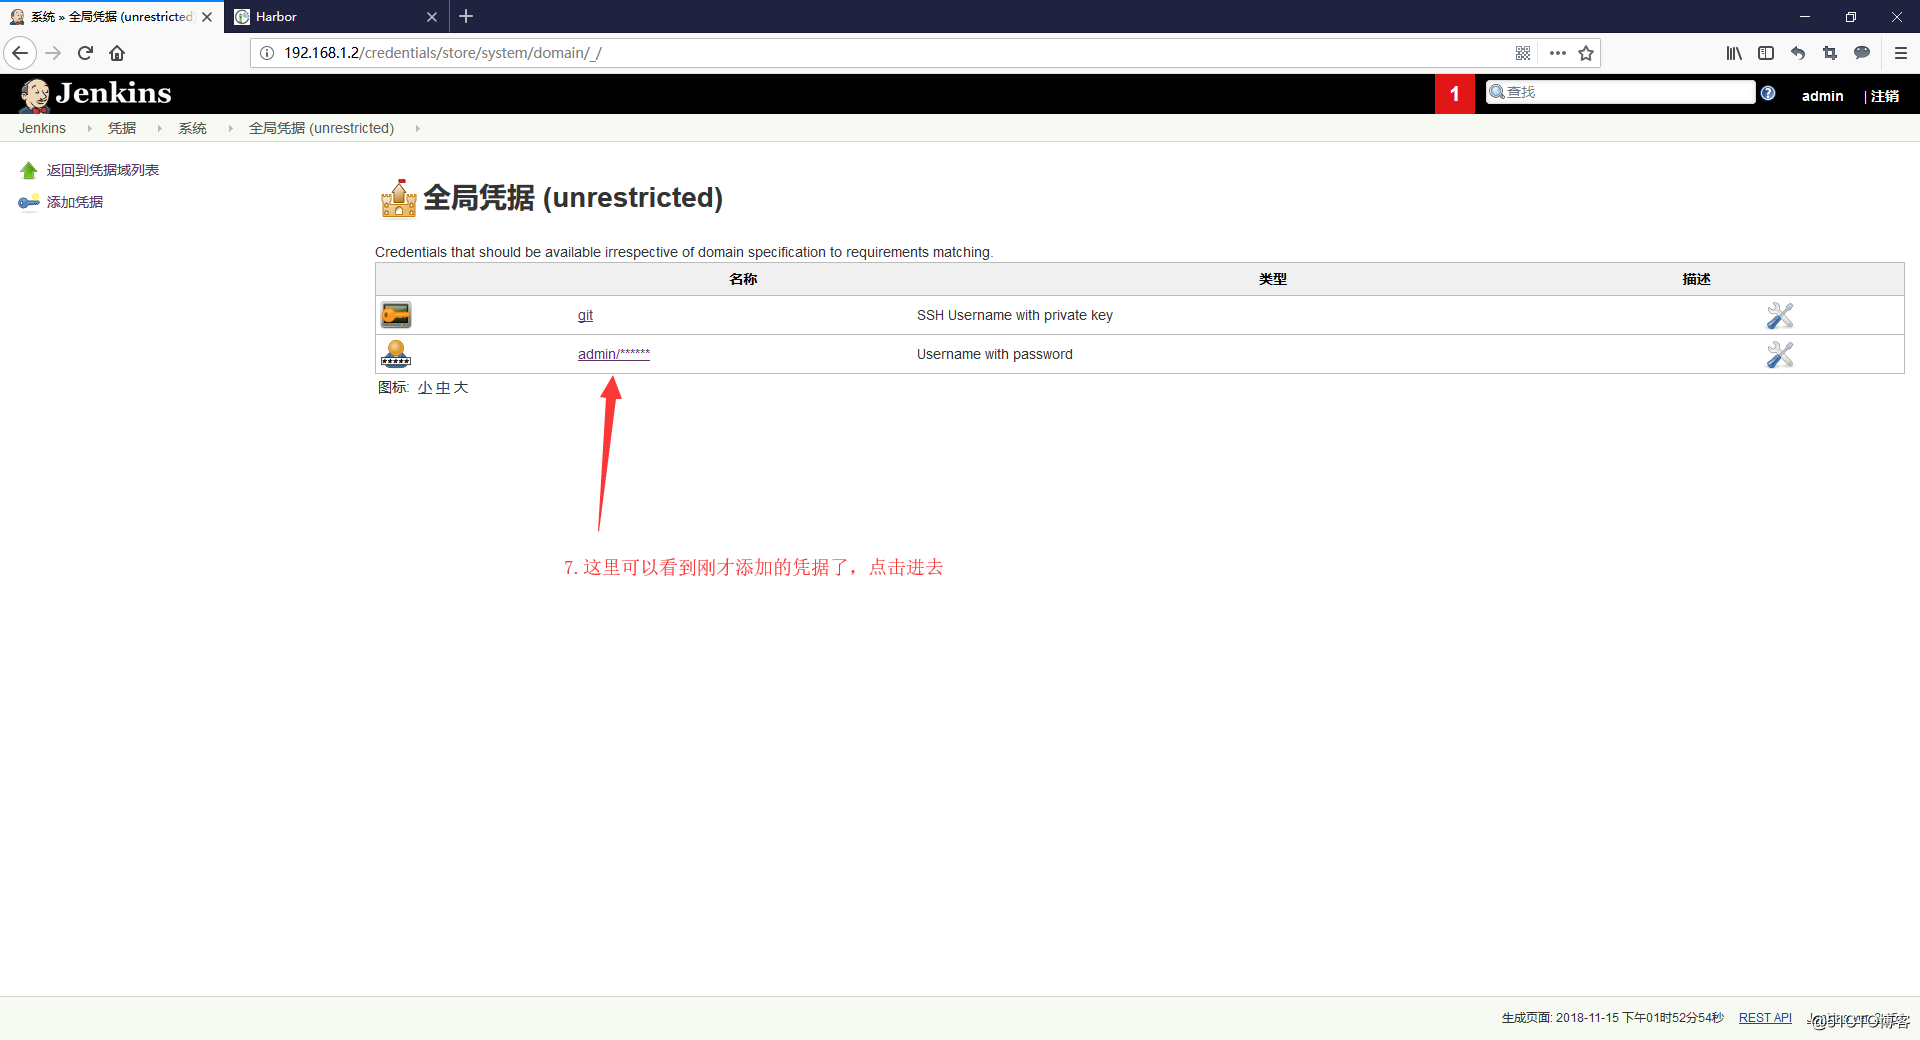
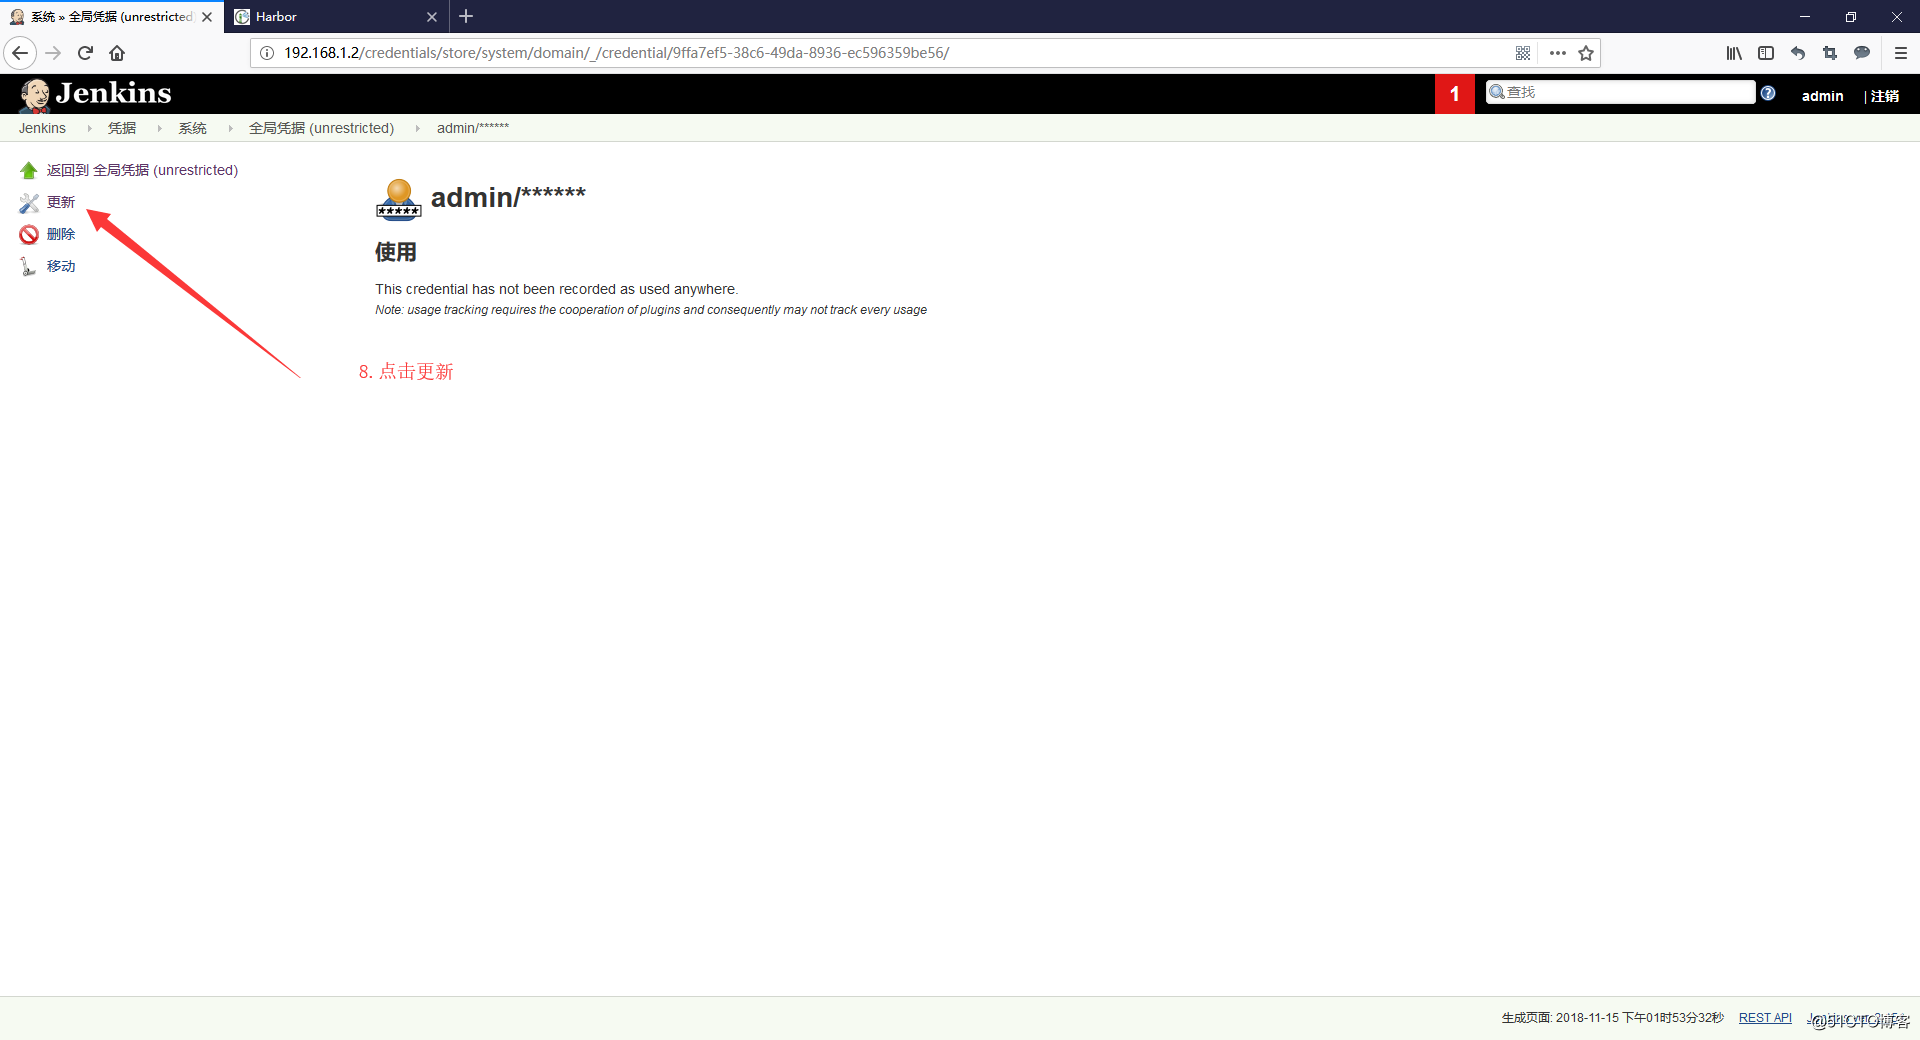
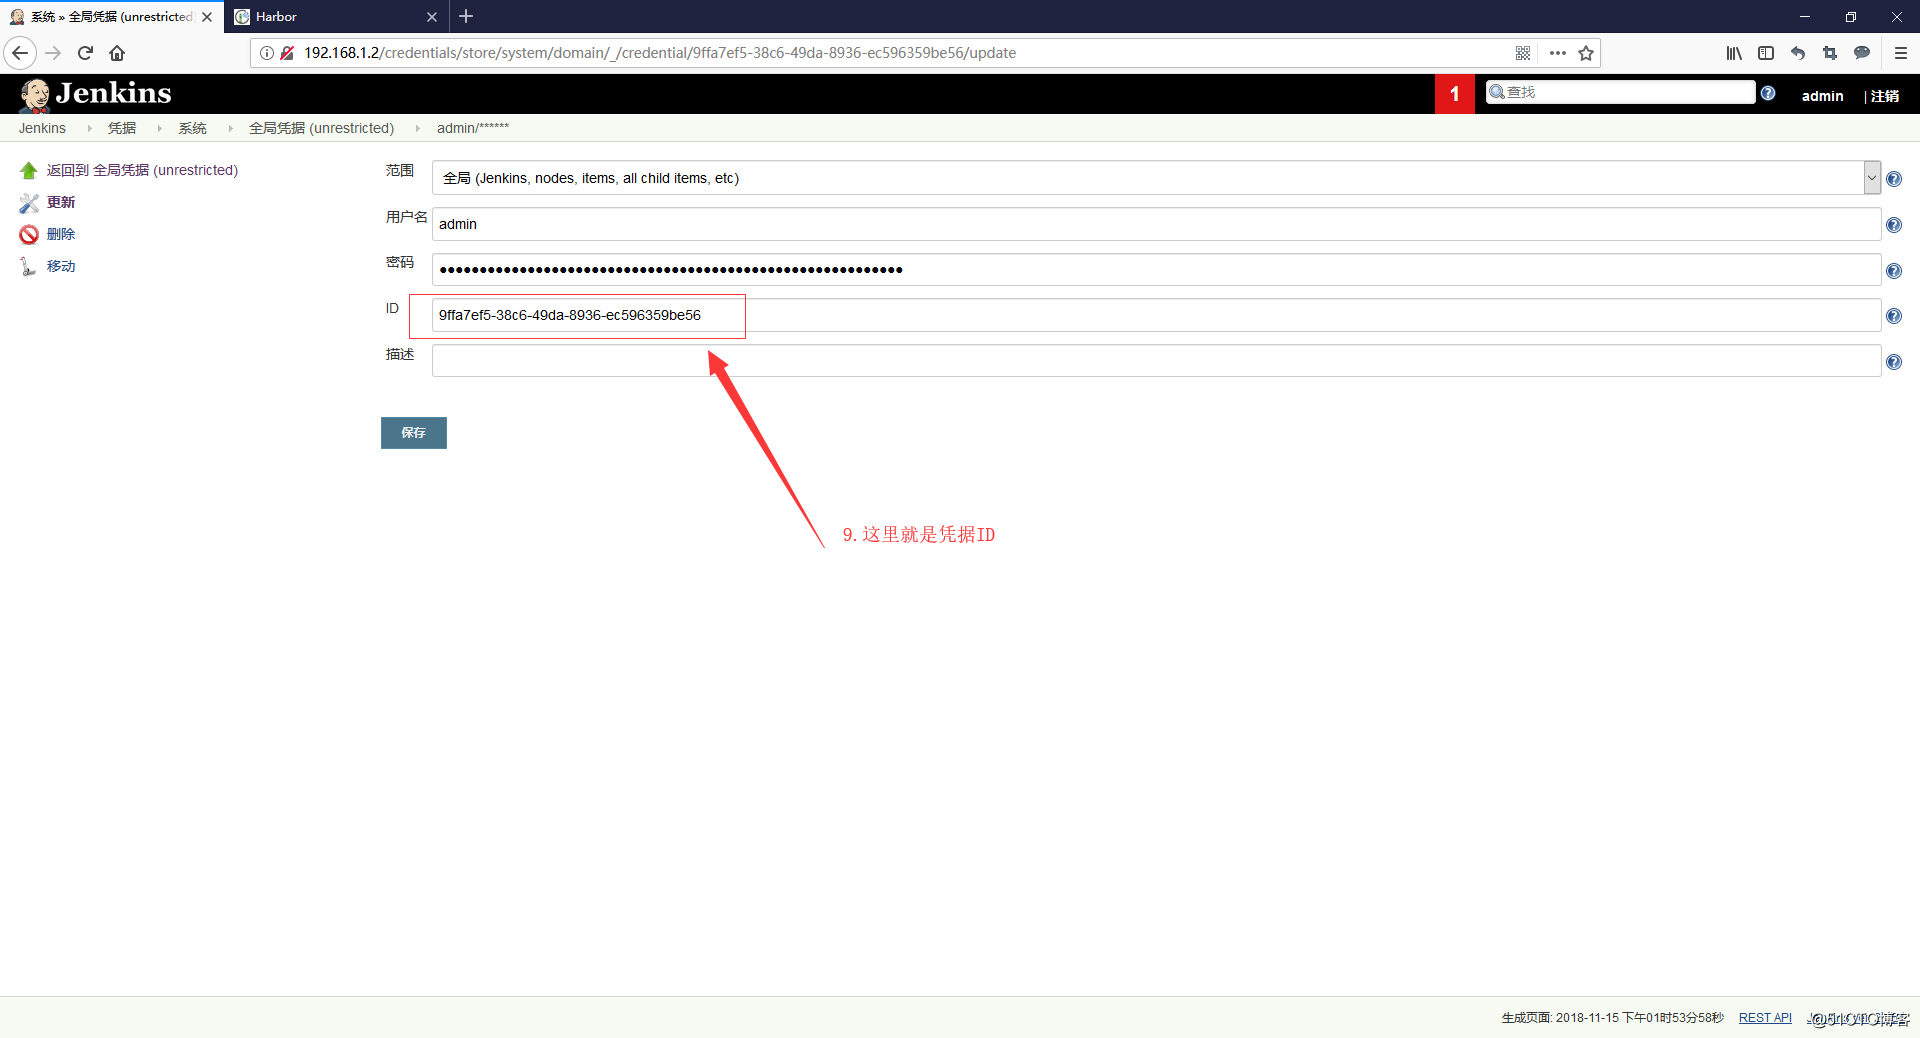
Jenkins凭据ID获取方法
- 发布脚本:depoly.sh:放到要部署代码的主机的/root/deploy目录下
-
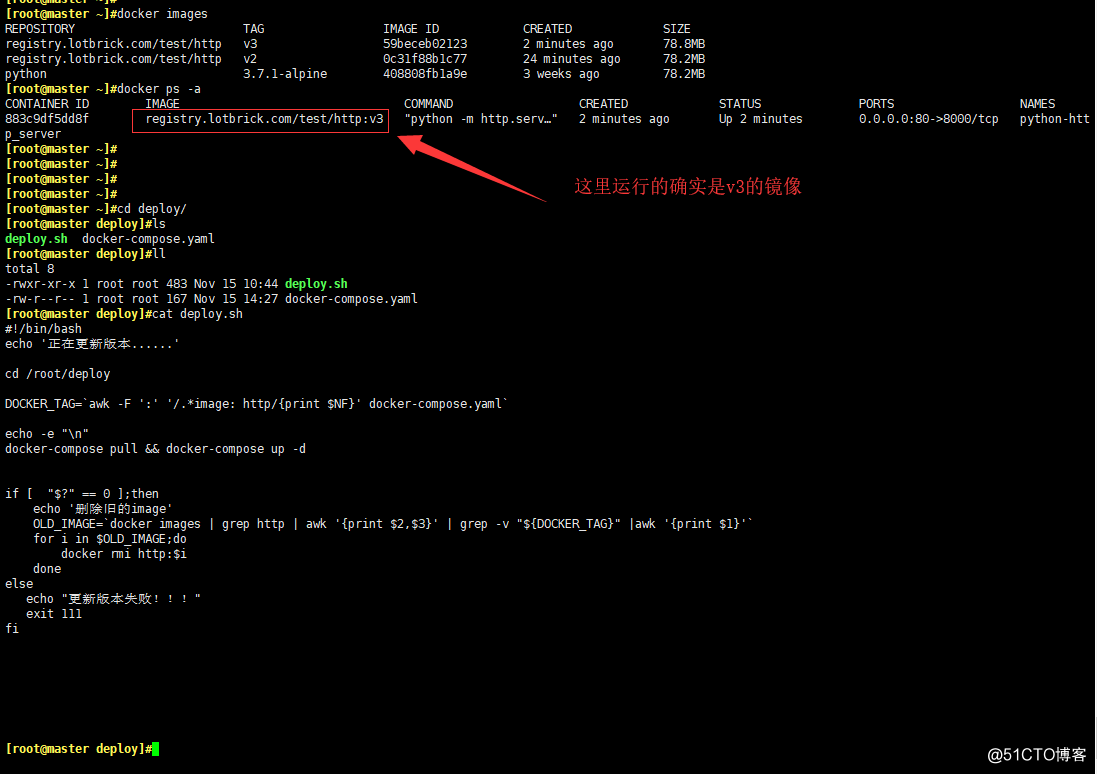
  #!/bin/bash
  echo '正在更新版本......'

  cd /root/deploy

  IMAGE_NAME='registry.lotbrick.com/test/http'
  DOCKER_TAG=`awk -F ':' '/.*image/{print $NF}' docker-compose.yaml`

  echo -e "\n"
  docker-compose pull && docker-compose up -d

  if [  "$?" == 0 ];then
      echo '删除旧的image'
      OLD_IMAGE=`docker images | grep $IMAGE_NAME | awk '{print $2,$3}' | grep -v "${DOCKER_TAG}" |awk '{print $1}'`
      for i in $OLD_IMAGE;do
          docker rmi http:$i
      done
  else
     echo "更新版本失败!!!"
     exit 111
  fi
测试发布
-
第一次发布

-
再来一次
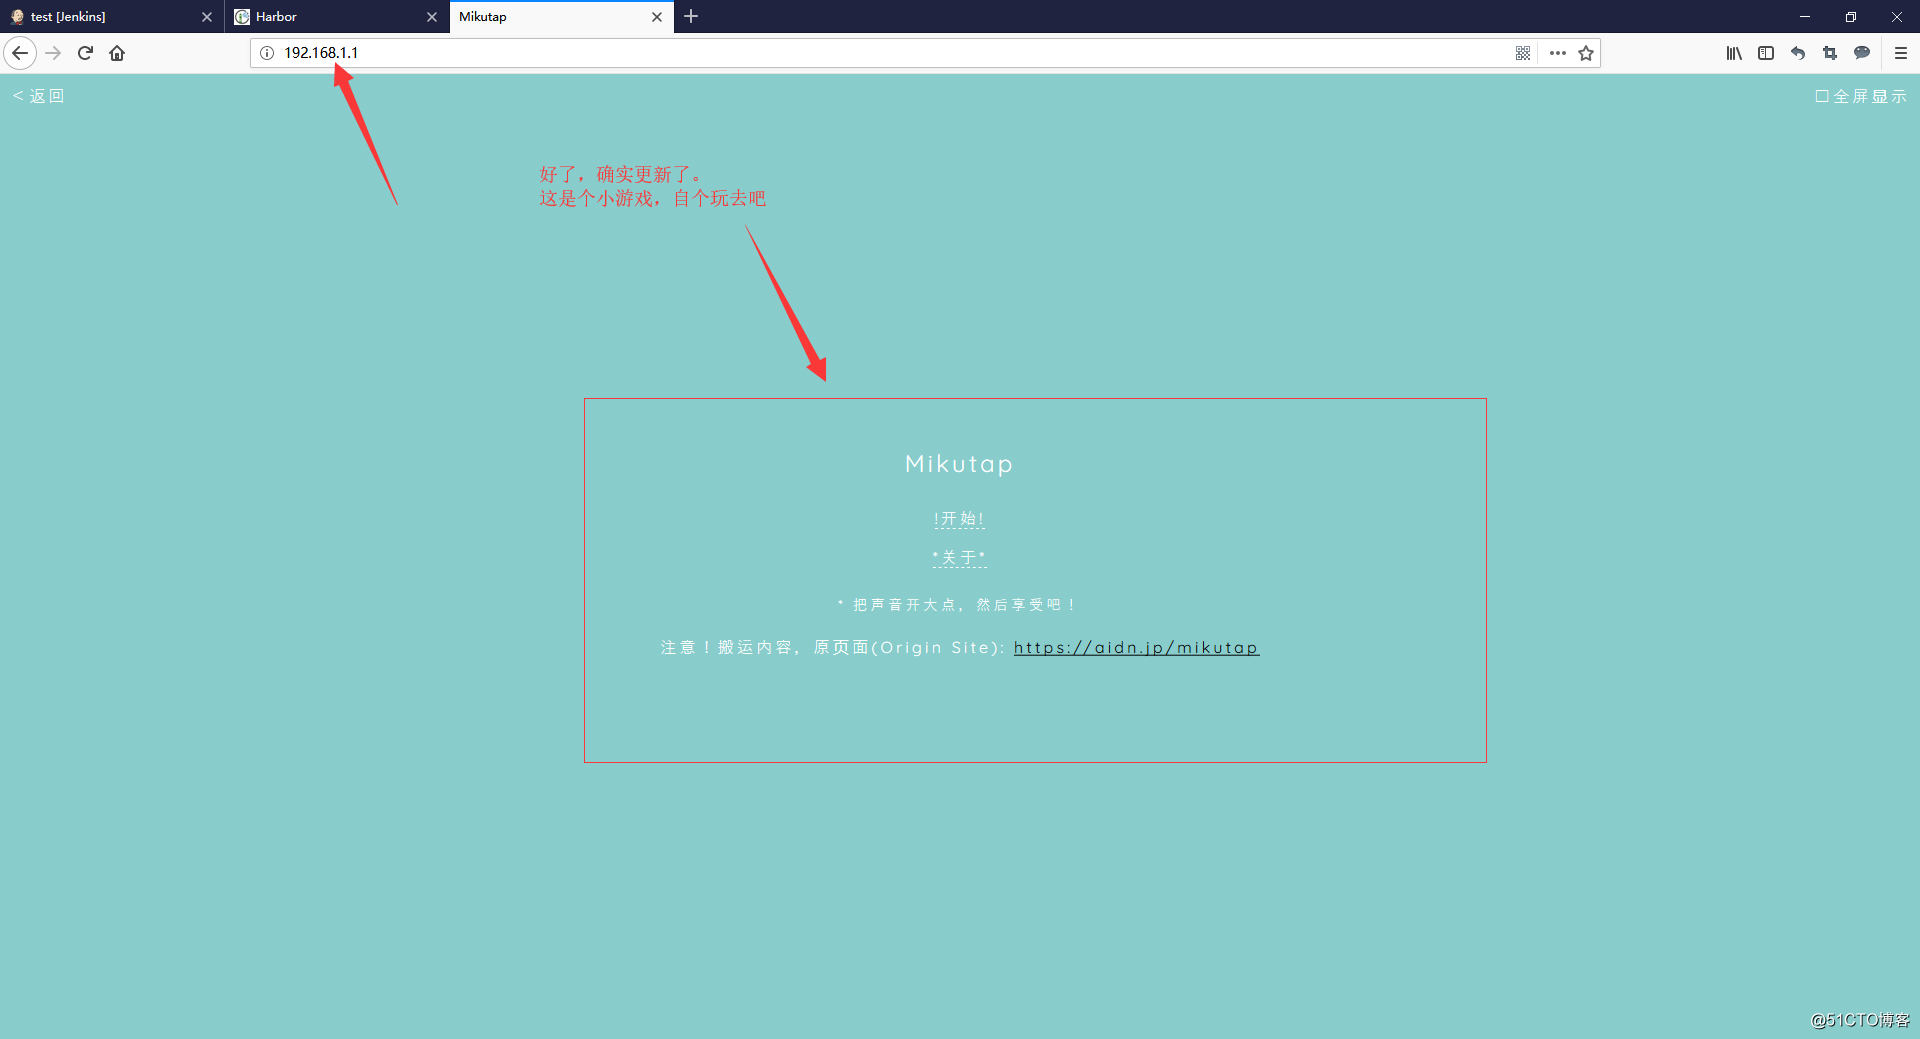
#感觉没玩够,再传个代码测试一回

cd $HOME
git clone https://github.com/HFIProgramming/mikutap.git

\cp -r mikutap/* test/ cd test git add . git commit -m 'add mikutap page' git tag v3 -m 'add mikutap page' git push --tags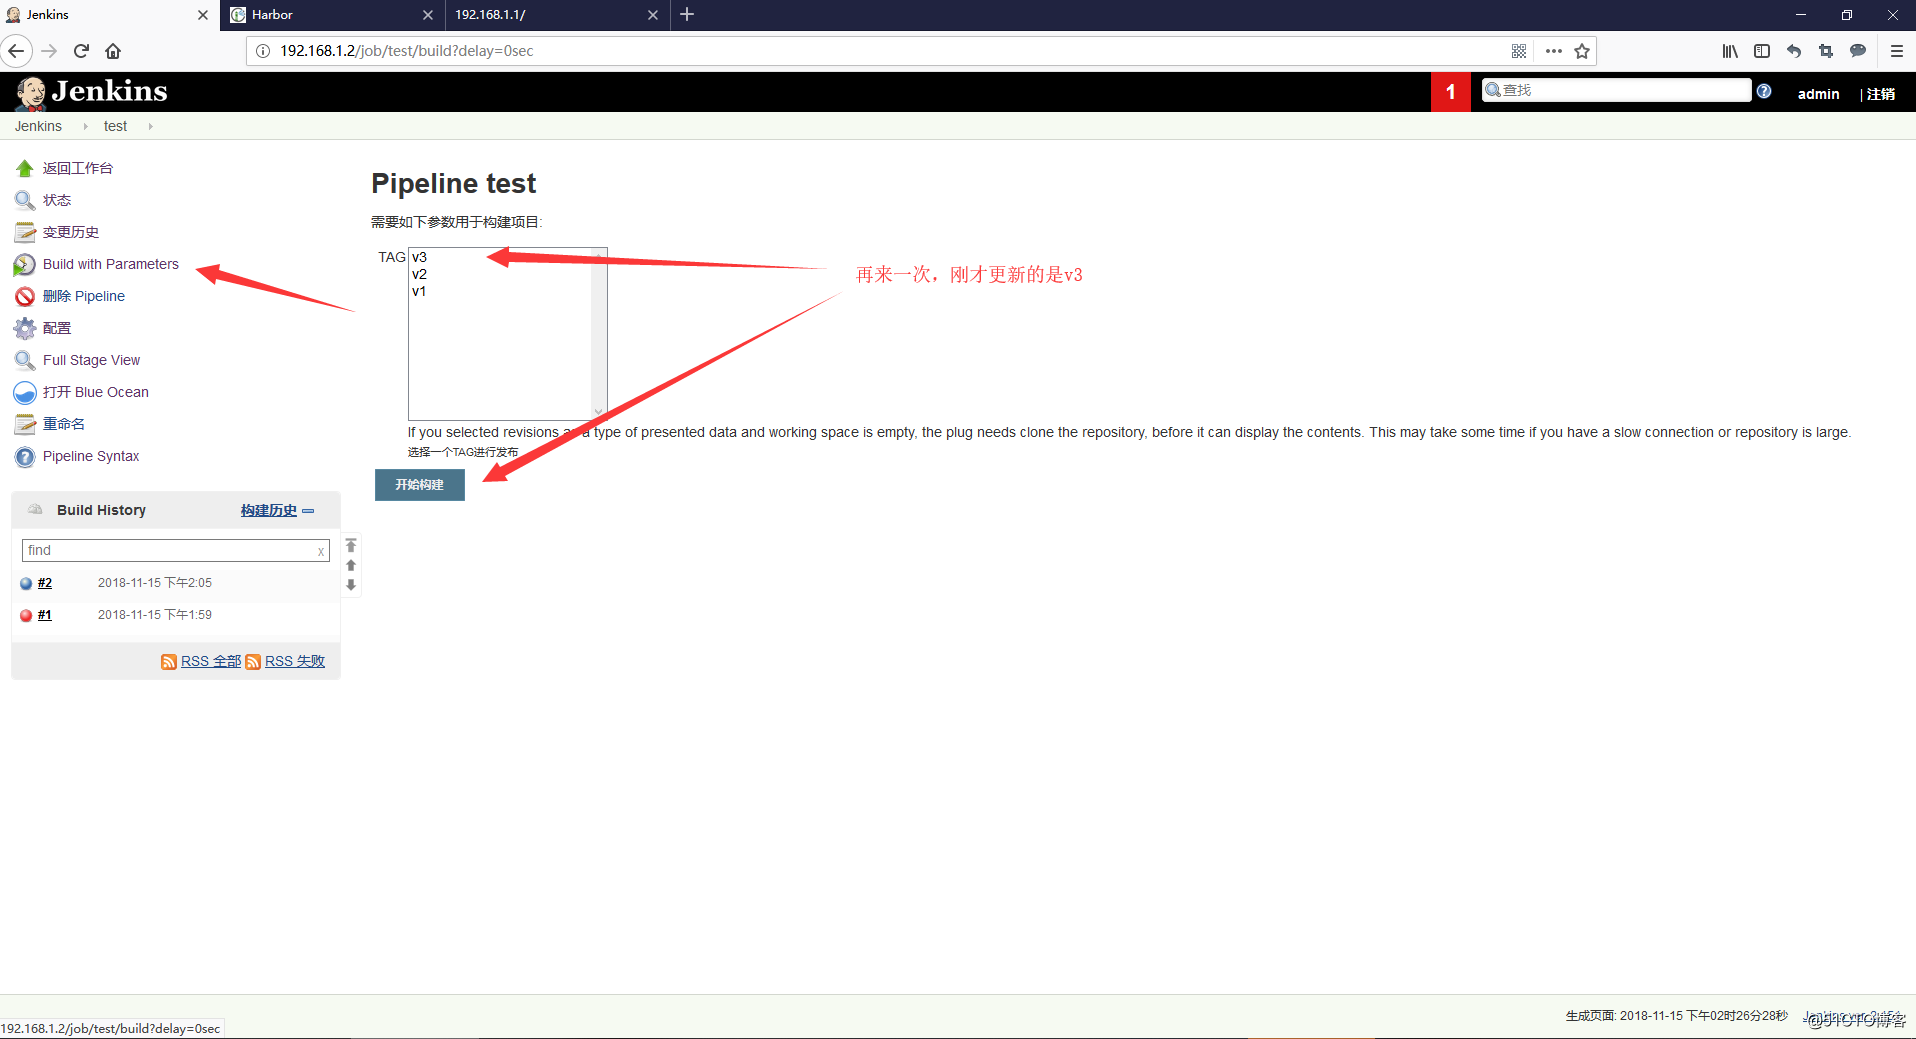
-
-