前言:上一篇项目总结介绍了页面骨架的开发、header组件的开发,这一篇主要梳理:商品组件开发、商品详情页实现。项目github地址:https://github.com/66Web/ljq_eleme,欢迎Star。
 |
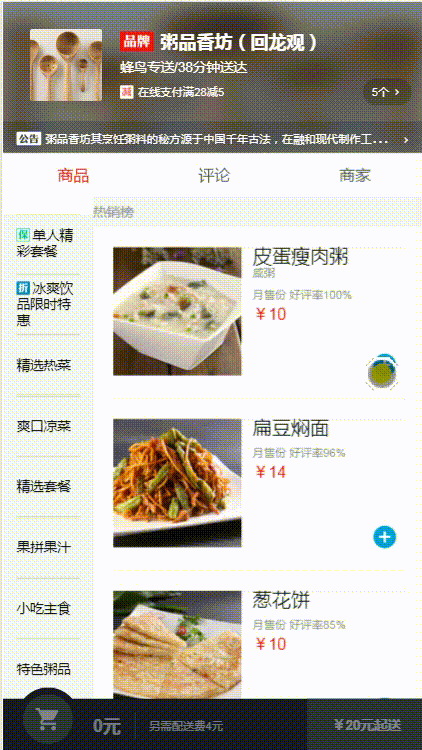 |
| goods | |
| 一、商品组件开发 |
- App.vue主组件传seller对象给每个路由:
<router-view :seller="seller"></router-view>
两栏布局-flex布局手机屏幕自适应
- 设计:无高度滚动条,高度超过视口高度就会隐藏
<div class="goods">
     <div class="menu-wrapper"></div>
     <div class="foods-wrapper"></div>
</div>
.goods
     display: flex
     position: absolute
     top: 174px
     bottom: 46px
     width: 100%
     overflow: hidden
     .menu-wrapper
            flex: 0 0 80px
            width: 80px
            background: #f3f5f7
            .foods-wrapper
                    flex: 1
左侧布局-菜单列表
- 需求:文字标题可能单行,也可能多行,但都要在列表项中垂直居中
- 小技巧:使用列表项display:table,文字标题disable:table-cell
.menu-item
    display: table
    height: 54px
    width: 56px
    line-height: 14px
    .text
    display: table-cell
    width: 56px
    vertical-align: middle
    font-size: 12px
- 关于box-sizing:border-box; 规定两个并排的带边框的框
右侧布局-食品列表
- 列表嵌套:第一层遍历商品项item in goods, 第二层遍历单个商品的信息项food in item.foods
列表滚动-better-scroll 第三方JS库
- 基于iscroll重写的库:better-scroll详解博客【重点突破】—— 当better-scroll 遇见Vue
- 安装:
cnpm install better-scroll --save - 使用步骤:
- goods.vue 引入:
import BScroll from 'better-scroll'; - ref 属性获取dom元素:驼峰命名法
<div class="menu-wrapper" ref="menuWrapper"> <div class="foods-wrapper" ref="foodsWrapper"> -
better-scroll初始化:
methods: { _initScroll(){ this.meunScroll=new BScroll(this.$refs.menuWrapper,{}); this.foodsScroll=new BScroll(this.$refs.foodsWrapper,{}); } } -
成功回调函数中调用_initScroll方法:
this.$nextTick(()=>{
     this._initScroll();
})
-
this.$nextTick()这个方法作用是当数据被修改后使用这个方法会回调获取异步更新后的dom再render出来
-
如果不在下面的this.$nextTick()方法里回调这个方法,数据改变后再来计算滚动轴就会出错
左右联动
- 需求:滚动右侧,左侧跟着变化;点击左侧,右侧滚动到相应位置
- 原理:依赖右侧滚动列表实时变化的Y值(纵坐标),移动到哪个区间,左侧列表就要显示哪个区间
- 【滚动右侧时左侧相应滚动】思路&实现:
- 在data中定义数组用来存储不同区间的高度
data () { return { goods:[], listHeight: [] } } -
为了获取高度,给food-list定义一个class--food-list-hook,不用来编写css,专门用来获取DOM元素,没有实际的效果,只是用来被js选择的
<li v-for="item in goods" :key="item.id" class="food-list food-list-hook"> -
定义foodList拿到每个li,每个li是包括包括标题在内的每一类food的高度,不是单独的一种good,将_calculateHeight放在nextTick中初始化_initScroll的后面,保证其能正确计算到高度
_calculateHeight() { //food-list-hook类的添加知识为了能拿到food列表,例如,拿到的是多个类似整个粥品的区块 let foodList = this.$refs.foodsWrapper.getElementsByClassName('food-list-hook'); let height = 0; this.listHeight.push(height); //listHeight是一个递增的区间数组,是每个专区高度的累加 for (let i = 0; i < foodList.length; i++) { let item = foodList[i]; height += item.clientHeight; this.listHeight.push(height); } } -
在data中定义一个scrollY对象,用来跟踪滚动的高度 scrollY:0;在初始化betterScroll时,为右侧添加probeType--可以检测到右侧实时滚动的位置,监听scroll,将其实时滚动的位置暴露出来
data () {
    return {
      goods:[],
      listHeight: [],
      scrollY: 0
    }
}
_initScroll() { this.meunScroll=new BScroll(this.$refs.menuWrapper,{ click: true //使better-scroll可点击,默认派发一个点击事件 }); this.foodsScroll=new BScroll(this.$refs.foodsWrapper,{ click: true, probeType: 3 //BScroll滚动时,能实时告诉我们滚动的位置,类似探针的效果 }); //foodsScroll监听事件,在scroll滚动时能见位置实时暴露出来 this.foodsScroll.on('scroll', (pos) => { this.scrollY = Math.abs(Math.round(pos.y));//本身是个负值,取正值 }) } -
拿到滚动的高度和内容区的固定高度之后, 查看scrollY落在哪个区间,并返回那个区间的索引(!height2是测试最后一个区间的)其中,>= 向下的是一个闭区间,这样第一个就会高亮了
computed: { currentIndex() { //currentIndex对应菜单栏的下标 for (let i = 0; i < this.listHeight.length; i++) { //不要忘了加this引用 let height1 = this.listHeight[i]; let height2 = this.listHeight[i + 1]; //获得了一个区间的上下范围,判断scrollY落到这个区间,!height2是判断最后一个区间 //避免i溢出,>= 向下的是一个闭区间,这样第一个就会高亮了 if (!height2 || (this.scrollY >= height1 && this.scrollY < height2)) { return i; //映射到第5行menu的变化 } } return 0; } -
拿到index之后,回到左侧的menu区,当我们遍历menu的时候,如果$index等于我们计算得到的currentIndex时,就为当前的li添加一个current样式
<!-- 如果index等于currentIndex,就为这个li添加一个current类,改变左侧导航栏的背景颜色-->
<li v-for="(item,index) in goods" :key="item.id"
    class="menu-item" :class="{'current': currentIndex === index}"
    @click = "selectMenu($index, $event)">
&.current position: relative z-index: 10 margin-top: -1px background: #ffffff font-weight: 700 .text border-none()
- 【点击左侧右侧滚动】思路&实现:
- 在左侧菜单栏添加点击事件selectMenu, @click = "selectMenu($index, $event)",将index传进去,就可以知道点选的是哪个区域,然后利用原生DOM操作将高度滚动到相应的位置
- 点击左侧菜单栏的时候没有反应,因为BScroll默认阻止点击事件,所以在 _initScroll()中获取DOM对象时添加click: true,并解决PC端双点击问题,event是点击时的event
selectMenu (index, event) {
    if (!event._constructed) { //浏览器直接return掉,去掉自带click事件的点击
       return;
    }
    let foodList = this.$refs.foodsWrapper.getElementsByClassName('food-list-hook');
    let ref = foodList[index]; //取到index对应的DOM
    this.foodsScroll.scrollToElement(ref, 300);//滚动到DOM所在位置
    //console.log(index);
}
购物车组件
- 定位在视口底部: fixed布局——右侧宽度固定,左侧自适应
<div class="content">
      <div class="content-left"></div>
      <div class="content-right"></div>
</div>
.content display: flex background: #141d27 .content-left flex: 1 /*让所有弹性盒模型对象的子元素都有相同的长度,忽略它们内部的内容*/ .content-right flex: 0 0 105px /*flex三个参数依次表示:等分、内容缩放情况、站位空间*/ width: 105p -
display:inline-block有一个默认间隙的问题 —— 解决:父级font-size:0
- 三种状态转换: 数据驱动Dom变化
cartcontrol组件
- 在设计尺寸基础上增加点击区域: padding
- 检测数据的变化:Vue.set
- 引入:
Vue import Vue from 'vue'; -
使用Vue.set接口:
Vue.set(this.food, 'count', 1);
- 按钮平移+渐隐渐现+滚动动画:
<transition name="move">...</transition> View Code
.cart-decrease
     display: inline-block
     padding: 6px
     transform: translate3d(0, 0, 0)
     transform: rotate(0)
     &.move-enter-active, &.move-leave-active
          transition: all 0.4s linear
          transform: translate3d(0, 0, 0)
          transform: rotate(0)
     &.move-enter, &.move-leave-active
          opacity: 0
          transform: translate3d(24px, 0, 0)/*开启硬件加速,让动画更流畅*/
          transform: rotate(180deg)
     .inner
          display: inline-block
          line-height: 24px
          font-size: 24px
          color: rgb(0, 160, 220)

购物车抛物线小球动画
- data数据中定义一个数组,存放5个小球,这5个小球可以满足的动画的运行
data() { return { balls: [{ //每一个成员都用来维护当前小球的状态,初始状态都是隐藏的 show: false }, { show: false }, { show: false }, { show: false }, { show: false }], //添加一个变量,用来存贮已经下落的小球 dropBalls: [], fold: true //购物车详情列表默认折叠 }; } - 布局
<div class="ball-container">
    <div v-for="(ball, index) in balls" :key="index">
        <div class="ball-container">
             <div v-for="(ball, index) in balls" :key="index">
                   <transition name="drop" >
                          <div v-show="ball.show" class="ball">
                                 <div class="inner inner-hook"></div>
                           </div>
                   </transition>
             </div>
         </div>
    </div>
</div>
- :key报错问题:key值是必须唯一的,如果重复就会报错。可以把key值改为index,就可以避免这个情况
<div v-for="(ball, index) in balls" :key="index" v-show="ball.show"></div> - 动画需求:小球有抛物线轨迹运动的过渡,而且发射出去就不会再回来了
- 动画属性只用enter,不用leave,并且小球起始点需要动态计算
.ball-container position: fixed left: 32px bottom: 22px z-index: 200 .inner width: 15px height: 15px border-radius: 50% background-color: #00A0DC transition: all 1s linear &.drop-enter-active transition: all 1s cubic-bezier(0.49, -0.29, 0.75, 0.41) -
CSS3 三次贝塞尔曲线(cubic-bezier):
贝塞尔曲线通过控制曲线上的四个点(起始点、终止点以及两个相互分离的中间点)来创造、编辑图形,
绘制出一条光滑曲线并以曲线的状态来反映动画过程中速度的变化。 - 动画分为两层,外层控制小球y轴方向和运动的轨道,内层控制x轴方向的运动
-
使用js动画钩子,vue在实现动画的时候提供了几个javascript钩子,可配合css动画一起使用,也可单独使用
View Codemethods: { dropMove(el) { // console.log(el) for(let i=0; i<this.balls.length; i++) { let ball = this.balls[i]; if(!ball.show) { ball.show = true; ball.el = el; this.dropBalls.push(ball); return; } } }, beforeEnter(el, done) { let count = this.balls.length; while (count--) { let ball = this.balls[count]; if(ball.show) { let rect = ball.el.getBoundingClientRect();//返回元素的大小及其相对于视口的位置 let x = rect.left - 32 //ball-container left:32 let y = -(window.innerHeight - rect.top -22); el.style.display = ''; el.style.transform = `translate3d(0,${y}px,0)`;//外层元素纵向移动 el.style.webkitTransform = `translate3d(0,${y}px,0)`; let inner = el.getElementsByClassName('inner-hook')[0];//内层元素横向移动 inner.style.webkitTransform = `translate3d(${x}px, 0, 0)`; inner.style.transform = `translate3d(${x}px, 0, 0)`; // console.log(el); } } }, dropEnter(el, done) { /*手动取到offsetHeight, 触发浏览器重绘*/ let rf = el.offsetHeight; this.$nextTick(() => { //样式重置回来 el.style.webkitTransform = 'translate3d(0, 0, 0)'// 设置小球掉落后最终的位置 el.style.transform = 'translate3d(0, 0, 0)' let inner = el.getElementsByClassName('inner-hook')[0] inner.style.webkitTransform = 'translate3d(0, 0, 0)' inner.style.transform = 'translate3d(0, 0, 0)' el.addEventListener('transitionend', done) // Vue为了知道过渡的完成,必须设置相应的事件监听器。它可以是transitionend或 animationend }) // console.log(el); }, afterEnter(el) { let ball = this.dropBalls.shift(); if(ball) { ball.show = false; el.style.display = 'none'; } // console.log(el); }
每个钩子都有一个参数el: 当前执行transition动画的DOM对象
当我们点击触发一个过渡的时候,我们在beforeEnter里先拿到当前元素的偏移位置,
然后给过渡元素设置其起始位置,在enter里需要重新触发下浏览器的重绘,然后在下一帧重新设置元素的结束位置,
这时就会产生过渡效果,在过渡完成后我们将当前元素隐藏即可。关于tansition实践详解博客:【重点突破】—— Vue2.0 transition 动画Demo实践填坑
| 二、food商品详情页实现 |
 |
 |
| food | |
商品详情页实现-food.vue组件
- 设计时:父组件可以调用子组件方法,子组件不能调用父组件方法
- 常见命名习惯:如果是父组件调用的方法,命名如show();如果是组件私有方法,命名会在前面加_, 如_show()
- 详情页从右往左飞入动画:
.food
    position: fixed
    left: 0
    top: 0
    bottom: 48px
    z-index: 30
    width: 100%
    background: #ffffff
    transform: translate3d(0, 0, 0)
    &.move-enter-active, &.move-leave-active
          transition: all 0.2s linear
          transform: translate3d(0, 0, 0)
    &.move-enter, &.move-leave-active
          opacity: 0
          transform: translate3d(100%, 0, 0)
- 坑:头图显示是异步加载的,不能写死宽高,因为视口是自适应的,但不设置高度,页面内容会有图片撑开高度的抖动过程。
- 解决:一开始给<img>限制宽高,设为容器的100%
.image-header position: relative width: 100% height: 0 padding-top: 100% // 百分比是相对于盒子的宽度来计算的,看起来就像是一个正方形 img position: absolute top: 0 left: 0 width: 100% height: 100% - 坑:“加入购物车”一点击就会display:none,这样执行better-scroll动画的时候,找ball.el.getBoundingClientRect()会找不到,小球就不能找到正确的初始位置。
- 解决:给消失的过程加一个opcity的transition动画,时长0.2s,这样就不会立刻消失
&.buy-enter-active, &.buy-leave-active transition: all 0.2s opacity: 1 &.buy-enter, &.buy-leave-active opacity: 0 - 坑:菜单列表的“+”“-”按钮,每次点击都会触发详情页显示,这是因为点击事件被穿透了。
- 解决:给cart-control.vue组件中的“+”“-”按钮的点击事件,都添加阻止事件冒泡
@click.stop.prevent="decreaseCart($event)" @click.stop.prevent="addCart($event)" - 同理,详情页的“加入购物车”按钮,最好也加上阻止事件冒泡
@click.stop.prevent="addFirst($event)"
split组件实现
- 一个很简单的样式模板组件,分隔区
View Code
<template>
  <div class="split"></div>
</template>

<script type="text/ecmascript-6">
  export default {};
</script>

<style lang="stylus" rel="stylesheet/stylus">
    .split
        width 100%
        height 16px
        border-top: 1px solid rgba(1, 17, 27, 0.1);
        border-bottom: 1px solid rgba(1, 17, 27, 0.1);
        background: #f3f5f7
</style>
商品评价 - ratingselect 组件
- 设置ratingselect组件中需要的props接收的数据,数据应从food.vue组件传入<ratingselect></ratingselect>,并由ratingselect.vue的props接收
<v-ratingselect :select-type="selectType" :only-content="onlyContent" :desc="desc" :ratings="food.ratings" @increment="incrementTotal"> </v-ratingselect> - props的值如下:首先是有一个变量【only-content】是否显示只看内容,还有一个【select-type】控制选择的类型,还有要维护一个【ratings】所有评价的数据,因为这里有一个评价数量;还要去维护一个【desc】描述,是(全部,推荐,吐槽)还是(全部,满意,不满意),按照以上标准设置外部组件传入ratingselect的props值
const POSITIVE = 0; const NEGATIVE = 1; const ALL = 2; export default { //需要一些评价数据才能完成评价组件 props: { ratings: { type: Array, default() { return []; } }, selectType: { //全部,满意,不满意 type: Number, default: ALL //默认情况时ALL,值等于2 }, onlyContent: { //只看有内容的评价还是所有的评价 type: Boolean, default: false //设置为可以看到所有的评价 }, desc: { //描述 type: Object, default() { //默认desc是这三种,在商品详情页的时候传入推荐或者吐槽 return { all: '全部', positive: '满意', negative: '不满意' }; } } }, -
在food.vue(商品详情页)中引入ratingSelect组件的时候,将desc改成"全部","推荐"和"吐槽",接下来写DOM布局:
View Code<template> <div class="ratingselect"> <div class="rating-type" border-1px> <span>{{desc.all}}</span> <span>{{desc.positive}}</span> <span>{{desc.negative}}</span> </div> <div @click="toggleContent($event)" class="switch" :class="{'on':oContent}"> <span class="icon-check_circle"></span> <span class="text">只看有内容的评价</span> </div> </div> </template>
-
在food.vue(商品详情页)的data中挂载对上述对象的跟踪,并对其进行初始化
const POSITIVE = 0; const NEGATIVE = 1; const ALL = 2; data () { return { showFlag: false, selectType: ALL, onlyContent: false, //先设置组件一开始显示有内容的评价 desc: { //desc做了改变 all: '全部', positive: '推荐', negative: '吐槽' } }; } -
需求:在切换不同商品的时候能有相同的初始化状态 —— 定义show()作为goods组件中调用food组件的函数,即点开商品详情的显示函数,将初始化设置传入到show()中
show() { //可以被父组件调用到,方法前加下划线一般是私有方法
       this.showFlag = true;
       //初始化部分,ratingselect组件是被被不同的商品使用的,所以我们希望在点开不同的商品时,能有一样的初始化状态
       this.selectType = ALL;
       this.onlyContent = false;
       //展示界面时用到BScroll
       this.$nextTick(() => {
                if (!this.scroll) {
                    this.scroll = new BScroll(this.$refs.food, {
                        click: true // 可以被点击
                    });
                } else {
                   this.scroll.refresh();
                }
       });
}
- 两种样式:公用样式、特殊样式
View Code
.ratingselect
    .rating-type
        padding 18px 0
        margin 0 18px //保证横线的长度
        border-1px(rgba(7,17,27,0.1))
        font-size 0
        .block //没有写文字的时候是没有被撑开的
            display inline-block
            padding 8px 12px
            margin-right 8px
            border-radius 1px
            line-height 16px
            font-size 12px
            color rgb(77,85,93)
            &.active  // block的active要设置一下
                 color #ffffff
            .count
                margin-left 2px
                font-size 8px
            &.positive
                background rgba(0,160,220,.2)
                &.active
                    background rgb(0,160,220)
            &.negative
                background  rgba(77,85,93,0.2)
                &.active
                    background  rgb(77,85,93)
    .switch
        padding 12px 18px
        line-height 24px
        border-bottom 1px solid rgba(7,17,27,0.1)
        color rgb(147,153,159)
        font-size 0
        &.on
            .icon-check_circle
                color #00c850
        .icon-check_circle
            display inline-block
            vertical-align top
            margin-right 4px
            font-size 24px
        .text
            display inline-block
            vertical-align top
            font-size 12px
- 被选中
:class="{'active':selectType===2}" - 居中对齐:
display: inline-block vertical-align: top -
因为rating下有一条border,所以在rating下不可以设置四周的padding值,如果设置了border就撑不开整个屏幕了
.rating //因为要在rating title下方画一条横线,所以不能用padding-left,改用title的margin代替
     padding-top: 18px
     .title
         line-height 14px
         margin-left 18px
         font-size 14px
         color rgb(7,17,27)
- 坑:[Vue warn]: Avoid mutating a prop directly since the value will be overwritten whenever the parent component re-renders. Instead, use a data or computed property based on the prop’s value. Prop being mutated: “gems” (found in component: )
- 这是因为在vue2.0中,直接修改prop是被视作反模式的。由于在新的渲染机制中,每当父组件重新渲染时,子组件都会被覆盖,所以应该把props看做是不可变对象。
- 解决:在props中接收到父组件传过来的selectType和onlyContent的值之后,在data中重新定义变量接收,以便观测值的变化(因为子组件将改变data中的值,子组件要将这些变化的值传递个父组件)
data() { return { sType : this.selectType, oContent : this.onlyContent } } - 之后,sType就替代了this.selectType,所以DOM就变成了
View Code
<template>
  <div class="ratingselect">
        <div class="rating-type" border-1px>
            <span class="block positive" @click="select(2,$event)" :class="{'active':sType === 2}">{{desc.all}}<span class="count">{{ratings.length}}</span> </span>
            <span class="block positive" @click="select(0,$event)" :class="{'active':sType === 0}">{{desc.positive}}<span class="count">{{positives.length}}</span></span>
            <span class="block negative" @click="select(1,$event)" :class="{'active':sType === 1}">{{desc.negative}}<span class="count">{{negatives.length}}</span></span>
        </div>
        <div @click="toggleContent($event)"  class="switch" :class="{'on':oContent}">
            <span class="icon-check_circle"></span>
            <span class="text">只看有内容的评价</span>
        </div>
  </div>
</template>
-
编写rating-type和swicth切换有内容评价部分的绑定函数:select(type, event) —— 在点击的时候就把类型123传进去,传入event是因为外层是一个betterScroll,要进行点击事件的判断,将sType的值更新之后通过emit将函数派发出去;
methods: { select (type, event) { //点击的时候外层是有一个BScroll的,所以要传递event阻止默认点击 if (!event._constructed) { //浏览器直接return掉,去掉自带click事件的点击 return; } //将this.selectType设置成传入的参数,而不是food传过来的初始化的值,之后样式就可以随着点击改变了 this.sType = type; /派发事件通知父组件food.vue selectType的改变,将type值传出去
console.log('ratingselect.vue ' + type); this.$emit('increment', 'selectType', this.sType); }, toggleContent (event) { if (!event._constructed) { //浏览器直接return掉,去掉自带click事件的点击 return; } this.oContent = !this.oContent; console.log('ratingselect.vue ' + this.oContent); this.$emit('increment', 'onlyContent', this.oContent); } } -
统计不同评价的数量(过滤评价类型),添加计算属性 -- positives和negitives数组,长度即为评价数量
<div class="rating-type" border-1px>
   <span class="block positive" @click="select(2,$event)" :class="{'active':sType === 2}">{{desc.all}}<span class="count">{{ratings.length}}</span> </span>
   <span class="block positive" @click="select(0,$event)" :class="{'active':sType === 0}">{{desc.positive}}<span class="count">{{positives.length}}</span></span>
   <span class="block negative" @click="select(1,$event)" :class="{'active':sType === 1}">{{desc.negative}}<span class="count">{{negatives.length}}</span></span>
 </div>
computed: { positives() { //对应所有正向评价的数组 return this.ratings.filter((rating) => { return rating.rateType === POSITIVE; }); }, negatives() { return this.ratings.filter((rating) => { return rating.rateType === NEGATIVE; }); } }
评价列表
- 切换子组件的按钮之后,父组件就可以根据子组件的选择进行内容的切换
- 为列表的显示添加选择
 <li v-show="needShow(rating.rateType, rating.text)" //v-show特殊用法:绑定函数返回值
     v-for="rating in food.ratings"
     :key="rating.id"
class="rating-item border-1px"> - 定义needshow()
needShow(type, text) {
     // console.log('this.selectType: ' + this.selectType + '  type: ' + type + ' out  ' + text);
     if (this.onlyContent && !text) {
            return false;
     }
     if (this.selectType === ALL) {
            return true;
     } else {
     //console.log('this.selectType: ' + this.selectType + 'type: ' + type + ' in ' + text);
            return type === this.selectType;
     }
}
- ratingselect.vue 中进行rating.rateType的切换,变量更改后的结果要传递到父组件中,这时用到了incrementTotal()
incrementTotal(type, data) { // 对子组件更改的数值进行监听 this[type] = data; this.$nextTick(() => { // 当我们改变数据的时候,DOM的更新是异步的 this.scroll.refresh(); }); } - 触发事件increment: 在子组件ratingselect中使用select和toggleContent中进行emit派发
- 时间的显示添加过滤器,将时间戳转化为时间字符串
<div class="time">{{rating.rateTime | formatDate}}</div>
import {formatDate} from 'common/js/date.js';
View Codeexport function formatDate(date, fmt) { if (/(y+)/.test(fmt)) { fmt = fmt.replace(RegExp.$1, (date.getFullYear() + '').substr(4 - RegExp.$1.length)); } let o = { 'M+': date.getMonth() + 1, 'd+': date.getDate(), 'h+': date.getHours(), 'm+': date.getMinutes(), 's+': date.getSeconds() }; for (let k in o) { if (new RegExp(`(${k})`).test(fmt)) { let str = o[k] + ''; fmt = fmt.replace(RegExp.$1, (RegExp.$1.length === 1) ? str : padLeftZero(str)); } } return fmt; } function padLeftZero(str) { return ('00' + str).substr(str.length); }
filters: {
      formatDate(time) {
          let date = new Date(time);
          return formatDate(date, 'yyyy-MM-dd hh:mm');
      }
}
版权声明:本文原创,未经本人允许不得转载