SALTSTACK自动化部署
server1 172.25.28.1 管理节点&托管节点
server2 172.25.28.2 托管节点
server3 172.25.28.3 托管节点
真机
在真机搭建第三方软件共享yum源
[root@foundation28 ~]# cd /var/www/html/
[root@foundation28 html]# mkdir pub
[root@foundation28 html]# cd pub/
lftp 172.25.254.250:/pub/docs/saltstack> mirror rhel6
[root@foundation28 yum.repos.d]# vim salt.repo
[root@foundation28 yum.repos.d]# yum clean all
[root@foundation28 yum.repos.d]# yum repolist
SERVER2配置salt-minon
1,共享真机的yum源
[root@server2 ~]# vim /etc/yum.repos.d/salt.repo
[root@server2 ~]# yum clean all
[root@server2 ~]# yum repolist
2,安装salt-minon,配置server2的master为server1,启动服务
[root@server2 ~]# yum install salt-minon -y
[root@server2 ~]# cd /etc/salt/
[root@server2 salt]# ls
cloud cloud.deploy.d cloud.profiles.d master minion pki proxy.d
cloud.conf.d cloud.maps.d cloud.providers.d master.d minion.d proxy roster
[root@server2 salt]# vim minion

注意:这里必须有一个空格,否则服务启动不了,会被映射为python语言,这里也可以写主机名,但是需要做好解析
[root@server2 salt]# /etc/init.d/salt-minion start
Starting salt-minion:root:server2 daemon: OK
SERVER1配置salt-master
1,共享真机的yum源
[root@server1 ~]# cd /etc/yum.repos.d/
[root@server1 yum.repos.d]# vim salt.repo
[root@server1 yum.repos.d]# yum clean all
[root@server1 yum.repos.d]# yum repolist
[root@server1 yum.repos.d]# cat salt.repo
[salt]

name=saltstack

baseurl=http://172.25.28.250/pub/rhel6

enabled=1

gpgcheck=0
2,安装salt-master,直接启动服务
[root@server1 yum.repos.d]# yum install salt-master
[root@server1 yum.repos.d]# cd /etc/salt/
[root@server1 salt]# ls
cloud cloud.deploy.d cloud.profiles.d master minion pki proxy.d
cloud.conf.d cloud.maps.d cloud.providers.d master.d minion.d proxy roster
[root@server1 salt]# /etc/init.d/salt-master start
Starting salt-master daemon: [ OK ]
3,server1和server2交换密钥通信
[root@server1 salt]# salt-key -L
Accepted Keys:
Denied Keys:
Unaccepted Keys:
server2
Rejected Keys:
[root@server1 salt]# salt-key -A #-A表示添加所有发现的主机
The following keys are going to be accepted:
Unaccepted Keys:
server2
Proceed? [n/Y] Y
Key for minion server2 accepted.
[root@server1 salt]# salt-key -L
Accepted Keys:
server2
Denied Keys:
Unaccepted Keys:
Rejected Keys:
************************************************************************************************************************
交换密钥md5sum查看
SERVER2:
[root@server2 ~]# cd /etc/salt/pki/minion/
[root@server2 minion]# md5sum minion_master.pub
dc9017953cb258cfab81685be99ee2f9 minion_master.pub
可以在server1上看到/etc/salt/pki/master/master.pub和这是一样的
[root@server2 minion]# md5sum minion.pub
b15932413ddcc4c02e69455582a705d3 minion.pub
可以在server1上看到/etc/salt/pki/master/minions/server2和这是一样的
主机名与minion_id
[root@server2 minion]# cd /etc/salt/
[root@server2 salt]# cat minionz_id
cat: minionz_id: No such file or directory
[root@server2 salt]# cat minion_id
server2 # 如果修server2改了主机名,那么需要删除此文件,它会重新加载,否则与server1的连通会有问题
**************************************************************************************************************************
4,管理节点测试
[root@server1 salt]# salt server2 test.ping #这是一个python方法
server2:
True
[root@server1 salt]# salt server2 cmd.run hostname
server2:
server2
[root@server1 salt]# salt server2 cmd.run 'df -h' #这是以root用户执行
server2:
Filesystem Size Used Avail Use% Mounted on
/dev/mapper/VolGroup-lv_root 19G 970M 17G 6% /
tmpfs 499M 16K 499M 1% /dev/shm
/dev/vda1 485M 33M 427M 8% /boot
可以看到server1和server2建立了长连接
[root@server2 salt]# netstat -antlpe
[root@server2 salt]# lsof -i :4505
COMMAND PID USER FD TYPE DEVICE SIZE/OFF NODE NAME
salt-mini 1738 root 22u IPv4 15082 0t0 TCP server2:36328->server1:4505 (ESTABLISHED)
ansible: ssh加密
saltstack:消息队列ZMQ
ZeroMQ被称为史上最快消息队列,它处于会话层之上,应用层之下,使用后台异步线程完成消息的接受和发送,完美的封装了Socket API,大大简化了编程人员的复杂度,被称为史上最强大的消息中间件。MQ产品基于高可用分布式集群技术,提供消息发布订阅、消息轨迹查询、定时(延时)消息、资源统计、监控报警等一系列消息云服务,是企业级互联网架构的核心产品。MQ 历史超过9年,为分布式应用系统提供异步解耦、削峰填谷的能力,同时具备海量消息堆积、高吞吐、可靠重试等互联网应用所需的特性
https://docs.saltstack.cn/topics/yaml/index.html YAML语法格式
默认的SLS文件的renderer是YAML renderer。YAML是一个有很多强大特性的标记性语言。Salt使用了一个YAML的小型子集,映射非常常用的数据结构,像列表和字典。YAML renderer的工作是将YAML数据格式的结构编译成为Python数据结构给Salt使用。
http://docs.saltstack.cn/salt-modindex.html salt命令模板
http://docs.saltstack.cn/ref/states/all/index.html
部署httpd服务
SERVER1
1,修改配置文件,确定base根,重启服务,建立base根目录
[root@server1 minions]# cd /etc/salt/
[root@server1 salt]# vim master

[root@server1 salt]# /etc/init.d/salt-master restart
[root@server1 salt]# mkdir /srv/salt
[root@server1 salt]# cd /srv/salt/
[root@server1 salt]# ls
2,创建httpd服务目录,以区分其他服务
[root@server1 salt]# mkdir httpd
[root@server1 salt]# cd httpd/
[root@server1 httpd]# pwd
/srv/salt/httpd
3,创建.sls推送文件,安装httpd和php并启动httpd服务
[root@server1 httpd]# vim install.sls
[root@server1 httpd]# cat install.sls
apache-install:

  pkg.installed:

    - pkgs:

      - httpd

      - php

  service.running:

  -name:httpd
[root@server1 httpd]# salt server2 state.sls httpd.install
server2端的80端口已经打开
[root@server2 salt]# netstat -antlpe
[root@server2 salt]# chkconfig --list httpd
httpd 0:off 1:off 2:off 3:off 4:off 5:off 6:off
5,修改推送文件,开机自启动httpd服务
[root@server1 httpd]# vim install.sls
[root@server1 httpd]# cat install.sls
apache-install:

  pkg.installed:

    - pkgs:

      - httpd

      - php

  service.running:

    - name: httpd

    - enable: True
[root@server1 httpd]# salt server2 state.sls httpd.install
开机自启打开
[root@server2 salt]# chkconfig --list httpd
httpd 0:off 1:off 2:on 3:on 4:on 5:on 6:off
6,修改配置文件,推送httpd的配置文件
[root@server1 httpd]# vim install.sls
apache-install:

  pkg.installed:

    - pkgs:

      - httpd

      - php


  file.managed:

    - name: /etc/httpd/conf/httpd.conf   # 发送到托管节点的路径

    - source: salt://httpd/files/httpd.conf  # 文件在管理节点的路径

    - user: root     # 推送过去之后的权限

    - mode: 644


  service.running:

    - name: httpd

    - enable: True

    - reload: True

    - watch:

      - file: apache-install
[root@server1 httpd]# mkdir files
[root@server1 httpd]# cd files/
[root@server1 files]# pwd
/srv/salt/httpd/files
从server2传一个httpd的配置文件给server1,在server1端对此配置文件可以作出修改,然后直接推送给托管节点,并且覆盖掉原来的文件
[root@server2 salt]# scp /etc/httpd/conf/httpd.conf server1:/srv/salt/httpd/files
root@server1's password:
httpd.conf 100% 34KB 33.6KB/s 00:00
[root@server1 files]# ls
httpd.conf
[root@server1 files]# vim httpd.conf
修改监听端口为8080
watch:
使用watch的一个很好的例子是service.running状态。 当服务监视状态时,除了Salt确保服务正在运行之外,当观察状态改变时,服务被重新加载/重新启动。如果没有- reload: True那么会选择重启,如果有,选择重新加载
http://docs.saltstack.cn/ref/states/requisites.html#watch watch的详细用法
[root@server1 httpd]# salt server2 state.sls httpd.install
7,查看到server1和server2端的md5sum加密是一样的,端口也被修改为了8080
[root@server1 httpd]# cd files/
[root@server1 files]# md5sum httpd.conf
b7ca7a0e786418ba7b5ad84efac70265 httpd.conf
[root@server2 salt]# md5sum /etc/httpd/conf/httpd.conf
b7ca7a0e786418ba7b5ad84efac70265 /etc/httpd/conf/httpd.conf
[root@server2 salt]# netstat -antlpe
对.sls文件结构做拆分(一)
一
1,推送httpd的配置文件,端口修改80
[root@server1 httpd]# vim install.sls
[root@server1 httpd]# cat install.sls
apache-install:

  pkg.installed:

    - pkgs:

      - httpd

      - php

  file.managed:

    - name: /etc/httpd/conf/httpd.conf

    - source: salt://httpd/files/httpd.conf

    - user: root

    - mode: 644


  service.running:

    - name: httpd

    - enable: True

    - reload: True

    - watch:

      - file: apache-install
[root@server1 files]# vim httpd.conf
修改监听端口
[root@server1 files]# salt server2 state.sls httpd.install
2,修改配置文件的结构,其实本质上没有什么变化
[root@server1 httpd]# vim install.sls
[root@server1 httpd]# cat install.sls
apache-install:

  pkg.installed:

    - pkgs:

      - httpd

      - php


  service.running:

    - name: httpd

    - enable: True

    - reload: True

    - watch:

      - file: /etc/httpd/conf/httpd.conf


/etc/httpd/conf/httpd.conf:    #

  file.managed:

    - source: salt://httpd/files/httpd.conf

    - user: root

- mode: 644
[root@server1 httpd]# salt server2 state.sls httpd.install
在推送过程中不会出现文件改变的信息
3,查看端口信息
[root@server2 salt]# netstat -antlpe
Active Internet connections (servers and established)
Proto Recv-Q Send-Q Local Address Foreign Address State User Inode PID/Program name
tcp 0 0 0.0.0.0:22 0.0.0.0:* LISTEN 0 8184 920/sshd
tcp 0 0 127.0.0.1:25 0.0.0.0:* LISTEN 0 8391 996/master
tcp 0 0 172.25.28.2:46686 172.25.28.1:4506 TIME_WAIT 0 0 -
tcp 0 0 172.25.28.2:46689 172.25.28.1:4506 TIME_WAIT 0 0 -
tcp 0 0 172.25.28.2:36337 172.25.28.1:4505 ESTABLISHED 0 15658 1738/python2.6
tcp 0 0 172.25.28.2:22 172.25.28.250:52870 ESTABLISHED 0 9085 1383/sshd
tcp 0 0 172.25.28.2:46687 172.25.28.1:4506 TIME_WAIT 0 0 -
tcp 0 0 172.25.28.2:46688 172.25.28.1:4506 TIME_WAIT 0 0 -
tcp 0 0 :::80 :::* LISTEN 0 17426 2078/httpd
tcp 0 0 :::22 :::* LISTEN 0 8186 920/sshd
tcp 0 0 ::1:25 :::* LISTEN 0 8393 996/master
二
[root@server1 httpd]# vim install.sls
[root@server1 httpd]# cat install.sls
httpd:

  pkg.installed    #拆分安装的软件


php:

  pkg.installed


apache:

  service.running:

    - name: httpd

    - enable: True

    - reload: True

    - watch:

      - file: /etc/httpd/conf/httpd.conf


/etc/httpd/conf/httpd.conf:

  file.managed:

    - source: salt://httpd/files/httpd.conf

    - user: root

    - mode: 644
[root@server1 httpd]# salt server2 state.sls httpd.install
根据官方的yaml语法及模块的用法,可以进行更多的拆分
部署NGINX服务
1,先搭建好yum源,配置为托管节点
[root@server3 yum.repos.d]# yum install -y salt-minion
[root@server3 yum.repos.d]# vim /etc/salt/minion

[root@server3 yum.repos.d]# /etc/init.d/salt-minion start
[root@server1 ~]# salt-key -L
Accepted Keys:
server2
Denied Keys:
Unaccepted Keys:
server3
Rejected Keys:
[root@server1 ~]# salt-key -a server3
The following keys are going to be accepted:
Unaccepted Keys:
server3
Proceed? [n/Y] Y
Key for minion server3 accepted.
[root@server1 ~]# salt-key -L
Accepted Keys:
server2
server3
Denied Keys:
Unaccepted Keys:
Rejected Keys:
2,建立nginx服务目录,用以区分别的服务
[root@server1 salt]# mkdir nginx
[root@server1 salt]# cd nginx/
[root@server1 nginx]# mkdir files
[root@server1 nginx]# cd files/
3,获取nginx源码包,建立.sls推送文件
lftp 172.25.28.250:/pub> get nginx-1.14.0.tar.gz
[root@server1 files]# ls
nginx-1.14.0.tar.gz
[root@server1 files]# cd ..
[root@server1 nginx]# vim install.sls
[root@server1 nginx]# cat install.sls
nginx-install:

  pkg-installed:

    - pkgs:

      - pcre-devel     # 软件包依赖

      - openssl-devel

      - gcc


  file.managed:

    - name: /mnt/nginx-1.14.0.tar.gz

    - source: salt://nginx/files/nginx-1.14.0.tar.gz


  cmd.run:

    - name: cd /mnt && tar zxf nginx-1.14.0.tar.gz
4,测试install.sls
[root@server1 nginx]# salt server3 state.sls nginx.install
[root@server3 ~]# cd /mnt/
[root@server3 mnt]# ls
nginx-1.14.0 nginx-1.14.0.tar.gz
[root@server3 mnt]# cd nginx-1.14.0
[root@server3 nginx-1.14.0]# ls
auto CHANGES CHANGES.ru conf configure contrib html LICENSE man README src
5,修改install.sls文件,测试
[root@server1 nginx]# vim install.sls
[root@server1 nginx]# cat install.sls
nginx-install:

  pkg.installed:

    - pkgs:

      - pcre-devel

      - openssl-devel

      - gcc


  file.managed:

    - name: /mnt/nginx-1.14.0.tar.gz

    - source: salt://nginx/files/nginx-1.14.0.tar.gz


  cmd.run:

    - name: cd /mnt && tar zxf nginx-1.14.0.tar.gz && cd nginx-1.14.0 && sed -i.bak 's/#define NGINX_VER          "nginx\/" NGINX_VERSION/#define NGINX_VER          "nginx"/g' src/core/nginx.h && sed -i.bak 's/CFLAGS="$CFLAGS -g"/#CFLAGS="$CFLAGS -g"/g' auto/cc/gcc && ./configure --prefix=/usr/local/nginx  --with-http_ssl_module --with-http_stub_status_module  --with-threads --with-file-aio &> /dev/null && make &> /dev/null && make install &> /dev/null   # 注意去掉版本号和debug

- creates: /usr/local/nginx
注意:1,仅在create指定的文件不存在时才会运行,如果/usr/local/nginx已经存在了,那么就不执行-name:的动作
2,这个编译命令应该在server3上测试可以通过
[root@server1 nginx]# salt server3 state.sls nginx.install
6,建立启动服务service.sls文件
[root@server1 nginx]# vim service.sls
include:

  - nginx.install      # 把安装文件包含进来,这里是类似python的方法格式


nginx-service:

  cmd.run:

    - name: /usr/local/nginx/sbin/nginx   #  这是nginx的二进制文件
[root@server1 nginx]# salt server3 state.sls nginx.service
7,查看进程和端口
[root@server3 mnt]# ps ax
1803 ? Sl 0:07 /usr/bin/python2.6 /usr/bin/salt-minion -c /etc/salt -d
1804 ? S 0:00 /usr/bin/python2.6 /usr/bin/salt-minion -c /etc/salt -d
4769 ? Ss 0:00 nginx: master process /usr/local/nginx/sbin/nginx
4770 ? S 0:00 nginx: worker process
4773 pts/0 R+ 0:00 ps ax
[root@server3 mnt]# netstat -antlpe
Active Internet connections (servers and established)
Proto Recv-Q Send-Q Local Address Foreign Address State User Inode PID/Program name
tcp 0 0 0.0.0.0:80 0.0.0.0:* LISTEN 0 22428 4769/nginx
8,修改优化启动文件service.sls
[root@server1 nginx]# cat service.sls
include:

  - nginx.install


nginx-service:

  cmd.run:

    - name: /usr/local/nginx/sbin/nginx

    - creates: /usr/local/nginx/logs/nginx.pid

# 如果nginx.pid这个文件存在,那么说明nginx已经启动,那么这个触发条件可以防止nginx在已经启动的状态再次启动报错

[root@server1 nginx]# salt server3 state.sls nginx.service
9,修改service.sls文件,加入nginx.conf修改模块,修改nginx的进程数
[root@server1 nginx]# vim service.sls
[root@server1 nginx]# cat service.sls
include:

  - users.nginx

  - nginx.install


/usr/local/nginx/conf/nginx.conf:

  file.managed:

    - source: salt://nginx/files/nginx.conf  # 这个配置文件从server3传来,修改之后分发给指定节点


nginx-service:

  file.managed:

    - name: /etc/init.d/nginx

    - source: salt://nginx/files/nginx  # 把本地的nginx启动脚本分发到/etc/init.d/下

    - mode: 755         # 必须要给可执行权限,因为这里是脚本启动,不是二进制文件

  service.running:    # service.running读取的是脚本,cmd.run读取二进制文件

    - name: nginx

    - reload: True

    - watch:

      - file: /usr/local/nginx/conf/nginx.conf
[root@server1 nginx]# vim files/nginx.conf
改变进程数

[root@server1 nginx]# salt server3 state.sls nginx.service
10,查看脚本分发到server3上,进程数变成2
[root@server3 logs]# ll /etc/init.d/nginx
-rwxr-xr-x 1 root root 3136 Aug 17 13:51 /etc/init.d/nginx
[root@server3 logs]# ps ax
1803 ? Sl 0:07 /usr/bin/python2.6 /usr/bin/salt-minion -c /etc/salt -d
1804 ? S 0:00 /usr/bin/python2.6 /usr/bin/salt-minion -c /etc/salt -d
4769 ? Ss 0:00 nginx: master process /usr/local/nginx/sbin/nginx
4892 ? S 0:00 nginx: worker process
4893 ? S 0:00 nginx: worker process
4894 pts/0 R+ 0:00 ps ax
11,创建nginx用户,在base根下建立users目录,这样不仅可以给nginx创建,也适用其他的
[root@server1 nginx]# vim files/nginx.conf

[root@server1 salt]# ls
httpd nginx
[root@server1 salt]# mkdir users
[root@server1 salt]# cd users/
[root@server1 users]# ls
[root@server1 users]# vim nginx.sls
nginx-group:

  group.present:

    - name: nginx

    - gid: 800      # 指定gid


nginx-usr:

  user.present:

    - name: nginx

    - uid: 800

    - gid: 800

    - shell: /sbin/nologin  # 不允许登录

    - createhome: False  # 默认会创建加目录,这里禁用

    - home: /usr/local/nginx
12,把user.nginx方法添加到service.sls服务启动文件
[root@server1 nginx]# vim service.sls
[root@server1 nginx]# cat service.sls
include:

  - users.nginx

  - nginx.install


/usr/local/nginx/conf/nginx.conf:

  file.managed:

    - source: salt://nginx/files/nginx.conf


nginx-service:

  file.managed:

    - name: /etc/init.d/nginx

    - source: salt://nginx/files/nginx

    - mode: 755


  service.running:

    - name: nginx

    - reload: True

    - watch:

      - file: /usr/local/nginx/conf/nginx.conf
[root@server1 nginx]# salt server3 state.sls nginx.service
[root@server3 logs]# id nginx
uid=800(nginx) gid=800(nginx) groups=800(nginx)
对.sls文件结构做拆分(二)
1,把安装依赖部分拆分出来,相当于做了一个方法,在install.sls直接调用
[root@server1 nginx]# pwd
/srv/salt/nginx
[root@server1 salt]# ls
httpd nginx users
[root@server1 salt]# mkdir pkgs
[root@server1 salt]# cd pkgs/
[root@server1 pkgs]# ls
[root@server1 pkgs]# vim make.sls
[root@server1 pkgs]# cat make.sls
make-gcc:

  pkg.installed:

    - pkgs:

      - pcre-devel

      - openssl-devel

      - gcc
2,修改install.sls安装推送文件
[root@server1 nginx]# vim install.sls
[root@server1 nginx]# cat install.sls
include:

    - pkgs.make   # 包含这个方法

nginx-install:

  file.managed:

    - name: /mnt/nginx-1.14.0.tar.gz

    - source: salt://nginx/files/nginx-1.14.0.tar.gz


  cmd.run:

    - name: cd /mnt && tar zxf nginx-1.14.0.tar.gz && cd nginx-1.14.0 && sed -i.bak 's/#define NGINX_VER          "nginx\/" NGINX_VERSION/#define NGINX_VER          "nginx"/g' src/core/nginx.h && sed -i.bak 's/CFLAGS="$CFLAGS -g"/#CFLAGS="$CFLAGS -g"/g' auto/cc/gcc && ./configure --prefix=/usr/local/nginx  --with-http_ssl_module --with-http_stub_status_module  --with-threads --with-file-aio &> /dev/null && make &> /dev/null && make install &> /dev/null

    - creates: /usr/local/nginx
[root@server1 nginx]# salt server3 state.sls nginx.service
部署HAPROXY
1,配置server1为托管节点,在server上部署haproxy
server1即是管理节点又是托管节点
[root@server1 ~]# yum install -y salt-minoin
[root@server1 salt]# vim /etc/salt/minion

[root@server1 salt]# /etc/init.d/salt-minion start
Starting salt-minion:root:server1 daemon: OK
[root@server1 salt]# salt-key -L
Accepted Keys:
server2
server3
Denied Keys:
Unaccepted Keys:
server1
Rejected Keys:
[root@server1 salt]# salt-key -a server1
The following keys are going to be accepted:
Unaccepted Keys:
server1
Proceed? [n/Y] Y
Key for minion server1 accepted.
[root@server1 salt]# salt-key -L
Accepted Keys:
server1
server2
server3
Denied Keys:
Unaccepted Keys:
Rejected Keys:
3,建立haproxy目录和install.sls推送文件
[root@server1 salt]# cd /srv/salt/
[root@server1 salt]# ls
httpd nginx pkgs users
[root@server1 salt]# mkdir haproxy
[root@server1 salt]# cd haproxy/
[root@server1 haproxy]# ls
[root@server1 haproxy]# vim install.sls
haproxy-install:

  pkg.installed:

    - pkgs:

      - haproxy
4,配置负载均衡yum源,否则推送时会报错,haproxy需要特殊的源
[root@server1 ~]# vim /etc/yum.repos.d/rhel-source.repo
添加
[LoadBalancer]

name=LoadBalancer

baseurl=http://172.25.28.250/rhel6.5/LoadBalancer

gpgcheck=0
5,在server2httpd的默认发布目录建立index.html页面!!!server3nginx有默认发布页面。
6,推送,查看haproxy
[root@server1 yum.repos.d]# salt server1 state.sls haproxy.install
[root@server1 yum.repos.d]# cd /etc/haproxy/
[root@server1 haproxy]# ls
haproxy.cfg
7,把配置文件放到files下,方便修改之后,推送到指定节点
[root@server1 haproxy]# mkdir /srv/salt/haproxy/files
[root@server1 haproxy]# cp haproxy.cfg /srv/salt/haproxy/files/
[root@server1 haproxy]# cd /srv/salt/
[root@server1 salt]# ls
haproxy httpd nginx pkgs users
[root@server1 salt]# cd haproxy/
[root@server1 haproxy]# ls
files install.sls
[root@server1 haproxy]# vim install.sls
[root@server1 haproxy]# cat install.sls
haproxy-install:

  pkg.installed:

    - pkgs:

      - haproxy

  file.managed:

    - name: /etc/haproxy/haproxy.cfg

    - source: salt://haproxy/files/haproxy.cfg


  service.running:

    - name: haproxy

    - reload: True

    - watch:

      - file: haproxy-install
8,修改haproxy.cfg,实现负载均衡
[root@server1 haproxy]# cd files/
[root@server1 files]# vim haproxy.cfg

[root@server1 files]# salt server1 state.sls haproxy.install
9,浏览器访问172.25.28.1,刷新网页,可以看到调度
一键部署haproxy
1,在salt的指定的base根目录下,建立top.sls文件
[root@server1 salt]# vim top.sls
[root@server1 salt]# cat top.sls
base:

  'server1':

    - haproxy.install

  'server2':

    - httpd.install

  'server3':

- nginx.service
注意:这里有个好处是可以针对特定的节点部署特定的服务
2,控制多个节点的salt命令
[root@server1 salt]# salt server* test.ping
[root@server1 salt]# salt server? test.ping
[root@server1 salt]# salt server[1-3] test.ping
[root@server1 salt]# salt '*' test.ping # 如果不加单引号,意思就是匹配当前目录下所有文件
server2:
True
server3:
True
server1:
True
3,高级推送,浏览器访问测试
[root@server1 salt]# salt '*' state.highstate
查看信息
[root@server1 haproxy]# salt server2 grains.items 查看server2的所有详细信息
[root@server1 haproxy]# salt server2 grains.item ipv4 查看server2的ipv4信息
[root@server1 haproxy]# salt '*' grains.ls 列出所有托管节点的所有参数,不显示信息
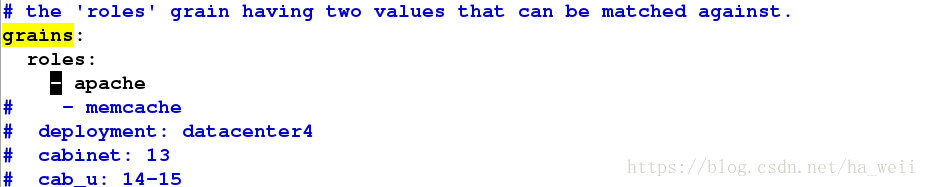
参数ROLES
方法一:在托管主机上修改
1,修改minion的配置文件,重启服务
[root@server2 ~]# cd /etc/salt/
[root@server2 salt]# vim minion
[root@server2 salt]# /etc/init.d/salt-minion restart
Stopping salt-minion:root:server2 daemon: OK
Starting salt-minion:root:server2 daemon: OK
2,查看
[root@server1 ~]# salt '*' grains.item roles
server2:
----------
roles:
- apache
server3:
----------
roles:
server1:
----------
roles:
方法二:在托管主机上修改
1,在base下建立grains文件,同步granis
[root@server3 ~]# cd /etc/salt/
[root@server3 salt]# vim grains
[root@server3 salt]# cat grains
roles:

  - nginx
[root@server3 salt]#salt server3 saltutil.sync_grains
2,查看
[root@server1 haproxy]# salt '*' grains.item roles
server1:
----------
roles:
server2:
----------
roles:
- apache
server3:
----------
roles:
- nginx
*****************************************************************************************************************
此时针对不同托管节点的top.sls可以改为
[root@server1 salt]# vim top.sls
[root@server1 salt]# cat top.sls
base:
'server1':
- haproxy.install
'roles:apache':
- match: grain 匹配grain
- httpd.install
'roles:nginx':
- match: grain
- nginx.service
[root@server1 salt]# salt '*' state.highstate 成功推送
*****************************************************************************************************************
方法三:采用静态的grains,在管理主机上修改
1,建立_grains目录,创建.py文件
[root@server1 salt]# mkdir _grains
[root@server1 salt]# cd _grains/
[root@server1 _grains]# vim my_grains.py
[root@server1 _grains]# cat my_grains.py
#!/usr/bin/env python  # 纯python语法

def my_grains():   # 定义了一个函数

     grains = {}   # 空字典

     grains['hello'] = 'world' #键值对

     grains['salt'] = 'stack'

     return grains
注:这里就是添加了一个模块,字典类型,为items设置了两个参数,一个是hello,值为world,一个是salt,值为stack
2,同步
[root@server1 _grains]# salt server2 saltutil.sync_grains
server2:
- grains.my_grains
3,查看,这个hello和salt就是item的参数
[root@server1 _grains]# salt '*' grains.item hello
server3:
----------
hello:
server2:
----------
hello:
world
server1:
----------
hello:
[root@server1 _grains]# salt '*' grains.item salt
server1:
----------
salt:
server2:
----------
salt:
stack
server3:
----------
salt:
4,查看server2的缓存信息
[root@server2 salt]# cd /var/cache/
[root@server2 cache]# cd salt/
[root@server2 salt]# cd minion/
[root@server2 minion]# ls
accumulator extmods files highstate.cache.p module_refresh pkg_refresh proc sls.p
[root@server2 salt]# tree .
可以看到同步的my_grains.pyc缓存文件
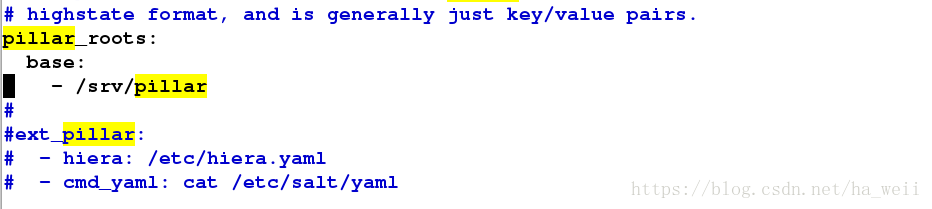
方法四:采用动态的pillar,在管理主机上修改
1,修改配置文件,开启pillar,重启服务
[root@server1 pillar]# /etc/init.d/salt-master restart
Stopping salt-master daemon: [ OK ]
Starting salt-master daemon: [ OK ]
2,根据配置文件建立pillar目录和install.sls配置文件
[root@server1 ~]# mkdir /srv/pillar
[root@server1 ~]# cd /srv/pillar/
[root@server1 pillar]# mkdir web # 这里为了区分,在建立一个web目录
[root@server1 pillar]# cd web/
[root@server1 web]# vim install.sls
[root@server1 webr]# cat install.sls
{% if grains['fqdn'] == 'server2' %}  # (Fully Qualified Domain Name)全限定域名:同时带有主机名和域名的名称

webserver: httpd   # 键值对

{% elif grains['fqdn'] == 'server3' %}

webserver: nginx

{% endif %}
3,建立top.sls为文件
[root@server1 pillar]# vim top.sls
[root@server1 pillar]# cat top.sls
base:

  '*':

  - web.install   # 如果没有建立web目录,install.sls直接就在pillar下,那么这个base根应该是install
4,刷新pillar,查看pillar的items
[root@server1 pillar]# salt '*' saltutil.refresh_pillar
server1:
True
server3:
True
server2:
True
[root@server1 pillar]# salt '*' pillar.items # 这个命令是显示全部,但是只定义了一个动态pillar的参数
server3:
----------
webserver:
nginx
server2:
----------
webserver:
httpd
server1:
----------
[root@server1 pillar]# salt 'server2' pillar.items
server2:
----------
webserver:
httpd
[root@server1 pillar]# salt 'server3' pillar.items
server3:
----------
webserver:
nginx
******************************************************************************************************************************
grains模式
[root@server1 pillar]# salt -G 'roles:apache' test.ping
server2:
True
[root@server1 pillar]# salt -G 'roles:nginx' test.ping
server3:
True
pillar模式
[root@server1 pillar]# salt -I 'webserver:httpd' test.ping
server2:
True
[root@server1 pillar]# salt -I 'webserver:nginx' test.ping
server3:
True
扫描整个网段
[root@server1 pillar]# salt -S '172.25.28.0/24' test.ping
server1:
True
server3:
True
server2:
True
**********************************************************************************************************************
动态参数推送
方法一:jinja模块
1,修改要推送的文件
[root@server1 httpd]# vim files/httpd.conf
Listen {{ bind }}:{{ port }}
2,修改install.sls
[root@server1 httpd]# vim install.sls
[root@server1 httpd]# cat install.sls
httpd:

  pkg.installed


php:

  pkg.installed


apache:

  service.running:

    - name: httpd

    - enable: True

    - reload: True

    - watch:

      - file: /etc/httpd/conf/httpd.conf


/etc/httpd/conf/httpd.conf:

  file.managed:

    - source: salt://httpd/files/httpd.conf

    - user: root

    - mode: 644

    - template: jinja     # 这里必须要写上模块名

    - context:

        bind: 172.25.28.2  # 变量内容,此变量在/etc/httpd/conf/httpd.conf中生效

        port: 8080  # 端口修改为8080
[root@server1 httpd]# salt server2 state.sls httpd.install
方法二:建立lib.sls文件
1,按照官网格式建立lib.sls文件
[root@server1 httpd]# ls
files install.sls
[root@server1 httpd]# vim lib.sls
[root@server1 httpd]# cat lib.sls
{% set port = 80 %} # 设置端口为802,修改变量所在文件
[root@server1 httpd]# vim files/httpd.conf

注意:官网是把lib.sls放在了base根下面,而我们为了服务之间不至于混淆,放在了base根下的httpd目录下,所以这里也要写清楚路径,这个格式类似python模板的导入格式
[root@server1 httpd]# salt server2 state.sls httpd.install
[root@server1 httpd]# pwd
/srv/salt/httpd
方法三:利用grains直接在变量所在推送.sls文件修改
1,删除files/httpd.conf 的导入语句
[root@server1 httpd]# vim files/httpd.conf
2,修改install.sls
[root@server1 httpd]# salt server2 grains.item ipv4
server2:
----------
ipv4:
- 127.0.0.1
- 172.25.28.2 这是一个列表,有两个值
[root@server1 httpd]# vim install.sls
[root@server1 httpd]# cat install.sls
httpd:

  pkg.installed


php:

  pkg.installed


apache:

  service.running:

    - name: httpd

    - enable: True

    - reload: True

    - watch:

      - file: /etc/httpd/conf/httpd.conf


/etc/httpd/conf/httpd.conf:

  file.managed:

    - source: salt://httpd/files/httpd.conf

    - user: root

    - mode: 644

    - template: jinja

    - context:

        bind: {{ grains['ipv4'][1] }}  # 不能写成{{ grains['ipv4'] }},否则会报这样的错+Listen ['127.0.0.1', '172.25.28.2']:8080,这里用python列表取值的方法,从0开始计数,1表示第二个数,也就是172.25.28.2,-1表示倒数第一个数,也是172.25.28.2,所以这里写1,-1都可以

        port: 8080
[root@server1 httpd]# salt server2 state.sls httpd.install
[root@server1 httpd]# vim install.sls
[root@server1 httpd]# cat install.sls
httpd:

  pkg.installed


php:

  pkg.installed


apache:

  service.running:

    - name: httpd

    - enable: True

    - reload: True

    - watch:

      - file: /etc/httpd/conf/httpd.conf


/etc/httpd/conf/httpd.conf:

  file.managed:

    - source: salt://httpd/files/httpd.conf

    - user: root

    - mode: 644

    - template: jinja

    - context:

        bind: {{ grains['ipv4'][-1] }}

        port: 8080
[root@server1 httpd]# salt server2 state.sls httpd.install
方法四:类似方法三,只是把grains['ipv4'][-1]写入变量所在配置文件
[root@server1 httpd]# vim files/httpd.conf

[root@server1 httpd]# salt server2 state.sls httpd.install
方法五:pillar在文件中定义,在变量所需文件调用
1,利用grains定义pillar参数
[root@server1 web]# ls
install.sls
[root@server1 web]# pwd
/srv/pillar/web
[root@server1 web]# vim install.sls
[root@server1 web]# cat install.sls
{% if grains['fqdn'] == 'server2' %}

webserver: httpd

bind: 172.25.28.2

port: 80

{% elif grains['fqdn'] == 'server3' %}

webserver: nginx

{% endif %}
2,在文件中调用变量
[root@server1 salt]# vim httpd/files/httpd.conf

[root@server1 salt]# salt server2 state.sls httpd.install
方法六:类似方法五,只是在install.sls推送文件中调用
1,在install.sls文件中调用变量
[root@server1 httpd]# vim install.sls
[root@server1 httpd]# cat install.sls
httpd:

  pkg.installed


php:

  pkg.installed


apache:

  service.running:

    - name: httpd

    - enable: True

    - reload: True

    - watch:

      - file: /etc/httpd/conf/httpd.conf


/etc/httpd/conf/httpd.conf:

  file.managed:

    - source: salt://httpd/files/httpd.conf

    - user: root

    - mode: 644

    - template: jinja

    - context:

        bind: {{ pillar['bind'] }}

        port: {{ pillar['port'] }}
[root@server1 salt]# salt server2 state.sls httpd.install