步骤1:新建CRC8.c文件,代码如下:
unsigned char crc_array[256] = {
0x00, 0x5e, 0xbc, 0xe2, 0x61, 0x3f, 0xdd, 0x83,
0xc2, 0x9c, 0x7e, 0x20, 0xa3, 0xfd, 0x1f, 0x41,
0x9d, 0xc3, 0x21, 0x7f, 0xfc, 0xa2, 0x40, 0x1e,
0x5f, 0x01, 0xe3, 0xbd, 0x3e, 0x60, 0x82, 0xdc,
0x23, 0x7d, 0x9f, 0xc1, 0x42, 0x1c, 0xfe, 0xa0,
0xe1, 0xbf, 0x5d, 0x03, 0x80, 0xde, 0x3c, 0x62,
0xbe, 0xe0, 0x02, 0x5c, 0xdf, 0x81, 0x63, 0x3d,
0x7c, 0x22, 0xc0, 0x9e, 0x1d, 0x43, 0xa1, 0xff,
0x46, 0x18, 0xfa, 0xa4, 0x27, 0x79, 0x9b, 0xc5,
0x84, 0xda, 0x38, 0x66, 0xe5, 0xbb, 0x59, 0x07,
0xdb, 0x85, 0x67, 0x39, 0xba, 0xe4, 0x06, 0x58,
0x19, 0x47, 0xa5, 0xfb, 0x78, 0x26, 0xc4, 0x9a,
0x65, 0x3b, 0xd9, 0x87, 0x04, 0x5a, 0xb8, 0xe6,
0xa7, 0xf9, 0x1b, 0x45, 0xc6, 0x98, 0x7a, 0x24,
0xf8, 0xa6, 0x44, 0x1a, 0x99, 0xc7, 0x25, 0x7b,
0x3a, 0x64, 0x86, 0xd8, 0x5b, 0x05, 0xe7, 0xb9,
0x8c, 0xd2, 0x30, 0x6e, 0xed, 0xb3, 0x51, 0x0f,
0x4e, 0x10, 0xf2, 0xac, 0x2f, 0x71, 0x93, 0xcd,
0x11, 0x4f, 0xad, 0xf3, 0x70, 0x2e, 0xcc, 0x92,
0xd3, 0x8d, 0x6f, 0x31, 0xb2, 0xec, 0x0e, 0x50,
0xaf, 0xf1, 0x13, 0x4d, 0xce, 0x90, 0x72, 0x2c,
0x6d, 0x33, 0xd1, 0x8f, 0x0c, 0x52, 0xb0, 0xee,
0x32, 0x6c, 0x8e, 0xd0, 0x53, 0x0d, 0xef, 0xb1,
0xf0, 0xae, 0x4c, 0x12, 0x91, 0xcf, 0x2d, 0x73,
0xca, 0x94, 0x76, 0x28, 0xab, 0xf5, 0x17, 0x49,
0x08, 0x56, 0xb4, 0xea, 0x69, 0x37, 0xd5, 0x8b,
0x57, 0x09, 0xeb, 0xb5, 0x36, 0x68, 0x8a, 0xd4,
0x95, 0xcb, 0x29, 0x77, 0xf4, 0xaa, 0x48, 0x16,
0xe9, 0xb7, 0x55, 0x0b, 0x88, 0xd6, 0x34, 0x6a,
0x2b, 0x75, 0x97, 0xc9, 0x4a, 0x14, 0xf6, 0xa8,
0x74, 0x2a, 0xc8, 0x96, 0x15, 0x4b, 0xa9, 0xf7,
0xb6, 0xe8, 0x0a, 0x54, 0xd7, 0x89, 0x6b, 0x35,
};
unsigned char CRC8_Table(unsigned char *p, char counter)
{
unsigned char crc8 = 0;
for( ; counter > 0; counter--)
{
crc8 = crc_array[crc8^*p]; //查表得到CRC码
p++;
}
return crc8;
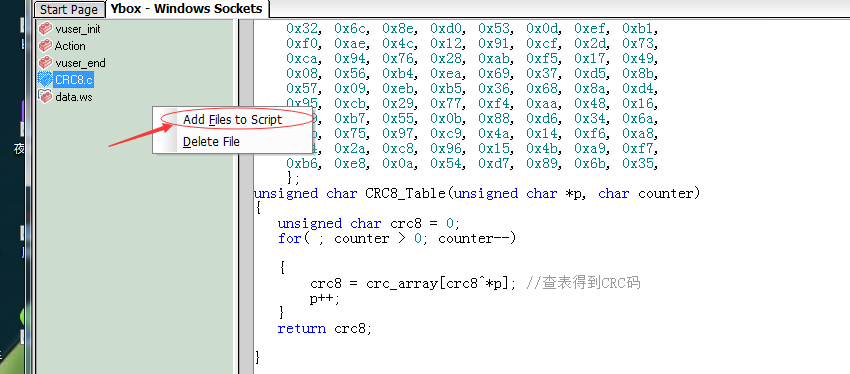
}步骤2:在loadrunner中引用CRC8.c文件,如下图:
步骤3:在loadrunner的action中,先在包头引入CRC8.c文件,并写调用代码,如下:
#include "lrs.h"
#include "CRC8.c"

Action()
{
	unsigned char buf[1024];
	unsigned char crc_result;
	char Buffer[] = "DB655B0FF91B";
	char *psrc=Buffer;
        char * hex_str;
	int i;
	char dst[1024];
	char buffers [1024];

	 //进行CRC8校验
	 //16进制字符转字节数组
         for(i=0;*psrc;i++){
		strcpy(dst,"0X");
		strncat(dst,psrc,2);
		buf[i]= strtol(dst,NULL,16);
		psrc+=2;
	 }
	 crc_result=CRC8_Table(buf,strlen(buf));   //进行CRC8检验
	 lr_output_message("16进制的CRC8校验值: %x",crc_result);

	 //将10进制数字转16进制字符串
	 sprintf(buffers, "%x", (int)crc_result);
	 lr_output_message("16进制字符串的CRC8校验: %s\n", buffers);

	 //组装CRC8校验校验值
	 strcat(Buffer,buffers);
	 lr_output_message("组装后的Buffer值为>>: %s",Buffer);

    return 0;
}
最后,执行结果:
Starting iteration 1.
Starting action Action.
Action.c(66): 16进制的CRC8校验值: 7a
Action.c(71): 16进制字符串的CRC8校验: 7a
Action.c(75): 组装后的Buffer值为>>: DB655B0FF91B7a
Ending action Action.
Ending iteration 1.