新手做毕设---后台管理系统
任务五 .xml配置方式动态实现数据增删查改
任务六 前后端数据跨域连接(分页查询并显示)
任务五我们进行了一个拓展训练,熟练掌握了spring boot集成mybatis时使用xml配置的方式。由于我们这里做的管理系统比较简单,主要是给大家介绍整个项目结构以及流程,所以,后期我们暂时不使用.xml方式,后续将给大家介绍mybatis-plus数据连接方式,将更加集成。
前面我们已经在后端实现了各种数据的增删改查,为项目的后续开发打下来扎实的基础。本次任务,我们就来到激动人心的时刻,实现前后端跨域连接,把我们查询到的数据在前端进行展示,并且我们还将实现分页查询功能。通过本次任务,大家能够:
(1)掌握分页查询SQL原理以及SQL统计语句(统计总记录数);
(2)了解前后端跨域的概念;
(3)后端添加跨域配置,实现前后端跨域;
(4)掌握前端pageNum和pageSize以及分页方法。
一、后端添加分页查询
一般来说,分页查询核心就是:每页需要显示多少条记录(pageSize),当前查看第几页(pageNum)。
SQL查找语句为:select * from table limit (pageNum-1)*pageSize, pageSize;
我们知道MySQL提供了分页函数limit m,n,但是该函数的用法和需求不一样,所以就需要根据实际情况去改写以满足需求。分析如下:
-
查询第1条到第10条数据的sql是:select * from table limit 0,10; ->对应我们的需求就是查询第一页的数据:select * from table limit (1-1)*10,10;
-
查询第10条到第20条数据的sql是:select * from table limit 10,20;
->对应我们的需求就是查询第二页的数据:select * from table limit (2-1)*10,10; -
查询第20条到第30条数据的sql是:select * from table limit 20,30;
->对应我们的需求就是查询第三页的数据:select * from table limit (3-1)*10,10;
通过上面的分析,可以归纳得出符合需求的分页SQL伪代码是:select * from table limit (pageNum-1)*pageSize,pageSize。总而言之,我们只需要告诉数据库要从第几行开始拿多少条数据就行了。但是,limit语句不支持计算,因此,需要从外部传参。
1. UserMapper接口添加分页查询方法
在UserMapper接口,继续添加分页查询的方法,代码如下:
 @Select("select * from sys_user limit #{pageNum},#{pageSize}")
    List<User> selectPage(Integer pageNum, Integer pageSize);
2. UserService类添加selectPage方法
在UserService类,添加selectPage方法,代码如下:
public List selectPage(Integer pageNum, Integer pageSize) {
return userMapper.selectPage(pageNum,pageSize);
}
3. 在UserController类,添加接口findPage
在UserController类,添加映射方法findPage,代码如下:
    //分页查询
    //接口路径user/page?pageNum=1&pageSize=10
    //RequestParam接受前台传过来的第几页,每页显示数
@GetMapping("/page")
public List<User> findPage(@RequestParam Integer pageNum,@RequestParam Integer pageSize){
   pageNum=(pageNum-1)*pageSize;
    return userService.selectPage(pageNum,pageSize);
    }
4. 运行项目
使用postman作为测试接口,进行分页查询测试。
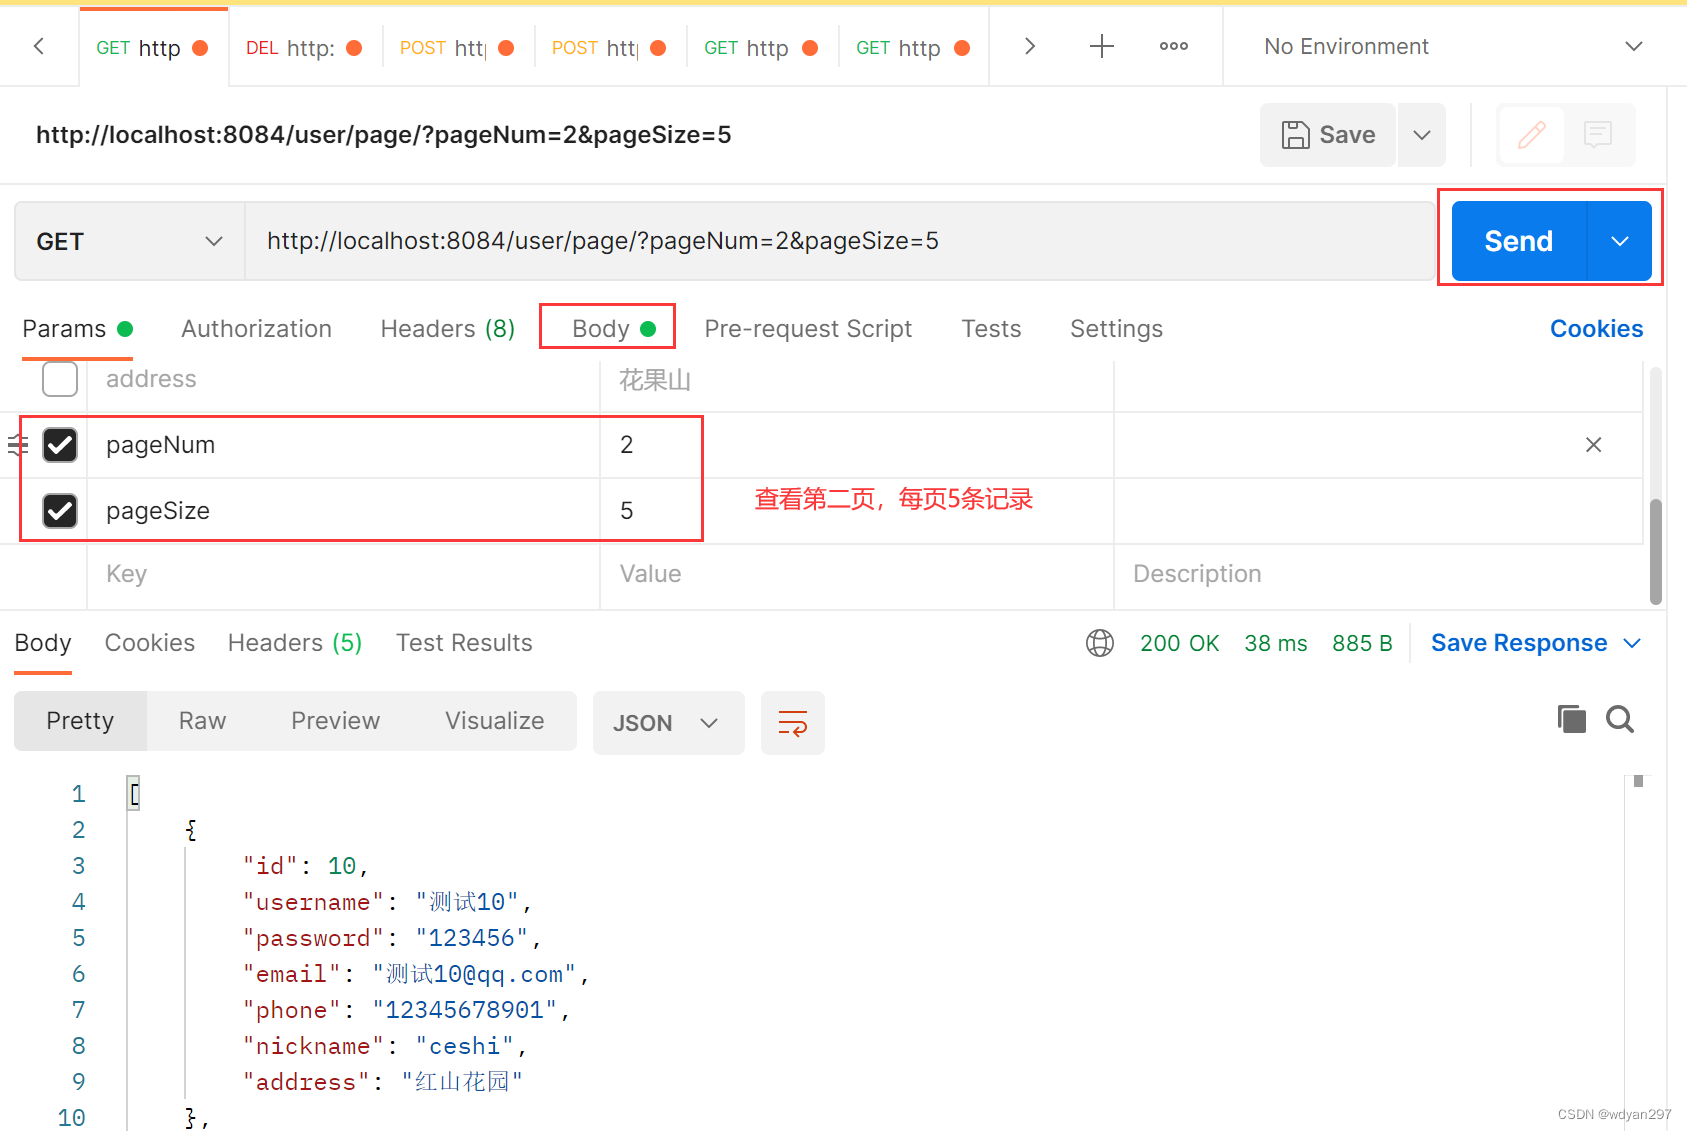
二、 后端获取总记录数
分页显示的时候通常需要获取总记录数。
1.UserMapper接口添加查询记录总数的方法selectTotal
在UserMapper接口,添加查询记录总数的方法selectTotal。代码如下:
@Select("select count(*) from sys_user")
 Integer selectTotal();
2. 修改UserController类的findPage,返回总条数及当前需要页的数据
修改UserController类的findPage,返回总条数及当前需要页的数据,代码如下:
@GetMapping("/page")
public Map<String,Object> findPage(@RequestParam Integer pageNum,@RequestParam Integer pageSize){
   pageNum=(pageNum-1)*pageSize;
   List<User> data=userService.selectPage(pageNum,pageSize);
   Integer total=userMapper.selectTotal();
   Map<String,Object> res=new HashMap<>();
   res.put("data",data);
   res.put("total",total);
   return res;
}
说明: 这里因为逻辑需求非常简单,所以就没有再使用UserService接口了。
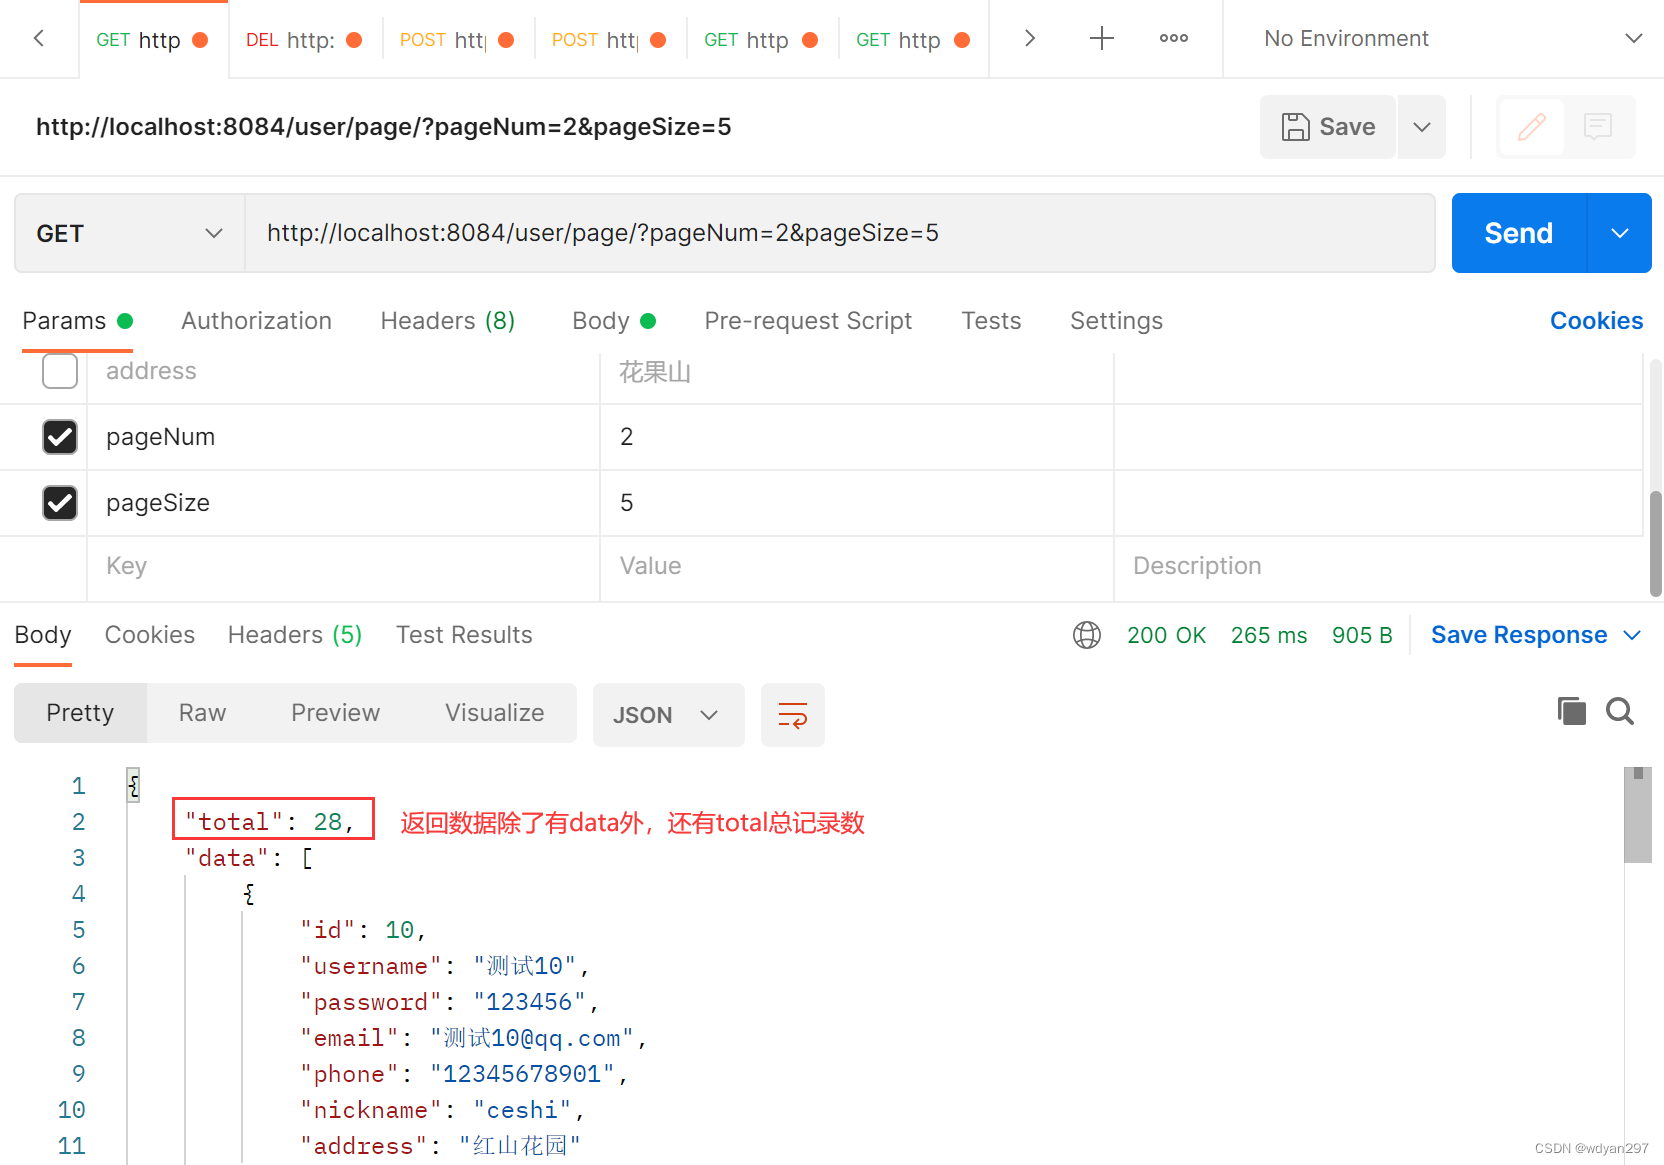
3. 运行项目
使用postman作为测试接口,进行分页查询测试。
三、前后端数据跨域连接
1. 前端home组件页面添加函数created
在前端页面添加获取数据的函数created。
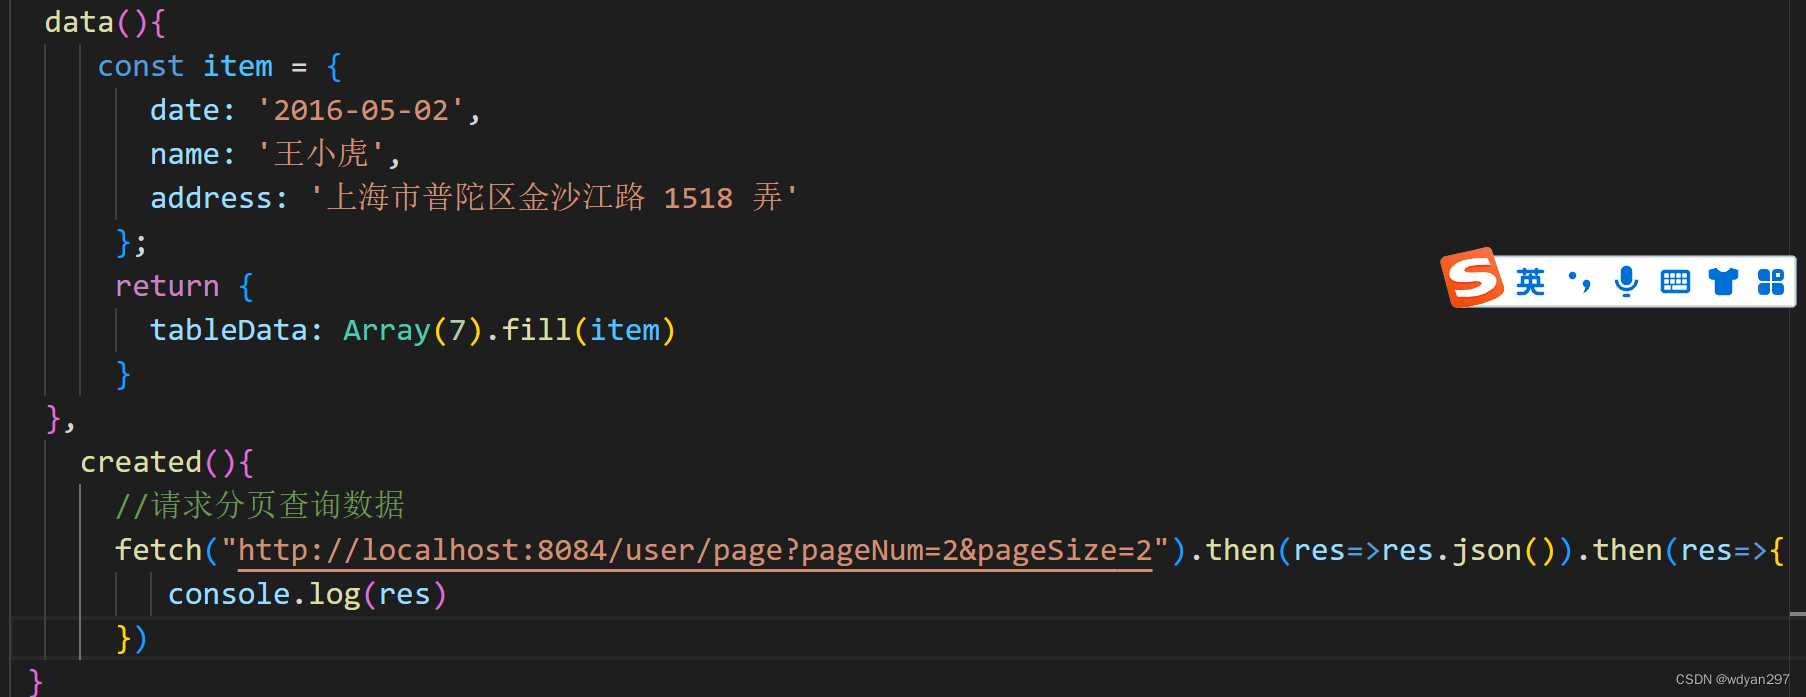
代码如下:
  created(){
  //请求分页查询数据
	  fetch("http://localhost:8084/user/page?pageNum=2&pageSize=2").then(res=>res.json()).then(res=>{
	  //查看跨域返回数据
	  	console.log(res)
  })
 }
此时运行后,F12浏览器打开开发者工具,会发现下面的错误:

注意: 这个跨域错误提示我们没有做允许跨域的设置。
跨域设置可以采用前端配置方式,也可以采用后端配置方式,这里采用后端配置。
2.新建CorsConfig类进行跨域设置
新建config包,然后新建一个CorsConfig类,进行跨域设置,代码如下:
import org.springframework.context.annotation.Bean;
import org.springframework.context.annotation.Configuration;
import org.springframework.web.cors.CorsConfiguration;
import org.springframework.web.cors.UrlBasedCorsConfigurationSource;
import org.springframework.web.filter.CorsFilter;

@Configuration
public class CorsConfig {
// 当前跨域请求最大有效时长。这里默认1天
private static final long MAX_AGE = 24 * 60 * 60;

@Bean
public CorsFilter corsFilter() {
    UrlBasedCorsConfigurationSource source = new UrlBasedCorsConfigurationSource();
    CorsConfiguration corsConfiguration = new CorsConfiguration();
    corsConfiguration.addAllowedOrigin("*"); // 1 设置访问源地址
    corsConfiguration.addAllowedHeader("*"); // 2 设置访问源请求头
    corsConfiguration.addAllowedMethod("*"); // 3 设置访问源请求方法
    corsConfiguration.setMaxAge(MAX_AGE);
    source.registerCorsConfiguration("/**", corsConfiguration); // 4 对接口配置跨域设置
    return new CorsFilter(source);
  }
}
设置跨域后,如果跨域不起作用,建议重新运行一下项目。尤其是使用了热部署的同学,强烈建议停止原先的运行,重新启动。这时候就不会再报跨域的错误了。
3. 完善前端home组件页面
解决跨域问题后,我们从以下几个地方修改前端页面。
(1)表格字段与数据表字段保持一致;
(2)参数pageNum和pageSize设置初始值为1,5,从第1页开始每页5条记录;
(3)应用Element中分页插件的@size-change="handleSizeChange", @current-change="handleCurrentChange"两个方法handleSizeChange(val)和 handleCurrentChange(val) 分别获取每一页显示的条目数、当前第几页,然后点击不同页码时重新加载数据。
home组件完整代码如下:
<template>
<div style="height:100%;">
  <el-container style="height: 100%; border: 1px solid #eee">
    <el-aside width="200px" style="background-color: rgb(238, 241, 246)">
      <el-menu :default-openeds="['1', '3']" style="min-height:100%; overflow-x:hidden"
       background-color=rgb(48,65,86)
       text-color=#ccc
       active-text-color=red
      >
      <div style="height:60px; line-height:60px; text-align:center">
        <img src="../assets/logo.png" style="width:20px;position:relative;top:5px;margin-right:5px"/>
        <b style="color:white">后台管理系统</b>
      </div>
        <el-submenu index="1">
          <template slot="title"><i class="el-icon-message"></i>导航一</template>
          <el-menu-item-group>
            <template slot="title">分组一</template>
            <el-menu-item index="1-1">选项1</el-menu-item>
            <el-menu-item index="1-2">选项2</el-menu-item>
          </el-menu-item-group>
          <el-menu-item-group title="分组2">
            <el-menu-item index="1-3">选项3</el-menu-item>
          </el-menu-item-group>
          <el-submenu index="1-4">
            <template slot="title">选项4</template>
            <el-menu-item index="1-4-1">选项4-1</el-menu-item>
          </el-submenu>
        </el-submenu>
        <el-submenu index="2">
          <template slot="title"><i class="el-icon-menu"></i>导航二</template>
          <el-menu-item-group>
            <template slot="title">分组一</template>
            <el-menu-item index="2-1">选项1</el-menu-item>
            <el-menu-item index="2-2">选项2</el-menu-item>
          </el-menu-item-group>
          <el-menu-item-group title="分组2">
            <el-menu-item index="2-3">选项3</el-menu-item>
          </el-menu-item-group>
          <el-submenu index="2-4">
            <template slot="title">选项4</template>
            <el-menu-item index="2-4-1">选项4-1</el-menu-item>
          </el-submenu>
        </el-submenu>
        <el-submenu index="3">
          <template slot="title"><i class="el-icon-setting"></i>导航三</template>
          <el-menu-item-group>
            <template slot="title">分组一</template>
            <el-menu-item index="3-1">选项1</el-menu-item>
            <el-menu-item index="3-2">选项2</el-menu-item>
          </el-menu-item-group>
          <el-menu-item-group title="分组2">
            <el-menu-item index="3-3">选项3</el-menu-item>
          </el-menu-item-group>
          <el-submenu index="3-4">
            <template slot="title">选项4</template>
            <el-menu-item index="3-4-1">选项4-1</el-menu-item>
          </el-submenu>
        </el-submenu>
      </el-menu>
    </el-aside>

    <el-container>
      <el-header style="text-align: right; font-size: 12px; border-bottom: 1px solid red; line-height:60px">
        <el-dropdown style="width:100px; cursor:pointer">
         <span>王小虎</span><i class="el-icon-arrow-down" style="margin-left:5px"></i>
            <el-dropdown-menu slot="dropdown">
            <el-dropdown-item>个人信息</el-dropdown-item>
            <el-dropdown-item>退出</el-dropdown-item>
          </el-dropdown-menu>
        </el-dropdown>
      </el-header>

      <el-main>
       <div style="padding:10px">
        <el-input style="width:250px" suffix-icon="el-icon-search" placeholder="请输入名称搜索"></el-input>
        <el-input style="width:250px" suffix-icon="el-icon-email" placeholder="请输入邮箱搜索"></el-input>
        <el-input style="width:250px" suffix-icon="el-icon-position" placeholder="请输入地址搜索"></el-input>
        <el-button style="margin-left:5px" type="primary">搜索</el-button>
      </div>
      <div style="margin:10px">
         <el-button type="primary">新增<i class="el-icon-circle-plus"></i></el-button>
         <el-button type="danger">批量删除<i class="el-icon-remove"></i></el-button>
         <el-button type="primary">导入<i class="el-icon-bottom"></i></el-button>
         <el-button type="primary">导出<i class="el-icon-top"></i></el-button>
      </div>
        <el-table :data="tableData">
          <el-table-column prop="id" label="ID " width="80">
          </el-table-column>
          <el-table-column prop="username" label="姓名 " width="80">
          </el-table-column>
          <el-table-column prop="email" label="邮箱" width="120">
          </el-table-column>
           <el-table-column prop="phone" label="电话">
          </el-table-column>
          <el-table-column prop="nickname" label="昵称">
          </el-table-column>
          <el-table-column prop="address" label="地址">
          </el-table-column>
          <el-table-column fixed="right" label="操作" width="240">
            <template slot-scope="scope">
              <el-button type="success" size="small" icon="el-icon-edit" @click="edit(scope.row)">编辑</el-button>
              <el-button type="danger" size="small"  icon="el-icon-delete">删除</el-button>
            </template>
          </el-table-column>
        </el-table>
        <div style="padding:10px">
         <el-pagination
            @size-change="handleSizeChange"
            @current-change="handleCurrentChange"
            :current-page="pageNum"
            :page-sizes="[5, 10, 15, 20]"
            :page-size="pageSize"
            layout="total, sizes, prev, pager, next, jumper"
            :total="total">
         </el-pagination>
       </div>
      </el-main>

    </el-container>
  </el-container>
</div>
</template>

<script>
// @ is an alias to /src
import HelloWorld from '@/components/HelloWorld.vue'

export default {
  name: 'HomeView',
  methods: {
      handleSizeChange(val) {
        console.log(`每页 ${val} 条`);
      },
      handleCurrentChange(val) {
        console.log(`当前页: ${val}`);
      }
    },
  data(){
      return {
        tableData:[],
        total:0,
        pageNum:1,
        pageSize:5
      }
  },
    created(){
      //请求分页查询数据
      this.load();
  },
   methods: {
      edit(row){
      console.log(row);
      },
      handleSizeChange(val) {/*传递过来当前是第几页*/
        console.log(`每页 ${val} 条`);
        this.pageSize=val;  //获取当前每页显示条数
        this.load();
      },
      handleCurrentChange(val) {/*传递过来当前是第几页*/
        console.log(`当前页: ${val}`);
        this.pageNum=val;   //获取当前第几页
        this.load();
      },
      //将请求数据封装为一个方法
      load() {
        //请求分页查询数据
          fetch("http://localhost:8084/user/page?pageNum="+this.pageNum+"&pageSize="+this.pageSize+"").then(res=>res.json()).then(res=>{
          console.log(res)
          this.tableData=res.data
          this.total=res.total
          })
        }
    },

}
</script>
<style>
  .el-main {
    text-align: left;
  }
</style>
供大家在完善页面时进行参考。
4. 前端运行
这时候会发现总条目数,当前页共显示5条记录。
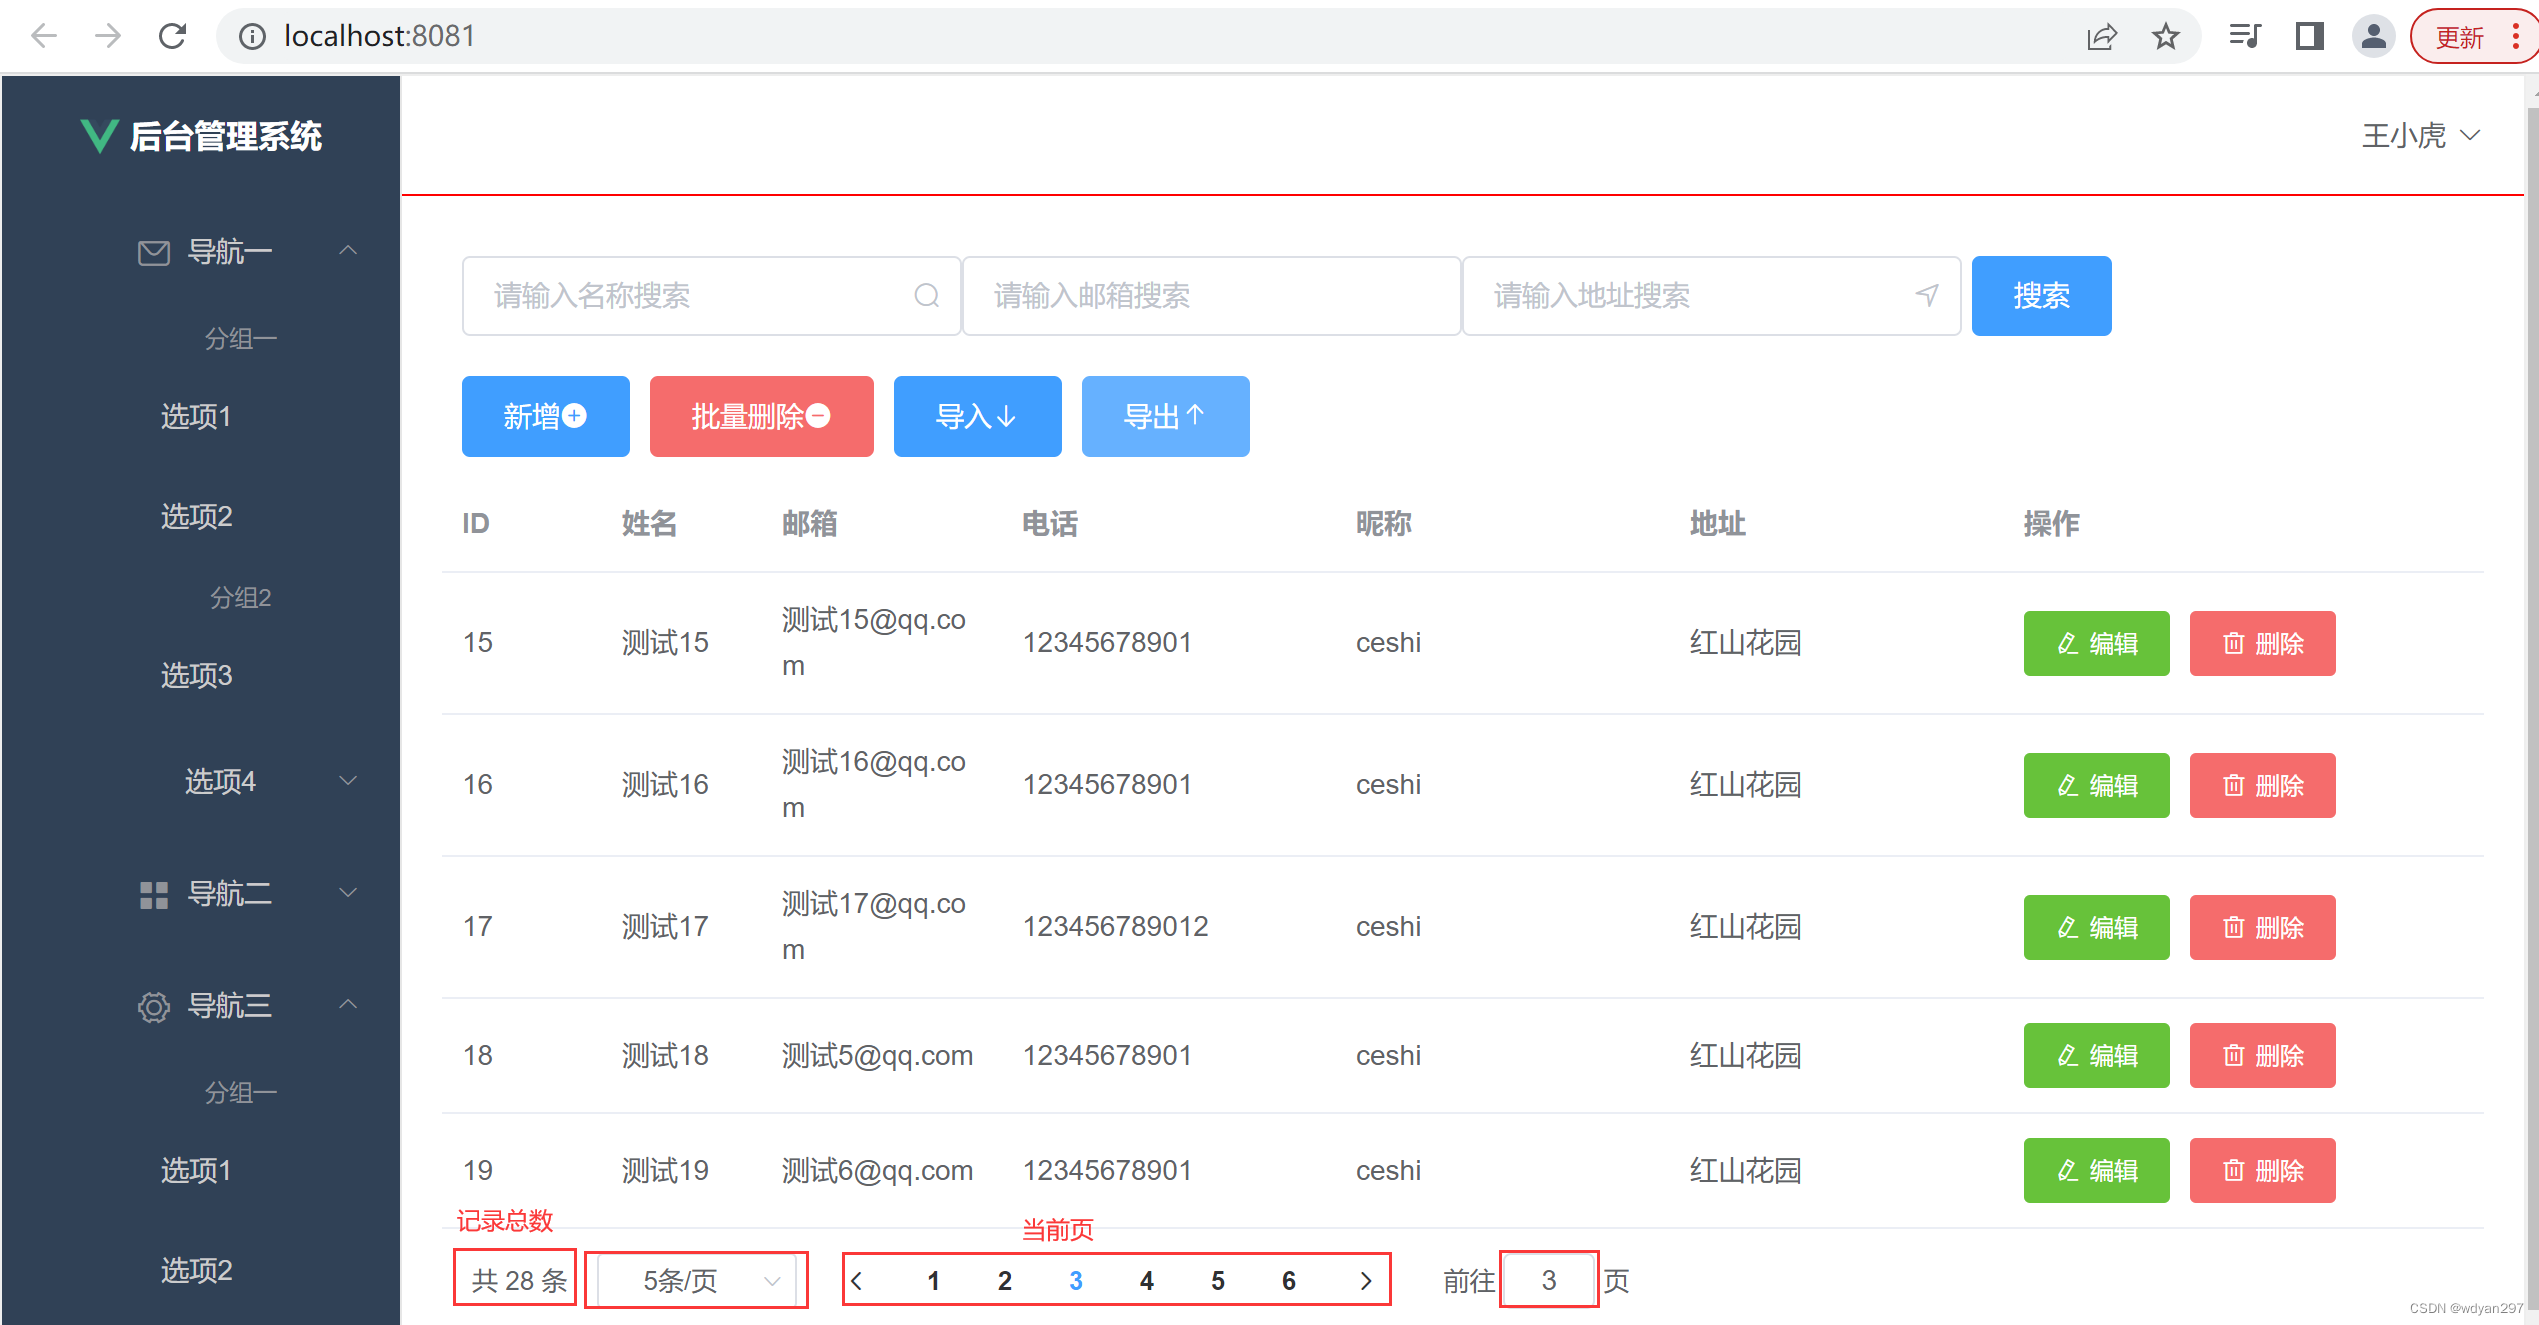
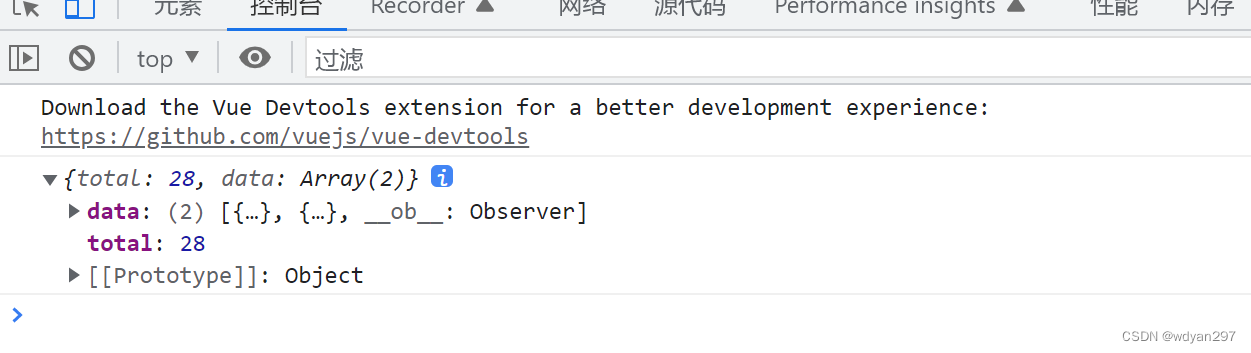
开发者工具中可以查看数据
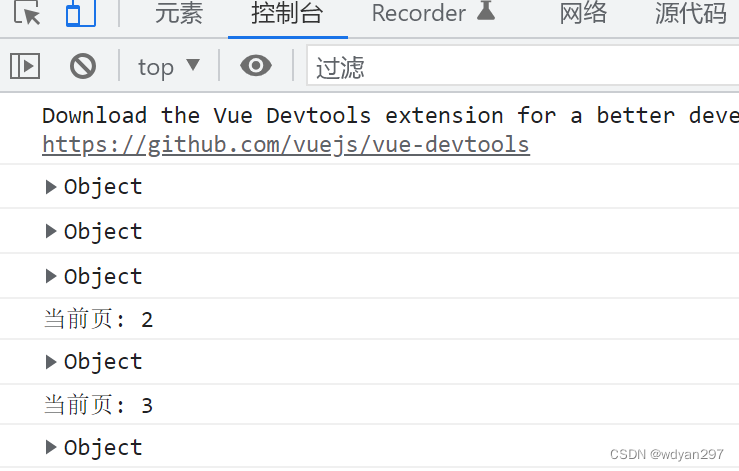
也可以查看数据流向

任务总结
本次任务我们终于做到了最有获得感的前后端数据跨域连接。实现了分页查询。
本次任务,主要完成并掌握以下内容:
(1)MySQL分页查询原理;
(2)通过后端CorsConfig实现跨域设置;
(3)前端分页插件使用,分页器应用。