文章目录
os
学习一下vue3 源码,顺便记录分享下
使用vitest 插件调试源码 辅助阅读
准备
去 github 下载 vue3源码 最新仓库名 为 core-main 使用 版本 为3.3.4
安装好依赖
npm i pnpm -g

pnpm install
vscode 准备两个插件 方便代码调试
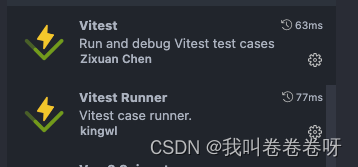
安装后会出现调试icon 未生效 可以重启vscode 。
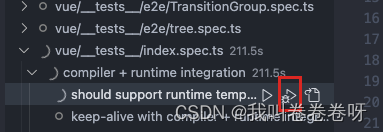
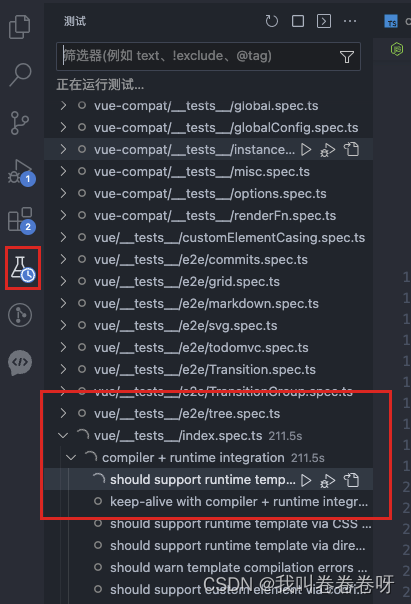
代码打上 断点, 开启debug 调试
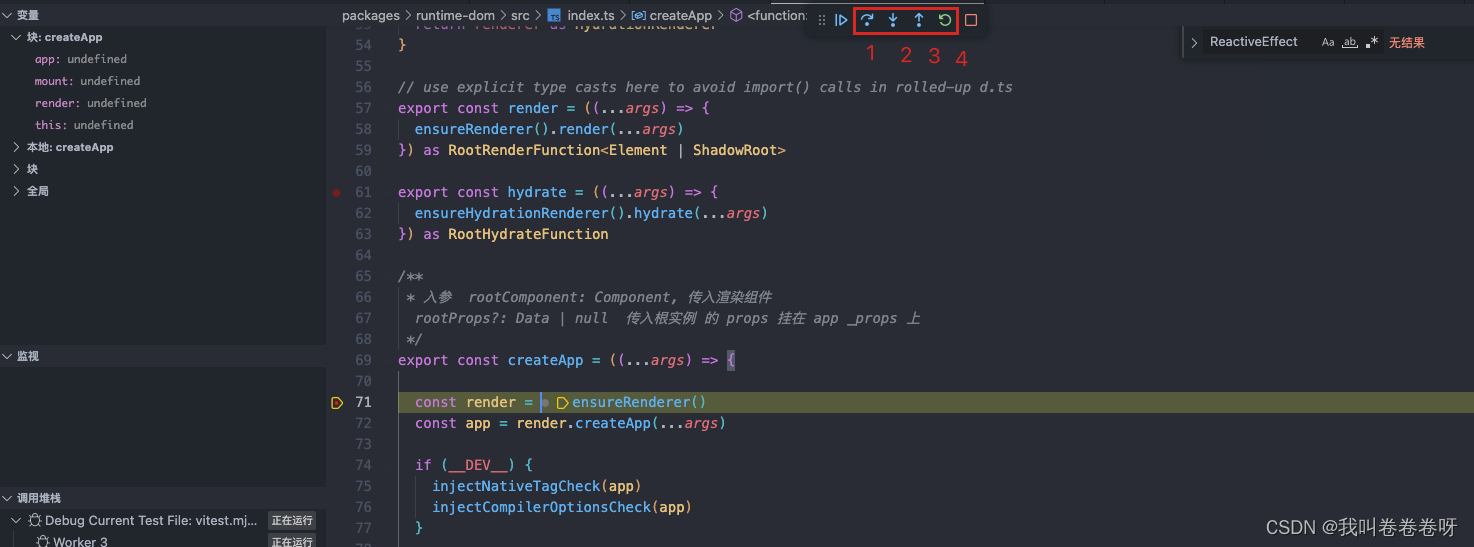
1 跳到下一个方法体
2 逐步执行
3 回退到上一步
4 重新执行
最后一个按钮就是 结束执行
组件如何被挂载到页面上
createApp(App).mount('#app')
第一步 createApp 做了哪些工作?
先看下入参和出参
export type CreateAppFunction<HostElement> = (
  rootComponent: Component,
  rootProps?: Data | null
) => App<HostElement>

入参: rootComponent 需要渲染的组件 App 也就是我们编写的 App.vue 文件
     rootProps 传入根实例 的 props 最后会被 挂在 app _props 上
出参 : 返回app 实例对象
// packages/runtime-dom/src/index.ts
export const createApp = ((...args) => {


  // 调用 ensureRender 生成render 对象
  const render = ensureRenderer()
  // 再调用 render中 createApp 方法 来生成 app实例
  const app = render.createApp(...args)
  ···· 下面先省略
  return app
})
ensureRenderer
// packages/runtime-dom/src/renderer.ts
// 实际调用的是 createRenderer
function ensureRenderer() {


/*
大致意思是 判断renderer实例是否存在,有就直接返回
没有执行 createRender 方法并 赋值 renderer 再返回
这里返回的 renderer 对象,可以认为是一个跨平台的渲染器对象,
针对不同的平台,会创建出不同的 renderer 对象,
上述是创建浏览器环境的 renderer 对象,对于服务端渲染的场景,
则会创建 server render 的 renderer


*/
  return (
    renderer ||
    (renderer = createRenderer<Node, Element | ShadowRoot>(rendererOptions))
  )
}

// 实际调用 baseCreateRenderer
function createRenderer<
  HostNode = RendererNode,
  HostElement = RendererElement
>(options: RendererOptions<HostNode, HostElement>) {


  return baseCreateRenderer<HostNode, HostElement>(options)
}
baseCreateRenderer
有两种模式 hydration 模式是 服务端渲染的 我们只考虑 no-hydration 浏览器渲染
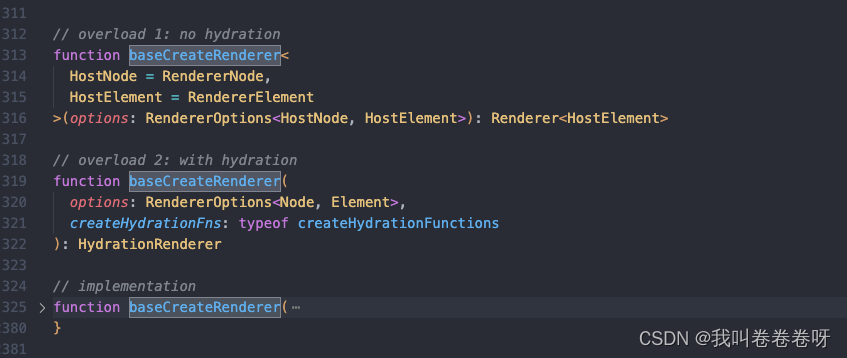
no-hydration 下
入参: options 初始化 渲染的参数 options 上挂载了 大量的操作dom 的操作 给 render 内部闭包使用
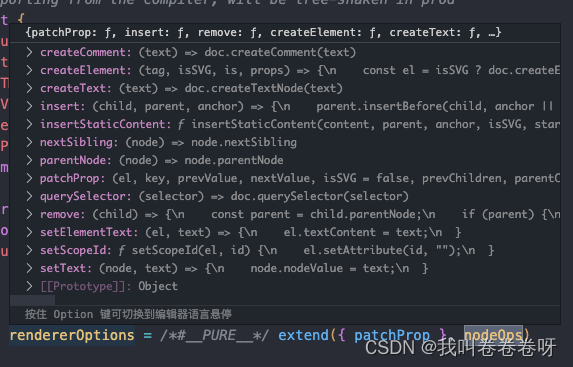
出参 :render

export interface Renderer<HostElement = RendererElement> {


  render: RootRenderFunction<HostElement>
  createApp: CreateAppFunction<HostElement>
}
具体伪代码 实现
// packages/runtime-core/src/renderer.ts
export function createRenderer(options) {
// ...
// 这里不介绍 hydrate 模式
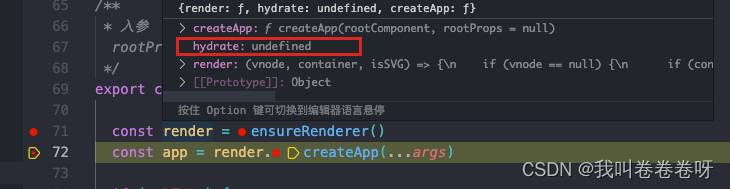
return {
render,
hydrate, // no-hydration 为空
createApp: createAppAPI(render, hydrate),
}
}
createAppAPI
// packages/runtime-core/src/apiCreateApp.ts
function createAppAPI(render, hydrate) {


  // createApp createApp 方法接收的两个参数:根组件的对象和 prop
  return function createApp(rootComponent, rootProps = null) {


    // 。。。 省略
    const app = {


      // ... 省略很多不需要在这里介绍的属性
      _component: rootComponent,
      _props: rootProps,
      mount(rootContainer, isHydrate, isSVG) {


        // ...
      }
    }
    return app
  }
}
Vue 3 初始化根组件的核心方法,也就是入口文件 createApp 真正执行的内容就是这里的 createAppAPI 函数中的 createApp 函数,该函数接收了 组件作为根组件 rootComponent,返回了一个包含 mount 方法的 app 对象,再看看 mount 具体实现
mount
// packages/runtime-core/src/apiCreateApp.ts
mount(rootContainer, isHydrate, isSVG) {


  if (!isMounted) {


    // ... 省略部分不重要的代码
    // 1. 创建根组件的 vnode
    const vnode = createVNode(
      rootComponent,
      rootProps
    )

    // 2. 渲染根组件  这里render方法 其实是baseCreateRenderer
    // 返回的render对象带的 render方法
    // 作用就是 将 vnode 渲染成真实dom
    render(vnode, rootContainer, isSVG)
    isMounted = true
  }
}
render
// packages/runtime-core/src/renderer.ts
const render: RootRenderFunction = (vnode, container, isSVG) => {


    // console.log('render-----');

    //第一个 入参 没传 代表 需要卸载
    if (vnode == null) {


      if (container._vnode) {


        unmount(container._vnode, null, null, true)
      }
    } else {


      // 否则走 挂载 或更新 操作
      patch(container._vnode || null, vnode, container, null, null, null, isSVG)
    }
    flushPreFlushCbs()
    flushPostFlushCbs()
    container._vnode = vnode
  }
// patch  所有vnode diff 比对 更新 转化新dom 操作全在里面
patch
const patch: PatchFn = (
    n1, //  需要 对比的 旧 vnode
    n2, // 新生成的 vnode
    container, // 最后生成的元素 需要挂载到的 目标组件元素
    anchor = null, // 挂载的参考元素;
    parentComponent = null, // 父组件
    parentSuspense = null,
    isSVG = false,
    slotScopeIds = null,
    optimized = __DEV__ && isHmrUpdating ? false : !!n2.dynamicChildren
  ) => {


    //n1 n2 完全一致 就 直接返回 不做更新 或 挂载
    if (n1 === n2) {


      return
    }

    // patching & not same type, unmount old tree  新旧 vnode  类型 不一样 直接 卸载 n1
    if (n1 && !isSameVNodeType(n1, n2)) {


      anchor = getNextHostNode(n1)
      unmount(n1, parentComponent, parentSuspense, true)
      n1 = null
    }


    if (n2.patchFlag === PatchFlags.BAIL) {


      optimized = false
      n2.dynamicChildren = null
    }
    // shapeFlag 判断vnode 实例是什么类型 有的是元素类型 函数类型 组件类型等
    const {

     type, ref, shapeFlag } = n2
    switch (type) {


       //文本节点
      case Text:
        processText(n1, n2, container, anchor)
        break
       // 注释节点
      case Comment:
        processCommentNode(n1, n2, container, anchor)
        break
      case Static:
        if (n1 == null) {


          mountStaticNode(n2, container, anchor, isSVG)
        } else if (__DEV__) {


          patchStaticNode(n1, n2, container, isSVG)
        }
        break
      case Fragment:
      // 处理 template 的虚拟标签
        processFragment(
          n1,
          n2,
          container,
          anchor,
          parentComponent,
          parentSuspense,
          isSVG,
          slotScopeIds,
          optimized
        )
        break
      default:
        // 其它类型
        //ShapeFlags 是一个二进制左移操作符生成的对象
        if (shapeFlag & ShapeFlags.ELEMENT) {


         // 这里走的是 组件内部元素普通dom的比对更新挂载逻辑
          processElement(
            n1,
            n2,
            container,
            anchor,
            parentComponent,
            parentSuspense,
            isSVG,
            slotScopeIds,
            optimized
          )
        } else if (shapeFlag & ShapeFlags.COMPONENT) {


        // 这里是 组件对比 component 逻辑
          processComponent(
            n1,
            n2,
            container,
            anchor,
            parentComponent,
            parentSuspense,
            isSVG,
            slotScopeIds,
            optimized
          )
        } 。。。 // 其它省略

    // set ref
    if (ref != null && parentComponent) {


    /*
     通过 ref 参数获取组件的引用对象。
     通过 n1 参数获取前一个 VNode 的引用对象(如果存在)。
     通过 n2 参数获取当前 VNode 的引用对象(如果存在)。
     如果前一个 VNode 的引用对象存在(即 n1.ref 存在),则将其置为 null,解除对前         一个组件引用的绑定。
    如果当前 VNode 的引用对象存在(即 n2.ref 存在),则将其绑定到组件的引用上。
     如果当前 VNode 不存在(即 !n2),则将组件的引用对象置为 null
   */
      setRef(ref, n1 && n1.ref, parentSuspense, n2 || n1, !n2)
    }
  }
初始化挂载 会进入到 processComponent方法
processComponent
// packages/runtime-core/src/renderer.ts
function processComponent(n1, n2, container, parentComponent) {


  // 如果 n1 没有值的话,那么就是 mount
  if (!n1) {


    // 初始化 component
    mountComponent(n2, container, parentComponent);
  } else {


    updateComponent(n1, n2, container);
  }
}

// packages/runtime-core/src/renderer.ts
function mountComponent(initialVNode, container, parentComponent) {


  // 1. 先创建一个 component instance
  const instance = (initialVNode.component = createComponentInstance(
    initialVNode,
    parentComponent
  ));

  // 2. 初始化 instance 上的 props, slots, 执行组件的 setup 函数...
  setupComponent(instance);

  // 3. 设置并运行带副作用的渲染函数
  setupRenderEffect(instance, initialVNode, container);
}

// packages/runtime-core/src/component.ts
function createComponentInstance(
  vnode: VNode,
  parent: ComponentInternalInstance | null,
  suspense: SuspenseBoundary | null
) {


  const type = vnode.type as ConcreteComponent
  // inherit parent app context - or - if root, adopt from root vnode
  const appContext =
    (parent ? parent.appContext : vnode.appContext) || emptyAppContext

  const instance: ComponentInternalInstance = {


    uid: uid++,
    vnode,
    type,
    parent,
    appContext,
    root: null!, // to be immediately set
    next: null,
    subTree: null!, // will be set synchronously right after creation
    effect: null!,
    update: null!, // will be set synchronously right after creation
    scope: new EffectScope(true /* detached */),
    render: null,
    proxy: null,
   //。。。 省略 属性
  }
  if (__DEV__) {


    instance.ctx = createDevRenderContext(instance)
  } else {


    instance.ctx = {

     _: instance }
  }
  instance.root = parent ? parent.root : instance
  instance.emit = emit.bind(null, instance)

  // apply custom element special handling
  if (vnode.ce) {


    vnode.ce(instance)
  }

  return instance
}

// packages/runtime-core/src/component.ts
export function setupComponent(instance) {


  // 1. 处理 props
  // 取出存在 vnode 里面的 props
  const {

     props, children } = instance.vnode;
  initProps(instance, props);
  // 2. 处理 slots
  initSlots(instance, children);

  // 3. 调用 setup 并处理 setupResult
  setupStatefulComponent(instance);
}


// packages/runtime-core/src/renderer.ts
/*
componentUpdateFn 这个函数,
核心是调用了 renderComponentRoot 来生成 subTree,
然后再把 subTree 挂载到 container 中
*/
const setupRenderEffect = (instance, initialVNode, container, anchor, parentSuspense, isSVG, optimized) => {


  function componentUpdateFn() {


    if (!instance.isMounted) {


      // 渲染子树的 vnode
      const subTree = (instance.subTree = renderComponentRoot(instance))
      // 挂载子树 vnode 到 container 中
      // 会重新进入 patch 方法 会走到 processElement 方法中
      patch(null, subTree, container, anchor, instance, parentSuspense, isSVG)
      // 把渲染生成的子树根 DOM 节点存储到 el 属性上
      initialVNode.el = subTree.el
      instance.isMounted = true
    }
    else {


      // 更新相关,后面介绍
    }
  }
  // 创建副作用渲染函数
  instance.update = effect(componentUpdateFn, prodEffectOptions)
}

/*
返回 vnode
*/
function renderComponentRoot(
  instance: ComponentInternalInstance
): VNode {


  const {


    type: Component,
    vnode,
    proxy,
    withProxy,
    props,
    propsOptions: [propsOptions],
    slots,
    attrs,
    emit,
    render,
    renderCache,
    data,
    setupState,
    ctx,
    inheritAttrs
  } = instance

  const proxyToUse = withProxy || proxy
  // 省略一部分逻辑判断 normalizeVNode
/*
 render 方法 其实是调用instance.render 方法
 就是在 初始化instance 方法 中 将 template 模版
 编译成 render 方法 用于 生成  vnode
*/
  result = normalizeVNode(
        render!.call(
          proxyToUse,
          proxyToUse!,
          renderCache,
          props,
          setupState,
          data,
          ctx
        )
      )
  return result
}
processElement
// packages/runtime-core/src/renderer.ts
function processElement(n1, n2, container, anchor, parentComponent) {


  if (!n1) {


    // 挂载元素节点
    mountElement(n2, container, anchor);
  } else {


    // 更新元素节点
    updateElement(n1, n2, container, anchor, parentComponent);
  }
}


// packages/runtime-core/src/renderer.ts
const mountElement = (vnode, container, anchor, parentComponent, parentSuspense, isSVG, optimized) => {


  let el
  const {

     type, props, shapeFlag, transition, patchFlag, dirs } = vnode
  // ...
  // 根据 vnode 创建 DOM 节点
  el = vnode.el = hostCreateElement(vnode.type, isSVG, props && props.is)
  if (props) {


    // 处理 props 属性
    for (const key in props) {


      if (!isReservedProp(key)) {


        hostPatchProp(el, key, null, props[key], isSVG)
      }
    }
  }
  // 文本节点处理
  if (shapeFlag & ShapeFlags.TEXT_CHILDREN) {


    hostSetElementText(el, vnode.children)
  } else if (shapeFlag & ShapeFlags.ARRAY_CHILDREN) {


    // 如果节点是个数据类型,则递归子节点
    mountChildren(vnode.children, el)
  }
  // 把创建好的 el 元素挂载到容器中
  hostInsert(el, container, anchor)
}
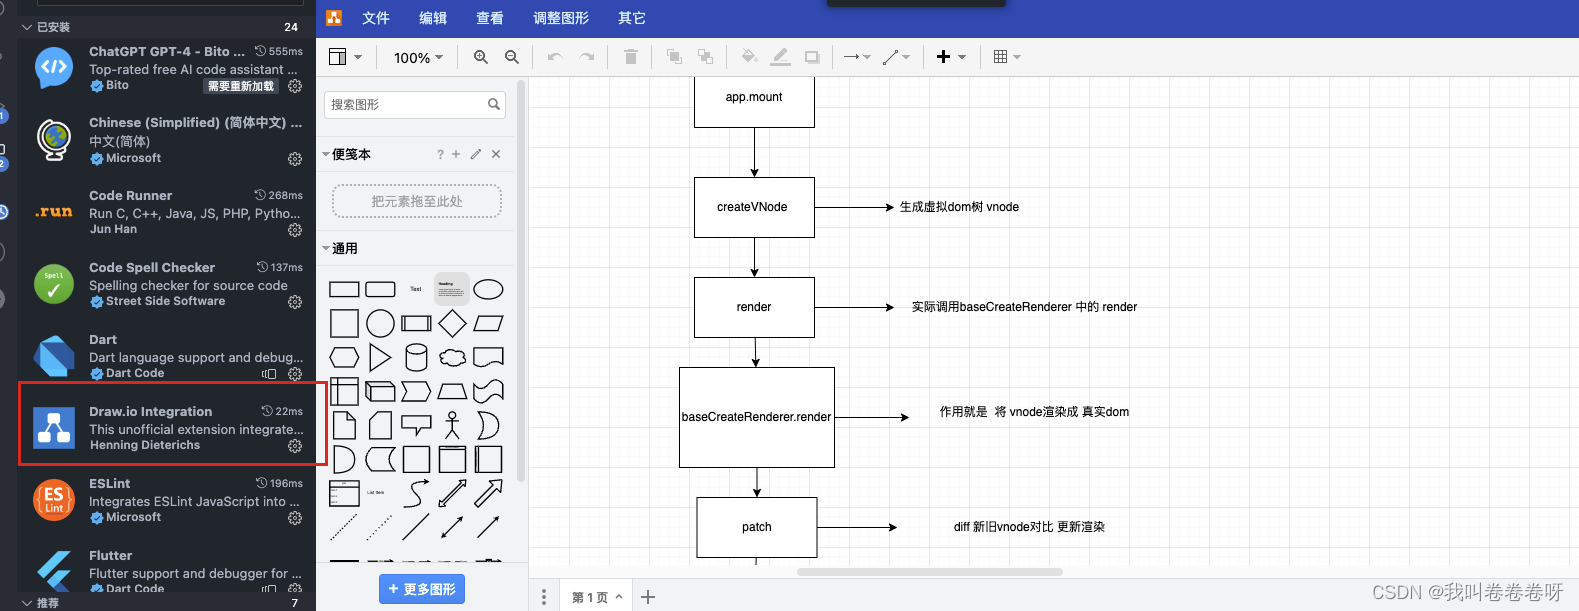
总结
以上就完成了 组件初始化工作。下面画了 几个流程图来辅助理解 。最好阅读的时候自己 也可以画下
安利一个好用的vscode流程图插件

备注:
有想一起深入学习vue3 源码,可以后台私信我