一、创建vue项目
1、检查node和淘宝镜像安装了没:node -v 和 cnpm-v
node安装:在官网:下载 | Node.js 中文网 下载安装包,然后一直下一步就安装成功了。
安装淘宝镜像:npm install -g cnpm --registry=https://registry.npm.taobao.org
2、安装vue
npm install -g @vue/cli
或者
yarn global add @vue/cli
3、命令行创建 vue create slot

翻译为:您连接到默认的纱线注册表似乎很慢。
也就是觉得你现在的网很慢,建议你使用https://registry.npmmirror.com来加快安装。
也有的是提示建议使用淘宝源的。

输入y回车即可。
扫描二维码关注公众号,回复:
16433371 查看本文章


版本就看实际需要了。
(自主搭建教程:Vue自主搭建项目:Manually select features_三月.'的博客-CSDN博客)
vue3:(复制于vue创建项目_yarn创建vue项目_汤卓杰的博客-CSDN博客)
vue create 项目名
?  Your connection to the default yarn registry seems to be slow.
###默认的镜像源下载会很慢,是否切换到淘宝镜像源?
   Use https://registry.npm.taobao.org for faster installation? (Y/n) y

### 请选择预置
? Please pick a preset: (Use arrow keys)
  Default ([Vue 2] babel, eslint) //使用vue2.X的模版
❯ Default (Vue 3 Preview) ([Vue 3] babel, eslint) //使用vue3.0 的模版
  Manually select features  //自定义模版---建议选择项

### 检查项目所需的功能:(按<space>选择,<a>切换全部,<i>反转选择,然后<enter>继续)
? Check the features needed for your project: (Press <space> to select, <a> to toggle all, <i> to invert selection, and <enter> to proceed)
>(*) Babel //兼容浏览器--将es6转成es5
 (*) TypeScript //JS超集,主要是类型检查
 ( ) Progressive Web App (PWA) Support //PWA。谷歌提出的桌面应用
 (*) Router //路由
 (*) Vuex //状态管理器
 (*) CSS Pre-processors //css预处理
 (*) Linter / Formatter //代码风格格式化
 ( ) Unit Testing //单元测试
 ( ) E2E Testing //端对端测试


### 选择一下vue的版本
 ? Choose a version of Vue.js that you want to start the project with (Use arrow keys)
❯ 3.x
  2.x

### 是否使用class风格的组件语法
?Use class-style component syntax? y

### 使用Babel与TypeScript一起用于自动检测的填充?
? Use Babel alongside TypeScript (required for modern mode, auto-detected polyfills, transpiling JSX)? y

### 是否选择用历史(history)的模式来做路由
? Use history mode for router? (Requires proper server setup for index fallback in production) Yes

### 使用什么css预编译器
? Pick a CSS pre-processor (PostCSS, Autoprefixer and CSS Modules are supported by default): (Use arrow keys)
> Sass/SCSS (with dart-sass)
  Less
  Stylus

### 选择格式验证工具
? Pick a linter / formatter config: (Use arrow keys)
  ESLint with error prevention only //只进行报错提醒
  ESLint + Airbnb config  //不严谨模式
  ESLint + Standard config //正常模式
> ESLint + Prettier //严格模式(没强迫症的别选这个,会很痛苦)

### 代码检查方式 (按<space>选择,<a>切换全部,<i>反转选择,然后<enter>继续)
? Pick additional lint features: (Press <space> to select, <a> to toggle all, <i> to invert selection, and <enter> to pr
oceed)
>(*) Lint on save //保存时检查
 ( ) Lint and fix on commit (requires Git) //提交时检查

### 你更喜欢将Babel, ESLint等的配置放在哪里?
? Where do you prefer placing config for Babel, ESLint, etc.? (Use arrow keys)
> In dedicated config files //config文件
  In package.json //vue2习惯放在package.json

### 是否保存配置在以后的项目中使用
? Save this as a preset for future projects? n

### 使用什么进行下载
? Pick the package manager to use when installing dependencies: Yarn
### 我的电脑在某次后没有这个选项了,默认yarn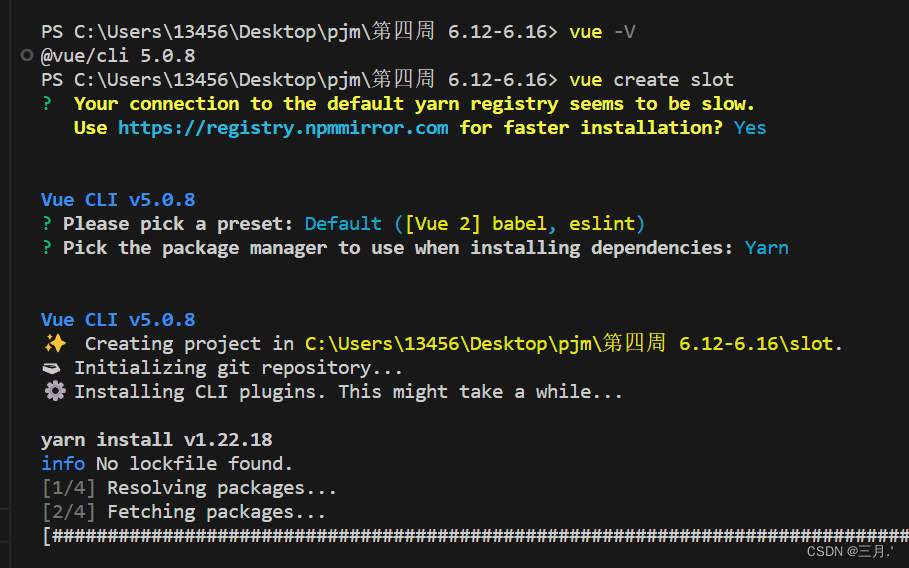
二、插槽
1、匿名插槽
一般只有一个
<template>
    <div>
        <h3>这是父组件</h3>
        <son>实践slot</son>
    </div>
</template>
<template>
<div>
<h4>这是子组件</h4>
<input type="text" placeholder="请输入">
<slot></slot>
</div>
</template>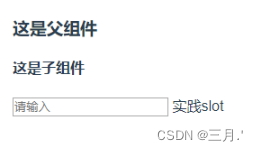
2、具名插槽
就是给子组件的slot标签填上name
子组件:
<template>
  <div class="nav">
      <slot name='left'></slot>
      <slot name='right'></slot>
  </div>
</template>
父组件: v-slot:可以简写为#
<template>
  <div>
      <template #left></template>
      <template v-slot:right></template>
  </div>
</template>
3、作用域插槽
(1)使用子组件 (2)通过v-slot接收子组件所传递的数据
子组件:存放一个带数据的插槽
<template>
  <div class="child">
    <slot :data="data"></slot>
  </div>
</template>

 export default {
    data: function(){
      return {
        data: ['zhangsan','lisi','wanwu','zhaoliu','tianqi','xiaoba']
      }
    }
}
父组件:通过slot-scope来接收子组件传过来的插槽数据,根据插槽数据来填充插槽的内容
<child>
    <template slot-scope="user">
        {

   { user.data }}
    </template>
</child>
效果为:
