QTAV源码包编译
下载源码
下载依赖库(里面有ffmepg等内容)
https://sourceforge.net/projects/qtav/files/depends/QtAV-depends-windows-x86+x64.7z/download
下载源码包
https://github.com/wang-bin/QtAV
- 更新子模块
cd QtAV && git submodule update --init
将QTAV源码和依赖库解压在同一个根目录下,不然之后的.qmake.conf内容可能需要做一些改变。
配置环境
将依赖库的lib\x64,bin\x64,include文件里的内容复制到Qt安装目录(Qt\5.15.2\msvc2019_64)下。
打开.qmake.conf文件
添加两行内容
INCLUDEPATH += $$PWD/../QtAV-depends-windows-x86+x64/include
#这里我们要注意 如果我们编译器是64位的 填以下路径
#LIBS += -L$$PWD/../QtAV-depends-windows-x86+x64/lib/x64
#这里我们要注意 如果我们编译器是32位的 填以下路径
LIBS += -L$$PWD/../QtAV-depends-windows-x86+x64/lib
构建
啊打开QtAV.pro,然后构建,我选择的是release版本的。中途会遇到一个错误:XXX是C++17中的用法。我选择在pro文件中加入CONFIG += C++17。然后就构建完成了,之后运行examples中的qml项目,可以正常运行。lib_win_x86_64里面的.lib和.dll库文件就是我们需要的编译好的QTAV第三方库。参考【Qt 开源音视频框架模块QtAV】01:介绍、编译以及简单使用。
安装qtav
在QTAV的编译目录下面找到sdk_install.bat点击安装,然后就安装好了。
在QML中使用QTAV
Qt里面可能无法识别QML中的qtav,所以可以在pro文件加入QML_IMPORT_PATH += [QtAVSourceCodeDir]/qml。参考Use QtAV In Your Projects。
- test.pro
QT       += qml quick

greaterThan(QT_MAJOR_VERSION, 4): QT += widgets

CONFIG += c++17

# You can make your code fail to compile if it uses deprecated APIs.
# In order to do so, uncomment the following line.
#DEFINES += QT_DISABLE_DEPRECATED_BEFORE=0x060000    # disables all the APIs deprecated before Qt 6.0.0

SOURCES += \
    main.cpp

HEADERS +=

FORMS +=

# Default rules for deployment.
qnx: target.path = /tmp/$${

    TARGET}/bin
else: unix:!android: target.path = /opt/$${

    TARGET}/bin
!isEmpty(target.path): INSTALLS += target

RESOURCES += \
    qrc.qrc

QML_IMPORT_PATH += [QtAVSourceCodeDir]/qml
- main.cpp
#include<QQmlEngine>
#include<QQmlContext>
#include<QQmlApplicationEngine>
#include<QApplication>

int main(int argc, char *argv[])
{


    QApplication a(argc, argv);
    QQmlApplicationEngine engine;
    engine.load(QUrl(QStringLiteral("qrc:/main.qml")));

    if (engine.rootObjects().isEmpty())
        return -1;
    return a.exec();
}
- main.qml
import QtQuick 2.9
import QtQuick.Window 2.2
import QtAV 1.6


Window {


    visible: true
    width: 640
    height: 480
    title: qsTr("Hello World")

    Video {


        id: video
        anchors.fill: parent
        source: "D://test.mp4"
    }
    MouseArea {


        anchors.fill: parent
        onClicked: video.play()
    }

}
使用vlc media player推拉流
下载VLC media player
去官网下载
推流
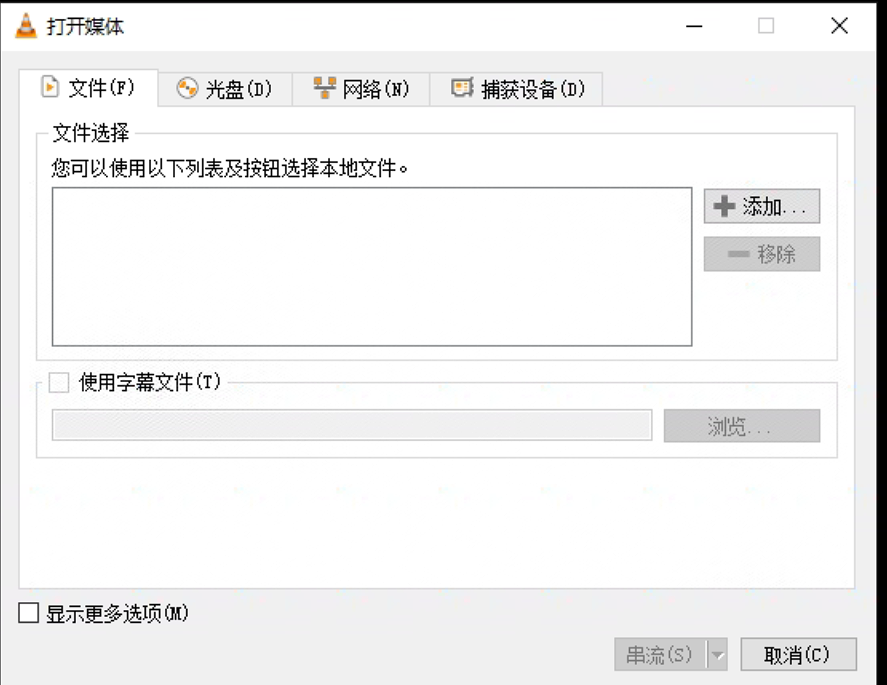
菜单->媒体->流。点击添加,添加一个MP4视频,点击串流。
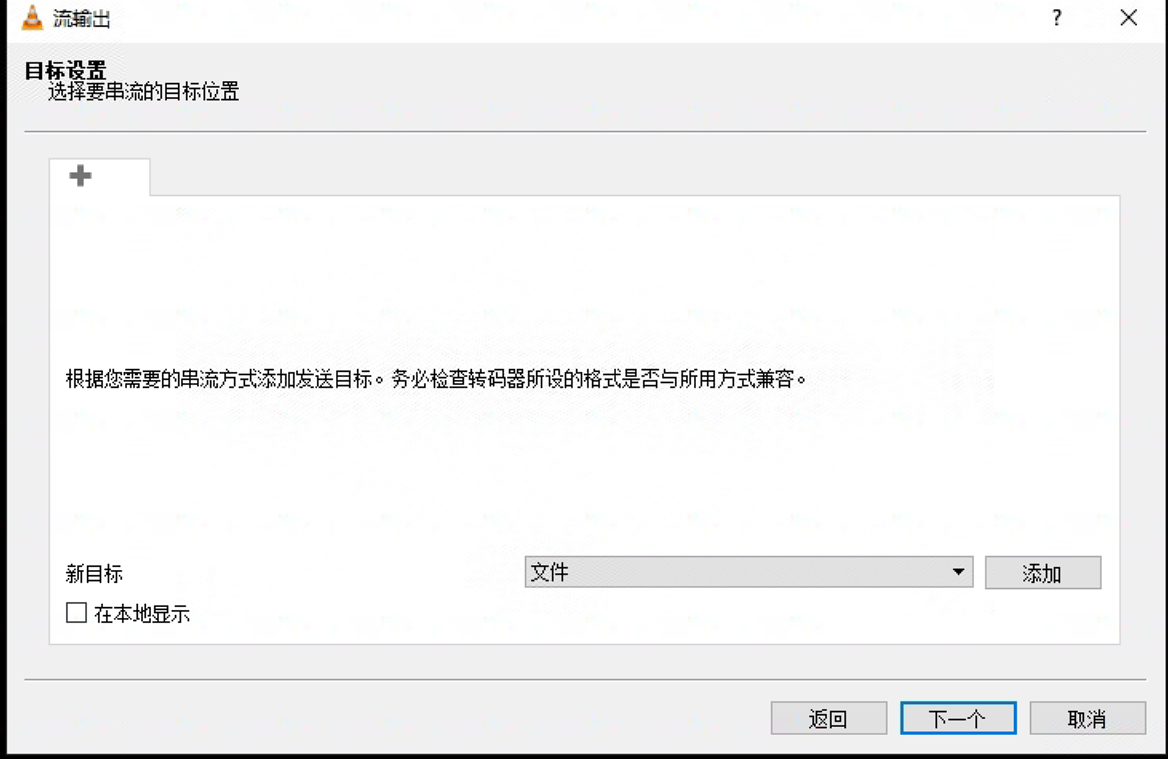
点击下一个

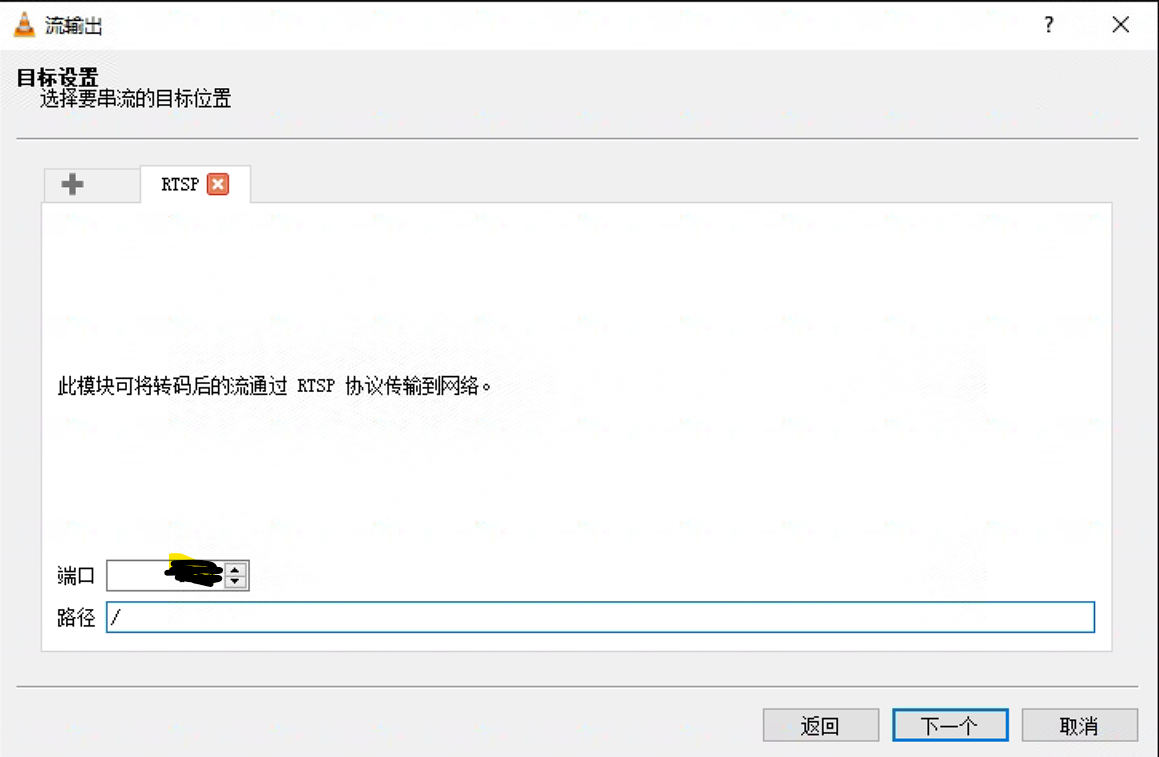
选择RTSP,点击添加
端口默认,路径自己输入
这个可以保持默认
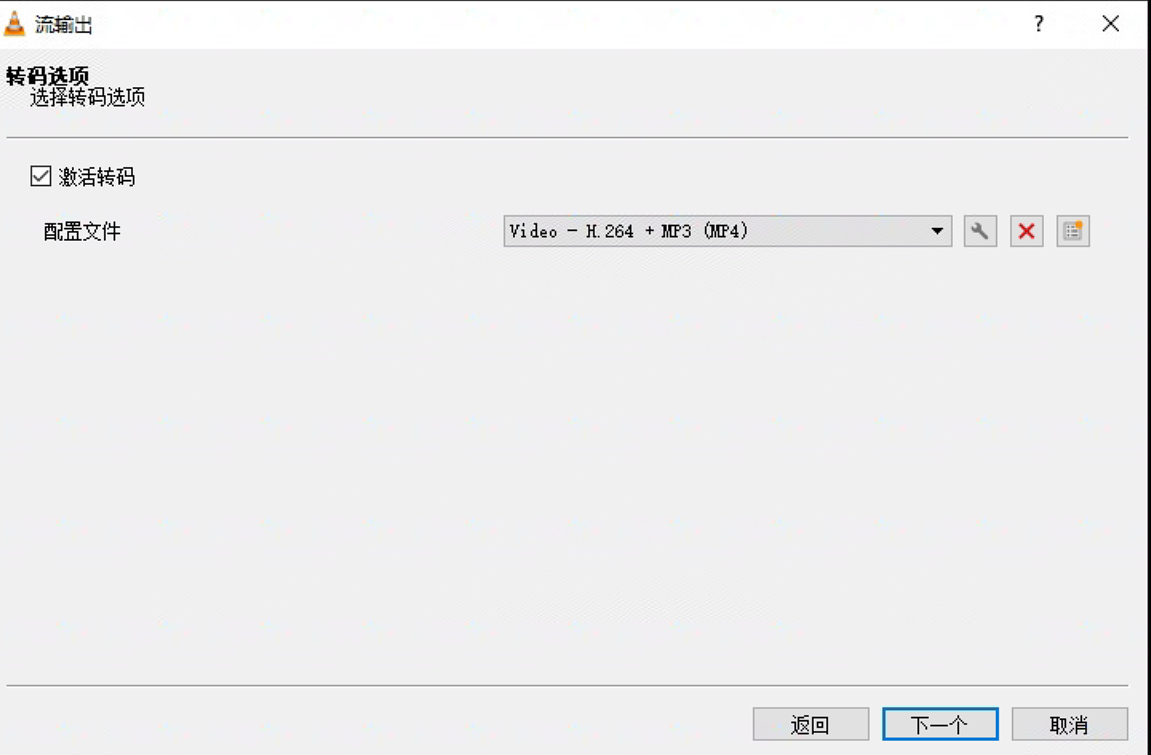
点击流
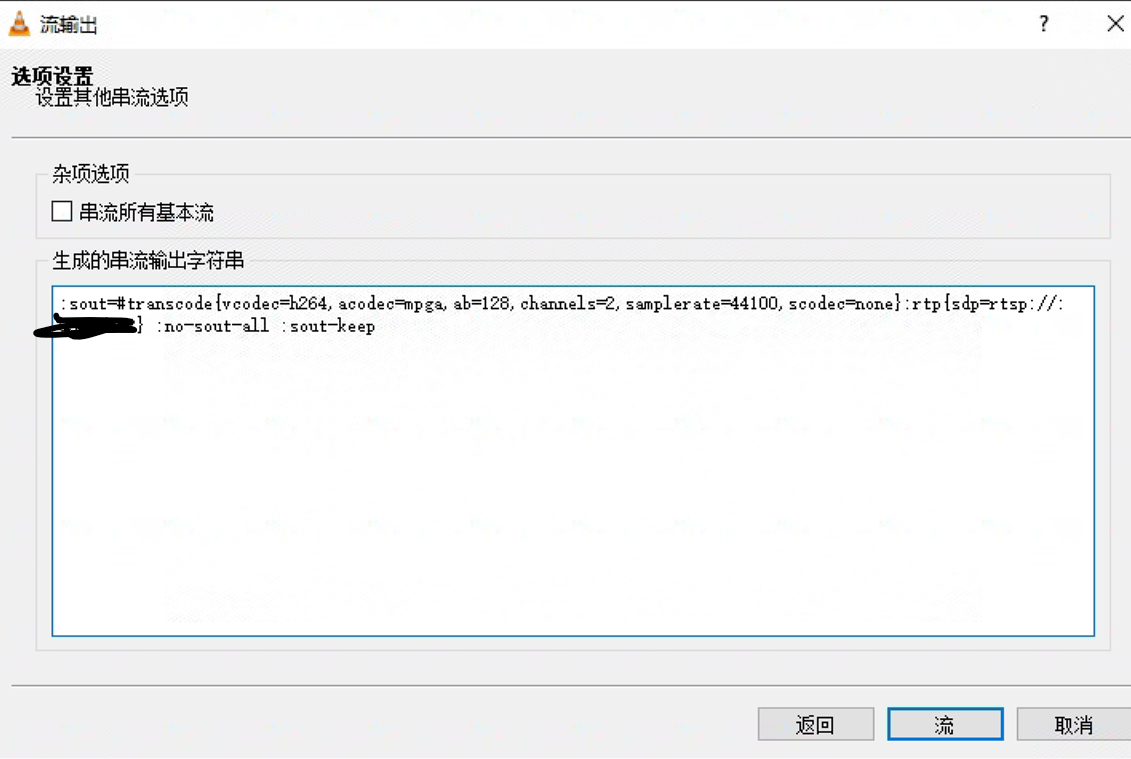
这个时候不要把这个窗口关闭!
在qml中打开
- main.qml
import QtQuick 2.9
import QtQuick.Window 2.2
import QtAV 1.6

//修改后
Window {


    visible: true
    width: 640
    height: 480
    title: qsTr("Hello World")

    Video {


        id: video
        anchors.fill: parent    //跟随父节点大小 全屏
         source:"rtsp://127.0.0.1:port//xxx"
    }
    MouseArea {


        anchors.fill: parent
         onClicked: video.play()

    }

}
然后就可以播放出视频,但是有时候比较卡,有时候直接黑屏,有时候画面很不清楚,可能是网络问题。这个问题有待解决。
使用vlc进行摄像头捕获、RTSP串流、播放
目前还没有研究这个问题,可以先参考使用vlc进行摄像头捕获、RTSP串流、播放。