在第四篇中我们学习了
mixin公共方法封装,VueRouter的使用以及配置权限路由,本期我们将讲述Pinia,并使用Pinia和Axios接口数据完成登录功能以权限路由改造
本期需要掌握的知识如下:
Pinia在项目中的使用及持久化- 使用
Pinia和Axios完成登录功能 - 使用
Pinia完成对权限路由改造
1. Pinia 安装及使用
$ npm install pinia 安装pinia
$ npm i pinia-plugin-persist --save 安装pinia 持久化插件
main.js 引入 pinia
import {

     createApp } from 'vue'
import './style.css'
import App from './App.vue'
import router from './router'

// pinia 部分
import {

     createPinia } from 'pinia';
import piniaPersist from 'pinia-plugin-persist'
const pinia = createPinia()
pinia.use(piniaPersist)

import ElementPlus from 'element-plus'
import 'element-plus/dist/index.css'
import zhCn from 'element-plus/dist/locale/zh-cn.mjs'

import 'nprogress/nprogress.css'

import axios from 'axios'
import VueAxios from 'vue-axios'


createApp(App).use(router).use(pinia).use(ElementPlus, {

     locale: zhCn }).use(VueAxios, axios).mount('#app')
scr目录下新建 store目录,并在该目录下新建 index.js
import {

     defineStore } from "pinia"
/**
 * 这个 第一个参数main,也称为 id,是必要的,Pinia 使用它来将 store 连接到 devtools。
 * 将返回的函数命名为use...(更好的语义化) 是跨可组合项的约定,以使其符合你的使用习惯。
*/
export const useStore = defineStore('user', {


  state() {


    return {


      current_userInfo: {


        id: '',
        username: '',
        password: '',
        isOpen: '',
        apiToken: ''
      },
      animationRoute: [],
    }
  },
  /**
 * 用来封装计算属性 有缓存功能  类似于computed
   */
  getters: {


    getNum(state) {


      return `我是一个计数器${

      state.count}`
    }

    //或者不使用state传递参数直接使用this
    //getNum(){


    //    return `我是一个计数器${this.count}`
    // }

  },
  /**
 * 编辑业务逻辑  类似于methods
   */
  actions: {


    SAVE_USER_MESSAGE(val) {


      this.current_userInfo = val
    },
    SAVE_ANIMATION_ROUTER(val) {


      this.animationRoute = val
    }
  },
  persist: {


    enabled: true, // 开启数据缓存
    strategies: [
      {


        key: 'user',//存储key值
        storage: localStorage, // 默认是sessionStorage
      }
    ],
  }
})
Pinia 解释说明:
state相当于vuex中的datagetters等同于vuex的gettersactions相当于vuex中的methods、actions的和persist持久化数据配置,防止 Pinia刷新后数据丢失- Pinia 中是可以使用
this关键字
2.登录功能实现
1.创建用户JSON文件和动态路由文件
 ·
·
// user.json
{


  "data": [
    {


      "id": 1,
      "username": "admin",
      "password": "123456",
      "isOpen": "true",
      "apiToken": "token_assets"
    }
  ]
}
// router.json
{


  "data": [
    {


      "name": "admin",
      "path": "/admin",
      "hidden": false,
      "meta": {


        "title": "首页"
      },
      "children": [
        {


          "name": "admin/user",
          "path": "user",
          "hidden": false,
          "meta": {


            "title": "用户管理"
          }
        },
        {


          "name": "admin/role",
          "path": "role",
          "hidden": false,
          "meta": {


            "title": "角色管理"
          }
        }
      ]
    }
  ],
  "code": 200
}
2.创建 api 请求接口
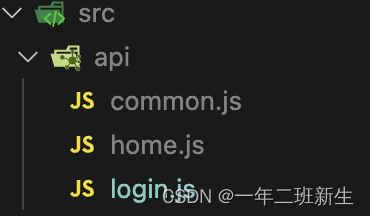
// login.js
import request from '@/utils/request'
export const handleLogin = () => {


  return request({


    url: 'user.json',
    method: 'GET'
  })
}
// common.js
import request from '@/utils/request'

// 获取动态路由接口
export const animationRoute = () =>{


  return request({


    url:'router.json',
    method:'GET'
  })
}
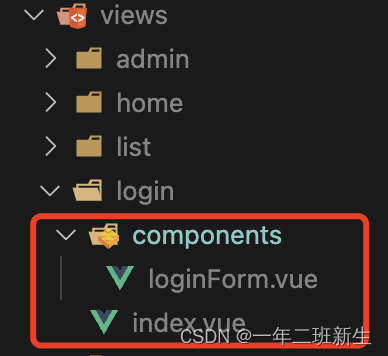
3.页面搭建及接口请求
目录结构如下
index.vue为父组件components目录下的loginForm.vue为子组件,包括Form表单
这样做的原因是:
- 减少每个页面的代码,使代码更简洁、方便后期维护
- 复习
组件传值
index.vue 代码
<template>
  <div class="login">
    <loginForm @LoginEmit="LoginEmit" />
  </div>
</template>
import {

     defineComponent, onMounted, ref } from 'vue'
import {

     useRouter } from 'vue-router'
import {

     ElMessage } from 'element-plus'
// 引入 pinia 方法
import {

     useStore } from '@/store/index.js'
// 引入 登录 api
import {

     handleLogin } from '@/api/login.js'
// 引入 权限路由 api
import {

     animationRoute } from '@/api/common.js'
// 引入 登录表单子组件
import loginForm from './components/loginForm.vue'

// 注册组件
const Component = defineComponent({


  loginForm
})


/**
 * @type data
 * @description 所有数据都在此体现
 * **/

const Router = useRouter()
const store = useStore()

/**
* @type methods
* @description 所有方法、事件都在此层中体现
* **/

// 登录按钮方法 由子组件触发并携带参数
const LoginEmit = async form => {


  const {

     username, password } = form
  let res = await handleLogin()
  // 以下三行代码是判断登录账号密码是否正确
  let currentUser = res.data.filter(item => {

     return item.username === username })
  if (currentUser.length < 1) return ElMessage.error('用户不存在')
  if (currentUser[0].password !== password) return ElMessage.error('密码错误')
  // 确保登录成功后 调用 Pinia 方法存储用户信息
  store.SAVE_USER_MESSAGE(currentUser[0])
  // 获取 权限路由
  let routerList = await animationRoute(username)
  // 调用 Pinia 存储权限路由方法 将路由信息存储到 store中
  store.SAVE_ANIMATION_ROUTER([...routerList.data])
  // 跳转到 首页
  Router.push('/home')
}
表单组件
<template>
  <div class="login-form">
    <div class="title">用户登录</div>
    <div class="login_content">
      <el-form ref="ruleLogin" :model="loginForm" :rules="rules">
        <el-form-item label="账号:" prop="username">
          <el-input v-model="loginForm.username" autocomplete="off" placeholder="请输入账号" />
        </el-form-item>
        <el-form-item label="密码:" prop="password">
          <el-input v-model="loginForm.password" type="password" autocomplete="off" placeholder="请输入密码" />
        </el-form-item>
      </el-form>
      <el-button type="primary" @click="handleLogin">登录</el-button>
    </div>
  </div>
</template>
import {

     ref } from 'vue'

/**
 * @type data
 * @description 所有数据都在此体现
 * **/

const loginForm = ref({


  username: '',
  password: ''
})
const ruleLogin = ref(null)
const rules = {


  username: {

     required: true, message: "账号不可为空", trigger: "blur" },
  password: {

     required: true, message: "密码不可为空", trigger: "blur" },
}


/**
* @type methods
* @description 所有方法、事件都在此层中体现
* **/

const emit = defineEmits(['LoginEmit'])

// 登录按钮点击事件
const handleLogin = async () => {


  try {


  	// 先判断表单校验是否通过,再去触发 父组件方法并传参
    await ruleLogin.value.validate()
    // 触发父组件登录方法
    emit('LoginEmit', loginForm.value)
  } catch (err) {


  }
}
4.权限路由改造
import {

     createRouter, createWebHistory } from 'vue-router'
import {

     homeRoutes } from './modules/home'
import {

     loginRoutes } from './modules/login'
import {

     getlocalstroage, clearSession, clearLocal, showNprogress, hideNprogress } from '@/mixin'
import {

     useStore } from '@/store'
import {

     storeToRefs } from "pinia"

// 首先把你需要动态路由的组件地址全部获取
let modules = import.meta.glob('../views/**/*.vue')
let flag = true

const router = createRouter({


  history: createWebHistory(),
  routes: [...loginRoutes, ...homeRoutes]
})

router.beforeEach((to, from, next) => {


  showNprogress()
  if (to.meta.title) {


    document.title = to.meta.title
  }

  const {

     animationRoute } = storeToRefs(useStore())
  addDynamicRoute(animationRoute.value)
  if (animationRoute.value.length > 0) {


    if (flag) {


      const NotFound = {

     path: '/:pathMatch(.*)*', redirect: '/404' }
      router.addRoute(NotFound)
      next({

     ...to, replace: true })
      router.options.routes.push(JSON.parse(JSON.stringify(...animationRoute.value),NotFound))
      flag = false
    }
  }

  if (to.path != '/login') {


    let apiToken = getlocalstroage('user') ? JSON.parse(getlocalstroage('user'))?.current_userInfo?.apiToken : null
    if (!apiToken) {


      clearSession()
      clearLocal()
      next('/login')
    }
  }
  next()
})

router.afterEach(() => {


  hideNprogress()
})

// 添加动态路由,parent默认为home是首页最外层的路由name名
const addDynamicRoute = (useroute, parent) => {


  for (let i = 0; i < useroute.length; i++) {


    if (useroute[i].children && useroute[i].children.length > 0) {


      router.addRoute({

     name: useroute[i].name, path: useroute[i].path, component: modules[`../views/${

      useroute[i].name}/index.vue`], meta: {

     title: useroute[i].meta.title }, hidden: useroute[i].hidden })
      // 递归添加动态路由
      addDynamicRoute(useroute[i].children, useroute[i].name);
    } else {


      router.addRoute(parent, {

     path: useroute[i].path, component: modules[`../views/${

      useroute[i].name}/index.vue`], meta: {

     title: useroute[i].meta.title }, hidden: useroute[i].hidden })
    }
  }
};

export default router