文章目录
1. 介绍
在 Vue 中,我们可以使用 scoped 特性来给组件的样式添加作用域。通过为组件的 <style> 标签添加 scoped 特性,我们可以确保组件的样式仅应用于该组件的模板中,而不会影响其他组件或全局样式。
2. 基本使用
<template>
  <div class="example">
    <h1>Scoped Styles</h1>
  </div>
</template>

<style scoped>
.example {


  color: red;
}
</style>
在上面的例子中,.example 类的样式只会应用于该组件的模板中,而不会影响其他组件或全局样式。
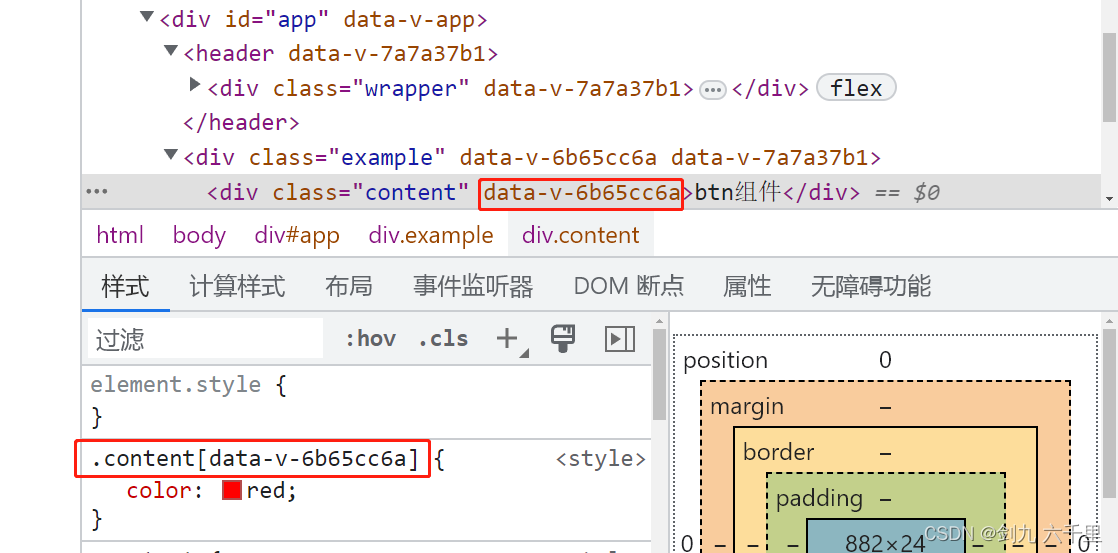
3. scoped原理
- 给当前元素及子元素都加上data-v-开头的一串随机 hash 值
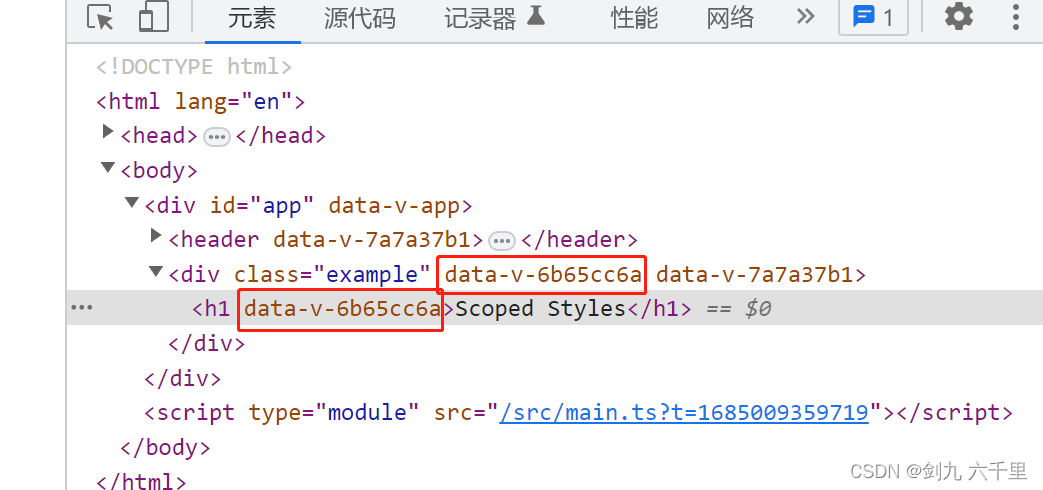
- css中通过属性选择器选择这个 hash ,这样就确保了唯一性,避免样式污染
4. 深度选择器
- :bind()
我们用vue开发过程中,总是会用到各种组件库,如:ElmentUI/andt design等等,或者我们自己封装的组件,这些组件库提供的组件样式有时并不满足实际需求,这时候就需要使用深度选择器来修改样式。
下面是一个使用深度选择器的例子:
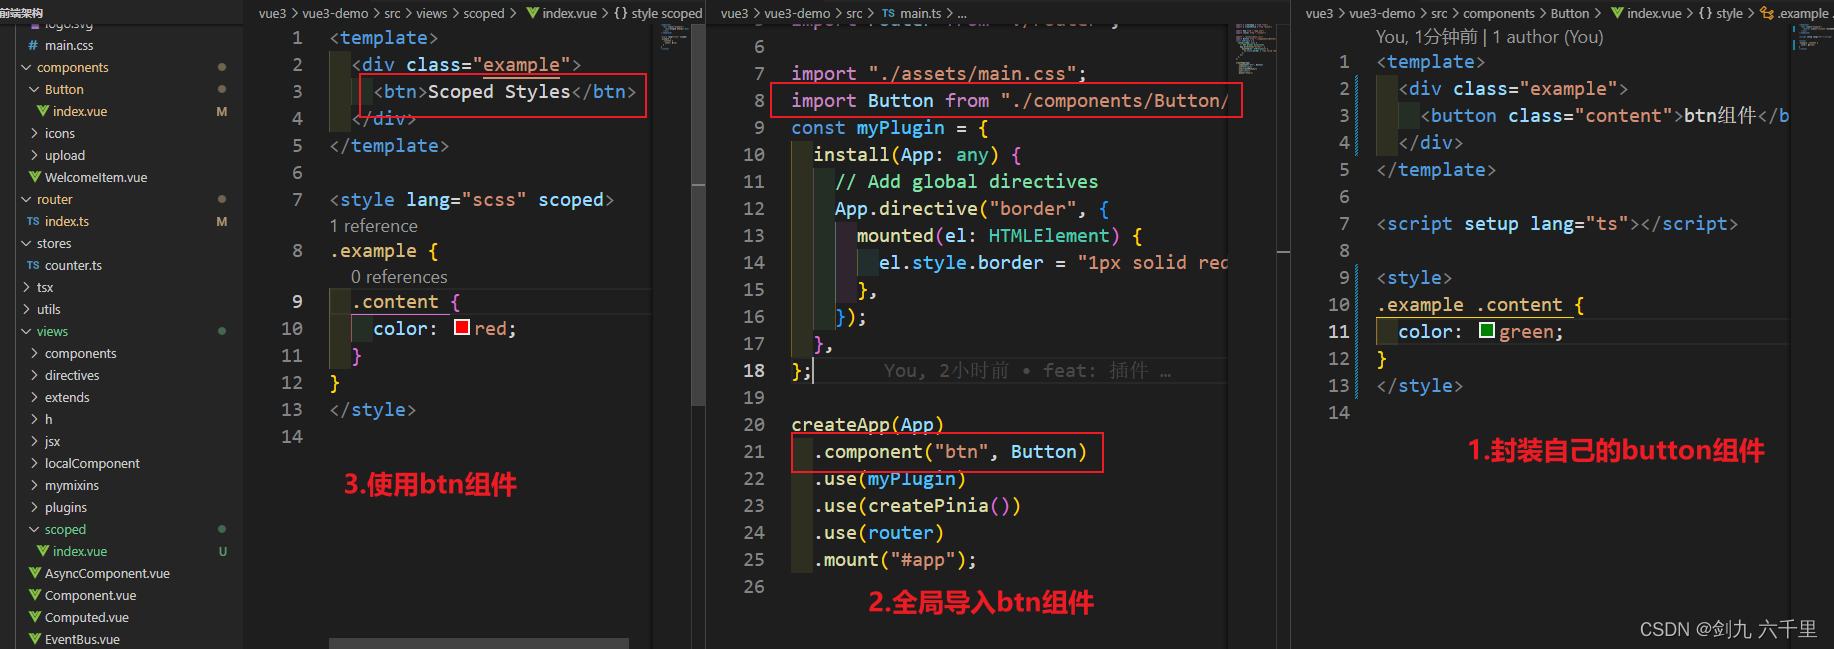
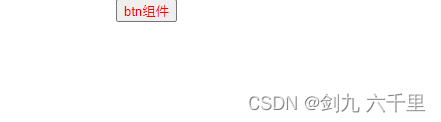
此时我们在自己的组件中修改 btn 组件的样式,发现并没有效果:

vue提供了:deep()选择器:
<template>
  <div class="example">
    <btn>Scoped Styles</btn>
  </div>
</template>

<style lang="scss" scoped>
.example {


  :deep(.content) {


    color: red;
  }
}
</style>
当然了在 sass 中我们还可以使用 ::v-deep (在 less 中使用 /deep/ )来修改样式,也是可以实现的。
5. 插槽选择器
- :slotted()
默认情况下,作用域样式不会影响到<slot/>渲染出来的内容,因为它们被认为是父组件所持有并传递进来的。使用 :slotted伪类以明确地将插槽内容作为选择器的目标:
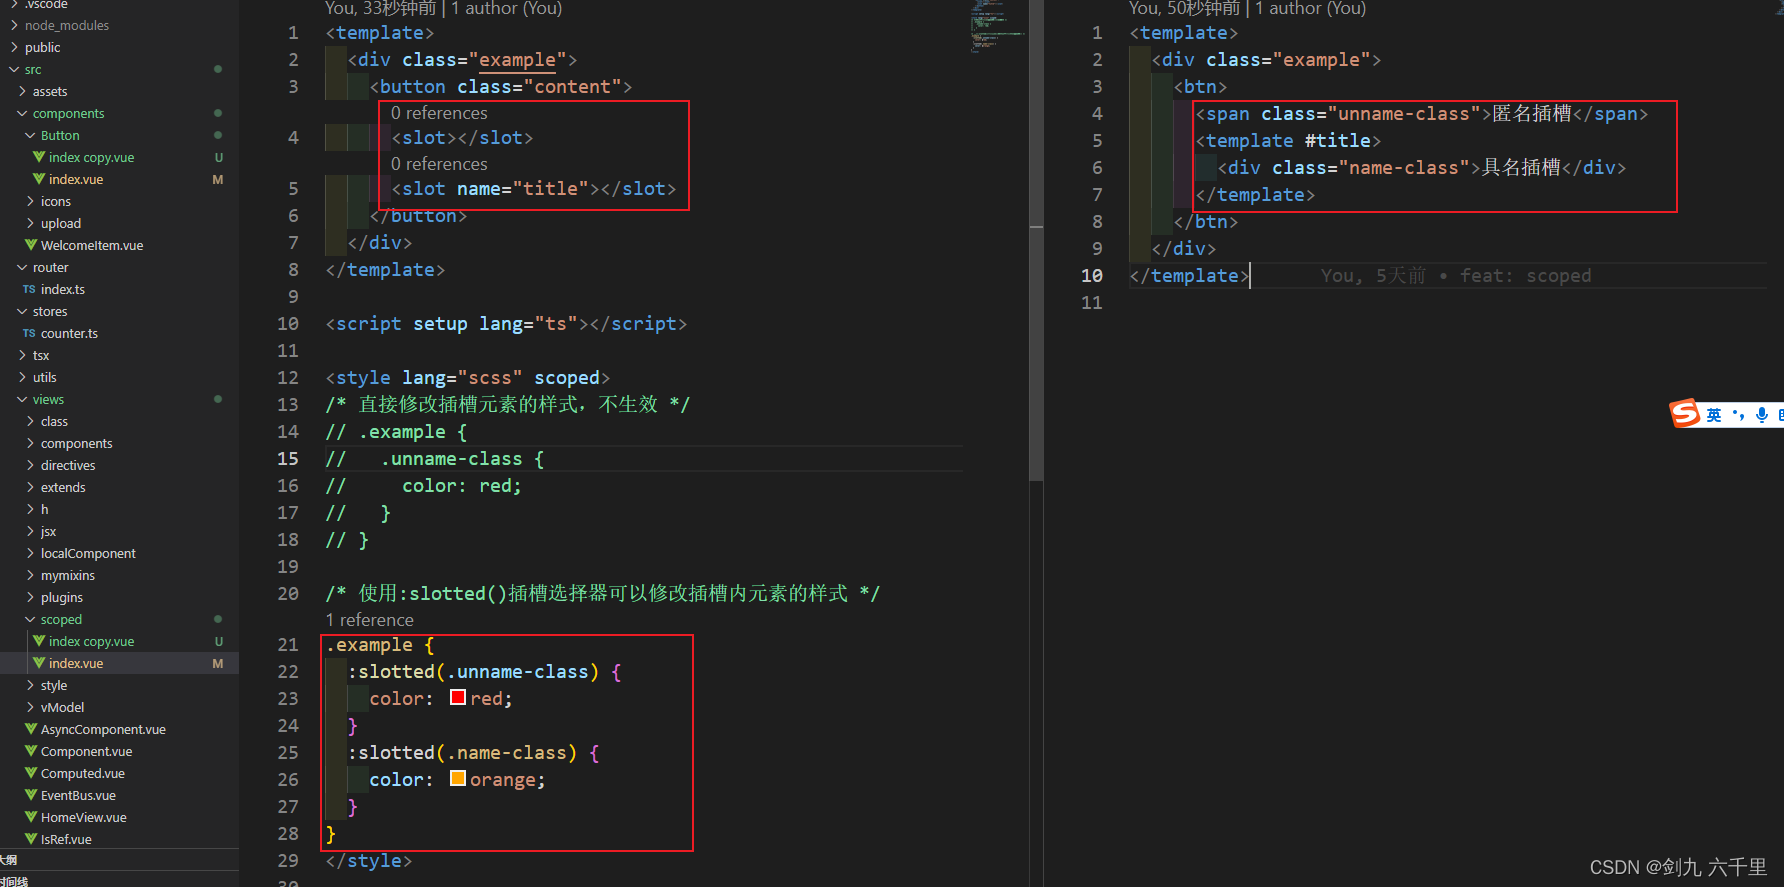
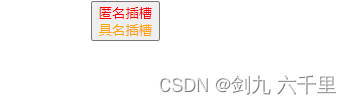
渲染效果如下:
- 代码如下:
<template>
  <div class="example">
    <button class="content">
      <slot></slot>
      <slot name="title"></slot>
    </button>
  </div>
</template>

<script setup lang="ts"></script>

<style lang="scss" scoped>
/* 直接修改插槽元素的样式,不生效 */
.example {


   .unname-class {


     color: red;
   }
}

/* 使用:slotted()插槽选择器可以修改插槽内元素的样式 */
.example {


  :slotted(.unname-class) {


    color: red;
  }
  :slotted(.name-class) {


    color: orange;
  }
}
</style>

</style>
6. 全局选择器
- :global()
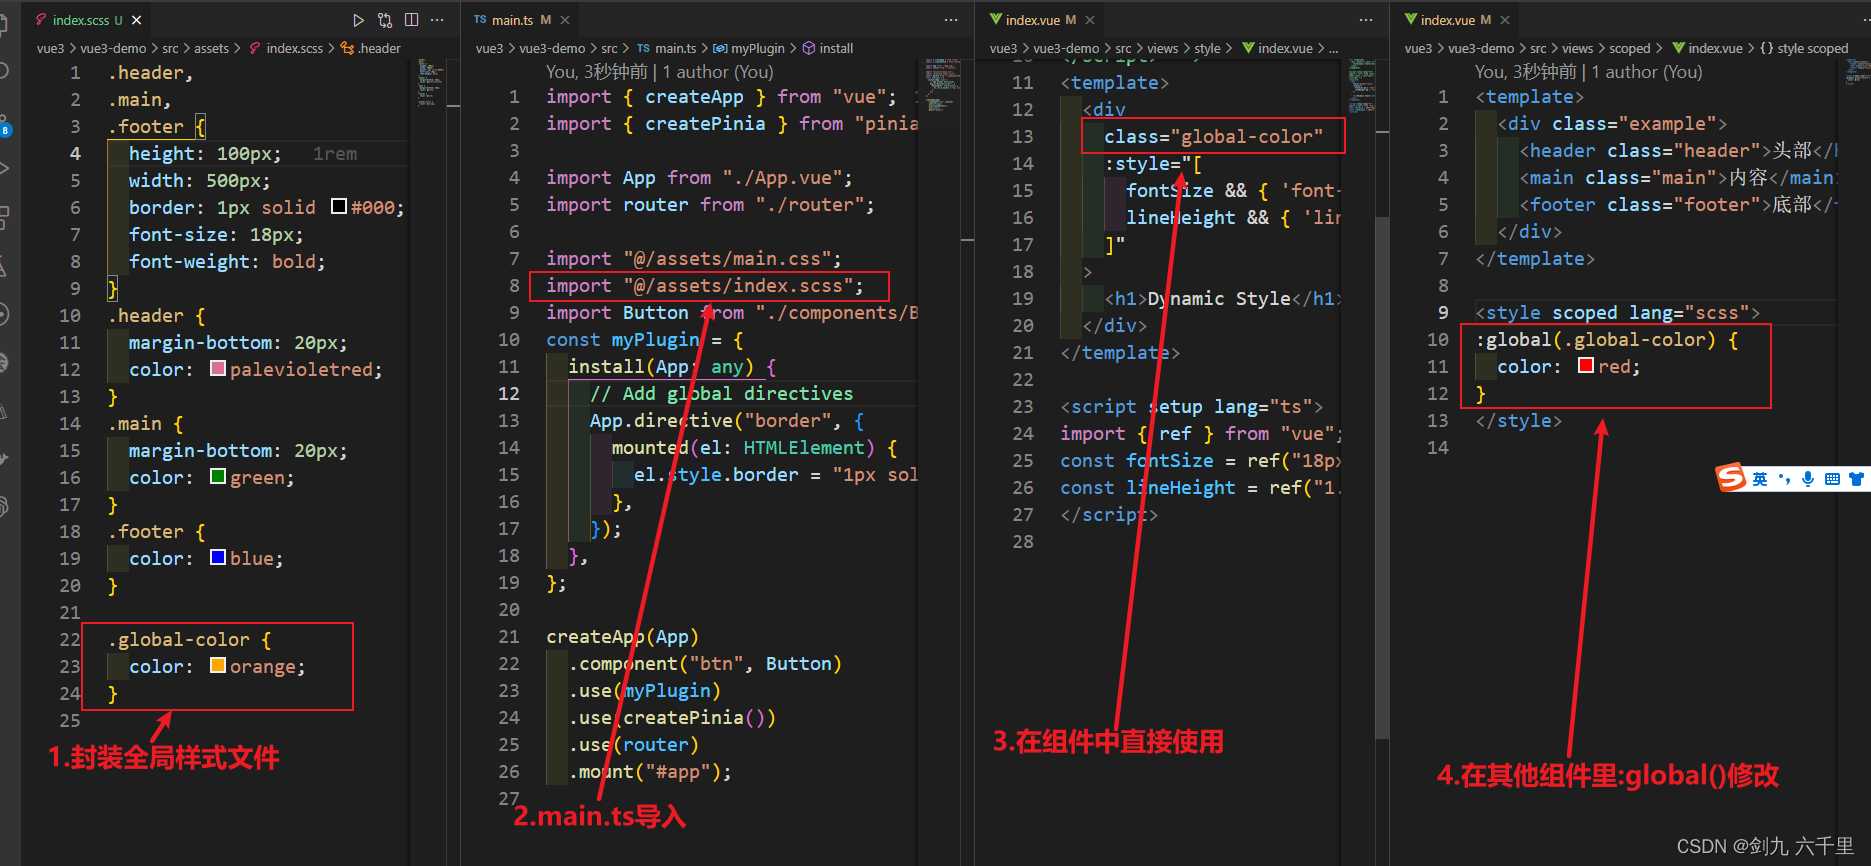
在实际开发中我们可能会封装比较多的公共样式文件,但在某个组件中我们想去修改某个公共样式,那这个时候比起另外创建一个<style></style>标签来说,更推荐使用:global()选择器:
<style scoped lang="scss">
:global(.global-color) {


  color: red;
}
</style>
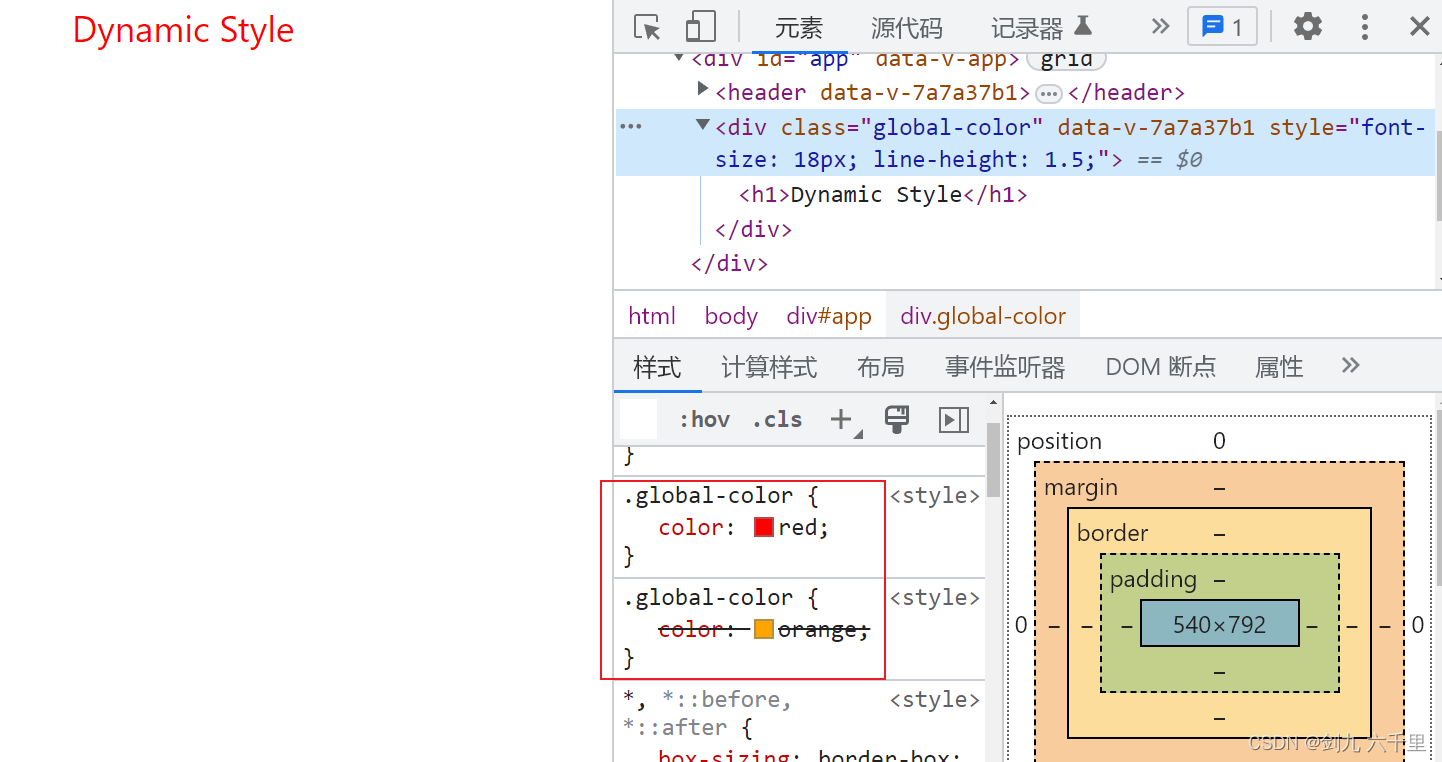
修改前文字颜色为橙色,修改后文字颜色已经发生改变,效果如下:
7. 混合使用局部与全局样式
- 可以在同一个.vue文件里使用 scoped 和非scoped
<style>
// ......
</style>

<style scoped lang="scss">
// ......
</style>
8. CSS Modules
- 除了
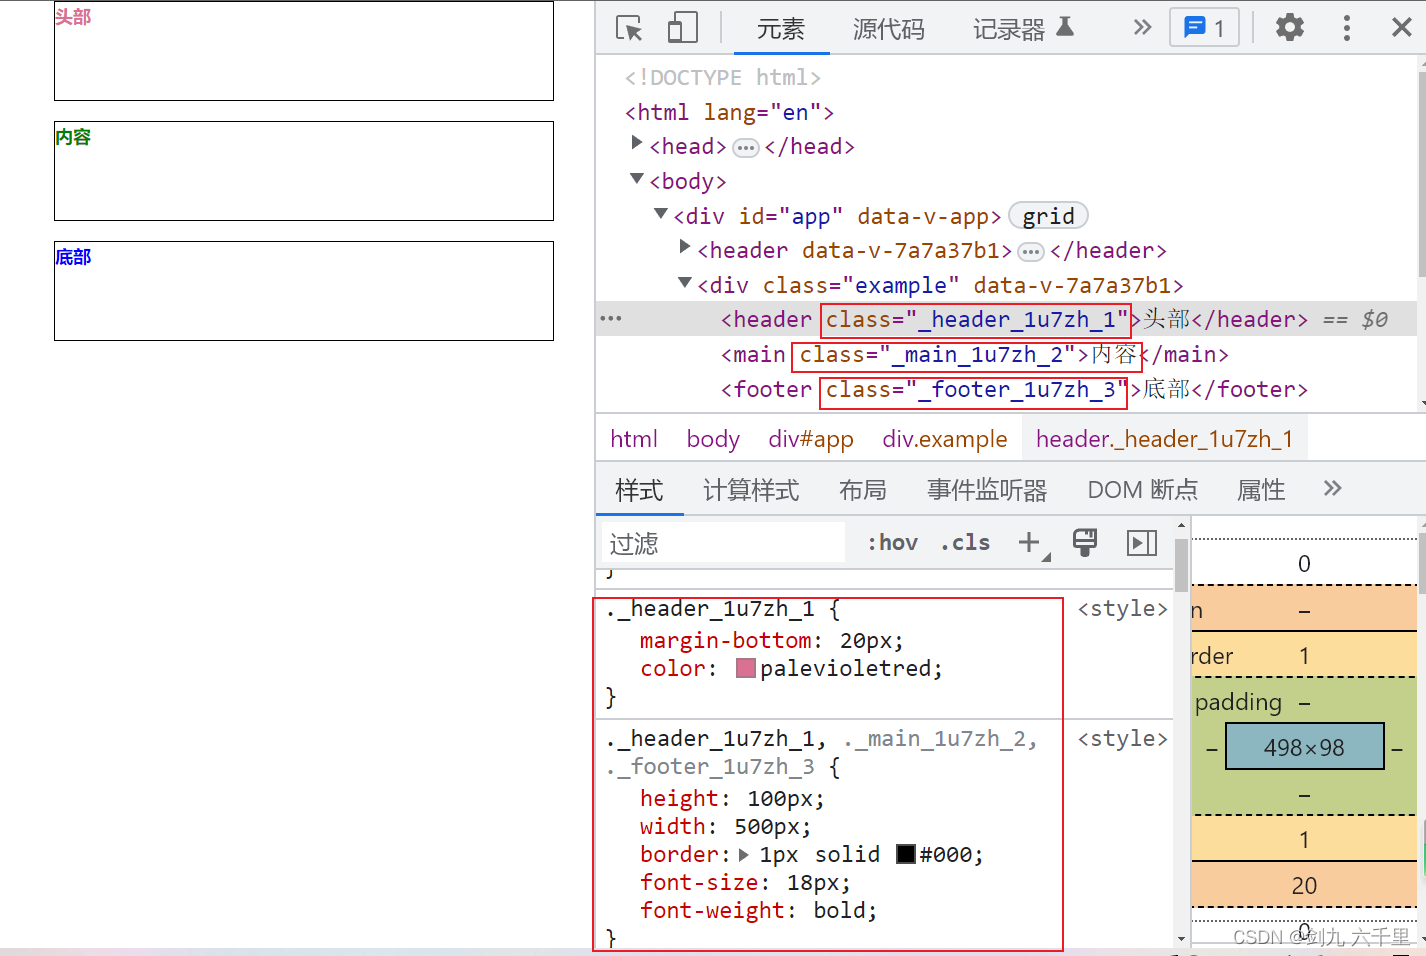
scoped之外,我们也同样可以使用module实现样式的私有化 scoped是通过生成一串data-v开头,随机的自定义属性,通过属性选择器实现的样式私有module是通过生成一个随机的类名,实现样式私有module将生成的 CSS class 作为$style对象暴露给组件
先看效果:
示例代码:
扫描二维码关注公众号,回复:
15231690 查看本文章

<template>
  <div class="example">
    <header :class="$style.header">头部</header>
    <main :class="$style.main">内容</main>
    <footer :class="$style.footer">底部</footer>
  </div>
</template>

<style module lang="scss">
.header,
.main,
.footer {


  height: 100px;
  width: 500px;
  border: 1px solid #000;
  font-size: 18px;
  font-weight: bold;
}
.header {


  margin-bottom: 20px;
  color: palevioletred;
}
.main {


  margin-bottom: 20px;
  color: green;
}
.footer {


  color: blue;
}
</style>
9. 自定义注入名称
module除了以上用法之外,还提供自定义名称的功能- 效果和
$style是一样的
<template>
  <div class="example">
    <header :class="myStyle.header">头部</header>
    <main :class="myStyle.main">内容</main>
    <footer :class="myStyle.footer">底部</footer>
  </div>
</template>

<style module="myStyle" lang="scss">
.header,
.main,
.footer {


  height: 100px;
  width: 500px;
  border: 1px solid #000;
  font-size: 18px;
  font-weight: bold;
}
.header {


  margin-bottom: 20px;
  color: palevioletred;
}
.main {


  margin-bottom: 20px;
  color: green;
}
.footer {


  color: blue;
}
</style>
10. CSS 中的 v-bind()
- 单文件组件的
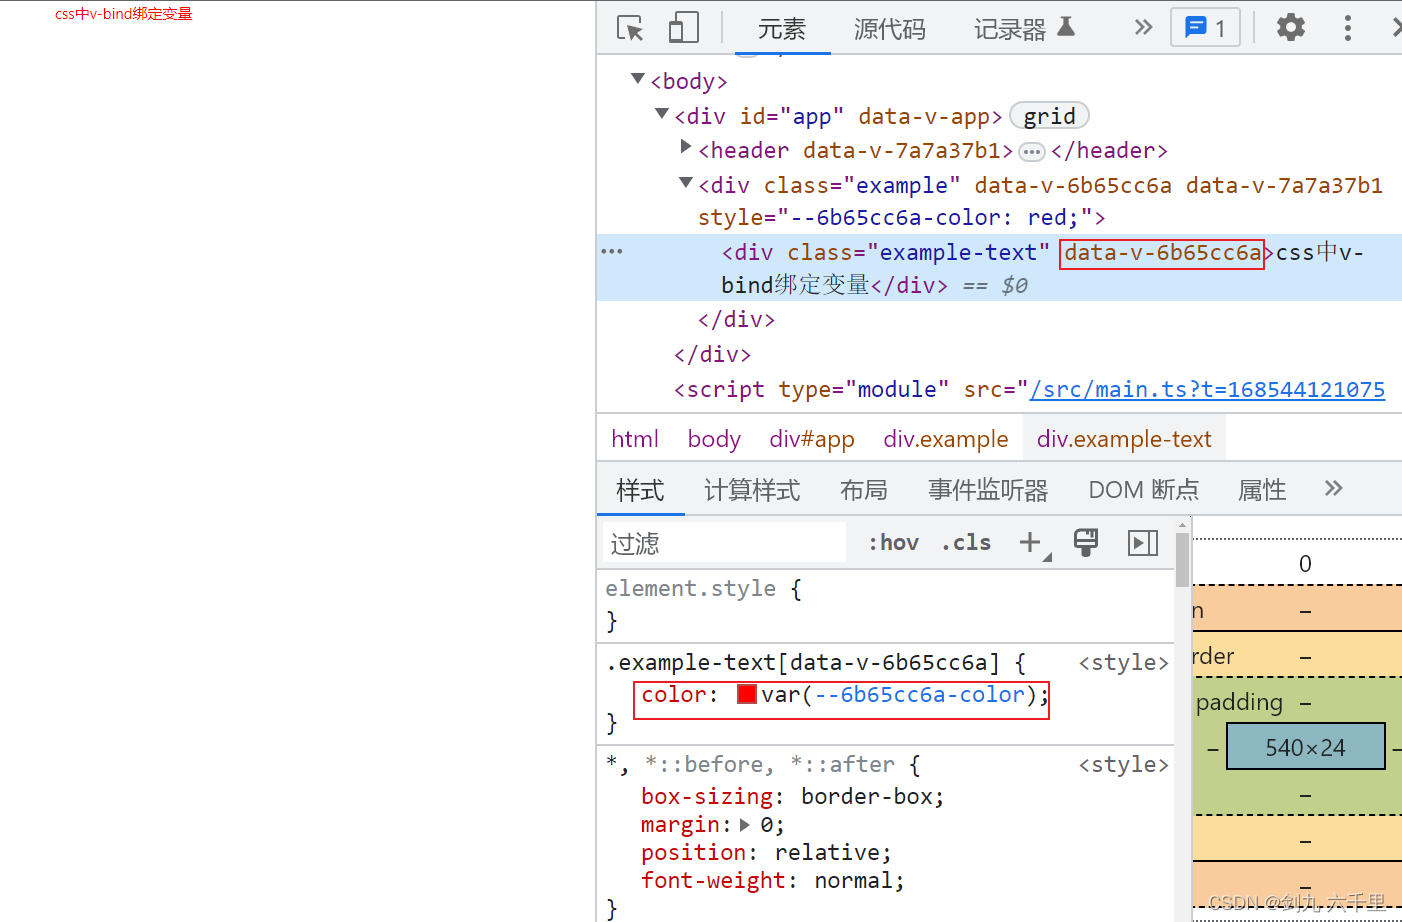
<style>标签支持使用v-bindCSS 函数将 CSS 的值链接到动态的组件状态 - 简单来说就是可以在css中通过
v-bind()函数动态绑定js中的变量 - 实际的值会被编译成哈希化的 CSS 自定义属性,并且在源值变更的时候响应式地更新。
渲染效果:
代码示例:
<template>
  <div class="example">
    <div class="example-text">css中v-bind绑定变量</div>
  </div>
</template>

<script setup lang="ts">
import {

       ref } from "vue";
const color = ref("red");
</script>

<style scoped lang="scss">
.example-text {


  color: v-bind(color);
}
</style>