前言
最近,为了方便收集数据,需要将工厂的各个文件夹及其子文件夹下的图片归一到一个文件夹下进行上传,所以就用C++进行了功能实现。
一、功能实现
1、遍历文件及其子文件夹下的图片,并将其路径放置容器中
这里是在windows上进行操作的,代码如下:
//遍历文件夹
void finddir(string dirpath,vector<string>&files){


	//文件句柄
	//intptr_t  hFile = 0;
	long long  hFile = 0;
	//文件信息
	struct _finddata_t fileinfo; //文件信息读取结构
	string p; //string类很有意思的一个赋值函数:assign(),有很多重载版本
	if ((hFile = _findfirst(p.assign(dirpath).append("\\*").c_str(), &fileinfo)) != -1)
	{


		do
		{


			if ((fileinfo.attrib & _A_SUBDIR)) //判断是否为文件夹
			{


				if (strcmp(fileinfo.name, ".") != 0 && strcmp(fileinfo.name, "..") != 0)
				{


					finddir(p.assign(dirpath).append("\\").append(fileinfo.name), files);//递归当前文件夹
				}
			}
			else  //文件处理
			{


				//cout << fileinfo.name << endl;
				string filename = fileinfo.name;
				string suffix = filename.substr(filename.find_last_of(".") + 1);
				//cout << suffix << endl;
				if (suffix == "jpg") {


					files.push_back(p.assign(dirpath).append("\\").append(fileinfo.name));//文件名

				}
			}
		} while (_findnext(hFile, &fileinfo) == 0); //寻找下一个,成功返回0,否则-1
		_findclose(hFile);
	}

}
2、创建文件夹
这里的功能实现的是判断储存的文件路径是否存在,不存在自动创建,代码如下:
//创建文件夹
void createDir(string path) {


	if (_access(path.c_str(), 0) == -1) {


		_mkdir(path.c_str());
	} //判断文件夹是否存在,不存在则自动创建
}
3、转移文件
将图片转移至指定目录下,move
//移动文件
bool move_file(string imgpath1, string imgpath2) {


	//imgpath1:原先路径
	//imgpath2:要转移的路径
	BOOL flag = MoveFile(imgpath1.c_str(), imgpath2.c_str()); //若imgpath2不存在会返回0
	return flag;
4、调用代码
int main()
{


	string dirpath = "";//待转移目录
	if (_access(dirpath.c_str(), 0) == -1) {


		cout << "该目录不存在" << endl;
	}
	vector<string> file_list;
	finddir(dirpath,file_list);
	//cout << "finished" << endl;

	string save_path = "";//目标目录
	createDir(save_path);

	//转移文件
	clock_t s,e;
	s = clock();
	for (int i = 0; i < file_list.size(); i++) {


		string imgname = file_list[i].substr(file_list[i].find_last_of("\\")+1);
		//cout << file_list[i] << ",\t"<<save_path + "\\" + imgname << endl;
		move_file(file_list[i], save_path + "\\" + imgname);
	}
	e = clock();
	double total_time = double(e - s) / CLOCKS_PER_SEC;
	cout << "Total time:" << total_time <<"s" << endl;

}
5、所需头文件
#include <iostream>
#include <vector>
#include <string>
#include<io.h>  //必不可少
#include<direct.h>
#include<fstream>
#include <Windows.h>
#include <ctime>
#include <cstdlib>
using namespace std;
二、打包exe
1.扩展安装
这里我们需要用到的工具是Microsoft Visual Studio Installer Project,安装方式如下,个人建议选择方式二:
(1):VS中选中工具—>扩展和更新—>联机,然后直接搜索就可,如图:
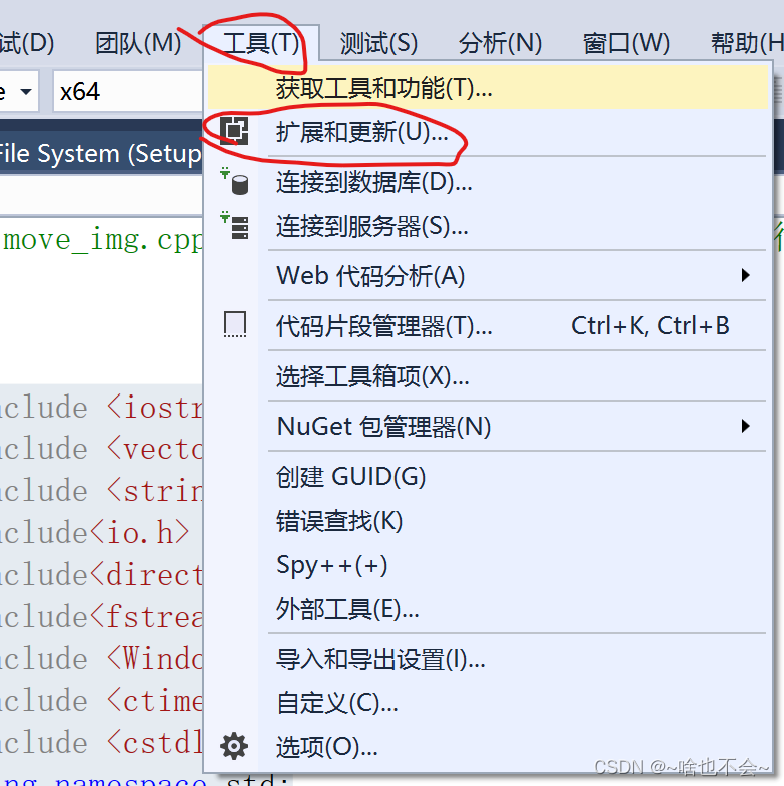

若安装上了的话,绿框显示的部分会和我一样。个人不太建议这种方式,因为属实太慢了,有建议说是换成热点安装,这个我还没试过,有兴趣的小伙伴可以试试。
(2)、下载好的扩展(建议使用迅雷),双击运行安装即可,官网链接如下:Microsoft Visual Studio Installer Project
注意版本要和你使用的VS版本一致
2.生成可执行文件
这里主要参考了这个大佬的文章,文章写的很详细,图文并茂,一路下来也没出现什么问题,链接如下:打包程序
总结
以上就是本篇的全部内容,本人C++也处于入门水平,有问题请指出