参考文章:https://www.bilibili.com/video/BV1et411b73Z?p=185
C++ STL(Standard Template Library)是C++标准库的一部分,它提供了一组通用的模板类和函数,用于实现常见的数据结构和算法,如向量、链表、堆、栈、队列、集合、映射、排序、查找等。STL的设计目标是提供高效、可重用、可扩展的代码,使得程序员能够更加专注于解决问题本身,而不是数据结构和算法的实现细节。STL的使用可以大大提高程序的开发效率和代码的可维护性。
文章目录
-
- 2 STL初识
- 3 STL- 常用容器
-
- 3.1 string容器
- 3.2 vector容器
-
- 3.2.1 vector基本概念
- 3.2.2 vector构造函数
- 3.2.3 vector赋值操作(assign)
- 3.2.4 vector容量和大小(empty()、capacity()、size()、resize()(改变size而不是capacity))
- 3.2.5 vector插入和删除(push_back()、pop_back()、insert()、erase()、clear())
- 3.2.6 vector数据存取(读取与修改)(at()、front()、back())
- 3.2.7 vector互换容器(swap())(swap()可用于匿名对象收缩内存)
- 3.2.8 vector预留空间(reserve()函数)(注意:vector数组空间不够时,会重新分配内存空间,将原有的元素复制到新的内存空间中,并释放原有的内存空间;如果一开始用reserve()函数分配足够大的空间,将减少vector在动态扩展容量时的扩展次数)
2 STL初识
2.1 STL的诞生
-
长久以来,软件界一直希望建立一种可重复利用的东西
-
C++的面向对象和泛型编程思想,目的就是复用性的提升
-
大多情况下,数据结构和算法都未能有一套标准,导致被迫从事大量重复工作
-
为了建立数据结构和算法的一套标准,诞生了STL
2.2 STL基本概念
- STL(Standard Template Library,标准模板库)
- STL 从广义上分为: 容器(container) 算法(algorithm) 迭代器(iterator)
- 容器和算法之间通过迭代器进行无缝连接。
- STL 几乎所有的代码都采用了模板类或者模板函数
2.3 STL六大组件(容器、算法、迭代器、仿函数、适配器(配接器)、空间配置器)
STL大体分为六大组件,分别是:容器、算法、迭代器、仿函数、适配器(配接器)、空间配置器
- 容器:各种数据结构,如vector、list、deque、set、map等,用来存放数据。
- 算法:各种常用的算法,如sort、find、copy、for_each等
- 迭代器:扮演了容器与算法之间的胶合剂。
- 仿函数:行为类似函数,可作为算法的某种策略。
- 适配器:一种用来修饰容器或者仿函数或迭代器接口的东西。
- 空间配置器:负责空间的配置与管理。
2.4 STL中容器(序列式容器、关联式容器)、算法(质变算法、非质变算法)、迭代器
容器:置物之所也
STL容器就是将运用最广泛的一些数据结构实现出来
常用的数据结构:数组, 链表,树, 栈, 队列, 集合, 映射表 等
这些容器分为序列式容器和关联式容器两种:
序列式容器:强调值的排序,序列式容器中的每个元素均有固定的位置。
关联式容器:二叉树结构,各元素之间没有严格的物理上的顺序关系
算法:问题之解法也
有限的步骤,解决逻辑或数学上的问题,这一门学科我们叫做算法(Algorithms)
算法分为:质变算法和非质变算法。
质变算法:是指运算过程中会更改区间内的元素的内容。例如拷贝,替换,删除等等
非质变算法:是指运算过程中不会更改区间内的元素内容,例如查找、计数、遍历、寻找极值等等
迭代器:容器和算法之间粘合剂(常用:双向迭代器、随机访问迭代器)
提供一种方法,使之能够依序寻访某个容器所含的各个元素,而又无需暴露该容器的内部表示方式。
每个容器都有自己专属的迭代器
迭代器使用非常类似于指针,初学阶段我们可以先理解迭代器为指针
迭代器种类:
| 种类 | 功能 | 支持运算 |
|---|---|---|
| 输入迭代器 | 对数据的只读访问 | 只读,支持++、==、!= |
| 输出迭代器 | 对数据的只写访问 | 只写,支持++ |
| 前向迭代器 | 读写操作,并能向前推进迭代器 | 读写,支持++、==、!= |
| 双向迭代器 | 读写操作,并能向前和向后操作 | 读写,支持++、–, |
| 随机访问迭代器 | 读写操作,可以以跳跃的方式访问任意数据,功能最强的迭代器 | 读写,支持++、–、[n]、-n、<、<=、>、>= |
常用的容器中迭代器种类为双向迭代器,和随机访问迭代器
2.5 容器、算法、迭代器初识
了解STL中容器、算法、迭代器概念之后,我们利用代码感受STL的魅力
STL中最常用的容器为Vector,可以理解为数组,下面我们将学习如何向这个容器中插入数据、并遍历这个容器
2.5.1 vector存放内置数据类型
容器: vector
算法: for_each
迭代器: vector<int>::iterator
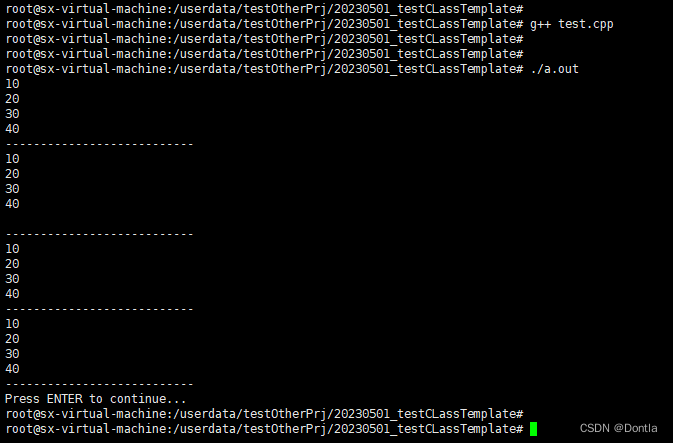
示例:四种遍历容器方式
#include <vector>
#include <algorithm>
#include <iostream>

using namespace std;

void MyPrint(int val)
{


    cout << val << endl;
}

void test01()
{


    // 创建vector容器对象,并且通过模板参数指定容器中存放的数据的类型
    vector<int> v;
    // 向容器中放数据
    v.push_back(10);
    v.push_back(20);
    v.push_back(30);
    v.push_back(40);

    // 每一个容器都有自己的迭代器,迭代器是用来遍历容器中的元素
    // v.begin()返回迭代器,这个迭代器指向容器中第一个数据
    // v.end()返回迭代器,这个迭代器指向容器元素的最后一个元素的下一个位置
    // vector<int>::iterator 拿到vector<int>这种容器的迭代器类型

    vector<int>::iterator pBegin = v.begin();
    vector<int>::iterator pEnd = v.end();

    // 第一种遍历方式:
    while (pBegin != pEnd)
    {


        cout << *pBegin << endl;
        pBegin++;
    }

    cout << "---------------------------" << endl;

    // 第二种遍历方式:
    for (vector<int>::iterator it = v.begin(); it != v.end(); it++)
    {


        cout << *it << endl;
    }
    cout << endl;

    cout << "---------------------------" << endl;

    // 第三种遍历方式:
    // 使用STL提供标准遍历算法  头文件 algorithm
    for_each(v.begin(), v.end(), MyPrint);

    cout << "---------------------------" << endl;

    // 第四种遍历方式:
    // 使用 auto
    for (auto i : v)
    {


        MyPrint(i);
    }

    cout << "---------------------------" << endl;
}

int main()
{


    test01();

    std::cout << "Press ENTER to continue...";
    std::cin.ignore(std::numeric_limits<std::streamsize>::max(), '\n'); // 读取内容直到用户输入enter键
    return EXIT_SUCCESS;
}
运行结果:
2.5.2 Vector存放自定义数据类型
学习目标:vector中存放自定义数据类型,并打印输出
示例:
#include <vector>
#include <algorithm>
#include <iostream>
#include <string>

using namespace std;

// 自定义数据类型
class Person
{


public:
    Person(string name, int age)
    {


        mName = name;
        mAge = age;
    }

public:
    string mName;
    int mAge;
};
// 存放对象
void test01()
{


    vector<Person> v;

    // 创建数据
    Person p1("aaa", 10);
    Person p2("bbb", 20);
    Person p3("ccc", 30);
    Person p4("ddd", 40);
    Person p5("eee", 50);

    v.push_back(p1);
    v.push_back(p2);
    v.push_back(p3);
    v.push_back(p4);
    v.push_back(p5);

    // for (vector<Person>::iterator it = v.begin(); it != v.end(); it++)
    // {


    //     cout << "Name:" << (*it).mName << " Age:" << (*it).mAge << endl;
    // }

    for (auto i : v)
    {


        cout << "Name:" << i.mName << " Age:" << i.mAge << endl;
    }
    cout << "-----------------------" << endl;
}

// 放对象指针
void test02()
{


    vector<Person *> v;

    // 创建数据
    Person p1("aaa", 10);
    Person p2("bbb", 20);
    Person p3("ccc", 30);
    Person p4("ddd", 40);
    Person p5("eee", 50);

    v.push_back(&p1);
    v.push_back(&p2);
    v.push_back(&p3);
    v.push_back(&p4);
    v.push_back(&p5);

    // for (vector<Person *>::iterator it = v.begin(); it != v.end(); it++)
    // {


    //     Person *p = (*it);
    //     cout << "Name:" << p->mName << " Age:" << (*it)->mAge << endl;
    // }

    for (auto i : v)
    {


        cout << "Name:" << i->mName << " Age:" << i->mAge << endl;
    }
    cout << "-----------------------" << endl;
}

int main()
{


    test01();

    test02();

    std::cout << "Press ENTER to continue...";
    std::cin.ignore(std::numeric_limits<std::streamsize>::max(), '\n'); // 读取内容直到用户输入enter键
    return EXIT_SUCCESS;
}
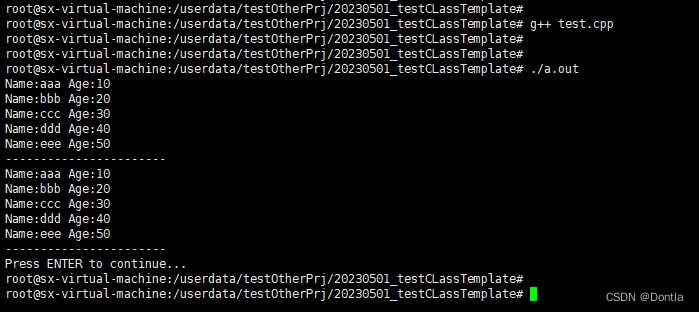
运行结果:
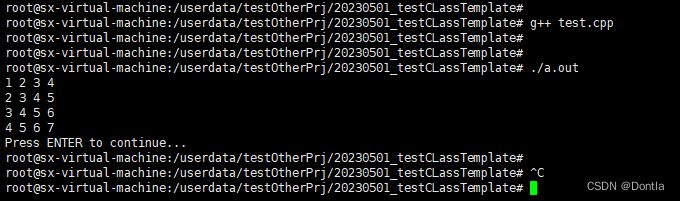
2.5.3 Vector容器嵌套容器(多维度)
学习目标:容器中嵌套容器,我们将所有数据进行遍历输出
示例:
#include <vector>
#include <algorithm>
#include <iostream>

using namespace std;

// 容器嵌套容器
void test01()
{


    vector<vector<int>> v;

    vector<int> v1;
    vector<int> v2;
    vector<int> v3;
    vector<int> v4;

    for (int i = 0; i < 4; i++)
    {


        v1.push_back(i + 1);
        v2.push_back(i + 2);
        v3.push_back(i + 3);
        v4.push_back(i + 4);
    }

    // 将容器元素插入到vector v中
    v.push_back(v1);
    v.push_back(v2);
    v.push_back(v3);
    v.push_back(v4);

    // for (vector<vector<int>>::iterator it = v.begin(); it != v.end(); it++)
    // {


    //     for (vector<int>::iterator vit = (*it).begin(); vit != (*it).end(); vit++)
    //     {


    //         cout << *vit << " ";
    //     }
    //     cout << endl;
    // }

    for (auto i : v)
    {


        for (auto j : i)
        {


            cout << j << " ";
        }
        cout << endl;
    }
}

int main()
{


    test01();

    std::cout << "Press ENTER to continue...";
    std::cin.ignore(std::numeric_limits<std::streamsize>::max(), '\n'); // 读取内容直到用户输入enter键
    return EXIT_SUCCESS;
}
3 STL- 常用容器
3.1 string容器
3.1.1 string基本概念
本质:
- string是C++风格的字符串,而string本质上是一个类
string和char * 区别:
- char * 是一个指针
- string是一个类,类内部封装了char*,管理这个字符串,是一个char*型的容器。
特点:
string 类内部封装了很多成员方法
例如:查找find,拷贝copy,删除delete 替换replace,插入insert
string管理char*所分配的内存,不用担心复制越界和取值越界等,由类内部进行负责
3.1.2 string构造函数
构造函数原型:
string();//创建一个空的字符串 例如: string str;
string(const char* s);//使用字符串s初始化string(const string& str);//使用一个string对象初始化另一个string对象string(int n, char c);//使用n个字符c初始化
示例:
    #include <vector>
    #include <algorithm>
    #include <iostream>

    using namespace std;

    // string构造
    void test01()
    {


        string s1; // 创建空字符串,调用无参构造函数
        cout << "str1 = " << s1 << endl;

        const char *str = "hello world";
        string s2(str); // 把c_string转换成了string

        cout << "str2 = " << s2 << endl;

        string s3(s2); // 调用拷贝构造函数
        cout << "str3 = " << s3 << endl;

        string s4(10, 'a');
        cout << "str4 = " << s4 << endl;
    }

    int main()
    {


        test01();

        std::cout << "Press ENTER to continue...";
        std::cin.ignore(std::numeric_limits<std::streamsize>::max(), '\n'); // 读取内容直到用户输入enter键
        return EXIT_SUCCESS;
    }
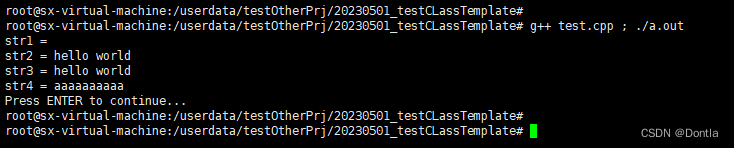
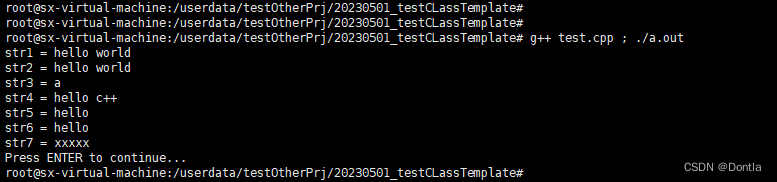
运行结果:
总结:string的多种构造方式没有可比性,灵活使用即可
3.1.3 string赋值操作(assign())
功能描述:
- 给string字符串进行赋值
赋值的函数原型:
string& operator=(const char* s);//char*类型字符串 赋值给当前的字符串string& operator=(const string &s);//把字符串s赋给当前的字符串string& operator=(char c);//字符赋值给当前的字符串string& assign(const char *s);//把字符串s赋给当前的字符串string& assign(const char *s, int n);//把字符串s的前n个字符赋给当前的字符串string& assign(const string &s);//把字符串s赋给当前字符串string& assign(int n, char c);//用n个字符c赋给当前字符串
示例:
#include <vector>
#include <algorithm>
#include <iostream>

using namespace std;

// 赋值
void test01()
{


    string str1;
    str1 = "hello world";
    cout << "str1 = " << str1 << endl;

    string str2;
    str2 = str1;
    cout << "str2 = " << str2 << endl;

    string str3;
    str3 = 'a';
    cout << "str3 = " << str3 << endl;

    string str4;
    str4.assign("hello c++");
    cout << "str4 = " << str4 << endl;

    string str5;
    str5.assign("hello c++", 5);
    cout << "str5 = " << str5 << endl;

    string str6;
    str6.assign(str5);
    cout << "str6 = " << str6 << endl;

    string str7;
    str7.assign(5, 'x');
    cout << "str7 = " << str7 << endl;
}

int main()
{


    test01();

    std::cout << "Press ENTER to continue...";
    std::cin.ignore(std::numeric_limits<std::streamsize>::max(), '\n'); // 读取内容直到用户输入enter键
    return EXIT_SUCCESS;
}
运行结果:
总结:
string的赋值方式很多,operator= 这种方式是比较实用的
3.1.4 string字符串拼接(append())
功能描述:
- 实现在字符串末尾拼接字符串
函数原型:
string& operator+=(const char* str);//重载+=操作符string& operator+=(const char c);//重载+=操作符string& operator+=(const string& str);//重载+=操作符string& append(const char *s);//把字符串s连接到当前字符串结尾string& append(const char *s, int n);//把字符串s的前n个字符连接到当前字符串结尾string& append(const string &s);//同operator+=(const string& str)string& append(const string &s, int pos, int n);//字符串s中从pos开始的n个字符连接到字符串结尾
示例:
#include <vector>
#include <algorithm>
#include <iostream>

using namespace std;

// 字符串拼接
void test01()
{


    string str1 = "我";

    str1 += "爱玩游戏";

    cout << "str1 = " << str1 << endl;

    str1 += ':';

    cout << "str1 = " << str1 << endl;

    string str2 = "LOL DNF";

    str1 += str2;

    cout << "str1 = " << str1 << endl;

    string str3 = "I";
    str3.append(" love ");
    str3.append("game abcde", 4);
    // str3.append(str2);
    str3.append(str2, 4, 3); // 从下标4位置开始 ,截取3个字符,拼接到字符串末尾
    cout << "str3 = " << str3 << endl;
}
int main()
{


    test01();

    std::cout << "Press ENTER to continue...";
    std::cin.ignore(std::numeric_limits<std::streamsize>::max(), '\n'); // 读取内容直到用户输入enter键
    return EXIT_SUCCESS;
}
运行结果:

总结:字符串拼接的重载版本很多,初学阶段记住几种即可
3.1.5 string查找和替换(find()、rfind()、replace())(rfind中的r是reverse的意思,反向)
功能描述:
- 查找:查找指定字符串是否存在
- 替换:在指定的位置替换字符串
函数原型:
int find(const string& str, int pos = 0) const;//查找str第一次出现位置,从pos开始查找int find(const char* s, int pos = 0) const;//查找s第一次出现位置,从pos开始查找int find(const char* s, int pos, int n) const;//从pos位置查找s的前n个字符第一次位置int find(const char c, int pos = 0) const;//查找字符c第一次出现位置int rfind(const string& str, int pos = npos) const;//查找str最后一次位置,从pos开始查找int rfind(const char* s, int pos = npos) const;//查找s最后一次出现位置,从pos开始查找int rfind(const char* s, int pos, int n) const;//从pos查找s的前n个字符最后一次位置int rfind(const char c, int pos = 0) const;//查找字符c最后一次出现位置string& replace(int pos, int n, const string& str);//替换从pos开始n个字符为字符串strstring& replace(int pos, int n,const char* s);//替换从pos开始的n个字符为字符串s
示例:
#include <vector>
#include <algorithm>
#include <iostream>

using namespace std;

// 查找和替换
void test01()
{


    // 查找
    string str1 = "abcdefgde";

    int pos = str1.find("de");

    if (pos == -1)
    {


        cout << "未找到" << endl;
    }
    else
    {


        cout << "pos = " << pos << endl;
    }

    pos = str1.rfind("de");

    cout << "pos = " << pos << endl;
}

void test02()
{


    // 替换
    string str1 = "abcdefgde";
    str1.replace(1, 1, "1111");

    cout << "str1 = " << str1 << endl;
}

int main()
{


    test01();
    test02();

    std::cout << "Press ENTER to continue...";
    std::cin.ignore(std::numeric_limits<std::streamsize>::max(), '\n'); // 读取内容直到用户输入enter键
    return EXIT_SUCCESS;
}
运行结果:

总结:
- find查找是从左往后,rfind从右往左
- find找到字符串后返回查找的第一个字符位置,找不到返回-1
- replace在替换时,要指定从哪个位置起,多少个字符,替换成什么样的字符串
3.1.6 string字符串比较(compare())
功能描述:
- 字符串之间的比较
比较方式:
- 字符串比较是按字符的ASCII码进行对比
= 返回   0

> 返回   1

< 返回  -1
函数原型:
int compare(const string &s) const;//与字符串s比较int compare(const char *s) const;//与字符串s比较
示例:
#include <vector>
#include <algorithm>
#include <iostream>

using namespace std;

// 字符串比较
void test01()
{


    string s1 = "hello";
    string s2 = "aello";

    int ret = s1.compare(s2);

    if (ret == 0)
    {


        cout << "s1 等于 s2" << endl;
    }
    else if (ret > 0)
    {


        cout << "s1 大于 s2" << endl;
    }
    else
    {


        cout << "s1 小于 s2" << endl;
    }
}

int main()
{


    test01();

    std::cout << "Press ENTER to continue...";
    std::cin.ignore(std::numeric_limits<std::streamsize>::max(), '\n'); // 读取内容直到用户输入enter键
    return EXIT_SUCCESS;
}
运行结果:

总结:字符串对比主要是用于比较两个字符串是否相等,判断谁大谁小的意义并不是很大
3.1.7 string字符存取(字符读取或修改)(at())
string中单个字符存取方式有两种
char& operator[](int n);//通过[]方式取字符char& at(int n);//通过at方法获取字符
示例:
#include <vector>
#include <algorithm>
#include <iostream>

using namespace std;

void test01()
{


    string str = "hello world";

    for (int i = 0; i < str.size(); i++)
    {


        cout << str[i];
    }
    cout << endl;

    for (int i = 0; i < str.size(); i++)
    {


        cout << str.at(i);
    }
    cout << endl;

    // 字符修改
    str[0] = 'x';
    str.at(1) = 'x';
    cout << str << endl;
}

int main()
{


    test01();

    std::cout << "Press ENTER to continue...";
    std::cin.ignore(std::numeric_limits<std::streamsize>::max(), '\n'); // 读取内容直到用户输入enter键
    return EXIT_SUCCESS;
}
运行结果:

总结:string字符串中单个字符存取有两种方式,利用 [ ] 或 at
3.1.8 string插入和删除(insert()、erase())
字符串插入相当于replace函数第二个参数为0,即凭空替换
功能描述:
- 对string字符串进行插入和删除字符操作
函数原型:
string& insert(int pos, const char* s);//插入字符串string& insert(int pos, const string& str);//插入字符串string& insert(int pos, int n, char c);//在指定位置插入n个字符cstring& erase(int pos, int n = npos);//删除从Pos开始的n个字符
关于string& erase(int pos, int n = npos);中的npos
npos是C++标准库中string类的静态成员变量,表示一个无穷大的值,通常用于表示字符串的末尾位置。在string& erase(int pos, int n = npos)函数中,如果不指定n的值,则默认删除从pos位置到字符串末尾的所有字符。因此,npos在这里的作用是表示字符串末尾的位置,以便于指定删除的范围。
示例:
#include <vector>
#include <algorithm>
#include <iostream>

using namespace std;

// 字符串插入和删除
void test01()
{


    string str = "hello";
    str.insert(1, "111");   //相当于str.replace(1, 0, "111");
    // str.replace(1, 0, "111");
    cout << str << endl;

    str.erase(1, 3); // 从1号位置开始3个字符
    cout << str << endl;
}

int main()
{


    test01();

    std::cout << "Press ENTER to continue...";
    std::cin.ignore(std::numeric_limits<std::streamsize>::max(), '\n'); // 读取内容直到用户输入enter键
    return EXIT_SUCCESS;
}
运行结果:

总结:插入和删除的起始下标都是从0开始
3.1.9 string子串(substr())
功能描述:
- 从字符串中获取想要的子串
函数原型:
string substr(int pos = 0, int n = npos) const;//返回由pos开始的n个字符组成的字符串
注意:substr参数是个左开右闭区间,即[pos, npos)
示例:
#include <vector>
#include <algorithm>
#include <iostream>

using namespace std;

// 子串
void test01()
{


    string str = "abcdefg";
    string subStr = str.substr(1, 3);
    cout << "subStr = " << subStr << endl;

    string email = "[email protected]";
    int pos = email.find("@");
    cout << "pos = " << pos << endl;
    string username = email.substr(0, pos);
    cout << "username: " << username << endl;
}

int main()
{


    test01();

    std::cout << "Press ENTER to continue...";
    std::cin.ignore(std::numeric_limits<std::streamsize>::max(), '\n'); // 读取内容直到用户输入enter键
    return EXIT_SUCCESS;
}
运行结果:

总结:灵活的运用求子串功能,可以在实际开发中获取有效的信息
3.2 vector容器
3.2.1 vector基本概念
功能:
- vector数据结构和数组非常相似,也称为单端数组
vector与普通数组区别:
- 不同之处在于数组是静态空间,而vector可以动态扩展
动态扩展原理:并不是在原空间之后续接新空间,而是找更大的内存空间,然后将原数据拷贝新空间,释放原空间
- vector容器的迭代器是支持随机访问的迭代器
3.2.2 vector构造函数
功能描述:
- 创建vector容器
函数原型:
vector<T> v;//采用模板实现类实现,默认构造函数vector(v.begin(), v.end());//将v[begin(), end())区间中的元素拷贝给本身。vector(n, elem);//构造函数将n个elem拷贝给本身。(创建一个包含n个elem元素的数组)vector(const vector &vec);//拷贝构造函数。
示例:
#include <vector>
#include <algorithm>
#include <iostream>

using namespace std;

void printVector(vector<int> &v)
{


    for (vector<int>::iterator it = v.begin(); it != v.end(); it++)
    {


        cout << *it << " ";
    }
    cout << endl;
}

void test01()
{


    vector<int> v1; // 无参构造
    for (int i = 0; i < 10; i++)
    {


        v1.push_back(i);
    }
    printVector(v1);

    vector<int> v2(v1.begin(), v1.end());
    printVector(v2);

    vector<int> v3(10, 100); // 创建10个值为100的元素的数组
    printVector(v3);

    vector<int> v4(v3);
    printVector(v4);
}

int main()
{


    test01();

    std::cout << "Press ENTER to continue...";
    std::cin.ignore(std::numeric_limits<std::streamsize>::max(), '\n'); // 读取内容直到用户输入enter键
    return EXIT_SUCCESS;
}
参考文章:

总结: vector的多种构造方式没有可比性,灵活使用即可
3.2.3 vector赋值操作(assign)
功能描述:
- 给vector容器进行赋值
函数原型:
-
vector& operator=(const vector &vec);//重载等号操作符 -
assign(beg, end);//将[beg, end)区间中的数据拷贝赋值给本身。 -
assign(n, elem);//将n个elem拷贝赋值给本身。
示例:
#include <vector>
#include <algorithm>
#include <iostream>

using namespace std;

void printVector(vector<int> &v)
{


    for (vector<int>::iterator it = v.begin(); it != v.end(); it++)
    {


        cout << *it << " ";
    }
    cout << endl;
}

// 赋值操作
void test01()
{


    vector<int> v1; // 无参构造
    for (int i = 0; i < 10; i++)
    {


        v1.push_back(i);
    }
    printVector(v1);

    vector<int> v2;
    v2 = v1;
    printVector(v2);

    vector<int> v3;
    v3.assign(v1.begin(), v1.end());
    printVector(v3);

    vector<int> v4;
    v4.assign(10, 100); // 赋予数组10个值为100的元素
    printVector(v4);
}

int main()
{


    test01();

    std::cout << "Press ENTER to continue...";
    std::cin.ignore(std::numeric_limits<std::streamsize>::max(), '\n'); // 读取内容直到用户输入enter键
    return EXIT_SUCCESS;
}

总结: vector赋值方式比较简单,使用operator=,或者assign都可以
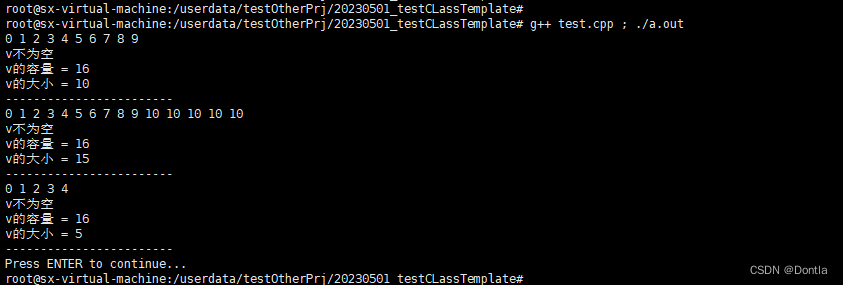
3.2.4 vector容量和大小(empty()、capacity()、size()、resize()(改变size而不是capacity))
功能描述:
- 对vector容器的容量和大小操作
函数原型:
-
empty();//判断容器是否为空 -
capacity();//容器的容量 -
size();//返回容器中元素的个数 -
resize(int num);//重新指定容器的长度为num,若容器变长,则以默认值填充新位置。 //如果容器变短,则末尾超出容器长度的元素被删除。
-
resize(int num, elem);//重新指定容器的长度为num,若容器变长,则以elem值填充新位置。 //如果容器变短,则末尾超出容器长度的元素被删除
示例:
#include <vector>
#include <algorithm>
#include <iostream>

using namespace std;

void printVector(vector<int> &v)
{


    for (vector<int>::iterator it = v.begin(); it != v.end(); it++)
    {


        cout << *it << " ";
    }
    cout << endl;

    if (v.empty())
    {


        cout << "v为空" << endl;
    }
    else
    {


        cout << "v不为空" << endl;
        cout << "v的容量 = " << v.capacity() << endl;
        cout << "v的大小 = " << v.size() << endl;
    }
}

void test01()
{


    vector<int> v1;
    for (int i = 0; i < 10; i++)
    {


        v1.push_back(i);
    }
    printVector(v1);

    cout << "------------------------" << endl;

    // resize 重新指定大小 ,若指定的更大,默认用0填充新位置,可以利用重载版本替换默认填充
    v1.resize(15, 10); // 以元素10填充
    printVector(v1);

    cout << "------------------------" << endl;

    // resize 重新指定大小 ,若指定的更小,超出部分元素被删除
    v1.resize(5);
    printVector(v1);

    cout << "------------------------" << endl;
}

int main()
{


    test01();

    std::cout << "Press ENTER to continue...";
    std::cin.ignore(std::numeric_limits<std::streamsize>::max(), '\n'); // 读取内容直到用户输入enter键
    return EXIT_SUCCESS;
}
总结:
- 判断是否为空 — empty
- 返回元素个数 — size
- 返回容器容量 — capacity
- 重新指定大小 — resize
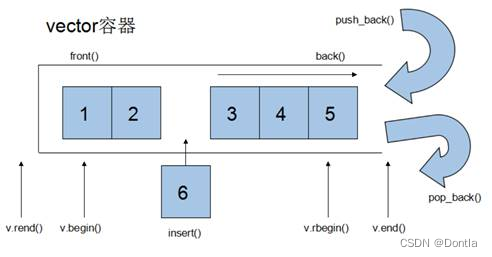
3.2.5 vector插入和删除(push_back()、pop_back()、insert()、erase()、clear())
功能描述:
- 对vector容器进行插入、删除操作
函数原型:
push_back(ele);//尾部插入元素elepop_back();//删除最后一个元素insert(const_iterator pos, ele);//迭代器指向位置pos插入元素ele(插入到当前下标元素之前)insert(const_iterator pos, int count,ele);//迭代器指向位置pos插入count个元素eleerase(const_iterator pos);//删除迭代器指向的元素erase(const_iterator start, const_iterator end);//删除迭代器从start到end之间的元素clear();//删除容器中所有元素
示例:
#include <vector>
#include <algorithm>
#include <iostream>

using namespace std;

void printVector(vector<int> &v)
{


    for (vector<int>::iterator it = v.begin(); it != v.end(); it++)
    {


        cout << *it << " ";
    }
    cout << endl;
}

// 插入和删除
void test01()
{


    vector<int> v1;
    // 尾插
    v1.push_back(10);
    v1.push_back(20);
    v1.push_back(30);
    v1.push_back(40);
    v1.push_back(50);
    printVector(v1);
    // 尾删
    v1.pop_back();
    printVector(v1);
    // 插入
    v1.insert(v1.begin(), 100);
    printVector(v1);

    v1.insert(v1.begin(), 2, 1000); // 插入两个1000
    printVector(v1);

    // 删除
    v1.erase(v1.begin());
    printVector(v1);

    // 清空
    v1.erase(v1.begin(), v1.end());
    v1.clear();
    printVector(v1);
}

int main()
{


    test01();

    std::cout << "Press ENTER to continue...";
    std::cin.ignore(std::numeric_limits<std::streamsize>::max(), '\n'); // 读取内容直到用户输入enter键
    return EXIT_SUCCESS;
}
总结:
- 尾插 — push_back
- 尾删 — pop_back
- 插入 — insert (位置迭代器)
- 删除 — erase (位置迭代器)
- 清空 — clear
3.2.6 vector数据存取(读取与修改)(at()、front()、back())
功能描述:
- 对vector中的数据的存取操作
函数原型:
at(int idx);//返回索引idx所指的数据operator[];//返回索引idx所指的数据front();//返回容器中第一个数据元素back();//返回容器中最后一个数据元素
示例:
#include <vector>
#include <algorithm>
#include <iostream>

using namespace std;

void test01()
{


    vector<int> v1;
    for (int i = 0; i < 10; i++)
    {


        v1.push_back(i);
    }

    for (int i = 0; i < v1.size(); i++)
    {


        cout << v1[i] << " ";
    }
    cout << endl;

    for (int i = 0; i < v1.size(); i++)
    {


        cout << v1.at(i) << " ";
    }
    cout << endl;

    cout << "v1的第一个元素为: " << v1.front() << endl;
    cout << "v1的最后一个元素为: " << v1.back() << endl;
}

int main()
{


    test01();

    std::cout << "Press ENTER to continue...";
    std::cin.ignore(std::numeric_limits<std::streamsize>::max(), '\n'); // 读取内容直到用户输入enter键
    return EXIT_SUCCESS;
}

总结:
- 除了用迭代器获取vector容器中元素,[ ]和at也可以
- front返回容器第一个元素
- back返回容器最后一个元素
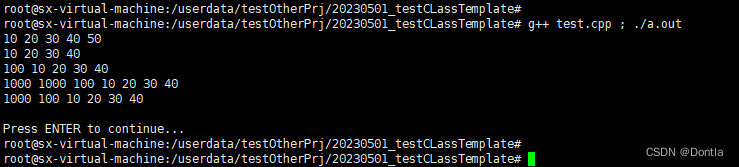
3.2.7 vector互换容器(swap())(swap()可用于匿名对象收缩内存)
功能描述:
- 实现两个容器内元素进行互换
函数原型:
swap(vec);// 将vec与本身的元素互换
示例:
#include <vector>
#include <algorithm>
#include <iostream>
using namespace std;
void printVector(vector<int> &v)
{
for (vector<int>::iterator it = v.begin(); it != v.end(); it++)
{
cout << *it << " ";
}
cout << endl;
}
void test01()
{
vector<int> v1;
for (int i = 0; i < 10; i++)
{
v1.push_back(i);
}
printVector(v1);
vector<int> v2;
for (int i = 10; i > 0; i--)
{
v2.push_back(i);
}
printVector(v2);
// 互换容器
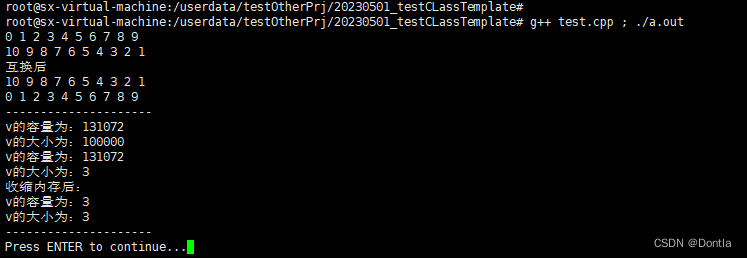
cout << "互换后" << endl;
v1.swap(v2);
printVector(v1);
printVector(v2);
cout << "---------------------" << endl;
}
void test02()
{
vector<int> v;
for (int i = 0; i < 100000; i++)
{
v.push_back(i);
}
cout << "v的容量为:" << v.capacity() << endl;
cout << "v的大小为:" << v.size() << endl;
v.resize(3);
cout << "v的容量为:" << v.capacity() << endl;
cout << "v的大小为:" << v.size() << endl;
// 收缩内存
vector<int>(v).swap(v); // 匿名对象
cout << "收缩内存后:" << endl;
cout << "v的容量为:" << v.capacity() << endl;
cout << "v的大小为:" << v.size() << endl;
cout << "---------------------" << endl;
}
int main()
{
test01();
test02();
std::cout << "Press ENTER to continue...";
std::cin.ignore(std::numeric_limits<std::streamsize>::max(), '\n'); // 读取内容直到用户输入enter键
return EXIT_SUCCESS;
}
总结:swap可以使两个容器互换,可以达到实用的收缩内存效果
3.2.8 vector预留空间(reserve()函数)(注意:vector数组空间不够时,会重新分配内存空间,将原有的元素复制到新的内存空间中,并释放原有的内存空间;如果一开始用reserve()函数分配足够大的空间,将减少vector在动态扩展容量时的扩展次数)
功能描述:
- 减少vector在动态扩展容量时的扩展次数
函数原型:
reserve(int len);//容器预留len个元素长度,预留位置不初始化,元素不可访问。
示例(vector的扩容策略是按照一定的规则进行扩容,每次扩容的空间大小都是原来的两倍)
注意:当vector中的元素数量超过其当前容量时,vector会重新分配内存空间,将原有的元素复制到新的内存空间中,并释放原有的内存空间。这个过程会导致vector的首地址发生变化。为了避免频繁的内存分配和释放,可以使用reserve函数预留一定的内存空间,避免vector频繁地重新分配内存空间。
vector的扩容策略是按照一定的规则进行扩容,每次扩容的空间大小都是原来的两倍
#include <vector>
#include <algorithm>
#include <iostream>

using namespace std;

void test01()
{


    vector<int> v;

    // 预留空间
    v.reserve(100000);

    int num = 0;
    int *p = NULL;
    for (int i = 0; i < 100000; i++)
    {


        v.push_back(i);
        if (p != &v[0])
        {


            p = &v[0];
            num++;
        }
    }

    cout << "num:" << num << endl;
}

void test02()
{


    vector<int> v;

    // 预留空间
    v.reserve(10);

    int num = 0;
    int *p = NULL;
    for (int i = 0; i < 100000; i++)
    {


        v.push_back(i);
        if (p != &v[0])
        {


            p = &v[0];
            num++;
        }
    }

    cout << "num:" << num << endl;
}

int main()
{


    test01();

    test02();

    std::cout << "Press ENTER to continue...";
    std::cin.ignore(std::numeric_limits<std::streamsize>::max(), '\n'); // 读取内容直到用户输入enter键
    return EXIT_SUCCESS;
}

解释:
在test02()中,虽然我们只预留了10个空间,但是在循环中我们一共push_back了100000个元素,这时候vector会自动进行扩容,每次扩容都会重新分配一块更大的内存空间,并将原有的元素复制到新的内存空间中,因此会有多次重新分配内存的操作。但是,由于vector的扩容策略是按照一定的规则进行扩容,每次扩容的空间大小都是原来的两倍,因此实际上重新分配内存的次数是有限的。在这个例子中,由于我们一开始就预留了10个空间,因此vector在第一次push_back时就会将这10个空间用完,然后扩容到20个空间,再扩容到40个空间,以此类推,直到扩容到最终的131072个空间。因此,实际上重新分配内存的次数只有15次。
总结:如果数据量较大,可以一开始利用reserve预留空间