本文中,我们将会安装一个基于activeMQ的MQTT服务器,对比于之前文间介绍的mosquitto来说,activeMQ有更多更强大的功能。在这章中,我们在同一台电脑上实现多实例,登陆鉴权,以及生成后台服务,每个实例会生成一个后台的服务,可以方便在之后的测试中,一个实例用来进行测试,另一个实例可以实现正常的运行环境。
一、安装
首先,我们的电脑需要有JAVA的运行环境,在当前的activeMQ5.17.3版本,JAVA的运行环境需要1.8以上。
java运行环境下载地址:https://www.oracle.com/java/technologies/downloads/
安装完成后,我们需要添加JAVA_HOME环境变量,变量的值为java的安装目录。同时,在Path环境变量中,增加一个{JAVA_HOME}\bin目录
activeMQ下载地址:https://activemq.apache.org/
里面有两种版本,分别为"Classic"和“Artemis”,在本文中,我们使用"Classic"版本为例建立一个MQTT服务器
下载后把文件解压,注意记住路径。在本章中,该路径会用{MQpath}来表示。
二、说明
这里大概介绍一下各目录内所存储的内容
{MQpath}\bin: 运行脚本文件
{MQpath}\conf: 配置文件
{MQpath}\data: 日志文件
{MQpath}\docs: 简单的帮助文档
{MQpath}\examples: 一些简单的实例配置
{MQpath}\webapps: web页面文件
{MQpath}\webapps-demo: web页面文件
我们主要要用到的是bin文件夹和conf文件夹
三、使用
如果我们只是做简单的测试,可以直接使用默认配置来建立一个MQTT服务器。
我们打开一个CMD窗口,CD到{MQpath}目录,之后的所有指令输入都在该目录下输入,输入指令:
.\bin\activemq start
出现类似上图的情况,就说明服务器已经正常工作了。在工作状态下,该CMD为不可操作状态,也不可关闭。
我们先打开一个浏览器,输入地址:
127.0.0.1:8161
用户名:admin
密 码 :admin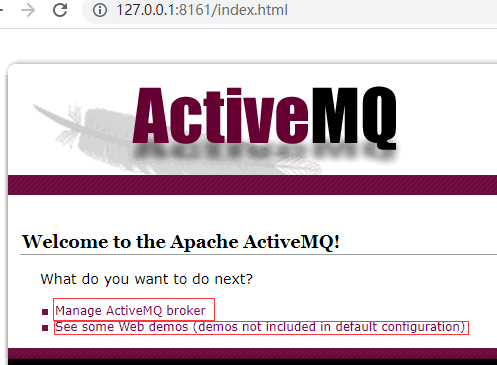
点击"Manage ActiveMQ broker"进入管理器
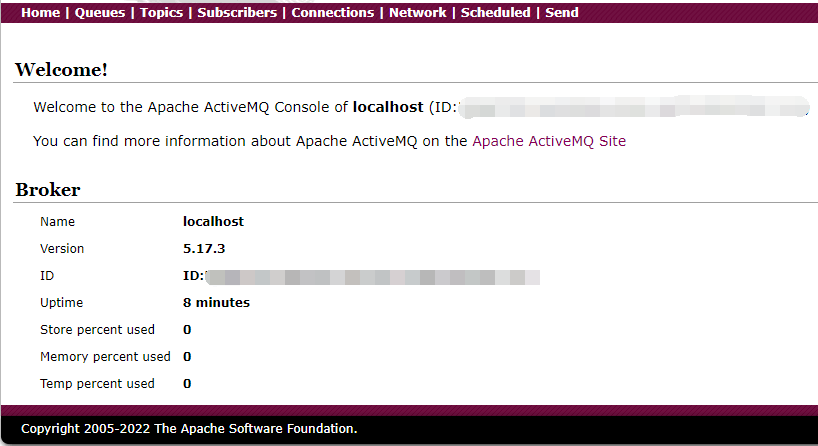
可以看到服务器的基本状态。
下面,我们找到{MQpath}\conf\activemq.xml配置文件,用文本编辑器打开该文件
<!--
Licensed to the Apache Software Foundation (ASF) under one or more
contributor license agreements. See the NOTICE file distributed with
this work for additional information regarding copyright ownership.
The ASF licenses this file to You under the Apache License, Version 2.0
(the "License"); you may not use this file except in compliance with
the License. You may obtain a copy of the License at
http://www.apache.org/licenses/LICENSE-2.0
Unless required by applicable law or agreed to in writing, software
distributed under the License is distributed on an "AS IS" BASIS,
WITHOUT WARRANTIES OR CONDITIONS OF ANY KIND, either express or implied.
See the License for the specific language governing permissions and
limitations under the License.
-->
<!-- START SNIPPET: example -->
<beans
xmlns="http://www.springframework.org/schema/beans"
xmlns:xsi="http://www.w3.org/2001/XMLSchema-instance"
xsi:schemaLocation="http://www.springframework.org/schema/beans http://www.springframework.org/schema/beans/spring-beans.xsd
http://activemq.apache.org/schema/core http://activemq.apache.org/schema/core/activemq-core.xsd">
<!-- Allows us to use system properties as variables in this configuration file -->
<bean class="org.springframework.beans.factory.config.PropertyPlaceholderConfigurer">
<property name="locations">
<value>file:${activemq.conf}/credentials.properties</value>
</property>
</bean>
<!--
The <broker> element is used to configure the ActiveMQ broker.
-->
<broker xmlns="http://activemq.apache.org/schema/core" brokerName="localhost" dataDirectory="${activemq.data}">
<destinationPolicy>
<policyMap>
<policyEntries>
<policyEntry topic=">" >
<!-- The constantPendingMessageLimitStrategy is used to prevent
slow topic consumers to block producers and affect other consumers
by limiting the number of messages that are retained
For more information, see:
http://activemq.apache.org/slow-consumer-handling.html
-->
<pendingMessageLimitStrategy>
<constantPendingMessageLimitStrategy limit="1000"/>
</pendingMessageLimitStrategy>
</policyEntry>
</policyEntries>
</policyMap>
</destinationPolicy>
<!--
The managementContext is used to configure how ActiveMQ is exposed in
JMX. By default, ActiveMQ uses the MBean server that is started by
the JVM. For more information, see:
http://activemq.apache.org/jmx.html
-->
<managementContext>
<managementContext createConnector="false"/>
</managementContext>
<!--
Configure message persistence for the broker. The default persistence
mechanism is the KahaDB store (identified by the kahaDB tag).
For more information, see:
http://activemq.apache.org/persistence.html
-->
<persistenceAdapter>
<kahaDB directory="${activemq.data}/kahadb"/>
</persistenceAdapter>
<!--
The systemUsage controls the maximum amount of space the broker will
use before disabling caching and/or slowing down producers. For more information, see:
http://activemq.apache.org/producer-flow-control.html
-->
<systemUsage>
<systemUsage>
<memoryUsage>
<memoryUsage percentOfJvmHeap="70" />
</memoryUsage>
<storeUsage>
<storeUsage limit="100 gb"/>
</storeUsage>
<tempUsage>
<tempUsage limit="50 gb"/>
</tempUsage>
</systemUsage>
</systemUsage>
<!--
The transport connectors expose ActiveMQ over a given protocol to
clients and other brokers. For more information, see:
http://activemq.apache.org/configuring-transports.html
-->
<transportConnectors>
<!-- DOS protection, limit concurrent connections to 1000 and frame size to 100MB -->
<transportConnector name="openwire" uri="tcp://0.0.0.0:61616?maximumConnections=1000&wireFormat.maxFrameSize=104857600"/>
<transportConnector name="amqp" uri="amqp://0.0.0.0:5672?maximumConnections=1000&wireFormat.maxFrameSize=104857600"/>
<transportConnector name="stomp" uri="stomp://0.0.0.0:61613?maximumConnections=1000&wireFormat.maxFrameSize=104857600"/>
<transportConnector name="mqtt" uri="mqtt://0.0.0.0:1883?maximumConnections=1000&wireFormat.maxFrameSize=104857600"/>
<transportConnector name="ws" uri="ws://0.0.0.0:61614?maximumConnections=1000&wireFormat.maxFrameSize=104857600"/>
</transportConnectors>
<!-- destroy the spring context on shutdown to stop jetty -->
<shutdownHooks>
<bean xmlns="http://www.springframework.org/schema/beans" class="org.apache.activemq.hooks.SpringContextHook" />
</shutdownHooks>
</broker>
<!--
Enable web consoles, REST and Ajax APIs and demos
The web consoles requires by default login, you can disable this in the jetty.xml file
Take a look at ${ACTIVEMQ_HOME}/conf/jetty.xml for more details
-->
<import resource="jetty.xml"/>
</beans>
<!-- END SNIPPET: example -->
我们注意110和111这两行
<transportConnector name="mqtt" uri="mqtt://0.0.0.0:1883?maximumConnections=1000&wireFormat.maxFrameSize=104857600"/>
<transportConnector name="ws" uri="ws://0.0.0.0:61614?maximumConnections=1000&wireFormat.maxFrameSize=104857600"/>可以看到,mqtt和ws两种协议的登陆端口分别为1883和61614,这是该配置文件的默认配置,我们也可以改动该处来改变这些端口。在这里,我们先不去改动它的默认配置,在之后,我们会生成多个新的实例来实现同时运行多个服务器。
我们现在可以用MQTT客户端工具来测试是否可以连接到该服务器了。这里不再详述。
四、生成多个实例
本节,我们同时生成两个实例来分别说明不同的配置状态。
我们先在之前的CMD中,ctrl+c(可能要多按几次),来退出之前运行的服务器
分别创建两个实例,分别输入指令:
.\bin\activemq create myMQTT1.\bin\activemq create myMQTT2如果成功,我们可以看到在{MQpath}目录下生成了两个目录。分别为"myMQTT1"和"myMQTT2"。里面都有两个目录,分别为"bin"和"conf"。
我们需要编辑多个文件:
{MQpath}\myMQTT1\bin\myMQTT1.bat
注意路径要改成你自已的activeMQ的路径
@echo off
set ACTIVEMQ_HOME="F:/TOOLS/apache-activemq-5.17.3"
set ACTIVEMQ_BASE="F:/TOOLS/apache-activemq-5.17.3/myMQTT1"
#增加以下两行,注意路径要改成你自已的activeMQ的路径
set ACTIVEMQ_CONF="F:/TOOLS/apache-activemq-5.17.3/myMQTT1/conf"
set ACTIVEMQ_DATA="F:/TOOLS/apache-activemq-5.17.3/myMQTT1/data"

set PARAM=%1
:getParam
shift
if "%1"=="" goto end
set PARAM=%PARAM% %1
goto getParam
:end

%ACTIVEMQ_HOME%/bin/activemq %PARAM%
{MQpath}\myMQTT2\bin\myMQTT2.bat
注意路径要改成你自已的activeMQ的路径
@echo off
set ACTIVEMQ_HOME="F:/TOOLS/apache-activemq-5.17.3"
set ACTIVEMQ_BASE="F:/TOOLS/apache-activemq-5.17.3/myMQTT2"
#增加以下两行,注意路径要改成你自已的activeMQ的路径
set ACTIVEMQ_CONF="F:/TOOLS/apache-activemq-5.17.3/myMQTT2/conf"
set ACTIVEMQ_DATA="F:/TOOLS/apache-activemq-5.17.3/myMQTT2/data"

set PARAM=%1
:getParam
shift
if "%1"=="" goto end
set PARAM=%PARAM% %1
goto getParam
:end

%ACTIVEMQ_HOME%/bin/activemq %PARAM%
{MQpath}\myMQTT2\conf\activemq.xml
......
    <bean id="jettyPort" class="org.apache.activemq.web.WebConsolePort" init-method="start">
             <!-- the default port number for the web console -->
        <property name="host" value="127.0.0.1"/>
        <property name="port" value="8162"/>    <!-- 在文件找到该处,把该端口号修改(原为8161,现改为8162),不能与myMQTT1中的该处设置相同 -->
    </bean>
.......
{MQpath}\myMQTT2\conf\jetty.xml
<transportConnectors>
<!-- DOS protection, limit concurrent connections to 1000 and frame size to 100MB -->
<!-- 找到该处,把下面四个端口号修改(61616,5672,61613,1883,61614,改为61626,5673,61623,1884,61624),不能与myMQTT1中的该处设置相同 -->
<transportConnector name="openwire" uri="tcp://0.0.0.0:61626?maximumConnections=1000&wireFormat.maxFrameSize=104857600"/>
<transportConnector name="amqp" uri="amqp://0.0.0.0:5673?maximumConnections=1000&wireFormat.maxFrameSize=104857600"/>
<transportConnector name="stomp" uri="stomp://0.0.0.0:61623?maximumConnections=1000&wireFormat.maxFrameSize=104857600"/>
<transportConnector name="mqtt" uri="mqtt://0.0.0.0:1884?maximumConnections=1000&wireFormat.maxFrameSize=104857600"/>
<transportConnector name="ws" uri="ws://0.0.0.0:61624?maximumConnections=1000&wireFormat.maxFrameSize=104857600"/>
</transportConnectors>修改完成后,打开两个CMD,分别输入:
.\myMQTT1\bin\myMQTT1 start.\myMQTT1\bin\myMQTT1 start

我们这时运行了两个不同的实例。我们可以在浏览器分别登陆这两个不同实例的WEB管理器,或者用MQTT客户端工具分别登陆测试这两个不同的实例。
五、增加登陆鉴权
我们给myMQTT2实例增加用户名和密码,打开{MQpath}\myMQTT2\conf\activemq.xml
在<broker>节点内添加
......
<broker xmlns="http://activemq.apache.org/schema/core" brokerName="myMQTT2" dataDirectory="${activemq.data}">
    <!--添加以下节点 -->
     <plugins>
            <simpleAuthenticationPlugin>
              <users>
                  <authenticationUser username="test" password="123456" groups="users"/>
                  <authenticationUser username="admin" password="admin" groups="admins"/>
              </users>
            </simpleAuthenticationPlugin>
        </plugins>
......
</broker>
即可以实现连接时需要输入用户名("test"或"admin")和密码("123456"或"admin")。
六、实现后台服务
把{MQpath}目录下的<bin><lib>文件夹,分别复制到<myMQTT1>和<myMQTT2>文件夹下,正常情况下,是不会出现有文件重名的,如果发生重名问题,删除这两个文件夹,回到第四节,重新生成<myMQTT1>和<myMQTT2>。
编辑{MQpath}\myMQTT1\bin\win64\wrapper.conf文件,找到:
......
#********************************************************************
# Wrapper Windows Properties
#********************************************************************
# Title to use when running as a console
#改动该值为myMQTT1
wrapper.console.title=myMQTT1

#********************************************************************
# Wrapper Windows NT/2000/XP Service Properties
#********************************************************************
# WARNING - Do not modify any of these properties when an application
#  using this configuration file has been installed as a service.
#  Please uninstall the service before modifying this section.  The
#  service can then be reinstalled.

# Name of the service
#改动该值为myMQTT1
wrapper.ntservice.name=myMQTT1

# Display name of the service
#改动该值为myMQTT1
wrapper.ntservice.displayname=myMQTT1

# Description of the service
#改动该值为myMQTT1 Broker
wrapper.ntservice.description=myMQTT1 Broker
......编辑{MQpath}\myMQTT2\bin\win64\wrapper.conf文件,找到:
......
#********************************************************************
# Wrapper Windows Properties
#********************************************************************
# Title to use when running as a console
#改动该值为myMQTT1
wrapper.console.title=myMQTT1

#********************************************************************
# Wrapper Windows NT/2000/XP Service Properties
#********************************************************************
# WARNING - Do not modify any of these properties when an application
#  using this configuration file has been installed as a service.
#  Please uninstall the service before modifying this section.  The
#  service can then be reinstalled.

# Name of the service
#改动该值为myMQTT2
wrapper.ntservice.name=myMQTT2

# Display name of the service
#改动该值为myMQTT2
wrapper.ntservice.displayname=myMQTT2

# Description of the service
#改动该值为myMQTT2 Broker
wrapper.ntservice.description=myMQTT2 Broker
......
找到
{MQpath}\myMQTT1\bin\win64\InstallService.bat
{MQpath}\myMQTT2\bin\win64\InstallService.bat
分别双击运行(如果系统有权限问题,右键选择"以管理员身份运行"),如果运行成功,在服务项中,将会生成两个新的服务

右键,启动,如果启动成功,就可以用MQTT客户端工具分别登陆测试这两个不同的实例了。